HomePosts Tagged "Top Menu" (Page 6)

Disasters and emergency situations are a part of our lives. You may not plan on getting lost in the wilderness while heading out on adventure plans, but it can happen to any of us. You may lose your way or get in an accident and end up in the wilderness.

Now, it is all about how you respond to such a situation that plays a significant role in your survival. With the right skills and knowledge, your chances of surviving the emergency situation will be high. Having a positive attitude will greatly increase your chances of finding solutions to problems that can occur in a survival situation. The key is to put your knowledge to use and create your master plan for survival in the wilderness.

While it is nice to have all the tools, food and water along with you, you may lose your basic survival kit and would have to survive the emergency situation with nothing except the tools in our head. No matter how scared and alone you may feel, optimism makes a big difference and impacts your ability to handle the survival situation.

This article is about all the skills you need to learn and remember that can help save your life in any wilderness survival situation. Having a working knowledge of these skills will improve your ability to survive in the wilderness drastically. You may not have any equipment with you, but with the right knowledge of the below-mentioned skill you will still do fine.

This survival guide ensures that you are physically and mentally prepared to face any situation without any tools with you and help yourself at all times. Learning these skills can help you make it through most dangerous survival situations and bring you back home safely.

There are a number of skills but the seven survival skills mentioned below are the most basic ones that you should be mastering first because these are the skills that will help keep you safe for a longer time until you are rescued.

Making Fire

It is important to keep the wind direction and the surrounding area in mind when trying to start a fire.

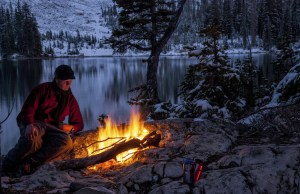
The first survival skill you must know is how to make a fire. Knowing how to build a fire that burns through the night is crucial. Fire provides you heat, light and smoke keeps you warm and comforts you during the night. You can use it to cook food, purify water, as a signal for help, as a source of light, to see in the dark, make tools and also for keeping critters away. It also creates a sense of security and safety.

When traveling in the wilderness, it is always better to carry a few fire-starting tools like lighter, matches, firesteel, etc.  You could also light a fire with the help of eyeglasses, water bottles, and cell phone batteries. In case you do not have any of these available then fire by friction is the most effective technique that you can use.

There are various other methods of starting a fire with a bow drill, flint, and steel, fire plow, fire saw, hand drill, etc., depending on what resources you find around you. It is important to keep the wind direction and the surrounding area in mind when trying to start a fire. Make the fire away from hanging branches, stumps, logs, dry grass, and leaves as it could turn out to be dangerous.

Finding and Purifying Water

Finding water will be mostly dependent on the surroundings you are in.

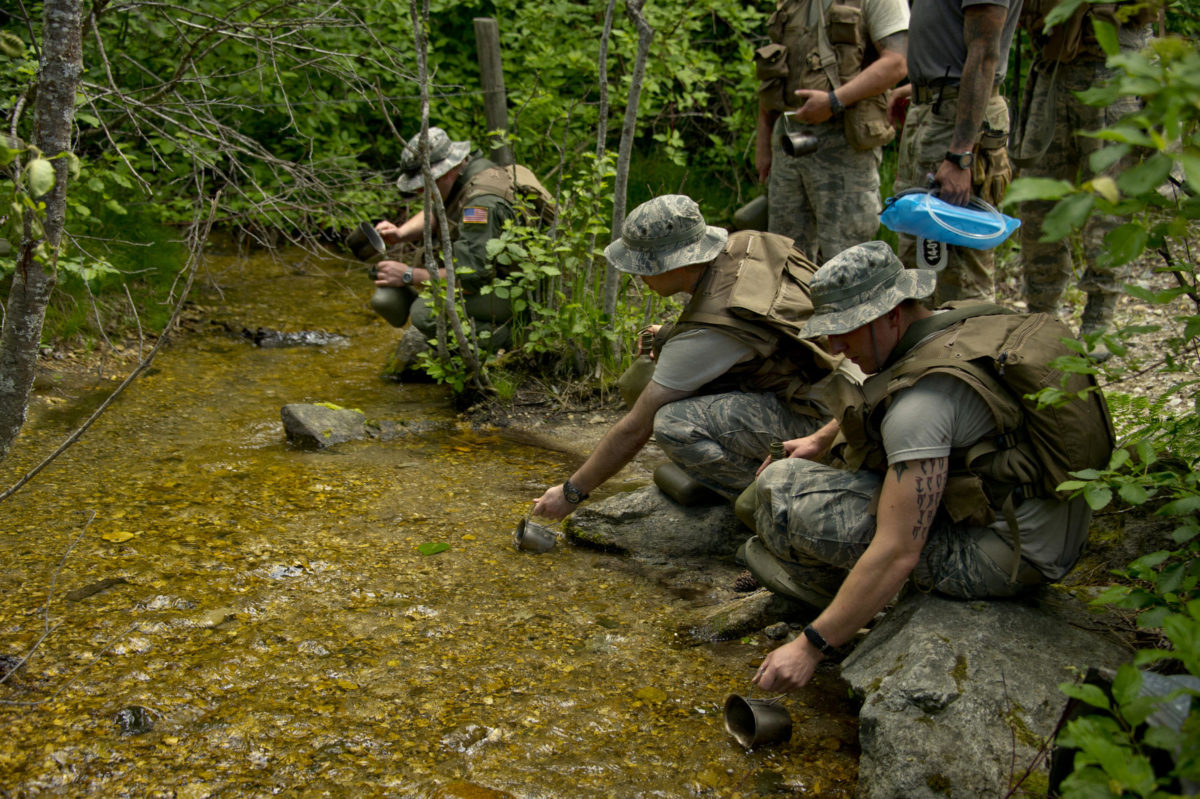
The next most important priority is water. Finding and purifying water is of primary concern in a wilderness survival situation. The best sources for drinking water in a wilderness are springs, headwater streams, and morning dew. You can find water by following the sound of a flowing river or grazing animals.

Finding water will be mostly dependent on the surroundings you are in. Large plastic bags can draw water from tree leaves; you can tap a tree to get some water. Dew on the grass is another brilliant source of water; you can collect water by running a piece of cloth through the grass. In the desert area, you can find water by digging up a dry creek bed. Stagnant water is not suitable for drinking even if you boil it.

Once you have found water, purifying it is another task. You can purify water by either boiling or filter it.

If you have a fire then boiling is the best way to purify water. Even if you don’t have a container to put water in, you can heat up some rocks, drop them into the water and let it boil for 2-3 minutes.

For filtering, allow the water to stand till the mud settles to the bottom and then you can use any cloth to strain out remaining silt.

Building Shelter

You can collect materials that could be put together as a rough shelter to help you get through until help reaches you.


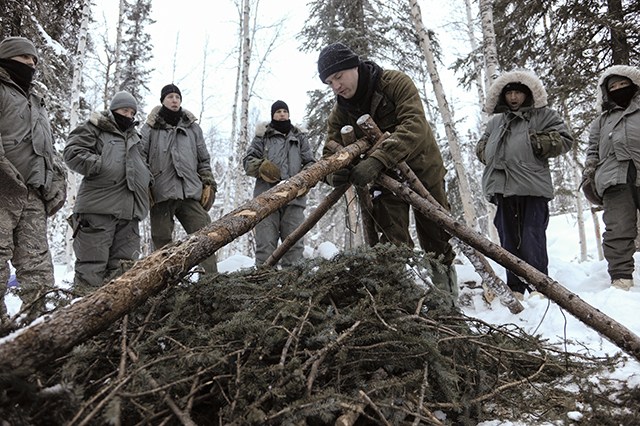
You are going to need a shelter at some point until you are rescued. You should at least carry a tarp in your kit, if not a tent. A tarp could be a lifesaver when stuffed with leaves or grass as a barrier from the wind, snow or rain. In case you lose your bag, you can build your shelter as long as you can collect materials that could be put together as a rough shelter to help you get through until help reaches you.

Being able to build a shelter is vital in a wilderness survival situation. You need to consider the location before planning to build a shelter. A good survival shelter must block all the outside elements and protect you from the ground, freezing temperatures, heat, winds that insulate cold or heat, snow, driving sleet and rains.

There are various kinds of natural shelters to consider such as caves, hollow stumps, and logs. You can also build shelters such as a debris hut, lean-to, scout pit, snow shelter, etc., The type of shelter depends on the supplies available to you. The debris hut is the most practical and easiest to construct in almost any environment.

Finding Food

If you do not have any food with you, you will have to find something to eat


Food might not top the survival essentials list, but it is equally important as you will start to lose strength if you do not eat for a long time.  It is wise to keep a small container of olive oil as it is packed with a huge amount of calories and can be used for other things as well. But if you do not have any food with you, you will have to find something to eat. Fishes, small animals, plants, and berries are some options that you can look for in the wilderness.

Most of the natural environments are filled with all these and various other foods. If you are around a lake or a river, fishing could be the best option in any survival situation. Hunting small animals with snare traps could also be considered if placed at the right spot.

Plants are another natural and best options that can satisfy your hunger during survival. But it is very important to identify any plant you plan to consume. Do not eat unless you are not sure about the plant as many plants can be poisonous. The best and readily available options are acorns from Oak tree, nut and inner bark from Pine tree, stalk, root and tuber from the Cattail of the grass.

Paracord Use and Paracord Knots

There are extensive uses of this survival tool like building shelter, making fire bow, snares, fishing lines, and stringer, securing an animal, building raft, ladder, etc.

Paracord is a very important survival tool that should always be kept handy. It is made of nylon, and it gives incredible strength and durability that can accomplish a variety of tasks. It is made in a braided form and can hold up to 550 pounds of weight. It is quick drying and resistant to rotting.

Paracord could be used in almost any wilderness survival situation. Paracord can be used intact, or the inner strands of it can also be separated and used for any work. There are extensive uses of this survival tool like building shelter, making fire bow, snares, fishing lines, and stringer, securing an animal, building raft, ladder, etc.

There are some cool Paracord projects that you can try yourself.

Paracord also has many uses in first aid and can be used as a signaling tool as well. All these abilities make paracord a powerful weapon.

Paracord Knot tying is another essential skill in survival techniques. It is a fast & easy way to make a quick safety harness. There is a kind of knot for every survival situation. There are numerous ways of tying paracord knots but taut-line hitch, figure eight knot, square knot, clove hitch and bowline are the most important and widely used paracord knots in any survival situation.

Self Defense

Self-defense is another very important skill in any wilderness survival situations. It is always recommended to carry a few tools or some weapon with you like a knife or pocket saw or any other sharp object that you can protect yourself with. If you do not have any of these, then you can probably make a weapon with the resources and materials available to you. You can find many potential weapons in the wilderness.

Self-defense weapons could be anything like a sharpened stick, branch, or a club or bow and arrow or an axe or simply a piece of rock. You can make a war club or an axe by using a sharp rock and a branch of the tree. All these could be a defensive weapon even in the most untrained hands in survival situations.

If you are at risk from any animal, do not panic or run away from it. It is better to face the animal and get away from it slowly. Throw anything that you can find at it. In case the animal attacks you, try to block its mouth with your non-dominant hand and smash its snout or directly hit it in the eye. Once the animal is temporarily disabled, run to find something that you can hide in. Arm yourself with any sharpened object that you can attack the animal with.

Learn to Communicate

Survival is your priority, but you also need to be rescued. One of the skills required in any survival situation to be rescued is to communicate. Communication is the key, and proper signaling plays an important role. Signaling is drawing attention. The rescuer must be able to recognize your signals and so you need to know effective communication skills.

Considering some wilderness places might not have cell coverage, you can use the following ways to communicate.

  • Construct unnatural objects that do not sync with the surrounding area and are easily noticeable. Use colors, materials, and shapes that can draw the rescuer’s attention.
  • A mirror can be used to reflect during the day. Aluminum foil, watches, silver parts on credit cards or anything shiny can also be used.
  • At night flares, torch and flashlights work best.
  • You can build a signal fire at a certain height in an open space and keep it ready to be lit instantly as you notice any plane or a helicopter.
  • A wave is considered as a signal to not land. Instead, form your arms in a “Y” shape indicating that you need help.
  • Wave your arms or a t-shirt attached to a branch of a tree vigorously; your movement will be noticeable.
  • Radio is surest and fastest way of communication. Learn how to operate and be familiar with the radios in your unit.
  • Whistles are another sure communicating tool that can be heard from far away. Always try to carry a whistle with you or learn how to whistle.
  • If you’re moving, it is better to leave some things behind as a signal at prominent clearings.

By maintaining a positive attitude and with the help of the above survival techniques you can not only successfully survive any wilderness situation but also you can get yourself out safely. For any situation Prepare, Adapt and overcome is the key to succeeding.

Disasters and emergency situations are a part of our lives. You may not plan on getting lost in the wilderness while heading out on adventure plans, but it can happen

 

Take a second and think if there is anyone you know who has loads of supplies packed in their home. Now ask yourself if that person has the knowledge and skill level to employ that equipment in critical times. What about you? Do you have the know-how when the going gets rough?

Maybe you’re just getting started with prepping and have an extremely tight budget. Your community and family are going to need capable people who can execute vital tasks when times are hard and lives are on the line. Don’t sell yourself short if your finances prevent you from acquiring massive amounts of equipment for any number of disasters. Think about the people on the other side of the coin who have lots of gear, but not lots of training on how to use it. Aristotle’s said, “The whole is greater than the sum of its parts” and pulling together as a community can pull you through any difficult circumstances.

Take a stroll through any prepper website and you’ll see that a ton emphasis is placed on gear and gadgets. I’m here to tell you that skills beat gadgets any day of the week and twice on Sundays! Knowledge weighs nothing and you always have it on you. People often try to buy their way out of a problem, but skills are built through habit and time. Today we’re going to focus on 6 basic skills that every prepper needs: Shooting, Medical, Survival, Communication, Gardening, and Leadership.

Shooting

A rifle with a sling in the hands of trained marksman can devastate and enemy force or consistently provide meat for the pot.

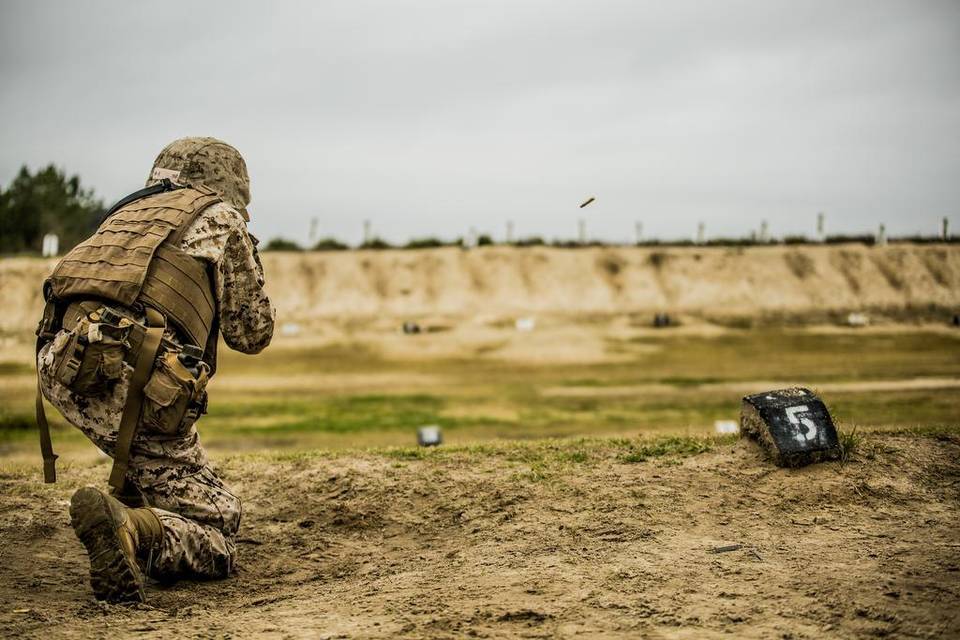
When things fall apart, it’s handy to know how to handle a weapon. Not just for self-defense purposes, but also for hunting. Even if you only have a .22 rifle, you can become deadly with it. Fancy scopes, match-grade barrels, suppressors and bi-pods are not required. A rifle with a sling in the hands of trained marksman can devastate and enemy force or consistently provide meat for the pot. You need to learn how to shoot – it can literally save your life!
Project Appleseed is a non-profit nationwide community of volunteers that teaches traditional rifle marksmanship that will “transform you from a person with a rifle into a principled and skilled Rifleman.” They offer inexpensive weekend shoots in nearly every state.

Medical

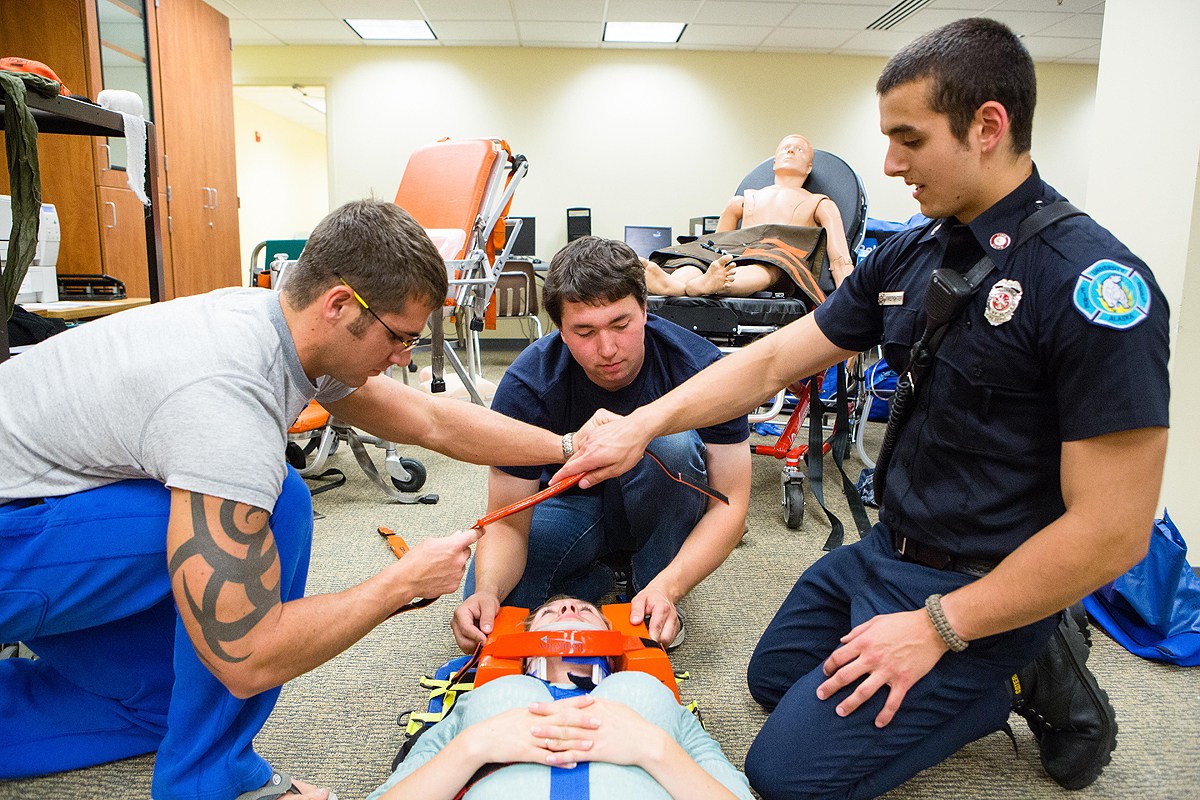
Medical emergencies don’t wait for the end of the world. They happen every day to thousands of people in your community. Trained First Responders can mean the difference between life and death. It’s likely that everyone will have to deal with some sort of medical or traumatic situation so it’s probably not a bad idea to learn how to deal with medical emergencies before they occur.

There are many counties/cities in every state that need volunteer firefighters. Since almost 80% of their calls are medical related, there are departments that will pay for your Emergency Medical Technician (EMT)- Basic Certification Course in return for your volunteer service to their department. This is an outstanding way to learn a crucial skill (for free) and get involved in your community. During my time as an EMT, I’ve seen first-hand the varied and extreme reactions of people’s response to stress while also developing the muscle memory to stay calm and provide emergency care to the sick and injured.

Survival

Whether you’re bugging out during a crisis or simply lost in the woods, survival skills are foundational to maintaining life. There are a lot of great resources on this topic that are free. Check out your local library for books or DVDs on survival. YouTube can also provide a lot of information regarding water purification, shelter building, fire-craft, signaling, navigation and snaring. There are a wide variety of techniques in the survival community so focus your search on practical skills and less on the primitive living techniques that can take years to master like fire by friction, tanning hides, flint-knapping, etc.

Communication

It’s a good idea to learn how to use radios now before you need them.For communities to effectively work together during catastrophes, they have to be able to communicate. In today’s society, we’ve become complacent with luxuries like the internet and cell phones that are highly vulnerable to failure when things go south.

In times of need, HAM radio operators stand in the gap to provide lifesaving information. This allows communities to prepare for incoming threats, make informed decisions, adjust provisions for crisis duration or work in concert with nearby communities. You can learn the basics of HAM radio with this free course.  Also, it’s less than $40 to get your license and using a simple handheld radio you can be talking to other operators in your community in no time!

Gardening/Canning

A garden is simply a prepping must-have to live off-grid.

You’ve probably heard the saying that “Growing your own food is like printing your own money” and in hard times this has never been truer. Imagine your delight eating fresh tomatoes or strawberries after two weeks of freeze-dried food. Or opening a jar of raspberry jam in the middle of winter that you canned earlier that summer. Gardening and canning are skills that can be learned with a minimum amount of startup costs. If you have no idea where to start, check out your local county extension or city. They likely offer free workshops on these subjects and some even provide supplies to take home! Don’t worry if you don’t have a lot of space. A simple window sill herb garden can teach you the learning curve that comes with gardening. The beauty of gardening is that even if crisis never comes, you’ll still enjoy the fruits of your labor. Ha…you see what I did there?!

Leadership

Working together is a key factor to surviving disasters and leadership is a fundamental role in making that happen. Your community is a lot like a tribe and it needs leaders at the local level. Good leadership comes from being informed and understanding what people need in hard times. One part of leadership is understanding what planning and execution is taking place at the city, state and national level. FEMA has tons of free online courses so you can work together and relay community challenges using the local chain of command. Here is a snapshot of some of the courses they offer:

  • Understanding the Incident Command System
  • Emergency Planning
  • Decision Making and Problem Solving
  • Planning for the Needs of Children in Disasters
  • Natural Disaster Mitigation

Check out their site to learn more:

There are also free courses on personal emergency preparedness offered by your city or county. A quick Internet search should point you in the right direction.

Sometimes the hardest part with most things in life is getting started. The good news is that you don’t need a fortune to start building your skillset. The danger here is not acting on this information; you have to apply it! Like Derek Sivers says, “If information were the answer we’d all be billionaires with perfect abs”. Now you know how to get started and move towards your goal. This can actually be a lot of fun. Invite a friend along with you and learn something new together. You might even find a new hobby!

  Take a second and think if there is anyone you know who has loads of supplies packed in their home. Now ask yourself if that person has the knowledge and

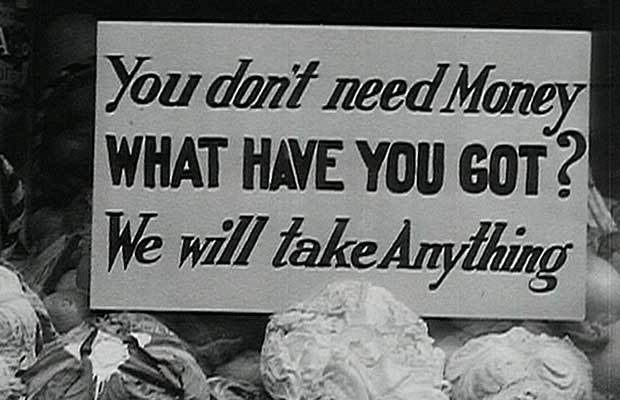
Say what you will about paper money, but it sure has made the process of buying things convenient. And plastic credit cards… well, perhaps they make purchasing a little TOO convenient. But what will happen when the day comes when paper money is no longer issued or backed by the government? What will happen when our credit and debit cards slide for the last time? Commerce and industry will never disappear, there will always be people buying, trading and selling. The only difference will be how they will be doing it once today’s money loses its value. So, below we’ve put together a list of 10 bartering items that will be worthy of trading for those days ahead, on the other side of that moment we call when the SHTF…

Information/knowledge

If you know how to do something and another person doesn’t, and the other person needs to know how to do that thing, then you have something of value. Some examples of knowledge that would be valuable for those days after the SHTF could be things such as an understanding of gardening and growing foods, basic medical knowledge, an understanding of herbs and medicines, skill in animal husbandry, skill in midwifery, skill in hunting, tracking or defense. Even a skill in storytelling might help you come out ahead at times. I mean, everyone wants someone fun to sit around the fire with!

So, while you’re preparing for those days ahead and storing your food and water, don’t neglect yourself or your brain. With the right decisions and knowledge what you see when you look in the mirror might be the most valuable bartering object you have!

Fabric

knit

Everyone needs fabric to keep themselves and their loved ones protected and warm and if the factories aren’t running eventually there will be a shortage. What fabrics you would want to save depends on where you live and what your lifestyle is. Lighter fabrics might be somewhat valuable in warmer climates, but in the cold and the mountains, thick wool fabric can be a literal lifesaver. Whether it’s mending a ripped coat or stitching a new pair of pants for a growing child, sometimes a thin layer of fabric is the only thing we have between us and a cold death.

Precious Metals

money

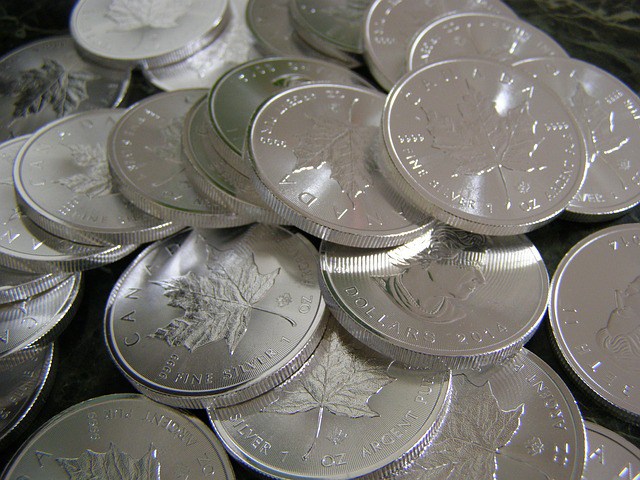
We humans have used precious metals like gold and silver for trading for tens of thousands of years. Usually precious metal is traded in coin form. Gold and silver coins are considered valuable due to their scarcity (there is not a lot of it and it’s hard to mine) and their how small and easily transportable they are.

While gold and silver coins will likely always have some degree of value you still can’t eat them or wear them, they won’t keep you warm and they won’t keep you out of the rain. Because of that gold and silver coins won’t likely have much value in the days immediately after the SHTF because people will be more worried about more immediate needs (like food and protection). But, once things start to calm down and an economy begins to reform it’s more than likely that gold and silver coins will once again claim value.

“Shoes”

work-boots

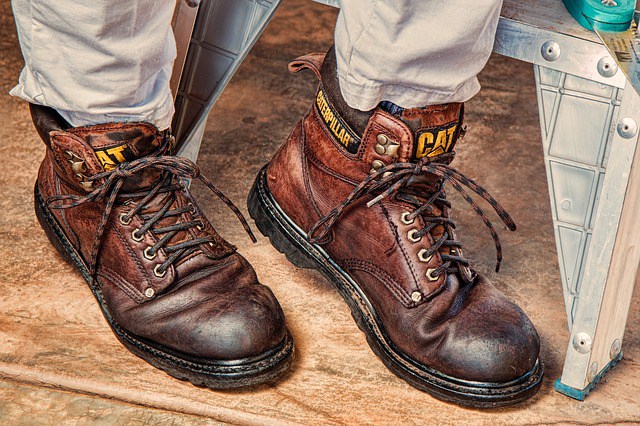
When I say “shoes” I don’t mean only shoes. What I really mean is any type of item that is both necessary and that also wears out with regular and sustained use. Shoes are simply a good example of this sort of item. This doesn’t mean I suggest you clear out the back portion of your garage and stock up on shoes the next time the shoe store has a sale. I’m simply reminding you that people aren’t going to want to have bare feet. And if you have shoes… well then…

Survival Gear

Yes, I know this is a huge category. It’s spans everything from knives to tents, from water purifiers to binoculars. But there is no denying that when things go south objects and items that help people stay alive will be in great demand and any item in great demand has trading value. With this in mind, when you upgrade to new equipment you might not want to throw out the old stuff. That old pair of binocs, while perhaps not something you’ll be using anytime soon, might be worth a week (or a month) worth of food to the right person.

Canned Food

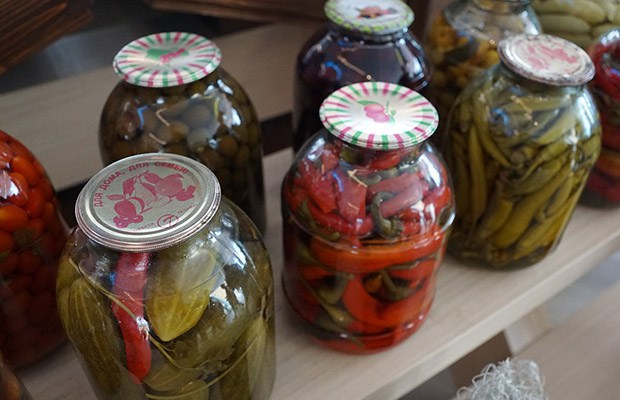
This is an obvious one. We, humans, need food every day, but every day lots of food spoils or goes bad. Canned and bottled food is the answer to this problem. When properly stored some canned and bottled food can last for decades or more. That’s a lot of flexibility in food storage. And, if after a couple of years you’re sick of your bottled green beans then perhaps you can find someone else who’s sick of their bottled beets and boom! You’ve got a trade (and thankful taste buds).

Guns

bestgun

Another obvious one. Guns, guns and more guns. Whether it’s a .22 or a .306, a pistol or a shotgun, few things will be more valuable than guns for when the SHTF. Guns can be used to provide food for yourself and your family, they can be used to protect your loved ones and to defend your own food. Perhaps one of the most valuable thing about guns isn’t shooting them at all, but simply the knowledge that you could shoot if you needed to.

One caveat that comes with bartering guns, make sure you trust who you’re trading the gun(s) to. A gun doesn’t care who’s holding it, it’s a tool, nothing more. And a gun in the wrong hand can do immense degrees of harm to you and the ones you love. So, if you have enough guns and see a value in trading feel free to do so, but don’t hand a gun over to a man or woman who will be likely to simply turn the gun around and use it on you.

Alcohol

whiskey

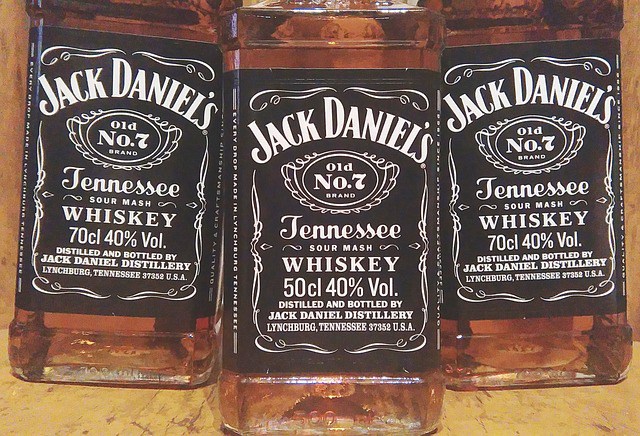
Even if you don’t drink it, chances are there will be someone nearby you that does, and they might be willing to trade you quite a bit for the chance to taste a bit of alcohol again.

Plus, alcohol can be used for more than just drinking. It can be used as a cleaning liquid, as a solvent, as a fuel and even as a preservative! And as long as the bottles are kept closed alcohol will store for basically forever. If you’ve got shelves full of canned and bottled food then you might want to consider adding a bottle or two, or twenty, of alcohol to your collection. You just never know when it will come in handy, and you never know just how much someone else will be willing to trade for it.

Dried Foods

Dried foods are in the same category as canned and bottled foods. The only difference is that the fact that they are dried means they are lighter and easier to transport. Because of this, dried foods will find their greatest value in a society or world that is moving and transitory. If you live in a cabin in the woods then you might want to invest in bottled foods. If you’re living in a tent and moving around then dried foods will be your best caloric value.

Bullets

bullets

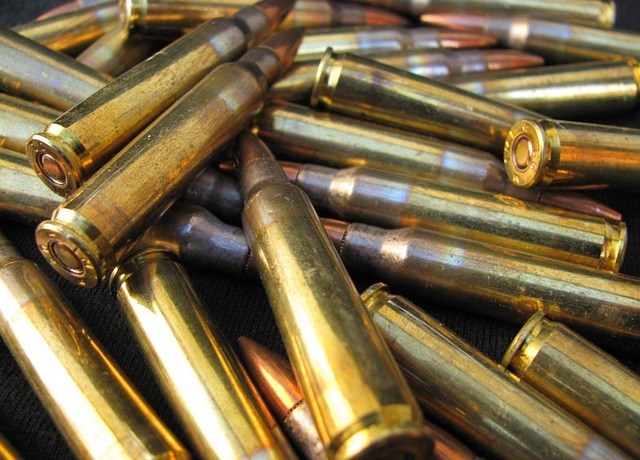
And here we are, item #1, what some might argue could, at the end of the day, be the most valuable trading item for those days on the far side of that moment where the SHTF. Bullets. Bullets? You might ask. Why would bullets be so valuable?

A handful of reasons. First, like precious metals, bullets are both difficult to manufacture and they are small and easily transported. Plus, like food or fabric, bullets have a utility value since they can be used to keep you and your loved ones alive. Like canned or bottled food, bullets have a very long “shelf life”. In addition, guns are mostly worthless without bullets so, if your neighbor is the guy with all the guns, and you are the one with all the bullets then chances are you’ll have a lot to talk about.


Many different types of bullets can also be reloaded and used multiple times as well. Due to all these elements, bullets will always have a great value in a post SHTF world.

At the end of the day, intelligence should be used while you prepare for the future and when you are preparing and prepping be sure you make the best purchases, especially with the goal of being able to barter in that strange new world.

Say what you will about paper money, but it sure has made the process of buying things convenient. And plastic credit cards… well, perhaps they make purchasing a little TOO

When most people think of long term food storage, pantries filled with canned goods is what often comes to mind. However, we have to be very careful with what we store and buy. Things are not always what they seem when it comes to food storage many products claim to be made with the famed 25 year shelf life, but start to read the label and you will find ingredients that will not last more than 2-3 years. This article will teach you what to look for.

When looking at long term food storage, you must first look at the ingredients. Can you pronounce every ingredient? Do you see words like hydrogenated, hydrolyzed, or Mono-sodium Glutamate (MSG)? These words, along with many others indicate artificial flavorings, colorings, and preservatives that can be very harmful to your body, not to mention unstable.

Read the label

If you have bought food go grab it and lets look at the label. If you see things like cake flour it only has a shelf life of 8 months to a year. Keep looking, do you see soy bean oil, canola oil, hydrogenated oils or hydrolyzed syrup? Those all have a shelf life of only a year or two, yet they are being sold as 25 year food storage! Don’t forget to also look for things like whole eggs or dairy as well. These ingredients simply can not last as long as these food storage companies claim and you need to be aware.

To be shelf stable, there also has to be the minimum of water content in the food. The FDA suggests that dehydrated food, using any form of dehydration, must have a water content less than 7%. The problem most companies find with following this mandate is simply cost. Making sure the food actually gets under 7% of water content requires extra time, effort and power, creating a path for shortcuts to be taken which most companies do.

When shortcuts are taken, added preservatives have to be used. By putting in the hydrogenated oils, food storage manufacturers can extend the shelf life of lower quality oils such as vegetable, soy, and safflower oils.  These oils have a natural shelf life of 18 months under preferable conditions. When chemicals and artificial preservatives are introduced, they can store for several years, but they have been altered to an unhealthy form to accomplish it.

When purchasing your food, make sure you do your homework and read the label. It may literally save your life.

Finding a manufacturer that believes in using natural, shelf stable ingredients means that they don’t have to use the artificial chemicals to preserve their long term food storage. The food is just as flavorful, healthy, and nutritious as when it was originally sourced. When you are looking for good ingredients, look for real food products that have been freeze dried and prepared to last. For example things like tomato or onion powder chopped or grated vegetables. Also look for whole foods like whole beans in the food, products that contain these types of ingredients will be sure to provide you the nutrition your body will need, when you need it.

Is your food protected?

Another thing to look for is packaging, this isn’t always the easiest thing to see because many products now come in the large white buckets. While the buckets look good they are not what actually is protecting the food from the elements. When you open up the bucket you will notice that the food is individually packaged in plastic or Mylar type bags. This is crucial to long term food storage because if your packaging fails your food will spoil long before its shelf date. A few things I like to look for is the quality of the bag itself. Is it flimsy and folds easily? That’s a bad sign, look for solid, quality bags at least 5.4 mm think so it will stand the test of time. I also really like the resealable option so you can one use a little at a time and still seal off your food.

The next thing to look for when it comes to packaging is how the provider is eliminating oxygen from the food. This will again provide the product a long shelf life as well as keep it fresh. If the company only provides an oxygen eliminating pack in its product, that’s really not enough to keep the food fresh. Look for a producer that fully nitrogen flushes its food to eliminate all oxygen in each bag.
Getting your food storage doesn’t have to be difficult. Don’t make the mistake of buying from the first food storage company you see and getting food that won’t be edible in an emergency.

When most people think of long term food storage, pantries filled with canned goods is what often comes to mind. However, we have to be very careful with what we

The various types of emergency foods that are available, coupled with the commercial hype surrounding them, can understandably lead the prepper to make less than optimal decisions with regard to the types and amounts of emergency foods to acquire. In this article I will briefly recap the most common types of emergency food and describe how each would fit in to a practical survival strategy.

The common types of emergency food stores include:

  • Canned Foods – Canned foods consist of fruits, vegetables and meats that have been prepared for long-term storage in jars and cans. Canned foods can be prepared at home and are available at virtually any grocery store. Depending on the type of food, they can either be ‘dry-pack canned’ or ‘wet-pack canned’. (Wet-pack canning involves immersing the food in hot water – sometimes in a pressure cooker – prior to vacuum-sealing.) Dried beans and dried white rice are the dry-pack canned foods most commonly stored by preppers and survivalists because they have an extremely long shelf life (up to 25 years!) and provide a good supply of proteins and carbohydrates.
  • mre

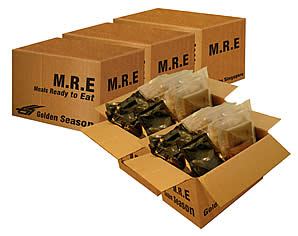
    MRE’s are a common choice for Emergency Food.

    Dehydrated Foods – Dehydrated foods have been processed in a food dehydrator to remove much of their moisture. This inhibits the growth of microorganisms that cause the food to spoil.

  • Freeze-dried Foods – Freeze-dried foods have been processed in a commercial freeze-drier in such a way that virtually all water has been removed (much more than is removed by a dehydrator). This process results in food that is lightweight and which has a very long shelf life.
  • Cured Meats – Cured meats have been treated with chemicals (usually nitrates) in such a way as to inhibit the growth of microbes and extend the unrefrigerated shelf life of meats.
  • Smoked Meats – Smoked meats have been exposed to the heat and smoke such that the increase in temperature dehydrates the meat (which inhibits microbial growth) while the smoke deposits an anti-microbial chemical layer over the meat.
  • Meals Ready-to-Eat – Originally developed for the military, MREs are portable, long-shelf-life food packets that contain complete meals. MREs can quickly be prepared and consumed. Often these packets include built-in food heaters and provide complete meals.

ISSUES RELATED TO NUTRITION

In general, all of the above forms of preserved foods provide good nutritional value. While the heating associated with some canning processes can degrade some water-soluble vitamins such as vitamins A, C, thiamine and riboflavin, they still serve as a good source of these and other nutrients. While nutritional value is preserved in the above types of foods, the nitrates used to cure meats have been shown to be carcinogenic in larger quantities. Salt and sugar may be added to canned foods to improve taste, which can also affect the nutrition offered by such foods (be sure to check the labels of any canned foods for references to sugar and salt!).

MREs provide good calories and some nutrition, but also contain a large quantity of sodium, which has been show to have adverse health effects when consumed excessively (MREs are designed to simply “get the soldier across the battlefield”).

SHELF LIFE OF DIFFERENT EMERGENCY FOOD TYPES

The shelf lives described here assume the foods are kept at room temperature of about 70 degrees Fahrenheit.

Canned fruits and vegetables typically have a shelf life of between 2 and 5 years. There is much anecdotal evidence of canned meats being eaten (and having good flavor and nutrition) after being stored for as long as 10 years. Some dry-canned foods such as dried beans and dried white rice can have a shelf life that exceeds 25 years.

Dehydrated fruits and vegetables typically have a shelf life of up to one year, while dehydrated meats have a shelf life of only about one month.

Freeze-dried foods have a shelf life that ranges between 5 and 25 years, depending on how well it is packaged (plastic food pouches have a shorter shelf life, while cans have a a much longer shelf life).

Smoked meats have an unrefrigerated shelf life of only a few weeks.

Cured meats have an unrefrigerated shelf life that ranges from a few weeks to as long as a year, depending on the type of meat and how it was cured.

Canned foods offer offer the most nutrition at the least cost. The other forms of food have the advantage of lighter weight and/or longer shelf life, but at significantly greater cost.

Smoked meats have an unrefrigerated shelf life of only a few weeks.

NOTE: While the storage of cured and smoked meats is of limited value in the time leading up to disaster; the ability, equipment and supplies required to smoke and cure meats will certainly be valuable skills to have in the aftermath if refrigeration systems are unavailable.

Modern MREs have a shelf life of between 3 to 4 years when stored at room temperature, however that shelf life can decrease rapidly when stored at higher temperatures (in a desert environment the shelf-life for a MRE may be as short as one month!). Also, when purchasing MREs you should be certain of their date of manufacture – otherwise you won’t get the benefit of the full shelf life.

DETERMINING YOUR OWN EMERGENCY FOOD NEEDS

A good way to begin to understand the types of emergency food supplies you will need is to consider how you will most probably be traveling during and after a major disaster. If you expect to be sheltering-in-place then the bulk of your emergency food supplies should consist of canned foods, as canned foods offer a very good shelf life and provide a lower cost per meal than other forms of emergency food. Even though canned foods are heavier than other types of emergency food, if you are sheltering-in-place then portability becomes a less important consideration than cost.

If you expect to be traveling on foot for an extended period, then the weight of your food will be a major consideration. In these circumstances you should plan on having freeze-dried food available, as freeze dried foods have an extremely long shelf life and are extremely light.

If you expect to be traveling by vehicle then weight is less of an issue and the ability to “eat while on the move” becomes important. MREs are an excellent choice for these circumstances because they can typically be unpackaged, heated and eaten without the need to interrupt travel. Also, because they utilize a chemical reaction to generate heat, the preparation of MREs does not produce smoke that might attract undesired attention.

When considering these factors you should not only be anticipating your travel needs when bugging out, but also potential future needs to travel overland for trade, barter and defense. Of course no one has a crystal ball to be able to predict these needs with certainty; however you should at least be able to develop a reasonable estimate. Additionally, you should build into your estimates the expected duration of the disaster, which should ideally be the amount of time required for you to become self-sufficient.

A quick way to estimate your emergency food needs is to answer the following questions:

  • How many people are in my group?
  • What duration disaster (in days) am I planning for or how long do I anticipate before achieving self-sufficiency?
  • If bugging out to another location, how many days of travel will be required?
  • In the aftermath of disaster, what percentage of total group members’ time will be spent on extended trips away?
  • What percentage of meals will utilize basic dry-canned foods such as beans and rice?

The answers to these questions can help you to estimate your own emergency food needs. If MREs are used exclusively for travel, for example, then the total number of MREs needed for travel is simply the product of number of group members, number of days of travel and number of meals per day. You may then increase this number so as to plan to use MREs for a percentage of post-disaster travel when concealment and speed are a top consideration.

Amounts of freeze-dried meals can be estimated as the product of average number of people traveling, the number of days of travel and the number of meals per day (while there will be some double coverage of travel by MREs and freeze-dried food, it’s never a bad idea to have some extra food on hand).

The balance between dry-packed “beans and rice” type meals and canned foods will be much more subjective, however by thinking in terms of the percentage of beans-and-rice meals vs. other meals, and of course considering the number of people you are planning to feed and the expected duration of the disaster, you will be able to identify the types and quantities of these bulk emergency foods that will meet your preparedness needs.

NOTE: Even before disaster strikes you should normally be consuming and replenishing your supply of canned disaster food so that you do not find yourself with a cupboard filled with expired canned food when disaster does strike!


The various types of emergency foods that are available, coupled with the commercial hype surrounding them, can understandably lead the prepper to make less than optimal decisions with regard to

Yesterday I began a new series called, Back to Basics. People every day can simply look at events happening anywhere in the world and understand how taking some simple steps to ensure you can handle minor emergencies, isn’t crazy. Prepping to a certain level makes sense for everyone, regardless of where you live.

This series was designed to go back to the basics of prepping, obviously. Today I wanted to share tips for how to stockpile food for emergencies that anyone can use. I will focus on preppers who are just starting out, but I think some ideas in the topics below could be useful to anyone looking to ensure their family has food and does not go hungry. This article will also have dozens of links to other content on the subject for additional reading.


I believe there are 5 main components to survival that everyone needs to consider. They are simply Water, Food, Shelter, Security and Hygiene. Yesterday we talked about the need for water and how you can easily store water for emergencies that render your traditional methods of obtaining water impossible. Water is more important to life than food or at least you can live longer without food than you can water, but they are both important.

Why do you need to stockpile food for emergencies?

If you are new to prepping, you may have something that triggered your awareness of the subject. Preppers have many reasons for doing what they do and no two preppers are alike. Some are preparing for the end of the world, but most see situations in our daily lives that give a perfect reason to stock up supplies. You have only to look at the recent winter storm that affected large swaths of the Eastern Seaboard to have a perfect example of why you don’t want to be left without a means to feed your family.

emptystoreshelves

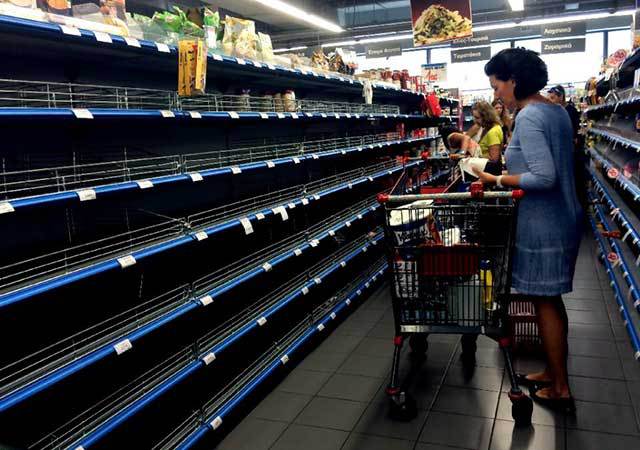
Greeks are finding food, medicine and fuel in short supply.

It seems almost cliché at this point, but invariably it always happens when a winter storm is forecast. Everyone rushes out to the store and certain food supplies are wiped out. Images of empty shelves are shown on practically every newscast and eventually prepper websites. Food shortages during simple storms are common if not expected. We don’t really even blink anymore because we are so used to this practice of waiting until the last-minute and then hitting the local grocery store on the way home from work to grab some basic necessities or comfort food.

Related – Build yourself the only unlimited water source you’ll ever need

If you can’t live for more than 3 days without going to the store, it’s time to reevaluate your family’s readiness. The statistic we hear most of the time is that the average home has only 3 days’ worth of food in it. If this is true, where would you be on day three if you had not been able to make it to the grocery store before the storm? What if instead of a snow storm, a virus outbreak had occurred and everyone was told to stay indoors to prevent infection? Each of us should have more food on hand that our families and friends will eat than is absolutely necessary to prevent surprises from leaving you hungry.

How much food do you need to store?

In the example above I used a virus outbreak as the condition that would prevent you from getting to the store. There are others though and weather could certainly be one of them. Some storms where I live have left roads impassable for upwards of a week. Could we walk to the store? Sure, but what if the stores having already been cleared of just about all of the food were closed? What if power outages prevented them from conducting any transactions? These are things you should consider.

Prepping is not something I ever consider you can accomplish. By that I mean, you are never going to be fully prepared. You may be much better prepared than some or all of the people around you, but you will never be 100% self-sufficient. Prepping should be done incrementally even if you have more money than you know what to do with because as you start to stock up food you learn lessons.

Related – The vital self-sufficiency lessons our great grand-fathers left us

A good rule of thumb for me is to start small when you are beginning to stockpile food for emergencies. You don’t need a year of freeze-dried foods to start with. Try just having a week or two of extra groceries that your family already eats. This is accomplished without any exotic storage needs usually or 5 gallon buckets of grains you have to figure out how to prepare.

Premium Fresh MREs Meal with Heaters

My wife purchases the groceries and I started out by giving her extra money to simply buy more food. I did this in the beginning because she is a much better shopper than I am and will always save more money than me. This worked great because she was easily able to fill our pantry and had plenty of meals planned to last us well over 30 days. Sure, at the end of that 30 days of food we would be getting into more exotic cans of mushrooms and soups that are better left as part of a recipe as opposed to your entire meal, but we wouldn’t starve.

What are the best types of food to stockpile?

Once we had a month worth of food and water stored up, I started looking at other options. I think each person should have a layered approach to food storage. This gives you flexibility and more importantly variety that as you go out to 6 months or 1 year or 2 will be important. My own personal goal is 2 years’ worth of food stockpiled for my family but that isn’t made up of only food from our grocery store. That can certainly be done though with a very good rotation plan.

Related – 4 Important Forgotten Skills used by our Ancestors that can help you in any crisis

Food storage should ideally cover the following:

Short Term Food Storage – The best and simplest foods are like I said above, what your family eats every day. One thing to consider is that the bulk of this food should be non-perishable in case you lose power. Canned foods are great as well as pastas, drink mixes and staples. These usually last at least a year.

Medium Term Food Storage – For the 5 – 10 year range MRE’s are a great option although they are heavier and their convenience comes at a higher price. I have several boxes of these and I like MRE’s because they are self-contained and don’t really need any water. Freeze dried camping foods like Mountain House are another great option to just add hot water to. Rice and beans make great additions to this category because you don’t really have to do anything crazy to store them as long as they are kept cool and dry.

Long Term Food Storage – When you start to look at foods that will keep for many years you get into stored grains like Hard Red Winter Wheat that you store in sealed 5 gallon buckets. Freeze dried food from any one of many suppliers out there keep for 20 years usually and are individually wrapped Mylar packets. They require water to re-hydrate but the taste can be surprisingly good. Make sure you have seasonings though….

Renewable Food Storage – This is when you have to get your inner farmer working. Renewable foods are an intensive garden, small livestock like chickens or rabbits and the occasional wild game caught either through hunting or snares. In the worst disasters, your food will run out so having a plan for that ahead of time will help you prepare.

vegetables

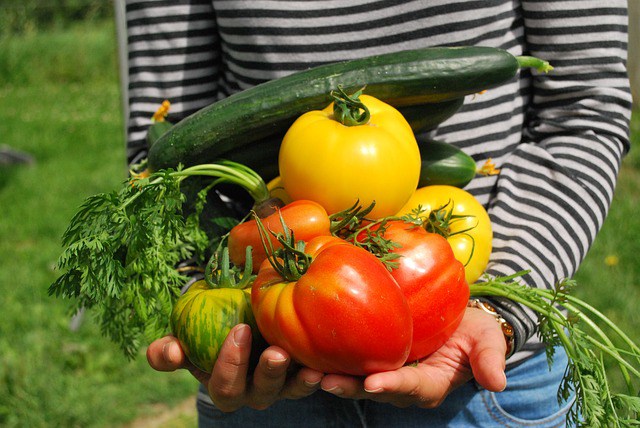
For a well-rounded plan, growing your own food will give you the most flexibility.

How do you plan for your food eventually running out?

I have a mix of the food storage options above. We eat on our grocery store items every day, but I also have MRE’s and a pretty large amount of freeze-dried foods stored. We also have the grains I mentioned and the all-important grain mill to grind them into flour. Several hundred pounds of rice and beans round out the equation.

Stockpiling food is only the start. We have a garden and small flock of chickens. The stored food is just to get us through the worst of the disaster. Hopefully before our food runs out whatever disaster has happened will be mitigated and life will have returned to some sense of normality. If not, we have a huge leg up that will allow us to further harvest our garden to put away food like the pioneers had to do. It is an approach that gives us some sense of security and prepares us to come out on the other side still alive.

What is your plan to stockpile food for emergencies?


On a different note, here’s some other self-sufficiency and preparedness solutions recommended for you:

The Lost Ways (The vital self-sufficiency lessons our great grand-fathers left us)
Survival MD (Knowledge to survive any medical crisis situation)
Backyard Liberty (Liberal’s hidden agenda: more than just your guns…)
Alive After the Fall (Build yourself the only unlimited water source you’ll ever need)
The Lost ways II (4 Important Forgotten Skills used by our Ancestors that can help you in any crisis)
The Patriot Privacy Kit (Secure your privacy in just 10 simple steps)

If you can’t live for more than 3 days without going to the store, it’s time to reevaluate your family’s readiness. The statistic we hear most of the time is

Pressure canning is, by its nature, done by those who wish to preserve an overabundance of fresh food for consumption at a later date, and as such is an activity routinely engaged in by many preppers. Of course, there are many other reasons people do their own pressure canning: environmental (only a thin metal lid to dispose of as the jar is reusable); nutritional (you know what’s in that jar); financial (saving energy by cooking several meals at once and by having convenience foods on hand).

However, those who are preparing for the dark days ahead don’t use their pressure canning to its fullest potential. They just don’t realize how important it is going to be to have variety in the diet, especially in a world where fresh and frozen foods will be lacking. 

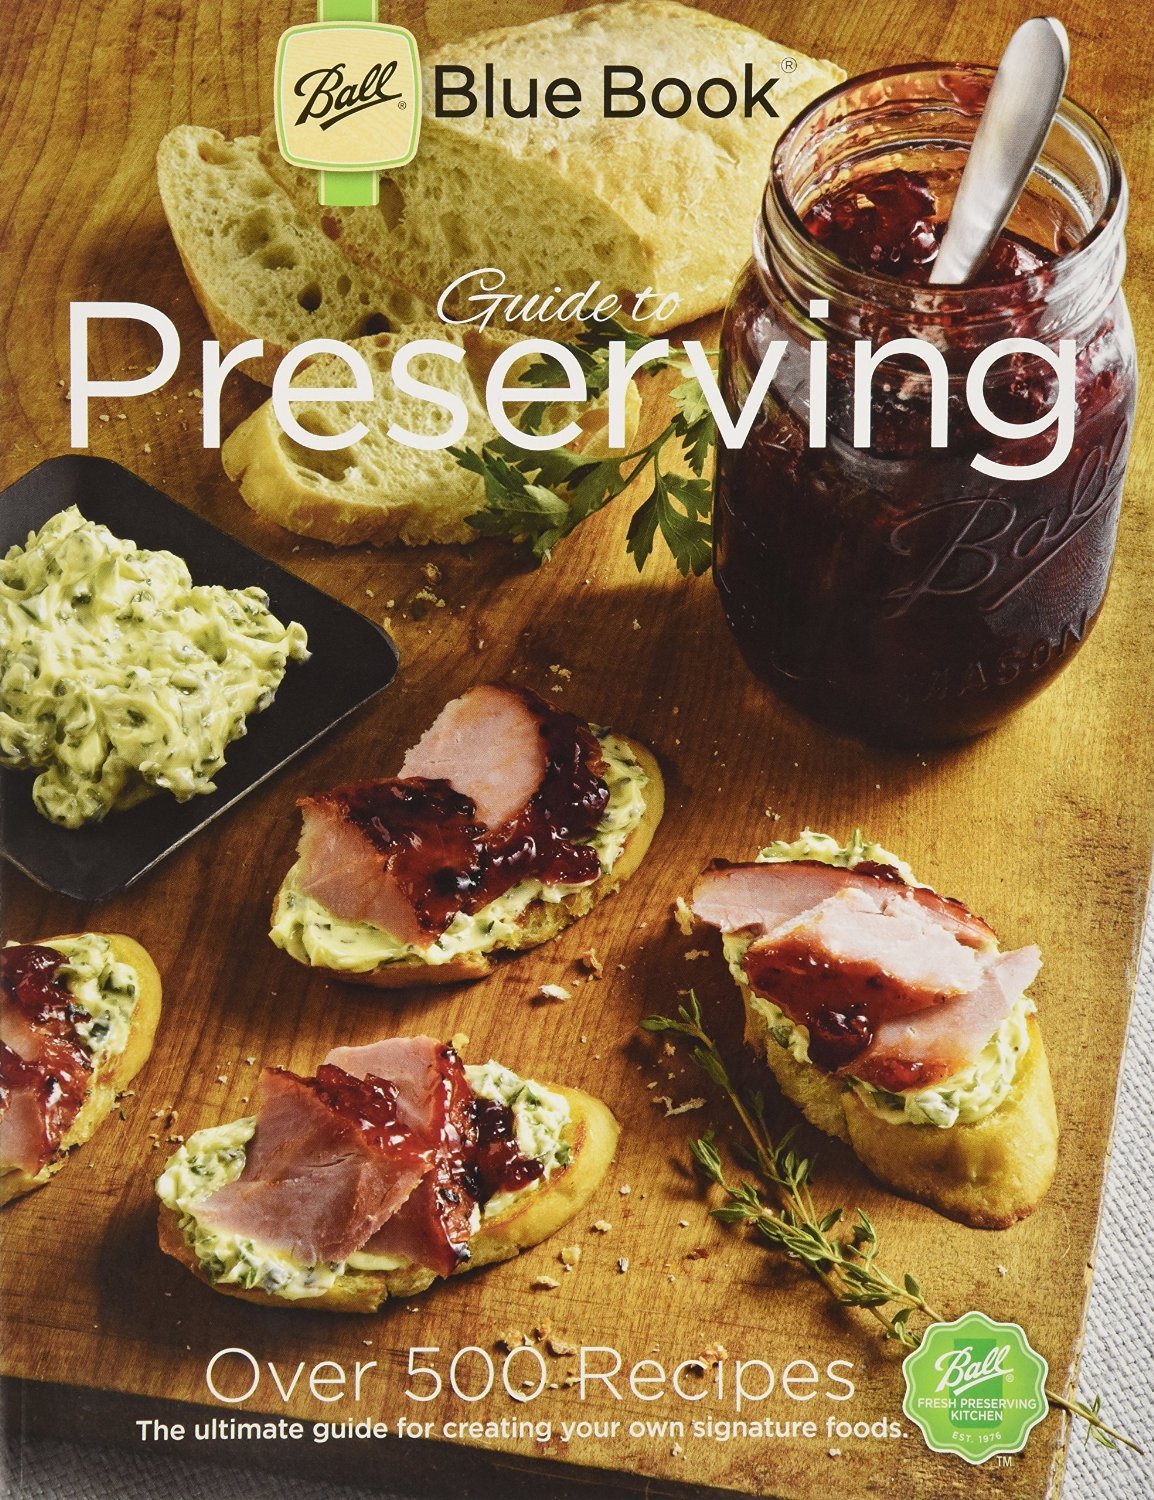
Most people look at pressure canning as a means of preserving garden produce and maybe some meat or a few stews here and there. And for those reasons alone a pressure canner is a worthwhile investment. But there is so much more that can be done. So let’s take it to the next level. The Ball Blue Book of Canning (hereafter the “BBB”) should be found in every prepper’s library and will provide all the guidelines for canning the basics. It should be consulted for all matters related to food preparation and processing times. This article is focused more on preserving some of the foods you really want to have on hand, those that will make meals a little more delicious and boost morale in difficult times.

Vegetables

Most of what is in the BBB regarding vegetables is pretty straightforward and beyond jazzing them up with spices or peppers, there isn’t a whole lot to discuss, with two exceptions. The first is canning shredded zucchini. Most people prefer to simply freeze their shredded zucchini to use later in zucchini breads and cupcakes (a favorite around here) and soups. But we’re preparing for when we won’t have freezers. So every year we can a few jars of shredded zucchini so that we can make our treats. The zucchini simply gets shredded in the food processor, packed in jars, and processed per the BBB.

Ball Blue Book Guide To Preserving should be found in every prepper’s library

The other exception is potatoes. Yes, potatoes are routinely canned so as to be able to make soups and mashed potatoes long after the fresh potatoes in the root cellar have run out. But in this case we’re talking about that other main food group in the American diet: the French fry. Even if the pressure canner was not used for anything else, it would be worthwhile (in this family, at least) to acquire one just to be able to have French fries when the grid goes down. These fries are so incredibly divine. Unfortunately, I can’t give you a taste. You’ll just have to trust me.

You’ll want a French fry cutter to make preparation a whole lot faster. Amazon sells them for about $15. (Use the larger blade—1/2”. The smaller blade is just too fine and the fries will kind of disintegrate. ) Buy a bag of large potatoes—not the super huge ones. The potatoes need to be scrubbed well, but as long as they are being used for fries, they don’t need to be peeled (soil can harbor the botulism spores, but deep-frying will kill the botulism, so no need to worry about peeling). Cut the potatoes into fries and follow instructions in the BBB, except instead of boiling potatoes for 10 minutes, only boil for three. Place the fries in wide mouth canning jars. Continue canning per instructions from your BBB.

When you wish to eat some fries (which will be often!), open the jar and put the fries into a strainer. Thoroughly rinse and drain to remove excess starch. Deep fry in peanut oil until they reach a golden brown.

Dry Beans

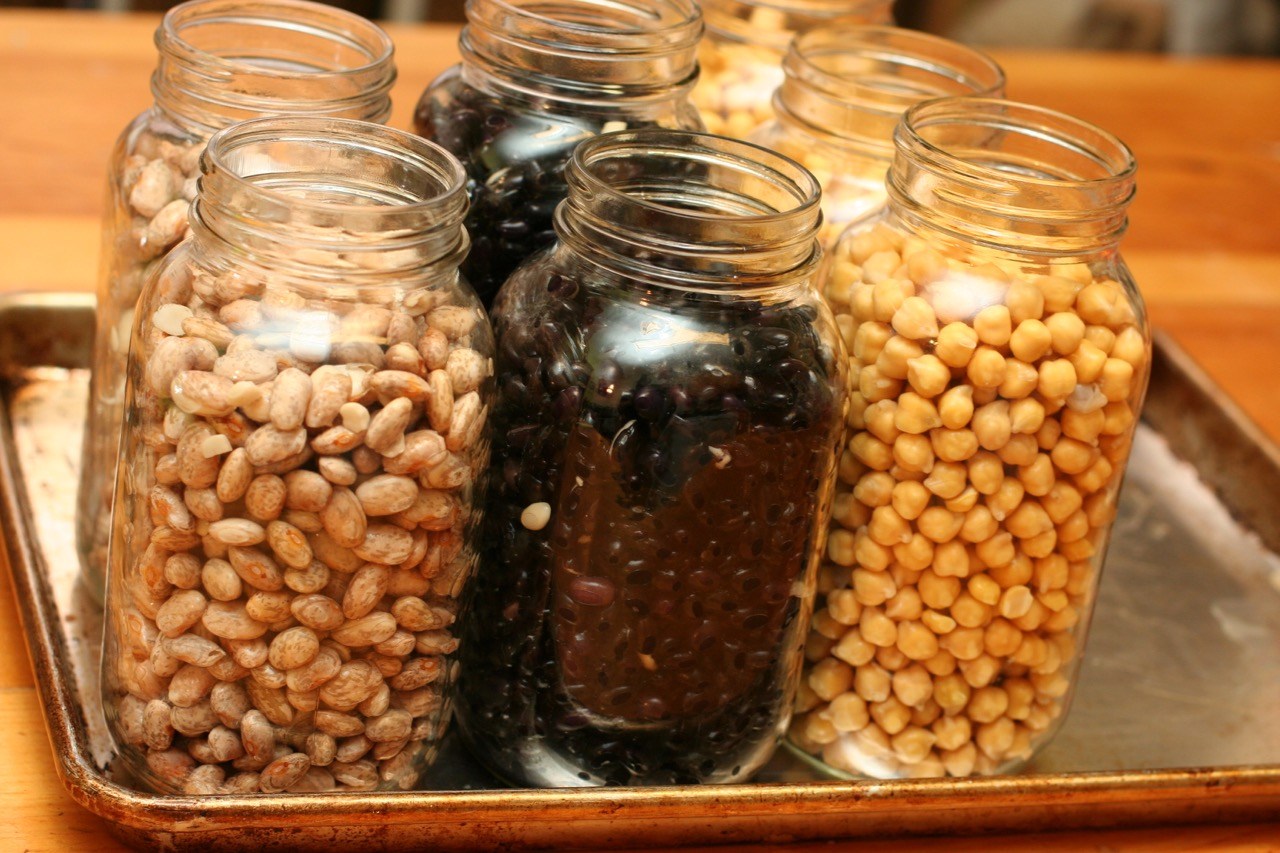
Dry beans aren’t a particularly exciting item to can, unless you get excited about saving money, time, and energy. Dry beans normally take hours to prepare for each meal. By utilizing a pressure canner, you prepare beans for several meals at once, saving money now and time down the road. So how is it done?

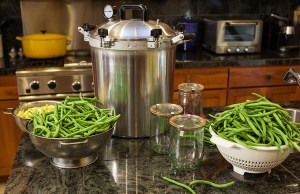
By utilizing a pressure canner, you prepare beans for several meals at once

Soak beans for several hours or overnight. Rinse and drain beans several times, then fill jars about halfway. This is the part that is a little tricky, and I can’t be more precise than “about halfway.” You see, the exact amount to put in the jar will vary due to several factors—the type of bean, for example black beans usually expand more than pinto beans; the age of the bean; and how dry the bean is.
After filling jars about halfway with beans, add salt (1/2 teaspoon per pint, 1 teaspoon per quart) and boiling water. Process per instructions in your BBB.

Meats

For those who haven’t ever ventured into the world of canning meats, but do have experience with canning fruits and vegetables, don’t be scared. Yes, you need to follow directions and be careful, just like for produce, but canning meats is so much faster and easier! All meats are canned exactly as outlined in the BBB; what I present here, however, are some ideas for preparing and packaging meats for other uses generally not discussed elsewhere. Having a variety of dishes in our menus will be critical to good morale in the coming crisis.

Beef

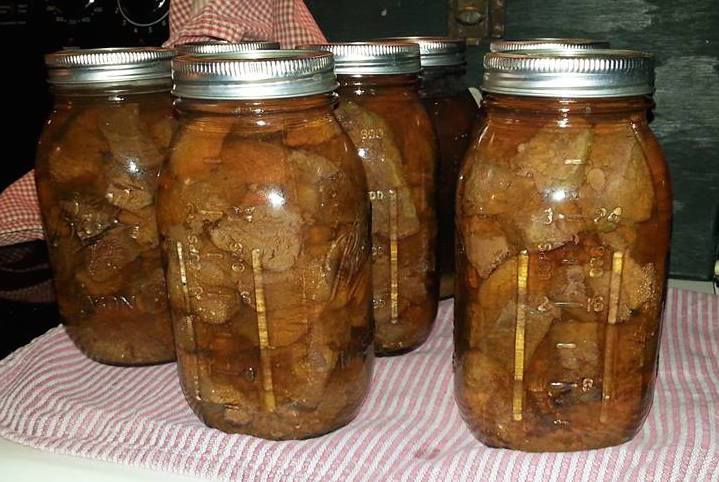
I can a good quantity of stew meat to be used as is in stews, but also to be shredded for use as taco filling, French dips, etc. Ground beef also gets browned and canned so that I can make soups and casseroles very quickly. Most people who are preppers and canners are already familiar with this. However, I know it will be very nice in the future to also be able to have a hamburger now and then. Obviously stew meat won’t work for this purpose, and neither will ground beef that hasn’t had a little extra preparation.

So this is what I do to have some hamburger patties. Form about one pound of ground beef into a log and roll it up in parchment paper that has been cut so that it is about an inch wider than the wide mouth jar being used for canning. Fold the parchment paper over the ends to help hold the hamburger log together. Put the hamburger log into the jar, making sure that you have one inch of head space. Process as per ground beef instructions in your BBB.

When you’re ready for some slider-sized burgers, run the jar under hot water for a minute or so to loosen the hamburger from the sides of the jar. Carefully slide the hamburger log out and remove the parchment paper. Slice the patties about ½” thick and fry them in a little butter or bacon grease for extra flavor. Serve with buns and all your favorite condiments.

Pork

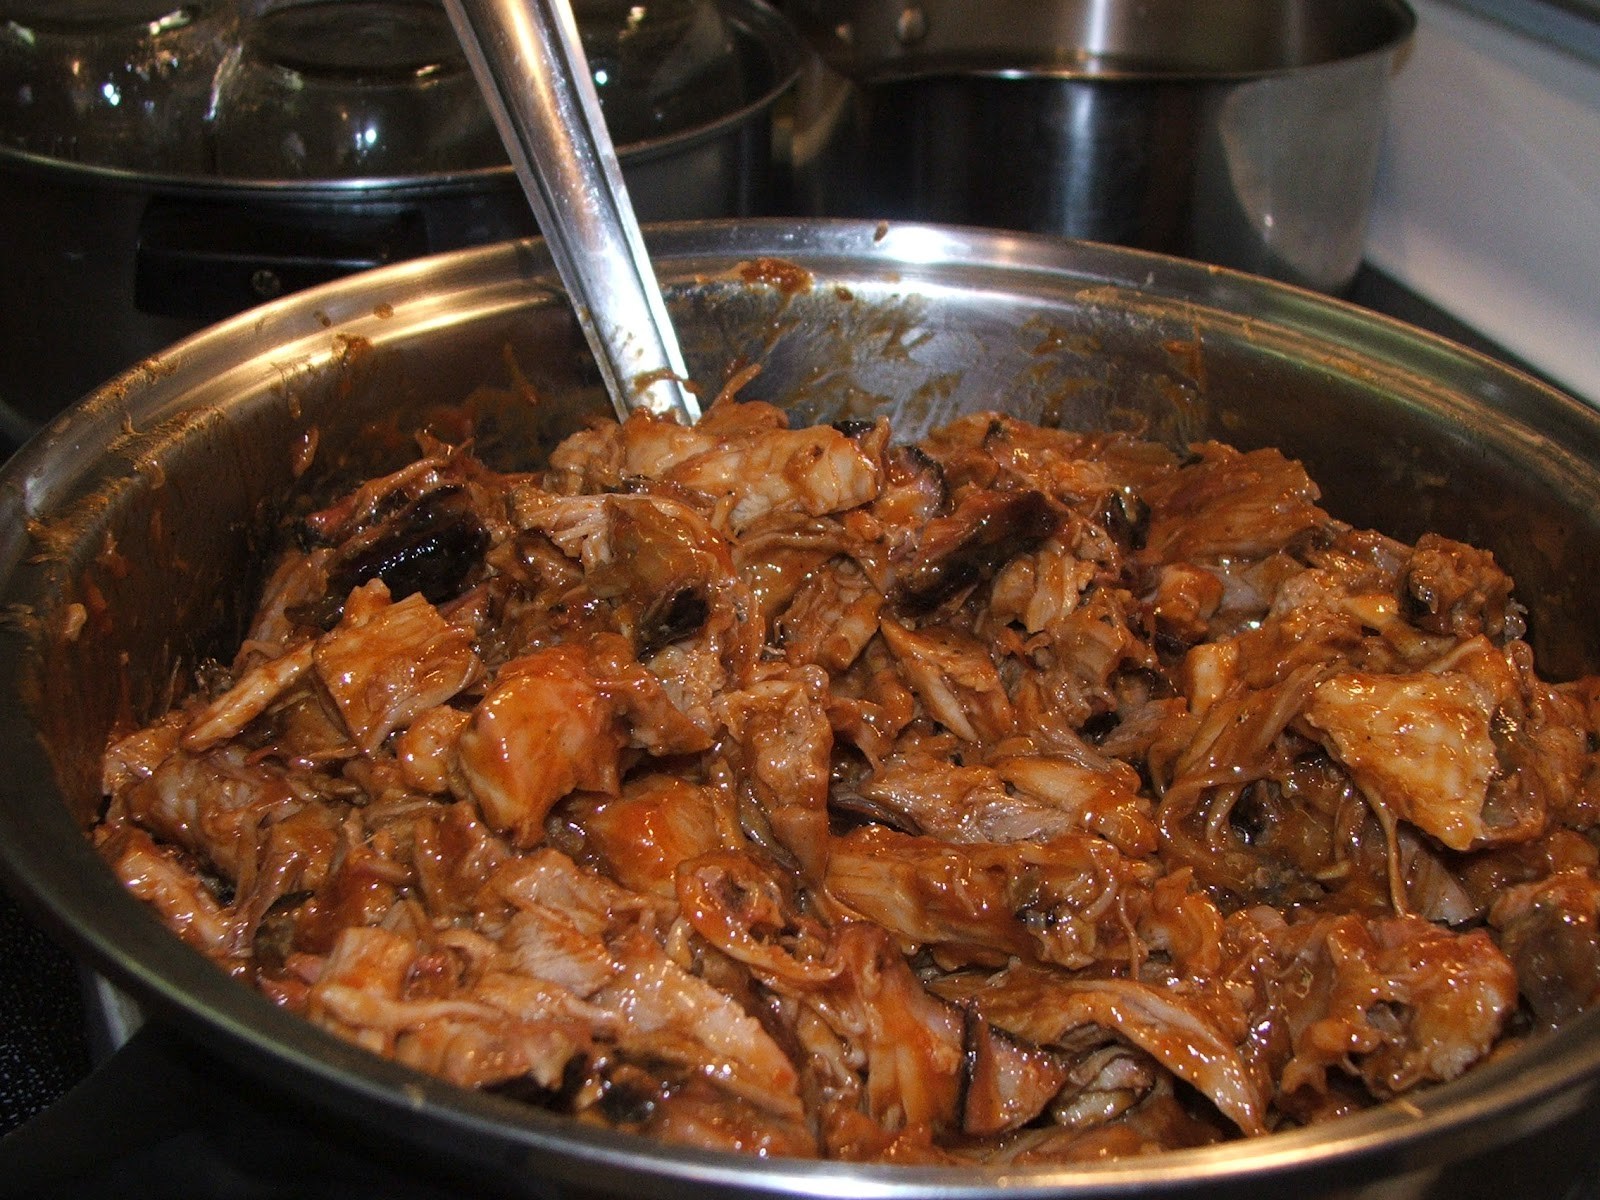
Some pork is canned in chunks for later use in chili or to be shredded for taquito filling or super quick pulled pork sandwiches. Leftover ham from Christmas and Easter (we always get a large one for just this purpose) gets canned for adding to soups or fried rice.
I think bacon will be one of the most important morale boosters in the food department, so I can quite a bit. To can bacon strips, cut a piece of parchment paper about two inches longer than the height of a wide mouth pint jar. Lay the bacon strips (which you have cut into halves or thirds) side by side down the middle of the parchment, fold the parchment over the bacon ends, and tightly roll the bacon up as you go. You’ll need a few pieces of parchment, and you’ll want to overlap each additional parchment strip with the previous one to hold everything in place. Stop when the roll is large enough to fill the jar and place the roll in the jar. Process per BBB instructions for canning pork. When you wish to cook your bacon, you’ll need to run the jar under hot water to soften the fat and be able to remove the roll from the jar. Lightly brown the bacon and enjoy.

Can there be such a thing as too much BBQ after the grid goes down?

I also can bacon ends and pieces. These are typically sold in three-pound packages. There is usually quite a bit of fat, but there is also quite a lot of solid meat, and there are some pieces that look more like regular bacon. They all get canned separately. I use the bacon fat in some of my cooking, and the meat will become bacon bits for salads and baked potatoes. Some will say that in a TEOTWAWKI situation, bacon bits will be a bit of a ridiculous luxury. And I might have agreed a few years back, but for this one experience. A few years back we had a phenomenal crop of potatoes, and as such baked potatoes were a frequent dinner in our home. The kids were getting a little tired of them, so I decided to fry up a can of bacon bits to add to the spuds that night. I could not believe what a difference it made in the kids. They were so excited! Another lesson learned in avoiding flavor fatigue.

Chicken

This is probably what we can the most of in the meat department, mostly because I have one son who cannot have beef or pork. Home-canned chicken is perfect for making quick casseroles or adding to a summer salad for a main dish meal. And with a can of chicken on hand, it takes no time to get homemade chicken noodle soup ready when someone comes down with a cold.

Chicken bones. No, this isn’t being recommended as food for people, but chicken bones can be pressure canned (using directions for canning chicken meat) for feeding cats. Because the bones are hollow, after being pressure canned they can be easily mashed with a fork and fed to cats. Unfortunately, the chicken bones are too high in protein to be fed to dogs. (Too much protein can cause kidney damage in dogs.)

Convenience foods

Pressure canning is mostly about preserving the harvest, but it’s also just as much about making life easier. It’s what people have been doing for decades when purchasing processed foods at the grocery store. However, as more of us realize what kind of garbage is being added to commercially produced convenience foods, we’re opting to do more of our own. While we all enjoy freshly prepared meals, sometimes that just isn’t an option—the chief cook is sick, there’s been an emergency, or labors that day were needed elsewhere.

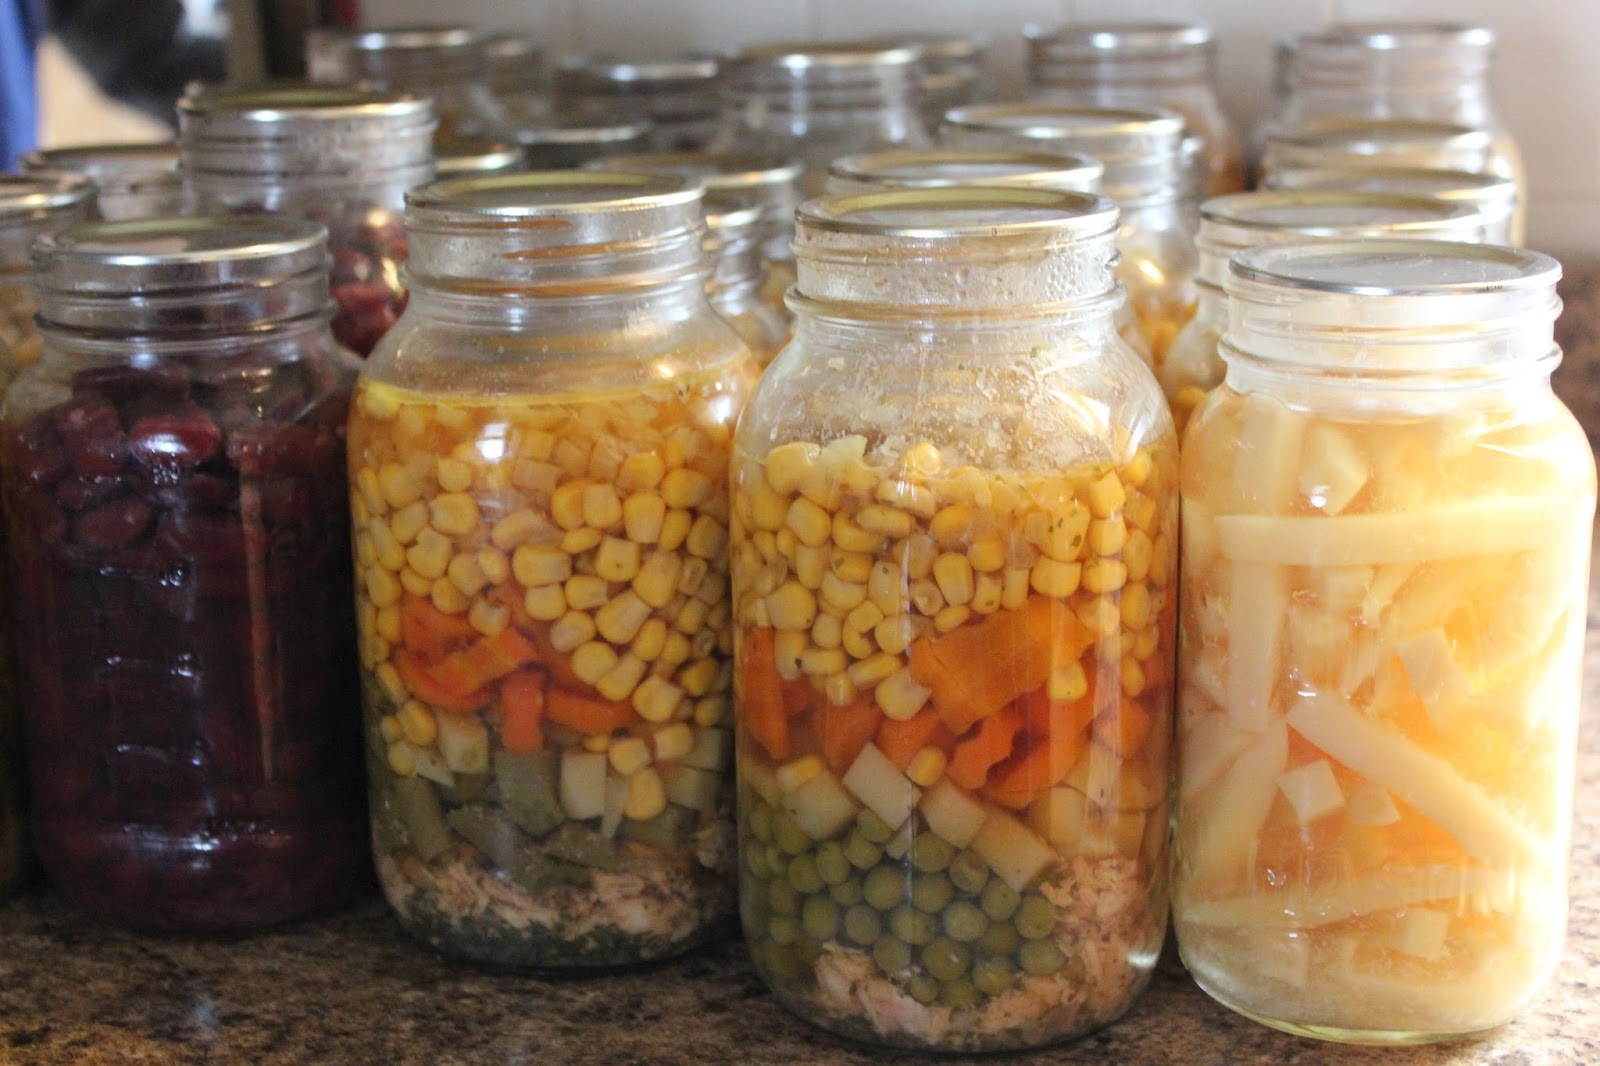
Keeping a ready supply of stew, chili, soup, and spaghetti sauce on hand for just such situations is a great way to reduce stress and be prepared at the same time.

Having some home canned convenience foods can really save the day. Keeping a ready supply of stew, chili, soup, and spaghetti sauce on hand for just such situations is a great way to reduce stress and be prepared at the same time. Because every family will have their own favorite recipes, I’m not providing any here. Most any recipe can be adapted for canning; one just needs to always remember to process for the time stated for the ingredient that needs the most time and highest pressure.

Traditional favorites for convenience foods to can at home are stews, soups and chili. Bear in mind, however, that some items just don’t do as well in a pressure canner at home. I’m not sure what the difference is between commercial canning and home canning, but unlike their commercially canned counterparts, noodles and rice just seem to go to mush when canned at home. So in this house we always add those ingredients just before mealtime.

With dark days ahead, and days that could quite conceivably turn into years, why not invest in a pressure canner and start preserving your own (at significantly greater savings over purchasing commercial products)? With more and more food being sourced from who knows where and with increasing reports of unsavory individuals employed at food processing plants, why not take control for more of our own food needs? A pressure canner is going to cost $100-$300. But the peace of mind that comes from preparing your own food? Priceless.

Pressure canning is, by its nature, done by those who wish to preserve an overabundance of fresh food for consumption at a later date, and as such is an activity

Planning for medical emergencies is one of the biggest challenges one faces. This is especially true if the situation will occur with limited outside resources on which to rely. There are several things you can do to improve the odds for yourself and your loved ones, including solid medical knowledge, the leadership skills necessary to create a makeshift hospital, and a comprehensive medical stockpile.

Education

Many people underestimate the immense value an education in a practical field like medicine will have in emergency situations. These types of skills can be bartered for goods and services in addition to being beneficial for yourself and those in your party. Training as a nurse or doctor is obviously going to be at the top of any resident wish list. However, any medical training will include basic skills that could be valuable.

Any career in the medical field will pay well and allow you to make interpersonal connections, receive continuing education, and give you access to information earlier than the general public. All of these are important considerations when preparing for an uncertain future. Be sure to keep any textbooks and potentially useful class materials with your supplies to use for reference.

Medicinal foraging and herbalism are other medical skill sets that will be indispensable for the long-term maintenance of medical supplies. There are local courses in most regions that will teach participants to identify plants native to the area and the best places to find those plants with medicinal and nutritional value.

Herbalism studies will teach people to prepare those plants as effective treatments and remedies for a variety of medical concerns. While many natural remedies are not as effective as their modern-day counterparts, they are far more effective than no care at all. The ingredients to prepare them will also be more readily available if modern amenities are unavailable.

Makeshift Hospital

One’s leadership style will play a significant role in how well any makeshift hospital is organized and run, as well as the type of patient outcomes it produces. In times of disaster, everyone looks for one person to take control and make them feel safe. That person will wield substantial power within the community, and knowing how to competently care for others is an excellent starting point.

The list of supplies needed, and the organizational effort required to run a field hospital are immense.  Start with basic supplies and build as your training and budget allow. The most important component of successful adaptation will be in the training and implementation of any plans you make. Make an effort to have quarterly or annual preparedness training for everyone who will be working together in the event of a disaster. If everyone knows their role, where supplies are located, and how to handle specific scenarios the real event will go much more smoothly.

Medical Stockpile

It is important to have a portable medical kit as well as a more comprehensive stockpile for larger emergencies. The portable kit should contain everything necessary for basic survival. The American Red Cross is a great place to find resources on a personal kit with basic components. The CDC and the WHO have excellent resources for planning on a much larger scale.

Don’t let the larger preparedness options overwhelm you initially. They are only appropriate after personal planning has reached maximum capacity. However, it is a good idea to begin looking ahead to create a plan for those who think they will want to take the initiative for their personal or local communities.


Other self-sufficiency and preparedness solutions recommended for you:

Healthy Soil + Healthy Plants = Healthy You

The vital self-sufficiency lessons our great grand-fathers left us

Knowledge to survive any medical crisis situation

Liberal’s hidden agenda: more than just your guns

Build yourself the only unlimited water source you’ll ever need

4 Important Forgotten Skills used by our Ancestors that can help you in any crisis

Secure your privacy in just 10 simple steps

Planning for medical emergencies is one of the biggest challenges one faces. This is especially true if the situation will occur with limited outside resources on which to rely. There

As much as you maybe want to believe your email is safe, it’s not… Prying eyes are watching you… Anyone who walks by your computer as you’re checking your email is privy to its contents; moreover, you could accidentally forget to log out of a public computer, malware could be recording screenshots and keystrokes, and (if unencrypted) your emails could be intercepted by unauthorized parties.

Data loss is a common issue, especially in regards to email. Accidental deletion is an example of email data loss, but all is not always lost in these situations. Email data recovery professionals can perform diagnostics and services in order to recover the lost data. And superior security software can ensure that your emails are encrypted and protected from malware attempts.

How to Keep Your Email Safe

Despite the fact that what’s lost can be recovered, it’s important to be proactive about email data protection. Take note of the Hillary Clinton email controversy? Presidential candidate Clinton used her family’s private email server to send official communications, including more than 2,000 emails which (once discovered) had to be retroactively marked as classified information.

Clinton’s use of her private servers has been widely debated because some members of congress believe that her actions violated State Department protocols, as well as some federal record-keeping laws. Although it’s debatable whether or not she was in compliance (she insists she was in compliance with federal laws), what’s not debatable is the security risks email poses.

Clinton was criticized for using her BlackBerry while appointed as Secretary of State. An unsecured BlackBerry poses a threat to security, and it’s just one example of how not secure email can be and how Clinton herself is fairly computer illiterate. She could have avoided the issue by not using personal email accounts for official business and ensuring that she was only corresponding about matters of national security from a federally sanctioned and secured computer.

You can avoid the issue of data hacking by avoiding transmitting sensitive emails on unsecured servers and unprotected mobile devices.

email

You can do everything on your end to protect your email, but if your recipient isn’t following a security protocol, you’re still at risk.

No matter what, it’s essential to encrypt your email. Especially in situations where your email correspondences include sensitive information, an encryption is vital to ensuring your emails aren’t intercepted by unauthorized third parties. As your email travels from the email server to its intended destination, if unencrypted it can be stolen by hackers. Only sign up for email with SSL-encrypted websites, which can be recognized by their link which begins with “https” instead of the unencrypted “http”.

Email Safety after Sending

You can do everything on your end to protect your email, but if your recipient isn’t following a security protocol, you’re still at risk. If your email account is on a private server, then you can manage your rights. Ask your IT team to include security features, such as a Do Not Forward option. This option ensures the email cannot be forwarded to others, nor can it be printed or copied from. You could also include something in the address bar that warns the user to read the email privately, such as “This email contains sensitive information,” or another type of warning that stops the recipient from reading it around prying eyes.

Also, and this is a big one, never ever transmit private information using a social media account. Facebook and other social media networks collect data on you, and they use it for their purposes… You don’t need that level of data breach in your life, and especially shouldn’t open your business up to it.

The rule of thumb here is to always assume the worst: nothing you email is truly private. Take proactive steps to ensure as much privacy as possible, but avoid transmitting anything that could damage your business or reputation. Change your password often, encrypt your data, and avoid opening your emails around lurkers and you should sufficiently minimize your security risk.


Other self-sufficiency and preparedness solutions recommended for you:

Healthy Soil + Healthy Plants = Healthy You

The vital self-sufficiency lessons our great grand-fathers left us

Knowledge to survive any medical crisis situation

Liberal’s hidden agenda: more than just your guns

Build yourself the only unlimited water source you’ll ever need

4 Important Forgotten Skills used by our Ancestors that can help you in any crisis

Secure your privacy in just 10 simple steps

As much as you maybe want to believe your email is safe, it’s not… Prying eyes are watching you… Anyone who walks by your computer as you’re checking your email

Silver in all forms has been employed by mankind for its antiseptic qualities over millennia. The Greeks and Romans used a silver coin to purify bad water and to preserve milk and wine. In later times, a silver coin was taped to the umbilical wound of a newborn child to prevent infection. A silver solution is placed into the eyes of every newborn to kill any infection that was picked up from the birth canal during delivery and silver is used in every burn center the world over to prevent infection. Surgical bandages are now silver thread impregnated for speedy healing.

Most Doctors know the antiseptic properties of silver. Just ask your MD.

The history of nutrition shows that humans have utilized natural foods and remedies for many thousands of years. The earliest physicians turned to Mother Nature for virtually all their health aids. The effectiveness of herbs and botanicals is well documented and enjoys increasingly wide use by the general public. But, today, with the advent of corporate entities and the influence of Big Pharma and her allies in the FDA, along with their innate financial pursuits and considerations, all this has seen a wide-spread attack.

Natural remedies and holistic treatments are denigrated by corporate America and many MDs as a rule. After all, if natural remedies cost very little and modern pharmaceuticals are very profitable for corporate America, which do you think will get the nod from the moneyed class? Not too much of a brain twister here!

The ancients had to rely on natural means of preservation and storage for foodstuffs. Lacking refrigeration, they had to find natural means for keeping a safe supply for long journeys and hot summers. Not surprisingly, they employed the anti-microbial qualities of silver for the preservation of drinking water, milk and wine. By either utilizing silver vessels for storage and transportation or simply dropping a silver coin into a container or a wineskin, they successfully kept their foods in good order until consumed. Archaeological investigations in the domains of Ancient Rome, Greece, and Mesopotamia are the sites for this information. Cisterns dating from 600 BCE bare the evidence that silver coins were placed in them for water purification and storage. Wine vats from ancient vintners are silent testimony to the same practice. The ancients were pretty darn smart!

In Medieval times, royalty ate and drank from silver vessels, plates and utensils not to be stylist and for pomp, but for health preservation. Acidic foods would tarnish the silver utensils and create toxic silver salts that had a tendency to turn the skin grey or blue. Argyria was common in the upper classes and they were referred to as “Blue Bloods” by the common folk. They were healthy, lived long lives and were immune to the plagues that wiped out a large percentage of European populations in that period. The products that turned people blue (a condition clinically known as argyria) are not true colloidal silvers and nutritionists don’t use or recommend the use of cheap and toxic silver salts in the modern age of health care.

Many folks who go to the Internet in search of information on Colloidal Silver (and many other subjects for that matter) find quite a bit of hype, misleading and just plain disinformation that is placed there by pitifully ignorant postings. And, having found negative claims for Colloidal Silver, they terminate their research and remain ignorant of the facts. You simply can’t trust much of the info you get through the Internet, so be careful of the sources you find there. One of the common claims I see quite often is that argyria is caused by Colloidal Silver and that is simply not true. Colloidal Silver is eliminated from the body quite speedily, but silver salts are not. Argyria is the result of ingestion of improper chemical forms and silver salts that are concentrated in the skin. No practicing nutritionist would ever recommend the ingestion of silver salts, and the use of sodium chloride as an aid to generation is not a good idea.

True Colloidal Silver is safe and effective and is easy to manufacture right in your own home. Claims that it will “turn you blue” are simply the result of gross ignorance or some other agenda. The author has been generating Colloidal Silver at home and has ingested 2 oz. per day for the past 22 years without even the slightest tinge of blue skin. Additionally, being a college professor, I was exposed to the flu every winter and I always came down with a full-blown case plus 2 to 3 common colds. I have not had either of those ailments since beginning Colloidal Silver in 1992, and I DON’T take the flu shot.

I don’t know the motives (or hidden agendas) of anyone who writes this kind of “colloidal silver causes blue skin” tripe, but these folks are out there. The condition of argyria that turned the famous “Blue Man”, Mr. Paul Karason’s skin blue came as an intentional result. He ingested on a daily basis high doses of high-strength homemade silver chloride he made in his garage. He even bathed in the stuff and then “fixed” the silver by using a tanning bed in an attempt to make it into the Guinness World Records book. Deceased now of a cardiac condition, Mr. Karason never had any infections.

Recent Research

The clinical use and medical applications for colloidal silver were recognized as legitimate and approved by the FDA as early as 1910. Many research articles were published by the 1930s. Then came the discovery of penicillin and all that changed. The cheap and readily available colloidal silver products were suddenly abandoned and the pharmaceutical industry began pushing the very expensive and profitable antibiotics. Penicillin saved many lives during the World War II years and thereafter. However, antibiotic resistance has raised its ugly head with the emergence of MRSA and a host of several other resistant bacteria. In addition, modern medicine has practically no effective treatments for viral infections. The common cold, influenza, herpes, HIV, HPV, and hepatitis (A,B,C,D,E,F &G) and now Ebola are all viral infections.

C. Silver may be our only hope when it comes to these. And C. Silver is experiencing a re-emergence in holistic medicine over the past several years. HIV and even some forms of cancer are now treatable. Specialists in wound care are turning to the use and application of C. Silver in increasing numbers because of its immediate effectiveness.

Emergency disinfection of water is a continuing concern among those individuals who anticipate the eventual need for self-protection in these uncertain times in which we live. Public water supplies are vulnerable to unexpected disruptions and even the private water well depends on a reliable source of electrical power from which to operate. Hunting and camping away from normally dependable water supplies carry its own concerns as well. Water taken from streams and lakes carries its own hazards and the taste of Halazone is far from pleasant. C. Silver is well known for its ability to render these questionable water sources safe to drink, and without any undue taste or flavor to offend the Mrs. A test of C. Silver was run in Nebraska some years ago on a swimming pool that had been contaminated by raw sewage. The plate counts for E. coli ran upwards of 7000 CFU/ml. Addition of silver brought the counts to non-detect within 3 hours of inoculation.   C. Silver should be a part of everyone’s survival kit.


Other self-sufficiency and preparedness solutions recommended for you:

Healthy Soil + Healthy Plants = Healthy You

The vital self-sufficiency lessons our great grand-fathers left us

Knowledge to survive any medical crisis situation

Liberal’s hidden agenda: more than just your guns

Build yourself the only unlimited water source you’ll ever need

4 Important Forgotten Skills used by our Ancestors that can help you in any crisis

Secure your privacy in just 10 simple steps

Silver in all forms has been employed by mankind for its antiseptic qualities over millennia. The Greeks and Romans used a silver coin to purify bad water and to preserve

Oatmeal – Jazzing Up the Ubiquitous Prepper Cereal

Being inexpensive, rolled oats can help us save money now, and it’s a good one to stock up on for the same reasons – cheap, filling and full of endurance-granting slow-release energy. I’m not a big fan of “just” oatmeal as a hot cereal. It’s just … well, boring. Too, I anticipate plenty enough spoon-and-bowl meals from beans and rice, boiled wheat or barley, or soups in a crisis, whether it’s a personal crisis or a widespread disaster. I’d rather avoid more as much as possible. The humble rolled oats tub actually helps me there in a big way.

Using mostly things that are also already in my storage or that are easy and inexpensive to obtain, I can churn out desserts, snacks, sides, dinners and breakfasts that are interesting and varied, and don’t really taste like oatmeal. Oatmeal also has a lot of soothing and absorption properties that gives it some handy topical uses.

Using Oatmeal to Extend Meats & Meals

Mix in flakes of oatmeal and-or lentils and ground beans to extend things like meatloaf, meatballs and the hamburger in stews. Oats also make a fabulous replacement for breadcrumbs that would be used as binding or for coating meats.

Add it into Stovetop or homemade bread dressing or stuffing to increase the healthy fibers and calories, and the feelings of satiety from meals.


Grind coarsely or finely and add to flours for bannock, breads, muffins, and biscuits. Zucchini bread, carrot cake and other sweets can take as much as a quarter of the flour in oats without a significant change in texture or flavor. Pancakes, pie crusts, dumplings, cookies and cobblers can all have part of the flour replaced, especially with oats processed to a fine powder.

Fifty-fifty mixes or greater will be far more noticeable and may require additional liquids, but it also increases the heartiness of foods, helps us feel fuller and keep that satisfaction longer over stripped bleached flours especially, gives us healthier, natural arcs of energy, and lowers the glycemic index of foods while helping stomachs process.

Ground oatmeal can also be used to thicken soups, stews and gravy, just like ground beans or lentils that are too old to soak up water efficiently.

Easy Non-Cereal Recipes

Oatmeal has a lot of applications for cooking, without resorting to a bowl of hot cereal. Most of them can be done with a Dutch oven, campfire, rocket stove, or a solar oven or Wonderbag cooker if we don’t have access to our stoves and ovens.

Ash cakes can be made out of pretty much any flour. Using some salt, milk, egg or fats will improve flavor, but the bare-bones way of doing it is to mix just a little water at a time with flour or meal – or in this case, oats – until we can form a patty, then flopping it onto a cooler section of ash. Rolled oats will do best if they’re ground to a flour or if they’re allowed to soak a bit first. As a plain, just-salted version, they make a bread we can have with soups or meats. A little sugar or fruits, and we’re getting closer to a cookie. Alternatively, we can top them with honey or jams, fruits, sweetened cream, or something like a chili or bean medley.

Baked Oatmeal Muffins – A basic recipe with add-in’s for interest and variety is here https://brendid.com/healthy-oatmeal-muffins-no-flour-no-sugar-no-oil/ along with additional links. You can also find dozens of recipes as simple or complicated as you like, with and without other flours and oils, with just about any search. They turn oats into a fast, easy finger food that’s readily portable.

No-Bake Cookies are a staple in some lives. With just a few ingredients and few utensils dirtied, we can use up our oats to satisfy cravings for a fork or finger food as well as a sweet treat. Given the speed with which they disappear as either drop clusters or sliced squares at BSA and adult gatherings these days, during a disaster they’ll be a for-sure hit.

Oatmeal bars can be found as Amish Baked Oatmeal or other standard baked oatmeal, such as this one http://www.tasteofhome.com/recipes/baked-oatmeal. Oatmeal can also be turned into homemade granola bars. They’re out there in the internet world as soft chewy bars or crunchy options. All of them are adaptable to the fruits, nuts and seeds we have on hand or prefer. There are also homemade granola bars that make use of cereals that store well such as Rice Krispies, Cheerios, or Chex, which can increase the variety even more.

Crunchy granola clusters like this one that has healthier ingredients and a few extra steps and this one that uses lower-cost and easy-to-source ingredients with fewer steps in the process have a lot of versatility. There’s a lot to be said for the ability to turn out a nice snacking portion while using up inexpensive oats, today and later. And, if you’re giddy for it, making mini clusters to throw in as a homemade cold cereal can help provide a different breakfast meal even with a spoon.

Fruit crisps – A basic oatmeal crisp recipe such as this one has a lot of versatility, both now and during a personal crisis or a widespread disaster. We can use it with any pie filling we have, or regular canned fruits we strain or thicken the syrups. We can also use it to make stuffed apples, pears or peaches. It can go over cubed, mashed or pureed pumpkin or sweet potatoes as well, or can be used as a topper for a baked sweet potato. Oatmeal crisp is pretty versatile and forgiving, so we can add a quarter to a half extra oats to our recipe if we want a somewhat heartier and healthier version, or just to help us use up a few more of our rolled oats.


Cookies, Pizzas & Pie Crusts – Cookies are pretty cool as they are. Made thick and gooey, they can be a pretty hearty dessert by topping with dried or canned fruit or pie filling, with or without heavy or whipped cream. We can spread them out in a pie pan to make a quickie crust, use a crisp recipe for a pie crust, or we can bake them as a big, wide cookie to then slice up as a dessert pizza topped with cream cheese, frosting or glaze and then whatever fruit, nuts or morsels floats our boat.

Southern Oatmeal Cake – There are numerous versions of oatmeal cakes, although they’re pretty similar. It’s not the prettiest dish in the lineup, but it’s gooey happiness that can satisfy our sweet tooth without enormous expense. For an easier version that’s more storage friendly or to create some variety, we can alternate the topping with tubs of German chocolate cake frosting, reduced sweetened condensed milk, or just honey if coconut isn’t available. It’s also pretty darn nummy just with some heavy cream, whole milk, whipped cream, or clotted cream on top.

Fried Oatmeal is like fried grits. It starts with the cereal we all know, then it gets packed in a glass or a lined bowl, chilled so it sets up, and later, gets turned out and sliced, then fried in grease, butter or oil. The amount or depth of oil in the pan can change the texture some. The size of the slice both in thickness and width-by-height can affect whether it’s a plate meal like pancakes or if it can be picked up like happy French toast fingers for a non-spoon meal. As with pancakes, waffles and French toast, the topping options become endless – fried “dippy” eggs, sweetened syrups or fruits, chocolate or strawberry milk syrup, cinnamon sugar, and sausage bits and honey are favorites in our house. Chopped nuts can be included in the cereal or added on top for a little bit more texture yet.

For additional ideas about using oatmeal, do a search for savory recipes. Even when it’s served as a bowl of hot cereal, inclusions like grated radish, sprouts, fish, and tomatoes and peppers can increase the variety we’re seeing with our rolled oats and help prevent fatigue from them.

Oats Outside the Kitchen

We can really feel our oats sometimes. Probably most of us have already seen or use – possibly regularly – a product that makes use of some of oats’ best qualities. Just as oatmeal is a pretty soothing and mild option for breakfast, it has a lot of uses externally, too.

Oats can be added to bathwater or used as a paste to relieve:

  • Dry, itchy skin (for animals, too)
  • Bug bites
  • Burns & sunburn

It can also be added to soaps for its soothing qualities, or turned into an exfoliating scrub.

Combined with baking soda, we can use ground oatmeal flour as a dry shampoo, scrubbing it in with our fingers, then brushing it out. The two absorb oils and relieve any itching, which can be an excellent low-weight and inexpensive option during sweaty garden seasons should water be in limited supply.

That dry shampoo can also safely be used on cats and dogs, to save money on no-rinse shampoos, to avoid stressing a pet with a shower bath, to treat flea or grass allergies, or to avoid getting them wet in cold weather.

Satchels & Sachets

When we don’t really want to turn a bath into an oatmeal pot to scrub, or don’t have a tub available, we can make little balls of rolled oats, with or without additives like baking soda or herbs and oils to gain relief from skin irritations. We can use them in showers, baths, creeks, or just dampened and dabbed on affected areas.

Those, too, can be used on our pets to treat hot spots, bites, and irritated skin.

Satchels of rolled oats can also be used to:

  • Absorb odors in shoes, closets, bags, coolers
  • Absorb moisture from containers before sealing, or sealed with important items

Heat relieves some of the discomfort from cramps, headaches and muscle pains. Pouches can also be filled with warmed dry oatmeal to create in-the-glove or pocket hand-warmers.

Using Up Oats

Oats are a major part of prepper food storage kits because they’re inexpensive. They store well, last well past supermarket best-by dates, have a lot of health benefits for the gut and cardiovascular system, and the fiber and whole grains of rolled oats help us feel full for longer as well as provide slow-release energy that can keep us moving through long days of work or travel.

Happily, they’re also pretty versatile, and with a little creativity we can use them to stretch our budgets now as well as increase our food storage.

There are probably fifty million more recipes out there for making oats without a steaming bowl and spoon, from breads to desserts. There are probably another dozen helpful ways to use it up outside the kitchen. These are just a few of my favorites, due to the ease or the effectiveness of them. Feel free to tag on your additional favorite non-cereal-bowl recipes and uses outside the kitchen.


Other self-sufficiency and preparedness solutions recommended for you:

Healthy Soil + Healthy Plants = Healthy You

The vital self-sufficiency lessons our great grand-fathers left us

Knowledge to survive any medical crisis situation

Liberal’s hidden agenda: more than just your guns

Build yourself the only unlimited water source you’ll ever need

4 Important Forgotten Skills used by our Ancestors that can help you in any crisis

Secure your privacy in just 10 simple steps

Oatmeal – Jazzing Up the Ubiquitous Prepper Cereal Being inexpensive, rolled oats can help us save money now, and it’s a good one to stock up on for the same reasons

A perennial problem faced by suburban and rural dwellers is obtaining water in the absence of utility provided electric power. Standby generators require fuel of some type, which will eventually run out, and deep drilled wells are poorly suited for use with hand pumps of most types.

As a prepper, this has always been a concern for me as I live in a rural setting, but in a house constructed with the modern “central-everything” design concepts. I do have a gasoline-powered generator, and maintain supplies enough for a few weeks of continuous running. After that, it’s carrying buckets to the stream.

This has led to my experimenting with some alternatives for my survival homestead, and based upon my current deployment I may just go off-grid for water completely. Most of the components I had lying around with the exception of the pump, and the batteries: those items set me back around $450.

Read more: The vital self-sufficiency lessons our great grand-fathers left us

The basics of my survival homestead:

  • Frame house with a huge, unfinished second story, currently just storage.
  • Drilled well: 270 finished depth, water table at approximately 50 feet down
  • Standard 220 VAC submerged pump at 100 feet depth
  • The usual captive air pressure tank with associated plumbing and pump pressure relay

So the conundrum is: how to extract perfectly clean water from this well at minimum cost, and without completely changing the plumbing. (I may want to sell and move further out, so any new owner will probably want things as standard as possible)

What I have come up with to date, experimental at this point is a solar/battery-powered pump that stores water in an elevated container, allowing gravity to supply the pressure. Keep in mind though: water is heavy! Be sure to reinforce your structure as needed! I’d consider this a relatively high level overview as opposed to a design doc, so tailor as needed for your own situation.

Stuff.

  • A 12/24 VDC submersible pump with 230 foot lift:
  • 100 feet of 1/2 “ pex tubing
  • Renogy 100 Watts 12 Volts Monocrystalline Solar Starter Kit (Amazon. Harbor Freight, etc)
  • 2 – 12VDC marine deep cycle batteries, connected in parallel
  • A second pitless adapter installed on the well casing
  • 2 – ½” Pex to brass adapter sized for the pitless adapter being used, (1/2 <> 1” in my case)
  • Pitless adapter top plug
  • A second strain relief for the well cap wiring pass through.
  • SharkBite check valve ½”
  • SharkBite Tee for ½” PEX
  • A used but good queen water-bed mattress (for experimenting only! Gets brittle when cold)
  • I will probably use plastic 55 gal drums for anything permanent.
  • 100 feet #8, 2 conductor, jacketed, direct burial stranded wire
  • 2 – reducing adapters – ½” pex > 1” brass
  • Zurn pressure reducer (had on hand – Zurn 1-NR3DU Wilkins 1-Inch Pressure Reducer Valve 15-75-75PSI)
  • 2 – SharkBite ½” gate valve
  • Limit switches (Amazon Model: a14061600ux0543)
  • Assorted connectors, plumbing bits, and crimpers

Read more: Build yourself the only unlimited water source you’ll ever need

Installing the new pump

welldetails

Drawing 1 – Well details:

The first thing is to install the new pitless adapter in the well casing, just follow the instruction that came with it, In my case, I needed a 1-3/4” hole saw.

Using a string with a weight on it find the depth of the torque arrestor above the standard pump.

Using the same string with a float find the water level in the well casing.

Cut a piece of PEX approximately three feet shorter than the depth of the torque arrestor but be sure it’s still well below the water height. If it very close you may have to re-examine the well suitability.

Connect the two-conductor wire to the new pump following the instructions meticulously: you do NOT want the fitting to leak.

Connect the piece of pex to the new pump. Use stainless clamps or crimp collers.

Connect the PEX to the pitless adapter using suitable adapter hardware.

Run a piece of paracord through the lifting eye on the pump, either use twice the needed length so you can pull it free later or a bowline if you want to keep it in place.

Secure the line to something sturdy, it’s there in case the pump slips out of your hands.

Drop the pump and attached wire down the well. Be very sure it doesn’t come to rest on the torque arrestor! If it does, pull it and adjust the length of the PEX.

Install the solar array where ever you want: mine are on a south-facing roof with a 45 degree pitch.

Install the solar panel charge converter somewhere out of the weather; connect the wiring as described in the instructions.

Run #8 stranded wires from the charge converter to the battery bank.

Turn the charge converter on and make sure the batteries are charging. A voltmeter is sufficient. Mine reads 13.8VDC across the battery terminals in bright sun.

Connect the new well wires to the batteries to ensure the pump works correctly.

If yes, disconnect the pump for now.

water-flow-detail

Drawing 4 – Water Flow Detail:

Connect the remaining PEX to the pitless adapter outlet, tape the pump wire to the PEX, and bury the entire run below the frost line for the area.

Run it into your basement or crawlspace using whatever critter-proof method you wish.

Install a large water container in a location above your typical faucet height. The higher the location the greater the water pressure.

I’ve been experimenting with a water-bed mattress because, 1 – I had it already, 2 – it distributes weight well.

storagedetails

Drawing 2 – Storage Details:

Run the PEX and wiring up to whatever storage container you are using, install the check valve, (flow toward the storage tank!), then the PEX Tee after the check valve, and then from the check valve outlet side into the tank, using suitable fittings to provide for a secure, leak free connection. Inside the container, if it’s not flexible like the mattress, install an addition piece of tubing that just barely reaches the bottom of the container.

Install the limit switch with a float or similar to open the pump circuit when the water level reaches the maximum desired height in the container. Typically you would use the normally closed contacts that will open when the float is lifted. There is a multitude of ways to do this, I happened to have the switches already.

chargedetails

Drawing 3 – Charge Details:

Now run the wiring to the batteries, and connect, observing the correct polarity as during the initial test.

On the original house water supply plumbing cut and insert a tee in the line from the pressure tank going to the house plumbing. Install one of the gate valves in the Tee side going to the new storage. The object is to connect the new storage container outlet Tee to the standard supply plumbing after the pressure tank check valve, see drawing 4.


Other self-sufficiency and preparedness solutions recommended for you:

Healthy Soil + Healthy Plants = Healthy You

The vital self-sufficiency lessons our great grand-fathers left us

Knowledge to survive any medical crisis situation

Liberal’s hidden agenda: more than just your guns

Build yourself the only unlimited water source you’ll ever need

4 Important Forgotten Skills used by our Ancestors that can help you in any crisis

Secure your privacy in just 10 simple steps

A perennial problem faced by suburban and rural dwellers is obtaining water in the absence of utility provided electric power. Standby generators require fuel of some type, which will eventually