HomePosts Tagged "Top Menu" (Page 20)

In just a couple of weeks a lot of you are going to be making New Year’s resolutions and according to our good old government (not sure why they have to have a webpage to tell us this) the most common resolution is to lose weight. This is a great goal for a lot of people but as preppers we can look at this another way too. Maybe it’s time to trim some pounds off your Bug Out Bag and save your back in the process. For a lot of us, the mythical – perfect bug out bag is one part Swiss army knife, one part hardware store and one part supermarket with a dash of your favorite clothing outfitter thrown in for good measure. Over time in our efforts to be prepared for anything, we have lost sight of what this bag is meant for and traded common sense for comfort, at the expense of weight.

What choo talkin bout Willis?

In my research as a prepper I have watched a lot of YouTube videos about Bug out bags from people all over the world and in many of them you get very well-meaning people who put together pages of items that you simply don’t need. Others have items that could be lighter or who carry too much of a single item when that isn’t necessary. I myself am a well-meaning person so here is my take on some simple steps you can take to lighten your bug out bag but before I get into that, I want to give you my opinion on what a bug out bag should be in the first place.

What is a bug out bag for?

A bug out bag has been called by a lot of names. I have heard I.N.C.H bag (I’m Never Coming Home). G.O.O.D bag (Get Out Of Dodge), the 72-Hour bag, Go Bag and others that crop up from time to time when I think people are just trying to create something new and trendy (S.N.A.P – Seriously Need Another Plan). Whatever you call it, the bug out bag concept was envisioned as a bag to carry everything you will need to LIVE for 72 hours if you only have that bag on your back and nothing else in the world. Why did I put the emphasis on live? That is because a lot of people start throwing everything but the kitchen sink in their packs and it is one of the reasons why I wrote the post “Is your bug out bag going to get you killed?

When you start adding items with minimal practical use or perhaps less likelihood of keeping you alive then you start adding weight. Do this enough times and your bug out bag becomes an unwieldy mess that can cause injuries or worse, get you killed. So what are some ways we can prevent that from happening?

Don’t carry too much water

Unless you live in the desert and I know that some of you do, water should be something that you know how to find and can easily disinfect to make it drinkable. For the large majority of us, packing 3 days’ worth of water is suicide in terms of size and weight and it is really unnecessary. Again, if you live in a desert I am not talking to you, but you really need to evaluate your plans also.

Sawyer Mini is a lightweight hero when it comes to water filtration.

Water sources are everywhere and you only need a good water filter to make all but the nastiest water perfectly safe for drinking. I like pump filters like the MSR Miniworks EX Microfilter and have taken this on several backpacking trips because they are simple and filter water very quickly. In terms of sheer weight and even space reduction, the Sawyer Mini Water Filtration System is a real champ though and in those respects it kicks even decently sized filters like the Miniworks to the curb. The Miniworks weighs 1 pound. The Sawyer mini weighs 2 ounces.

For water I would carry one full litter bottle and have one plastic bladder that I would use to collect water that I need to filter with my Sawyer. Nalgene water bladders weigh almost nothing empty and can roll up to fit in tiny spaces. My plan is to find and filter water as I need it along the way. Could you boil your water instead and maybe save these few ounces or use water treatment tablets? Of course, but you have to have a fire, keep something to boil it in, wait for it to boil, then cool down, lather rinse repeat or deal with the weird taste of those tablets. The filter is the easiest fastest way to go for me and the Sawyer will filter over 100,000 gallons! That is enough to keep you alive for over 200 years if my math is right.

Don’t pack like you are going on vacation

Too many bug out bag lists will contain a spare pair of boots and another change of clothes. Do you need more clothes to live? Maybe if you are bugging out from a nudist colony and you don’t have any on, but you should already have some clothes on. Maybe you need to adjust your wardrobe and put on a good pair of boots before you bug out, but packing another set of clothes takes up space and adds weight; especially if you are packing heavy winter clothes.

Dress in layers and take items that will compensate for a lot of additional items. I would bring a pair of socks so you always have a dry pair, set of clean underwear and not much else. If it was cold I would have a base layer(s) and maybe a fleece, but I might have that on my body anyway. Clothes shouldn’t be packed in place of shelter; you should deal with that separately.

What about my camping towel, deck of cards, favorite coffee cup and my travel pillow? Leave all of that stuff at home. This pack should only have the essentials if your goal is truly to have the least amount of weight you can. If you are running from everything you know for some reason you have bigger problems than a pillow and you will never pack everything you need in all scenarios for all situations so why try?

Use a tarp instead of a tent

Tents can easily weigh 5 pounds so they are prime opportunities for reducing weight. One of the simplest alternatives to packing a tent is to pack either a rain fly or tarp. Tents do not offer much in the way of protection from the elements unless you have a serious mosquito problem and primarily they are for keeping the rain off of you while you sleep and maybe affording some degree of privacy.

For a really nice option that also gives you camouflage, you could go with the Aqua-Quest Heavy duty tarp. This will string up easily between two trees, keep the rain off of you and as long as you were in a wooded area, this could prevent your location from being noticed by passersby. This tarp weighs 3.4 pounds so there are some savings but it rolls up much smaller than a regular tent and you don’t have to worry about those stupid poles and stakes that are always lost. Breaking down and setting up will go much faster as well once you have a simple tarp rigging system down and memorized.

Pack a tarp instead of a tent.

Rain fly’s for hammocks are a similar option but usually weigh a little bit less. It’s the same concept as a tarp but with a slightly different footprint and coverage area. The ENO Pro Fly Rain Tarp only weighs 22 ounces and that is a huge difference from that 5 pound tent.

Look at the weight of your bag itself

Sometimes we can save weight simply by looking at our bug out bag that we are carrying all of this lifesaving gear in. Take just two common bags out there, the Rush 72 by 5.11 Tactical and the Maxpedition Pygmy Falcon II. These bags are not without their differences, but the Rush 72 weighs 4.8 pounds and the Maxpedition Pygmy weighs 2 pounds 1 ounce.

Now I don’t have both of these bags in front of me so the 5.11 could be twice as large as the Pygmy, and with a name like Pygmy, you know it isn’t Super Grande, but the point is your bag also contributes to the overall weight. Maybe if you are looking to shave some pounds and you make some of the changes above you won’t need as large of a bag in the first place. Something to consider.

Lighten your food load

Food is a great place to reduce weight. On one of our first backpacking trips into the woods we didn’t think about weight at all, we thought about pigging out after long days hiking with heavy packs. We had foil packets of tuna, summer sausage, cheese and crackers, whole bags of trail mix, pop tarts and cookies. We never even made it through all of our food that we packed in and in the process of that first backpacking trip learned a valuable lesson. Some foods weigh more than others and you don’t really need to pig out that much to have more than enough to keep you alive.

For a bug out scenario I am looking for a great calorie to weight ratio and one option is G.O.R.P which is simply good old raisins and peanuts. One problem with G.O.R.P is it’s shelf life and ability to handle storage extremes. If your bug out bag is always located in the hall closet or down in the basement where it’s always 62 degrees then G.O.R.P is a great option. The trick is to only eat as much as you need based upon the caloric content. You can’t just eat until you are full or else all your G.O.R.P will be gone the first day.

Other options which are more heat tolerant and long lasting when we look at from a storage perspective are emergency ration bars (my current Get Home Bag option) and freeze-dried food like Mountain House. These are lighter than bringing 6 cans of spam in your pack and can take the heat of a car parked in the summer without spoiling.

Also, these options don’t require you to bring your own mess kit which is another item that isn’t necessary. Just bring a spoon like the Titanium Spork or even an old plastic spoon from an MRE and you are good to go. The Emergency Rations don’t even need that.

Reconsider One Is None

A prepping mantra is “One is none and two is one.” That simply means that stuff happens. Murphy will appear when you least expect him and anything you have can be lost or broken. That single water filter you have could roll down the hill, into the river and out to the ocean. The survival knife you have could be lodged in that great big bear you were forced to scare away from your camp and they might run off into the woods never to be seen again.

The temptation to pack two of everything sounds like great advice but it isn’t necessary or practical in a bug out bag. Could you find a use for two fire starting kits? Maybe. Could you need a back-up rain poncho? You could, but all of your redundancy is adding weight. Think carefully about whether you need this weight or maybe you should just be more careful. If we were talking about prepping supplies for the home I definitely agree that having two is a good idea, but when it comes to hiking through the woods, trying to survive I am less likely to adhere to that advice. I know I could regret it, but we are talking about weight reduction here.

Maybe there are certain items that you could have two of like a knife or a way to start a fire. I have a multi-tool as part of my EDC which has a knife that could be my backup. Also, I have a fire steel and a Bic lighter, but I am not going to carry two tarps in case I lose one.

Sleeping bag Options

Sleeping bags are another item that can weigh a lot and take up a bunch of space. I have a military sleep system that I purchased at a gun show that I love but would never put this in my bug out bag if I was trying to save space or weight. It is huge and heavy. I also have sleeping bags from Wiggy’s that are very warm, but they also take up a lot of space.

You can spend hundreds on very expensive bags that pack down small or you can spend a lot less money, dress in layers and maybe use your survival bivvy to supplement that system. The Recon 3 from Elite Systems is easily half the size and weight of my Wiggy’s and costs a heck of a lot less. Will it last as long as the other bags or keep me warm down to -20? No, but if it is -20 my butt is looking for shelter and a heat source.

So there are 7 ideas for reducing the weight of your bug out bag. What ideas do you have?

In just a couple of weeks a lot of you are going to be making New Year’s resolutions and according to our good old government (not sure why they have

In a perfect world, one would like to think that when disaster strikes, people would rush to help and support each other through it. And while people certainly will, such catastrophes unfortunately sometimes bring out the worst in many people as well. And these opportunistic predator types don’t target strapping he-men either. They’ll be looking for what they think are vulnerable victims; the elderly, the disabled, and women.

While in these more enlightened times few people still think of women as the “weaker sex”, most men still retain some advantages in physical height and strength.

Fortunately, there are a number of self-defense tips and techniques that can level that playing field and allow women to protect themselves and those that they are responsible for protecting. Some of them involve an outlay of money, some involve exercise, some involve surprisingly simple preparation, but all of them should be considered now, not after the worst happens. Below are some of the more effective ones.

Get And Stay Physically Fit

The healthier and more physically fit you are in the aftermath of a crisis, the better.

You’ll be able to run from danger. You’ll be able to run and get help and possibly track down prey.

Weight lifting will allow you to…well…lift weights.

Rock climbing and ropes courses now may help you to extract yourself and assist others in escaping from collapsed buildings, scale cliffs, and climb trees.

And the great thing about physical fitness programs is that they need not involve memberships at expensive gyms. An exercise regime as simple as daily rope-jumping may have you putting others to shame when trouble strikes.

Don’t Be Afraid Of Fear

It’s a perfectly natural emotion, designed by nature to help you avoid serious problems. But there’s a fine line between breaking down into hopeless hysteria or running blindly off of the edge of a cliff, and making your fear work for you.

Don’t be crippled by fear, but do listen to that little voice warning you when going into unfamiliar areas, encountering strange groups, etc. And remember that the adrenaline produced when you enter the “flight or fight” mode actually increases your physical strength. Use it accordingly.


Face to face with a street thug? Do THIS
Sometimes it doesn’t even feel like we’re living in America anymore, with…
• Outraged alt-left mobs who burn any American flag they come across…
• Trigger-happy thugs who have ZERO regard for human life…
• Radical terrorists plotting to murder Americans right here in our country…
That’s why an ex-CIA Officer made this brief self-defense video and he’s sharing it FREE with all law-abiding American citizens.

Every Heel Has His (Or Her) Achilles Heel

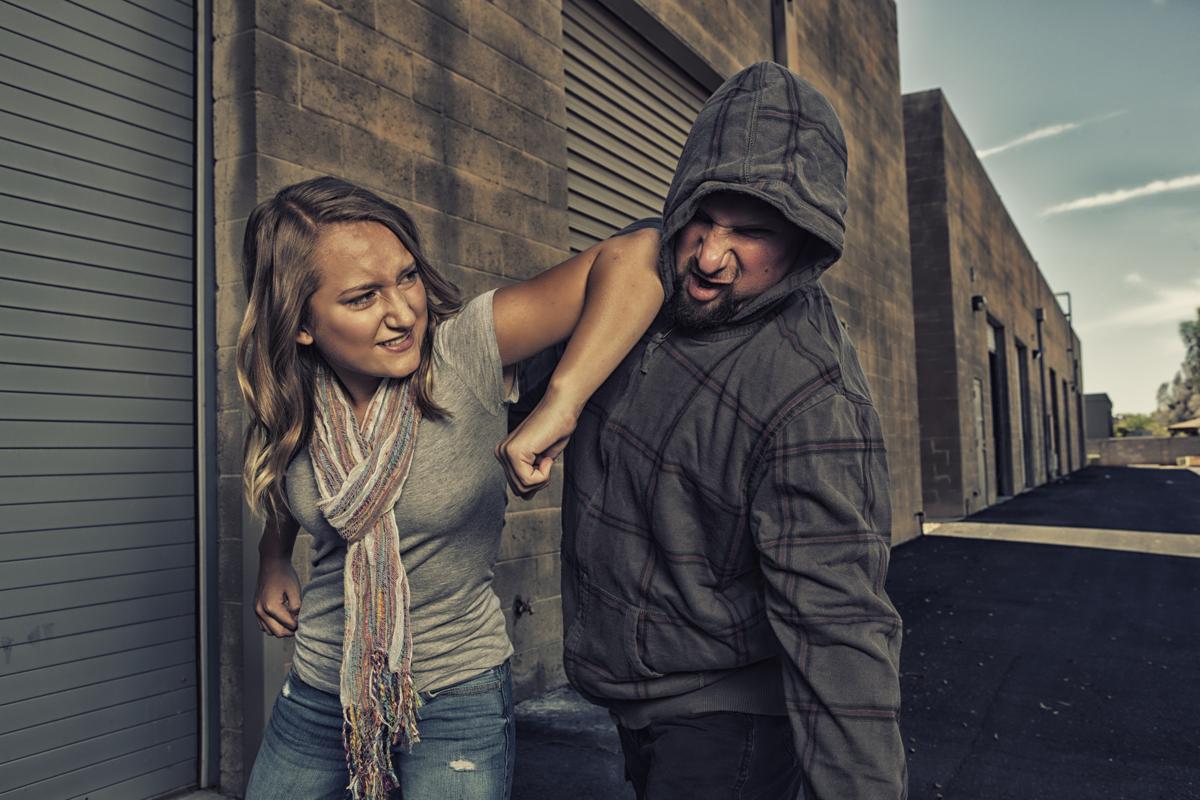
Even physically fit women may not prevail in a confrontation with a man that involves running or brute force. So don’t let him get the upper hand, but calmly and effectively go on the offensive by attacking him in areas that will hurt, with blows and kicks to the:

  • Eyes
  • Groin
  • Kidneys
  • Nose
  • Adam’s apple (that “bulge” in the throat)
  • Shin
  • Instep
  • Solar plexus (between the sternum and stomach)
  • Knee
  • Nose
  • Jaw
  • Sternum (the flat bony area in the center of the chest)

Make sure that these blows are hard, and yes, they work just as effectively on women. And in situations like these, biting is absolutely fair play, and effectively painful. For some defense moves that you can try out, check out this article on The 3 Essential Self-Defense Moves.

Take A Class

There are a couple of reasons to take formal self-defense courses now.

The first one is that you will be learning in a safe and comfortable environment with professional instructors. This guarantees that you’ll be learning how to use techniques effectively, having questions answered by knowledgeable sources, and reducing the chances of injury to yourself or another student.

The second reason is that retentive learning of this nature tends to go better in a group situation, with the positive feedback, support, and hands-on learning opportunities offered by this type of classes.

Join A Shooting Club/Go To A Firing Range

Waiting until the apocalypse is nigh upon us is a bad time to become comfortable with using a firearm. It’s also possible to receive instruction at these locations to insure that you know how to effectively protect yourself with a firearm against attackers.

Other (Non-Lethal) Firearm Knowledge That All Self-Defenders Should Have

Neither the survivor party that you’re trying to protect nor the gang of slobbering attackers that you’re facing will be too impressed if your gun jams or you shoot yourself while firing it, now will they?

The Israeli Woman Teaching the Art of Stiletto Self Defense

Survivalists or preppers who know or think that they will be handling guns should:

  • Know how to load and unload various types of firearms
  • Know how to clean and perform at least minor types of other maintenance on guns
  • Be conversant with various parts of firearms
  • Know how to correctly wear a holster, as well as correctly drawing from and returning a weapon to it

It would also be very helpful to master the not-difficult but time consuming art of reloading, or manufacturing your own ammunition.

Prevention Is The Best Cure

The most effective self-defense? Avoid putting yourself in situations where you have to use self-defense!

Avoid traveling by yourself, traveling at night, or traveling in exposed or isolated areas. Sometimes of course, one has no choice. In such situations, keep a straight, tall posture, walk quickly and purposefully, and keep weapons out and in your hand.

Use Caution In Making New “Friends”

Until you actually get to know them, all unknown parties should be treated with caution. This means maintaining a distance of a couple of meters when meeting and speaking to them. You say this seems rude? Consider this. It buys you some space if the “friend” goes into attack mode, and allows you to observe what most vulnerable body parts the attacker (see #3) is exposing to you.

Maintain Self-Confidence

It can be hard to keep a stiff upper lip during the End of Days, but remaining calm and assertive will not only help you combat depression and feelings of self-hopelessness, it will make you appear less of a “mark” to attackers and other unsavory types.

Hunker Down At Home

If the crisis is short-term or there’s no immediate danger, like Dorothy said in the Wizard Of Oz, “There’s no place like home”. Make sure that your palace is a fortress though, by pre-stocking plenty of non-perishable foods, potable water, and medical supplies. Regardless of weather, all unused doors and windows should be secured. Install an “alarm” system even if it’s just a dog, and if possible, create a well-stocked “panic area” in the home where you can flee from intruders, and they can’t follow. Better still, be cautious about admitting any strangers to your home.

Wrapping Up

What do you think, are there other important factors women need to keep in mind to be able to effectively defend themselves? If you have some thoughts on the subject, please share them with us by commenting in the comments section below. We would love to hear from you!

Face to face with a street thug? Do THIS
Sometimes it doesn’t even feel like we’re living in America anymore, with…
• Outraged alt-left mobs who burn any American flag they come across…
• Trigger-happy thugs who have ZERO regard for human life…
• Radical terrorists plotting to murder Americans right here in our country…
That’s why an ex-CIA Officer made this brief self-defense video and he’s sharing it FREE with all law-abiding American citizens.


In a perfect world, one would like to think that when disaster strikes, people would rush to help and support each other through it. And while people certainly will, such

In Part 1, we discussed the conundrum of water; how it was necessary, but safe water is not always available.  We listed what could contaminate water, and mentioned the six practical ways to fix this.  Then we investigated the first two of these methods.  Here is the investigation into the other four methods.

Boiling

Boiling is a very simple concept; bring water to a boil for a few minutes and anything biological is killed.  This process does not do anything for any particulates, salt or chemicals, and requires a source of heat to get and keep the water at 212 degrees F (at sea level; the temperature goes down as the altitude goes up).  A useful item to always have in your water bottle or canteen pouch is a stainless steel cup into which the bottle nests.  Not only can you boil water to kill organisms, but can melt ice or snow to get the water, and cook in it.

Bring water to a boil for a few minutes and anything biological is killed.

Chemical Treatment

As an alternate to boiling contaminated water to kill the organics, you can poison them.  Fortunately, they are more sensitive that we are, and the amount of poison needed for them is not enough to bother us.  It can taste bad, though.  The common choices are Chlorine or Iodine based.  Chlorine can be cheap (think standard bleach), but is unstable (has a short life span), leaves a bad taste, and the residue left behind is suspected of causing some cancers.  Iodine deteriorates on exposure to sunlight.  It also leaves a bad taste and is dangerous for people with some thyroid conditions.  The iodine taste can be alleviated with Ascorbic Acid (Vitamin C) after it has completed its work.  Although you can use the liquid forms of these chemicals directly, they are subject to deterioration and the potential to leak all over everything, and need care to avoid overdosing.  A tablet purification system is more practical.  The “best” treatment seems to be Katadyn MicroPur tablets, which uses Chorine Dioxide.  This formulation increases the effectiveness and durability, and keeps the chlorine taste to a minimum.  Aquamira is generally considered the number two tablet, also Chlorine Dioxide based, and the number three rated tablet is often considered to be Potable Aqua, which is iodine based (they now also have a Chlorine Dioxide product which has not been evaluated yet).

Cryptosporidium cysts have a high resistance to poisoning; Chlorine Dioxide will do it, but it can take as long as four hours.  Iodine is not reliable against Cryptosporidium.

For something completely different from tablets or liquid, there is the Potable Aqua PURE device.  Solar powered, it takes a salt and water brine mixture and produces a Chlorine and Peroxide purification liquid.

Distillation

Each chemical has a temperature at which it transforms to its gaseous form (boiling point); this temperature varies inversely with the surrounding pressure.  For water, of course, this is 212 degrees Fahrenheit at sea level (1 Atmosphere of pressure).  If you capture the gaseous form of water and cool it, it turns back to liquid water.  This process is called “distillation” and the apparatus is often called a “distiller” or “still”.  If the liquid (contaminated water) is a mixture of compounds, then some of the chemicals may “boil” (transform to gas) at lower temperatures than water (alcohol is one such chemical), and some at higher temperatures.  Thus, in order for this to be effective at purifying water, you must NOT capture, or contaminate your cooling apparatus with, any vapors prior to the water boiling AND keep the temperature below the boiling point of water until all (or at least most) of the low boiling point contaminants are gone.

And this can take a while, since some of these chemicals (like alcohol) REALLY like being mixed with water.  And you have to remove the cooling apparatus before the water has all boiled away AND keep the temperature from rising above the boiling point of water so no other contaminant is boiled off.  Theoretically, with care, you could get perfectly pure water using this methodology.  In practice, that is often not the case, but the results can be adequate.  Most often, this apparatus consists of  a tank which can be filled with contaminated water, situated over a fire or other heat source, and a way to capture only the steam from water and run it through tubing, which uses open air or a liquid bath to cool and “condense” the steam back into water.

If you capture the gaseous form of water and cool it, it turns back to liquid water.

Many of the commercially available distillers are “one piece”, so should not be relied on if there is much chance of low boiling point contaminants.  Most of the rest seem to be “screwed together”, so it might not be practical to keep the collection and condensing parts free of low boiling point contaminants.  The WaterWise WW1600 seems like it might allow you to just add-on the collection part when the water is boiling, but it looks freaky, the reviews are not very good and the price is too high for me.  There is another option, the Prime Water distiller, which appears to allow placing the collector/condenser after the water is boiling (make sure you have a way to avoid getting burned by the steam), and it is quite low-priced.  They appear to be low producing though; the models they list are specified as only putting out two or four quarts of distilled water PER DAY, and I’m not sure how easy it would be to avoid re-contaminating the output, since it is a bowl which floats in the contaminated liquid.  Then there is the Gravi-Stil from SHTFandGo, which can be set up either as a distiller or a filter, and the non-auto-fill version looks like it could be made to do the job.  Or if you already have or can get two large pots, they have the D-Stil light which looks like it would be fairly easy to use in our desired manner, and the price is not too bad.

Distillation takes a lot of fuel, and does waste some water; some might escape as vapor and as the remaining contaminants in the liquid increase, production of water will decrease, eventually resulting in having to discard it.  You might lose as much as four gallons of water for each one gallon purified, but with good temperature control and care, should be able to get the losses down significantly.

This works, but often you spend more water (as sweat) building the still than you get back from the still.

There is also the concept of the “solar still” which uses solar energy to cause evaporation (the other way a liquid can be transformed into a gas) which is then condensed back to pure water.  This can be a hole in the ground covered with an appropriate plastic film.  This works, but often you spend more water (as sweat) building the still than you get back from the still.  Nowadays, there are “one piece” solar stills.  These are essentially “balls” or “bags” which enclose contaminated water, and uses the sun to evaporate the water and condense it back into a clean container or area.  Note that you don’t want to use this system with any water with contaminants which “boils” at a temperature less than water, such as from a car radiator.  An example of this is the Aqua Mate solar still similar to those included in lifeboat survival kits to purify sea water.  A variation on this is a “transpiration” still, which captures the water given off by a living plant during photosynthesis.  Since the plant draws water from the ground, this can produce small amounts of water continuously.  If a living plant is not available, this methodology will also work on plant clippings which contain moisture, but only as long as moisture remains.  The Hydro Kit from Survival Metrics is an example of this.

UV/Solar

Ultraviolet (UV) radiation is effective against organisms, and highly portable units such as the SteriPen are available.  I don’t trust them because they require batteries or other sources of power which may or may not be available, they are electronics which are subject to failure or an EMP, and if there are any particulates in the water, it is possible some organisms will be “shaded” from the UV and survive to wreak havoc.

The SODIS method is very easy to apply: A transparent PET bottle is cleaned with soap. Then, the bottle is filled with water and placed in full sunlight for at least 6 hours. The water has then been disinfected and can be drunk.

Solar disinfection (often called SODIS) adds heat and sometimes other techniques to UV, only needs sunshine and would seem to be a more reliable methodology, although it takes a lot longer.  It is sometimes done with special containers, but can be approximated with standard PET/PETE (clear plastic, recyclable mark “1”, somewhat flexible) bottles with all labels removed.  PVC bottles should be avoided, as chemicals from the container can be added to the water.  Clear glass bottles will work as well.  An interesting option is the Puralytics SolarBag, which not only is an effective SODIS container, but contains a mesh which is designed to treat organic contaminants and heavy metals.

Choosing a Water Treatment Methodology

Unfortunately, there is not really a universal solution.  You need to evaluate what is likely to be in the water and go from there.  Here is a summary of the common methods and what they can usually handle:

  Filter Purifier Reverse Osmosis Boiling Chemical Treatment UV SODIS Distillation Activated Carbon
Particulate YES YES YES NO NO NO NO YES MAYBE
Bacteria YES YES YES YES YES YES YES YES NO
Cryptosporidium YES YES YES YES MAYBE YES YES YES NO
Virus NO YES YES YES YES YES YES YES NO
Salt NO NO YES NO NO NO NO YES NO
Chlorine NO NO YES NO NO NO NO YES YES
Heavy Metal NO NO YES NO NO NO MAYBE YES SOME
Volatile Organic Compound NO NO YES NO NO NO MAYBE YES YES
Inorganic Chemical NO NO YES NO NO NO NO YES MAYBE
(Taste) NO NO MAYBE NO WORSE NO MAYBE MAYBE YES

As you can see, for a fixed location with a regular water supply, a distillation or RO system can be a good choice, or if fuel will be a problem or water is limited, a large Purifier with an Activated Carbon stage.  For portable use, a small purifier with an activated charcoal stage would seem the best bet, but this could be a bit hard to find at a reasonable price, with the possible exception of the water bottle based Sport Berkey.  As an alternative, multiple methods might serve.  Boiling, Chlorine Dioxide tablets, UV or SODIS, followed by a filter with an activated charcoal stage would seem to cover everything practical.  Alternatively, a filter followed by an enhanced SODIS like the SolarBag would seem to be about the same.  For salt water, distillation or RO seem the only practical options.

Finally, don’t get a water treatment methodology and assume you are good.  Some of these things have been known to break or fail or get used up; water is not only a requirement for life, but an immediate requirement.  Always have backups; either duplicates or alternate methods.  For instance, have distillation or RO AND a Big Berkey or equivalent at a fixed location, and coffee filters, a metal cup and MicroPur tablets, a portable purifier with Activated Carbon or Sport Berkey, and possibly a SolarBag or Hydro Kit in a bug out bag or other mobile methodology.  It is a good idea to test your systems where practical.  For instance, I ran my tap water through a Sport Berkey, and there was no change to the TDS reading, although I expected at least the Chloramines to be removed.  I talked with a dealer, but she has not responded yet, so I guess I’ll have to go to the company.

Note that in addition to being able to purify your water, you should have ways to collect it for purification, and store or transport it after purification.  If you are going to be using chemical treatment, make sure your container is appropriately sized for the chemical used.  I like 1L water bottles since my chemical tablets are designed for that volume, but they are a bit hard to find, and don’t fit into some of the carriers.  Stainless steel is my favorite, but there is nothing wrong with some plastic bottles as long as you have that stainless cup it nestles into.  In small kits, I use 1L sample bags.  Whenever possible, I like to also have a hydration bladder; it might not be optimal for purification, but it is hard to beat for transport and continual hydration.  A length of surgical tubing can help you get access to water you might not otherwise be able to get to, and has other uses as well.  A clean cloth or “Survival Sponge” can help you collect water from dew or condensation.

In Part 1, we discussed the conundrum of water; how it was necessary, but safe water is not always available.  We listed what could contaminate water, and mentioned the six

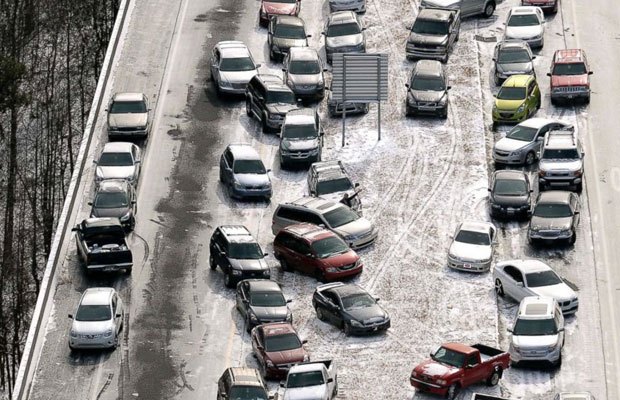
There were lots of times when people were stranded in their cars, forced to sleep in the floors of local stores and cities that looked virtually unprepared for any winter event. Its times like this that I wonder how things would have been different if everyone involved had taken the time to prepare a simple winter car survival kit. I think that there are certainly factors that would have made this little amount of snow something to contend with anyway, but the lives of a lot of people could have been much better with a little planning and preparedness. This type of road incident isn’t unheard of and it simply makes good sense to have supplies in your car that you can count on if you are stranded.

The weather may force a lot of people to wait in traffic for hours due to accidents or road clearing operations. Having simple preparations ahead of time (even more so with the threat of inclement weather) would make these delays more tolerable and could ensure that more people can make it home to their families instead of spending the night on the floor at CVS.

What do you need for a winter car survival kit?

Before I get into the actual content list of items to store in a winter car survival kit, I should bring up fuel. It can’t be said enough that you should have no less than a half a tank of gas at all times. Why? Because if for some reason, you aren’t able to fill up, a half a tank will last longer and get you more places that sitting on empty. For those people who must sit in their cars for hours, a half a tank of gas could keep them warm and more importantly moving.

So on to the list. The items below should be in everyone’s car if you go anywhere in the winter. Some of the winter car survival kit items are just as important in the summer and can be considered as core. We’ll list off the items that are specific to Winter, but it will be obvious.

Core- Car Survival Kit items.

Winter Car Survival Kit additions

  • Wool Blankets – 2
  • Survival Bivvy – 2
  • Boots or hiking shoes with good gription (yes that is a word)
  • Small Camping shovel – necessary in some locations more than others
  • Windshield scraper
  • Sleeping Bag
  • Wool or Fleece hat/gloves
  • Spare fleece pullover

What could you sub in there for Summer? Certainly more water and perhaps sunscreen or shading devices. I am sure we will write on this topic for the summer also. Stay safe by making sure you have these basics with you. They do take up a little room, but you can fit all of this in a decent sized plastic bin and forget about them. You will be happy they are in the back when you need them.

Is this list the end all be all of survival necessities? Nope, but it is the basics and you have to start somewhere.

If you want to print this list out, just click on the Print button at the top of the page.

There were lots of times when people were stranded in their cars, forced to sleep in the floors of local stores and cities that looked virtually unprepared for any winter

Water is a critical component of life.  Go without any for three days, and your chances of being dead are very high.  We are used to water being available at every tap, water fountain and purveyor of beverages.  The only problem is, this continuous availability of water depends on a lot of infrastructure, and if some or all of that collapses, water is going to “dry up” quickly.  And if you head out into the wilderness, taps, fountains and retail sellers are few and far between.  You should always be keeping an eye out to make sure you have “enough” water and/or a way to get water.

Different Types of Water

Water is water, but not all water is the same.  There is pure water, just combinations of two Hydrogen atoms and one Oxygen atom (H2O).  Generally the closest you can get to this is distilled water.  This is useful and fairly harmless, although it is hypotonic (has a lower solute concentration than do human cells) and can cause hemolysis (rupturing of red blood cells); this is usually not a major concern even if this is all that is available to drink.  Using it on wounds may delay healing a bit; and it might be a problem for people with ulcers (bleeding in the stomach).  But this is still way better than no water.  On the other end of the scale are various degrees of contaminated water, polluted with chemicals and/or biological organisms, which can make you very sick and even kill you.  Salt water can be considered in this latter class as well, even if there is nothing else in it besides the salt.  In between are various types of water, all of which are potable (suitable for drinking without major harmful effects).

Determining what water is potable and what is not can be quite a challenge.  If it is in a sealed container and properly labeled, then it MIGHT be OK.  Labels have been known to be inaccurate (accidentally and even deliberately).  If it comes from a municipal tap, then it MIGHT be OK.  Just ask the people of Flint, Michigan about that.  If it is from a known well, it MIGHT be OK.  My dad’s well was found to contain arsenic.  And if the water is from an open source, such as a stream or pond, there is a chance it might be OK, but the odds are very high that it is contaminated.

Market failure.

Even if some water does not have anything seriously harmful in it, there might be particulates (sand, silt, plant or insect parts and the like) which would make the water unpleasant and/or things which might be only relatively harmless.

During “normal” times, pre-packaged or professionally provided water is usually tolerable, but if the water infrastructure breaks down for any reason, all water is not to be trusted as is.  Open water should always be viewed with suspicion regardless of the state of the surroundings.

Contaminants in Water

There is a tremendous variety of contaminants.  Some are “natural”, such a minerals in water drawn from a well, or silt from the bed of a river.  Some are man-made, and leaked into surface water accidentally or even deliberately; some eventually work their way into the water table.  Some are added accidentally or even deliberately by water distribution networks or packaging.  For convenience, let us group contaminates into particulates, organisms, organic chemicals (contain carbon), inorganic chemicals and salt (a special case of inorganic chemical).

Determining some specific contaminates can be done with a “pocket-sized” kit, but many require chemical tests which may be a challenge for people without lab access.  But you can get a compact “TDS” meter cheap which will tell you the “Total Dissolved Solids” in your water.  As an example, fish tank water gave a reading of 448, tap water read 229, and reverse osmosis water read 17.  We don’t know WHAT contaminants are there, but we have an idea of HOW MUCH.  Some of these meters also measure “EC” (Electrical Conductivity); pure water is an insulator and it is the ions added to it which makes it conductive, so TDS and EC are closely related.


This weird device will do just that – SAVE YOUR LIFE in a crisis.

Because requires no electricity, it is ideal for home use, on or off-grid.

Purifying Water

There are six common, practical philosophies of treating contaminated or suspected water.  Each has its strengths and weaknesses.

  1. Chemical reaction changes harmful chemicals (usually inorganic) to harmless ones (such as ion exchange), or adsorb (attract to the surface and “grab onto”) some chemicals (usually organic).
  2. Filtration removes particulates and bigger organisms; most filters allow some organisms (particularly viruses) and all chemicals through.  Salt water cannot be purified by filtration and can damage the filter.
  3. Boiling kills all organisms; it is useless against particulates, salt and chemicals
  4. Chemical treatment has pretty much the same effect as boiling, without the cost in fuel, but often adding an unpleasant taste (you are adding chemicals).
  5. Distillation is an extension to boiling which, if done correctly, should be able to deal with biological, particulate and most chemical contamination, as well as salt.
  6. UV radiation kills organisms exposed to it as long as the water is pretty clear; it is useless against particulates, salt and chemicals

There may be other methodologies which I am not familiar with, particularly large-scale, but these six would seem to be those of most interest for survival purposes.

Since no method is perfect, often two or more methods are used together.

Chemical Reaction

The most common form of this is “activated charcoal”.  This is carbon (charcoal) media which has been treated with Oxygen to create a myriad of tiny pores between the atoms, resulting in a massive surface area of potential chemical bonds.  The carbon attracts some chemicals, particularly organic ones, and they bond to the surface (adsorption).  These usually cannot be cleaned, so clog up and must be replaced fairly quickly.  Also, if the carbon media is granular, some dust sneaks out, requiring a pre-flush of the filter before normal use.  Because the intention is for the contaminants to bond with the carbon, we want the contaminants to be in contact with the carbon for a “long time”.  Thus, the better ones of these have a slow production rate, and arguably the “best” of these uses “carbon block” technology where the media is fused together into a mildly porous solid.

You have probably heard of one common Ion Exchange device, the ubiquitous water softener.  It exchanges two sodium (salt) ions for each calcium or magnesium ion.  This is for non-drinking reasons, because calcium and magnesium are often better for you than salt, and tastes better too.  For water purification, the process has two different beads which exchange inorganic ions to produce Hydrogen ions and Hydroxyl (OH) ions, which combine to form H2O (pure water) to replace the chemicals.  Of course, the ions are used up rapidly, they are for a specific list of chemicals, and the beads need to be regenerated.  And of course, this method has no effect on organisms or particulates.  These are fairly rare; an example would be the MB series filters from CustomPure.com which also include carbon filtration for some of the things Ion Exchange won’t handle. They claim it can remove “sodium” which is salt, but I doubt it would be able to handle the amount of salt in salt water.

Water Filtration

Filtration is very simple in concept.  You pass the contaminated water through a medium with holes smaller than what you want to take out.   As such, a key specification for any filter is what size the “holes” are.  This is usually specified in “microns”, or “micrometers”.  That is, one millionth of a meter.  Some claim this measurement (micron) is obsolete, but it still seems to be the measurement of choice for filters.  Some recent purifiers specify their size in “nanometers”, where 1 nanometer is .001 micron.  Keeping with the “metric” measurements, filter capacity (how much water can be processed before replacement) is often specified in Liters (L); for a rough estimate, a Liter is approximately the same volume as a quart, so four Liters is approximately a gallon.

When comparing filters, the one with the smaller holes would seem to be the better choice.  The problem is that some companies have varying sizes of holes, and claim the size of the smallest hole in their filter rather than the biggest.  Since it is easier for the water to get through a bigger hole and much of it does, this can be a seriously misleading rating.  In your final analysis, try to find out the actual percentage of contaminants removed.  This is the most accurate way of determining filter effectiveness.  Another term which can sometimes be used in a misleading manner is water “purifier”.  The correct use of this term is for a unit which removes the much smaller viruses.  Units which remove particulates and organisms as small as bacteria are simply to be called “filters”.

Some filters become “plugged up” quickly and are rated for a specified number of gallons (or liters), while others can be cleaned and restored to service or even are self-cleaning.  Reverse osmosis (RO) is a prime example of purification and self-cleaning.  It forces the water through a semi-permeable membrane and continuously washes any contaminates off of the source side of the membrane.  This is a very effective system (see the TDS meter example above), but requires the water to be pressurized, and worse, the wash water now has an even higher level of contamination than it had at the beginning.  In many systems, you “throw away” as much as four gallons of water for each gallon purified.  I’ve heard of one household system where the wash water is fed into the hot water line rather than the drain, but I’m not seeing how the pressure in that line is overcome.

LifeStraw Personal Water Filter – $20

Other filters run the gamut from several layers of cloth or a coffee filter, suitable only for large particulates, to 0.01 micron (or less) water purifiers; from pocket-sized to counter-top and bigger.  Since the smaller the holes, the slower the filtration and the more likely it is to clog up, often filter systems have multiple filters, starting with a pre-filter for “chunks”, course filters for large particulates, possibly some medium-sized filters and ending up with the finest filter.  Smaller holes require more “energy” to force the water through the holes; this can be from gravity, or more effectively, a pump or suction.

In filters (i.e., won’t remove viruses), perhaps the most compact and simplest to use is the “Lifestraw“.  This is rated at 0.2 micron, with a 264 gallon capacity.  It is light, easy to carry and reasonably priced.  To use it, stick the input end into contaminated water and suck the water from the other end just like from a straw.  It takes a few seconds of sucking to start delivering water.  There also seems to be a Lifestraw Steel model, which adds a metal body and an activated carbon filter to remove some chemicals.  This latter part is replaceable, which is good because its capacity is 26 gallons, only a tenth of the main filter capability.  Another popular compact option is the Sawyer Mini system.  This is rated at 0.1 micron, and can be cleaned to provide up to 100,000 gallons of filtered water.  It can be pressurized by squeezing a pouch of contaminated water, or used inline with a hydration pack, from a standard soda bottle, or used as a straw from an open source.

As for portable purification, an example is the pump powered MSR Guardian, rated at .02 microns and with about a 2500 gallon capacity.  Another, bigger option is the Lifestraw Family, rated at .02 microns and with a 2600 gallon capacity.  I found a particularly compact suction powered (straw) system which sounds promising; the Etekcity 1500L rated at .01 microns with a 396 gallon capacity, but don’t know anything about the company.  They have a wide range of products, so it’s not like they specialize in water purification.


This weird device will do just that – SAVE YOUR LIFE in a crisis.

Because requires no electricity, it is ideal for home use, on or off-grid.


A countertop system is an option at a fixed location.  An example of this is the gravity powered Big Berkey (actually, the whole Berkey family).  This company doesn’t provide a micron rating since it can be misleading as mentioned above; they stand on their contamination removal percentages.  Their filter cartridges have a capacity of 3000 gallons per filter element, with two to four elements installed in the system.  More elements don’t filter any better, just faster.  Not only is it very effective against virus (and bigger things), but many chemicals as well.  And you can get an add on filter for each element which takes out Fluoride, Arsenic and a couple of other additional chemicals, with a capacity of 500 gallons per add-on filter.

Tune in for Part 2, which investigates the other four purification methods.

Water is a critical component of life.  Go without any for three days, and your chances of being dead are very high.  We are used to water being available at

Preppers have become known for a lot of things in the media, but until recently it wasn’t for any prepper skills. We are known for underground bunkers, stockpiling tons of freeze-dried food and weapons. Preppers are frequently portrayed as preparing for the end of the world (on more than one occasion) and we generally get lumped into a very large classification of people who seemly panic and overreact to everything. For many years, if you were someone who considered themselves a prepper you could expect to be the butt of many jokes.

But somewhere along the way, that perspective started to change and for the most part, preppers aren’t viewed quite as harshly as we used to be. In fact, I don’t believe Prepper is such a bad word anymore.

Oh, sure there are still sarcastic remarks you will hear occasionally from intellectual hipsters. “You’re one of those Doomsday Preppers, aren’t you?” Some people even write articles about how they just wish preppers would all die so they could eat their stored foods. Even some preppers complain about other preppers and question their motivations for preparing or argue over what is really going to happen and what is fantasy in their opinion.

There will always be arguments over style, but it seems that the ideas behind the motivation to prepare are catching on. News reports actually reference preppers from time to time and soberly relate advice we have all been saying for years. So the idea has gained some validation, but if you had to boil it down to some generic survival skills, what would those be?

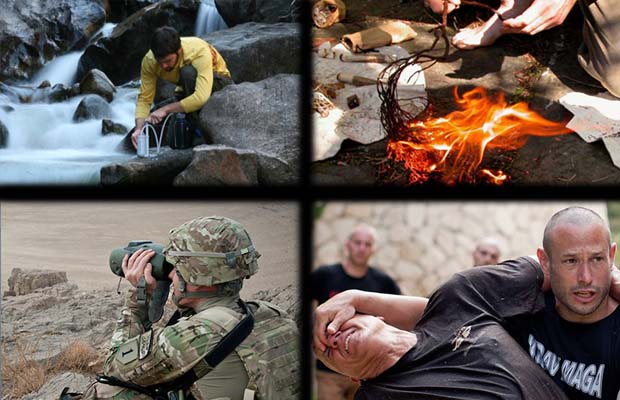
I started to think about what were the must have Prepper skills that I thought each person could try to master in order to give themselves the best chance of survival. We dig much deeper into each of these areas below on Final Prepper blog, but people love lists so here it goes.

What are the must have prepper skills?

The ability to create or find shelter

There is a saying in survival circles about the rule of 3’s. The Rule of 3’s states that you can live for 3 minutes without air, 3 hours without shelter, 3 days without water and 3 weeks without food. Naturally, there are exceptions to the rule, but is a good baseline to look at when we talk about surviving. Assuming you are able to breathe, the first prepper skill revolves around shelter because exposure to the elements can kill you more quickly than most other non-human involved situations.

When we think of shelter that usually means heat or cold in the extremes. Sure having a dry roof over your head is nice but the important factor is keeping your core temperature in the healthy range. If you can’t keep warm and your body temperature drops too low (hypothermia), you die. If you can’t keep cool and your body temperature rises too high (hyperthermia) you die. There have been many people who died in the dry cold of abandoned buildings.

A simple debris shelter can insulate you from the cold and if done properly, conceal your location.

Shelter includes wearing the proper clothing, regulating your body temperature and augmenting your environment to keep yourself alive. It is one of my main concerns when faced with the thought of bugging out and that is why I do pay attention to the supplies my family has for their bug out bags. Additionally, I know ways to create shelter out of natural elements like the traditional debris shelter in the picture above.

The ability to find water and make it safe to drink

Following the next most important aspect of the survival paradigm of the rule of 3’s is the ability to keep yourself hydrated. If you don’t have good clean water to drink and pretty regularly, you will die. You might think this isn’t really a skill, but I consider the acquisition of water in a grid down situation very important to your survival. Finding it, carrying it and disinfecting it can prove to be a challenge for many people. Our reality is that clean water flows from the taps. When that stops what will you do?

If you only have to worry about yourself, you might be thinking that all you need is a LifeStraw and you are all set. That may help you survive, but in order to thrive you need to plan for much more water for daily use. Every person adds to that total which makes finding a reliable source of water a mandatory first step. Yes, you can find water in the woods, but you can also walk around a long time without finding any.

Some additional information:

The ability to obtain food

A good edible plant guide makes a great addition to the prepper bookshelf.

How can finding food be a prepper skill you ask? Assume for a minute that none of the regular places you go to now for food are available? How will you eat? We assume that the grocery stores will always be open or we will simply walk out in the woods and shoot a deer while we eat a nice salad from our garden with dressing made from the apple trees in our orchard and herbs from the back porch. That may happen, but what if all of those other methods were out of reach for you? What if you weren’t in your home anymore and you were on the run? I think to survive we are all going to have to rely on as many methods for obtaining food as possible.

Foraging – Yes, there are edible plants all around us but do you know what they are? Do you know how to prepare them so your children will eat them? Do you know how many stalks of that green vegetable you will have to eat to actually have a full stomach? What will you eat in the winter when nothing is growing outside?

Fishing – Fishing seems like a great fall back idea. If you have access to a lake or a river it would be easy to think that you will simply walk down to the bank with your trusty rod and reel and fill up a bucket of fish. All ponds and lakes have a maximum amount of fish they can support and they can be over-fished. If you figure about 50 lbs. of fish per acre per year, that really isn’t even enough to keep one person alive if you consider the approximate average of about 400 calories per pound of fish. Fishing can certainly augment your food stores but unless you have an insane amount of water that nobody else is using, you can’t plan on this as your only source. Obviously, if you are out on the ocean, this is not the same problem but us landlocked people have to consider that.

Hunting – We will all be hunting for our meals when the grid goes down and this is one of these myths that so many preppers believe in. If you live in the woods and have successfully hunted every year of your life, you could still starve in some catastrophe where the amount of hunters increases exponentially. Let’s assume you have 1000 hunters around where you live and each hunter where you live can shoot 10 deer per year. What happens when the number of hunters goes up to 10,000? How many deer will that leave you? Assuming you are lucky and are able to get your 10 deer, what happens the next year? All of the deer will be hunted to extinction.

Trapping – Setting snares for animals can get you a great amount of protein for your table, but that also assumes animals find them and fall for the trap. You can set all the hunting snares in the world, but if the animals don’t find your traps or there are no animals left in your area, you will still starve if you are only relying on trapping. I’ve watched an episode, some time ago, of Mountain Men on TV. One character was in Alaska, himself a very experienced trapper and he barely caught anything after many weeks on end. Certainly he was alone in the wilderness so you would assume there wasn’t any competition for food, but if he was counting on those traps to eat, he would have starved. The animals simply didn’t appear.

TrapsandSnares
Snares can catch a meal if you are lucky, patient and in the right place at the right time.

Having a plan to provide yourself and your family with food should be multi-dimensional; it should change with the seasons and should consider times when food is scarce. That is one reason to have plenty of long-term storable food, several months’ worth of food you already eat everyday as well as a garden you tend and put back extra for the winter months. Hunting, fishing, trapping and foraging are all great activities too, but they take practice, luck and materials. Don’t expect to simply pull out your book on wild edibles and feed your family if the grid goes down.

The ability to make a fire

You need fire to keep warm and burning wood is one of the best alternatives to not having a furnace powered by electricity or fuel. There is an art to starting a fire and this is something that requires a little practice. Once you have a fire going, it needs to be maintained. In a grid down situation, it is highly likely that you will be cooking over an open fire so mastering this seemly simple task can give you a means for surviving.

Starting a fire is something you can easily practice now and I am frequently amazed at people who have never in their life started a fire. The basics are covered in the video below.
Some additional information:

The ability to provide for your security – Defend this house

Defensive needs will vary by the person, location and situation. What is right for you?

So far we have covered keeping yourself protected from the elements, obtaining and either filtering or disinfecting a source of water, planning for finding different sources of food and creating fire to help you stay warm or cook that big caribou you just shot with your favorite survival rifle. There are other risks to your health and safety though and in my mind one of the biggest threats to your life in a grid down scenario where the basics of society have been lost, are other people.

People are going to be one of the biggest considerations you have to plan for eventually. If you are able to keep yourself alive, someone could come along who wants what you have. Defending your life or the lives of your family could be a real possibility in a collapse. There are many options depending on your principles, values, physical limitations, legal realities or preferences.

For me, I try to have redundancy as much as possible. For security, my default position is that I have firearms in several different configurations for different needs. Hopefully I won’t have to use them but if the world has gone to hell and somebody is trying to separate me and my family from food, I won’t be wrestling with him. He will get the business end of one of my different weapons.

That sounds well and good but what if your gun jams Pat? Fair enough question and you have to be ready and willing to get physical too. The world of combat has many disciplines and I am no expert on which is the best. Krav Maga has been put forth as an effective fighting style that can save your life. Is it better than boxing or judo or Brazilian grappling or any one of hundreds of other styles? I don’t know and I can’t say what will work best for you, but investigate self-defense from as many angles as you feel comfortable with. Your life might depend on it.

The ability to heal yourself – First Aid

People get hurt every day and in a survival situation you should have basic skills to stop bleeding, care for wounds, fight infection and prevent further injury. Would it be great if you were a brain surgeon? Absolutely, but not many of us have the time or money for school and I don’t know if brain surgery would be the best investment of your time if you are only doing this to prepare for some emergency situation.

Basic first aid on the other hand is very valuable. I don’t expect many of us will be conducting surgery but for many injuries our body has an amazing ability to heal itself. All we can do is help it and having some basic medical supplies and a little know how never hurts. Good medical reference materials are great to acquire now so that you have them on hand if something were to happen before you could get back to Amazon.com.

The ability to pull your own weight – Physical Fitness

When I was in the Army we had PT every morning. I would be lying if I said I jumped up at the sound of my alarm and bounded outside to wait in formation for PT to start with a big cheery grin on my ugly mug. PT for was luckily forced on me and I was in pretty decent shape back then. Motivating yourself to be physically healthy is hard for some people, but the better shape you are in now, the more able you will be to take the stress and physical requirements of a much harder life.

We sit around a major part of the day largely because of the conveniences we have. We don’t have to go very far for water or to use the bathroom. We purchase food by the trunk load and rely on cars to get us where we want to go, engines till our soil and we purchase anything we need instead of making it. Take away electricity, vehicles and engines and life just got much harder. Many people who are so sedentary now that they rarely get out of the house, will likely die shortly in a world gone dark when they are suddenly required to move more than they are used to. Sure, there will be a good portion of people who soldier through it, lose weight and regain muscle like they did in Wall-E, but many more will not.

Nobody expects you to be a weight lifter or a marathon runner, but how much weight can you lift? Can you do 20 push ups without slowing down? How about 5? How far can you walk with that 50 pound Bug Out Bag? How far do you walk each day now? Can you run? Act now to get in better shape. You don’t have to have zero body fat, but you need to be physically able to perform tasks to simply stay alive. Can you garden all day and defend your home too? Are you able to haul water from that stream 1 mile downhill?

Some additional information:

The ability to read a map – Land Navigation

I use my GPS on my phone more times than I want to admit. Remember the good old days when you had to know street names and before you would go somewhere new you had to ask for directions? OK, it doesn’t sound like it was better, but we were conditioned to get around in a different way that wasn’t reliant upon technology. Everyone had maps in their glove compartment. You watched for street names before blindly turning and ending up going the wrong way.

Even if the grid doesn’t go down and satellites aren’t falling from the sky you may have to rely on something besides your phone to get around. Want to get off the grid? Leave that phone behind and walk into the woods. You may need to map alternate routes to your bug out location or navigate around cities that have descended into chaos. Knowing how to read a map to get where you are going could be a much-needed prepper skill.

Some additional information:

The ability to read the future – Situational Awareness

OK, technically you wont be able to tell the future, but having a good sense of situational awareness and practicing your observation skills could help you in ways that may seem to the uniformed that you knew what was coming ahead of time. Make sure you know what is going on in your immediate area by getting your face out of your phone. Make sure you know what is happening in your city by paying attention to the news, observing the people around you and what they are doing. Follow regional and state-wide events usual alternate media and radio programs as well as keeping tabs on international news. What happens in other nations could wind its way to your neck of the woods. Will you have a plan in place ready to act or will you be caught off guard?

The ability to keep your eye on the prize – Kill complacency and the normalcy bias

I mentioned in the beginning of this article that preppers have occasionally been linked to people who predicted the end of the world, somewhat prematurely. Time after time, preppers have focused on an impending event that rallied them into action only to suffer a form of let down when nothing came to pass. Imagine being disappointed that the world didn’t stop on 1.1.2000 or the end of the world didn’t materialize when the Mayan calendar said it was supposed to.

Prepping is about surviving anything that comes your way. We diversify our prepping focus and plan for what we need to live so that we have the tools, gear, knowledge and plans to stay alive regardless of the evil creeping down the street. Just because the economy doesn’t collapse on the day they said it would, you can’t give up and sell all of your prepper supplies to your neighbor for pennies on the dollar. If there never is a military coup, don’t give up prepping and ignore that garden. You have to stay focused because the people who give up, the people who think everything is fine are the ones hit first during tragedy. Instead of believing that you are impervious and nothing bad will ever happen, continue to scan the horizon for threats and take comfort in knowing you are prepared even if on your deathbed you have been proven wrong.

Prepping is often compared to life insurance and I can’t think of a better example. I spend money on insuring the things I do not want to lose. Prepping is my personal insurance plan that I hope I never need, but if I do I want to have all the prepper skills mentioned above to help me survive.

There will always be arguments over style, but it seems that the ideas behind the motivation to prepare are catching on. News reports actually reference preppers from time to time

Everyone has a personal bias they bring to any situation they are placed in. Your mental baggage is formed in part by who you are (your life experiences, how you were raised, personal beliefs or principles) and what you think you know (skills, training, history, and evidence) combined with the various factors of the situation or how it relates to you in terms of personal risk/reward. Put 6 people in a room and catch the room on fire, you will have 6 different responses at least internally to what each individual is thinking and is capable of doing. Or at least that is what I think.

I do believe that for whatever reason – and I know smarter people than I have studied and diagrammed this out millions of times – that each of us has our own opinion based upon, for lack of a more scientific term, what we feel in our gut. How our gut gets programmed is a science arrived at by the specific disciplines I mentioned above more or less I believe and maybe 1 part supernatural, but regardless of how we get to what we are; each of us brings our own perspective to everything we do. It is no different with potential threats we all consider when we are talking about SHTF and how best to prepare for those threats as we see them in our own minds. What is our gut telling us about the various threats and how should we react knowing what we think we know and dealing within the realities of our current lives?

All of this is to say that we all have different opinions on what is important. We all make our own determinations as to what is reasonable for us individually and each of us comes to the subject of prepping, with respect to the threats we visualize, from a different point of view. How in a world of so many various viewpoints and opinions, advantages and limitations can anyone say they have a concrete step by step plan for all people that will guarantee safety and security without fail?

The bottom line is you can’t.

I take with a grain of salt anyone who proposes to sell you a 10-step program that promises to solve all your problems. You should look at the information on Final Prepper the same way if we start doing that. Even from my own perspective, I speak in generalities more often than some people are comfortable with because I believe that you have to make the best decisions for yourself and your family based on what your gut is telling you. I can share areas of consideration that I can argue make sense, but I can’t make the specific detailed decisions for you because I am not you. I don’t know what you know. I don’t live where you live. I may never go through the same things you go through and I may not act the way you would act when confronted with the same information.

Too often we look for the easy way out and I am just as guilty of doing this as anyone from time to time myself. We just want a magic box of preparedness that we can stash in the closet that will give us everything we need. We don’t want to think about what is in that magic box and we don’t want it to take up too much space or require us to pay attention to it from time to time. We just want someone to send us the box that will do anything we need it to if we have a disaster. People want to be prepared just by owning a “kit” and then having that box checked, we can go on with our lives. Preparedness to me isn’t just about having stuff (your survival kit), it is taking steps in a direction that puts you on a path to preparedness that you are constantly traveling. The destination is never reached.

I don’t believe there is any magic kit of preparedness that you can purchase. There isn’t a single list of prepper supplies that will cover any and every contingency that you could ever be faced with but I do believe there is a strategy you can follow that can guide you down the right path towards being better prepared for any crisis. So absent the rationale of the specific threat itself which we might all disagree with; what do we all as humans need to do to be prepared for any crisis that we face from Alien invasion to Zombies? (Note to the new reader to Final Prpper, that signifies A to Z… not that I only believe in highly improbable events)

Physical health and ability are just as important as having the gear.

Are you physically prepared for any crisis?

I can’t imagine that too many people would argue with the statement that a physically healthy individual is better prepared to handle any crisis. I have discussed this on Final Prepper before and this isn’t a new topic by any stretch on prepping blogs, but I see so many people who are out of shape but believe they are going to be running through the woods with a giant overloaded bug out bag on their backs. Have you gone to almost any store and looked at the overall physical health of people? I would say that where I live, a majority are toting an extra 100 pounds on their mid-section. I shouldn’t need to pull up statistics on obesity in the US, but survival in great measure depends on strength, endurance and the need for hard work and movement. If any of these are difficult to do on a normal day, how do you feel it will be when it is raining aliens from another planet?

All joking about aliens aside, even if you have the latest bulletproof vest, survival rifle and all the tactical battle gear in the world, that doesn’t mean you are prepared as well as possible to survive. Even if you have 500 cases of the best freeze dried food on the planet, that doesn’t mean you can’t have a heart attack carrying it up the stairs. If you aren’t able to run a couple of miles, carry that bug out bag for a few days or work hard in your yard all weekend without pulling something or being laid up the next week with body pains; you should consider how this might affect your overall chances at surviving anything.

This is not directed at the more senior of us out there who may have age related health issues, but if you are a 30 year old man who can’t do any push ups, couldn’t run 2 miles to save your life, but have spent thousands of dollars on the must-have prepper gear you should stop and think about getting physically prepared now. If the crap hits the fan chances are you won’t be able to do a Jillian Michaels workout in your living room fast enough to get in shape before you need to.

Are you mentally prepared for any crisis?

I think the mental angle of preparedness is more important than just about any other aspect of prepping when you consider everything that goes into forming, executing and possibly modifying your preparedness plan. Going back to what I said at the start of this article, you can’t simply buy a ton of gear, lock that in a safe and call yourself prepared. There is a mental component to analyzing data that changes daily. Certainly having supplies stored up is a component, but mentally you have to work through the problems of figuring out what supplies you might need and in what quantities. You will have to adjust for your own environment so that could involve researching alternatives and there is your own reality. You may have small children that require different approaches than an older teen for example might need. Prepping is a lot of thought and it is this process of research and a lot of trial and error that has informed my prepping plans more than any book.

In addition to knowledge, mentally you have to consider the various outcomes possible from some of these scenarios you are preparing for. It doesn’t matter if you have the best handgun in the world. If someone comes to your home intent on harming you or taking your supplies, are you prepared to use that handgun? What good is stocking up in the first place and purchasing a weapon for security unless you have made the mental decisions about what you will do if ever placed in that situation? In the end it will boil down to what you actually do and your mental preparations need to take this into consideration. The magic box isn’t going to think for you.

Are you logistically prepared for any crisis?

I saved this for last because it is less important in most respects than the other two in my opinion. I believe knowledge trumps stuff, but stuff can and will benefit you. It is very important to have water on hand for example, but without it, the person who will be better prepared is the person who can go get water, disinfect it and live when it runs out. These two people are both capable of obtaining water for at least the short-term and that may be all that is necessary. Another way of looking at this is the person who doesn’t have any water stored, but is able to go out and acquire it may be putting themselves at greater risk that the person who has it stored at home.

A well-rounded prepper should both know how to make do without supplies and ideally have those supplies at their disposal when they are needed. This gets into subjects like food storage, having a garden that is producing, having first aid supplies and self-defensive weapons. I am not advocating having a lot of “stuff” without knowing how to make it work for you, but if you do have a fully stocked pantry, a working garden or livestock that you can depend on for food if the stores are no longer working, you may have an advantage over the person who knows how to create a snare to trap small game; at least initially. Long-term Daniel Boone will be better prepared, but in the short-term I wouldn’t advocate relying entirely on your ability to acquire food in the forests.

In addition to supplies, you may have to move. Are you prepared to leave your home if needed? I know my personal plan is to shelter-in-place, but I know that can change. If it does, my family has prepared to go on foot. We have options should my perfect disaster situation not work out like I hope. Going back to mental preparation, this backup planning and strategizing will help you.

Prepping gets distilled down to simple lists and advice, but there are tons of things to think about. I personally think the act of thinking about the various topics benefits each of us. Certainly conversations on this blog inform others so I welcome the dialog.

Have you thought outside of your magic box?

Everyone has a personal bias they bring to any situation they are placed in. Your mental baggage is formed in part by who you are (your life experiences, how you

Things had not gone exactly as planned for Louis, Julia, and their three-year-old twins Melissa and Victor. For a couple of years, they had been budgeting for supplies, learning survival skills, and even made bug out plan full of contingencies. The plan was simple but all the details were meticulously addressed by the couple, throw a few pre-packed bags into the car and drive the 90 miles to Julia’s grandparents farm.

Louis didn’t have thousands of dollars to spend on the best AR-15 that money could buy. Besides budget constraints, they were illegal to own in his home state anyway. So, Louis lovingly maintained his .357 revolver. After using his revolver to “clear the road” while getting out of town, the shook up the family quietly made the rest of the drive to Julia’s family farm.

That was until high water was blocking the road only 20 miles from their destination. Because of their maps and pre-planning, Louis and Julia knew the way around the water, along the two-lane country roads, and through the little towns to their destination. Inside, Louis was emotional after firing his weapon. He played the cool-headed strong father that his family needed. He wasn’t real keen on getting off the highway and doubling the amount of time they would spend on the road. Even though they had done a “map recon” the road ahead was not so clear. Louis figured he had enough ammo to protect his family but he wished there was a way to resupply before heading on the road less traveled…..

Many people, when first joining the preparedness community initially focus on guns and ammo. They want nice, useful, and effective weaponry and enough ammunition to last for years and years before needing to purchase more. After a few years of prepping and a few years’ worth of trips to the rifle range, those once fired brass rifle and pistol cartridges can really pile up, assuming they are collected after shooting.

With about $300 to $400 invested in reloading equipment, all those hundreds or even thousands of once fired brass casings can be reloaded for a tremendous savings over buying factory new ammunition. Sometimes the savings can be as drastic as 80% of the price of purchasing new ammo! Most preppers on a budget can really appreciate that amount of savings. So, many people will buy a single stage reloading press and keep the equipment at their primary residence, where it makes sense to store it, and cut the cost of their preps by reloading. But can reloading equipment be worthwhile to bring on a bug out?

Bugging out with reloading capacity

When most people consider reloading equipment, their thoughts are of single stage reloading presses or progressive reloaders. This equipment is a great addition to anyone’s preps. But this stuff is heavy and bulky. Also, progressive loaders are best set up in the most efficient manner and left in place, not toted around in a suitcase or ruck sack. A single stage press can be more easily mobile than a progressive loader but is still not practical to pack along, even on a vehicle bug out or for an INCH kit when space and weight are limiting factors.

That leaves a cartridge loader set for consideration as a practical way to include reloading in a bug out plan. Even though cartridge loaders and cartridge loader kits have limitations, they can be very effective tools to maintain an ammunition supply in a survival or grid down scenario. In the following discussion, these three reloading set ups will be examined for their strengths and weaknesses as related to bug out applications and some of the limitations of the different equipment will be addressed with recommendations to improve their practicality.

When most people consider reloading equipment, their thoughts are of single stage reloading presses or progressive reloaders.

The Cartridge Loader

Most people begin reloading with a single stage press. It may not be the fastest method. It may not be the cheapest option either. However, the single stage press produces the consistent, accurate, and high quality ammunition that makes people want to start and continue in reloading. The single stage press is less mechanically complicated and less expensive than the progressive loader. It is easier to maintain consistency and precision with a single stage press than it is with a cartridge loader. For these reasons, the overwhelming choice for beginning reloaders is the single stage press.

A single stage press makes a perfect set up for reloading to cut cost and maintain ammo supply at a home base. Some people will choose to buy a progressive loader after using a single stage press for a period. If the single stage press is replaced with a progressive loader in the home set up, it is a great idea to cache the single stage press that is no longer being used at a bug out location. Additionally, learning to reload and reload well on a single stage press will help the hand-loader get the best performance out of a cartridge loader. Because of size and weight considerations, the cartridge loader is the practical and effective equipment choice for reloading on the run.

Cartridge loader sets, similar to the Lee Classic Loader for example, have been in use since the proliferation of the metallic cartridge. Often, these were sold along with a new firearm just as safety locks are sold with new guns today. In the 1870’s it was likely that the local general store may not have ammo for a person’s new firearm, so the cartridge loader allowed the owner to keep firing his / her weapon after all the cases were spent. The principles of using the antique cartridge loaders and the modern ones are basically the same. The body of the cartridge loader, like the Lee Classic Loader, is assembled in different ways and struck with a dead blow or non-marring mallet to perform the different reloading tasks of depriming, forming, and bullet seating. These little kits are caliber specific, like a set of dies, and come with a little powder dipper. To get the best performance out of these kits and make them a viable bug out option, their limitations must be understood and minimized.

The Lee Classic Loader comes with the tools needed to perform the reloading steps of depriming, sizing, priming, and bullet seating. It also includes a powder dipper. However, there are a few extra things that will help with reloading ammunition on the move.

A case mouth deburring tool is small, inexpensive, and useful for cartridge prep. Also, a dial caliper is needed to check cartridge case length and overall cartridge length. Additionally, a hard-plastic case for the dial caliper is necessary to protect it from damage. Finally, the issue of measuring powder must be addressed. A receiver failure during bug out would be unacceptable.

The included powder measure is not acceptable as is, and was never intended to be a standalone powder measuring device for bug out reloading. There are many companies that will make custom powder dippers to exact specification and unless a scale is carried around this is a necessary purchase to add to this reloading kit. Even with the best custom powder dipper, some variation in powder charge from load to load is to be expected. To help minimize the variations, test the powder measure at home before adding it to the kit.

Scoop the powder gently the same way each time so that more powder by weight is not compacted into the scooper. Level it by either tapping or by scraping across the top but do it consistently. Then, weigh the results on a scale to get an average weight and learn the best and most consistent technique. With powder charges, consistency is important!

It is also necessary to add some case lubricant to the kit. Finally, the kit needs a nonmarring or dead blow mallet to power the loading tool. The overachiever could add a cylinder type case length gauge to the kit as well. This reloading set up fits in a small toiletry bag with plenty of room to spare. Add some powder, primers, and bullets for a complete mobile reloading station capable of maintaining and extending a person’s ammunition supply.

There are limitations to this mobile reloading kit. Most notably, it is powered by a hammer which makes lots of noise. A bug out may not always include active evasion but it rarely includes active attention seeking either. For the rural settings, the noise of a hammer banging away carries a long distance over an open area. And if sheltering in an abandoned building in an urban setting, the banging noise will likewise give away one’s location.

This kit is used in the interim to maintain the ammunition supply. It can be enhanced greatly by the addition of a few extra reloading tools cached at the bug out location. A triple beam balance powder scale and a powder trickler are inexpensive and would greatly improve the accuracy and consistency of ammunition loaded with the kit if these were placed ahead of time at the bug out destination. A hand priming tool would be convenient and easy to use.

Additionally, a case trimmer and a cylinder type cartridge minimum / maximum case length gauge could go a long way to increase the number of times a cartridge could be reloaded in an extended bug out. A few extra tools in cache will greatly improve the reloading ability. Of course, if a reloader had a progressive loader set up at home as a primary reloading means, the older and no longer used single stage press could also be left at the bug out destination. With these extra larger tools left at the bug out location and some components in cache, the survivalist can greatly extend his / her ammo supply.

In conclusion, many people do not consider reloading on a bug out to be viable because of the size and weight of traditionally considered reloading equipment. However, when packing for a vehicle bug out or putting together an extensive INCH kit, there is a great opportunity to include reloading equipment. By thinking outside of normal applications for reloading equipment, the resourceful prepper can benefit greatly from adding reloading to his / her tool kit. Aside from saving money in good times, reloading can stretch and extend the ammunition supply in an extended survival scenario. Aside from just stockpiling more and more ammo, give these reloading set ups some serious thought and consider how including reloading can benefit preparedness.

Things had not gone exactly as planned for Louis, Julia, and their three-year-old twins Melissa and Victor. For a couple of years, they had been budgeting for supplies, learning survival

On October 21, 2016, the internet broke. Netflix, Twitter, Paypal, and more were all hacked, and it took most of the day for representatives from the many major companies affected to find, fix and implement the problems. For most people, this was a minor disruption to their day. To my teenage daughter, the SHTF situation we’ve all been waiting for was occurring right then and there. She instantly lost at least half of her ability to communicate and find news, she lost her entire source of entertainment, and she lost the ability to pay for anything online, even if temporarily.

I think it’s safe to say that we could all live without Twitter. Netflix is a great modern convenience, but we could live without that too. What would happen, though, if we lost Wikipedia? I know that I reference Wikipedia at least twice a day, whether it’s for random historical trivia, information I need for work, or items of interest I’m using to plan my next prepping project. To lose access to what I consider to be the major source for all accumulated human knowledge would be a major blow. News recently broke that the Turkish government is preventing it’s citizens from accessing Wikipedia.

The outage I referenced earlier was one of the largest in the short history of the internet, and it was, fortunately, quite temporary, lasting around 12 hours. What if it affected your personal PC? The infamous computer hijacks and ransomware that have been plaguing PC users for the past few years often destroy and corrupt enough of your internal data that it cannot be recovered. What if it were permanent? That could be an EMP attack or a CME that wipes out all power, or it could be a targeted hack that we can’t figure out how to solve, or something else entirely. What happens if our government passes laws similar to those already in place in Turkey and many Asian countries which prohibits access to sites which they have decided contain information they don’t want shared?

I don’t have all the answers to these problems, but I know one potential solution – Local Data Backup. Most amateur computer owners have one or more PCs, with probably only one or two copies of their most important data – resumes, scans of birth certificates and other legal documents, family photos and more. The true solution is to have many copies of your important data stored locally, updated frequently, and maintained in a Faraday cage in case of an EMP attack.

To start, you’ll want a high-capacity data external storage device. I would recommend at least 5 terabytes of storage space per unit, and multiple drives if possible. You should also have at least one or two flash drives that store at least small parts of this information. This should run you about $200. That, and an older computer or tablet with a USB cord and an internet connection should be all you need for this invaluable project. I’ve heard some preppers who prefer to maintain optical discs with information on them, but a number of the solutions I want to implement will require files that are larger than the storage capacity of a single DVD or CD. You’d also have to consider storage space – all those discs and the disc drive itself will take up more space than a single external drive.

Personal Data comes first

The chances of any computer contracting a virus or a worm while you’re surfing the internet (yes, even you Apple people) is significantly higher than the chances of an EMP attack happening in next few weeks. It’s important to have a copy of your birth certificates and other important documents, including copies of social security cards, recent pictures of your immediate family, address and phone contact information, and other information available for bug-out situations, and it’s valuable to have that data stored in a variety of locations, including on your external hard drive. It is also highly recommended that you maintain a copy of receipts or warranty’s for major appliances, and pictures of each of the rooms in your house. It is possible that, in the event of a major flood or fire, that you could use these items to help increase the amount of money you can get back from home insurance as proof of at least some of the major items you’re keeping in each area of your house.

Second, survival. One of the first tricks that preppers learn when getting involved in the lifestyle of preparedness is that it’s possible to download a wide variety of “prepper manuals” online, including military survival PDFs and other documents. You could even save valuable web pages and articles for offline viewing. I have printed many materials to put in a binder, but again, that takes valuable storage space, and could be easily destroyed in a fire or a flood. My digital copies of data, so long as they remain well-protected in their Faraday cage, are safe from most dangers.

Next is the broad category of “items of personal importance” which could include almost anything that you find important to keep around. What’s in my collection? Family photos & videos take up a large bulk of my storage space. A simple feed scanner that you can purchase on Amazon for about $100 will allow you to scan and store thousands upon thousands of photos onto your external drive, where they are well-protected from flood damage and fading due to aging, and where you can easily gift them to another relative to open up more storage space under your stairs for prepping supplies. All of my wife’s hard work on our family tree is now scanned and preserved in it’s own folder as well for the next generation to continue the work, as are my grandfather’s old diaries we’ve been left. I also keep a local copy of any digital media I own, which is everything from digital copies of Disney movies that come for free with the Blu-Rays I’ve purchased for my kids, to those new music albums that I’ve bought as MP3s because it was cheaper and more convenient than buying the disc. I’ve got downloaded digital copies of my Audible collection, and a few Kindle books as well. Essentially, if I’ve paid money for it, I have a copy of it on my external drive that I can download and access forever, even if these host companies go out of business or lock my accounts.

Additional data to backup

Finally, you can do what I’ve done and keep a localized backup copy of Wikipedia and other sources of world knowledge. Many of these archive sites allow anyone to download a full copy of the entire site, and with a Wiki reader, it’s possible to maintain a version of Wikipedia which does not require the internet to search. In addition, you can also download a few other collections for posterity , including a huge collection of out-of-copyright novels from Project Gutenberg that could keep you reading for your entire lifetime without having to purchase a new book.

I believe that maintaining at least a bare-bones minimum of these documents and files is essential regardless of whether you take the steps necessary to protect this data from an EMP. For that, a Faraday cage – an enclosure completely surrounded by metal on all sides – is important. There have been thousands of people before me who have discussed the creation of such a device, so I’ll leave them to it. Suffice it to say that if an EMP occurs, it is widely assumed that almost all electronic equipment that is not protected is in jeopardy. That means that if you are taking the time to store data, you also need to store some kind of old computer or laptop capable of accessing the data, and a backup copy of installation files for programs you can use to read them. That means that you want a PDF reader installed, as well as programs that will allow you to view photos and videos, and if you have movies or audio-books tied to a service like Audible, you’ll need to have those installed.

Is this doable for Preppers?

The value of a project like this is in the details. First, it preserves a large amount of your family’s history, making it more accessible for younger, computer-savvy members of your family to learn about and carry on the knowledge we have as a modern society and many of the traditions that you hold dear. Second, this is a great way to make more space in your life (for prepping supplies, or whatever else you want to have). I was able to re-gift fifteen banker’s boxes worth of photos, VHS tapes, diaries, CD-ROMs and floppy discs full of data and combine them into one external hard drive, and I purchased a second drive to send to a distant relative overseas as a holiday gift that meant the world to him. Finally, I truly believe that with cloud computing, government regulations on access to information, and an ever-increasing life-or-death reliance on technology, there will come a time when the freedom of the internet and our personal data will be under attack. Having at least a portion of that knowledge stored in a metal trash can in your garage where Big Brother can’t find it might make all the difference.

Is this an expensive project? Yes, it certainly can be. A good quality hard drive along with a backup copy of a computer and a Faraday cage could cost a pretty penny. There’s no doubt that this is a long and difficult project as well. Even with a fairly fast feeder scanner for photos and small documents, but with searching and downloading times for files, and figuring out how to store this data for ease of use, it took me the better part of all Winter and Spring to make this a reality. How much of this would be useful in a true SHTF situation? Potentially quite a lot, potentially not at all. The information on that Wikipedia backup might be invaluable, but you may also not have the electrical power to access the data. As a project that has so many qualifications, this is likely not applicable to all preppers, but for those who have enough backup water filters, have installed their solar panels, and have too many boxes of old photos you can’t get rid of, this is a great project to start this year to help not only modernize but also to help prepare.

On October 21, 2016, the internet broke. Netflix, Twitter, Paypal, and more were all hacked, and it took most of the day for representatives from the many major companies affected

Unless you’re a psychic, you never know when s*** is going to hit the fan. If and when a crisis occurs, the last thing you want is to be unprepared. But prepping isn’t always easy. With so much contradicting information out there, it can be difficult to separate the good information from the bad. With that said, I want to show you 10 awesome prepping tips that actually work. By following this advice, you’ll be ready for any survival situation.

#10: Build a Bug Out Bag

A bug out bag is basically an emergency kit that will provide you with the ability to survive for a minimum of 72 hours after a crisis. They should contain all of the essentials required for survival: food, water, basic first aid equipment, etc. While you can buy a bug out bag that’s already comes with items, it’s much better to build one in my opinion. Not only is it cheaper, but it also allows you to know exactly what’s in your bug out bag.

#9: Stock Up on Non-Perishable Food Items

Meal Kit Supply

There’s no sense in stocking up on foods that have a short lifespan. Why? Because you never know how long grocery store shelves will remain empty. Non-perishable food items include dried oats, dried rice, honey, powdered milk, and dried means. It’s also a good idea to invest in MREs (Meals-Ready-to-Eat). When purchased in bulk, they can be relatively inexpensive. Plus, they’re super-practical. Finally, consider investing in a food dehydrator so you can dehydrate foods.

#8: Check for Expired Food Items

This is one of the most overlooked prepping tips out there. There’s no use to having a bunch of food stored if it’s all expired. It’s much healthier to not eating anything at all than to eat something that’s expired. For this reason, I highly recommend keeping an eye out for when expiration dates are due. That way, you’ll know exactly what to throw out and re-stock on. Note, by learning advanced food storage techniques, this will become less of an issue.

#7: Rotate Clothing Based on Season

Another big mistake that a lot of people make is not rotating their clothing based on whatever season they are in. For example, during winter months, make sure that you have jackets and other insulating clothing packed in your bug out bag. Then, as the summer months roll in, swap out those clothes with lighter ones. That way, you’ll be prepared for the specific type of whether that your location is currently experiencing. This is one of those prepping tips that are super-important to remember.

#6: Focus on “The Big Three”

As a general rule, your emergency kit should be located in three places: in your car, in your home, and at your office. Why? Because you can’t predict when a crisis is going to occur. A bug out bag isn’t any good at home if you’re at work (and vice versa). By having emergency kits in all three locations, you’ll be able to reach them no matter what, and ultimately increase your chances of survival.

#5: Read Survival/Prepping Books

How to Protect Yourself Against Terrorism, Natural Disasters, Fires, Home Invasions, and Everyday Health and Safety Hazards

When it comes to survival and preparedness, nothing is more important than knowledge. I would recommend reading books on the topic. Some of the more popular ones include The SAS Survival Handbook, The Prepper’s Pocket Guide, and The SAS Urban Survival Handbook. There are many other great titles out there as well. Reading is important because it teaches the fundamentals of survival when modern technology is gone. As the old saying goes, “If you give a man a fish, you feed him for a day. If you give him a fishing pole, you feed him for life”.

#4: Invest in Iodine Solution

I would recommend investing in a 5% or 10% iodine solution and placing some in all of your emergency kits. Aside from the fact that it can be used as a disinfectant for minor cuts, you can also use it to keep your thyroid functioning normally. Remember, iodized salt is typically enough to keep your thyroid functioning properly. However, if you run out, you’ll definitely want to have some iodine solution available. A few drops per liter is typically enough. Plus, iodine can help purify water!

#3: Weigh Your Bug Out Bag

When I first put together my bug out bag, I was happy and proud of myself. Then I picked it up, “Uh oh…” I could barely lift it. Sometimes we get so caught up in putting as much stuff in our bug out bags as possible that we forget about weight. That last thing you want when bugging out is hurting your back because your bag is too heavy. That’s why it’s a good idea to weigh your bug out bag beforehand. That way, you’ll know whether or not you’ve got too much stuff.

#2: Buy a Weapon

You don’t necessarily need to buy a gun, but it’s still a good idea to invest in some kind of weapon. Whether it be pepper spray, a Taser, or a knife, you always need something to protect yourself. And here’s why: have you ever watched a video of people on Black Friday? If not, here’s a quick look:


As you can see, these people are acting CRAZY- and there isn’t really a real threat happening. Imagine if a crisis took out the power grid and the grocery store shelves were empty. You can be rest assured that people would act far, far worse. That’s why I recommend investing in some kind of self-defense weapon (preferably a gun).

#1:  Prep a Little Each Day

We’ll leave you with one final tip: prep a little each day. Some people get discouraged from prepping because they think that they need to spend thousands of dollars to do it. But this couldn’t be further from the truth. There’s nothing wrong with spending just a few dollars each day on supplies. Personally, I like to spend an extra $10 on canned foods each time I visit a grocery store. After a few months, it adds up to be quite a collection. Remember, prepping is a marathon, not a sprint. So be sure to treat it that way and you’ll do far better.

Bottom Line

These prepping tips should make the process much easier on you. The biggest takeaway from this article is to make sure that you have your bug out bag ready. If possible, try to have an emergency kit in your car, at your home, and at your office. That way, you’ll be prepared for anything, anytime. Good luck, and leave a comment below if you have any questions (or your own tips and strategies for prepping). Thanks for reading.


Unless you’re a psychic, you never know when s*** is going to hit the fan. If and when a crisis occurs, the last thing you want is to be unprepared.

There are some things we can still count on to remain the same after SHTF. A woman’s time of the month being one of them. Even if you are not a woman, including female hygiene items in your prepping is still a great idea!! If you have a female partner, sister or daughter over the age of 8, you can count on these items coming in handy. As an added bonus, if you don’t end up needing these things, They will still make great bargaining bags that can be used to trade for something you will use.

You may have noticed that Wal-Mart dedicates an entire section just to female hygiene products as do most grocery stores and pharmacies. There is obviously a very high demand for this need. With that said, there are hundreds if not thousands of female hygiene supplies out there. I am not going to list them all. I will be sticking with the basics that are affordable, accessible and most likely to be used. There is no point in stocking up on things you may never use when you can stock up on usable items instead and still accomplish the same goal.
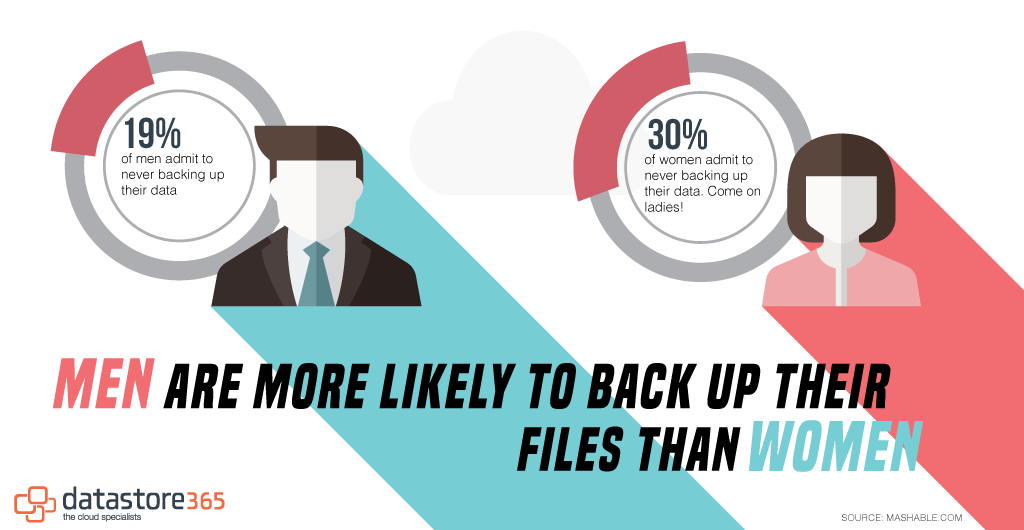
Female Hygiene items to Consider

  • Menstrual products
  • Cleansing products
  • Disposal of products
  • Back up products
  • Other Issues
  • Putting it all together

Menstrual Products:

** 6-12 Supply of items you already use

If you are a woman, chances are you already know which products work best for you. I highly recommend keeping at least a 6 month supply of your favorite product/s on hand. To accomplish this you may wish to simply go buy a 6 months supply at once or you may want to consider buying two packages instead of one each month that you do your regular shopping.. put the extra pack away somewhere dry and water proof. Within 6 months you will have a 6 month supply on hand should SHTF. You can actually do this for up to a year or more if you wish. BONUS: These are products you would normally buy anyway, you are simply buying in advance so you are not wasting ANY money!!
If you are buying for someone else, you may not already have a “favorite” or collection of favorites. Don’t let this scare you away!! The most commonly used disposable products are liners, pads and tampons. I recommend a large box of liners, a large box of tampons and several large packs of pads (overnights will be your best bet). Pads are also good for minor incontinence (of urine and stool) and make a great bandage in a pinch.
Cleansing Products:

**6-12 supply of wipes and wash

Something often overlooked when it comes to this particular kind of feminine hygiene is cleanliness. Cleanliness is going to be especially important if SHTF to avoid infections and unpleasant odors. We need to keep in mind that showering and bathing may not be something we can do everyday. With that said, I highly recommend stashing some cleansing products with your menstrual products. In a pinch, some soap, water and a facecloth will do the trick but that is something I personally do not want to resort to for as long as possible. So how do we keep our lady parts clean and odor free? My personal favorite is playtex fresh wipes which are made for this specific purpose but baby wipes will do just as good for much cheaper. I’ve stashed 12 packages away with my tampons. Men, if you do not have a female in need of these you will still find them very handy when you run of toilet paper. BONUS: Baby wipes are good for everything, back up toilet paper, removing make-up, washing your face, cleaning up spills ect..
On top of the cleansing wipes, I also recommend keeping a bottle (or several) of feminine hygiene wash. It is specifically made for washing lady parts (or male ones) and makes you feel so much “fresher” then just regular soap. If SHTF feeling “fresh” may be a luxury not many have. A great wash for this is vagisil feminine wash but pick your own favorite to stock pile on.

Disposal of Products:

**Have a disposal plan before SHFT

By using the above products you will be creating garbage, unsanitary garbage at that it. It is very important to have a plan in place for disposing of these products. Where you live will play a big factor on proper disposal of bathroom products so it’s always a good idea to have more than one plan. BONUS: Everyone needs a disposal plan regardless.

Most of these products are burnable and by burning them we will be completely getting rid of the waste.

Flush it: My ideal means of disposal is to simply flush it down the toilet. Even without power most of us can still flush our toilets by pouring a bucket of water into it (I live near a brook and have a well). If you do not have an unlimited supply of water or your products are not flush able this may not work for you. **Keep a bucket handy for flushing!

Burn it: Most of these products are burnable and by burning them we will be completely getting rid of the waste. This is something that should be done outside under strict supervision and preferably not in a fire pit you use for cooking food. If this seems like a good option for you, take the steps to build a burn barrel or burn pit. You can do this for little money by using an old truck tire rim or by digging a deep hole (away from trees).

Bury it: These products take a long time to decompose so burying them is not the most ideal situation but if you have no other options this is something to consider. Have a shovel available for in the event SHTF. Dig as deep as possible and avoid burying near any source of water.

Reusable products: By using reusable products you will not be creating any extra garbage to be disposed of. This is one of the main reasons I do not stock pile more than a years supply of these items. Something that works for disposal for short-term might not be as doable long-term.

Store it: This should be an absolute last resort. In the event of bad weather or a stay-indoors warning, you may need to store used products until you can safely burn or bury them. For this reason, you may wish to invest in some zip lock bags. You can buy 100 of these small bags for as little as $1 so I recommend keeping several boxes of them along with at least one large heavy-duty bucket with a secure lid. Some kitty little or saw dust is a good idea, too. Store the soiled product in a zip lock bag then in the bucket, use the kitty litter or saw dust to help mask odors. Dispose of the contents properly as soon as possible. Brown paper bags are another more environmental friendly option.

Reusable Options – Naturally Cozy washable, reusable feminine hygiene and incontinence products

Back up Products:

**Always have a Plan B

Even if you decide to store a lifetime supply of these products it is still a good idea to have a plan B. Your stash could get ruined, you could be separated from it or you just might not be able to dispose of it. Whatever the reason, have a back up plan. Being under the impression that you can always run to the store to restock is probably not the best back up plan. BONUS: Having a back up plan for female hygiene will also provide extra options if you run out of toilet paper.
Pads: Consider investing in enough cloth pads to get you through 2-3 days of your cycle, this will give you enough time for washing and drying them without running out. Amazon has some really neat cloth pads available in a variety of sizes and patterns. They even have pads with wings. If buying isn’t possible, check out YouTube for some how to videos on making your own!!

Tampons: While I still recommend the cloth pads as a back up plan, if you really don’t care for pads there are internal options such as cloth tampons and menstrual cups.

Cleansing: In a long-term SHTF scenario, the wipes and washes will eventually run out but cleanliness will still be a top priority so I recommend a back up plan for this, too. Amazon is also home to many pre-made bundles of family cloth which can be used as toilet paper. You can also make your own or fill an empty container with some baby face cloths. Keep some extra soap for this purpose, baby soap is mild and does a good job.

In a Pinch: If you find yourself in a situation without disposable or pre-made products, you can use just about any soft absorbent material. Baby receiving blankets, thick face clothes, cut up towels or even an old sweater.

Storing/Washing: Reusable products will need to be washed and stored until washed. You can buy special cloth bags for storing your used products in until it’s time to wash them or you can use any kind of pail with a lid. Keep white vinegar on hand, fill the bucket half full of a water and a little vinegar to prevent stains from setting in and to cut down on odors. If buying pre-made, pay close attention to the hand washing instructions. If making them yourself, you can wash them in your machine (if it’s still working) or hand wash them in hot soapy water. Consider having a boiling pot if your products are white or highly soiled (you can boil them to kill germs). It may also be a good idea to stock up on bar wash soaps (sunlight makes a good one). They can be hung to dry.

Other Issues:

**Take into considerations all other related issues that may effect you.

There are lucky women out there who breeze through cycles without any issues and then there are women who will find themselves curled into a ball from the pain of cramping. If you find yourself in a situation where you can’t run to the store for a package of pads then chances are you also can’t run to the store for some midol or chocolate. Be prepared. BONUS: All these items should be included in your prepping for other reasons so no money is being wasted.

Pain relief: Store a big bottle of your go-to pain reliever. If you are prepping for someone else, a big bottle of Tylenol (100 tablets) and a reusable hot water bag will do the trick. (Tylenol can be used for anyone not allergic and hot water bottles can double as a warmer under the covers at night)

Cravings: Try to keep a few of your favorite sweets on hand and replace them as you dip into them. Consider hot-chocolate, it can sooth a sweet craving and has a decent shelf life. It can also be used for some baking recipes.

Yeast Infections: Yeast infections are quite common in woman so keeping an extra tube of monistat could save some discomfort.

Pregnancy: You may be prepared for your period but what if it doesn’t come? If pregnancy is a possibility you can find a list of good supplies to have here.

Putting it all together:

**Now that you are aware of what you may need it is time to put it all together.

In The Bug Out Bag: Almost every woman will at some point be caught off guard by her monthly visitor. For some woman this will happen while on the move or “bugging out“. The best place to start is by preparing a mini PMS package. I recommend including enough supply to get through one cycle. It is as easy as throwing a pack of pads/tampons, a small pack of wipes, a bottle of Tylenol (or your choice of pain relief) and some hand sanitizer into a zip lock bag then putting it in your BOB or purse. It’s fast, it’s cheap and it’s easy!! If you don’t already have the supplies on hand, consider picking them up on your next grocery trip. If you don’t have a BOB congratulations, you’ve just made your first prep!!

In The Home: Stock pile a 6-12 month supply of your favorite products, don’t forget some cleansing wipes/wash with your stockpile. Also consider having pain relief and the possibility of cravings, yeast infections and pregnancy. You do not need to do this all at once, pick up an extra pack every time you are able.

Disposal: The next time you are at the dollar store, pick up a few boxes of sandwich bags. Have a look around the house for a bucket with lid. Don’t throw out those old rims, make a burning pit. That’s it, you are done!!

Backing it up: Consider purchasing some cloth pads or reusable products. In the meantime, visit the local consignment shop and pick up some baby receiving blankets for under $1.00. These can serve as back up pads and wipes until pre-made is in the budget. Keep some Vinegar and sunlight soap around for washing and you are all set!!

That’s it. You can do this!! Do not let mother nature catch you off guard. This is one of the easiest/cheapest ways you can start preparing yourself and your family as early as today!!

There are some things we can still count on to remain the same after SHTF. A woman’s time of the month being one of them. Even if you are not

I am always looking to learn skills that can improve many facets of my life. A chief aspect of prepping I believe is to continually learn and increase your ability to survive. This education can come in many forms from training courses, real-life exposure, videos, lectures and books. For me though I don’t learn from books as well as I do with hands on exposure to the core aspects I am trying to learn. The more complicated the subject, the less likely I am going to learn from a book and at a certain point no matter how compelling the subject matter, if the book is too detailed I usually don’t finish.

I am sure this challenge hampers me from mastering a lot of concepts, but I can’t help how I was born so I try to learn in different ways to prevent my learning-handicap from getting in the way of acquiring skills or knowledge that could be crucial someday. Sometimes I find a source that seems to be a perfect fit for my learning style and 100 Deadly Skills by Clint Emerson fits the bill nicely.

Clint Emerson is a retired Navy SEAL who spent twenty years conducting special ops all over the world while attached to SEAL Teams (including the elite SEAL Team SIX) and the National Security Agency (NSA). Clint was able to use an array of practical skills he developed to protect himself while at home and abroad, he created Violent Nomad—a personal, non-kinetic capture/kill program cataloging the skills necessary to defend against any predator or crisis and his recent book 100 Deadly Skills puts much of that knowledge he obtained and created into the hands of everyday people like you and me.

Going back to my learning style, 100 Deadly Skills isn’t a technical manual. It isn’t a college level white paper on the various subjects Clint is discussing although I firmly believe that any Navy Seal receives so much more education and instruction than could ever be contained in 20 books. I am no Navy Seal though and 100 Deadly Skills is set up to share concepts in a compelling way that while not replacing professional training, still give the average person tons of useful information that could help you if you are confronted with many survival situations.

100 Deadly Skills that you never knew you needed

100 Deadly Skills takes the standpoint of a “Violent Nomad” who is characterized in the book as an operator working overseas under heavy cover. The book proceeds to share tactics that an operator could use in all aspects of what I would assume someone in that line of work would need to plan for.

100 Deadly Skills - Great information for people who want to make sure they can survive any dangerous situation.
100 Deadly Skills – Great information for people who want to make sure they can survive any dangerous situation.
  • Mission Prep
  • Infiltration
  • Infrastructure Development
  • Surveillance
  • Access
  • Collection
  • Operational Actions
  • Sanitization
  • Exfiltration and Escape

Now you may be saying to yourself, “Why would I ever need to know what a Navy Seal operator working overseas in hostile environments would need to know?” and I admit that this book definitely has a target audience of people who find this type of skills or tactics fascinating. This book is not for Navy Seals or secret agents as I said before, it is for regular people and it easily shares information that even a regular Joe could use to protect their life.

Each skill or BLUF (Bottom Line Up Front) as Clint calls them is no more than a page or two and comes with excellent quality illustrations showing the finer points of each of the 100 deadly skills he tries to teach you. I found almost the entire book to be extremely interesting and I came away with a lot of new ideas that I could catalog in the back of my noggin for use potentially. I know I am never going to be working clandestine in the Middle East, but I can easily see the benefit of these skills in a SHTF event. Even if the world as we know it doesn’t end, there is still crime; there are still bad people and bad situations that you might face. A little knowledge sure helps and if these topics interest you, I am sure you will enjoy Clint’s 100 Deadly Skills.


I am always looking to learn skills that can improve many facets of my life. A chief aspect of prepping I believe is to continually learn and increase your ability