HomePosts Tagged "Survival" (Page 7)

Editors Note: This post is from Gaye Levy. Gaye was nice enough to share this with our readers here. Backup power is one of the most fundamental preparedness items you should have at the near top of your list. This article demonstrates her and her husbands experience with one option that might work for your family.


When it comes to understanding electricity, my mind tends to blank out when it gets to the point where I have to determine volts, amps, amp-hours, voltage under load and other terms that are second nature to the electricity savvy.  Let me make it clear that this is not a girl thing or a guy thing.  It is simply that some of us are better at understanding how power and electricity works than others.

In all fairness, in my boating days I was quite familiar with the operation of our house batteries and the inverter.  Using this set-up, I had fresh coffee in the morning and power for my laptop.  Life was sweet.  Although that was almost ten years ago, the lessons learned were simple: don’t discharge the batteries more than 60% and don’t mess with a working electrical system unless you know what you are doing.

Given my own thick head when in comes to all things electrical, I have always considered the prospect of installing a small solar system in my home a bit daunting.  I should not have worried.

HARBOR FREIGHT TO THE RESCUE

A few months ago I was contacted by Harbor Freight and asked if I would like to try out one of their Thunderbolt Solar Kits.  This was not the time to be bashful so of course I said yes, as long as they understood there would be little or no sun in the Washington State for a month or two. Having set the stage, I was sent the following items for testing:

Thunderbolt Magnum 45 Watt Solar Panel Kit
Thunderbolt Magnum 15 Volt Solar Power Panel
Cen-Tech 750 Watt Continuous/1500 Watt Peak Power Inverter
Thunderbolt 12 Volt, 35 Amp Hour Sealed Lead Acid Battery

Harbor Freight Solar Kit (4)

So how did it go?  The first thing I did was recruit the Survival Husband to do the heavy lifting.  Then, together, we decided that we would install the solar kit on the roof of our garage which was angled just right and facing the south.  During the summer months, we should get six to seven hour of sun a day in this location.

We also agreed that climbing the roof was a task for someone younger – a lot younger – so until my brother and my electronics wizard nephew come to visit, we set things up on our upper patio and to heck with the patio furniture.

TIPS FOR INSTALLING THE THUNDERBOLT SOLAR KIT

The Thunderbolt solar kit comes complete with three 15 watt solar panels for a total of 45 watts.  It also includes all of the parts you will need:  a mounting frame, controller box, cables, connectors and even a couple of 12 volt lights that plug directly into the controller box.  Everything is included for a ground level installation.  On the other hand, a roof top installation will require some brackets – something we have not purchased yet.

The installation was simple.  We just followed the instructions in the manual and things worked.  Okay, truth be told, Shelly (the Survival Husband) does not always read manuals thoroughly so he put the frame together goofy and had to start over.  And then he could not find the power switch on the inverter and thought it was defective.  I found it, turned it on and had immediate power.

He did offer up some tips:

When assembling the frame, make sure the top bar marked front actually faces front.  Otherwise you cannot install the legs.

Harbor Freight Solar Kit (7)

There are two sizes of screws with wing nuts.  The bag with eight screws are shorter and are the screws to be used when assembling the frame.

Harbor Freight Solar Kit (8)Harbor Freight Solar Kit (9)

When attaching the three panels to the frame, it is easier to attach the middle panel first.  Other than that, just follow the instructions.

After completing the frame and panel setup, follow the directions by attaching the 3 leads from the panel to the splitter cable.  Add the extension cable and plug into the charge controller.  Next attach the battery terminals (on the battery) to the charge controller to confirm that you are receiving voltage from the solar panels.  There is a large LED display on the front of the charge controller indicating the voltage so that you will know right away if everything is working okay.

You need to use an inverter to convert the power to AC.  In that case, you need to attach the included cables from the inverter to your battery terminals.

Harbor Freight Solar Kit (12)Harbor Freight Solar Kit (14)

The controller box itself, without an inverter, has a 12V cigarette lighter socket, 5V USB, 3-6-9V DC outlets and two 12V sockets for the included light kit.  Note that the USB port is only 5 volts, okay for cell phones, Kindles and tablets such as an iPad but not for devices or electronics that require higher voltage.

The battery is not waterproof so you will need to keep it covered and protected from the elements.

The Quick Start guide is well laid out and intuitive with accurate, easy to understand diagrams.  Plus, all of the manuals are available online so that they will always be handy, even if you lose the originals.

BUT DOES IT WORK?

The first thing I tested was my crock pot.  If the grid was down and I wanted to eat but I did not want to build a fire, a working crock-pot would be a godsend.  It uses just a modest amount of steady power and can be used for soups, stews and even for baking quick breads.  I ran the crock-pot for quite some time with no problems.

Harbor Freight Solar Kit (16)        Harbor Freight Solar Kit (17)

My next test was more challenging – a hair straightening iron. If my hair iron worked, then I not only would look good, but I would be able to re-seal the Mylar bags I opened to get to my stored food items.  Again, no problem.  From there I moved to lighting and to my alkaline battery charger.  Again, everything worked perfectly and I was pleased.

Using the Harbor Freight solar system was almost to easy – definitely a set it and forget it operation although the directions indicate you should not leave a charging battery unattended.

I am not done testing yet. The way these things work is that more batteries equals more amp hours equals more current.  Or, in plain English, more battery juice means you can run more stuff for a longer period of time.  We plan to add some marine deep cycle batteries and a large watt inverter to the basic set up so we can run more stuff.  But for the basics and for now, this system works just fine.

THE FINAL WORD

This Thunderbolt Solar Kit from Harbor Freight is inexpensive if not downright cheap.  But do not let the price dissuade you.  For lighting, small appliances and laptops, this system works great.  It would be even better with a larger battery.  You do not need to be an electronics genius to set it up but if you need help, you can find it online, especially at the New World Solar/DIY Solar Energy Forum.

It is my understanding that folks have tied two or three of these systems together for even more power.  As good as that sounds, it is beyond our technical capability at this moment but we are learning and just might get to that point.

Our goal for now is the get the complete system installed on the roof and to add some additional batteries, probably the marine deep-cycle type.  We will then use the solar to kit to power all of our outdoor security lighting as well as our power tools and and everything else that we have running off of our garage and outdoor receptacles.

This does not apply to us, but I think this would be an ideal backup power source for a well.


What do you think? Any of this applies to your household? Let us know if this works. And how it changed your life.

This is just another effort to find the best ways to go all independent and self-sufficient. Your answers or notes are helping all of us to move forward. I hope you understand that.

God Bless.

Among all the benefits of solar panels, the most important thing is that solar energy is a truly renewable energy source. And there's more.

In modern war, you would die like a dog, for no good reason.

Hemingway said it. And he was not far from today’s reality.

We are already at war. We are at constant war. If not with another nation, then we are at war with something else. Since we’re fighting in 7 different countries in this very moment, would you be surprised to find out that the number of fanatics hating us grows exponentially?  

So then it is logic that we will be hit when we least expect it. And where we least expect it. For we are too busy planting our seeds of democracy someplace else, while our own country turns into a demo-crazy.  

Fighting terrorism with real weapons begins to sound a little outdated right? It’s like we discovered solar power but we continue to dig for coal. We could maybe end terrorism online if we really paid attention to how things evolve outside the US. Instead of financing useless wars trying to change people that maybe don’t want to change, maybe we should invest in new technologies. Cyber terrorism is the real threat.

When we used the military, they used some planes. When we used drones, they used busses and trucks. When we close the borders they use the internet.

This is not about Putin. Or the dictator in Syria. This is about the rage of the common radicals. And you should fear people who have nothing else to lose.

We fight them abroad. But they are already here. Remember where the 9/11 hijackers trained? On US soil. Remember what airplanes they used? American. Who’s grid is going down if they succeed? Ours. We are not the only ones taking advantage of technology..

And with the help of our own technology, what they’re planning now is going to destroy our infrastructure, our power supply, and the quality of our water. Imagine how easy would be to kill an entire city if you get access to the grid. And it’s all online now.. So everything that is connected won’t start anymore. Because a blackout interrupts more than the grid.

[See: What to do when there are no doctors around.]

Hard to imagine? You better. For time is running out for all of us.

War is something people used to engage in back in the days, when they didn’t know better. When they were still burning people for not believing in God. Did anything change? How come we ask for maturity and understanding and empathy when we have none?

Do you at least care for yourself and your family?

The time has come! This is not a drill.

Want to stay alive? You need to make an effort.

[ See: How to survive a blackout on your own.]

Truth is, a blackout could happen anyways.

Our grid is older than all of us. Remember the March Venezuelan blackouts? It was like living in the Apocalypse.  And it all started because of the Guri hydroelectric plant, which serves 70% of the country. So you do the math. Three major blackouts in one month. Venezuela was crumbling.

For days and nights, unruly crowds sacked 523 stores in Maracaibo as residents stood on their porches wielding weapons to guard against looters. Dozens died in hospitals. Bodies decomposed in the morgue. And what little food remained in refrigerators rotted away as the nation went hungry.

Should we even dare to imagine what if it was us? Are you ready for such a scenario?

Prepping is not about running to the store in the day disaster starts. On the contrary. Prepping is making sure we have a Plan B, C, etc.

Learn here how to become the household healer when a simple blackout disrupts your life.

There are always solutions for the ones who chose life. 

What are you going to do about it? How prepared are you? Let me know in the comments. We can only do this thing together.

Prepping is not about running to the store in the day disaster starts. On the contrary. Prepping is making sure we have a Plan B, C, etc.

I never imagined that there’s anything better to start a fire than char cloth. Well, times have changed, and so have I. At least about the fire-starting bit.

Ever heard about steel wool? Yes, I know it sounds rather contradictory, but this thing which, by the way, our grandparents used to scrub clean all those pots and pans, is everything a prepper may expect to find when reading our articles.

Apart from the fact that steel wool goes up in flame like its gasoline or something, it has tons of other uses around the house and, of course, in survival-type situations.

Fascinated by this – I don’t know how to call it – a byproduct of the metalworking industry, I spend a couple of hours searching for ways preppers utilize this stuff. What can I say, other than the fact that I struck gold? So, without further ado, here are 6 ways to use steel wool in a shit hits the fan situation, both in and out of the house.

Prevent drain clogging

I’ve always hated the idea of playing repairmen around the house (at least in rooms that have nothing to do with the bedroom). You want to know why? Because everything can be avoided if everyone around the house would exercise a quint little thing called common-sense. Recently, I had to unclog the bathtub’s drain two times because my wife has this thing about washing the dogs more often than necessary.

Anyway, I found out that a great way to prevent these mishaps would be to put some still wool around the drain before taking a bath. That thing sucks up every lock of hair like it were a sponge or something. You should also try using it in your kitchen’s sink, especially if you don’t have a garbage disposer.

No more loose screws

You probably know how frustrating it can be to try and drive a screw through a piece of wood when the hole’s too big. Well, you can try your luck finding a screw to fit the hole (pun intended), or you can use this simple prepper’s trick – wrap some steel wool around the screw and give it one more twist. If you don’t have any, take rip a small piece from a match, and stick it in the hole.

No more mice around the house

If you’re having critter trouble, snoop around a bit to see where they’re coming from. Once you find the mouse hole, cover it with a big piece of steel wool. Don’t worry about the mouse chewing through it – never going to happen!

Keep things sharp

If you ever run out of sharpening stones (true story here), you can use a wad of steel wool to keep your tools in working conditions. Works great on knives, but steel wool really works wonders on blunt scissors. Just take a big piece and snip it a couple of times with your scissors. You’ll get that thing sharpened in no time.

No more critters in the exhaust pipes

Winter comes, many people allow their cars and motorcycles to take a breather until spring. Nothing odd about this. However, what about them critters which tend to crawl into the exhaust pipes and air intakes? Apart from the fact that you end up gassing them to death once you start the engine, the stuff they bring along with them can clog the exhaust, resulting in engine damage and, possible, carbon monoxide poisoning.

Plugging the exhaust is the most obvious. Still, you don’t need to buy something very expensive to get the job done. Take a wad of steel cloth and shove it inside the air intake and the exhaust. You can wrap a bright-colored cloth or take around the pipes which you’ve stuffed with steel wool to serve you as a reminder to take them up before using the car.

Make rusty tools shine again

While searching for some stuff around the attic, I stumbled upon a small toolbox with several rusty tools inside. Asked my dad about them, and apparently, they belonged to my grandfather. Seeing the state they were in made my heart bleed, which meant I had to do something about it. Luckily, I had a pack of steel wool in my garage which made my job a lot easier. If you have rusty tools, try giving them a good scrub with a wad of steel wool. Works like a charm.

Now, if you really want to restore them to their former glory, you can try this trick – fill a tub with Coca-Cola and put every rusty tool inside. Let them soak overnight. Early in the morning, take them out and use a towel or cloth to remove the excess liquid. After drying them, scrub them with steel wool. You won’t find shinier tools anywhere. By the way, this method works on chrome surface as well.
Remove persistent wood stains

I’ve never seen true Hell until my wife put her coffee mug on the small living room table I just bought. You know those rings on the bottom of the mug that usually form when the coffee goes over the edges? They never go away. And, no matter how hard you scrub that wood surface, you won’t be able to remove it.

Well, least I thought before using steel wool. Encouraged by the kickass results I had with restoring grandpa’s rusty tool, I attempted to apply the same method on the wood table. Wouldn’t you know it? It worked! I had my share of doubts about using something as abrasive as steel wool on a fine surface, but, apparently, it didn’t leave any scratches. If you’re having the same issues, try a wad of steel wool.


Well, that’s about it for my uses of steel wool around the house. Sorry for not writing a word or two about its fire-starting abilities, but it seemed like self-implied. Anyway, hope you liked my article. As always, for comments, additions, rants or all three of them, hit the comments section.

Apart from the fact that steel wool goes up in flame like its gasoline or something, it has tons of other uses around the house and, of course, in survival-type

Sometimes in the preparedness folds, we really get wrapped around axles. We have so much that we’re learning and trying to do, and we’re regularly doing it on a budget – which is just one more thing that circles around our heads and beats us up.

We can limit some of the pains of preparedness by changing how we look at things, but also how we do things. Gardening and larger-scale growing is routinely on our to-do list. It’s something that’s going to come as a shock for those who don’t practice ahead of time, no matter how many tricks get applied. However, we can save some time and stress on our bodies with a few low-cost and low-skill tricks and tools, and see increased yields. Bigger yields means lower dinner costs and potentially some increased food storage, letting us expand our preparedness in other ways.

Here are a handful of quickie, usually highly inexpensive – easy garden hacks to save time, money and labor. As you read them, don’t forget: paper products are compostable.

Mulch

Mulch makes life easier.

In some forms of mulch gardening, the mulch stays right there year-round. Some styles use a mulch that in hot, damp climates rots enough during the off-season and is tilled in that winter or early in spring. In others, we scoot aside just enough to drop seeds or transplants in during succession plantings, add amendments like cured manure or compost or pH-raising pine by raking it just into or over the surface, and add mulch more slowly.

Mulch can be straw or wood chips, lightly soiled animal litter, mown or whole leaves, the tips of branches we’re pruning, or shredded white paper. Shredded paper will settle into a mat that makes it tough for weeds, but “loose” mulch routinely does better with a weed suppression barrier down first.

We can use newsprint, cardboard, or phone book pages as a weed suppressor and to keep small plants free of dirt kicked up by rain. We won’t get the same moisture-holding and soil aeration improvements, we will still have to weed some, especially if we already have beds that are weed prone, but it lessens our time spent sitting or crouched and bent over.

Mulch lessens the pains of gardening. We don’t weed as much, our plants do better, and we don’t have to water as much.

Plastic bottles

olla-drip-irrigators-easiest-way-to-do-it-plantcaretoday_com

Sub-irrigated planters for buckets and storage tubs and conventional planters can be made using bottles for the tubes instead of aquarium or garden hoses or PVC.

We don’t store water or foods in milk jugs because they’re porous and can leach previous content out slowly, but they have their place among soda and juice bottles in the garden.

Various bottles can be used to make mini-greenhouses, cloches, scoops, and seed spreaders, as well as mouse and rat traps (2Ls can work for small squirrels and chipmunks, too, or slow them down enough for the garden terriers to get there). They’re great for vertical strawberry and herb and lettuce towers. We can use them to keep cord from tangling, and punch various holes to use for spreading amendments and treatments. Whack them in half, use sourdough starter and water or beer, and they catch horrific numbers of slugs.

For time savers and back savers, though, bottles really excel at helping us water.

Sub-irrigated planters for buckets and storage tubs and conventional planters can be made using bottles for the tubes instead of aquarium or garden hoses or PVC.

Whether we grow in raised beds or tilled rows, mulched beds or lasagna beds, we can use bottles as a spin on irrigation, too. We can drill holes all over, bury it near our plants, and use a hose to fill it quickly.

A similar version plants the bottle cap-down, with holes drilled in the cap and the sloping neck, and the inverted bottom cut entirely or with just enough remaining to make a flap. Those are even easier and faster to fill, with less aim needed.

The water from those will then sink out slowly, watering deep at the roots and watering our plants, not the weeds or walkways. Less water is lost to evaporation, and we don’t have to deal with timers or hose connections, or PVC to avoid standing out there forever to slowly sink in water. We pour it in, fill it up, and move to the next. If it’s really hot and dry, we might need to repeat, but it’s a low-tech, low-expense way to work faster than standing there with a hose or moving hoses back and forth so we can mow.

Maybe that means less time on our feet overall, or maybe that lets us progress to our weeding and suckering or the next round of planting.

Seeding time – The Dibble

A dibble is basically just something that makes a hole for us. Usually, it’s a somewhat shallow hole and it’s usually intended for seeds but we can work with that. There are two general types, rolling or boards, although with leek dibbles (which work with any transplant), you walk around with a rake or double-handle tool poking your holes. Boards are typically set up with dowels that will poke holes, or come as cutouts and we use something to poke holes to our desired depths. Rolling dibbles tend to be drum or wheel style.

drum-or-rolling-dibbler-and-dibble-board-www_ncat_org

There are two general types, rolling or boards.

Plans are out there for dibblers that can run from almost nothing if you salvage parts or make minis out of coffee cans and 12” PVC or make a single, double- or triple row dibble wheel out of bikes from Craigslist. Drum styles can cost as much as $100-200 to make at home if you’re inclined to go that route instead. Some of the really fancy board dibblers even get marked in colors so one board can be used for spacings from 1” to 6”.

In no-till schemes where you drag a pointed hoe to clear a spot for seeds, dibble wheels tend to be handy. In tall raised beds and window boxes or trays, a board dibbler may be more beneficial.

Using dibbles at whatever scale we choose to lets us quickly mark the space for seeds and transplants. Even if we have to go back with a post hole digger for some of those transplants, time spent upright instead of crouched tends to make for happier backs.

Seeding time – Furrowing rake

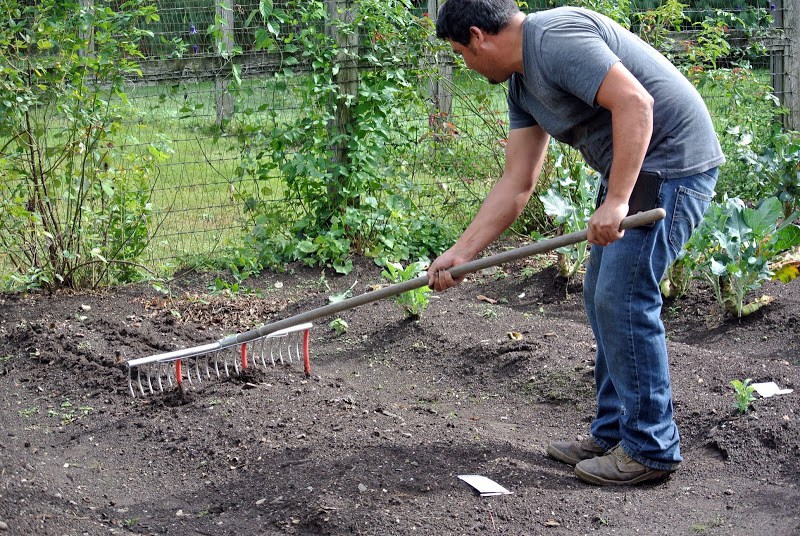
A furrowing rake is the simple DIY result of adding tight, relatively stiff hose or PVC to an ordinary hay or garden rake, and using it to drag lines along a prepared bed. It’s typically done so that the extensions are movable, letting us go as tight as the 1-1.5” gaps of the rake tines out to the full 1-2’ width of that rake.

We can get as complex as we like, adding marker lines to tell us how deep we’re aiming, or using multiple depths so we can plant cutting salad greens in the shallowest grooves and have deeper grooves for our peas. We can drag it both down and across a bed to create a grid, with seeds going at the cross points.

rake-with-hose-for-seed-spacing-1-themarthablog-dot-com

A furrowing rake is the simple DIY result of adding tight, relatively stiff hose or PVC to an ordinary hay or garden rake, and using it to drag lines along a prepared bed.

Taking a few minutes to prep some moveable rods or pipes and lay out our grid – while standing – limits how much measuring we do while we’re bent or crouched, saving time and pain with a very quick and low-cost trick.

Seeding tubes or pipes

Dibbles and furrowing aren’t the only way to limit how much time we spend crouched over during seeding time. Even a congestion-planting scheme that calls for under-seeding doesn’t have to be done from a stool or our knees.

All you really need is a pipe smooth enough for seeds to roll through cleanly and sturdy enough to stand up straight.

If you want to work with tiny seeds as well as larger ones, maybe you lay on skinnier aquarium tubing to attach to a tool handle or yardstick (with rubber bands, even), and make yourself a pasteboard, tin-can or paper funnel and tape it in place. Use the back-end of a teaspoon or the little measuring spoon from somebody’s aquarium chemicals to fish out 2-5 seeds at a time.

knowledgeweighsnothing-com-pvc-seed-hack

Seed tapes and mats

If we’re not digging the various seeding tubes, we can also use our rainy days or blistering hot days to make seed tapes out of strips of paper, or larger seed mats out of unfolded paper napkins and paper towels. We don’t have to mix up some kind of funky glue like with some of the DIY-ers show. The toothpick dab of white Elmer’s the first site shows is water-soluble and works just fine.

When we’re ready to plant, we just zoom along exposing our soil or following her mix, lay out our mats, and cover them again. We can work in fair-sized lengths that we roll up around an empty tube and then just nudge along using a broom or hoe, or use a square or two at a time that lets us stagger our planting for a staggered harvest or interspersed companion flowers.

Seed mats and strips can also be made out of a single thickness of newspaper pages for larger seeds like peas and beans as well, although we’ll want to make a small 1/8” slit or poke a pencil-tip hole through to give our seeds a head start on busting through the heavier paper.

Since we’re planting 3-6” or as much as 8-12” apart in those cases, whether we do rows or congestion beds, working with a larger paper size makes sense. The newspaper sheet will decay over the season, but being thicker, it does offer a nice head start for our seeds over the weed seeds that may be lurking below. Being thicker, it also does better if the seed gets that head start of a slit.

No more removing gloves. No more exposing seed packets to dirt and moisture, or unfolding and refolding and sticking them in a pocket as we try to keep track of where exactly the tiny black seeds landed in our bed. And since they’re evenly spaced instead of scattered in lines and areas, it’s minutely easier to tell which tiny baby dicot we should be plucking when the weeds start – at least we can work quickly in some of the gaps.

In the garden – Avoid the crouch-ouch

So why the focus on things that improve soils without hauling lots of bales, limiting all the bending, limiting the bending and time we spend watering (or pumping water), collecting trash to make all kinds of weird contraptions in the garden?

Especially for seniors and those with nagging pains and injuries, the ability to work standing upright or from a chair without leaning over or reaching far can not only increase the joy of gardening, but in some cases go as far as making gardening possible again.

Arthritic hands, shaking from an injury or age, and loss of full motor function from an accident can make it frustrating and painful even to fetch out and drop a lima or pea, let alone broccoli and spinach, and unless they’re willing to just punch some holes in a baggy and shake, just forget about iceberg and romaine and strawberry spinach.

The ability to work slowly over winter or summer to prepare for spring and autumn leaf and root crops, the ability to use a tube and funnel, then shake or scoop seeds using something they can actually grip is enormous.

Reexamine how you garden

Even for those in good health or who just like to be out there, some simple and inexpensive DIY projects and some trash collection and reuse can save a lot of time.

That might make a difference in garden size now, while we’re working and balancing families. It will definitely make a difference later, when we’re depending on those gardens to feed us or add a little forkability and crunch to our starvation-staving diet.

Saving backs and creating easy-to-use tools can also let us involve our parents and kids a little more in some cases, giving them independence and sharing the satisfaction that comes from a meal we procured for ourselves. There’s little better in life than seeing that pride returned to your parents and grandparents, or watching it bloom in your children.

It also sucks to fail, especially when we have a lot of time invested in something.

Water reservoirs, reduced weed competition, proper seeding coverage, and workload-friendly seeding methods can help increase our rate of success, which encourages us to do it again.

Saving backs and creating easy-to-use tools can also let us involve our parents and kids a little more in some cases, giving them independence.

I’m painfully aware of the fact that smartphones and prepping don’t mix, but part of being a prepper means using anything you have on hand in order to survive. Smartphones themselves make for an interesting case study – for some, it’s a big no-no, because the battery, unreliability in case of an EMP attack, cheap components that make them very fragile, but I urge you to reconsider. In all aspects, smartphones are the epitome of communication technology and, as a result, they have a lot to offer.

Sure, I won’t stake my life on one single piece of plastic with a display and a camera that makes the most awesome pictures period, but in checking out the mobile applications market, I’ve discovered a very interesting aspect. If you know where to go, what to download, and use, your smartphone can be turned into a tool as versatile and dependable as a survival knife.

So, for today’s article, I have compiled a small list of my favorite ‘survival’ apps for smartphones. Enjoy!

Facebook

Yes, I know that most of you would hardly associate duck faces, food pics or check-ins with survival. However, Zuckerberg’s wunderkind does have its merits. If you still have an active Internet connection, you’ll be able to find out in a jiffy where you are.

Moreover, in case of a natural or man-made disaster, Facebook allows its users to mark themselves “safe” which basically discloses the location, as to allow their loved ones to know that they’re out of harm’s way. Careful about permissions – data mining’s real and hardly a trifle. Still, a very good survival app.

Red Cross First Aid

A great cross-platform app (means it’s available for Android, iPhones, and Windows phones) which boasts two types of first-aid modules: one for learning which teaches you useful stuff like performing CPR, treating wounds or dealing with allergic reactions and a second one that kind of synthesizes all teaching modules. The latter can be very helpful in case you need to render first-aid since you won’t have time to scroll through pages of text.

Compass Steel 3D

As everyone needs a compass and this smartphone delivers. Compass Steel 3D is a lightweight compass app with tons of features like calibration, sun and moon direction, sunset and sunrise time. Given the fact that it relies solely on your phone’s accelerometer (the sensor that changes the screen’s orientation based on position) means that you really don’t need an active Internet connection.

Offline Survival Manual

Everything you need to know about survival in lieu of an Internet connection. Offline Survival Manual is what a like to call an encyclopedia – it covers a lot of common prepping topics like first-aid, food, water, but also offers unique content such as mental preparedness tricks and basic med guides.

Scanner Radio

What’s the use of having a short-range communication device like a walkie-talkie if there’s no one to speak to? This is where his nifty app comes into play – using GPS, Wi-Fi or mobile data; Scanner Radio will snoop around the area for active radio stations. It can also pick up radio chatter from the authorities or from people using this device.

Battery Doctor

Every smartphone out there has a built-in application that keeps an eye on battery level. Most target notorious battery drainers such as screen brightness, applications running in the background or the Internet connection. Battery Doctor takes this to an entirely different level – it now only kills redundant apps, but it also boasts a super power-saving mode that can extend the life of your battery by several days at least. This would come in handy for phones that drain batteries like there’s no tomorrow or for situations which call for an amp of juice in your smartphone.

Flashlight

A simple name to serve a simple purpose – illumination. Indeed, your phones come with its own flashlight options, but apps such as this one can improve the brightness by a factor of ten. Careful about that battery life, though. You should only use Flashlight in case you run out of matches, lighters, light sticks, flares or tac light batteries.

Wild Edibles

Now, this is what I call a must-have for preppers. Wild Edibles has a database of over 200 edible wild plants. It also comes with useful information about location, how to identify, harvest, and what to do in case you eat the wrong ones. If that wasn’t enough for you, Wild Edibles also has a plant recognition algorithm that uses your smartphone’s camera to identify the plant in front of you.

Guardly Mobile Safety

This is the cheapest alternative to a personal emergency beacon. Let’s assume for the fact that you missed a call or a message. In case this happens a couple more times, this application will relay your GPS location to the authorities or to your emergency contacts.

Knots 3D

How can you not know how to knot? Well, apparently there are many people who get even their shoelaces wrong. That’s why Knots 3D is a very handy survival app – its large database shows you how to tie even the most intricate know, using a step-by-step video approach.

Smart Tools

Every prepper needs a toolbox, but a real one would be a little impractical to carry around. This is where Smart Tools comes into play – need to measure something? Fire up the ‘meter’ option and get crazy. The app has tons of other features such as mirror, flashlight magnifier, compass, GPS, and even a sound meter.

OpenSignal

This app is very similar to Scanner Radio, with one small difference – instead of picking up local radio chatter, OpenSignal scans for nearby radio or Wi-Fi towers. It also has a smart built-in tool that boosts your phone’s signal in case the radio tower is out of reach. Sorry, iPhone people – this one is for Android users only.

That’s about it for my top 12 favorite survival apps for smartphones. Think anything’s missing from the list? Let me know in the comments section.

If you know where to go, what to download, and use, your smartphone can be turned into a tool as versatile and dependable as a survival knife.

During the last couple of days I came to realize that I’m kind of hooked on technology – if I want to search for anything like a recipe or the answer to any kind of question, I usually end up using my smartphone or laptop.

Sure, there’s nothing wrong about taking full advantage of modern tech. I mean, without my PC and Internet I wouldn’t be able to share my thoughts with you people. Still, the idea of being surrounded by too much tech should be a reason for concern considering that it takes one blackout to witness firsthand what life B.E. (before electricity) felt like.

In one of my articles (can’t remember exactly which one), I talked about how awesome it is to have powerless tools around the house. Of course, you can always use a manual food processor when the power’s out or a manual drill over an electric one, but some things just cannot be replaced. However upsetting this though may be, we kind of need out smartphones for a lot of things, not just taking pictures or playing Candy Crush while riding the subway.

Okay, so we established that mobile tech is one of those things that we can’t do without. The question at hand here is what in the Hell are we going to do when there are a power outage and our phone’s close to dying? In a previous article, I’ve shown you a clever way of charging your phone using a 9V battery and a car charger. That is, indeed, a neat trick, but hardly the only way to juice up your phone without using the outlet.

Well, after doing a bit of research, I’ve stumbled upon more flaky ways to recharge that smartphone of yours. Think the 9V battery hack was weird? Get of a load of these.

Harnessing the power of…cranks!

A hand-cranked flashlight is, without a doubt, one of the most useful items to be had in case shit hits the fan. Still, a flashlight is not enough. In general, those gadgets come with all sort of wicked options: AM\FM radio, music player, photovoltaic cells, USB ports, all of them sucking up that precious juice generated by the owner who has nothing better to do than to spin that lever.

Yes, I know that this might come off as a no-brainer, but many who own a hand-cranked gizmo overlook this option for some reason.

So, is the power out? Not a problem if you’re phone on the brink of death. Just plug your USB cable into your hand-cranked gizmo and start, well, cranking. It’s possible to use such a device to fully charge your phone’s battery, but I don’t see how you’ll be able to reach 50 percent without your arms going numb.

There’s another trick you can trick to boost the efficiency of your hand-cranked device. As many of these gizmos pack solar cells and capacitors, it would be wise to leave it in the sun before attempting to use the crank. Sure, it won’t fully charge your phone, but at least it will spare you a couple of hours of cranking.

Hack your landlines!

If prepping was a patient with OCD, I would say that he had a thing for landlines. Don’t get me wrong; landlines are a great way of staying in contact with the outside in case of a natural or man-made disaster. In case of a power outage, landlines will still have some juice inside. Why not take advantage of this?

Here’s a clever trick of how to get some of those amps inside your dying phone. Keep in mind that this project requires a bit of tinkering. However, when you’re done, that phone box of yours will double up as an emergency phone charger. Now, for this project you will need:

  • Phone cord.
  • USB cable.
  • 5V voltage regulator. There are usually 52V inside that phone box, so you will need this regulator in order to make the outlet compatible with your smartphone’s battery. Otherwise, you’ll end up frying your phone. Voltage regulator looks, more or less, like TV or computer chips, only a lot bigger. They have three prongs for input, output, and grounding. You can probably find them at your local hardware store, in the electronics section (the one you need is labeled ‘7805’).
  • Knife.
  • Soldering iron.
  • Electrical tape (optional).


Here’s what to do in order to hack your phone box

Step 1. Start by exposing the cables of your phone cord. Leave a plug on the other end, because that one will go in the phone box. There should be two wires: red one (this will be your input) and a green one (grounding).

Step 2. Next, expose the wires of your USB cable using the knife. You’ll see four cables: red, blue, green, and black.

Step 3. Put the voltage regulator on your work table. To ensure that you solder the wires to the correct prongs, flip the chip (the ‘7805’ should be facing you).

Step 4.  Solder the phone cord’s red wire to the first prong (that’s the left one).

Step 5. Solder the phone cord’s green wire to the regulator’s grounding prong (that’s the middle one). You’re doing great! Halfway there.

Step 6. Solder the USB cable’s black wire to the regulator’s middle prong. Yes, you can solder it on top of the phone cord’s green wire.

Step 7. Solder the USB cable’s red wire to the regulator’s output prong (that would be the one on your right).

(Optional) Use some electrical tape to cover the soldering points on the regular.

Step 8. Plug the phone cord into the box and the USB cable in your smartphone. Congrats! You now have an emergency phone charger outlet.

When life gives you lemons, make electricity.

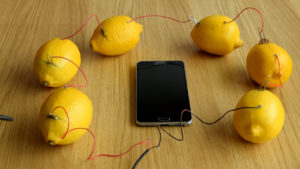
Lemonade is not the only thing that you can make out of lemons. In case of a major emergency – say you want to send out of short message or call the authorities, it may be possible to reboot your phone using fruit-generated electricity.

Yes, I know exactly how it sounds, but it works. Don’t expect to get a full charge on a single lemon (you’ll need at least 1,000 of them to get your phone’s power cell to 100 percent). Anyway, here’s how to boot up your phone by harnessing the power of electrochemical reaction. Start by gathering your materials. For this project you will need:

  • Zinc or galvanized nails.
  • Copper nails (you can replace them with coin or paper clips).
  • Copper wires.
  • Mini-USB cable.
  • Six lemons.

Here’s how to piece together your lemony phone charger

Step 1. Expose the USB cable’s wires using a knife. Leave the mini-USB plug on the other end. You should see a red and a black wire with orange strips.

Step 2. Arrange your lemons in a circle.

Step 3. Insert zinc nail on the left side of the lemon.

Step 4. Insert a copper nail\paper clip\coin on the right side of the lemon.

Step 5. Connect or solder the USB cable’s red wire to the zinc nail inserted in the lemon on the left side.

Step 6. Connect or solder the USB cable’s black wire with orange strips to the zinc nail inserted in the lemon on the right side.

Step 7. Connect or solder the copper wire of the left lemon with zinc nail inserted in the lemon behind it. Repeat this operation to close the circuit.

Step 8. Plug the mini-USB into your phone and wait for the magic to happen.

(Advice) If you don’t have lemons around the house, you can try with oranges or other acidic fruits.

Onions make me cry, but at least I have a full battery

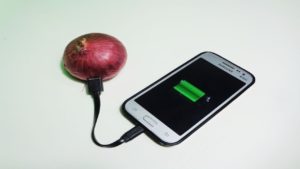
Because I’m madly in love with these strange science projects, I found another way to charge my phone using stuff found in the fridge. In this case, the one giving away its life so your phone might live to tell the tale is the onion. Don’t cry for me, Duracell. As in the case of the lemon charger, the onion one relies on electrochemistry. Here’s what you’ll need to whip up an onion-based electricity generator:

  • One onion (the bigger, the better).
  • Any kind of beverage containing electrolytes (I used a bottle of Gatorade for this project, but you can use anything you like or have around the house).
  • One large bowl.
  • One phone charger.

Sounds delightful, doesn’t it? Here’s how to make your first onion charger.

Step 1. Using a Philips screwdriver or an awl, poke two holes on either side of the onion.

Step 2. Fill your bowl with Gatorade or your favorite electrolytic beverage.

Step 3. Place the onion in the bowl and allow it to soak for at least 15 minutes. The holes you’ve just poked will allow the Gatorade to get inside that onion fast.

Step 4. Once the time has passed, take the onion out of the bowl and place it on a clean towel.

Step 5. Use the towel to dry your onion.

Step 6. Stick the USB end of your charging cable into the onion. Doesn’t matter where you insert it.

Step 7. Connect the mini-USB end to your phone and let the magic happen. If you’re still not convinced, drain your battery completely and connect to the Gatorade-soaked onion to see what happens.

Wrap Up

I feel compelled to stress out once more that these should not be, under any circumstances, considered permanent solutions. The only thing that comes close to an outlet is one of those portable batteries.  If you don’t have one, you should consider making a small investment. Check out your local auto stores for those jumper packs – great for starting your car when the battery’s dead, but can also help you charge other devices such as laptops, smartphones, radios or tablets.

I strongly advise you to exercise extra caution when crafting those onion or lemon-based generators. Technically speaking, they should work. However, don’t be surprised if your phone suddenly goes up in flames. If you don’t have other means of charging your smartphone, better get a meter in there to see if the voltage is fine.

Another thing to keep in mind is that phone box chargers are very tricky. Well, you don’t need a Ph.D. in astrophysics to solder a couple of wires, but it is rather difficult to get ahold of that voltage regulator.

Sure, there are plenty of websites that sell them by the dozen, yet in case of a blackout, this is not really a viable option. If you can’t find any at your local store, it may be possible to salvage one or two working ones from an old VCR or a tape recorder. I wouldn’t go tinkering around TVs because they use entirely different regulators. You can also try your luck with an electrical-powered short-wave radio.

That’s about it on alternative ways to juice up your smartphones during a blackout. What’s your take on this? Hit the comments section and let me know.


On a different note, here’s some other self-sufficiency and preparedness solutions recommended for you:

The Lost Ways (The vital self-sufficiency lessons our great grand-fathers left us)
Survival MD (Knowledge to survive any medical crisis situation)
Backyard Liberty (Liberal’s hidden agenda: more than just your guns…)
Alive After the Fall (Build yourself the only unlimited water source you’ll ever need)
The Lost ways II (4 Important Forgotten Skills used by our Ancestors that can help you in any crisis)
The Patriot Privacy Kit (Secure your privacy in just 10 simple steps)

Being surrounded by too much tech should be a reason for concern considering that it takes one blackout to witness firsthand what life B.E. (before electricity) felt like.

Everybody has his guilty pleasure – mine is powdered eggs. Yes, I know that nothing beats fresh-laid chicken eggs, because they’re packed with calcium, albumin, and so on and so forth. But what can you do? The heart asks pleasure first, as the saying goes, and I wouldn’t even consider coming down for breakfast if I’m all out of powdered eggs for my killer omelet.

There are very good reasons why I chose this instead of regular eggs, apart from the fact that they tout more or less the same nutritional values as their ‘living’ counterparts – they can be stockpiled for months if not years; can fit into any B.O.B, no matter how big or small it is and, most importantly, powdered eggs will be worth their weight in gold during an SHTF situation when all supermarkets will run out of the fresh variety.

Now, before showing you how I managed to make my first few jars of powdered eggs, I should warn you that this recipe will require a small investment because you’ll need a contraption called a dehydrator.

Wait! Don’t close this article yet. I was talking about a maybe a few tens (bought mine from Costco for $30). That’s about it as far as the financial part is concerned. Trust me when I say that this investment will pay off – imagine not having to hunt online discounts on survival foods such as powdered eggs. And, most importantly, if you know how to cook ‘em, you won’t notice any difference in taste.

Anyway, here’s what you will need to do in order to obtain a near-endless supply of powdered eggs.

Gathering your ingredients and kitchen supplies

To pull this off, you will need the following:

  • Eggs (I used two dozen for my first batch).
  • A teaspoon of vegetable cooking oil or butter.
  • The dehydrator.
  • A food processor.
  • A blender or fork for whipping up the eggs.
  • Canning jars.
  • Skillet.

Done gathering the ingredients? Great! Here’s what you’ll need to do next.

How to prepare powdered eggs

Step 1. Start by cracking open the eggs in a large bowl.

Step 2. Whip up the eggs using a mixer or a fork. I would advise you to use a blender since it’s quite tricky to whip up that many eggs using a simple fork and takes less time.

Step 3. Put the skillet on the cooking machine and add a little bit of veggie oil or butter. If you don’t have a non-stick pan, use both or stick to butter.

Step 4. Set the heat to medium-low and wait for the oil to heat up. If you’re using butter, you should put the whipped eggs inside when the butter’s all melted.

Step 5. Add the whipped eggs.

Step 6. Wait until the eggs begin to bind, then use a wooden spoon or spatula to sort of shred the omelet mass. Keep stirring and separating the eggs. It takes about 10 minutes or so. Yup, basically it’s like doing scrambled eggs. Now, if you want your eggs to be extra puffy, you can add a splash of milk to the bowl while you’re whisking them.

Step 6. Move the scrambled eggs to a clean plate with a bit of paper tissue underneath and allow them to cool.

Step 7. Once the eggs have cooled down, transfer them to your food processor and set it on “pulse.” Give your scrambled eggs a couple of spins. After a couple of seconds, you should have a puffy mass of diced eggs.

Step 8. Turn on your dehydrator and set it to 125 degrees Fahrenheit. Wait for it to reach the desired temperature (mine has a green LED bulb in the front which sort of lights up when the device reaches the right temp). Don’t forget to remove the dehydrator’s lid before heating it up.

Step 9. Transfer the eggs from your food processor to the dehydrator. Put on the lid and wait. It takes about four or five hours for the machinery to remove all the moisture from the eggs. Once they’re done, the eggs will have a brittle aspect.

Step 10.  Put the eggs back into the food processor and give them a spin or two to turn them into powder. Enjoy!

There’s another way of making powdered eggs. Works great if you’re on the run or not in the mood of going through all the steps. As you will see, the dehydrator you’re just bought comes with a fruit roll sheet (yup, you can use it to get the moisture out of fruits and make your own trail mix).

Now, get half a dozen eggs and whisk them. Put the fruit roll sheet on top of your dehydrator and set it to 145 degrees Fahrenheit. When the thing’s beginning to heat you, dip a paper towel in some veggie oil and grease the surface of your fruit roll sheet.

Add the whisked eggs (careful not to spill your mix inside the device). You don’t need to put the lid on. Leave it like this for 14 to 16 hours. Swing by from time to time to see if everything’s okay. When they’re done, they’ll have the same brittle texture as in the steps described above. All you need to do now is to transfer them to your food processor (don’t bother waiting for them to cool down), give them a good shake, and that’s it.

As for storing, you can use regular canning jars or zip-lock bags. If you want to make survival packs for your bug out bag or household survival kit, you can try using a vacuum sealer.

For the cooking part, all you’ll need to do would be to rehydrate them – I personally like to add them to a small pan with boiled water and sort of make poached, scrambled eggs. Yes, I know it sounds unappetizing, but nothing a little bit of salt, pepper, and a slice of homemade spam can’t fix.

Hope you’ve liked my article on how to make powdered eggs at home. If there’s anything more to add, be sure to hit me up in the comments section.

Powdered eggs will be worth their weight in gold during an SHTF situation when all supermarkets will run out of the fresh variety.

Yup, you read the headline right – today we’re going to have a nice and cozy chat about how lady supplies can very well save your ass one day. As someone who has bought more tampons than he could ever care to remember, I always wondered if those things can be used for other purposes then, well… you know.

Anyway, after digging around for a while, a stumbled upon this nice prepping forum where the topic was tampons. Although everything could have gone to shit, the people there were surprisingly very open about sharing their opinions on how to use feminine supplies in a shit hits the fan situation.

So, without further ado, here are 15 ways to use tampons for survival.

Bandage Replacement

Since most tampons are made from pure cotton, obviously they can be used as bandages in case of a medical emergency. I would venture to say that they’re more efficient in stopping bleeding compared to regular gauze since they’re manufactured to, well, suck out every drop of blood.

Don’t forget to keep the pressure on that wound and to stack as many tampons as necessary to stop the bleeding.

Tinder

If you run out of char cloth, you could make some more using a tampon. Unwrap the thing and pour some lighter fluid on it before setting it on fire. Alternatively, you apply a thin layer of petroleum jelly.

Ear mufflers

Neighbors too loud? Mosquitos won’t stop buzzing around? No problem. Take a tampon out of its wrapper, rip it in half, and stuff the pieces in your ears. Now you’re all set for nap time.

Dry-clean yourself

If you forgot to pack a towel, use a couple of tampons to dry yourself. As most of them pack some kind of perfume, you could very well end up smelling like the proverbial rose. They’re also very useful for wiping your forehead of sweat.

Patch up tent holes

A hole in the tent’s tarp is no laughing matter, especially if you plan on camping during mosquito season. If you don’t have anything else, you could use to repair the hole, take a tampon out of its wrapper, strip some cotton, cover the hole, and apply some duct tape.

Craft an emergency candle

If your tac light’s out of juice, it’s possible to make an emergency candle out of a tampon. Get a bell or mason jar, fill with oil, fat, wax or petroleum jelly and stick a tampon in it. Allow it to soak the fuel and set it ablaze. Haven’t tested this out yet, but, apparently, the flame from burning a tampon is powerful enough for cooking. Let me know if it works.

Bait

As gory as this may sound, a blood-soaked tampon can be used to bait fish. And no, it doesn’t have to be human blood – you can use some from a freshly-gutted game or a smaller fish.

Self-defense\offensive weapon

Well, when shit really hits the fan, you’ll want to do everything to get your ass to safety, even if that includes torching someone or something with a tampon Molotov cocktail.

To craft one, get yourself an empty glass bottle and fill it with lamp or gas. Take a tampon out of its wrapper and dip it in some petroleum jelly (you can also soak it in lighter fluid). Place the tampon inside the bottle but leave a bit dangling outside. Flip the bottle a couple of times to soak the tampon in oil or gas. Set fire to the part sticking out and let it rip.

A waterproof carrier for tinder and matches

Lost your tinder box? No problem. To avoid getting those matches and tinder soaking-wet, place them in a tampon wrapper and store them in your bug out bag. As many tampons come with a small, metallic case, you may be able to use that in order to craft a new Tinder box.

Extra cordage

Don’t panic if you run out of cordage. If there are tampons left in your backpack, take them out of their wrapper and cut them into smaller stripes using your multi-tool or survival knife. Tie the heads together, and voila, you have an extra piece of rope.

Figuring out the wind direction

If ever in doubt as to the wind direction, use a tampon. Take a small pole, attach a tampon to one of the ends and stick it in the ground. You’re welcome!

Corking a bottle

Should you lose your bottle’s cork or have to use it for any purpose, use a tampon to cork your wine bottle or whatever.

Making an emergency potty

You can make your own portable toilet by using a couple of tampons and a large zip-lock bag. Here’s what to do. First of all, ensure that there are no holes in the bag. Next, unwrap a couple of tampons, and get them inside the zip-lock bag.

That’s it! You now have a pocket-size emergency toilet- great for number one, though I’m too sure about the other one (would be stupid to carry your own crap in a plastic bag, but survival makes us do ‘amazing’ things).

Water filtration

If you run out of water purification tablets or have no other means of sterilizing water, use a tampon and a plastic bottle. Put as many tampons as possible inside the bottle and pour water. The process will take a while, but the water collected at the bottom is safe to drink.

Treat blisters

I don’t think there’s any universe where blisters are embraced. Doesn’t matter if you’re hiking or running for your life, those blisters will slow you down.

Now, if you have one on your foot, it may be possible to reduce the friction between the skin and boot and, at the same time, protect the area by duct taping a tampon over the blister. Yes, it looks awful, but it works.

Well, that’s about it on how to use tampons in a shit hit the fan situation. What’s your take on this? Hit the comments section and let me know.

Yup, you read the headline right – today we’re going to have a nice and cozy chat about how lady supplies can very well save your ass one day.

In my opinion, every prepper needs to know how to cook. More than that, he or she must become acquainted with the intricacies of preparing the game. Since it’s nearly impossible for me to cover every kind of game out there, I’m going to stick with something smaller and found in almost every corner of the globe – the rabbit.

Yup, you’ve guessed; in today’s article, I’m gonna show you how to deep-fry Bugs Bunny. Yes, I am well aware of the fact that they are cute and friendly and make great house pets, but do keep in mind that in SHTF situation, there’s no room for bias or, in this case, for mercy.

Anyway, you should know that in many countries, the rabbit is considered a delicacy, especially the wild one. Not that there’s anything wrong with domesticated bunnies, but those with ‘freedom to roam’ have an entirely different taste – it’s exactly the same thing between eating domesticated and wild hogs.

Now, the recipe I’m about to show you is very easy to prepare and, as the headline suggests, it involves plenty of oil. Consider this dish a prepper’s take on Colonel Sanders’ iconic fried chicken. So, without further ado, here’s how to prepare a Kentucky-style fried rabbit.

Gathering the ingredients

For this dish, you will need to following ingredients:

  • One young rabbit. Regarding the meat, you can use almost any part. I prefer the cottontails because they’re easier to prepare and far juicier compared to the other cuts.
  • Two cups of buttermilk.
  • Two tablespoons of Italian seasoning or your favorite spice mix. Just make sure it contains oregano, thyme, and dried parsley.
  • One tablespoon or paprika.
  • One tablespoon of powdered garlic.
  • Two or three tablespoons of black or cayenne pepper.
  • One and a half cups of all-purpose flour.
  • One teaspoon of salt.
  • Two cups of vegetable oil or tallow.

You done gathering the ingredients? Great. Let’s get to the fun part.

How to prepare Kentucky-style fried rabbit

Before seasoning your rabbit, you may want to brine it. The thing about using wild rabbit for this recipe is that it comes out all dry. Brining the rabbit beforehand ensures that the, well, nuggets will be moist and crispy at the same time.

To do that, grab a zip-lock back an add a ¼ tablespoon of rock salt and four cups of water. Put the cottontails inside and leave in the fridge for four to 8 hours. After that, take the rabbit out of the bag and start cooking.

Step 1. In a large bowl, put your buttermilk, paprika garlic powder, pepper, and Italian seasoning. Whisk the ingredients.

Step 2. Coat the cottontails with this mixture, stick in a zip-lock bag, and place in the fridge for a couple of hours or overnight.

Step 3. When you’re ready, take a skillet or frying pan and fill it with oil or tallow. Ensure that the oil completely covers the cottontails. Otherwise, you will need to flip it more times than necessary.

Step 4. Take the rabbit out of the zip-lock bag and place it into a strainer. Allow your cuts to drain for 15 or 20 minutes.

Step 5. While the rabbit’s sitting in the strainer, prepare the crust. Normally, you would have to put flour in a deep plate or something and sort of roll over your cottontails in it. However, there’s a faster way, one that does not involve getting your hands too dirty. Take a large zip-lock bag, add all-purpose flour and the salt.

Place your rabbit cuts inside, seal the bag, and shake. That’s it! All you have to do now is to use some thongs to take out the flour-coated rabbit and to place on a plate while waiting for your cooking oil to reach the desired temperature.

(Optional) If want a crunchier crust, follow the Viennese schnitzel recipe. Put some all-flour in a plate, some breadcrumbs in another one, followed by a third plate which contains one whisked egg, two tablespoons of milk, a dash of salt and pepper. First, roll the cottontail through the flour, dip in the eggs and milk mixture, and finally roll through breadcrumbs.

Step 6. Set the heat to medium-high. You’ll need a temperature of at least 325 degrees Fahrenheit to deep-fry those rabbit cuts.

Step 7. When the oil gets hot, add the cottontails. Deep-fry them for 8 to 12 minutes. Keep in mind that rabbit tends to suck a lot of oil, so be ready to pour some more if the oil level drops.

Step 8. When they’re done, place on a piece of paper towel. It will absorb the excess oil. That’s it! Serve while it’s still hot. Rabbit cottontails is a very versatile food since it can be paired with almost any kind of side-dish. I personally like to serve them with mashed or blanched potatoes and some green lettuce. Since it’s a deep-fried dish, you can always serve it with garlic sauce and a cold beer.

Wrap up

Preparing the rabbit is not that difficult. Of course, there are other ways to prepare this sort of game, but those recipes call for a lot more steps and ingredients. The best thing about this dish is that you can prepare it in any kind of setting. I personally like to prepare this recipe during a family camping trick. All you need are the right spices, a survival knife, a medium-sized cast-iron pot, and a source of the fire.

If you can’t afford to carry a pot, you can always use your canteen. As for frying the cuts, you can replace oil with tallow if you’ve got some of you. Always remember that domestic rabbits don’t need brining. Moreover, while keeping the wild rabbit cuts in the salt and water solution, you would do well to set a timer. If it stays longer than 8 hours, it will get all mushy during the deep-frying process.

That about covers it for my mouthwatering Kentucky-style fried rabbit. What do you think about this recipe? Hit the comments section and let me know.

Every prepper needs to know how to cook. More than that, he or she must become acquainted with the intricacies of preparing the game.

Do you wanna know the secret behind a great camping trip? Well, apart from flying solo or going with you SO, there’s also that sprinkle of magic called food. Yes, I know that most of you prefer a quick snack (MREs, poached eggs, may a couple of veggies), but what if I told you that you could actually enjoy a meal fit for a king’s table while backpacking?

Granted, it sounds like a contradiction in terms since camping has always been about leaving behind the hustle and bustle of the big city, which, incidentally includes fancy eateries and heavy cooking gear.

Well, the recipe I’m about to show you will not only blow your mind but will surely make the question the ways you chose to cook your Sunday roast. Anyway, as the title suggests, the only cooking tools you’ll need are the ones that should be included in your backpack or bug out bag.

Now, for those of you who are wondering about the cooking machine, I would recommend a simple and, if possible, firebox. Of course, you can always try your luck with a gas-powered stove.

For my part, I went with option A, since nothing beats that smoky flavor that only charcoal can provide. Moreover, since this is a 7-hour roast, I don’t think it would be a good idea to pack extra gas tanks just to cook one hunk of meat.

So, without further ado, here’s how to prepare your first 7-hour roast beef.

Gathering the ingredients

A simple dish calls for basic ingredients: salt, pepper, a bit of vegetable oil, and a dash of thyme (pairs divinely with beef). As for the cut, T-bone’s good, but a chuck steak’s better. As I said – simple stuff.

Now, for the rest of the stuff: one firebox filled with charcoal, one firestarter, and your camping pan (make sure that it’s one of those models that come with clamps). If you don’t have such a pan, you can always take a regular one from home and use a metallic bowl as a lid – clamp it in place using regular paper clips.

So, did you gather your stuff? Great! Now find a good spot and let’s work some magic.

How to prepare a 7-hour beef roast

Step 1. Find a good spot to set up your firebox.

Remember your grills safety training. We don’t wildfires now, do we? Best would be to pick a barren spot, away from trees or any vegetation. When you’re done, place a piece of paper on the bottom of the firebox and stack some tinder.

Fire it up and start shoveling coals once the fire picks up in speed. I wouldn’t recommend using lighter fluid or whatever, because your roast is going to end up tasting like gasoline.

Step 2.  Prepare the roast beef.

If you’re not in a hurry, you can marinate the roast beef for a couple of hours before the cooking part. I would venture to say that two-and-a-half hours are more than enough for the marinade to get into the beef. Regarding the latter, don’t overcomplicate things; in a zip-lock bag, add water, sugar, salt, pepper, some chili flakes for a kick, a couple of crushed garlic cloves, and two tablespoons of veggie oil.

Bag the meat, give it a couple of shakes, and store in the shade, away from insects. Now, if you want to skip this extra step, you can go ahead and start preparing the meat for pan-frying.  To do that, unpack your meat, season on all sides with salt and pepper. Don’t forget to rub the chunk with a little bit of veggie oil.

Step 3. Pan-frying the meat.

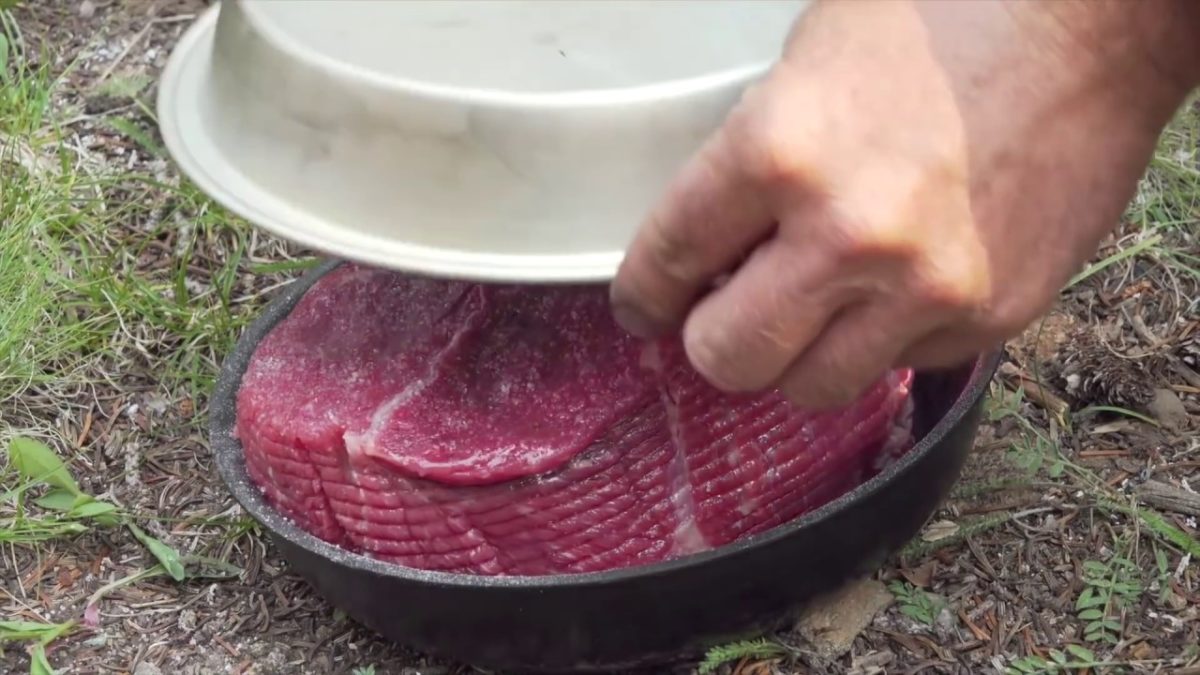
Once the fire has started to gain momentum, drizzle some oil in your frying pan and place on top. When the oil reaches the cooking temp, take the beef chuck, and place in the pan (fat part down). You only need to sear the meat – two minutes on each side is more than enough. When it’s done, take it out of the frying pan.

Step 4. Oven-roasting

In the same frying pan, add some more oil, and a splash of water. Make sure that there are still coals in your firebox. Next, you will need to place the meat in the pan, pop the lid, secure it with paper clips, if you have any, and to place it over your firebox.

Leave for 30 minutes to cook. After that, grab some hot coals from the firebox and place them on top of the frying pan’s lid – this will ensure that your beef will be cooked on both sides.

Now, there’s not much left to do but to sit and wait. Keep an eye on the coals and add some more if you feel like the fire’s ‘losing its touch.’ The first time I made this dish, I was with the whole gang: wife, kids, best friend, his SO, dogs, and, yes, even the cat (taught it how to walk on a leash). Our pastime of choice was obviously cracking open a few cold ones and reminiscing.

Well, if you really want to make more out of your camping trip, you can spend this time looking for side-dishes that pairs well with the beef like wild mushrooms or even fish.

Anyway, do keep in mind that this is going to take a while, so, there’s no point to guarding the firebox.

Step 5. Twist and turn.

After about four-and-a-half hours, remove the coals from the lid. Pop it open and flip your roast. Careful not to drop it or it’s bye-bye dinner. When you’re done, put the lid back again and continue cooking it for about two-and-a-half hours. Don’t forget about the coals.

Advice: if you want to add a crunchy crust to your meat, you can ditch the lid after six-and-a-half hours. Flip the meat every now and then. If you run out of the liquid, add a little bit of water. Otherwise, the meat will dry up and, eventually, turn into ashes (true story!).

Step 6. Gravy all around!

When the beef’s done the cooking, don’t throw away the liquid in the frying pan. Use it instead to prepare a mouthwatering gravy that will everyone a run for their money. Yeah, I know that this qualifies as an extra step, far from the simple dish – simple tools ideal, but trust me when I say that the gravy made from beef feet is the best thing that ever happened to your mouth.

So, here’s what you’ll need to do in order to prepare a simple gravy:

  1. Pour your beef stock in a separate container.
  2. Add a little bit of butter to the same pan.
  3. Wait for the butter to melt then add the stock.
  4. Let it simmer for a couple of minutes.
  5. Add half a cup of all-purpose flour and whisk the mixture.
  6. When the composition becomes silky-smooth, add another half a cup of all-purpose flour.
  7. Give a few more whisks and allow it to cook for another minute or so.
  8. Add salt and pepper.

Advice: if you prefer smoother gravy, you can strain it a couple of times through a sieve or a piece of gauze.

That’s it! You now have a nice cup of gravy which pairs wonderfully with the 7-hour beef.

Additional considerations on the 7-hour beef roast

As you see, preparing this dish is easy, and you only need a handful of tools to get the job done. Now, you’re probably wondering about how to serve this ginormous beef roast. It’s all up to you, of course, but it would be a shame not to make some pulled meat sandwiches. Yes, I know that you usually prepare those with pork, but, hey, beef’s good too. So, here’s what to do in order to prepare some juicy pulled beef sandwiches from your roast.

Step 1. Get yourself a couple of bread slices.

Step 2. Put a metal plate over your firebox and drizzle it with some cold water. You can also add some veggie oil.

Step 3. Grill the slices on both sides. Don’t burn them, though.

Step 4. Put some of that gravy on each slice.

Step 5. Place your roast in a small tray and use two forks to pull the meat apart. Better you do this while the meat’s still hot.

Step 6.  Take some meat shreds and place on each bread slice. Add more gravy if you like. Now, if you fancy carrying around more veggies and ingredients, you can garnish the sandwich with onion rings and a piece of cedar cheese.

Well, campers, that’s about it for my 7-hour roast beef recipe. Hope you’ve enjoyed it as much as I did cooking it. Sorry for not posting any clips or anything, but there was hardly anything left to be shot after everyone dug in (beer will do that for you). Anyway, if you have any questions or think that the recipe can be improved in any way, don’t be a stranger and hit the comments section.

I know that most of you prefer a quick snack, but what if I told you that you could actually enjoy a meal fit for a king’s table while backpacking?

Ever wondered what it’s like to pull a Houdini in real life? I have; not because of some flight of fancy or whatever, but because it’s something that it may happen to you. I like overseas holiday trips just like the next persons, yet I’m not very comfortable with the idea of visiting a country labeled as ‘dangerous.’

Last year, my wife booked us a vacation to Caracas, Venezuela (said it was a dream of hers to visit Caracas). Anyway, for those of you who don’t know, this year, Venezuela’s capital got first place in the ‘most dangerous cities in the world’ top (120 homicides per 100,000 citizens). Yeah, you can very well imagine that I was on edge the whole time.

Now, from what I gathered, guerillas have this method of getting rid of ‘evidence’ by binding the victim’s hands and tossing the unfortunate soul in a deep body of water. Charming, isn’t it? Well, after doing a little bit of research, I stumbled across a former SEAL Navy instructor’s interview in which he explained how special forces prepare for capture and execution.

I won’t bother you with the details, but he did indeed broach a subject which, to my opinion, may prove to be invaluable in an SHTF situation: not drowning when your hands and feet are tied. Sounds very far-fetched; I know. Still, this is the extreme survival series, which means one thing: very low prob, but good to know.

So, without further ado, here’s how to survive a tied and drowning scenario.

Step 1. Consider the bigger picture

Say you were captured by some guys that want to use you as fish bait. Forget about what you’ve seen in the movies about cement shoes or Chicago overcoats – ain’t nobody got time for that! More than likely, your hands and feet will be tied with some sort of cordage (rope or zip ties).

According to the former SEAL instructor, the first thing you will need to do is to feign death by drowning -yes, acting is probably not your forte, but do keep in mind that your captors are packing a lot of firepower; emerge too soon, and you will probably wind up with a piece of hot lead between your eyes. So, the best thing to do would be to hold your breath for as long as you can.

There’s no guarantee that they will leave immediately after tossing in the water – it’s a gamble and, like it or not, your life is on the line. You should also consider the fact that your body can hit bottom in an awkward position.

Now, you should keep in mind that the biggest challenge, in this case, is panic. I know that it’s easier said than done, but be aware of the fact that is panicking leads to hyperventilation which, in turn, leads to getting more water in those lungs. So, keep calm, wait for the danger to pass, and then act!

Step 2. Getting a breath of fresh air

You may be able to hold your breath for a long time but, eventually, you’ll still need to grab some fresh O two. Here’s what you will need to do. First of all, make ensure that you’re in the right position (water surface on top and bottom on, well, the bottom, guess). You may need to do a couple of spins in order to reposition yourself. When you’re done, follow this sequence:

  1. Get all of the remaining air out of your lungs.
  2. Thrust to the bottom.
  3. When you reach the bottom, assume a crouch position.
  4. Push as hard as you can to get topside.
  5. Take a breath of fresh air before getting back underwater.

Bear in mind that you may need to repeat these steps at least a couple of times; the goal is to swim back to safety, not to stay underwater – talk about a no brainer!

Step 3. Keeping your head above water

Swimming is very easy – I mean, your body knows what needs to be done in order to stay above water. However, it may be trickier this time, considering that your hands and feet are tied. Indeed, it’s harder, but not impossible. Here’s what you will need to do in order to float:

  1. Use the above-mentioned steps to reach the water’s surface.
  2. Just before hitting the edge, bend your knees, while keeping your head in the water.
  3. Kick back and arch your back.
  4. Repeat the process to obtain buoyancy.

Step 4. Getting to shore

Now that you’ve mastered the flotation technique, it’s time to ‘swim’ back to safety. First of all, pop your head out of the water a couple of times to scout a safe patch of land. You should also make sure that there’s no one there. Otherwise, all your efforts would have been in vain. Once you’ve identified a safe spot, repeat the step 2 sequence to replenish your air supply. To travel back to shore, follow these steps:

  1. Assume the floating position (head below water, bend knees, and exhale).
  2. Kick backward and propel forward by straightening your back
  3. Repeat these steps to travel to safety.

Note: during your trip to the shore, you will need to stop a couple of times from getting more air. To do that without losing speed, when you’re at the top, flip over and inhale. After that, flip back to the initial position (head down). Repeat this a couple of times. This trick allows you to maintain travel speed while replenishing lost oxygen.

That’s about it on how to survive being tied and tossed to the bottom of the water. A little tidbit before I go: this method is part of a SEAL’s examination. As these units operate far behind enemy lines, the chances of capture are quite high. So, as part of their training, they are literally tied, gagged, and tossed in the water (talk about a rough school day!). What’re your thoughts on this? Hit the comments section and let me know.


Ever wondered what it’s like to pull a Houdini in real life? I have; not because of some flight of fancy or whatever, but because it’s something that it may

I know for a fact that no man has ever seen coconut oil being used for other stuff than scrubs, facial masks, and the occasional fancy dinner with an Asian twist. If I had been called to write an article a couple of years ago, I would have dismissed the task, arguing that I and beauty just don’t mix (keep thinking why my wife picked me in the first place; lost wager, I gather).

Anyway, since I turned to prep, I discovered that coconut oil could be used for tons of other stuff. And no, it’s no unmanly to go and stock up on this stuff.

Need more convincing? No problem there. Here are 13 ways to use coconut oil in those situations when your ass is on the line.

First-aid

Because coconut oil’s packed with nutrients and more good stuff, it can successfully be used to treat all sorts of medical emergencies. For instance, when applied to a limb with edema, it will reduce inflammation and enhance tissue regenerations. In its watered-down form, coconut oil can be used to deal with yeast infections and common viruses.

Moreover, since study has shown that oil extracted from coconut shell has a strong anti-protozoa effect, it can be employed to treat giardia, a parasite known to lurk in untreated waters. Fever? No problem. Just use a coconut oil extract, and you’re good to go. The same substance’s good against viral infections and various skin conditions produced by bacteria.

Get rid of that beard

Sure, there’s nothing manlier than a beard, but, man, that thing itches like Hell. Well, if you decide on getting rid of that beard and have no shaving cream on hand, you can always use a bit of coconut oil. Yes, yes, I know that it sounds like I’m giving you beauty advice or something, but the truth of the matter is that this stuff’s way better than regular cream.

Apart from the fact that it moisturizes your face, it makes the blade slide across your face like it was an Olympic skater. Best of all, you won’t cut yourself.

No more stuffy nose from allergies

Feel like your nose just doubled in size on account of your allergy? No problem. Take a big bowl, pour hot water, and add some coconut oil. Put a towel over your head and inhale. After a couple of minutes, you’ll feel like a newborn.

Foot care

Sore feet? Blisters? Wash the area thoroughly and apply a thin layer of coconut oil.

Repel nasty smells

If you ever run out of deodorant, you can always use a little bit of coco oil. Rub a little bit under your armpits, and you’re good to go. Since it has a great anti-microbial effect, it will effectively kill all bacteria that produce that foul smell. Just don’t coconut oil instead of showers.

Give those gums a good massage

Commercial toothpaste can easily be replaced with a homemade concoction made of equal parts coconut oil and baking soda. Might not taste that good, but at least it gets the job done.

For when the tummy starts growling

I really don’t care that much about carrying veggie oil or butter during hiking. Still, as the beast has to be fed, a stove-cooked meal would be just the thing to put the twinkle back in those peepers. So, if you don’t want to burden yourself with oil or a loaf of butter, grab a small can of coconut oil. Yes, I know exactly how it sounds, but coco oil is an excellent substitute for the regular variety.

Get the juices going

Ever felt like you’re about to fall off your feet but you can’t because you still have tons of shit to do? Well, you can now rest easily because I have just the thing you need to replenish that lost energy: coconut oil. Take a teaspoon of this stuff on an empty stomach, and you’ll have enough juju to move mountains (don’t know about splitting the sea in half, though).

For when Nature doesn’t come calling

Constipation’s perhaps the nastiest thing that could happen to you. Sure, there is other bad stuff out there, but believe me, there’s nothing worse than feeling that you’re more stuffed than a pinata. So, in order to get rid of constipation, just take two teaspoons of coconut oil. Since it’s packed with fibers, it will help your tummy eliminate that nasty stuff in no time.

Use as lubricant

No, not that kind of lubricant, but hey I’m not judging. If you have to deal with bolts that won’t budge or with stuck machine parts, just use a little bit of coconut oil. Of course, this is pricier compared to WD40 or Vaseline but helps if you don’t have anything else.

Waterproofing hiking gear

Thinking about wasting some more money on expensive waterproofing solutions? You may not need to. If you have a box of coconut oil lying around the house, use a little bit to waterproof your boots and coats. Works wonders on hiking boots, by the way.

Clean your eating utensils

Water’s a precious resource, no matter if you’re in the woods or the big city. So, if you’re in a situation where you have to use clean water for other purposes, know that you can use coconut oil to clean your eating utensils. And yes, it’s way better than water and dish detergent.

No more rust!

Think that vinegar’s the only thing that knows how to deal with rust? Then you haven’t seen coconut oil in action. Now, if you have stuff covered in rust, rub a little bit of coconut oil and let it sit for an hour or so. After that, rinse with plenty of water, dry with a paper towel, and you’re good to go.

Well, that about covers my favorite bushcraft uses of coconut oil. What’s your take on this? Don’t be a stranger and hit the comments section.

I know for a fact that no man has ever seen coconut oil being used for other stuff than scrubs, facial masks, and the occasional fancy dinner with an Asian