HomePosts Tagged "Survival" (Page 5)

Your EDC gear that you carry daily can be used in millions of ways. It could be something as trivial as having a light to shine into a dark room for greater visibility or as serious as a weapon to defend your life or the lives of others. We carry and advocate EDC (Every Day Carry) to place tools on your body or within ready access that can make whatever situation you are faced with easier, safer or more survivable.

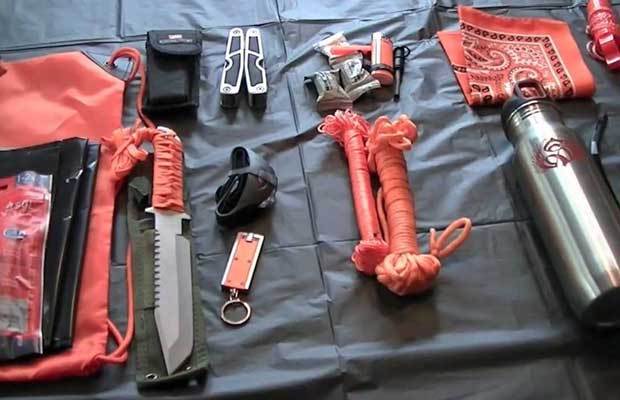
Some of the items I carry on my person (practically) everywhere I go are my concealed carry weapon, a folding knife, multi-tool, flashlight and bandana. Naturally, I have the more common items like a cell phone and a watch, usually some paracord and a Nalgene bottle of water in my bag but I don’t carry much more than that. This allows me what I consider are the basics that can be used in situations to provide me with an advantage.

For additional capacity I have my Get Home Bag or Bug Out Bag in my vehicle that has pretty much anything I would need in all but the most dire circumstances to live for 72 hours or more. I don’t have that on my person, but it is in my vehicle so when I am venturing away from home, those additional supplies are with me as well.

But there are supplies and gear I can expect to use that fall outside of the ideal mission for a Bug Out Bag. I don’t really want to raid that bag anytime I need something because I will then have to remember to put it back. Additionally, I don’t want to overload my bug out bag with gear I might not be able to use effectively in a bug out scenario. I don’t want unnecessary weight that could slow me down. Enter the vehicle EDC gear concept.

What is vehicle EDC gear?

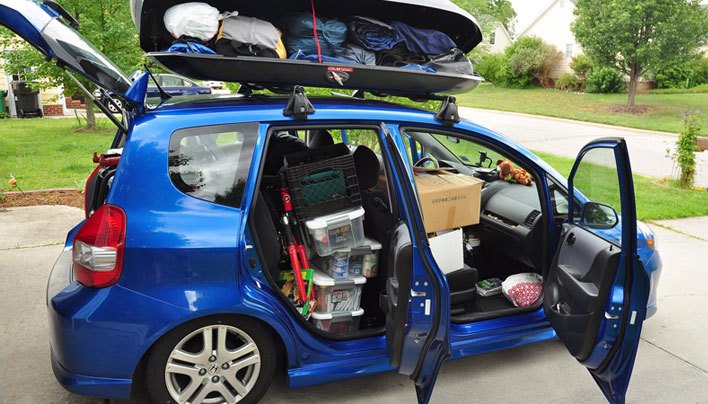
Your vehicle EDC gear are supplies that can easily be stored in your vehicle that can give you advantages in situations where survival or simple convenience require them. Just like with my personal EDC gear that I have on my person, I might not use any of my vehicle EDC gear on a day-to-day basis. I might not use it for months or years, but it is there if I need it.

Your vehicle EDC gear extends your regular EDC gear but it doesn’t take the place of your Bug Out Bag.

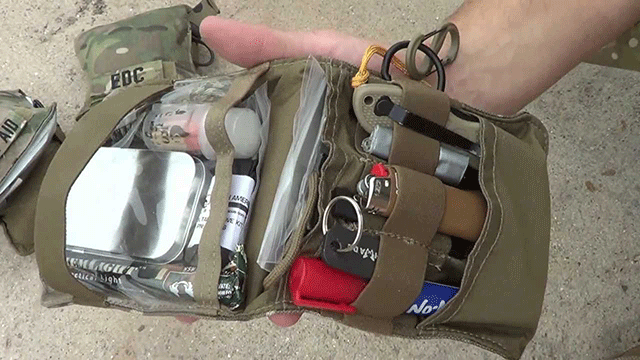
Some of your vehicle EDC items can be stored in smaller pouches like this one.

Important factors to consider when choosing your vehicle EDC gear list?

Every person is different. We have different vehicles, different resources, and different commutes, live in different climates and have different priorities and concerns. The items I am listing for my vehicle EDC are ones that I have chosen based upon what I can see myself possibly needing on any day where I live and commute daily. My list isn’t set in stone and has and will evolve over time. Your list might look different and that is perfectly fine. This exercise is simply looking at what items could augment your daily carry EDC and make life a little better if you encounter an emergency.

The amount of time you spend in your vehicle, the work you do, the vehicle’s mechanical condition and what you may be able to fix, if needed all play into consideration for this list.

What vehicle EDC gear should you consider?

So with all of that out-of-the-way and without needing a tractor-trailer to haul everything, what are some ideas for vehicle EDC gear that could help you?

Water

We never used to carry water in any of our vehicles until I got into Prepping. It wasn’t long after that my wife decided that she didn’t like the thought of being stranded in the car with small children in the heat of the summer. Water is possibly the easiest thing you can do to affect your survival situation no matter what you are faced with. You can either buy a case of water and keep it in the trunk or fill up some stainless steel water bottles and store them. The stainless steel will prevent the plastic leaching into the water when it gets really hot, but don’t forget about them when the temperatures drop down to freezing. I lost a perfectly good SIGG water bottle this past winter due to that and some of my gear had mildew damage for sitting in water for I don’t know how long.

Food

Not everyone carries a set of jumper cables anymore. Would you have some in an emergency?

This one might be up for debate. I know some people will say you should always have some spare food in your vehicle, but choosing the type of food is a little trickier because again you have to worry about it spoiling in the heat. Even if that isn’t an issue, you have to prepare it unless you buy something that requires no cooking. I have two mainstay emergency rations in my bug out bag, but I don’t have any spare food in my car. Would this be completely different if I was on a cross-country trip or commuted more than 10 miles to work? Yes, but as it stands right now I don’t.

Vehicle Maintenance/Misc.

Some of the items don’t apply to all vehicles and to all people. If you have zero mechanical skills for instance, there really isn’t any value in putting tools in your car is there? One could argue that maybe you should learn how to fix vehicles and I can see some value in that, but for me if my car broke down and I couldn’t see something very simple I could fix, I would start walking if there weren’t any other options. I wouldn’t be pulling the engine apart trying to see if I could fix some broken part with duct tape.

  • Jumper Cables – This should be a no-brainer. My kids have run the battery down in our car while my wife was inside shopping. She wasn’t in there long, but it doesn’t take long running the fan in the summer, lights on and radio blaring to kill a battery. She had to call me because she didn’t have any jumper cables. It would have taken all of two minutes to get her back on the road, but because nobody around her had any, or was offering to help she was temporarily stranded. Needless to say, she had jumper cables that night.
  • Duct Tape – Getting back to my point above, I don’t expect anyone is going to be fixing a flat tire or mending a broken axle with strong duct tape, but that stuff sure does come in handy. You probably don’t need an entire roll either, just wrap some around your water bottle for emergencies.
  • Fluids (as necessary) – Again, this is vehicle dependent. I don’t carry any fluids because my vehicle doesn’t go through fluids that I should worry about it. Some people have older vehicles that needed the occasional topping off of oil or coolant. If that is you, plan accordingly.
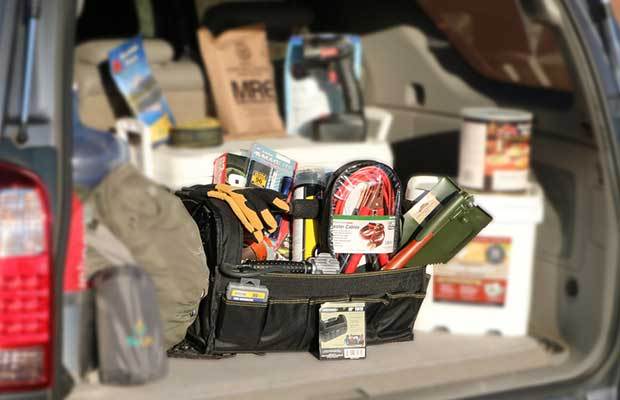
  • Flat Tire Tools – The simplest option is a good old can of fix a flat although sometimes that can cause more havoc when you take your tire into the shop and they refuse to fix the Tire Pressure sensor. The jack and wrench that come with your car are the bare essentials. They will get the job done, but not as easily as a beefier jack and lug wrench. Make sure the spare is full when you top off the other tires too. You don’t want to get a flat tire only to find out your spare is empty.
  • Spare Gloves – A good pair of mechanix gloves or even simple leather work gloves will come in handy if you have to get your hands dirty. It is much easier to put on a set of gloves than to get grease off your hands.
  • Tarp – Another multi-use item. A tarp can provide protection from rain. You can lay on it instead of muddy or frozen ground if you have to get under the car or it can protect the inside of your car from getting dirty.
  • Gas Can (empty) – Again, this is one that I don’t personally have only because I am pretty much always filling up when my tank gets to half-full. I could regret this one day, but for me it isn’t needed at this time. If you do get one of the newer style (which are practically worthless, thank you California) be sure to get a Gas spout and modify the can so it actually pours.
  • Basic Tools – Back to the initial point. Tools are great if you know what you are doing. If you can’t find the hood release, or recognize the big parts under the hood, this probably won’t do you any good.
  • Demolition Hammer – This might be a luxury item but if you ever need to beat the ever-loving crap out of something or just hammer some tent pegs in, a big hammer will come in handy. Doesn’t take up too much space either.

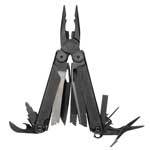
A good multi tool has hundreds of uses.

Survival/Safety

  • Multi-tool – The multi-tool goes in the duct tape category. Actually, for most people, this might be the only tool that you need. No, it won’t allow you to remove the water pump, but it can take on a myriad of smaller tasks.
  • Spare Magazines – No, I don’t mean People Magazine or the latest Oprah. In addition to my concealed carry weapon, I have a weapon in my car. It is my EDC backup. Usually, there are a few more on long trips, but I always have spare magazines for each weapon ready to go.
  • Seat Belt Cutter/Glass punch – The likelihood that you are going to be involved in an accident that requires you to cut your seat belt or shatter your window to escape is remote, but having something like the resqme car escape tool is cheap and provides some extra peace of mind.
  • Rope – I have some general use Polly rope if I ever need to tie something down to the roof rack. Paracord is a suitable alternative too and takes up a lot less room.

First Aid

Most of the time you will need a first aid kit in your car it is going to be for either headaches or minor boo-boos. You likely won’t need the Elite First Aid fully stocked medic bag unless you drive up to a war zone or horrific accident and have the skills and training to know what to do. However, a good first aid kit gives me peace of mind. I don’t plan on surgery, but I do have some celox quick clot, some blood stoppers along with my own IFAK. If nothing else, I can help stop bleeding if I need to until help arrives. Then I’ll pop some aspirin and go back to my car.

A good handheld ham radio will work in disaster scenarios to communicate when traditional methods are out.

Communication/Navigation

Getting lost is half the journey, right? Well, if you have all the time in the world to kill and plenty of gas, maybe that sounds nice but I usually don’t go for joy rides. Have you ever been given the wrong directions on your GPS? We have. I have had Google Maps tell me to get off the highway at one exit, drive back to the previous exit and turn around again. Yes, like an idiot I followed it. GPS might cease to work, or due to some other reason, you can’t use it. I like to have backups.

  • Road Atlas – Rand McNally has simple and low-cost maps that you should have in your car. Throw it in the trunk for emergencies.
  • State Atlas – I also have a state atlas for my state that will help me get out of my neighborhood (figuratively speaking here) if the roads are blocked and I need alternate routes.
  • Cell Phone Charge cord – You should have a spare cell phone charger in your car at all times. These are usually less than $20, plug into a USB to cigarette lighter adapter and can keep your phone going.
  • Ham Radio w/Battery Charger – I have one of my Baofeng handheld radios in my car in case all else fails. This also has FM frequencies on it if I need to listen to local news/radio.

General Purpose

  • Pen/Pad
  • LED Flashlight
  • Headlamp – Superior to a flashlight in a lot of cases due to the hands free nature.
  • Light Stick
  • Spare Batteries
  • Lighter
  • Toilet Paper
  • Shop Towels
  • Trash bags

Weather Dependent

The weather where you live greatly affects this list so I am not going to get too specific. I think people who live in colder climates already know the importance of keeping some supplies just in case.

  • Cold Weather
    • Tire Chains – or all-weather tires
    • Wool Blanket –I like a wool blanket better than the space blankets although it is more expensive and takes up more space.
    • Tow Strap – I now have a 4X4 so I have a tow strap just in case I can pull someone out who has fallen into a ditch. Again, this doesn’t make sense for all vehicles.
    • Proper footwear
  • Hot Weather
    • More water, electrolyte solution
    • Hats to block sun

What to store your vehicle EDC gear in?

Now, what do you store all of this EDC gear in? If you are building your kit out I would suggest you compile everything first and then choose a suitable container or containers for holding this gear. Some gear makes sense to be kept with similar associated gear and the potential for use might dictate where you place it. For instance, you might have food and any cooking supplies in one container. The vehicle you have will obviously dictate where some of this goes. The general purpose items could go in a glove-box, center console or a molle visor attachment.

I have different gear spread over the vehicle, but the majority sits nicely in a plastic tote from Rubbermaid. It’s there if I ever need it and I am not surprised at how often my vehicle EDC gear has come in handy. Maybe some of these items could help you out.

Your turn! What do you keep in your car that I missed?

Your EDC gear that you carry daily can be used in millions of ways. It could be something as trivial as having a light to shine into a dark room

It’s happening now. This is a real SHTF event. Major disaster has hit, power is out, everyone is panicking, grocery stores are being raided and emptied within hours, and cars are grid-locked trying to make their way to safety, anywhere. No one knows where that is.

As Preppers, we have already prepared for this eventuality. We already have our emergency supplies packed, it’s likely we have a plan in place as to where we are heading. And we’re long gone before the panic has set in. However, it’s all very well having your bug out bag ready, learning survival skills such as how to catch your own food, how to filter water, and how to start a fire, but if you don’t have a shelter; you’re missing the most important survival item you need.

If you spend any reasonable amount of time in the outdoors, you’ve probably heard of the ‘Survival Rule of 3’. You can survive:

  • 3 minutes without oxygen or in icy water
  • 3 hours without shelter in extreme environments
  • 3 days without water
  • 3 weeks without food

These four rules rely on the previous one being satisfied. So for example, you can only survive 3 hours without shelter if you’re not in icy water, you can only survive 3 days without water if you have shelter from a harsh environment and so on. Therefore, next to being able to breathe oxygen, shelter is the next most important element of survival if you find yourself in extreme weather conditions.

It’s likely that most Preppers will know how to make temporary shelter using materials you can find on the forest floor, but what about if the disaster or crisis descends into total chaos and it’s TEOTWAWKI? (The end of the world as we know it). Would you know how to make a more permanent structure for you and your family to live in? If you’re lucky, you might come across an old underground bunker, but you’ve not left anything else to chance in your methodical planning, so why leave this to chance?

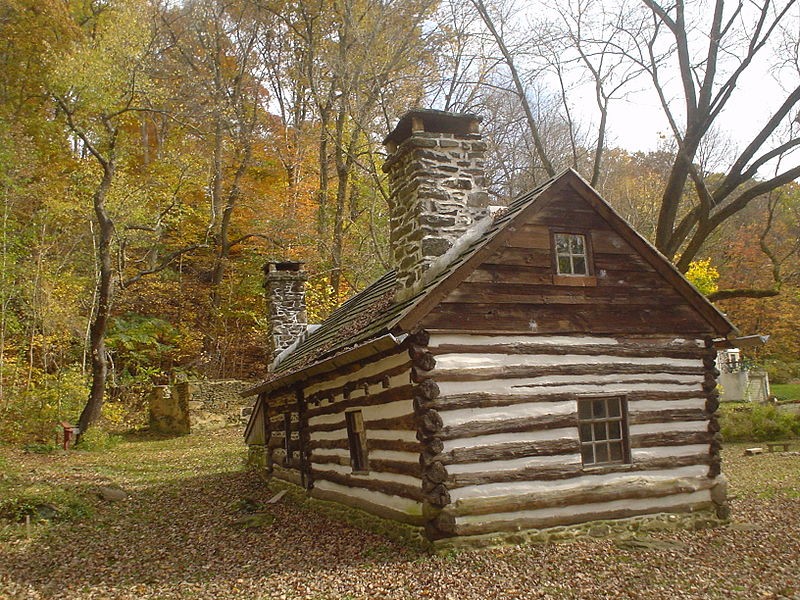
You need to know how to build your own survival cabin. Let’s face it, when SHTF most of us are bugging out to the forest. There is good reason for that. In the forest you’ll find one of the most valuable resources that you need to build a long term shelter: wood. This type of survival shelter is going to require time and effort, so it’s important that you learn the basics right now rather than learn through trial and error and the time and waste resources.

First, let’s look at what you will need to make your survival shelter. Ideally, you don’t want to be carrying a ton of tools around with you, so we’ll focus on building a shelter that only requires you to have minimal basic tools that you’ll probably already have packed: an axe, a fixed blade knife and a multi-tool. Let’s not beat around the bush, if you were going to build the same shelter at your own leisure, you could make the process a lot quicker using a whole host of other tools, but this isn’t about speed, this is about building a shelter to keep you safe.

First things first, you’ll want to choose a log cabin plan. You’ll most likely want to build a square or rectangular cabin, around 14×14 foot. We’re going to use that as our example throughout this set of instructions. There are five main steps to building a survival shelter; choosing your site, selecting your logs, laying the logs, openings for windows and doors, and finally, raising the roof. Step one, and to some extent, step two are something you should go and research now. Step three through five, you’ll need to have written down so you don’t make any mistakes when it comes to the build.

Step One: Choose your Site

Get to know the site you intend to escape to now. How far away is it, how long will it take to get there, how will you get there? Choose somewhere you can get to either by foot, or with one tank of gas. Once you’ve found a few places that you can reach without too much difficulty, you’ll also need to make sure it is far away enough from main roads and cities. You don’t want to set up a shelter in plain sight for anyone to come and make their own.

Where are the nearest places for natural materials? You’ll need somewhere close-by to a water supply, plenty of trees to use both for your shelter and for firewood, somewhere that has an abundance of animals that you can trap. Ideally, you’ll also need some softer materials to create somewhere to sleep, initially grass will do.

You’ll also want to consider the temperature year round. If the area you’re settling is made up of hills and valleys, you’ll find both the top and the bottom gets cold quickly. It’s windy at the top, and the valleys trap the cold air. Settle around 3/4 up a hill if you do find yourself in this position.

Scout the area for poisonous plants; don’t set up a permanent shelter if there are any in the immediate vicinity. What are the trees like surrounding your proposed site? You’ll need some for protection, but you should make sure they’re not dead or they might fall down onto your shelter.

One last thing to think about is the natural elements. How will the rain fall and collect, is the land flat? Where does the sun rise and set, make the most of this to heat your shelter if you’re in a cold climate, or ensure you have shade if you’re in a hot climate.

Step Two: Selecting your Logs & Preparing the Site

The majority of trees are suitable for building a survival shelter. Even though hardwoods such as walnut, poplar or oak will give you a more durable build, they are harder to work with. Instead, choose Pine, Cedar or Spruce. If you don’t have an option – just build with whatever trees are growing in your area.

The trees you choose should be long enough to create the length of your shelter, or double if they’re large enough to get two lengths out of each tree. They will need to be around 10 inches in diameter, to provide you with sufficient insulation. The trees also need to be as straight as possible.

For a survival shelter of 14×14 feet, you’ll need logs that are 16 feet in length. The extra one foot either side of the log allows them to be notched together and provide an overhang to give a sturdy and solid join.
Note: If your logs are 10 inches in diameter, to create a 9 feet high shelter, you will need 11 x 16 ft logs for each side, and a further 10-15 logs to create two gable walls. You should put aside the best 7 logs, to use as the sill logs and the purlin and rafter logs.

Sill Logs: Four logs that will form the base of your shelter

Purlin Logs: Two logs that will join the gable walls and provide a surface to attach your roof

Ridge Log: One log which sits at the top, and joints the two gable walls.

To fell the trees, use your axe to cut them in the direction that they are naturally leaning. Briefly, the best way to fell trees is to make a horizontal cut 1/3 of the way into the tree just above knee height. Next, make a 45 degree cut upwards to meet the end of the first cut. Then, make a cut on the opposite side, around 2 inches above the first cut. The tree should then start falling. Once you have all your logs, cut off all the branches, and debark them using your axe or knife at a 30 degree angle.

Usually when building a log cabin shelter, you’ll want to lay foundations however it’s unlikely you’ll have access to all the heavy machinery and concrete in TEOTWAWKI scenario. Therefore, to prepare your site will be simple. You should clear any debris and leaves away, and level the ground as much as you can. You will need some form of foundation, so without access to concrete, you should do this: bury four upright logs into the ground, leaving around 3-4 inches sticking out of the ground. You will use these as posts to put your sill logs on.

Step Three: Raising the Walls

The first step in raising you walls is to put your four sill logs into place. These logs should be the four that are largest in diameter, straightest and longest. First, you need to take two of them. Use your axe to create a notch (hole) at either end of two sill logs.

To create this type of ‘reverse-saddle-notch’, put your log into the place it will eventually sit (on top of two of the horizontal posts that are buried into the group). Take your knife and mark where the log is going to sit. Using your axe, make a V shape in the underneath side of the log until the notch is large enough to create a snug fit around the horizontal post. Do this at both ends of two sill logs.

Take your other two sill logs, and notch the underside of them to fit onto the top of the two sill logs you’ve already laid. You will now have the perimeter of your log cabin. The rest of the process is simple, but time consuming. This could take you a couple of weeks depending on how much help you have. You are going to continue notching the underside of each log and stacking the walls until you have the height that you want before you start creating the pitched roof.

Step Four: Windows and Doors

To create the openings for your doors and windows, you can use your axe to create a hole. When you reach the height that you want your window or door at, start cutting and removing the logs one by one to make space for a door.

There are lots of tutorials about how to make doors and windows available. Just make sure that you have thought this through, so you’re not left with large open gaps which can get very drafty and will defeat the point of having shelter unless you’re able to cover them effectively.

One such way to make doors is to keep hold of some of the thicker branches when you fell your logs, and use rope or other natural resources such as fibrous plants to tie them together. You might also want to do this for the windows so that you can replace them during the night/when the weather is cooler.

Keep openings to an absolute minimum.

Step Five: Raising the Roof

The shelter is now almost finished, but this is definitely the heaviest and hardest stages of the entire build. You’ll need some good brute strength here. You’re now going to create to triangles on two opposite walls; these will form your gable walls. Continue building the logs up, gradually getting short in length using the same notching method. When you are half way up, you need to take the two purlin logs and notch them so that they connect the two gable walls, one either side of the triangular shape you’re creating.

Carry on building the two gable walls until you reach the tip of the triangle, and then use the large ridge log to connect the gable walls. This can be extremely heavy work depending on the size of the logs, and how much help you have.

Once your ridge log is in place, use some smaller diameter logs to lay over the ridge logs, purlin logs, and the top of the walls, onto which you can attach roof rafters. You might want to use branches, leaves and mulch to create your roof’s finish.

You Survival Shelter

And there you have it – a long lasting survival shelter than will keep you safe, warm and dry. The instances in which you might need to build a structure of this quality and stability are rare, but as mentioned earlier, rather plan for all eventualities, than end up in a situation of needing a permanent structure and not knowing how to create one.
The beauty of this structure is that trees are available in almost every area of the world, they are one of the most reliable building resources and so if you learn this simple technique, you’ll be able to build yourself a shelter wherever you are.

As Preppers, we have already prepared for this eventuality. We already have our emergency supplies packed, it’s likely we have a plan in place as to where we

As the proud owner of two small cats, I can admit that sometimes I just can’t keep up with their potty habits. Sometimes they’re worse than kids; spreading those silica pebbles all over the bathroom or bringing them to bed when it’s nap time. Anyway, in buying so many sacks of cat litter, a thought occurred to me – what if I can use this stuff for other purposes than, well, kitty litter?

Of course, this sort of thing called for some extra time spent online searching for non-cat uses of kitty litter. Well, after a very though peer review (cats were pleased with the results of my searches), I pieced together this small list of ways to repurpose kitty litter.

Yes, I know that most of you have heard that cat litter can be used to defog car windows or to gain extra traction during the winter, but there are other ways to use this stuff.

Now, without further ado, here are some ingenious ways to use kitty potty pebbles during an SHTF situation.

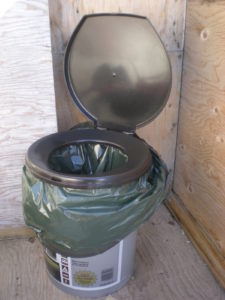
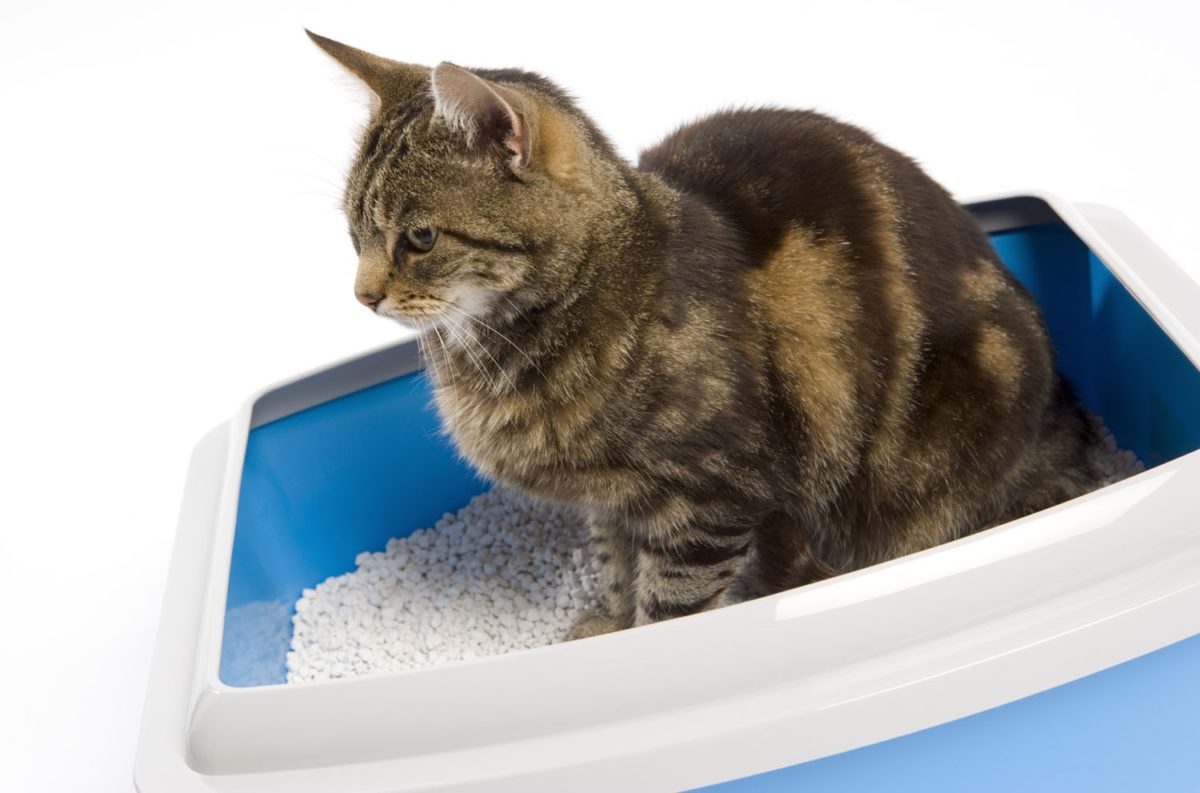
  1. Dump some of that stuff in a portable emergency potty

Since kitty litter is made to draw out moisture, it makes for an excellent smell and liquid buster for your portable toilet. The idea of having to go number two in a bucket or whatever may be unnerving, but you won’t have much choice during an emergency.

Want to hear one more reason why you should add kitty litter to your portable toilet? Because you won’t have the time or disposition to empty it after each use. So, do yourself a favor and put some of this stuff inside your mobile potty before nature takes its course.

  1. Making your driveway slip-free

You know how people end up in the ER when the frost sets in? Slipping on the driveways after getting out of the car. You can either use regular rock salt to deal with the ice, but that stuff eats through concrete like acid, or you can opt for an environmental- and driveway-friendly solution which is kitty litter.

Sure, it won’t do much about the ice, but at least you’ll have enough traction to stay upright until you get inside the house. You should also sprinkle some kitty litter under your doormat – yup, that thing can also become very slippery during the winter.

  1. Putting the kibosh on them moles

Prepper loves veggies, mole loves veggies, but prepper does not like a mole – that’s how it is; a true Shakespearian forbidden love affair which ends in the above-mentioned person finding all kinds of non-soil-friendly ways to get rid of the blind Romeo.


Anyway, if you don’t want to end up poisoning the ground, sprinkle a little bit of cat litter around your plants. For some reason, moles abhor cat litter and will stay away from your garden. From where I stand, it’s a win-win situation: no one gets hurt, the soil remains healthy, and plants will grow unhindered.

  1. Nips grease fires in the bud

Whether you’re cooking outside or inside, grease fires are a very real and very scary possibility. Even worse is that you can’t do shit with water. Now, if you forget to check your fire extinguisher, leave it where it is. Grab a handful of kitty litter and toss it over the fire.

Since the silica pebbles are designed to draw out moisture from, well, anything, they’ll blanch that grease spot faster than you can say “preparedness.”  You should also consider keeping a small bag of kitty litter in your BBQ’s firebox if you’re planning on cooking grease-laden foods.

  1. No more rancid smells around the house

Kitty litter is great at reducing foul smells around the house. If there’s a stink in the fridge, put some of this stuff on a small plate and place it inside the fridge.

Now, if the kitty litter doesn’t help with the bad smell, try this trick – in a small bowl, combine one tablespoon of diatomaceous earth, one tablespoon of fine rock salt, and one tablespoon of baking soda. You can also add a splash of apple cider vinegar if you like. Stick the bowl in the fridge, and I guarantee you that by morning, the inside will smell as if the fridge just came out the production line.

  1. No more rodents lurking around your food pantry

Before I got around to redoing the pantry where I keep my emergency food and water stockpile, rats and mice were a big issue. Sometimes I had to throw entire packs of trail mix or whatever because they were literally covered in rat bites and feces. Plugging every hole that you can find is indeed a good fix, but a costly one.

After doing a little bit of research, I’ve discovered that moles aren’t the only pests that detest the sight and smell of cat litter. Apparently, even rats and mice flee in terror at the sight of these pebbles (probably because they know that a cat may be hanging around).

Anyway, doesn’t matter if you own a cat or not, should you find yourself up to the neck in rodents, scatter some kitty litter around the area where you saw bites or feces. They won’t trouble you any longer after this.

  1. Plant care

Since I’ve always like fooling around the garden, knowing how much moisture plants need was kind of an issue for me. There was this one time I ended drowning my wife’s cabbage patch because I used the power hose to water them. If you’re just like me when it comes to gardening, you can use kitty litter to balance the water levels.

Since this stuff absorbs extra moisture, you need not worry about giving too much water to plant – it will draw out the exact amount it needs. The rest will be absorbed by the kitty litter (would be best to use silica pebbles, because they have a higher absorption rate).

That’s it for my 7 funky and fun ways to use kitty litter in an SHTF situation. What are your thoughts? Hit the comment section and let me know.

As the proud owner of two small cats, I can admit that sometimes I just can’t keep up with their potty habits. Sometimes they’re worse than kids; spreading those silica

Survival food is everywhere. Question is, just like everything else in our lives, should we take it for granted?

Food: it seems to be the one constant in prepping. We start out buying food and many of us are still buying food, long after we think we’ve got all our other preps in place. No matter how much food we have in our stockpiles, we never really think we have enough. So, instead of calling it “done”, we just add another month’s worth.

There’s nothing wrong with stockpiling all that food. None of us know what sort of disaster we’re going to be faced with, and if we’re ever faced with a true TEOTWAWKI event, then we’ll need all the food we can get. In fact, we’ll all be wishing we had more.

But what’s it going to be like when we open up those buckets and find the food contained inside? Are we going to be pleased with what we have or are we going to feel like something is lacking? What’s it going to taste like and what sort of nutrition are we going to get from that survival food? Will it truly be enough to survive on?


Of course, a lot is going to depend on what we have stored in those buckets and who packed them. You might actually be more content with your own survival food, than with buying the prepackaged buckets.

While the prepackaged food may be made up by “professionals”, we really don’t know the criteria they were using when they developed those survival meals. Taste seems to get a lot of attention when people talk about survival meals, but isn’t nutrition actually more important?

Let me deal with taste to start with, as that’s actually the easier subject. I’ve eaten a number of different survival meals, from a number of different companies. I’ve also eaten military MREs, which is the real basis for the types of food that we’re talking about.

Based upon that, I’d say they are all edible and some are even rather tasty, if you like the Rice-a-Roni or Skillet Helper type of flavor. The main seasoning used in the majority of these foods is salt, like much of the food we eat every day. As salt is necessary for survival, that’s probably rather good, although I will have to say that the amount of salt that they use is probably a bit high, as with most of the prepared food we eat.

Calories in that Survival Food

We’ve all been taught to think in terms of a 2,000 to 2,500 calorie per day diet. That’s actually more than we need, especially if we live a sedentary lifestyle. On the other hand, if we live an active lifestyle, that probably isn’t enough. Soldiers in combat are fed 4,500 to 5,500 calories a day, whether eating in a mess hall or eating MREs, to ensure they have plenty of energy to fight.

You’ll receive different information from different sources, but by and large, the average person needs 1,200 calories per day to survive. Men need more than women, due to being larger with a larger muscle mass. Of course, that doesn’t take into account activity; but rather, is just based on what is needed to survive. As activity increases, the energy the body needs has to come from somewhere, either from food being eaten or energy stored in the body’s fat cells.

When you open your survival rations, you’ll find that they base everything on servings. If you buy a 30 day package for one person, that usually means 90 servings (30 days x 3 servings per day). Now, here’s the thing; in the case of many of those prepackaged survival meals, those three servings per day work out to only 1,000 to 1,200 calories, although there are some which contain 2,000 calories per day.

In other words, no matter how good your buckets of pre-packaged survival rations taste, they are most likely going to end up leaving you hungry. You will probably not be eating enough to sustain your body weight and most likely will not have a whole lot of energy for strenuous physical activity.

Nutrition in that Survival Food

If you spend any time talking to a nutritionist, or even reading what they say, you’ll find that they spend a lot of time talking about micronutrients. Listening to them, it sounds like all we need to eat is Omega 3 fatty acids and anti-oxidants to survive.

In reality, micronutrients won’t keep you alive all by themselves. The nutrients which talk about them are already assuming that you are getting enough of the macronutrients your body needs, probably more than enough. If you are already getting enough macronutrients, then the idea behind supplementing those micronutrients is to improve your health.


That’s all well and good; but in the case of survival, we really need to focus on the macronutrients, not the micronutrients. There’s really no value in being the healthiest corpse in the graveyard.

There are three macronutrients. They are:

  • Carbohydrates – These come from grains and should make up 50 – 60% of a survival diet. Carbohydrates are your body’s biggest source of energy.
  • Fats – This includes both plant and animal fats and should make up about 30% of a survival diet. Fats break down slower than carbohydrates, providing a “second wind” of fuel to your body when the energy from the carbohydrates runs out.
  • Proteins – We’re talking animal proteins here, although some can be garnered from plants, Proteins are essential so that your body doesn’t turn on itself and cannibalize muscle tissue to get them. You need about 10 – 15% of your diet to be animal proteins in a survival diet.

In reality, the one thing that most “survival foods” are really good at providing is carbohydrates. While they provide fats or proteins, they don’t provide enough. Not only that, but the protein they provide is “textured vegetable protein” or in other words, flavored soy curds. While you can survive on them, they aren’t an ideally balanced survival diet.

Micronutrients are all but non-existent in these survival foods. That’s okay for a short-term survival situation (under 30 days), but if you continue eating this sort of diet for a prolonged period of time, your body will not receive all the nutrients it needs and will become susceptible to disease.

In order to use those buckets as your main source of nutrition, you really need to augment the food that is in them with other fats and proteins, as well as fruits and vegetables to provide the micronutrients your body needs. Of course, if you are growing an extensive vegetable garden and using it to supplement your survival food, you’ll be doing a lot to provide the micronutrients your body needs.

How will the Survival Food Affect You?

If you try to live only on survival food, you will find it affecting you quite a bit. Of course, a lot will depend on the actual survival food that you are eating, how many calories it provides, how much physical activity you undertake and what your health is like before the disaster strikes. Nevertheless, there are some conclusions we can generalize on:

#1. You will most likely lose weight. Not only will you be eating less calories than you are accustomed to, but you will also be doing more physical work than you normally do.

#2. You will find yourself weakening. The food in survival buckets is intended to help you survive; it is not guaranteed to keep you in top form. So you will find that you will become weaker over time.

#3. You may find that you don’t think as clearly. One of the things a poor diet affects is the higher brain functions.

#4. You will be more susceptible to disease. Without a fully-balanced diet, your body will not have the defenses it needs to fight off disease. I’m not talking so much about infection here, as I am about diseases where the organs of the body are not able to function fully.

#5. You will probably have digestive problems, due to a lack of sufficient fiber in your diet.

I would recommend that you augment that food with other food stocks, more specifically: jerky or other dried meats, canned meats, nuts, peanut butter, canned vegetables, canned fruits, dried fruits and vitamins.


Other self-sufficiency and preparedness solutions recommended for you:

The vital self-sufficiency lessons our great grand-fathers left us

Knowledge to survive any medical crisis situation

Liberal’s hidden agenda: more than just your guns

Build yourself the only unlimited water source you’ll ever need

4 Important Forgotten Skills used by our Ancestors that can help you in any crisis

Secure your privacy in just 10 simple steps

Survival food is everywhere. Question is, just like everything else in our lives, should we take it for granted?

What if the SHTF when you are away from your home? What if you are on the big family vacation down at the Grand Canyon and the global economy finally tanks like a drunken toddler going down the stairs on roller-skates? You could be hundreds, maybe thousands of miles away from your home, your supplies and everything you have been preparing for. All of your careful planning, saving and prioritizing would be wasted if you couldn’t get back home to the comparative safety of your home or retreat.

This is something I think about whenever I have to travel out-of-town so I have developed a couple of processes to help me if my main priority is getting back home. The steps I take are different and my plans need to be adjusted depending on how I am traveling and who I am traveling with. Naturally, the distance and duration of my travel has an impact on my plans as well.

Distance

If I have to travel less than 500 miles away from home, I try to drive. Why drive 500 miles when you can simply hop on a plane you ask? For several reasons, I dislike flying. No, let me say I hate flying with a blind passion.

When you fly anywhere now, unless you are going from one major city to another major city you will most likely be on multiple flights. The airlines do this so they can combine travelers on bigger jets but it makes a simple trip for the average person a pain in the rump. If you have one of these multiple hop nightmares, you could face delays on one leg that make you late for your connecting flight. There are few things more infuriating than running with your luggage across a crowded airport only to arrive at your next gate and watch the plane you were supposed to be on slowly pulling away. No, they won’t come back for you either. Add to this security delays, which mean you need to get to the airport earlier, parking, shuttles, luggage hassles, not to mention the ultimate insult as they grope you and your family.

I do still fly, but with certain considerations and it isn’t my first choice. If you are flying, you have much less you can do in the way of taking major preparations with you. Less than 500 miles I like to drive because my trip starts the minute I leave my driveway. I can also take firearms, extra food and water and other items I may need if I have to get back home. You can still carry firearms on a plane, but in a car, there is almost zero hassle.

Alone or With Companions

If I am traveling alone, I definitely carry fewer items in my survival kit. Actually, I don’t take a true survival kit that you would recognize. I always have my EDC which consists of knife, multi-tool, handkerchief, water etc. I also carry concealed if the state I am traveling to honors my permit. I don’t worry about carrying too much extra food, because I am not as concerned with feeding myself as I would be if I had a hungry wife and kids with me.

Read more: Knowledge to survive any medical crisis situation

If I am traveling with my family, I bring much more because I have more people to consider. Hunger, at a minimum, can seriously harm morale and is one of the easiest concerns to prepare for.

Food

Traveling with a family, our family anyways, involves food. There is something about a car trip that makes everyone hungry so snacks are necessary just to get us to the next food stop. I think there is some chemical aroma that our car puts off that makes you hungry if you are in it more than 20 minutes. It may be years worth of fries under the seats. We make sure we have more than enough snacks for our trip for everyone in the car. These don’t seem like much, but the caloric count of the snacks we have in the cooler would more than make up for a days’ worth of eating.

Water

Depending on the time of year we adjust the amount of water we carry in our car. Regardless of the outside temperature, everyone has a full Nalgene bottle before we leave the house. We also have enough bottled water to last us each 2 days. This isn’t enough to take showers or cook with, but we wouldn’t die of dehydration.

Read more: Build yourself the only unlimited water source you’ll ever need

Now, if we are driving through the desert, we pack more. I have also packed my backpacking water filters on occasion and always carry water purification tables in my Get Home Bag.

First Aid

I found an excellent combat medic bag at a gun show last year for $80 and this is always in the car with us on long trips. This has more supplies than I would ever use on a standard trip, hopefully ever, but I have this for a couple of reasons. First, if we are in a serious car accident, or witness a serious car accident I would be able to immediately assist with first aid (provided I wasn’t the one injured) and possibly save a life. The second reason is that if we had a grid-down scenario I would like to have my first- aid bag on steroids with me and not at my house. In this bag I have all of the normal items and some major blood stoppers.

Eventually, my plan is to add an IV. This bag is really to treat and stabilize major trauma; immobilize injuries and stop blood loss. I don’t think there is one Band-Aid in the whole bag. I also have a simpler first-aid kit that we bring with us on day trips. This is augmented with survival blankets,but the Combat Lifesaver is left in the car most of the time.

Weather

You should have a pretty decent idea of the weather you are going to encounter along your trip and at your destination. With the prevalence of weather websites and smart phone apps there is no reason except for laziness to not know how to pack. Is there a snow storm planned for where you are taking a vacation? Hurricanes in the summer can wreck all of your vacation plans, but these are the big-ticket items that receive a lot of notice on the news. What if there is no hurricane or blizzard, but you don’t pack a jacket and the temperatures are lower than you expect? You have to plan clothing that could keep you alive.

Read more: The vital self-sufficiency lessons our great grand-fathers left us

At a minimum I try to pack like I am not coming home. I bring too many clothes, but I am usually prepared for any weather. I have a rain blocker and a fleece if I am going anywhere where the forecast is rain or cooler temperatures. Even at the beach, nights can be cool. Could I live without the fleece if I only have to go back inside? Sure, but what if I am stuck outside and that fleece is the only thing keeping me warm overnight? My little trick is to have and wear clothes that would keep me alive if I didn’t have a car or a warm house to go to. This usually involves headgear and gloves which never get used, but it’s nice to have them as backup.

Fuel

Having all of the items you need to survive a collapse is great, but if you don’t have enough fuel to get you where you are going, it could be a much less pleasant trip. If you are driving, never let your tank get below half-full. This way your vehicle can get you closer to home regardless of what happens during your trip. Having the vehicle you are in maintained is a no-brainer also.

Firearms

Every trip I can, the firearms go with me. Why? What if the SHTF and you are hundreds of miles away from your AR? Just like clothing, I imagine what it would be like if I had to shoot my way back home. It may sound paranoid, but I have several firearms with multiple magazines each and at least one rifle. In some cases I have more than that. Again, all state and federal laws should be obeyed, but I don’t like being away from home without some serious firepower. Murphy’s Law states that would be when I would need it.

All of this is fine if you are driving, but what if you have to fly or you are traveling internationally? You can still travel with a lot of the items I mention above but every situation is different. You may need to adjust your plans to your travel requirements. It may help you in the use as I described though and if nothing else; it may help you prioritize when you are packing next time. Is there a case to be made for minimalism and making do with less or using items differently, of course. The main point is to be prepared and if that means another suitcase, so be it.

If you have travel ideas or tips, please share them with everyone in the comments below  and “safe travels”!


Other self-sufficiency and preparedness solutions recommended for you:

The vital self-sufficiency lessons our great grand-fathers left us

Knowledge to survive any medical crisis situation

Liberal’s hidden agenda: more than just your guns

Build yourself the only unlimited water source you’ll ever need

4 Important Forgotten Skills used by our Ancestors that can help you in any crisis

Secure your privacy in just 10 simple steps

What if the SHTF when you are away from your home?

Where would we be today without mouthwash? Probably brushing our teeth several times per day in order to get rid of all those food pieces. Wouldn’t call it a marvel a technology, but mouthwash does have its uses and, some of them, go way beyond oral hygiene.

And because I was thinking the other day about reasons to stockpile even more mouthwash than usual, I ended up burning the midnight oil to see what that stuff’s good for apart from, well, using it to wash your mouth. Of course, I won’t bother you with tall tales about guys using mouthwash and mumbo-jumbo to summon otherworldly beings, but I did discover some very interesting facts about this stuff.

Did you know that there was a time when FDA was seriously considering blackballing mouthwash on account of a freak study that linked this substance to oral cancer? Of course, it was later proven that the study was a bogus and that the only severe reaction mouthwash can cause is the so-called black tongue – basically, the tongue grows tired of shedding dead skin cells which end up sitting there, is not pretty.

The black color is the result of a chemical reaction between an oxidizer commonly found in mouthwash and the dead skin cells. No reason for alarm, as it is not life-threating (just use a brush with soft bristles to scrape your tongue or chew some gum).

Anyway, back to the topic du jour – mouthwash in survival. As many common household items, mouthwash can also be used during an SHTF situation. Here are my choices in alternative uses of mouthwash.

Antiseptic

Let’s start by stating the obvious – since mouthwash was designed to kill bacteria responsible for tooth decay and bad breath, it’s safe to assume that it has strong antibacterial properties. If you don’t have anything else on hand, you can always pour a bit of mouthwash on small scrapes and nicks. Word of caution though – this stuff’s going to sting like hell.

Have you ever tried to disinfect a minor wound with medicinal alcohol? It stings even worse than that. Don’t forget to wash with clean water and flush the area with a saline solution – mouthwash contains other substances that really don’t belong inside the wound.

Get this book now and learn such facts as: The Antioxidant 550 times stronger than vitamin E and 6,000 x More Powerful Than vitamin C. Get your copy here.

Washy-washy the toothbrush

As I’ve said countless of times, oral hygiene’s very important, no matter how shitty the situation is. If you ever find yourself stranded in the field, it may be possible to sterilize your toothbrush with a little bit of mouthwash. In fact, it’s quite advisable to do so before putting that thing in your mouth, especially if you’ve been on the road all day.

If you want to make sure that toothbrush’s germ-free, I would advise soaking it in mouthwash – grab a zip-lock bag or small airtight container, put the toothbrush inside, pour a little mouthwash, seal, and stir.

No more stinky feet

Yeah, I know that this not qualify as an SHTF situation, but try sleeping in a closed tent after a day of walking, hiking, running or whatever. In case you don’t have any soap nearby, just drizzle some mouthwash on those mutton chops, rinse with water, and dry yourself with a towel. Yes, you’ll have less mouthwash, but at least you’ll get a good night’s sleep.

Itchiness and Accidental Poisoning

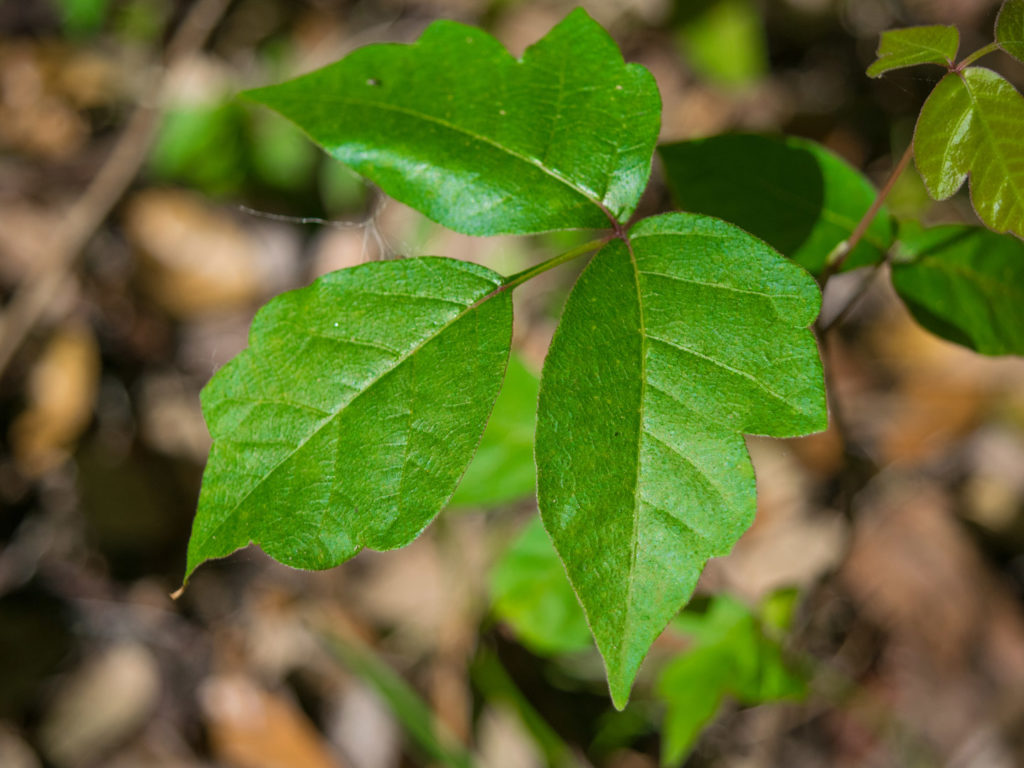
There’s nothing more thrilling than the feeling of tiptoeing through poison ivy or nettles. Don’t fret, don’t whine, and, most importantly, stop scratching. Put a bit of mouthwash on the sting, and you’ll be up on your feet in no time. Just be sure you use an alcohol-based solution – the other kind won’t be of any use to you in this situation.

Ensuring that your cooking stuff is germ-free

One thing hikers and backpackers fail to observe are keeping their food utensils clean. Yes, I know no one will be in the mood for washing plates and cutlery after a hearty meal, but this would mean extending an invitation to all kind of nasty germs.

Now, if you don’t have anything on hand to sterilize your plates, and that includes clean water, you can always use a bit of mouthwash. Shake the bottle for some foam – it will be easier to remove grease and anything sticking to the plate.

Makes body stink go away

Because no good deed should go unpunished, the result of pushing your body beyond its limits is a nasty smell. From where I stand, there are two options – either you wait until you find a source of water to take a bath or do something before the smell curls your toes.

If you have nothing else in your B.O.B, use a tiny amount of mouthwash to wash those stinky body parts. Works great for the armpits, chest, and legs, but I wouldn’t try it elsewhere.

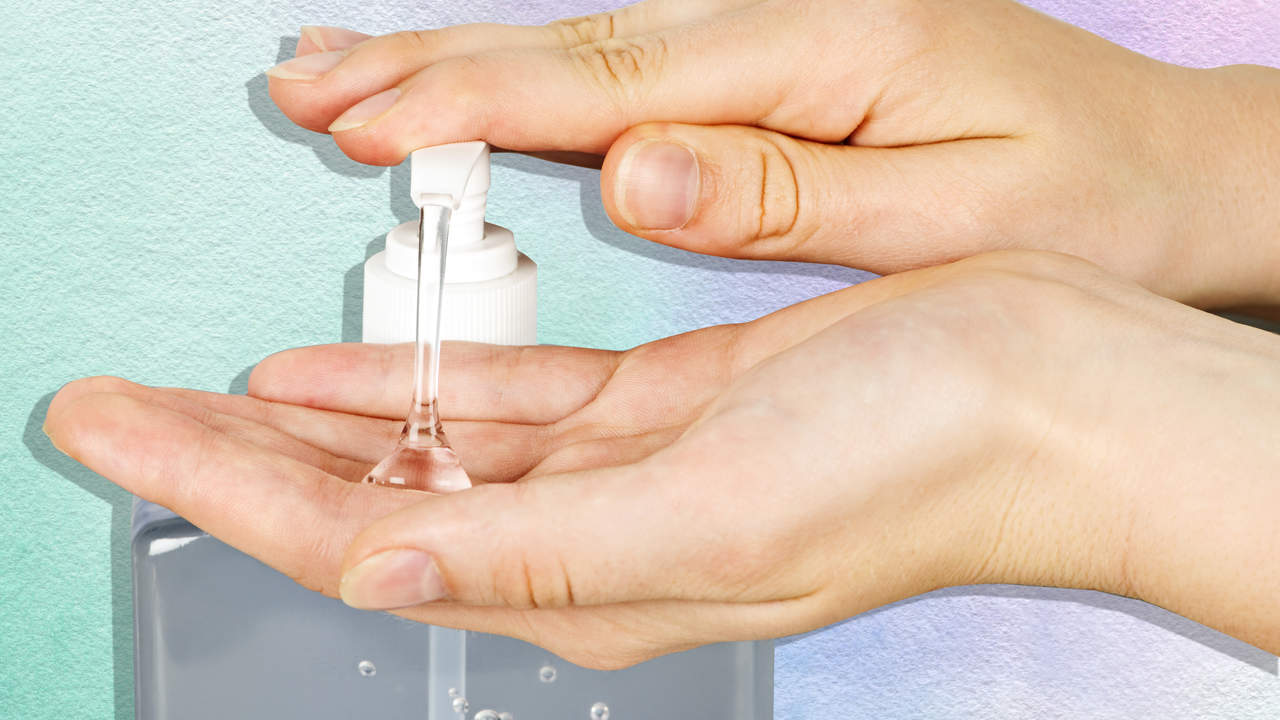
No hand sanitizer? Not a problem.

Hygiene’s important but it becomes vital in a shit hits the fan situation. Apart from the fact that most of the environments you’ll be traversing are riddled with all manner of germs that would like nothing more than to take a bit out of you, your hands will be in permanent contact with icky stuff. I don’t know if your B.O.B contains soap or not, but it should at least have a small bottle of hand sanitizer.

In the event you run out of the stuff, use some mouthwash to sterilize your hands. Might not be as powerful as a regular hand sanitizer, but at least your hands are clean enough to handle food or tend a wound. I don’t judge.

And so, we come to the end of yet another entertaining piece of how everyday items can save our lives in a potentially life-threatening situation. Mouthwash is indeed a good thing to have around the home, regardless if you’re a hygiene freak or not. Just to be safe, you should throw in a couple of small mouthwash bottles in your B.O.B. Missed anything? Drop a line or two in the comment section and let me know.


Other self-sufficiency and preparedness solutions recommended for you:

The Lost Ways (The vital self-sufficiency lessons our great grand-fathers left us)

Survival MD (Knowledge to survive any medical crisis situation)

Backyard Liberty (Liberal’s hidden agenda: more than just your guns…)

Alive After the Fall (Build yourself the only unlimited water source you’ll ever need)

The Lost ways II (4 Important Forgotten Skills used by our Ancestors that can help you in any crisis)

The Patriot Privacy Kit (Secure your privacy in just 10 simple steps)

Where would we be today without mouthwash? Probably brushing our teeth several times per day in order to get rid of all those food pieces. Wouldn’t call it a marvel

Recall how almost all material on prepping says something about having at least one cornbread around the house? It’s, indeed, delicious, nutritious, and, all thing’s considered, very easy to make.

As I’m always on the lookout for great survival recipes, a couple of days ago, I stumbled upon this nifty cornbread recipe. The thing that stroke me is that I still can’t figure out if this thing should be served with something on the side, like some butter or cheese, or is more of a dessert. Well, it’s up to you to figure it out.

Anyway, the cornbread recipe I’m about to show you is not only very easy to prepare, but it also has a peculiar name. In Mormon tongue, this type of cornbread is called a Johnnycake. No comments there. I will do some more digging to figure out why it’s called that way (if you know, don’t be stranger and share with the rest of the community. So, without further ado, here’s how to make some Mormon Johnnycake.

Gathering the ingredients

For this recipe, you’ll need the following:

  • Two eggs. This recipe calls for both egg white and yolk.
  • One cup of buttermilk.
  • Two or three tablespoons of molasses.
  • Half a cup of all-purpose flour.
  • One teaspoon of salt.
  • One teaspoon of baking soda.
  • Two cups of Yellow cornmeal (you can find that at your local food market).
  • Two or three tablespoons of melted butter.
  • (Optional) Agave nectar.

All done gathering the ingredients? Neat! Put your chef’s bonnet on because it’s time to do some major cooking.

How to prepare Mormon Johnnycake

Step 1. Start by grabbing a baking dish or cast-iron skillet. To ensure that your Johnnycake won’t stick to the bottom, grease it with some butter, tallow or a little bit of sunflower oil.

Step 2.  Preheat your oven to 425 degrees Fahrenheit.

Step 3. Grab a large bowl and add your eggs, buttermilk, and molasses. Give them a good stir with a whisk.

Step 4. Get another mixing bowl for your dry ingredients.

Step 5. Grab a flour sifter and get to work on that flour. You can skip this step if you like your bread with air bubbles.

Step 6. Add your salt and the baking soda.

Step 7. It’s now time to put everything together. Using a mug, add the dry ingredients to the bowl with the buttermilk, honey, eggs, and molasses. Don’t add it all at once. Empty the contents of a cup and slowly whisk the mixture. Do this until you’ve incorporated all the flower.

Step 8. The batter should be smooth. If it’s too watery, add some flour and whisk.

Step 9. It’s now time to add your cornmeal. Just like before, pour half a cup, and gently whisk it. Yes, I know it’s frustrating, but do you have anything better to do?

Step 10. When you’re done incorporating the ingredients, transfer the batter to the cast-iron skillet or baking dish.

Step 11. Stick the baking dish\skillet into the oven and bake for 15 to 20 minutes until it’s golden brown. To see if your Johnnycake is ready, use a toothpick to test the batter. If it comes out clean, it means that it’s ready.

Step 12. Johnnycake is what chefs like to call comfort food. Serve it on rainy or cold days with plenty of butter. If you like to turn it into a desert, pour some agave nectar or maple syrup on top. Enjoy!


An alternative way to prepare Mormon Johnnycake

This recipe’s extremely versatile. Although the classic recipe calls for oven or stove baking, there’s another approach. Called Hoe Cakes, it’s the Southern take on the original Mormon Johnnycake recipe. The major difference between the two is that the first gets you a classic bread loaf, while the latter is more, well, pancakes. Anyway, here’s how to make some delish Southern Johnnycake pancakes for breakfast.

Ingredients

  • One cup of flour.
  • One cup of cornmeal.
  • Two and a half teaspoons of baking powder.
  • One teaspoon of salt.
  • Three-quarters of a cup of milk.
  • Half a cup of water.
  • Half a cup of melted butter.
  • One teaspoon of vanilla.
  • Half a tablespoon of nutmeg.

How to prepare Southern-style Johnnycakes

Step 1. Take a large bowl and mix your flour, sugar, baking powder, salt, nutmeg, sugar, and cornmeal.

Step 2. Using your fingers, make a little hole in the center of your dry mix.

Step 3. Put the milk, egg, vanilla, melted butter, and water in the hole.

Step 4. Mix the batter using a whisk or a fork. Since Southern Johnnycakes are closer to pancakes than to bread, your batter should be silky smooth.

Step 5. Take a cast-iron skillet or a frying pan and place it over the oven. Set to medium-high heat. You can use butter to fry the Johnnycakes or some cooking oil. I personally prefer to use tallow.

Step 6. Using a ladle or a small cup, pour some batter in the skillet and fry. Once the bottom is golden-brown, flip it and fry the other side. Continue until there’s no more batter left in the bowl.

Step 7. Like in the first case, serve hot, with some agave nectar or maple syrup. If you want to turn this into a really fancy dish, you can also add some frozen berries.

Wrap-up

As far as the traditional Mormon Johnnycake is concerned, I believe you can turn it into a full-fledged bread if you skip the sweet ingredients. Yes, I know that it’s hardly a substitute for oven-baked peasant’s bread, but it’s super easy to make and requires no cooking skills at all. If you’re careful enough to store it in a zip-lock bag or airtight container, that loaf can last for at least a couple of weeks, if not months.

The traditional recipe calls for the bread to be served hot out of the oven. Well, it is possible to eat it stone-cold but doesn’t have the same taste. What do you think about the Mormon Johnnycake? Hit the comments section and let me know.


Recall how almost all material on prepping says something about having at least one cornbread around the house? It’s, indeed, delicious, nutritious, and, all thing’s considered, very easy to make.

Booby traps are devices set up with the intent to surprise, harm, or even kill an unknowing victim. They are triggered by the presence or unwitting actions of another.

Booby traps have been used since ancient times. Cave drawings indicate even prehistoric humans used them as a means of capturing prey, such as in “pitfalls” where a large hole is dug and spikes placed inside. The hole is then covered.

Historically speaking, booby traps do not win wars. They are, however, considered a key element in psychological warfare. Also known as PSYWAR, psychological warfare is by definition, something that is done to either deceive, manipulate or otherwise influence an opponent and to incite hopelessness, fear, despair, and loss of morale. Used extensively in WWII and Vietnam, booby trap effects have caused many surviving soldiers long-term pain and trauma. They can also be an effective early warning system. However, they can also cause civilian casualties, be inadvertently set off by friendlies or neutral people within the vicinity, and sometimes even by animals or natural events. They are also dangerous to set up if using any explosive materials. Caution should be used. One way to hopefully limit unnecessary injury would be to secure the perimeter with non-lethal alert devices. Hopefully once someone has realized they are approaching traps, they will turn around. If they continue, then chances are they are either hostile or being driven that direction by hostile forces.

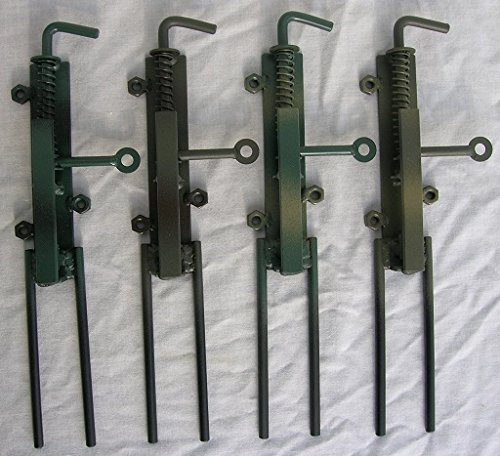
4 SENTRY ALARM MINES .22 Cal trip wire alarms MULTICAM PREPPER PACK

Booby traps come in two main categories: anti-tank, and anti-personnel. We will start with the former.

Automatic roadblocks work much in the same way as a regular trip wire except that they designed in ways that impede traffic and damage vehicles. The end of a strong wire is attached to a secure point on one side of the road. Perhaps looped around a large tree. On the other side it is attached to something to be pulled into the road. A common option is to attach an anchor to another tree and chop it almost to the point of falling. The cord must be taut and high enough that a vehicle will pull it in the correct direction and not run over it. The cut tree is pulled down into the road, damaging the vehicle and effectively creating a roadblock. This method was employed by the Japanese when fighting the Allied Forces in the Philippines. It can be effective as a standalone device to slow the opposition, or as the onset of an ambush.

Another tripwire mechanism that can be adjusted to block a road, is a simple explosive charge set next to a makeshift retaining wall on a hill or cliff. Rocks, stones, branches, and debris are piled behind the obstruction. It may be necessary to route the wire through small anchors to adjust for the angle of the hill. Once armed and triggered, a small avalanche plummets onto the road, injuring and blocking enemy forces.

Homemade booby trap found in the woods of Provo Canyon.
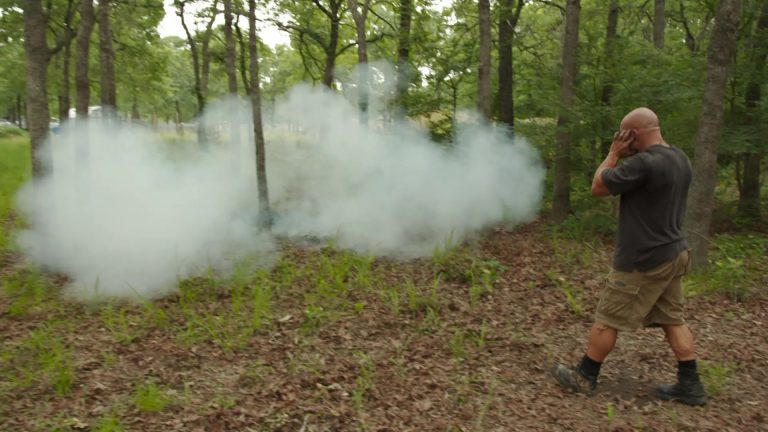
Caltrops have been used since Medieval times, possibly earlier, as a way to impede incoming troops and damage cavalry and have since evolved into an effective way to combat automobiles. A metal worker can create them quite easily out of small hollow pipes that are bent and welded together. This option allows for more rapid air escape and therefore faster deflation and blowout of the tire; theoretically, any metal strong enough and sharp enough to withstand the weight of the vehicle can be used as long as it is fashioned in such a way that one blade is always pointing up.

Even vehicles themselves have been used as booby traps. A charge can be detonated by opening the door or turning on the ignition (which seems to be popular in the movies). Bombs can also be detonated by impact, where the cars themselves were used as roadblocks. If an armored vehicle attempts to simply pummel through and push the vehicles aside, they explode.

Now we get to the category where most preppers are focusing their efforts. Home invasion protection and anti-personnel defensive booby traps.

The most common booby trap as far as prepping is concerned is probably the tripwire.

The most common booby trap as far as prepping is concerned is probably the tripwire. Easy to set up with nothing more than a piece of string and a personal panic alarm. It is easily improvised and can detonate explosives, fire weapons, or activate spotlights for early detection.
Pressure plates can be simple DIY projects or can be purchased prefabricated. Again, these can be improvised to either turn on lights, sound an air-horn, or detonate explosives. I personally would not attach explosives to these as they are usually placed quite close to your residence as a final warning someone has made it to your door. Some can be quite sensitive and can easily be activated by a dog or other fair-sized animal. If you are placing them further away from your home, or do not care about a potential house fire, explosives could be used. One additional and interesting use for these is their ability to be an automatic door opener, if you want a secret entrance and hide it well.

Mobility Denial System (MDS) is a deterring slime that can come in handy (if you can get your hands on any) It is a last line of defense as it will create an impassable surface directly around your home for 6-12 hours. It was invented for the Marine Corps and police riot protection. It is not readily available, however, if you were to put your mind to it, you could up with something along the same lines. You want to deter any hostile party, by any means necessary, before they ever get that close to you, and preferably either drive them back or keep them at bay until you can retaliate.

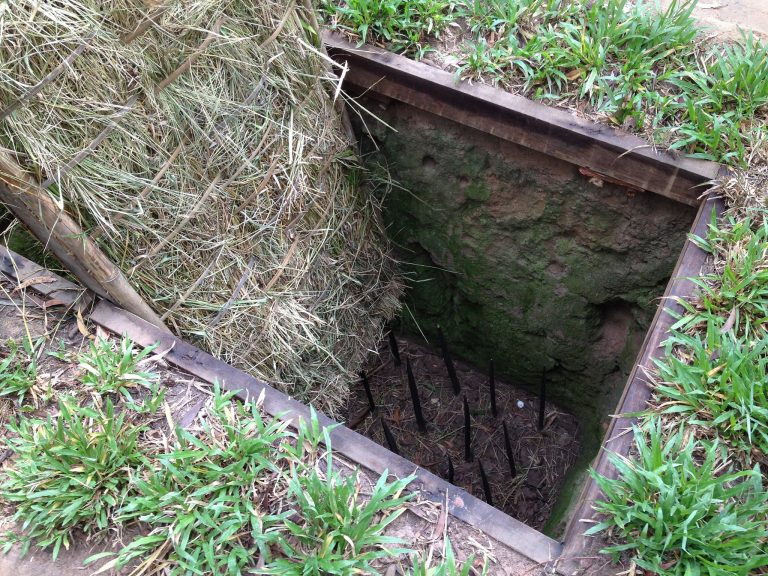
Spike booby trap used during Vietnam.

Spikes. They can be as simple as large nails in boards turned upwards around your yard in the tall grass. They could be placed over a hole so that when stepped on with any force, the person’s foot snaps the board, goes into the hole and the nails impale their ankles. In times of war, they were often coated with toxic material or feces to promote infection. Some people attach them to stones or logs to create pendulum contraptions that are triggered by a tripwire. Personally I find this a foolish waste of time. A well-trained individual can evade such a device. It would probably take less time to dig small trenches, which might at least sprain some ankles, but to each their own. Spikes on boards can also be weighted and submerged into creek beds and ponds.

Razor wire and barbed wire is another option for underwater depending on how long it stays there. It can also be used similarly to tripwire in heavily vegetative areas where it can be concealed. I’d recommend a matte finish, camouflaged to blend in. In can be used along top fencing, around windows etc… Anywhere you would want to deter someone, perhaps diverting them into even more unfavorable habitat where you have a greater advantage.

Bullets can be set inside a small section of bamboo, atop a firing pin, and buried until just the tip is exposed. If stepped on with any amount of force the bullet explodes.

Hand Grenades. If you can acquire them, all you need is a tin can and a piece of string and duct time and you can secure any door. This is dangerous for the person loading them but was widely used in WWII and Vietnam. Tie a string around the grenade under the handle. Depress the trigger handle and pull the pin. Quickly and carefully slide it into the tin can. Secure the can somewhere with tape or wedge it tightly. Attach the string to a door handle or use as a tripwire. When the door is open or trap is triggered, the grenade dislodges from the can and detonates.

Remember that booby traps are just one element in the line of defense. Their primary purpose is to slow down the enemy, instill fear, reduce morale, and possibly to injure, maim, or kill. The time these traps may buy you can be greatly varied. Use it wisely and remember, offense and defense are opposite sides of the same coin. You need both or you are broke.

Recognizing the extreme injustice of recent liability suits awarding home invaders large sums for getting injured while burglarizing a house, it could be considered foolish to construct booby traps unnecessarily, regardless of intention or the degree of danger. That being said, I don’t know anyone who wouldn’t use them or wish they had them to use when put into a potentially deadly situation.

Stay safe, and happy prepping!

Booby traps are devices set up with the intent to surprise, harm, or even kill an unknowing victim. They are triggered by the presence or unwitting actions of another. Booby traps

Ever since I bought my very first computer back in the odd ‘90s, I sort of became a hoarder of everything related to tech – I kid you not when I say that the back of my garage is filled to the proverbial brim with outdated components like CPUs, motherboards, video cards, monitors, and boxes of CDs, DVDs, and floppy disks.

Sometimes I feel the urge to pop open my PC’s optical drive just to see what’s on them. Unfortunately for the computer geek in me, half of that stuff has stopped working long ago. As for the CDs and DVDs, not even wishful thinking can restore them to their former glory. Still, that doesn’t mean I should throw them away.

Even the thought of parting with a single CD would break my hear. So, as usual, I paid a visit to my old pal Google to see what other people have done with their optical disk collection. I was stunned to see just ingenious people get when it comes to repurposing stuff.

And yes, even though all the threads began with “do, I really need to throw them in the garbage?”, they usually ended in a lighter note – great homesteading projects and some of them carried out by guys who haven’t even head the word “prepping.”

So, if you are the proud owner of a huge CD or DVD collection, here are X clever ways to use them around the house.

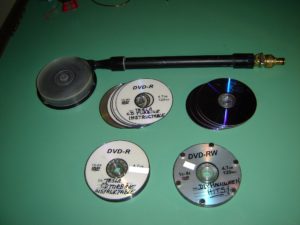
  1. Building a gigantic solar cooker

I simply love outdoor cooking, no matter if it’s barbequing or watching others prepare food. Anyway, this one thread was speaking about creating a solar cooker from CDs or DVDs. Yes, I know it sounds crazy. That was my first impression as well. However, the math seemed to be right, and since the weather’s nice, I tried to see if it works.

Now, keep in mind that you will need around 100 or 200 CDs and DVDs for this project and old parabolic antenna (the biggest you can find). If you don’t want to invest too much cash, you can always pay a visit to your junkyard to scavenge for parts (that’s where I found the antenna). Here’s what you will need to do in order to create your solar cooker.

Place the antenna in the yard’s hottest spot (that would be around the back). Using a nail gun or zip tie, attach the CDs to the antenna. Make sure that you don’t leave any gaps. When you’re done, take a small grill and attach it just below the receiver (I used a couple of metal pieces which I secured to the receiver using screws).

Wait for the grill to get hot, then BBQ your meat of choice. If the weather’s holding out, you should be able to get at least 700 degrees Fahrenheit. Now, if the temp’s too high for you, simply remove a couple of CDs to lower it.

  1. Creating a retro-futuristic night lamp for your off-grid cabin

Everything can be solved with a little illumination. If you’re a big fan of DIYs and repurposing, you should definitely try out this simple and neat project. The result is a cool, retro-futuristic night lamp that’s brighter than anything you have around the house. Even neat is the fact that it won’t cost you a dime.

Here’s what you’ll need to do – salvage a bulb socket from an old lamp. Search around the house for an LED bulb (there’s bound to be one somewhere, especially if you’re committed to stockpiling survival items).

Take a closer look at the wires coming out of the socket. If they’re too far gone, replace them with new ones. Now grab a handful of CDs (I used about 50 for my project) and some epoxy. Stack and glue them together. Place the socket inside the stack, screw in the bulb, draw the wires, attach a plug, and have fun with it.

  1. Keeping pests away from your veggie garden

I like birds and bees and flies as much as the next man, but not while they’re tearing apart my veggie garden and my corn. Still, I can’t find it within me to take out my hunting rifle and shoot those birds down. And no, I won’t even consider using chemical pesticides. While reading about CDs and DVDs, I came across a thread which suggested that old optical supports can be used to keep pests away.

Didn’t believe it for a second, but I hung up a couple of ones at the edge of my garden just to see what happens. Don’t know how or why, but those crows seemed to be scared shitless of the light reflected by those old CDs. What can I say? Win-win.

  1. A hiding place for docs and jewelry

Not enough dough for a strongbox or a safe? No problem. You can use a stack of old CDs or DVDs to create a hiding place for your valuables. Here’s what you will need to do. Get ahold of one of those mini-CDs (you’re going to use this as a reference point). Place it over a bunch of old CDs (at least 50) and draw the mini disk’s outline using a marker.

Now here comes the fun part: using a hacksaw, cut on the ‘dotted line.’ When you’re done, glue all of them together to create a miniature tower. It’s now time to put everything together. Place one CD on the bottom of the plastic holder.

Glue the stack to the base. Now put a holder inside your mini safe (I used an old muffin mold). Place another CD on top, screw the plastic lid in place and, voila, your project’s completion.

That’s it for my four neat ways of repurposing old CDs and DVDs. Now, I know there are tons of other ways to make use of disks, and I would really like to know your thoughts on this. So, hit the comment section and let me know.


Other self-sufficiency and preparedness solutions recommended for you:

The Lost Ways (The vital self-sufficiency lessons our great grand-fathers left us)

Survival MD (Knowledge to survive any medical crisis situation)

Backyard Liberty (Liberal’s hidden agenda: more than just your guns…)

Alive After the Fall (Build yourself the only unlimited water source you’ll ever need)

The Lost ways II (4 Important Forgotten Skills used by our Ancestors that can help you in any crisis)

The Patriot Privacy Kit (Secure your privacy in just 10 simple steps)

Ever since I bought my very first computer back in the odd ‘90s, I sort of became a hoarder of everything related to tech – I kid you not when

Probably the best thing about an off-grid home is that it kinda forces you to get back on speaking terms with things you wouldn’t do for all the money in the world. If someone had told me 15 years ago that I was I going to split logs, stack manure or making candles out of bacon, I would’ve probably told him that his mom’s a very nice person (not!).

Anyway, ever since I bought this dingy, I learned that the things I once considered as being nasty or beneath me are actually very entertaining and, dare I say, therapeutic to some degree. Of course, shoveling manure can hardly be considered fun, but spending an afternoon splitting logs for a cozy campfire or late-night BBQ is awesome.

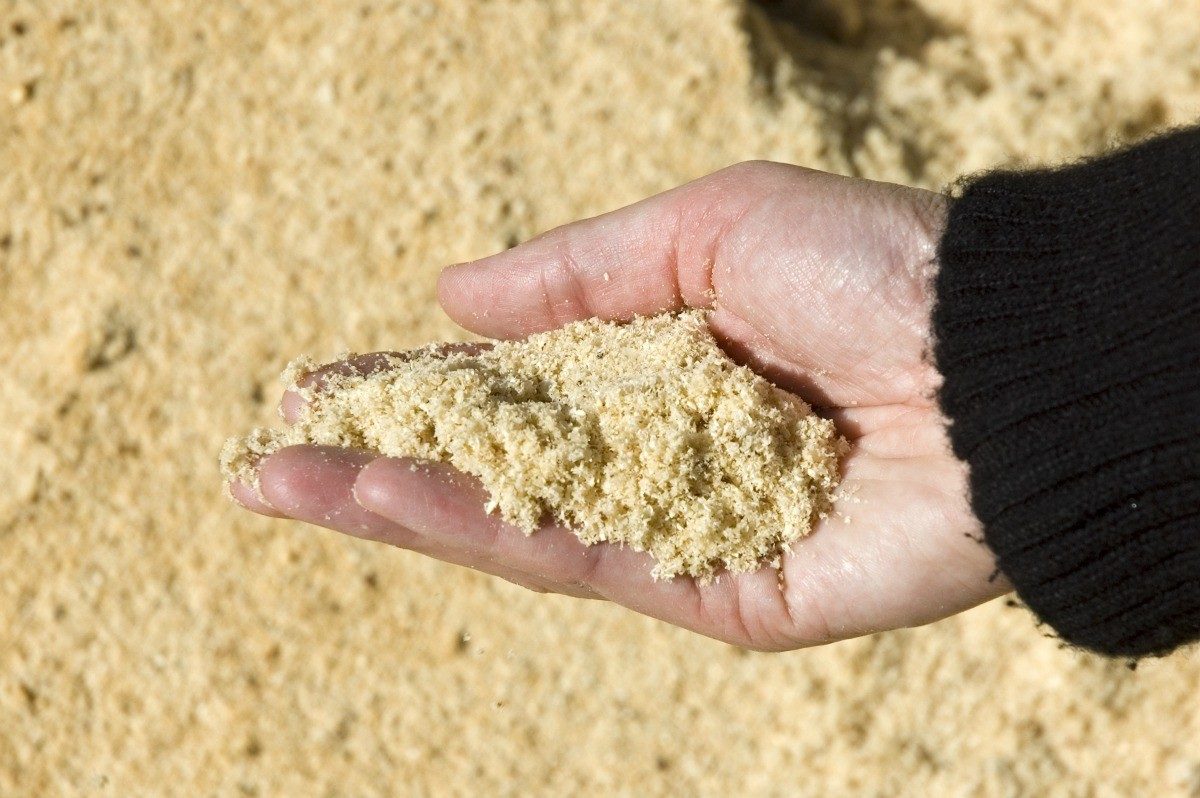
On the latter activity – splitting logs and making fires is fun. Cleaning up afterward is not. The only thing that kept me from doing this all day was sawdust. It gets everywhere – I found that stuff inside my boots, my pants, even my skivvies for God’s sake. And no matter how hard you broom or power wash the place, you will still find sawdust piles.

Okay, so cleaning sawdust is not entertaining, but figuring out what to do with that stuff after gathering it, well…still not fun enough for me. I mean, what in Hell’s name can you do with a handful of wood chippings and dust apart from taking it to the thrash? That’s when it hit me.

I remember watching this outdoor cooking show featuring this guy who had the same problem with sawdust. The only difference between us is that he figured out a way to reuse it. His clever workaround was reusing the stuff to cure and smoke meat. Neat, isn’t it? Well, long story made short, I hopped on the Internet and searched for ways to reuse that stuff around the house. And, wouldn’t you know, there is indeed life after death, at least for sawdust. So, without further ado, here are X creative recycle and reuse wood dust.

Making a campfire

Remember about the tinder box? Well, because it can get so lonely for that char cloth of yours, here’s one more thing you can add – fine sawdust. Since this stuff’s the byproduct of woodworking, it’s safe to assume that it can be used to start a fire. However, since sawdust’s very, well, dry, it will need something else to sustain a flame.

On a prepping forum, someone suggested that you can make a briquette out of a bar of wax and a handful of sawdust. It’s very easy – melt the wax in a small pan and add the wood shavings. Stir and allow the mixture to harden. After that, cut it into tinder box-size pieces and profit.

Weed-whacker

A gardener has but four sworn enemies: moles, bad weather, moles, insects, and weeds. Moles can be kept away by sprinkling a bit of wood ash at the base of the plant, while insects go nuts around coffee grounds. There’s nothing you can do about bad weather, though (you can try a rain dance if that makes you feel a little better). But weeds can be dealt with by using sawdust. After planting your veggies, place a thin layer of sawdust on top.

Veggies don’t mind wood chippings; weeds, on the other hand, won’t go near that stuff. I don’t know the science behind this claim, but I’ve read somewhere that it has something to do with inhibiting the weed’s natural parasitic properties. Tried it a couple of times in my garden, and it works like a charm. You can also use some of this stuff in those cracks that appear on your driveway.

Pulling a fast one on a drunk friend

I don’t think there’s anything more disturbing than waking up butt-naked outside during the winter. If you want to pull a fast one on someone’s who got sauced at your party, get some sawdust, spray-paint it white, lay it outside, and carry your bud then. Well, this may not be your typical SHTF use, but at least it makes for a great YouTube video.

Dealing with oil spills

Probably most of you have attempted at least once to fix your car in the garage. The operations might have gone well, but the same thing cannot be said about the floor, which is covered in motor oil. Power washing the floor won’t work. Trust me. I think I’ve used up more water than two hospitals trying to clean one tiny spill.

To quickly get rid of that thing, sprinkle some sawdust over it. In a couple of minutes, the sawdust will absorb all the oil. All you need to do now would be to use the power blower to get rid of the oil-soaked sawdust pile.

Make neat garden or forest paths

If your home’s next to the forest, there’s bound to be a place of interest nearby – a creek, rock with peculiar features, an old tree, perhaps even a cave. Wouldn’t it be nice to have a nice path leading to it, instead of relying each time on markings or memory? Well, you can do that using sawdust, sand, and a couple of river rocks. Start by choosing you rocks – they should be flat and smooth because you wouldn’t want to hurt your feet now, would you?

The path should be at least one-and-a-half meters in width which mean that you’ll need to use at least three small and flat rock or two big ones. Figure out just how many rocks the path will require before heading off into the forest to scavenge for materials.

Use a hoe or an implement with a flat head to trace the path from your garden to the place of interest. After that, add a think layer of sand and a layer of sawdust on top – this combo will allow you to them the river rocks easier. Finally, arrange the rocks, place some tiki torches on either side of the path for mood, and you’re done.

Extra fertilization!

Plants don’t have enough yum-yum to grow? Try a little bit of sawdust. Here’s what I like to do about pretentious veggies – in a plastic bucket, put one full shovel of manure, two shovels of organic compost, and half a kilogram of sawdust. Add some water and mix with something (I usually end up putting some surgical gloves on because it’s easier to mix that stuff with your hands). When you’re done, pour that mix over your veggies of choice and wait to see what happens.

Sawdust’s also a great and eco-friendly way to combat soil erosion. Some gardeners even use it for mulching.  Word of warning though – if you plan on using sawdust in conjunction with manure and compost, avoid walnut trees. Apparently, walnut wood contains a substance that kills plants without discrimination.

For when nature calls

Well, these are shitty times, which means that we always have to ensure that there’s at least one functional toilet around the house. This is not a problem for those of use leaving close to the woods, but what do you in case your city toilet gets clogged, or the water pump fails? Sure, you could go to a friend or neighbor’s house for number 2 or number one, but that’s hardly what I would call a solution. In the immortal words of Bear Grylls: adapt, overcome, and…. make a portable shitter.

It’s very easy to build one. Best of all, you’ll only need things that are usually found around the house. Here’s how to do it. Take a big plastic bucket and saw the top off. Get a second smaller bucket, and place it inside the bigger one. Fill the smaller one with a mixture of sawdust, kitty litter, and perhaps something to wish away the nasty smell. Now, go around the house and search for an old toilet seat and a plastic ring.

The latter should be thin enough to slide in the narrow gap created by the two buckets. Use some epoxy to glue the plastic ring to the bottom part of the toilet seat. Congrats! You’ve just built your first portable emergency toilet. When the potty fills up, take out the second bucket, discard in the compost pile or heavy-duty garbage bag, and refill with sawdust and kitty litter.

Using as bedding for your cats and dogs

If you’re unable to get to the pet shop, you can use sawdust to fill your cat’s\dog’s poopy box. It may not be pretty, and your cat will surely have the murderous gaze in its easy, but at least your pet will not go number two on the carpet or bathroom tiles.

Provides extra traction

As you know, many counties made winter traction kits mandatory for drivers. A good thing too, because getting snowbound isn’t exactly relaxing. If you want to add more kick to your winter traction solution, try this trick. In a bag or bucket mixt kitty litter, sand, rock salt, and sawdust. It’s a great combo – litter, sawdust, and sand will provide you with extra traction while salt makes the snow melt.

Patching holes in woodwork

I was more than thrilled about my new home away from home. Mostly because I managed to convince the former owner to go way below the initial price. Well, long story short, there was a reason why the guy did this – the entire living room carpentry was full of holes as if someone had been using the walls for target practice or something. Obviously, the thing cost me a pretty penny, and I didn’t have much left to repair the walls. However, a fellow prepper told me that I could use sawdust to temporary fill the holes.

Yes, I know it was a piss-poor job, but at least the living room didn’t look like Swiss cheese. If you’re having the same problem, here’s what you will need to do – put a small amount of epoxy inside each hole. After that, take a handful of sawdust and fill the hole. Allow the glue to harden. Finally, give that wall a fresh coat of paint and, voila, no more holes.

Grow your own mushrooms

Remember my article about using coffee grounds to grow mushrooms? Well, there’s another way to grow a yummy-yummy batch of shrooms. The trick is to use Eastern Red Cedar sawdust. This might come as good news for people who have no love for coffee. Or for those who prefer coffee capsules over the regular variety.

The procedure’s more or less the same as in the case of using coffee leftovers. Get a plastic bucket, put some fresh dirt into it, add a handful of sawdust, add some stuff from your compost pile, mix, add some mushroom seeds, and store into a damp place. You’re welcome!

Well, that’s it on how to recycle sawdust. Do you have other ways in mind? Hit the comments section and share your thoughts with the rest of the community.

Probably the best thing about an off-grid home is that it kinda forces you to get back on speaking terms with things you wouldn’t do for all the money in

For many preppers, a firearm is a must-have item for dealing with the aftermath of a potential SHTF or grid-down event. Firearms in the hands of properly trained individuals can prevent as well as cause death, so their use and acquisition isn’t something to be taken lightly. We routinely talk about firearms under the security category when I am mentioning the 4 things you should focus on when you are prepping, but simply having a weapon isn’t the end. You can check the box on having a firearm in your SHTF arsenal, but to be better prepared, you should look at what else needs to be planned for with that firearm to ensure that tool doesn’t become an expensive paperweight shortly after you need it.

Don’t get me wrong; just the fact that you have a firearm and a box of ammo is an advantage should you be called on to protect or defend your life, but history has shown us in order to be more fully prepared, there are other considerations that you need to account for and these topics are what I wanted to bring up today on the Prepper Journal. What are all of the other things you need to consider for your safety and protection that you may need to maintain that firearm and conversely your ability to protect yourself if the grid goes down?

Why do you need weapons if the grid goes down?

Before we get into the SHTF weapons checklist, I wanted to briefly paint a picture for you. Some disaster has happened and society is in chaos. Let’s take the example of an economic collapse which as I discussed the other day is a real and tangible threat our country faces. When millions (more) are out of work, services are cut and there are shortages on food, gasoline, power and protective services of police, people will get angry. Once they are angry, people will get desperate and once people get desperate, you better watch out.

A firearm is only a tool, but it is a tool designed to inflict mortal damage on your opponent. In the case of a desperate individual breaking into your home, would you rather have a firearm or harsh language? For me personally, I want firearms to be a tool my family has at our disposal in a case just like this. Above all things, I hope I never am forced to use a firearm in defense of my life or the lives of anyone in my care, but the pragmatist in me doesn’t believe for a second that people are always good deep down. I know people can be evil and act in ways that are dangerous. To believe anything else is foolish I believe so I prepare for evil and dangerous people while hoping I will never see that.

What are the best weapons for SHTF?

So if you are still hanging with me by now and don’t already have a firearm, you might be asking what are the best weapons to have on you in a STFT scenario. This question can be answered many different ways and I have actually written on this subject before. If I am looking holistically at an array of weapons you need for many different STHF scenarios, I would make similar recommendations as in our Top 5 Firearms You Need To Get Your Hands On Now, but this is an ideal scenario, not just what is necessary.

I have also recommended a shotgun as the best weapon for home defense under the assumption that if you only had time/money to purchase one weapon, what would that be. For a SHTF scenario, I think I have changed my mind somewhat on the best single weapon to a pistol. I read a post from FerFal who has his own blog. Ferfal lived through the Argentinian economic crisis and he makes a compelling case for the pistol as the best weapon for SHTF and I tend to agree with him. The main reason is that a pistol over any rifle or shotgun is highly concealable. Even if there is an economic collapse, life won’t immediately turn into Mad Max so as FerFal rightly proposes, you will still have to function in society for some time before you can whip out your camo outfit and go running down the streets geared up for battle.

The right pistol can be used for home defense easily and as I mentioned above, you can take it outside with you concealed so you can also have protection away from your home. I do still think that ideally you would have more weapon options, but a pistol would seem to be a priority for living in the immediate aftermath of any SHTF fallout.

What else do you need for SHTF?

OK, so for the rest of this article we are going to assume you have procured a SHTF weapon of some form, likely a pistol but what else would you need? A firearm is just a tool like I said and that tool needs several things to function ideally in bad situations for a long time. When we are talking about SHTF, you aren’t getting much worse than that and we will also assume a trip to Walmart or your local Sporting Goods store is out of the question.

Do you have supplies to keep your firearms clean after SHTF?

Ammo – Any weapon you have is going to need ammo and many people have asked me how much ammo do you need. Each person has to answer this question for themselves. I know some preppers who will say you can never have too much ammo. These people plan to not only never worry about running out, but logically state that ammo will be more valuable than precious metals after a collapse. Selco, who runs SHTFSchool.com and who lived through the Bosnian War where his city was under siege for years wrote that he personally gave all his gold for ammunition. Now, he says he keeps 2000 rounds per weapon. Your mileage may vary but consider how much ammo you need if you can never go to the store again. How much do you think you would need for one week? For one month? For one year? Purchase Hollow-points for damage and ball for practice.

Cleaning supplies – Sometimes we overlook how many weapon cleaning supplies you might need. Imagine the worst scenario. Do you have enough cleaning supplies for your weapons to last? Do you have a portable weapon cleaning kit? Do you have all of the right brushes for your various bore sizes? Do you have spare oil and cleaning solvent?

Magazines – Most new pistols will come with one or two magazines, but what if you lose one? What if during the chaos of a firefight, home invasion or attempted car-jacking you have to change magazines and in the panic, leave one on the ground that you aren’t able to find? Do you have spares to replace what could be lost? What about your AR-15? Do you have enough magazines for a load out and spares to replace those if you have to ditch your gear for some reason?

Holsters – This is one thing I think most people overlook and that is a good holster for your pistol. Sticking this down your pants isn’t the ideal way to carry concealed so a good holster is really important to have if you plan on carrying that firearm around with you. I would opt for a good concealed holster first and then get your go to war holster if you need one after that. Most people will only ever need a good concealable holster.

Spare parts – Things break all the time and you won’t be able to log on to Amazon.com to get 2-day free shipping in order to be resupplied after SHTF. You can now purchase spare parts for your weapons online easily so it may make sense to have spare parts on common items that may need replacing(if any) on your model of firearm . One of the reasons I like sticking to one weapons platform is that parts are interchangeable in many cases. I am partial to Glock so some of my magazines, all component parts and some barrels are interchangeable with different Glock weapons I own.

Training – Training is crucial because even if you have the best firearm in the world, pallets of ammunition and enough spare parts to last a lifetime, you still need to know how to use that weapon. Training at a minimum should enable you to safely use the weapon to hit what you are aiming at. You should be comfortable reloading ammunition, changing magazines, clearing jams or malfunctions and taking the weapon apart and putting it back together for cleanings. There are all forms of advanced tactical training courses out there too, but know the basics first.

I think that if you have a plan to keep a firearm for self-defense and you foresee a situation where you could be putting this weapon to use in a bad scenario, you should consider the checklist above. Do you have these bases covered? Did I miss anything?


Other self-sufficiency and preparedness solutions recommended for you:

Healthy Soil + Healthy Plants = Healthy You

The vital self-sufficiency lessons our great grand-fathers left us

Knowledge to survive any medical crisis situation

Liberal’s hidden agenda: more than just your guns

Build yourself the only unlimited water source you’ll ever need

4 Important Forgotten Skills used by our Ancestors that can help you in any crisis

Secure your privacy in just 10 simple steps

For many preppers, a firearm is a must-have item for dealing with the aftermath of a potential SHTF or grid-down event. Firearms in the hands of properly trained individuals can

When your supply of freeze-dried food runs out and the survival garden isn’t producing as well as you hoped, there are plenty of food options to be found – provided it is the right season and you know what you are looking for.

This infographic came from UK Oak Doors, but it is a beautiful informative resource for preppers looking to maximize their chances of survival. I know that many of you, myself included have these plants growing in your yard or not far away and if you are looking for an edible plant source when the grid goes down, this list might save you. That is assuming you don’t suffer from Botanophobia.

This list of what plants are safe to eat in the wilderness gives you a nice photograph of the plant, a description of where it is commonly found, which part of the plant that is edible and some additional notes to help you out. Along with great printed resources like Peterson’s A field guide to edible plants, this infographic shows quickly sources of nutrition that may be all around you, even if your garden isn’t cooperating fully.

While I do always consider a fully stocked pantry and a large producing garden, complemented with other sources of protein the absolute best way to prepare, that might not always be possible. It is always great to have options and rely on other sources of sustenance if plan A decides to take a hike.

Hope you enjoy!

When your supply of freeze-dried food runs out and the survival garden isn’t producing as well as you hoped, there are plenty of food options to be found – provided