HomePosts Tagged "stockpiling" (Page 2)

As much as I hate doing this, I have to agree with the docs on smoking. I don’t really need to remind you just how unhealthy tobacco is – social media’s a pretty good job informing people on the dangers of chain-smoking, nicotine addiction, and all that crap. I find myself in an unusual position – although I have been smoking since 19 and yes, I’m one of those people who really enjoys having a cigarette after a good meal, I still remind others about how bad smoking is.

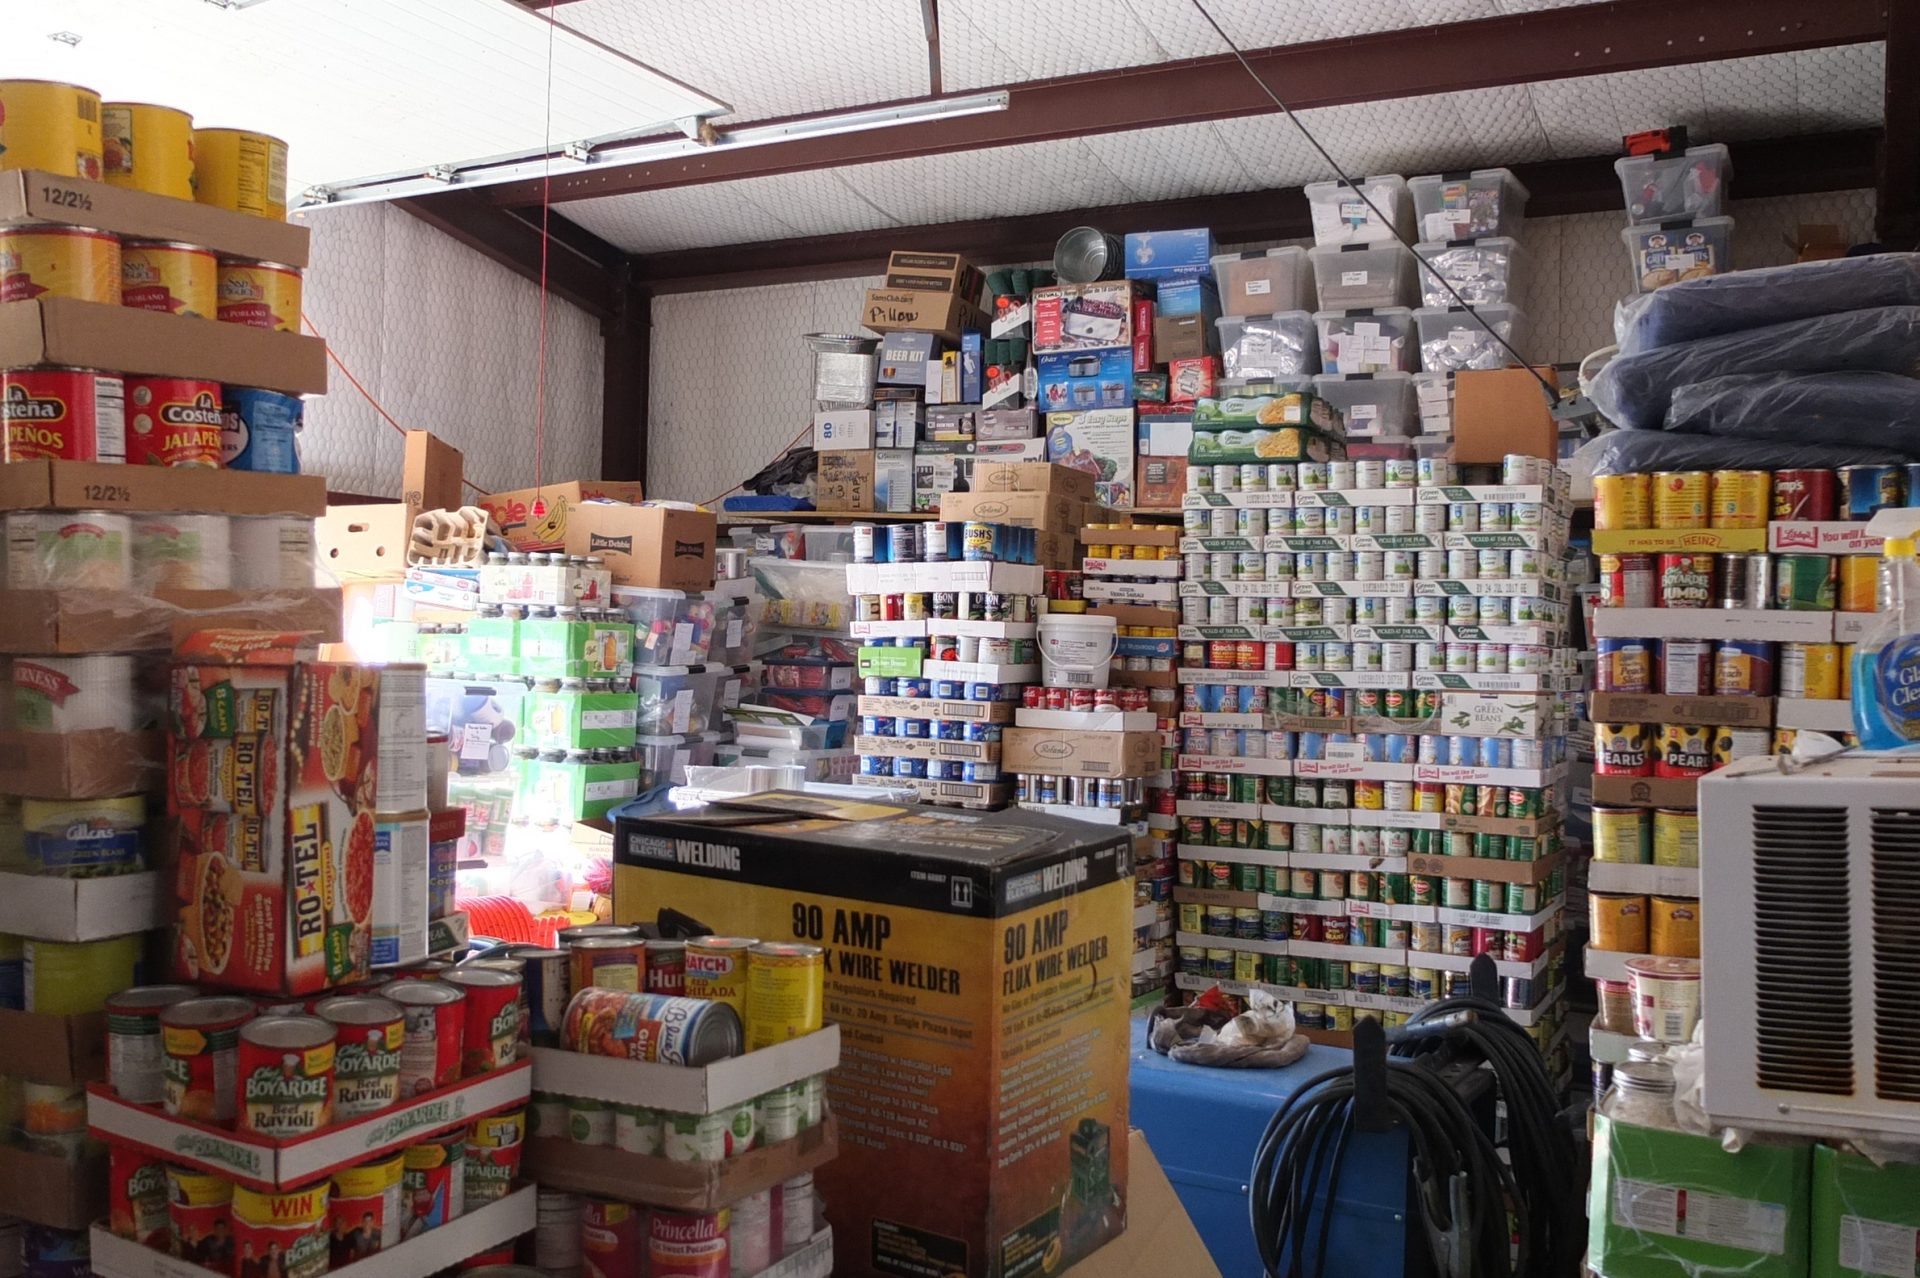
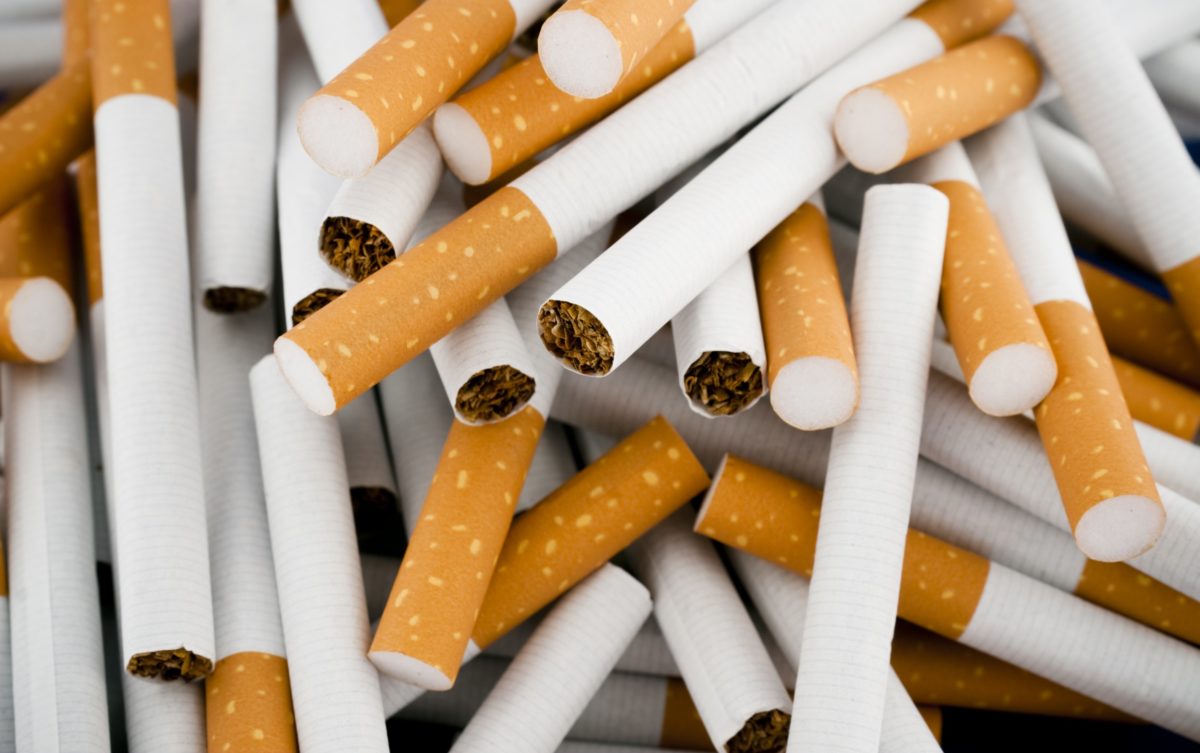
Anyway, maybe I’m a bit of hypocrite when it comes to smokes, but let’s leave it at that. In today’s article, I’m going to show you 8 unusual ways of using tobacco and cigarettes in a shit hits the fan situation. Should you smoke? That’s a big nope. Should you stock up on cigs? Most definitely! So, without further ado, here’s how to use those coffin nails in the field.

Trading

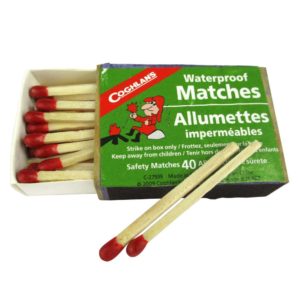
Remember those movies about gold-diggers using cigs and jeans for bartering? Well, in some parts of the world, and not to mention places like prisons or whatever, cigs are still being used for trading. Doesn’t matter if you smoke or not.

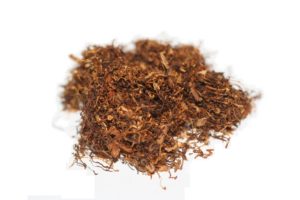
If someone has something you want and that person enjoys a good cig, then you’ve got yourself the best bargaining chip. Just be sure to stock up on the good stuff, not that cheap contraband crap. It would also be a good idea to stockpile some rolling tobacco as well.
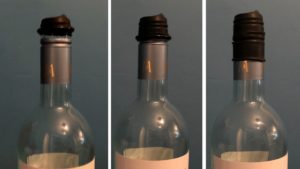
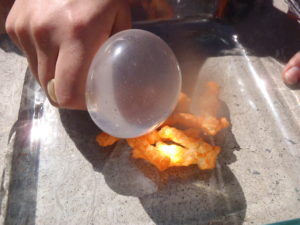
Starting a fire

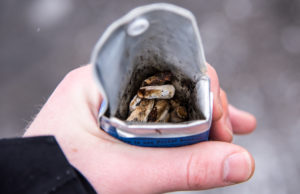
Well, if a cigarette’s destiny was to end up in flames then, by all means, let’s oblige. If run out of tinder, char cloth or steel wool, you can always use a cigarette tube to start the fire. Don’t throw away that tobacco. You may need it later.
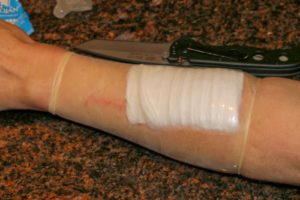
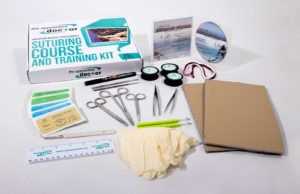
Wound management

To increase clotting rate, light up a cigarette, and sprinkle some fresh ash over the wound. Yes, I know that it sounds like an open invitation to infection, but it actually allows the wound to close faster. Of course, you can always use a lit cig to cauterize the wound in case you don’t have any other means of stopping the bleeding. Just be sure you clean the spot and flush with a saline solution afterward.

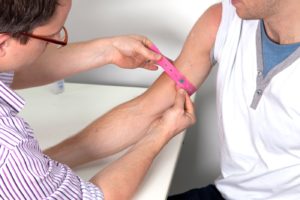
Now, in case you have to deal with a more severe wound, let’s say gunshot or stabbing wound to the lung, you may be able to stop the bleeding by using the packet’s plastic wrap. Tape that thing over the wound and roll over. That makeshift wound plugger will stop the bleeding and, at the same time, will prevent blood from filling up your lungs.

Get rid of a tooth pain

I don’t think there’s anything worse than tooth pain. Throughout my life, I had to deal with broken bones, scrapes, bruises, nicks, and everything in between. But nothing compares to that pulsating pain you feel when you have a tooth infection.

If you’re in the field with no pain meds, break open a cigarette, take a little bit of tobacco and rub it against the hurting tooth. The pain will go away in a couple of minutes since tobacco has minor anesthetic properties. It can also be used as an antiseptic.

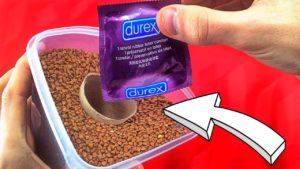
Get rid of intestinal parasites

In a previous article, I’ve shown you a couple of ways to get rid of intestinal parasites such as giardia, hookworms, and roundworm. You may want to add another anti-parasitic med to that list of yours: tobacco.

You know the saying: what doesn’t kill you, makes you stronger and also kills tummy worms. So, if you’re experiencing intestinal parasites symptom, here’s what you will need to do. Get the tobacco out of two cigarettes and eat it. Just like that! Drink plenty of water as the tobacco is sure to leave a nasty aftertaste. To ensure that the stuff killed all those disgusting worms wriggling in your tummy, repeat the procedure after 48 hours.

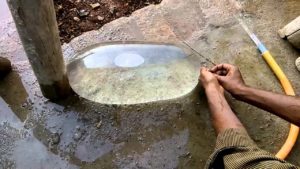
Removing nasty stuff from your water

In a survival-type situation, water is vital. However, that doesn’t mean you can drink water from any muddy puddles and springs you come across. If you run out of water purification tablets, you can use cigarette filters in order to make water safer for drinking. Here’s what you will need to do. Search your bug out bag for straw or any tube-like implement.

Remove two cigarette filters and shove them in the tube. Place your water filtration implement above a clean canteen and start pouring water. The water will slowly trickle into that container of yours. This system works more or less the same as the charcoal & pebble filtration system. That’s because most manufacturers place trace amounts of charcoal inside the filter tips.

Keeping the insects at bay

Camping would indeed be charming if not for mosquitos and other creepy things that sting at night. If you’re all of the insect repellent, you can make your own by using a pack of cigarettes. To do that, get all the tobacco out of pack and place in a pot.

Add some water and bring the whole thing to a boil. While it’s still hot, pour it in a bucket, and place it outside your sleeping area. I should warn that the smell makes your stomach churn. However, it will keep mosquitos and other crawling things away from your bedroll.

Relieves a stuffy nose

Spring’s is finally here! However, at least for me, it’s not a joyous time on account of my allergies and those damned colds. Well, if you feel like someone has shoved lint up your nose, try this old Native American remedy. Take a handful of rolling tobacco and put it in a pan. Add water and bring the mixture to a boil.

Grab a large bowl from the kitchen and a towel. Remove the pan from the fire and empty its contents in the bowl. Now, get your head over the bowl and cover your head with the towel. The smell may not be nice, but at least those tobacco vapors will relieve your nasal passages.

That’s it for my article on ways to use tobacco and cigarettes in a shit hits the fan situation. What’s your take on this? Hit the comments section and let me know.

As much as I hate doing this, I have to agree with the docs on smoking. I don’t really need to remind you just how unhealthy tobacco is.

A best friend in need (BFIN) is a great friend indeed – especially if it can suck the air out of every bag, helping you organize the shit out of your B.O.B.

I was, of course, referring to the vacuum sealer (although that could have easily described every guy’s first-gold-digger-mistaken-for-true-love relationship), a great piece of technology that makes packing a piece of cake. Sure, many of you would come off telling me that this nifty gadget’s been around for quite a while and that I should get out more, but better late than never, as our grandparents used to say.

Indeed, I have to admit that the vacuum sealer’s been somewhat of a late-coming revelation, but that’s mostly because I had the impression that there’s nothing more than I could’ve learned about neat packing.

I was dead wrong. Anyway, I stumbled upon this gadget during one of my trips to the downtown thrift shop – paid around 15 bucks for the sealing machine and two dozen packs of sealing bags. I guess you can also order it online or find it at a hardware store or something, but if you come across one in a thrift, don’t miss out on the opportunity.

So, after packing everything that can be packed, I decided to write this piece to share with you people just how helpful such a doodad can be, especially if you have trouble organizing your stuff. And because nobody likes very long and tedious foreplay (unless there’s booze involved), here are a couple of cookie ways of how to use a vacuum sealer around the house.

  1. Creating weatherproof containers for your meds

Why waste a truckload of bucks on the weatherproof first-aid kit when you can create one using vacuum sealer bags? Thank you, Internet, for telling me this after spending 150 bucks on a heavy-duty kit from my local drug store.

Anyway, if you really want to make a medkit that can withstand anything from heavy rains to snow storms or any Kingdom Come events, grab everything you need and place them in one of these nifty bags. Be careful when sealing your items, especially when it comes to stuff that doesn’t take kindly to moisture. A great workaround would be to seal your medical supplies with a small desiccant silica gel pack.

That should get rid of any remaining moisture. Now, if you really want something hospital-grade, you can try out this nifty trick – get yourself one of those cosmetics bags (you can usually find them in any supermarket, especially around Father’s Day) or a padded Pepsi cooler. Next, take everything out of your regular first-aid kit and separate them. Put your pickup scissors in one sealable bag, sterile gauze in another, painkiller meds in the other, and so on.

Make sure that every object is sterile before placing them in the sealable bags. Vacuum the air out of each bag, place packs in your cooler or cosmetics bag and, voila, you now have a hospital-grade first-aid kit. What I like to do is leave a small gap in the upper part of the bag, in cases I need to break open the pack really fast (you should do this for stuff like gloves, gauze, and pickups). You can seal off the rest completely.

  1. Storing important documents and copies

As you know, one of the most crucial aspects of preparing a bug out bag is ensuring that you have at least one folder or something that contains copies after important items such as house deed, medical insurance, driver’s license, and whatnots. Sure, you can go ahead and buy a folder or something for your documents, but watch out for drizzles or snow.

One clever way of making sure that your docs remain intact no matter what would be to put them in a vacuum sealer bag. I did this for all my docs and copies, Yes, you can seal even the originals. Now, if you have very old documents, it would be a good idea to laminate them instead of placing them in vacuuming bags.

Apart from the fact that they look really neat and ready to be framed, the lamination foil also protects them from stuff like oil, moisture, dirt, dust or anything that may hasten the paper’s weathering rate. I found out that vacuum sealing is a great way to safeguard old docs, books, sketchbooks, and notebooks from those blasted paper moths which literally eat everything in their path (that’s how I lost my Don Quixote princeps edition).

  1. Keeping valuables away from prying eyes

If you have valuable objects like jewellery, gold & silver bullion, Tim Hortons discount tickets, you should consider vacuum sealing them before stashing them in your hiding place of choice. In this form, they’re way easier to retrieve and, believe it or not, vacuum protects valuable objects from things like moisture, dirt, dust, mold, mildew, and, of course, people who ask far too many questions.

If you have gadgets that are no longer of use to you, don’t throw them away if you can salvage the component. Put them in a sealable bag and stash them in your garage or something. Remember that in an SHTF situation, an older but functional phone battery can become more valuable than a bar of gold – priorities! It’s always a question of priorities.

  1. Crafting tailored MREs

Nothing beats that feeling of having a well-organized B.O.B, especially when it comes to the food part. MREs come in all shapes and sizes, meaning that sometimes it’s pretty challenging to keep everything nice and tidy. A great workaround would be to make tailored, vacuum-sealed MREs.

Here’s the deal: no two preppers have the same tastes in food. I, for one, like homemade meals ready to eat and would gladly get rid of stuff like crackers, biscuits, beef jerky, trail mix or potato chips. Whatever your SHTF culinary preferences are, sealing the food in vacuum bags will help you save a lot of space, which you can use for other gadgets and trinkets. Just be sure to toss a pack of desiccant silica gel in each food bag before using the vacuum to suck the air out.

  1. Weatherproofing hiking and camping supplies

Yes, I know you can use cheap garbage bags to weatherproof your clothes and undies, but do bear in mind that a thin plastic sheeting won’t keep your stuff dry for long, especially if there’s extra moisture in the air. One way of making sure that your clothes retain that out-of-the-wardrobe freshness would be to vacuum seal each piece of apparel before tossing them back into your B.O.B or hiking pack.

  1. Creating cheap storage containers for oil, vinegar, salt, and sugar

Among other emergency food, oil, vinegar, salt, and sugar are known to last almost indefinitely, provided that they’re stored in the proper conditions. With a vacuum sealer, you can create ultra-safe containers for your foods.

Sugar and salt are easy to pack, but you may want to pay extra attention when vacuum sealing oil and vinegar (you should consider looking for bags that come with bottlenecks and stoppers). Moreover, you can also make B.O.B versions by using smaller sealable bags.

  1.  Making awesome marinades

As you know, some types of meats like wild game, need to sit in a marinade for at least a couple of days before it can be cooked. Sure, you can put everything in a zip-lock bag before sticking it in a freezer, but there’s always that small chance of air getting inside.

Another reason why it’s better to use vacuum sealer bags has very much to do with refrigeration. Zip-locked marinade needs to stay cool. Meat and marinade that have been vacuum sealed can be kept basically anywhere because there’s no air left to oxidize the meat. Go ahead and have fun with your vacuum-sealed marinade. Just be sure to cook it soon.

  1. Easy icepacks

Don’t have anything on hand to put the ice in? No problem! Take the ice out of the freezer and toss in a small vacuum bag. Seal, make sure there are no leaks and use immediately. You can also stockpile icepacks for later use.

  1. Making spice and condiment packs

Remember the last time you were out camping, and you had to carry all these spice and condiments packs because you didn’t know for sure which one would pair best with the meat?

Well, if you have one of these awesome gadgets, you can make your own condiment packs and spice mixes. Even better is the fact that you can make person-tailored portions. For instance, if you’re more partial to mustard than to ketchup, you can put a little extra for yourself.

Same goes for the other members of your family or hiking group. As for the spice pack, the vacuum sealer eliminates the need to carry all these small packs of salt, pepper, paprika or whatever. Save yourself the trouble of having to carry those around by creating your very own spice mix. Here’s my all-time favorite:

  • Dried minced onion (around three tablespoons).
  • Dried thyme (one tablespoon).
  • Allspice (one or two tablespoons).
  • Black pepper (one tablespoon).
  • Cinnamon (one teaspoon).
  • Cayenne pepper (one or two teaspoons).
  • Sea salt (one teaspoon).
  • Garlic powder (one teaspoon).

Crush everything into a fine powder, add to your sealable bag, give it a shake or two, and enjoy.

  1. Storing bed sheeting and linen

I used to have an entire wardrobe filled with bed sheets and linen. Yes, I know everyone has trouble organizing it, which is exactly the reason why I went ahead and tried to vacuum-seal everything inside.

It’s best to do this after ironing them (allow them to cool down before bagging and tagging to ensure that there’s no moisture inside the pack). You can throw a pack or two of desiccant silica gel if you like. Anyway, I very much prefer vacuum-sealing my bed stuff because you can store them virtually anywhere, leaving you with extra space for new clothes or whatever.

It’s best to take this one step at a time. First vacuum-seal your winter linen, while keeping the spring\summer stuff within reach. When the time comes to use them again, pop open the bags, and seal the rest. You can do the same with jackets, parkas, hunting socks, scarves, gloves or anything wintery.

That’s it for my list on how to take full advantage of your vacuum sealer. As I’ve mentioned, the machine itself is very cheap (you can probably find one in a thrift store as I did). Still, you may have some trouble finding suitable bags – try Amazon or inquire at the store. You can always buy plastic rolls, cut them to shape, seal one end with a laminator or something if you’re looking to upscale or downscale project. Missed anything? Hit the comment section and let me know your thoughts.

A best friend in need (BFIN) is a great friend indeed – especially if it can suck the air out of every bag, helping you organize the shit out of

I admit that I’m somewhat of a hoarder when it comes to food. No shame in this, only the fact that I’m on round-the-clock freezer and fridge cleaning duty. Yeah, I know it’s kind of a bummer to take a garbage bag and throw away that awfully good food just because you consider your family’s needs nor the fridge’s capacity (true story).

Anyway, after cleaning the fridge this morning, a thought stroke me: what if there’s some magical way of telling if the food’s safe to eat or not? Well, that would spare the trouble of having to clean the damned thing each week, not to mention the fact that I would probably save a lot of money.

As a prepper, you probably know by now that food past its prime is unsafe to eat, no matter how SHTF-ish the situation gets. This is the reason I’ve spent the rest of my day searching for a way to tell apart rotten from safe to eat food. Yes, I needed to ask Google for directions because I’m really bad at colors and, because of this damned cold, my sense of smell is close to nonexistence.

So, before you grab your garbage back to summer-clean your fridge, freezer or both, you may want to take a closer look at my kick-ass list on how to figure out if your food’s still good or packing a six-shooter.

  1. Soggy edges

Could never tell for sure how off my veggies were. I always assumed that as long as they don’t give off a funky smell, they’re good for eating. Dead wrong! Apparently, soggy edges, especially in green-leafed veggies like lettuce, kale, spinach, watercress or cabbage is, in fact, the first sign of spoilage.

Yes, I know that it’s a no-brainer, but as I discovered, people usually disregard this part, telling themselves that the veggie’s safe to eat if you cut around the soggy part. So, if you see any sogginess, brown patches or if the vegetable sort of deflates, it means that it has gone bad and, therefore must be thrown in the trash can.

  1. Discoloration

Of course, nothing spells “spoilage” better than an unnatural color. However, in some cases (red bell pepper) it’s hard to tell if that’s part of the vegetable’s life cycle or a tell-tale sign of spoilage. The best way to see how fresh your veggie is would be to make a small nick on the green part. Pull it aside. If it’s green on the inside, it means it’s safe to safe. On the other hand, if it has a brownish tint to it, do yourself a favor and throw it in the trash.

  1. Molding

While you’re cleaning your fridge and freeze, you may want to take a closer look at the bread and any other pastry you may be hoarding. See, no matter how well you keep your bread, there’s always that chance of mold growing on it. If you see any, throw it away as fast as you.

Heard a doozie some time ago that moldy bread may be safe to eat, at least for a couple of days, if you remove the moldy part and stick the loaf in the oven for 10 minutes. That’s a big no-no, and I would advise you to throw away the bread as well as the other stuff it came in contact with.

  1. Limpness

Veggies such as green beans have a limp-type of aspect after being kept in the fridge for too long. If you see any of that, it means that the legume is way past its prime, meaning that it has lost all nutritional value and could severely compromise your health if consumed. Yes, I know that most of you are in the habit of quick-freezing green beans and other stalky veggies.

Still, the freezer’s not always the best option for long-term food storage. Sure, it can extend the shelf-life by a couple of weeks or even months but, eventually, all of it will go bad. In case of veggies look for paleness and a thick layer of ice. As for meat, ice plus a violet tint equals garbage bag.

  1. Foul smell

The nose always knows! If you pick off any strange odor coming from your food, then it’s more than safe to assume that it really has gone bad. Meat will give off a rotten smell, while veggies will smell just like forest fungi. The same smell can emanate from eggs and eggplants. Keep in mind that eating rotten stuff can result in food poisoning or worse.

  1. To float or not to float?

In some cases, it’s quite difficult to figure out if they’re spoiled or not. Take eggs for instance. If there’s no expiration label on them, it’s nearly impossible to tell the difference between a fresh and an old one. Luckily there’s a test you can use to figure out if the eggs are safe to eat or not. Fill a bowl with cold water and place all your eggs inside. If they went under and lay flat on their sides, it means that they’re fresh. If not, then you should consider going to the store to buy a new carton.

  1. Discoloration in meat

There’s a bit of an argument on this one. While some say that meat discoloration is solely the result of poor packaging and exposure to air and, therefore safe to it, others argue that meat turned grey or brown should be tossed in the trash. Can’t say for sure which side is right, but my humble opinion, it’s not a good idea to begin experimenting on food. Best to throw away anything that has an unusual color.

That’s it for my short and sweet guide on how to tell if the food’s still edible or not. As always, if you feel that’s, I’ve missed something crucial, do hit the comments section and speak your mind.

Before you grab your garbage back to summer-clean your fridge, freezer, or both, you may want to take a closer look at my kick-ass list on how to figure out

As the saying goes, there are more ways to skin a <please insert name of an animal other than a cat, because Mr. Jynx is giving me the death stare while I’m writing this> and even more ways to use a pleasure rubber when the shit hits the fan. Yes, you’ve nailed it – today’s article will be about that one item that flushes out first-daters, being the embodiment of unbridled passion, lost nights, and broken hearts  – the condom.

With a history that spans at least one millennium, this STD prevention is, in some parts of the globe, standard equipment for infantry and other military branches. Did you know that during the Juno beach landing of 1944 US soldiers used natural rubber condoms to prevent sand and enter seeping into their weapons? Yes, it’s quite an ingenious trick which kind of proves to us that even an object wildly associated with bouncy-bouncy can have many uses, some of them even outside the bedroom.

Anyway, ever since writing that piece on survival uses of chapstick, I’ve been messing around the Internet searching for even more ‘odd’ objects that have a great SHTF potential. Of course, I could’ve gone with anything like bobby pins, household bleach, zip ties or whatever, but yours faithfully seemed to be more drawn to the wondrous world of bedroom games and ear-ripping onomatopoeia rather than shed-ware.

So, without further ado, here are 17 great ways of using pleasure rubbers in a shit hits the fan situation.

  1. Water carrier

Remember when we were kids, and we used to buy rubbers by the dozen only to use them as water balloons? Well, wouldn’t you know it, condoms can double up as water carriers in case of an emergency. And if you’re now wondering just how much water a condom can hold, let me clear that up for you – most of the ‘regular’ fit types can carry up to a gallon of water or even more.

If you’re looking to enhance your B.O.B with additional water-carrying items, you should consider throwing in a pack of ginormous condoms. Word of warning though – don’t rely too much on condoms when it comes to storing water. Making do with one on an emergency is okay, but in the long run, you may get off with a very bad taste in your mouth after drinking water (that would be the lubricant or the anesthetic, depending on the brand).

  1. Open wound management

Bandages may be hard to come by during an emergency (happens all that time). That’s why you need to be ready to improvise. Though odd, carrying a condom or two in the first-kit may be more beneficial than you realize.

If you run out of sterile gauze or pads, you can tape a condom over the cleaned and debrided wound. This acts as a water sealant and as a barrier for bugs, dirt, or anything in between. In case of light luxation, you may be able to use a condom as an icepack (just fill the thing with ice or ice-cold water and apply on the affected area).

  1. Food storage

Yikes! Condoms used as plastic bags for food storage! What has the world come to? Actually, it’s a far better idea to store food in such a container, since condoms do a great job at keeping moisture away.

More than that, because most respectable condom manufacturers add a trace amount of disinfectant inside the rubber, those bad boys can also whack germs away apart from keeping moisture away. Remember when we were kids and used to think that milk-filled rubber gloves are udders? Use your imagination on this one.

  1. Sterile gloves

Any wound management protocol dictates that any nick, cut or open wound should never be touched without sterile gloves. Sure, that’s true in a world with ample medical supplies, but may become something of luxury during an SHTF situation. If you run of gloves or, worse, you sterilize medical supplies have gone bad; you can pull a condom over your hand and use them as rubber gloves. Of course, it’s trickier to worth with stuff that has no fingers, but then again, who cares?

  1. Corking bottles

I’m the kind of person that always loses bottle caps. Yes, I know it’s frustrating, and in most cases, those darn caps disappear as if wished away by a trickster or something. Don’t panic! If you have a condom within reach, you can use it to cover the opening of a container.

I wouldn’t use on fizzy drink, because the surface is not good enough to prevent the gas from getting out. In case you were wondering, yes, I did, in fact, used an open condom to cover a milk bottle, which I later placed in the fridge. I imagine my wife was not too pleased to discover a pleasure rubber stuck in the bottle when she made breakfast.

  1. Fire-starter

There are always plenty of ways to start a fire, but it all depends on what kind of tinder or fuel you’re using. If you don’t have char cloth or whatever, you can always rip open a condom pack and use it as a fire-starter. Be careful about lighting it though – it’s going to get up in flames really fast so keep a safe distance to prevent breathing in those toxic fumes.


  1. Water-proofing gadgets

The rain in Spain may, indeed, stay mainly on the planes, but out here it tends to knock out everything that’s electronic in nature. I had to pay a whopping $1,000 for two new phones because of the rain- yes, I don’t always carry an umbrella or raincoat.

Anyway, if you’re caught in the rain and don’t have anything on hand to protect your smartphone or tablet, you can use a condom to create a water-repellent barrier around the device. Just make sure you tighten the other end of the condom. Might be a good idea to keep the case on, as many smartphones have jagged edges which can punch holes in the condom.

  1. Slingshot

If you’re out hunting for small game or just target practice, you may be able to use a condom to fashion a slingshot. All you have to do is to find a y-shaped piece of wood. Tie both ends of the condom, put some padding in the middle, and that’s basically it. Good huntin’!


  1. Tourniquet

Although the tourniquet should not be used outside the hospital or by people who have minimal medical training, some cases call for drastic measures. If you’re dealing with an arterial bleeder, you will need more than one pressure point to control the bleeding. Condoms are great for this job – since the outer surface is dry, you can be sure that the thing won’t slip when you’re tying it around a wound.


  1. Weather-proofing matches

Saw a movie once about two Canadian soldiers fighting in the mud-filled trenches of Passchendaele who were having a chat on crucial field-survival techniques. While the first one argued that keeping you gun dry or having a full canteen are the most important things to consider in a survival situation, the other said that keeping your matches dry is much more essential (having something to light a cig and soothe your nerves before the big push).

War aside, the weather-proofed match can take quite a beating, but in some situations (dropping the box in a river or stream), not even goodwill can make those matches come back to life. This is where the condom comes in – before setting out, place your matchbox inside a condom to add an extra water-proof layer. Of course, you can do the same for other fire-starting gadgets the tinderbox, lighter, and emergency candles.

  1. Flotation device

If you ever find yourself floating on the ocean or any body of water for that matter, you can always blow up a condom and use it as life preserver or vest. Keep in mind that condoms can usually hold one or two gallons of water, which means that they tend to displace the same volume of liquid.

  1. Trash bag


Whenever in doubt, use a condom. In case you don’t have anything on hand to dispose of trash, pop open a condom and use it as a garbage bag. Sure, it won’t look pretty, but at least it gets the job done.

  1. Opening jars

Have you ever heard about the expression “mom-sealed jars”? Those aren’t your regular sealed jars, but the doing of someone whose aim was for the jar to stay that way forever. Yes, my mom always had a fiendish delight in seeing me getting read in the face when I tried to open one of her canning jars. Fortunately, there’s a way to breaking the seal without using torch blowers, saws or hammers – wrapping a condom around the lid. That will give you more grip than usual.

  1. Footcare

I could never wear a new pair of shoes without ending up with tons of blisters on the soles. And, apparently, I’m not the only having this problem. Now, if you’re just like me when it comes to new shoes, I would advise placing a condom on each foot before trying them on. This will minimize friction, thus allowing your foot to get used to the new shoes. Try this one for size!


  1. Hand care during woodworking

Doing a little bit of carpentry in your spare time is great. Except for those damned splinters that somehow end up in your fingers. Fortunately, there’s a great workaround for that and, yes, it does not involve wearing padded gloves – wrapping condoms over the fingers holding the wood. I know it looks silly, but don’t judge it before you try it.

  1. Keeping away peeping Toms and animals

I shit you not when I say that those things can really leave a mark if you know how to throw them. Having a hunting cabin means I’m accustomed to dealing with the regular scavenger bear and other two-legged beasts. In case of bears, I like to fill a condom with water and to throw it as close to the critter as possible (don’t hit it though, because this will surely prompt an attack). You can always do the same for people hanging around your property or for pulling a prank on a family member.

  1. Defensive weapon

There’s nothing more manly than that feeling you get when holding or making a weapon. If you find yourself in a close encounter situation, you can always defend yourself using a condom filled with sand, dirt, rubble, small rock or anything you found nearby. Sure, it would awfully silly to smack someone over the yapper with pink condom stuffed with sand, but a man’s got to do what a man’s got to do to protect himself.

That’s it for my killer list of how to use a condom in a survival-type situation. Thought of any other uses for a condom in SHTF case? Let me know in the comments section.

Remember when we were kids, and we used to buy rubbers by the dozen only to use them as water balloons? Well, wouldn’t you know it, condoms can double up

There’s nothing more American than bacon, and don’t even try to deny that. We love it, cherish it, and with good reason since breakfast isn’t the same without those mouth-watering, fat-laden pork strips. I know that for the most part bacon’s a big dietary no-no, but what would life be if we couldn’t indulge on simple things like bacon?

Yup, you’ve guessed it – since he’s a big fan of bacon and, to that end, he has searched high and low for all kinds of wacky ways to make those juicy strips last longer. That’s the trouble with bacon I guess – you’ve got to cook it as fast as possible. Otherwise, you will end up with some bad to the bone meat (insert guitar riff here), along with a lot of crushed breakfast dreams and hopes.

Anyway, since yours truly hasn’t better things to do around the house than looking for ways to preserve food, in one of my scavenger hunts, I’ve stumbled upon a kick-ass bacon storage method. Of course, I couldn’t resist the urge of writing about it and sharing it with you wonderful people. What stroke me the most was the method’s simplicity.

Come to think of it; it’s almost elegant. What’s even better is that, according to the guy who recommended it, by following a couple of simple steps you can potentially increase the bacon’s shelf life by at least 15 years if not more.

As far as the ingredients are concerned, I’ve only tried it on a single batch of common supermarket bacon. Still, if you’re the kind of person that fancies pancetta or prosciutto over bacon, you could try canning those as well (as someone who a lot of cooks, I can tell you that there’s virtually no difference between the three types of meats, except for the fancy names).

Well, time’s a-wasting, and you’ve grown tired of hearing me talk about my buds and exploits. So, without further ado, here’s the well-kept, military-grade secret of storing bacon.

Ingredients and materials:

  • Bacon (as much as you can find).
  • Pressure canner (I use a traditional one).
  • Canning jar (be sure they’re sterilized).
  • Parchment paper (use the unbleached kind. I don’t have some nearby, use masking paper instead).

How to prepare

Step 1. Get your pressure cooker ready. If you opted for the no-power version, it would be a good idea to bring it to a boil before placing the canned bacon inside. As for the electric version, plug it in, pour water inside, and set the pressure between 10 and 15 PSI.

Step 2. Take the parchment roll and use a pair of scissors or sharp knife to cut a long piece (it should be at least 18 inches in length).

Step 3. Get your bacon out of the fridge and separate the slices.

Step 4. Arrange the bacon slices on the parchment. Don’t leave any gaps between them. You’ll see in a moment why this is essential.

Step 5. After arranging the bacon on the parchment, fold over both paper and bacon in half. By the way, someone suggested that you can make the bacon last longer in the fridge or even in a space without refrigeration by coating each piece with a very thin layer of maple syrup.

‘Twould be better to do this after placing the bacon on the parchment paper. Otherwise, the pieces will be a sticker and, therefore, harder to arrange on paper.

Step 6. Upon folding the paper into half, grab the other hand and start rolling it. Just like you do with the newspaper when the dog goes number two on your grandma’s Persian rug. Tuck in the excess paper at both ends to ensure that the parchments don’t unravel inside the jar.

Step 7. Put the Bacon Parchment of Absolute Truth and Might inside a CLEAN and STERILIZED canning jar. Regarding the latter part, there are various ways to do it. If you’re just as lazy as I am, fill a tub with hot water, pour liquid detergent, and dump your canning jars inside. Let them soak for about half a day.

Afterward, take them out and rinse out the excess detergent. Still, if you want to take the high road, you can always boil the living Hell out of those jars before using them for canning. The choice is entirely up to you.

Step 8. Put the lid on each jar and tighten them gently. You won’t need to apply too much force as your pressure canner will do all the heavy lifting.

Step 9. If the water inside your pressure canner has reached the boiling point, carefully place the cans inside. Put the lid on, set the pressure to 10 PSI, and let them simmer for approximately 90 minutes.

Step 10. When it’s over, kill the fire, pop the lid off the pressure cooker, and carefully remove each jar. Place them on a wooden support or something and allow them to cool down. Word of caution – don’t try to force-cool the jars. Heard my mother-in-law say that ‘cooked’ jars are liable to blow up in your face if you run them under cool water or submerge them in ice.

Your best choice would be to leave them be for the time being. Another thing I should mention is that the canned bacon will leave quite a lot of fat on the bottom of the jar. Don’t concern yourself with that part, ‘cause it’s normal.

That’s it! You now know how to can bacon, prepper-style. As I’ve mentioned, this method extends the bacon’s shelf life by at least 15 years. Perhaps even more. To store, either place the canning jars inside the fridge or stick them in the pantry you usually keep your emergency supplies.

Works both ways. To eat, pop the lid, unroll the bacon, cook, and enjoy. I personally like to eat plain canned bacon – it’s less smoky compared to the fresh variety, but has a gentle aroma that reminds me of meatloaf.

What’s your take on this awesome canning method? Let me know what you think in the comment section.

What’s even better is that, according to the guy who recommended it, by following a couple of simple steps you can potentially increase the bacon’s shelf life by at least

You know ‘em, love ‘em, and, most of the time, you buy them by the pallet. No wonder MREs are so popular since they make excellent snacks while providing your body with all the proteins and fats it needs to keep on rolling. But let me ask you a question here – is it really necessary to go to the military supplies store to buy MREs every time you run out? The answer’s “no” because these delish treats can be baked in the comfort of your kitchen. What’s even great is that you already have all the ingredients this recipe requires.

When I was doing my research for the first piece on pickling meat (be sure to check it if you haven’t done so already), I discovered, much to my bemusement, that there are lots of preppers out there who wanna know the best places from where one can buy Meals Ready to Eat. Can’t say that I wasn’t tempted in pulling a fast one by doing a piece on top 10 places that offer great bargains on MREs, but, then again, I really wouldn’t want you guys to spend more of that hard-earned cash.

I came to realize that my folks were baking MREs, long before the stuff hit the market. So, is this a family recipe? Yes, it is! An old one, at that. Mom told me she picked it up from my great-grandmother’s recipe book, who was a sister of mercy back in WW1. Apparently, this stuff would sell like hot cakes during the Great Depression, mostly because they go along so well with a glass of beer or moonshine or whatever (that raised a couple of eyebrows, back in the time).

After baking the first batch, my wife and I did the math: we spend somewhere around 20 on the ingredients for 8 jumbo-size MREs (although we could have made more if yours truly wouldn’t have sampled the mix too many times). That kind of money will probably get you around 4 or 5, and we still got enough left for another batch.

Still not convinced? Keep on reading for our killer survival ration baton recipe.

Why should I bother baking when I can always hop on the Internet to buy some more?

Because, contrary to popular belief, knowing your way around the kitchen is as important as learning how to swim or perform CPR. And we’re not talking here about whipping a quick breakfast or curing meat for long-term storage.

Nope, far from it! Cooking’s a no-brainer if you know how to follow a couple of simple steps.  And by that, I mean that you’ll be able to whip up a delicious and nutritious dish in no time, even if you’re that kind of person who sees the kitchen as just a room. Since I know most of you guys enjoy a good survival ration baton every now and then, I’m going to show you that it’s easy-peasy.

As I’ve said, the recipe involves ingredients found around the house – honey, assorted nuts, sugar, oats; stuff like that. There’s nothing fancy about this recipe, and it will only take you a quarter of an hour, tops. The result – 8 crunchy and sweet energy bars, each of them packing at least 3,000 calories. Check out it for yourself.

Get ready to ruuuuuumble!

As I’ve told you, all the ingredients for this recipe will cost you around 20 bucks, at most.  If you’re not too keen about going shopping, you can always order them online. Now, for 8 survival ration bars you’re going to need:

  • 5 cups of dry milk powder.
  • 3 tablespoons of honey.
  • 3 tablespoons of water.
  • 1 cup of granulated or white sugar.
  • 1 pack of gelatin (at least 3 oz)
  • 1 cup of peanuts or assorted nuts.
  • 2 cups of dry oats (you can also use normal oats).
  • 1 cup of dried cranberries (if you’re not too fond of cranberries, you can replace them with trail mix or assorted dried fruits of your choice).

Managed to grab all the ingredients? Neat! Let’s start making some survival bars.

Step 1. Preheat you over. Aim for 350 degrees.

Step 2. Grab a large bowl from your pantry and mix the following ingredients in order: milk, oats, nuts, and sugar.

Advice: use a wooden spoon or spatula to mix the ingredients (avoid using metal because the resulting mixt will have a bitter taste to it). Don’t stir too fast. You’ll want your mix to be a little chunky. What I like to do is to sort of dip the spatula and bring everything from the ground up top. Do this for a couple of minutes to make sure that there are no air bubbles left.

Step 3. Time to prepare the gelatin for the bars.

  • Grab a small pan and empty the gelatin pack’s contents inside.
  •  Add three tablespoons of water (don’t add more otherwise you would end up with mush).
  • Add three tablespoons of honey to the pan.
  • Crank up the heat and bring the mixture to a boil.

If you want to add a dash of color to your energy bars, try using some edible paint. Go crazy with them.

Step 4. It’s now time to put together everything – the dry and the moist ingredients. One thing you shouldn’t do would be to let the gelatin and honey mixture cool down completely. If you do that, you won’t be able to mix them with the dry ingredients.

So, toss the spatula aside, and ready your hands. Yes, you’re going to use the hands for this part. It’s much easier and, why not, fun. Don’t forget to wash them hands before messing with the mix.

Just like before, stick your hands inside the mix and bring the stuff on the bottom right to the top. Do this for a couple of time to make sure your dry ingredients are thoroughly mixed.

When you’re done, grab the gelatin pan. Pour a little over the mixture and use your hands to knead the stuff. Continue pouring and kneading until there’s no more gelatin.

Advice: the first time I tried doing this one on my own, the dough turned out to be way too dry even after pouring the entire contents of the pan. To make is moister (wipe that smirk off your face), add a little bit of lukewarm water or even a tablespoon of milk.

Knead, knead, and knead again, until everything’s hunky-dory. If you want your batons to be extra puffy, cover with a clean cloth and it aside to rest for around half an hour. Plastic wrap also works if you don’t have a cloth.

Step 5. Place some baking paper on an oven tray and pour the mix right in the middle. Then, using a spatula or your hands, spread it around as to cover the entire surface of the tray. Over should have reached the desired temperature by now.

Step 6. Use a pizza knife or the other end of a wooden spoon to separate your energy bars. I like to make them rectangular, but you’re free to try out any shape you like (next time, I think I’ll make them in the shape of hearts or Christmas trees just because I can).

Step 7. Stick the tray into the pre-heated oven and bake for 20 to 25 minutes (might takes less if you have one of those convection ovens). Here’s what I like to do in order to see if the bars are ready to be taken out of the oven.

FYI, this trick works for all your baking needs (cake, cookies, pastry). So, what I do is take a toothpick or small piece of wood (grandma used a clean straw from the broom), and sort of poke a small hole in the middle of the dough. Take out the toothpick and look at it – if the dough’s still clinging to the toothpick, it means that it’s not yet ready. On the other hand, if the toothpick’s clean, take it out of the oven before it hardens.

Step 8. Take the tray out of the oven and allow the power bars to cool down before bagging them. You can store them in zip-lock bags or airtight plastic container.

More on home-made MREs

That’s about it for the baking part. It’s exactly what I’ve been telling you – simplicity itself. Now, some of you are probably wondering about shelf life.

Well, since this recipe calls only for ingredients with very long shelf life, in theory, they should last for quite a while if you’re careful enough to store them in a proper environment. Still, if I were you, I would bake a fresh batch every couple of months or so just to be that the B.O. Bs are up to speed.

For those of you with peanut allergy, I would advise you to replace them with dehydrated fruits. You can also use more oats if you like that stuff.

Also, if the good, old doc told you to cut back on the sugar, you can always 86 the sugar from the recipe and stick to honey, pun intended. I wouldn’t use artificial sweeteners like stevia because that would give the bars and unpleasant, metallic-like taste.

The best thing about this recipe is that no matter how clumsy you are in the kitchen, you’ll still be able to make it to the finish line. First time I tried baking MREs, I poured the mixture from the side, instead of putting it in the middle of the tray. Yeah, I ended up doing more cleaning than actual baking.

If the power goes out, which tends to happen of a weekly basis where I live, you can still bake these thingies if you have a gas oven, a thing I highly recommend.

Another thing you can try out is to try an all-nut version (without fruits). Of course, that would definitely make the calorie count go through the roof..

So, have fun with your baking and don’t forget to hit the comment section to show me how your MREs turned out. Ta-da, guys!

Is it really necessary to go to the military supplies store to buy MREs every time you run out? The answer’s “no” because these delish treats can be baked in

I can’t remember the first time I heard the word “prepping.” Probably back during those school camping trips when our PE teacher tried to show us how the Native Americans used to whip up a fire, long before matches and lighters were ever invented. Of course, what child was taken far away from home with his friends would have the energy or the attention span of listening to a man rubbing two sticks together?

That’s one of the things I tried showing to my students – if someone shows you a trick, even a small one like I don’t know, turning a poncho into a rainwater collector, pay attention and learn. You’ll never know when that stuff will come in handy.

Anyway, on to the topic du jour – what is prepping and when should we start, well, doing it, I suppose? This isn’t Merriam-Webster, nor the “P” volume of Encyclopedia Britannica. Don’t know any fancy definitions and never needed one, for that matter. For me, prepping is like knowing you will receive a slap for somebody and doing things in order to prevent it to the best of your powers. Something like that, I suppose.

Come to the prepping side! We have MREs

We don’t prep because we’re members of the tinfoil brigade or strongly believe that the world’s coming to an end and survival of the strongest and all that BS. We do it because it makes sense. I remember reading in a magazine (yes, I’m that old!) that prepping is like having your own crystal ball and being able to see into possible futures.

Leaving the mystical mumbo-jumbo aside, this sentence does raise a very good point – being able to predict something and act in accordance. For instance, if your car’s bulbs would burn out while you’re on the road, the most sensible thing to do would be to go to the nearest auto shop and get them replaced.

However, a good prepper would have the hindsight of carrying a box of extra in his glove box or vehicular emergency kit. A seasoned one would, however, get his car a good going-over before hitting the road, in addition to making sure that he has everything he needs to deal with this sort of emergencies.

This is just one example. There are countless more out there, and neither one spells out crazy or paranoia. Do you consider yourself “having bats in your belfry” just because you have a stockpile of canned food around the house or an extra pack of bottled water? No, you’re not, my friend. It’s, in fact, the other way around – it would be foolish not to have those around the house. All it takes is something as ‘harmless’ as a blackout to realize just how much you would have needed those stuff.

I tend to get this question a lot: when do you start prepping? Well, let me put it to you this way. This is not the sort of thing you only do when it’s convenient or fits into your agenda. You just start doing it and never stop. Still, anything has to start somewhere, and a good starting step would be the news. Have you tried reading them lately? One thing you’ll realize is that no matter where you live, there’s always something happening – a blackout, earthquakes, tsunamis, snow blizzards, rioting, active shooter.

The world’s littered with danger, and you can’t always rely on the authorities to keep you safe. Remember the Christchurch mosque shooting, the event that ended with the death of over 50 people? Well, as it happens, New Zealand was and is still considered one of the safest countries in the world, even though it has the same gun regulations as the United States.

The last event of this magnitude occurred in the early 50s, and even then, the country was still considered a safe one. Don’t make the mistake of assuming that you live in this glass menagerie, where everything is pink, fluffy, and happy. Shit happens, and when it does, it brings along all its friends.

Congrats! You have just taken the first step of your prepping journey. It’s called risk assessment and, in my opinion, the most important aspect. Knowing the name of the demon gives you power over it, the guy from The Exorcist used to say. The same goes for natural and man-made disasters.

The next steps are fairly easy, and all of them have, more or less, to do with your little incursion in the realm of danger. As a future master prepper, you will have to focus on the following areas: food, water, shelter, and security. Let’s take this one step at a time.

Water

Fact: the human body needs water for, well, everything. You need water to digest the food, and your brain needs water to keep the lights on. Remember the rule of threes? You may go for three weeks without food, but no more than three days without water. That’s how important water is. And no, chugging energy drinks, soft beverages, coffee or booze does not replenish your body’s water supply. In any survival-type situation, find a source of water is crucial.

More than that, you will need to know how to make water drinkable and maybe palatable. For instance, in heavily wooded areas, there are plenty of ways to get water: springs, tree holes, puddles, rivers. Some of that water’s safe to drink, but, in most cases, you will need some sort of filtration like water purification tablets. Even tap water can sometimes become unsafe to drink, especially in the aftermath of a disaster. Water purification is an essential skill, one that you will need to master.

Food

Food for the belly, food for thought, and food for the soul. No matter your choice, you should also have a well-stocked pantry at home. This includes emergency rations such as canned or easy-to-prepare food, MREs, and cured meats. If you get lost, you may need to replenish your food stocks by hunting small game or fishing. Apart from that, knowing with that do with it is as vital as getting it. Venison can be easily turned into beef jerky with salt, wind, and a little sun. The same goes for fish or plants like seaweed. No matter where you are, you must always remember to have a 72-hour food supply.

Shelter

Shelter comes in all shapes and sizes – makeshift ones like those constructed from scavenged materials or retrofitted rooms as in those used to hunker in during a natural disaster. Remember that a shelter’s role is to protect you against the elements and any threats that may be in your area. Anything can be a shelter as long as it protects your body and keeps you warm.

Security

I kid you not when I say that entire books have been written on the topic of defense and security. To make a long story short, security refers to two things: how you keep your property safe and defend yourself in case of an attack. Security bars, alarms, motion-triggered sensors, VoIP cameras are all great security measures for your house. As for yourself, try to squeeze some self-defense classes into your schedule or learn how to take down opponents using non-lethal weapons such as tasers, pepper sprays or security batons. The choice is entirely up to you.

If prepping was as art, which it is, then it would definitely be the art of teaching yourself how to listen to your instincts. In some cases, it may be the defense you have. Logic may be great, but nothing beats a tad of hindsight.

If someone shows you a trick, even a small one like I don’t know, turning a poncho into a rainwater collector, pay attention and learn. You’ll never know when that

You know ‘em, you buy them by the dozen, and they usually end up in the washing machine along with the rest of the clothes. Yup, you’ve guessed it – the chapstick, the only thing that shouldn’t be missing from your pocket, especially during the cold weather, regardless of sex. Sure, it’s funny to see a 7-foot-something mountain of a man using a chapstick because of cracked lips, but still, the thing has its uses.

A couple of days ago, I was at home watching this guy on TV who kept on repeating that all everyday items can be used in an SHTF situation. This guy did say that ALL EVERYDAY ITEMS, including the ones found in pockets and purses, can be used for survival. He managed to cover everything from lipstick, hand sanitizer, credit cards, and pens, but he missed out on one item that can do that all of that stuff put together.

And, after doing a bit of snooping around on the Internet, I’ve discovered some of the most ingenious uses for these objects which, as I earlier said, ends up on the clothesline after a good wash. So, without further ado, here are 9 awesome ways to use chapsticks in and SHTF situation.

  1. Blister buster

If you’re the kind of person who gets blister each time he wears a new pair of shoes, then chapstick is the answer you were seeking. Since the stick contains a small amount of antibacterial substance, applying a little bit on the area predisposed to chaffing and blistering will go a very long way. Give it a go and see how it works.

  1. Fixing small cuts

In case you find yourself without disinfectant or bandage, you can apply a thin layer of chapstick on the cut. Bear in mind though that this only works for small cuts (wouldn’t try using it on larger wounds). If you really want to speed up healing, you can use a combo of chapstick and clean cloth on the cut.

  1. Cleaning glasses

As the very proud owner of prescription glasses since the age of 12, I can tell you that nothing cleans lens better than chapstick. First, wipe both lenses with a clean cloth and then apply a very thin layer of chapstick. You can use the same cloth to wipe off the chapstick, or you can rinse the glasses with plain tap water (don’t do this too often, as water can erode the lens). Sure, this may not qualify as a run-of-the-mill SHTF situation, but do bear in mind that many car accidents have occurred because the drivers simply forgot to wipe off their glasses before getting behind the wheel.

  1. Hiding money

If you live in a rough neighborhood, then your kind of forced to improvise when it comes to money. Sure, keeping them on credit cards or a virtual account like PayPal usually works, but with cash being king you simply cannot step out of the house with a couple of greens on you.

A very clever way to conceal money is by using an empty chapstick tube. Pocket the thing and in case trouble find you the only thing your wannabee robber will see is a regular chapstick tube. You can also use the same method to save some cash for stuff – that’s how my wife bought me an amazing B.O.B for my birthday.

  1. Crafting emergency candles

For when the lights go out, that’s when all the hidden treasures of the world reveal themselves. The nigh may be dark and filled with dangers, but nothing a little light can’t solve. If you’re all out of 24-hour candles or flashlight died out on you, it’s possible to make an emergency candle out of a chapstick. Get a Q-tip and pop the top of your chapstick. Fluff the cotton on one end and dip it into the chapstick. After that, simply stick the other end in the stick, use your favorite fire-starting method on the fluffed end, and, voila, let there be light!

  1. Blocking sun glare

Summer’s great – except for that f-ing glare which makes you feel like somebody used your eyes for Voodoo practice. Of course, nothing beats sunglasses, but in case you lose or break them you can block some of the glare by using a combination of soot and chapstick. On a clean surface, put the contents of a chapstick. Grab a handful of soot and use a stick or something to mix them. Smear this under your eyelids, and you’re good to go.

  1. Setting up snares

If you’re trapped in the wild with no food, you can use chapsticks to bait small animals. Rabbits, for instance, are suckers for anything that’s sweet (no, you can’t use your engagement photo to lure the critter into your trap). Set up a trap and instead of food, place an opened chapstick (would be great if you have one with fruit-flavored one).

  1. Leather care

There is plenty of stuff on the market for leather care. However, I found out that nothing makes a leathery surface shine better than a chapstick. It’s very similar to using the cream for your shoes or boots: wipe off the dirt and dust with a clean cloth and then apply a thin layer of chapstick. For a great shine, use a fine brush after the chapstick has dried.

  1. Lubricant

First of all, wipe that smirk off your face. I was talking about things that need a little extra something to get moving like screws or a machinery’s moving part. If something’s stuck and won’t budge, you can always replace the famous WD40 squirt with chapstick. It works wonder on rusty things as well.

Hope you’ve enjoyed my piece. As always, if you have any questions, wanna say ‘hi’ or add something to the list, hit the comment section.

After doing a bit of snooping around on the Internet, I’ve discovered some of the most ingenious uses for these objects which, as I earlier said, ends up on the

You’re looking at a man who is 50 bucks richer than yesterday. Why? Because I just won myself a bet, that’s why. See, a while back, I got into an argument with a prepper friend of mine – great guy, but a bit of a shrewd when it comes to buying survival equipment. His theory is nothing can beat first-hand, mint, hot-off-the-press items (yup, he’s that kind of dude who believes in the power of new, I’m not talking about religion here).

Anyway, we were out talking about the finer points of pre-EMP prepping (meaning that we cracked open a couple of cold ones and watching the game), when he got around to telling us how he spent this $1,000 monthly bonus on gear.

Can’t say that I was too impressed about the sum, and neither were the other guys. Now, a couple of minutes later, I wagered him that I could probably get the same items he got for $20 if not less. Of course, no wager’s complete without something to sweeten the pot – our bet was 50 bucks. Kind of have to admit that it was like taking candy for a tyke because I knew that the yard sale season was coming (sorry, dude, but you kind of asked for it).

And so, at the crack of dawn, I got up, put on my awesome lumberjack jacket and went around the neighborhood to see what’s cooking.

Living in the suburbs does have its perks – neighbors are annoyingly friendly and, with a bit of luck and, of course, a wide smile painted on your face, you can probably end up buying everything you need from the house without having to spend more dough than necessary.

And wouldn’t you know it, I managed to spend no more and no less than 20 bucks. Needless to say, my wife gave me the death stare when I got home with all that stuff because I knew too well that we have a major storage issue. But, a bet’s a bet.

So, after my glory dance and in-your-face-loser moment, I thought I should let you guys on the spoils. Now, I know that most of you are not quite taken aback by the perspective of buying survival stuff from an old man’s garage, but if you know what you’re looking for and know how to haggle a bit, you can even walk out with stuff you usually find in antique stores (a friend of mine bought a fully functional pair of WW2 field binoculars from a guy with a “$5 everything” sign on his table).

Now, without further ado, here’s what 20 bucks got me from yard sales.

  1. Radio

I was planning on buying myself a CB radio for the family van, but never really got around to it. Luckily, while doing a bit of snooping at the yard sale, I managed to find a fully functional one.

The owner, who was a cab driver in NY before retirement said he bought the thing back in the ’70s for his pickup but never used it. After a bit of haggling, I’ve managed to convince him to sell me the thing for five bucks.

Apparently, he was so grateful for getting rid of that thing, that he even gave me the matching antenna and car dongle. Neat!

2. Hiking pack and frame

One does not have to be a mountain junkie to get a hiking pack. Those things are great for most any job that requires some serious lifting.

Can’t say I needed a pack, but seeing that this dude was selling and an army-style pack with a metallic frame – those things are so old-school, that even pops said he hadn’t seen one of those since his days in the Army. The pack was in a pretty good condition, considering the price (paid $4 for it).

Still, I had to sew back one of the straps which probably came lose some time ago and reinforce the metal frame with some pieces of sheet iron. Other than that, I think I got a pretty good deal if I say so myself.

3. Propane tank

Propane tanks aren’t that pricey, but hauling them can give anyone nightmares. I personally abhor to go and refill the propane canisters for our generator, that’s why I always avoid using it till the very last moment.

In searching the yard sale, I came upon a nice lady who said that she no longer has a use for a BBQ propane tank since the thing broke down years ago. Scored one full propane tank for a couple of bucks. Great! Now I got to figure out what to use it on.

4. Suturing kits and medical instruments

One of the biggest frustrations is not being able to get into pre-med. Don’t quite recall exactly what happened, but it doesn’t really matter. Anyway, I’m sort of a freak when it comes to med stuff (even got my own CPR dummy in the garage), which means I’m always on the lookout for a way to make my super-duper first-aid kit even more awesome.

In searching for stuff, I came upon this elderly gent who used to be a gynecologist back in the day. We chatted for a while about the med, disease, pills, aches, and things like that. Didn’t leave empty-handed, though – got a couple of sealed 3.0 silk suturing kit, forceps, and a pair of pickups for $6 (of course I’ll sterilize them before use!). He was nice enough to throw in a scalpel, as a bonus (love you, gramps!).

5. Gold and silver coins

You don’t know a thing about swindling if you’ve never been to a yard sale. One of the guys living next to my house was offering for sale a small chest which he claimed to contain golden and silver coins from Napoleon’s time. Was a bit skeptical at first, but I soon came to realize that the man was right.

What follows is a “don’t try this at home, kids” moment – took a bit off one and told the man that all of them were tin replicas of Napoleonic coins. Yes, I know I should be ashamed, but that’s how it went down. I bought the chest and lot for $8. The things you find at yard sales nowadays!

6. Hand-cranked lantern

Remember those oil-powered lanterns you see in any Victorian movie? I managed to get myself a pretty decent electrically-powered replica of one for $3. Still, I think it needs a little bit of work – the bulb flickers from time to time, and the reflector dish is smudged.

The crank could also use a bit of oiling. Other than that, the lantern’s pretty good, and I can’t wait to try it out the next time I go camping with my wife.

7. Shit-ton of books

You can never have enough books. Yes, I admit to being a true-blooded book hoarder, and f-ing proud of it. Now, I’m painfully aware of the fact that electronic gadgets such as Kindles are great for the environment and all that, but I wouldn’t trade the smell of old books for anything. Not even at gunpoint.

Anyway, this time I managed to restock my poetry shelves with some classics – Tennyson, Whitman, Coleridge, and a little bit of Edgar Allan Poe. Some of them are in a deplorable state; the complete poetical works of Tennyson is covered in childish doodles, and even Poe’s not in very good shape. Still, two bucks are two bucks.

8. Canning jars

Whether it’s for pickling meat, stock, bouillon or storing MREs, canning jar are always a sight for sore eyes. Yeah, I know you can buy them by the dozen from any supermarket, but why bother when your neighbor is selling them at ludicrously low prices? I picked three jumbo pickling jars for 20 cents, each. Wife won’t be thrilled to find out that I’ll soon pickle more stuff, but, hey, can’t a man have fun around the kitchen?

9. Weathering stones

If you’re just as obsessed about keeping your knives razor-sharp, you know that weathering stones are a must around the house. Each time I go out shopping, I never forget to bag at least two or three. My yard sale tour was quite fruitful in this regard – managed to buy several sharpening stones of various smoothness for 10 cents each.

10. Intact tarps

Tarps are the Tom Mix pocket knife of B.O.B prepping, meaning that you can do just about anything with them – collect rainwater, use them for cover, make them into rain ponchos.

They’re also quite useful for keeping firewood dry and covering swimming pools during fall. The trouble with buying tarps from yard sales is that most of them are either warped or have small holes in them.

Yes, I know that you can fix those in the jiffy, but what’s the point of paying for a tarp if you have to patch it afterward? I got lucky on this one – my next-door neighbor sold me a couple of military-grade tarps for 2 bucks each. Quite a bargain and after getting them home, I realized that they were in pristine state.

11. Sleeping bag

It’s not what you might call hygienical, but who cares about germs and all that when you’re in an SHTF situation – probably the man with an infected wound.

Anyway, I really didn’t need another sleeping bag. Still, who can resist those granny eyes telling you that you’re as sweet as her grandson? A couple of minutes later and minus five bucks, I had a brand-new old sleeping bag.

12. Vacuum cleaner

You know what irks me the most about today’s electronics? They’re so fragile. Two years ago, I had an argument with my wife about what kind of vacuum cleaner we should buy. I may be stingy, but compared to her, I’m a spendthrift. So, we got this cheap-ass vacuum from the electronics store. Fast-forward in time, just before the bet, the wife called me to say that the motor burned out.

Great! More money on electronics, I told myself. But that yard sale really managed to sort this one out. There was this man who was selling a brand-new, no-sack, water filtration Samsung vacuum. The thing was in perfect condition – he didn’t even open the box. After haggling for a bit, I managed to convince him to sell it to me for $25 (yes, I know that I didn’t play fair, but the vacuum wasn’t even on the list).

13. WWI gas mask (I shit you not!)

On the topic of curious picked up from flea markets, sometimes, I have to admit, that these things are veritable treasure troves. During one of my raids (yeah, that’s what I like to call them) I actually managed to get my grimy paws on an authentic WWI gas mask.

Sure, it had no filter, and the bag was a little warped, but other than that the mask was in pretty good condition. I spend around $7 or $8 (can’t remember) for this piece of war memorabilia.

Dunno for sure what I’m going to do with it, though. It’s obvious that it can’t be used in this state, and spare WW1 gas masks filters are pretty expensive. Anyway, if you know someone who refurbished infantry equipment, do give me a holler. Beer will be on me!

14. Portable ashtray

Yes, I know I should give smoking for Lent – easier said than done. Meanwhile, I have had some issues over what to do with those butts while hiking.  Lucky for my local yard sale, because I managed to pick up some sets of three portable ashtrays (they even come with a lanyard hole in case you want to attach it to your backpack). The set was 2 bucks a piece. I bought three of them!

15. Spare ammo

Well, if you’re missing a couple of ammo boxes, you can always call upon your neighbors’ stocks. Haven’t picked up ammo from yard sales, but I’ve seen a guy who sold shotgun shells and AR ammo for $5 apiece. So, whenever in doubt, check your local flea market.

I know that most of you are not into buying survival stuff from a yard sale, but if you know what you’re looking for you can even walk out with

There’s a reason why each shopping cart contains at least a bottle of bleach – this stuff’s good for a lot of odd jobs around the house, and some of them don’t have anything to do with cleaning. I being a computer geek have always kept an ample supply of bleach because it works wonders on yellow computer cases.

Anyway, ever since it became commercially available, bleach has been held in high regards, especially by those who had a rough time cleaning nearly-impossible to remove stains and for keeping germs away. In it’s watered down form, bleach can also be used as a room freshener and for giving shine to grandmamma’s white porcelain collection.

Beyond the mere household, bleach can also be successfully employed in survival-type situations. Hence today’s piece which will deal in the many uses and faces of survival bleach, this Jack-of-all-trades of the pantry.

Because I had time to look up more stuff while doing research on my pleasure rubber in SHTF article, I’ve somehow managed to stumble upon a treasure trove of info about the over glorified Clorox bleach. So, fellow preppers, prepare yourselves and feast your eye on the wonders of bleach in just about any SHTF situation.

  1. General sterilization

Of course, one would be very inconsiderate if not stating, well, the obvious – bleach is the ultimate germ buster, being successfully employed in virtually every cleaning job. Grime? No problem! Scale? Who cares? Smears? I have 99 problems, but Clorox makes all of them go away. The stuff is very handy for disinfecting tools used in minor surgery (a pair of pickup scissors or needle with surgical thread) when you don’t have other means of removing the germs. If you water it down a little, you can also remove stain and bacteria from small objects.

For instance, a solution containing one-part Clorox and three parts water may be used to clean and sterilize LED displays (always water down the bleach before using it). My grandma had the habit of spraying all the rugs and upholstery with a diluted bleach solution.

Apparently, this is the best way to remove bacteria, revive colors, and prevent warping. If you’re a fan of second-hand shopping, the above-mentioned bleach mix will help you get rid of lingering germs, while removing that old, musty smell that tends to follow every object bought from these sorts of establishments.

If you have a kid on the way, you may use spraying bleach to disinfect every item the kid may come in contact with – cradle, toys, clothes.

In the field, it may be possible to use trace amounts of chlorine bleach to purify water. Sure, it won’t have the same taste, but at least you won’t come down with dysentery, enterocolitis or any other tummy diseases.

Pet owners can use spray-based chlorine to remove animal smells from the furniture. I being the proud owner of two cats (a boy and a girl), I found relief in the fact that bleach’s able to remove that nasty odor tomcats tend to leave behind when establishing boundaries.

  1. Crafting an anchor

Though the idea of becoming adrift is akin to pure dread, there’s no reason why you can’t anchor down your raft if you have a bottle of bleach nearby. If the situation calls for immediate action, use the remaining bleach to sterilize your gear and water supplies, and salvage the bottle.

Wrap paracords or any dental floss around the bottle’s neck and fill it with anything heavy (concrete, sand, tiny rocks). Congrats! You’ve just made yourself an anchor worthy of any ship on its maiden voyage.

  1. Cleaning your veggies and fruits

Water’s the best way to clean fruits and veggies, isn’t that right? In most cases, yes, but there are some cases when using just purified water just won’t cut. Enters bleach, a marvelous disinfectant that can be used in case of an emergency to clean your veggies and fruits. Just be sure to use a watered-down mix. Otherwise, you will end up with bleach-soaked food, a thing which does not agree with your esophagus and stomach.

By the way – be very careful around the stuff, because the thing can burn through your skin like acid. In case you accidentally spilled some on your hands, or other parts of the body (I don’t judge) go and wash the area with plenty of soap and lukewarm water. As for the drinking part, don’t try to induce vomiting. Instead, dial CDC’s accidental poisoning hotline and await further instructions. In the meantime, drink water or a glass of milk. You should stop in case you’re experiencing convulsions or other changes.

  1. Weed-whacking

Without a doubt, every prepper’s turned gardener waking nightmare is seeing his crops wilting or, worse, eaten away by pests or overtaken by weed. Sure, you can try out all kind of artificial weed-whackers and whatnots, but you’ll probably end up poisoning the soil and making bad veggies.

A great and safe way of getting rid of pests and weeds is to spray your plants with a mixture of water and chlorine bleach. Like always, the recipe calls for one-part chlorine bleach and three parts water. Cover your garden using a hose with a fine mist. For the best results, you should do this at least once a week. Be careful about weed-whacking the wrong kind of weeds (see my article on healing herbs and weeds that grow around the house).

  1. Anti-rad countermeasure

Although it’s highly unlikely that we would have to deal with a nuclear detonation any time soon, it’s good to know that household bleach can be used for decontamination. Hypothetically speaking, if you find yourself stranded in an area with high radiation, take off your clothes and soak them in a tub filled with water and chlorine bleach.

As for body decon, wash all body parts with water and soap first, then used a watered-down bleach solution to rinse your body. Be careful when preparing the mix – for body decon, it should be one unit of bleach to 100 units of purified water.

  1. Self-defense

Pray it won’t come it, but when the spam hits the ham, a bottle of chlorine makes a great weapon of self-defense and distractionary device. If your opponent gains ground, uncork a Clorox bottle and toss it in his face. The results won’t be pretty, I guarantee that, but saving your can is sometimes more important than thinking about the interaction between skin and bleach.

  1. Outliving a contagion

Hold on to your britches there, because I wasn’t referring to the next Black Plague or Ebola. Even the flu season is considered an outbreak, and it should not be taken lightly. One way to purify the air is by bleach and water.

Hygiene is very important but becomes crucial when dealing with a contagion. To minimize exposure to the virus, make a 50-50 bleach and water mix. Pour it inside an empty and clean spray. Use a fine mist on things like clothes, upholstery, pet beds, bathroom tiles or any place that may hoard bacteria and deadly viruses.

  1. Getting rid of mold and mildew

Probably the most annoying part of being a homeowner is finding ways of removing mold and mildew from various objects. Since my son has a slight allergy to mold, I and my wife always try our best to removing as much as the stuff as possible.

One of its nesting places are the gaps between bathroom tiles (yeah, I real back-buster when it comes to spring cleaning). It is possible to hack away any mold and mildew from your home by mixing bleach and water in a bucket. Take a clean rag, soak it in the mix, and wipe. Not only will the mold come off on its own but it takes less scrubbing compared to using special cleaning supplies.

  1. Removing grime and dirt from trashcans

As you know, in case of an emergency, trashcans, especially the big ones, can be converted into portable water carriers. Still, that they are somewhat challenging considering the amount of grime, dirt, and sludge festering at the bottom. A quick way of removing that filth in a sinch is by using bleach in addition to detergent. Prepare a 50-50 bleach mixture and add some detergent. Don’t forget to wear protective gloves while cleaning the trashcan. Word of warning – while preparing the mix, fumes might emerge from inside the container.

Don’t breathe in those fumes as they are highly toxic. If you do, immediately stop what you’re doing, wash your face with plenty of water, and wipe with a clean cloth. You can try to flush out any lingering bleach from your nostrils with blood serum (you can find those bottles in any drug store or pharmacy, and they’re perfectly over-the-counter).

Fill up a small syringe with blood serum, tilt your head a bit, and slowly inject the stuff into your nostrils. Don’t breathe in the stuff!  Blow your nose in the sink and rinse with plenty of water.

  1. Field-sanitization of food plates and eating utensils

Just because one finds himself in the middle of shit hits the fan situation, it doesn’t mean that one should disregard basic hygiene rules and eat from whatever plate, no matter how dirty it is. If you were planning on adding one or more items to your B.O.B, my advice to you is to toss in a small bottle of Clorox. Combined with purified water, bleach can be used to clean and sterilize everything from plastic plates to cutlery.

I myself like to use the stuff in order to clean and remove any grime from my portable stove. The mix also works wonders on other objects used for cooking like cast-iron pots, stoves, ovens, and knives. Careful about using too much bleach on your chopping implements as the substance is known to reduce the life of stainless steel blades.

That about wraps it on ingenious ways to use bleach in an SHTF situation. Instead of a conclusion, I will leave you with a question: to bleach or not to bleach? As always, if you figure out another great way of using this stuff in a survival-type situation, don’t be shy and hit the comment section.

There’s a reason why each shopping cart contains at least a bottle of bleach – this stuff’s good for a lot of odd jobs around the house, and some of