HomePosts Tagged "Prepping" (Page 10)

I frequently highlight the need for water when you are preparing for emergencies. This simple, yet vital element of life can’t be ignored for long, so I recommend a multi-faceted approach when it comes to making sure you always have enough to drink. As long as the tap is running and the source is not dangerous to your health, you should be fine. That works great normally, but we all know that stuff happens. Water mains break, sources become contaminated or the disaster can render the pumping stations inoperable due to personnel or equipment problems. Your job is to keep any of those situations from impacting your ability to provide good clean water to your family.

If you are in the safety of your home you can store water in large containers so potential disruptions don’t affect you as much. You can collect and filter rain water from your roof normally or in emergencies, public sources like ponds, streams or rivers will work for a large percentage of us assuming you have fairly consistent access to them. This is usually enough if rainfall and those water sources are prevalent.

But what if you live in a drier climate and you are forced out of your house due to some emergency? Or what if you are lost in the wilderness and your source of water is depleted?

A reader of Final Prepper, James sent me an email asking for more guidance on water for the millions of preppers who actually live in Phoenix or other desert environs. I do appreciate the question and although I don’t live in the desert (so this subject is a little out of my imagined wheelhouse) I figured that this topic was very worthy of research for my own information as well. Below are some of the ways I knew about in addition to new ways I learned to find water in the desert. I know that we do have some readers (and authors) who live in Arizona who will be happy to fill in with their own ideas in the comments below also. So, without further ado, let’s get started.

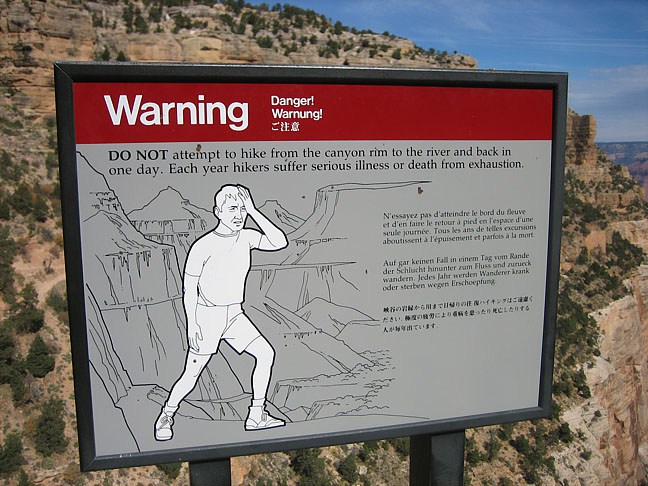
canyon-hot-warning-dead

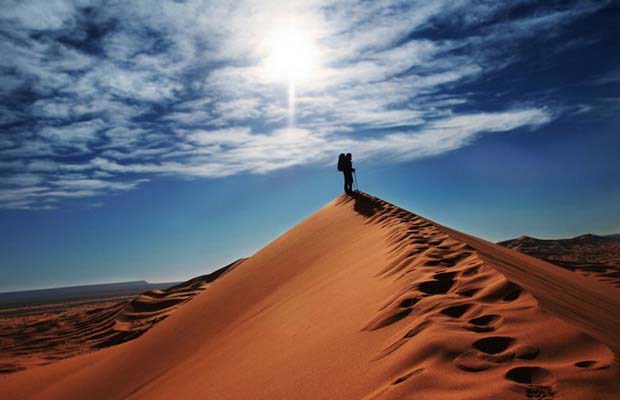
The desert doesn’t play around…

Where can you find water in the desert?

I have been to Phoenix, AZ before on a business trip to a nice resort type of location in the warm days of July. If I did not fully appreciate it before, that trip really reinforced my gratitude for Willis Carrier, the inventor of modern air conditioning. To be honest, the temperatures really weren’t that bad in the evenings and mornings. I was inside during the day so it isn’t like I was too inconvenienced by the heat but with temperatures over 105 degrees, I know that you really wouldn’t want to be more than arms reach away from a good water source for very long. For Preppers, this type of climate does impact the importance of water in your survival plans. The heat and low humidity (but it’s a dry heat!) seemingly evaporates your sweat instantly so I didn’t even see the traditional outward signs of moisture loss, but the ready access to water everywhere reminded you to keep hydrated.

This was reinforced doubly when my wife and I took a drive after that up to the South rim of the Grand Canyon. I had planned a short hike into the canyon and in my research; I was frequently admonished about my hiking plans and water supply. Because of its altitude, the rim where you begin your hike down into the depths of the Canyon can be as much 40 degrees cooler than your destination. You start out at the top of the Canon and it is a relatively pleasant 80 degrees, but by the time you reach the bottom near the Colorado River, the temperature can be as high as 120. To make things worse, the hike back can take you twice as long as the trip down so if you foolishly consume all of your water going down, you won’t have any for the much more strenuous hike back up. Our plans weren’t to even hike all of the way to the bottom, mainly because I didn’t want to have to carry 2 gallons on my back.

Had I been in another, flatter desert environment and found myself without water, there are some tips and tricks you can try.

A woman seeks water in a dry riverbed near Kataboi village in remote Turkana in northern Kenya. In 40 degree heat and no access to clean water, she resorts to collecting unfiltered water for her family in containers. The lack of rain this year across the Horn of Africa has resulted in failed crops, lack of water and death of livestock. The Government of Kenya declared the drought a national disaster as 3.5 million people in the country are in need of emergency assistance.

A woman seeks water in a dry riverbed near Kataboi village in remote Turkana in northern Kenya.
In 40 degree heat and no access to clean water, she resorts to collecting unfiltered water for her family in containers.
The lack of rain this year across the Horn of Africa has resulted in failed crops, lack of water and death of livestock. The Government of Kenya declared the drought a national disaster as 3.5 million people in the country are in need of emergency assistance.

Dry riverbeds can still contain plenty of water if you dig for it.

North facing shady areas at the base of cliffs – There is water in the dry climates like Arizona. Actually, the main source of water for Phoenix comes from three rivers and they bank surplus water underground, but if you were out in the wilderness it might be harder to find. One thing to remember is water goes to the lowest point which is almost always underground. Even when there is no water on the surface, you can often find it where it used to be. In lower areas, near the base of cliffs, you can dig down and find water occasionally. This water has run off the face of the rocks and settled below the surface. If you find a low spot that looks like the sand is moist, you can dig down and sometimes find plenty to drink. This water will need to be filtered for sediment if nothing else but could save your life.

Watch where birds and insects travel from/follow animal trails – Birds and insects like humans need water to live. You can watch the path that they fly from in the early mornings and evenings for a clue as to where a source of water may be. Animal tracks can be used to follow a path to a water source as well and you may find a watering hole used by the native wildlife. To get a clean source without any type of water filtration you can dig a hole 9 feet away (roughly) from the water source and allow cleaner water under the surface to re-hydrate you. This water, filtered through many feet of sand and silt should be free of any contaminants that the water on the surface of the watering hole would have. Again, I would always try to keep some form of water filtration device with me if I was going out into the wilderness. It’s just one less thing I have to worry about.

Tinajas

Water collects in Tinajas and you can use this to keep you alive.

Rock pockets and depressions – Rain is routinely collected in depressions in rock surfaces. Some of these can be large enough for you to swim in. If you are searching for water, it is a good idea to get up a little higher up to see if you can see a source like this. Just one good-sized hole could be enough to keep you in water for a very long time. There are some of these large depressions called Tinajas, that have petroglyph markings on them and it is thought that some of these may have been ancient directions to denote good places to get water. If not, at least they are really interesting to look at.

Where vegetation is living/broad-leafed trees – If you can find trees growing in the desert, it’s a good bet they have tapped into a source of water. Broad leafed trees like cottonwoods are an indicator that you can dig down to their roots and find water suitable for drinking. These trees could be growing in old riverbeds that still have water flowing way beneath the surface.

In dry river beds – Like the example above, just because there is no water on the top, you may find water by digging below the surface. The drier it has been, the less likely you are to find water but look for a lower place in the riverbed, one where the water would have likely stayed there the most time and dig down. This is another reason to have a handy bandanna with you to soak up water and squeeze it into your mouth.

What not to do if you are looking for water

Solar Still – Now I have heard about solar stills for a very long time. I think even in the Army we discussed these as a good source of water. In a desert however, you won’t get the same amount of return for your effort. Digging a solar still will expend a lot of calories and effort and you won’t get much moisture out of the ground. If you have plenty of green leaves to lie in there, you still have to wait a whole day. If you are thirsty it is better to stay in the shade than dig a still.

Forget the cactus – You have probably seen the cowboy chopping open the cactus and drinking from it. Trying this yourself can get you killed. There is only one type of cactus you can drink from and only one variety of that one cactus. The barrel cactus looks like its name and the Fishhook barrel cactus has water in there that isn’t toxic. It isn’t like a bottle of Evian though and you could still get sick. One alternative is to eat the fruit off the cactus. Prickly pear can be roasted to get rid of the little hairs and spines and can provide some moisture.

Don’t drink your own pee or anyone else’s for that matter – If your body is straining with lack of hydration, the last thing you want to do is force your kidneys to work overtime on a strange substance. Yes, your urine is supposed to be “sanitary” but this shouldn’t be a trick you use to re-hydrate yourself even in an emergency. What you can use it for is evaporative cooling. Soak that bandanna in your urine and wrap it around your neck to cool off somewhat. Then make a mental note to wash that bandanna.

So there are some ideas I have for how to find water in the desert. I think it goes without saying that as much as possible, you should plan for water well before you find yourself in a situation that would require you to use any of these methods above. If you are, hopefully this will help.

I frequently highlight the need for water when you are preparing for emergencies. This simple, yet vital element of life can’t be ignored for long, so I recommend a multi-faceted

Preppers are a resourceful group of people and there aren’t too many dire situations we don’t have some type of prepared response for ready in our minds. Our plans and preparations for survival are expansive and limited in most cases only by our imaginations or our paycheck. You name the disaster and we have got the bases covered in terms survival kit, our basic needs, bug out plans and tactical DEFCON 1 defensive measures.

But there is still a large number of people in the world who simply don’t see the same value in preparing as preppers do. I personally think that number is coming down, but like everything else, there are degrees of urgency based upon your own situation and each individuals’ views of likely risks as you see them. I know friends who 4 years ago would laugh at the mere suggestion that our country could have anything approaching an economic collapse but who now, at least in conversations, agree that the future looks a little dimmer than even they had imagined. They can now freely admit that they have a sense that there will be bumps ahead, but disagree on how much you should worry about or prepare for any ‘potential’ disaster. They can acknowledge increased risks but they don’t feel inclined to do too much about it.

Then there are other people who never in a million years believe anything bad like economic collapse, pandemic, war or outright tyranny could happen in this our enlightened society. They also believe that the mere thought of bad people getting together to do bad things and not tell anyone (conspiracy) is a sign of mental illness. Sure they will agree that monstrous atrocities have happened in our collective past but rationalize that away because people were less educated, or concede it is limited today to a few violent places in third world countries. They will tell you that as a modern, interconnected world we are so much more thoughtful and considerate now. Rational discourse rules the day.

They have no doubt seen far too many Oscar award-winning, tear-jerking movies about bad people and bad situations to believe that any tragedy on a similar scope could befall us in these progressive times. These bad stuff deniers seem to have this view of the Star Trek ‘United Federation of Planets’ utopia where everyone gets along (usually) and there is peace and harmony across the cosmos if only the smart people (elites) are in charge. Sounds nice doesn’t it?

Well, even these people who have watched far too much TV and rely too heavily on the wizards of smart can admit that even if we don’t have Klingon battle cruisers outside our Solar system, you can have storms, both literal and figurative that wreak havoc with our peaceful civilization.

Even Prepping Deniers want a backup plan

Understanding that there are people like those I mentioned above out there, some of whom we are even related to, I wanted to try to put a less ominous spin on Prepping for the benefit of those who need some additional encouragement. You can still have some level of preparedness without going to the lengths that others of us choose to do. Granted, you are only going to be as prepared as the level of time and energy you put into it, but something is better than nothing.

denial

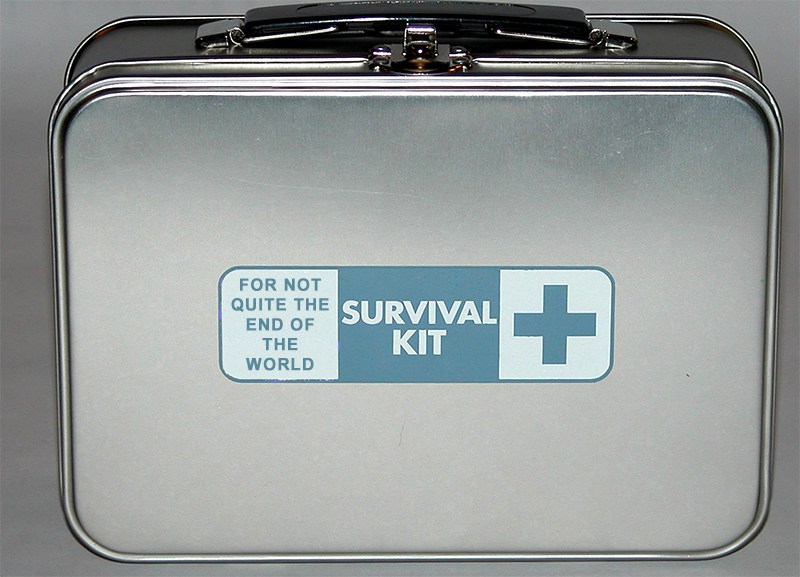
Even if you don’t believe anything bad can or will ever happen, wouldn’t you feel better with a just-in-case survival kit of items on hand?

To that end, I wanted to put together a list of common sense survival items to have on hand just in case, barring all logic and the goodwill of your fellow enlightened souls, something bad does happen and you are forced to rely on your own self for survival. These survival items are multi-purpose should be non-threatening to anyone out there. I won’t mention camouflage or firearms of any type today but I thought a simple list of items to go into a survival kit for not quite the end of the world could still come in handy to you out there someday.

This survival kit and the items below should be something that anyone can store in a closet of your home, nicely out-of-the-way and hidden from all your friends who would react with horror and derision at the mere hint you were taking any of this ‘prepping nonsense’ seriously. It may not be enough to keep you alive if we really do have a SHTF event, but it will help in many situations where it’s not quite the end of the world.

So for those of you who can foresee some minor inconveniences in life that are worked out shortly, but still want to be prepared, a little…. This list is for you.

Simple Survival Kit List

Backup Power – When the power goes out, it’s good to be able to replace that electricity isn’t it? You can do this in many ways according to how much you want to spend, but let’s assume that a whole home generator is not what you had in mind. Neither is a noisy portable generator. You can still have a fairly reliable source of backup power with a solar panel charging kit like the EnerPlex Kickr IV Portable Solar Charger. This set of panels allows you to roll it out and charge up your cell phone. Add something like Generatr S100 Portable Battery and you can charge a larger battery that will in turn recharge more devices. Another thing to consider with this is having extra batteries on hand should the power go out. I have Sony Eneloop rechargeable batteries but there are many other types of rechargeable batteries that I can use in almost all of my devices like radios and flashlights. I also have spare USB type batteries like a portable RavPower 16750mAh USB charger that sits fully charged. With this one unit, I can charge my iPhone 6 times.

BlackoutNY

Blackouts happen all the time.

If all that fails, you can also purchase a simple 1000 W inverter to plug into your car’s adapter to provide power to larger appliances or recharge your batteries much faster. Just make sure you have extra fuel stored for your cars too.

Lighting – Even during the bright hours of the day, if you are stuck inside, you could be in the dark, literally. Flashlights are a must have for power outages even during the day. You can choose from a lot of options like a bright tactical flashlight to something you attach to your key-chain but for the best of both worlds I like a headlamp. This way I can have the light automatically shine where my eyes are pointed and my hands are free to do whatever task I need to. Have one source of light for every family member.

Money – When the power goes out, so too usually goes your ability to get money out of the bank or ATM or make purchases without cash. Almost all point of sale systems rely on electricity and now the internet. so having a small stash of cash on-hand makes pretty good sense. Just a couple hundred dollars could buy your family food, get a hotel room in another state or purchase gas to power your car. Make sure you keep some on you and some hidden at home. You can hide some spare emergency cash in between your phone and the phone case and always have a backup. Have at least $200 in cash where you can get to it. Smaller bills (20’s) are better.

Food – Who wants to go hungry during a power outage or short-term emergency? You can either keep more food stored at home, or purchase food for emergencies. The former will give you better tasting food, but the later requires a little less discipline. Storing extra food in your survival kit keeps everything in one place, but it does take up additional room. Ideally we wouldn’t lose that space to something you already have storage options for, but it may work out better this way.

Along with actually storing and having access to food to eat, you need a way to cook it unless you want to eat a lot of cold canned food. One of the better options I have found is simple freeze-dried camping meals. All you need for these is hot water which you can either heat over a fire outside or with a small camping stove like the JetBoil. Sure the freeze-dried meals aren’t going to be the healthiest options but for short-term situations like this they store nicely, pack a pretty decent amount of calories (make sure you check first) and are filling. I would much rather eat a warm packet of Mountain House Chili-Mac than eat a cold or even warm can of beans. Have enough meals for 5 days for each family member.

Water – Water is one of the trickier items if you consider it. It is all around us usually, but clean drinking water may be hard to come by at times. If the water isn’t coming from the faucet, you might need to find a source. Fortunately, in most climates, there is water around us in lakes, pools, hot-tubs, water heaters and streams. You should store one gallon of water per person per day. We have been going with 5 days so far, so plan accordingly.

Having water on-hand is the best, but just in case, you need a water filter too. For the most basic needs, you can boil water for a minute to kill any bacteria. Filters like the gravity filters from Platypus allow for a lot of water filtration plus carrying capacity in a short time. LifeStraw makes an individual option too that is cheaper, but you can’t filter a large amount of water using one of these easily. Compared to boiling, purification tablets and the LifeStraw, I prefer the gravity fed options best.

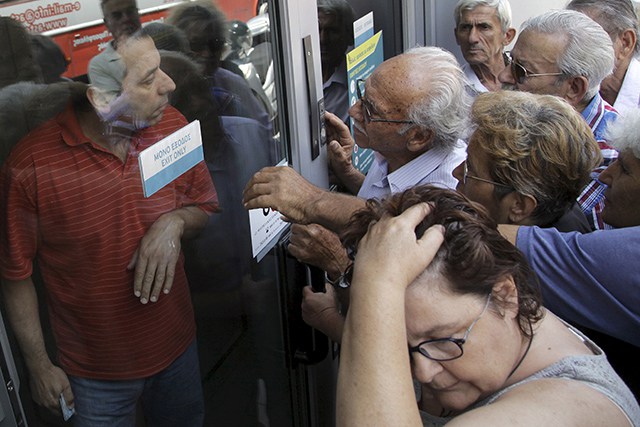
Pensioners

Do you have a supply on cash just in case the banks don’t let you in or the ATM machines aren’t working?

Shelter – We will assume that you have shelter since this is not quite the end of the world and heat isn’t something you can easily plan around without power. Cold is something that can be easily addressed with a little more preparation. For this a good three season sleeping bag is a nice item to have for each member of your family. Optionally, you can go with something like the puffy blanket from Rumpl which packs down small and will keep in body heat. Hats and gloves are good also.

CommunicationsA simple weather radio will help you stay in touch with what is going on and you can even use some of these to charge your portable devices and also see in the dark with the included flashlight. No, you won’t be able to communicate out, but you can stay informed.

How do you store your survival kit?

For most of the items mentioned above,  they will easily fit in a good-sized plastic tote. Something like Rubbermaid’s 48 Gallon Action Packer will allow you to store these items neatly away. You may need additional options for water since that takes up so much space but the rest of these items should fit fine.

That will get the most basic needs out-of-the-way, but what else could you store if you were really hoping to cover more bases?

Miscellaneous tools and gearA good sturdy knife is important as well as a multi-tool or at least a decent set of tools to work on items around the house. A nicely stocked first aid kit would be a good addition. Disposable lighters are always handy and are much easier to use that a fire striker.

Security – I said I wouldn’t mention guns, so you can use something like pepper spray or a tazer if you feel that your security would be helped by having something. I would tend to agree.

Mobility – The ability to pack all your gear into a bag would be another nice to have, but if you are talking about evacuating, we have moved well past the simple survival kit mentioned above. If you do decide something more robust is necessary, we have lots of articles on Final Prepper that can help you with that. Bikes are another consideration.

Hopefully the simple items above can help you out if you find yourself in an emergency that isn’t as dire as The End of the World As We Know it. As anyone who regularly reads this site should know, I strongly advocate much more serious and comprehensive methods, skills and supplies, but that isn’t for everyone. Maybe this will help or inspire those out there who still can’t see the point, but nevertheless want a little insurance.

Preppers are a resourceful group of people and there aren’t too many dire situations we don’t have some type of prepared response for ready in our minds.

As disaster prepping continues its precipitous rise in popularity it seems every conceivable gadget, defense rig or bit of advice has been done or handed out. Everything’s been thought of, right? Not so fast. When you come right down to it, that advice, those how-to’s are what works for them. “Them” are all the people out there on the internet writing blog articles and posting videos. Most of them have the best intentions. They want to impart their knowledge to others who might benefit from it. But how do you take what they offer and make it your own? How to tweak it, modify it and customize it to what works best for you? This is exactly what should be done for a bug out vehicle, or in this case a bug out trailer. It has to meet your specific needs and include those particular adaptations and improvements that will be comfortably functional for you when everything else is going down the tubes.

Where to Start

First, select a base trailer to build up into the perfect survival masterpiece trailer. Lucky, for you there are a ton of choices out there. Trailers in all shapes and sizes have been manufactured for decades to meet all kinds of utilitarian needs from the professional contractor or construction firm hauling equipment to trailers meant for moving goods to those built for transporting recreational toys. Add to those variations all the recreational camping trailers on the market and the choices seem pretty much endless.


Do your research, envision the finished trailer in your mind, go look at potential buys in person, seek out used trailers for sale to save money, and pick the one that best fits your needs. Remember the longer a trailer is, the more restricted it will be for some locations. Longer trailers, obviously, need a larger turning radius and more space, in general, to maneuver. They are also limited to predominately flat roads as they are unable to manage rolling trails with narrow troughs between steep inclines.

Consider these types as potential bases to build out from;

  • Box utility trailers
  • Compact horse trailers
  • Teardrop trailers
  • Airstream trailers (compact versions)

To pull that trailer you need to first build your bug out vehicle.

These types provide solid bases from which to customize to your unique specifications offering enough variety to fall within particular budget constraints. The benefit of these trailers is they are already enclosed which is a head start, so to speak, which allows you to jump right into customizing the inside. Having said that, though, there are numerous examples of people who have built up open-topped trailers, or even homemade pickup bed trailers, into rugged, workhorse camp trailers capable of going anywhere the vehicle towing them can go. But more on those later.

Enclosed Trailer

Determine the type of space you want to have inside. Will the trailer be self-contained with room to sleep and move around or will it serve as a gear and supply storage and transport? Once the usage of the inside space is settled on you can set to designing the features; insulated walls, the sleeping and sitting areas, storage (gear, food, water), cooking equipment and fuel (Used inside or out? Is ventilation needed?) and windows.

The biggest decision to make (most likely made before even buying the trailer) is will it be a sleeper or a transporter. Will the environmental conditions require an insulated, indoor living area or will an expansion component like an attached tent or pop-up roof sleeper be sufficient and comfortable?

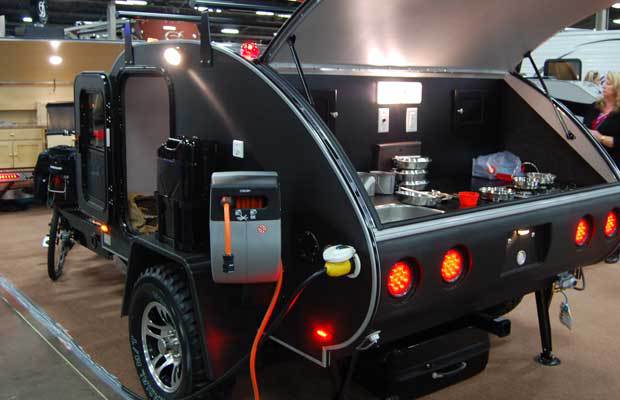
BugOutTrailer1

This trailer has almost every bell and whistle imaginable. Click the image for more photos and details.

If you’re starting with what is, essentially, an empty box on wheels then it would behoove you add a layer of insulation, especially if you plan to sleep inside. The typical, recreational, camp trailer will already be insulated but it’d be worth checking its condition if the unit is an older model. Insulating a cargo trailer is done in the same fashion as insulating the walls of a house. The trailer will already have ribbed, structural support throughout, just as a wall has studs. Cut and fit sections of insulation between these ribs and cover over with sheets of plywood, measured and cut to fit properly and don’t forget to do the same with the roof.

From here, the rest is a custom job, built to your standards and needs. Aftermarket interiors such as cabinetry, foldout beds, convertible seating (into sleepers), and counters are available from various travel trailer retailers or you can build them yourself. Sinks and plumbing are easily found at supply stores and counters can be built to fit a typical camp stove. Research space-saving techniques online for innovative storage areas, utilizing every empty space inside and out. Add storage fuel and propane tanks, generators and batteries outside to avoid gasses from building up creating dangerous conditions inside. For additional energy supply needs beyond fuel, with most trailers’ flat roofs, consider installing solar panels or even a roof-mounted, wind turbine.


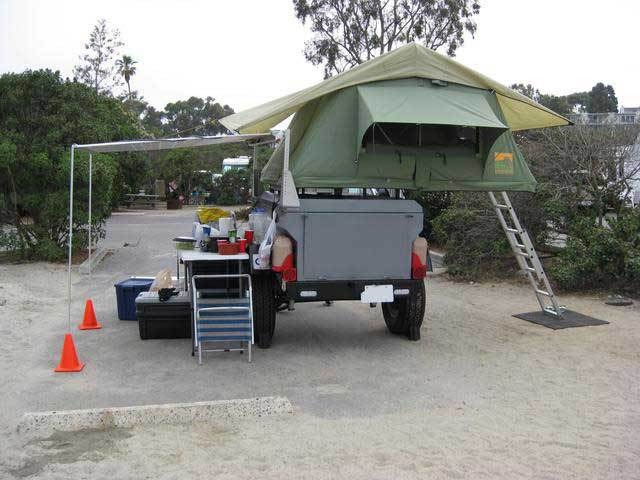
ButOutTrailer4

Sleeping tents are a popular add-on to some bug out trailers.

Open Trailer

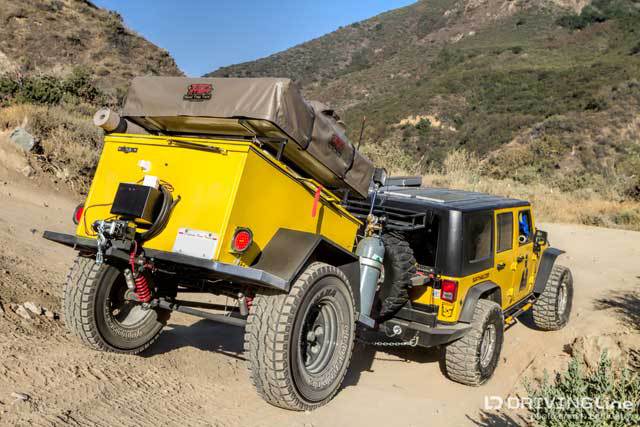
The open utility trailer comes in a full range of forms and sizes. By the term “open” we mean what is essentially, a flatbed trailer with 1-2 foot sides all around or a shallow, open-topped box on wheels. A popular customization for these is to convert them into tent trailers. A number of companies have cropped up over the years that manufacture folding or pop up tents that collapse into a zipped up square and overlays the open trailer. The tent and its support platform are hinged on one side and raise like a hatchback and serve as a cover lid for the open-topped trailer. The inside space is used for equipment and supply storage which can be partitioned off to effectively organize supplies. Or a portion of the inside houses slide-out storage containers or even full, outdoor kitchen setups with stove, sink and counter space.

Many people who go this route with their bug-out trailer make them into truly rugged, go-anywhere contraptions. Fitted with independent suspension, off-road tires and specialized hitches with couplings that allow for extreme vertical and horizontal towing angles these trailers can go virtually everywhere the vehicle towing them can go.

Both types of trailers, open-topped and enclosed, can incorporate external storage containers mounted to the outside walls, on over-sized wheel wells and to the roofs. There is often space on the trailer’s tongue for sturdy containers, propane tanks for cooking fuel or battery banks to store power. The customization opportunities are extensive, limited only by your imagination, time and to some extent, your wallet.http://fpnws.wpengine

Trailers are really one of the most versatile, bug-out vehicle options able to carry all that’s needed for a survival situation – food, water, shelter and lots more – the essentials, all piled into a mobile home away from home.

As disaster prepping continues its precipitous rise in popularity it seems every conceivable gadget, defense rig or bit of advice has been done or handed out. Everything’s been thought of,

Urban Camouflage and Concealment

It makes me laugh when I see a lot of SWAT Teams and PSD guys wearing Tactical Black and other colors that look cool but do nothing but make them stand out. In reality, black is one of the worst colors to wear. Ask yourself, what is black in nature? Look around you and what in your surroundings are black? I expect very little… In urban areas, most walls are white, gray or cream… Light colors! The colors you wear should blend in with your background whether its day or night.

At night dark colors stand out, especially when moving past light backgrounds and in urban areas most backgrounds are light colors. Even in rural dry areas when moving through low bush and fields the silhouettes of people in dark colors are easy to see at a distance.

You do not have to have expensive patterns to give you good camouflage and concealment, a gray dress shirt and a pair of light khaki pants is way more effective than tactical Tim dressed in SWAT black!

Movement and Rural Camouflage

Modern humans are positively disadvantaged when surviving in and moving one foot in rural and wilderness areas. Most people these days have never spent a night outside without any cover, let alone in bad weather. When you’re in the woods or bush you need to get comfortable in the environment. I remember one of my military instructors telling me that to be able to fight in an environment, you must first be able to live comfortably in that environment, and this is true. If you’re having difficulty living day-to-day how can you operate?

6000768

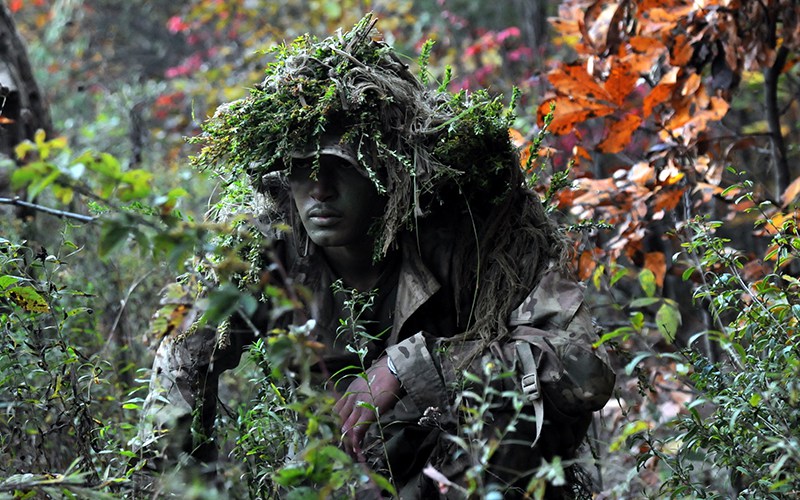
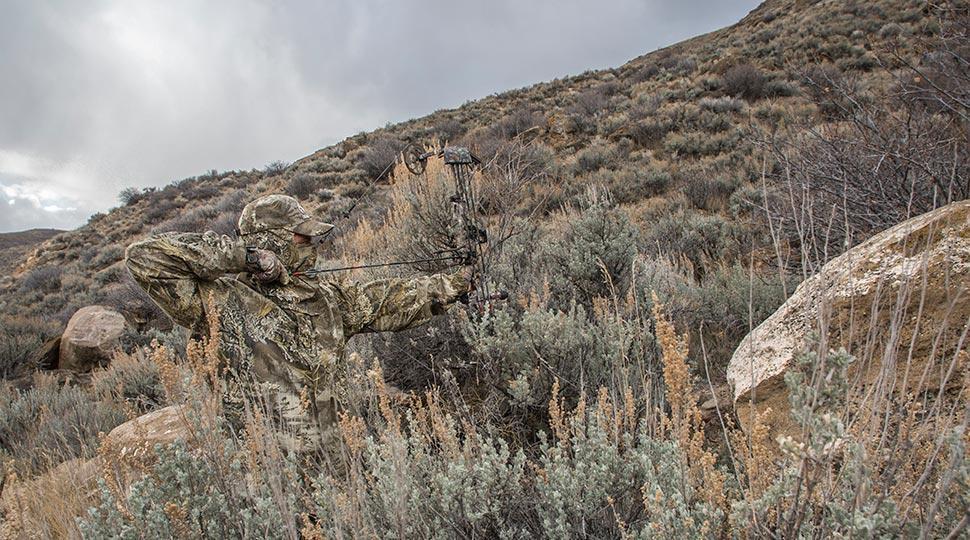
Camouflage your face, neck and any areas of the exposed flesh with mud, ash or charcoal from fires. Or use a balaclava or scarf to cover your face and wear gloves.

You need to start using all your senses as the animals do, learn to identify sounds, smells, movements and what they mean. You need to especially be able to identify things associated with people, like footprints, cigarette stumps, broken twigs or foliage, fences, straight lines, domestic animals, aircraft, vehicles, talking, etc. Think about human smells like fires, food, fuel, human waste, and tobacco; if your senses are sharp in bush or wooded areas you should be able to smell or hear people before you see them.  When moving you must do so quietly and regularly stop to look, listen and smell for any indication of people. If you identify people in your proximity are you going to take cover, evade or ambush?

You should always consider camouflage and wear clothes that blend in with your environment, in urban areas wear light blues and grays in rural areas browns and greens. As I have said before there is no need for military camouflage clothing as this will just draw attention to yourself.

Basic fieldcraft, things are seen because of these reasons: Shape, Shadow, Silhouette, Shine, Spacing & Movement.

  • Shape: Disguise your shape; use foliage or rags to break up your outline.
  • Shadow: Keep in the shadows and always be aware that you are not casting a shadow that could be seen by your opposition.
  • Silhouette: Don’t stand out against skylines, lights, white walls, etc.
  • Shine: No chrome, shiny watches, mirrored glasses, sparkly jewelry and the like.
  • Spacing: If moving with others, remain spread out, but not too regularly and do not bunch together.
  • Movement: Move carefully, as the sudden movement draws attention and is the main reason camouflaged personnel and animals are seen.

The basic guidelines for camouflage are

  • Learn to blend in with your surroundings.
  • If you are using foliage to conceal yourself or your position don’t use too much or too little.
  • If you are in a long-term hide remember to keep your camouflage fresh, dead foliage will alert people to your position.
  • When moving avoid skylines.
  • Don’t use isolated or obvious cover; it’s the first place others will look. Consider hiding in thorny bushes or nettles as most people will not expect anyone to hide there.
  • Camouflage your face, neck and any areas of the exposed flesh with mud, ash or charcoal from fires. Or use a balaclava or scarf to cover your face and wear gloves.
  • Take all noisy objects from your pockets, such as keys and coins and make sure nothing on your person rattles.
  • Make sure there are no shiny surfaces on your person, equipment or clothing.

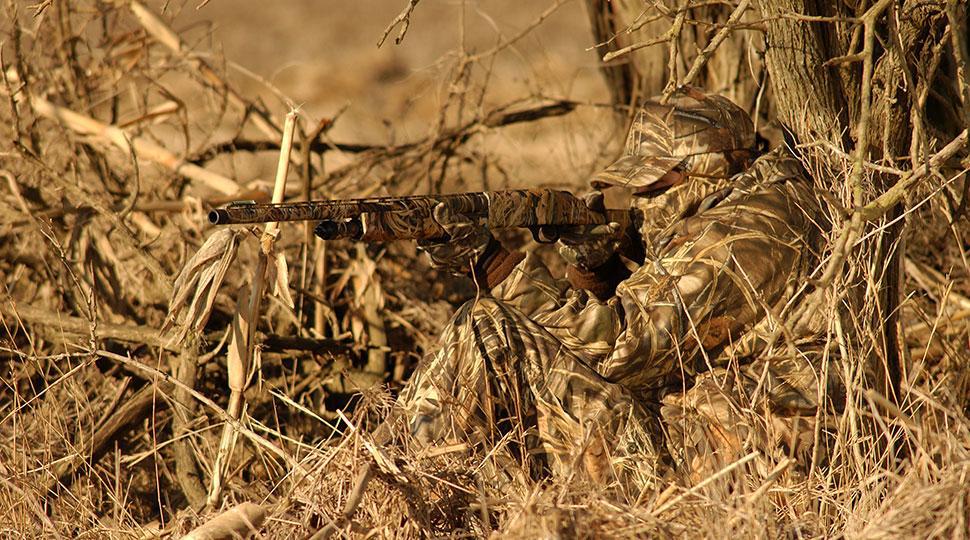
realtree-camo-pattern-max-1-xt-05

Guidelines for Movement

You should always move quietly and cautiously and avoid stepping on dry twigs or breaking through foliage and undergrowth as this will make noise and leave an easy trail to follow. If you know you’re going to a rural area or possibly going to be in an escape and evasion situation avoid smelly foods, strong soaps and aftershaves, as these will be easy to smell by those used to being in the bush. Always be careful not to leave signs you were in an area such as footprints, broken foliage, human waste or trash.  Trash and human waste should be carried out of a hostile area and disposed of when safe to do so.

You should always move in “bounds” from one piece of cover to another. Your bounds should never be more than, say 50 yards, especially at night. When you stop at the end of each bound you should use your senses to try to detect any human presence then plan your next bound. Moving in short bounds is the safest way to move through populated areas or places there are unfriendly forces. Remember, always be prepared to take evasive action or defend yourself.

61w8LlcrfyL._SL1002

Camo Face Paint Sticks – 3 Pack – 6 Colors

The speed at which you travel will depend on whether it’s day or night, the type of terrain you’re in, people or police patrols in the area. Never push yourself to your limit, you always need to have energy in reserve so you can run in an emergency; tired people are also rarely mentally alert. If you must run from your opposition try to do so only for a maximum of a few hundred yards, then slow down and move quietly, cautiously and cover any signs of your direction of travel. Do not use obvious routes, which tend to be the easiest routes to use; head up hills and into thorny areas, etc.

There are no set time periods for halts but you should try to take ten minutes in every hour on long journeys. Tracks, paths, and roads make for fast, easy travel and can aid navigation but can also be very dangerous as your opponents will watch them closely. To be cautious walk a few meters off to the side of any roads or tracks.  Places to expect sentries are at the entrances to urban areas, on bridges, crossroads and on high prominent terrain.

Avoid being silhouetted when crossing skylines and hills, go around them rather than over them where possible. If you need to cross an obstacle or skyline then keep low and crawl, if it’s a fence, crawl through it or under it. If you have to cut through a fence, cut through the lower strands and then disguise the hole with undergrowth or tie the wire strands back together, never cut through the top strands as this will be easily noticed.

realtree-camo-pattern-realtree-max-4-04

Moving at night

You need to learn to treat the night and darkness as your friend, darkness affords you cover. Many people are afraid of being in the dark especially in rural areas or derelict buildings; you should use this to your advantage. If you are moving you should always try to stay in the shadows, if you get caught in a beam of light or car headlights you should freeze, the chances are that you will remain unnoticed. You must have your immediate reaction drills for encountering a person, being caught in the light of the hostile fire at the forefront of your mind. Being caught off guard will get you captured or killed.

There are both natural and man-made noises that are useful to you because they can cover up or disguise the sounds that you make when moving. The best time for moving covertly is during bad weather; rain will cover the noise of your movement and any ground sign you leave. Bad weather also keeps people undercover, lowers the morale of those standing guard, learn to love bad weather.

General guidelines for rural movement

  • Wear clothing that blends in with local people and the terrain.
  • Do everything possible to disguise evidence of your passage; cover footprints, never break twigs or undergrowth and repair broken foliage.
  • Avoid contact with all people unless absolutely necessary.
  • Litter, food and human waste must be buried or carried with you.
  • Learn about tracking, then you’ll be aware of what anyone following you will be looking for.
  • If moving with others spread out and when crossing obstacles such as rivers or roads etc. take up positions to be able to give warnings of any threats that might be approaching. Also, stay low move fast and cross one by one.
  • Always be ready to take cover from gunfire or people you may encounter by surprise.
  • Remember certain smells indicate human activity; odors float downhill in cool air and rise in warm air.
  • Watch for stones, leaves or logs that have been moved, the undersides of these will be darker in color and damp environments, this can be an indicator of human activity or the location of hides.
  • Always look for straight lines as they are rare in nature and are usually man-made.
  • Learn to identify unnatural vegetation, such as green leaves among dead branches or areas of too much foliage as this could indicate human activity such as hides or ambushes.

These are some basic guidelines to get you thinking, these skills can’t be learn sat in a comfy chair, you need to get out and learn and practice them. Everything I have written about here is simple and the main thing required is situational awareness and common sense!

Modern humans are positively disadvantaged when surviving in and moving one foot in rural and wilderness areas. Most people these days have never spent a night outside without any cover,

This is the second article looking at ways we can cut our dependence on commercial feeds for our livestock. The first article primarily dealt with historic feeds and ways of storing them and some of the feeds that are rarely seen in small-scale production in the U.S. As stated in the first article, our modern livestock – even a lot of the dual-purpose homesteading breeds – are accustomed to certain types of feeds, heavy on mass-production mono-culture grains and hay. Those feeds tend to produce the fastest results and be cheap and easy to access.

However, they do contribute to the financial cost of keeping livestock and they require certain cultivation methods that may not be available to everyone. Substituting fertilizers and water-hungry crops for tubers and less-common grains may be part of the solution to making our livestock resilient to a small personal crisis or a major regional disaster. It can help us weather some of the ups and downs in pricing, as with droughts that send livestock feed and grocery bills skyrocketing.

There are some other ways we can increase our self-sufficiency and resiliency, though, even if it drops our livestock’s production to historic levels and takes a little longer to finish our meat stock. There is no one way to do anything, and no solution is going to work for everyone. However, having some backup ideas and methods in place as alternate feeds is rarely a bad thing, especially if we’re counting on meat rabbits and chickens, eggs, and milk in a collapse or Great Depression situation.


Rule of Thumb – Rabbits to Goats, Chickens, & Pigs

There are a couple of rules of thumb that can apply to our livestock and what we provide as a base feed or supplement. The first is that if hares can eat it, so can goats. Happily, chickens and pigs will eat almost anything – especially if they see other livestock going after it. Most feeds safe for rabbits will apply to them, too.

The Rabbit Food Pyramid

The Rabbit Food Pyramid

The rabbit point comes in because of all the lists available out there for pet or show rabbits. Some of the feeds for rabbits come right out of our kitchen gardens. Some of the feeds in those lists lack the roughage both hares and goats need to keep their guts processing. Others offer some excellent ways to increase the feed availability for livestock using something that already exists.

One example is trees and tree hays. Rabbits and goats can happily consume a wide number of trees, some of which may already be on our property and in need of pruning, such as willow, apple, maple, elm and mulberry.

Tree hays are little different from using a fodder like locust and calliandra that’s fed green. We can treat a surprising number of trees just like we do grasses and dry limbs at peak nutrition to pull out for hay or add to our silage. Like grasses, tree leaves are at their highest nutrient content before they flower and start directing energy toward fruits.

That allows us to selectively harvest small green boughs that would be pruned in another season normally, selecting for branches with lower impact on our future fruit harvest. And since the flowers themselves are sugary powerhouses and pollen is an excellent protein source, collecting limbs that bear those is only a bonus.

rabbits eating tree leaf and branch

Rabbits, tree branches and leaves


The richest tree fodders can only be used in limited number to modern rabbits, because they have sensitive digestions. Once it’s hay, instead of a leaf or three for a large meat rabbit, up to 20-40% of their grass hay can be replaced by tree hay. The larger branches themselves can go to rabbits, goats and chickens, too, even a couple of inches across should you prune something that large. They’ll strip the bark in some seasons, and rabbits will use chunks to help keep their ever-growing rodent teeth under control.

Soaking tree hays can help increase the interest and palatability for finicky livestock. Individual leaves can be soaked, or branches can be righted and stuck in a bucket of water for 24-48 hours to soak up liquids. Chickens won’t eat quite as many of the tree hays, even soaked, and pigs regularly need them soaked and sometimes mixed in with something like turnips and grasses. However, both are a little more willing to eat silage.

Don’t use the whole branches for silage, just the leaves and the tenderest tips that cattle in bare lots are willing to nibble.

Tree Fodder & Fruits

Cattle - lucerne tree fodder

Cattle consuming tree lucerne


There are actual trees like the black locust and smaller options like pea shrub that are being studied and cultivated as livestock feed replacements, especially in places like Africa with limited irrigation and poor soils. There are mixed feelings about keeping livestock on tree fodders, there are mixed research results, and studies tend to focus on one aspect of feed or another – it’s hard to get a comprehensive paper on DM, protein, digestibility and palatability all at once. Still, if livestock is part of the plan, it might not hurt to look into some of them. A lot of U.S. climates can mimic climates found somewhere in Africa – where a lot of the research starts and focuses still.

Fodder and forage trees and shrubs can be managed for human harvest and transport, or planted along outsides of fences or inside curbing poles and fences that limit livestock’s reach. Quickly rotated pastures can also allow the trees and shrubs to mature and grow back.

Native trees and shrubs that can be used for grass and hay replacement for rabbits and goats include American sycamore, blackberry, dewberry, raspberry, roses, hackberry, gooseberry, alder and mesquite. Livestock can eat currants, but currants and some of the other soft berry shrubs tend to not respond as well to “pruning” as brambles and gooseberry.

Other options for livestock include planting trees that drop seed or nuts, either for human harvest and fodder, or for livestock to forage on its own. Elm samaras can be collected green or brown to use as a fatty nut or seed supplement as well. Acorns are another example. There are a wealth of oaks out there that produce at different times, produce in ebb-and-flow cycles, develop acorns for two years instead of one, and produce different sized acorns. Most nuts are too valuable for livestock, but somebody with thriving hazelnut/filbert thickets might run in goats and then pigs or chickens.


Goat climbing and eating black locust

Goat climbing and eating black locust

There are the conventional fruits such as apples and pears. For me, the focus on fruit trees for livestock is largely on storable fruits that can go from tree to cellar. Most tree fruit is going to be too rich for domestic rabbits and a lot of cattle and horses, but pigs and chickens seem just fine with even large portions of meals made up of pears.

“Weedy” fruits like wild plum and mayhaw need absolutely no help from me to grow, but will produce some goat forage and fruits for pigs and chickens. Shrubs like chokeberry and chokecherry can be used alongside chicken tunnels and moats and runs, with the birds helping themselves to berries that protrude or drop within reach, and humans harvesting the berries they can’t reach – berries which don’t look like “normal” human or livestock foods and that dry well for later feed.

Rule of Thumb – What we eat, they eat

A lot of livestock feeds are already made from things that humans can consume – corn, soy, wheat, sunflower, millet. In the first livestock feed article, we pointed out things like tubers that store well. We can also take a look at local foraging options, and encourage what are basically weeds to use as feed. I wouldn’t try to forage for a goat’s entire diet, although there are things I can plant (and protect) that they can forage for themselves.

Sheep eating Kudzu

Sheep eating Kudzu

Cattail in the four or five human-edible stages is happily and healthily consumed by everything but cattle and horses. Reed grasses (avoid European phrag like the plague) provide a storable seed. Chickens and hogs will dig chufa. Don’t plant the stuff for heaven’s sake, but if kudzu is nearby, it makes a nice flower jelly and its leaves are readily palatable to even cattle.

Wood sorrel, henbit, low clovers, plantain, purslane, and dandelions are so routinely cursed by gardeners and lawn-growers, but they provide an enormously beneficial mix of protein- and micro-nutrient heavy foods, with the benefit of being enormously palatable as well as cold hearty. That means we can stick them under some plastic or grow them in tiers of soda bottles in our windows in winter, and be providing fresh foods to our livestock, even in just dribbles. That keeps our livestock healthier and more ready to transition back to pasture grazing.

Wood sorrel, henbit and chickweed are also tall enough and “heat”-tolerant enough that we can use them in grazing frames inside chicken runs, letting the birds munch them down as far as they can reach but having them grow back faster because the birds can’t get all the way down to the roots. They’ll hold up to grazing and manure better than just wheat or barley grasses.

Chicken grazing frame

Chicken grazing frame

Cheno-family lamb’s quarters, mallow, amaranthus pigweeds, shepherd’s purse, most of the sonchus thistles, any strawberry plants to include the invasive “weed” variant with little or no flavor, and wingstem or Iron weed can all be consumed by rabbits, goats and chickens. Most can also have leaves and stems dried to provide roughage or healthy supplements throughout winter and early spring.

Check out what Sam Thayer says about your area and your local foraging guide. Nettles have to be treated for livestock the same way they are for us, and some wild edibles are too time consuming, but there are others that can increase our feed (and pantry) potentials without a great deal of work because the weeds grow like … well, weeds.

Alternative feeds for your livestock

Using a mix of intentional forage and fodder trees, increasing the use of fruit trees and shrubs to harvest green grass and dry hay replacements or increase silage content, and looking at the wild edibles in our areas as a way to increase livestock feeds can make a difference in both resiliency and livestock costs, especially if we’re running small flocks and herds.

You need to slowly transition livestock to new feeds, especially if they’re accustomed to 1-2 base feeds, but livestock is just like humanity – we all do best with a variety of foods. Livestock is especially dependent on gut microflora to help them break down foods. I’m sure you’ve heard the “starving with a full belly” nugget. Before commercial feed and penned livestock was so prevalent, there was also “spring sickness” or “green dribbles” that came in part from livestock being able to access pasture again after winter, eating their heads off, and ending up with upset stomachs. Slowly transitioning livestock and keeping them on a variety of feeds can help limit those conditions because their guts stay primed to consume them.

Some other nuggets to research, especially for game birds like ducks and young poultry that need higher proteins, include black soldier fly farms, algae and duckweed aquariums, and worm bins or troughs. Fast-breeding minnows will change the flavor of eggs and meat, but can be kept in pretty small tanks with low energy needs. There’s also barely-sprouted grains (the ones that barely have any “tail” showing when they’re offered). I’m not a major fan of sprouted fodder systems (the kind that grow root mats and green shoots in trays) as a primary livestock feed for anything more than a couple of chickens or rabbits, but then, I’d also rather grow and re-grow rotating flats of mixed weeds and wheat grass for them in winter because it’s a lot less costly and labor intensive. Just remember that while some livestock like chickens and rabbits can be vegans and have lower protein needs, the game birds like ducks are not really grazers – they need seeds and-or live foods and the higher calories and proteins those offer.

There are a world of livestock feed options that don’t begin with slicing an alfalfa bale or cutting open a bag of pellets. Even if we choose to stay with grains and conventionally farmed feeds, having the alternative foraging and fodder options gives us a fallback and gives us something to shoulder as we walk around, giving our livestock extra nutrients and variety that can help keep them healthier.

This is the second article looking at ways we can cut our dependence on commercial feeds for our livestock. The first article primarily dealt with historic feeds and ways of storing

Nothing beats mom’s homemade food. Unless you live alone or don’t have any cooking skills or no emergency food left in the pantry. Well, you know how it goes – when life wants to throw crap at you, it uses a shovel. However dim the perspective may be, Mother Nature will always provide, if you know how to ask.

In today’s article, I’m going to talk about one of the most interesting birds out there – the pigeon. Some love them because they’re friendly and chatty and pettable, others not so much. I personally neither like nor hate them – they’re okay as long as they stay away from my car!

Anyway, even though the perspective of catching your own food is not something one would do out of pleasure, there are times when stop caring about those things and do what’s best for your growling stomach. If you find yourself without food, you can always enjoy a nice and tasty pigeon stew or steak.

The idea of eating pigeon meat may appear as revolting. However, history reveals that pigeon meat is not only palatable but a delicacy which once adorned royal feasts. During the 19th century, around Boxing Day, young couples and families would head out of the house to do a little bit of ice-skating.

As the weather was nippy, the skaters needed something hot and tasty to put some color back into those flushed cheeks. The snack of choice was the so-called Pigeon Pie Mystery. Fast-forward in time, pigeons have become associated with nasty things like car-wreaking, necrophagic behavior, and uncleanliness.

Despite these objections, pigeon meat is safe to eat, but you’ll need to catch them first. Sure, they may be friendly and a bit curious, but that doesn’t mean they’ll allow you to gut them.  In today’s article, I’m going to show you a quick and rather ingenious way of trapping pigeons, using common household items. Enjoy!


Gathering the materials for your first pigeon trap

For this project, you will need the following materials:

  • Plastic straw rope (you can replace it with dental floss or any kind of cordage).
  • An old plastic bottle.
  • Plastic bucket.
  • Wire cage (it doesn’t have to be new; if you can’t find one around the house, you can always go and buy one from your local flea markets or thrift shops).
  • Styrofoam board (should be about the size of the wire cage).
  • Crafts knife.
  • Pole.
  • Glue.
  • Small wooden board.
  • Hammer and nails.

Are you done gathering the necessary materials? Wonderful. Here’s how to piece together your first pigeon trap.

Crafting the backyard pigeon trap

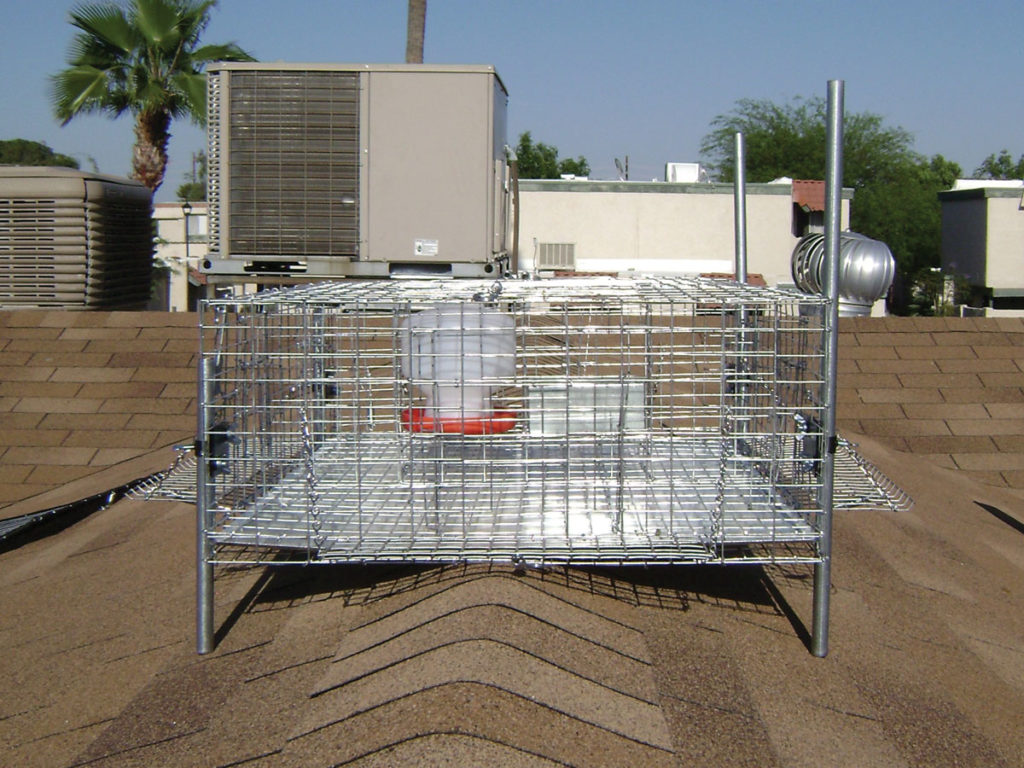
Step 1. Remove the part of your wire cage. For this project, you may want to get one of those rectangular cages (mine is an old chicken coop I found in the attic).

Step 2. Glue the Styrofoam board to the top part of your cage. Allow the glue to work its magic before proceeding to the next step.

Step 3. Using your crafts knife, cut a hole in the Styrofoam board. The hole should be wide enough for your plastic bucket to pass through with any problems but, at the same time, prevent the pigeon from escaping.

Step 4. Once you’re done cutting the hole in the Styrofoam board, use the same knife to cut two small entrance on each side of the plastic bucket. If you really don’t want to sacrifice a bucket, you can go for one of those one-kilo yogurt containers. Just be sure you keep the lid.

Step 5. Apply some glue over the edges of the lid and place in on the bucket. Allow the glue to dry.

Step 6.  It’s now time to craft your wooden lever. Nail the small wooden board to the top part of the pole. Make sure that the board can move up and down freely.

Step 7. Plant the pole-and-board lever into the ground, just above the Styrofoam board opening.

Step 8. Make one small hole in the front part of the board and another one in the back.

Step 9. Draw some cordage through both holes. Ensure that the cord drawn through the hole made in the front back of the board is long enough as to allow the bucket to reach inside the cage.

Step 10. Tie the front string to the bucket’s handle.

Step 11. Fill your plastic bottle with water and tie it to the back string.

Step 12. Place a couple of seeds, kernels or breadcrumbs on the bottom of the bucket, and wait. Congrats! You’ve just built your first pigeon trap.

More on the makeshift backyard pigeon trap

The idea behind this simple trap is simple: attracted by the seeds or kernels placed on the bottom of the plastic bottle, the pigeon will land on the edge of the Styrofoam board. Bear in mind that pigeons are cautious by nature, meaning that they will take a good look at your thingamajig before stepping inside the trap.

If you cut only one small hole in the side of the bucket, the pigeon will not approach the seed, because it will realize that they’re no way out of there. That’s why you should have two openings.

Once the little sucker starts eating, it will probably figure out that everything’s okay and will step on the bottom to stuff its beak with them goodies. The second it steps inside, the bucket will be lowered inside the coop, trapping the bird.

You should pay extra attention to how the bucket’s lowered inside the cage. For this trap to work, the cord’s length should allow for the bucket’s body to reach the inner part of the cage, with the lid blocking the opening made in the Styrofoam board.

I can’t give you any precise measurements – it’s a trial-and-error process. One last thing: the plastic bottle’s contents. It would be wise to fill it with water instead of sand or earth; the trap’s sprung by the pigeon’s own weights. Putting anything heavier inside the bottle will make the trap useless.

That’s it on my makeshift pigeon trap. What do you think? Hit the comments section and let me know.


Other self-sufficiency and preparedness solutions recommended for you:

The Lost Ways (The vital self-sufficiency lessons our great grand-fathers left us)

Survival MD (Knowledge to survive any medical crisis situation)

Backyard Liberty (Liberal’s hidden agenda: more than just your guns…)

Alive After the Fall (Build yourself the only unlimited water source you’ll ever need)

The Lost ways II (4 Important Forgotten Skills used by our Ancestors that can help you in any crisis)

The Patriot Privacy Kit (Secure your privacy in just 10 simple steps)

Nothing beats mom’s homemade food. Unless you live alone or don’t have any cooking skills or no emergency food left in the pantry. Well, you know how it goes –

When disaster strikes, will you be ready? Will you be organized, calm, and ready to adapt to whatever the situation brings? Sometimes we have some warning, and sometimes things happen out of the blue. There is one simple secret that will allow you to sail through nearly any crisis. It doesn’t cost a lot of money or take up an entire roomful of storage space: acceptance.

You can’t take the actions that could save your life until you have accepted the fact that something bad enough has happened that those actions need to be taken.

The more time you spend denying that this  – whatever “this” is – could ever happen to you, happen in your hometown, or occur at all, the less time you have to take definitive action. In fact, your willingness to accept that disaster could strike before it ever does puts you even further ahead, because you’ll be ready for immediate action without wasting valuable time wrapping your brain around it.

I’m not the only person who thinks that acceptance is important. Selco wrote that when the SHTF in Bosnia, most people missed the fact that it was all going down until it was too late to take steps to protect themselves.

You may miss the signs. I did.

I have seen all the signs above, and I failed to run. I ended up right in the middle of SHTF.

It is not only important to see and recognize signs. It is important to believe that it can actually happen. Because after I saw all the signs, I just said to myself, “Oh, it cannot happen here. Somebody somehow is gonna solve everything.”

It is very hard to trust in something that you did not experience before. Only now do I believe that a lot of horrible things are possible. (source)

He wrote in another article that because he didn’t accept how bad things were getting, he did not loot as much as he should have when society broke down. He didn’t accept the fact that new rules were in play.

Please understand that when I talk about acceptance, I’m not telling you to just sit there and accept your fate. I’m advising you to avoid your brain’s way to protect itself through denial because that will slow you down.

We watched denial at work firsthand during the King Fire.

A few years back, we hovered on the edge of evacuation for 12 days due to the King Fire, a forest fire that nearly reached 100,000 acres. We got up on a sunny Saturday morning,  never realizing that would be the day an angry man would punctuate a domestic dispute by setting fire to a tree in the other person’s yard. Certainly, no one expected that one act of anger to set off a fire that would exceed the size of the city of Atlanta.

However, he did set that fire, and it came as close as 2 miles to our home over the almost-two-weeks that we watched with bated breath.

During the fire, I joined a number of local groups online so that I could get the most up-to-the-minute information, and during this time, I took lots of notes of my observations. The thing that was very clear is that those who were at least somewhat prepared handled the situation far better than those who simply couldn’t accept that this threat was actually happening to them.

As someone who has studied preparedness for many years, I witnessed firsthand the classic exemplar of human behavior during a disaster. Tess Pennington, the author of The Prepper’s Blueprint, wrote an article called The Anatomy of a Breakdown. In the article, she pointed out that in the event of a disaster, society devolves in a predictable pattern with four distinct phases. Her observations were accurate during our experience. As we watched the events unfold, some people changed dramatically.

What helps you to be calm during a crisis?

The difference between the people who crumbled, becoming easily offended, snarling, and hysterical, and the people who were generous, calm, and effective? Their levels of preparedness, both mental and physical. Because they were prepared, they had already

Think about any stressful situation that has ever happened to you. Once you accepted the fact that it had happened you were able to set a course of action. Once you had definitive steps to take, you probably felt much calmer. You took control of the things you could, and you executed your plan. Only by taking that first step – accepting that this mishap had indeed occurred – could you take the next two.

1.) Accept

2.) Plan

3.) Act

No matter what situation you find yourself in, these steps will nearly always see you through. (Here’s an article about that process.)

Here’s how it all went down.

During our own experience, here are the things I witnessed. They could apply to any type of disaster, natural or otherwise. Notice how acceptance plays a starring role in many of them.

Bug out bags are absolutely the first prep you should make. If you’re just getting started, do this one thing. You can do it without spending a penny, by just gathering up things that you already own. You may not have a top-of-the-line, ready-for-the-apocalypse bag like this one, but you’ll still be far ahead of most people. When we first learned of the fire and realized that evacuating might become necessary, I had only two things to do. I had to get documents from the safe (the documents, by the way, were already housed in a plastic folder, so I only had to grab that one thing) and pull the pet carriers out of the shed. In less than 5 minutes, we were ready to roll. Had it been necessary, we could have left with only the photocopies of the documents, because those always remain in our bug-out bags. Having your bug-out bag ready means that you have accepted in advance that disaster could strike.

Any time one disaster strikes, several more are sure to follow. This is highly probable.  Some people in the fire zone not only stayed on the edge of evacuation for nearly two weeks, but they also lost power due to the fire. This greatly reduced their ability to get news and information, which is vital in a disaster situation. It leads to even more worry and stress, and while you’re dealing with the potential of your home burning down, you’re also living through a power outage lasting several days. Getting prepared for a two-week power outage is absolutely vital and can see you through most regional disasters. Also, when it finally began to rain, although it helped to quench the flames, firefighters were suddenly threatened by flash floods. These were made worse because the areas no longer had the same natural obstructions to deter the flow of water.

Unprepared people panic.  Some people panicked initially. When we got the first evacuation alert (a notice that evacuation was highly likely within the next 24 hours), a woman who lived down the street was wailing and sobbing as her husband tried to pack up their vehicle. She was rendered absolutely useless by fear. Meanwhile, my 13-year-old was fulfilling her list while I fulfilled mine and we quickly made an orderly stack of important belongings, then turned on a movie to beat the stress. Had our area actually been forced to evacuate, those who panicked would have either been the last to leave, or they would have forgotten important things as they left in a disorganized rush. It’s important to decide ahead of time who packs what, and for each person to have a list. Sit down well before disaster strikes and make an evacuation plan with your family.

Get organized.  All the lists in the world won’t help you pack quickly if you don’t know where things are. One change we’re making is that all of the items we deemed precious enough to pack and take with us will now be stored in one area so that we won’t have to look for them when seconds count. Another friend ran into the issue of dirty clothes: he actually had to evacuate with hampers of unwashed laundry. Having your home tidy and organized (and your laundry washed and put away) will help your packing go smoothly in the event of a sudden evacuation.

You can’t be prepared for everything.  Disaster situations are always fluid and they don’t go by a script. It’s vital to be adaptable to the changing situation.

Keep your vehicle full of fuel.  If you have to evacuate, lots of other people will be hitting the road too. When you’re stuck in traffic, you don’t want to be worried about your fuel gauge dropping to the empty mark, leaving you stranded in a dangerous situation.

The criminals come out, like cockroaches. Within 24 hours of the first evacuations, we learned that the local scumbags had looted some of the homes that had been left unattended. Within 48 hours, we learned that the scourge had reached the outlying areas, with these people breaking into cars that had been loaded up with the things that families had determined to be most important to them. Of course, if you’ve evacuated, there’s nothing you can do about what’s happening to your home. But before evacuation, or in the event of civil unrest, it’s vital to be prepared to defend your family and belongings. In these situations, the first responders are busy, and that’s what criminals rely on. You should consider yourself to be completely on your own, and be ready for trouble. Keep in mind that during the civil unrest in Ferguson recently, the only businesses that didn’t get looted were the ones at which the owners stood armed and ready to defend their property.

The longer the stress lasts, the worse some people behave. As continued stress is applied, the true nature of a person becomes evident. People who formerly seemed like perfectly nice individuals were on the local message forums saying terrible things to one another. They were verbally attacking others for imagined slights and taking offense at things that would normally never ruffle feathers. Some folks were launching tirades against the very people who were performing the greatest service: the admins of the webpages who worked round the clock to keep us informed. If it was this bad in a potential emergency, can you imagine how bad things will get in a truly devastating long-term scenario?

But then…some people are wonderful. Alternatively, sometimes you see the very best of human nature. The generosity of many of my neighbors cannot be overstated. They housed livestock, pets, and families full of strangers during the evacuation. People showed up at the shelter with food and comfort items for those who had been evacuated. Firemen who came from near and far to fight the blaze were constantly being treated to meals at local restaurants, as other diners surreptitiously paid their tabs. Watching the kindness and gratitude helped to restore some of my faith in human nature, after seeing the squabbling and crime. It was interesting to me that the people who gave the most generously were the ones who were the most prepared. These folks were calm and could focus on other things besides “Oh my gosh, I don’t know what to do!” We definitely learned who the people were that we wanted to surround ourselves with when the S really HTF.

Take steps now to be one of those calm people later.

Today, I want you to think about disasters. It’s certainly not a pleasant thought, but considering these things now – when there’s no fire bearing down on you, no hurricane heading your way, no chemical spill poisoning your water, no pandemic in the next town over – allows you to think more clearly and make a definitive plan of action. Instead of hoping it never happens to you and fearing that the actions you take will make it happen, accept that at some point, something bad will strike. And you’ll be ready.

So…

  • Check your bug out bags.
  • Organize your most precious belongings.
  • Discuss your plans with your family so that everyone knows what to expect.
  • Understand the most likely disasters in your area and know what to do if they strike.
  • Learn more about the nature of the people around you and expect all that you know to change in the blink of an eye.

When – and it’s always “when” not “if” – disaster knocks at your door, be prepared to respond immediately. Learn about what to expect from others in order to keep your family safe and on-plan. Human nature isn’t as much of a variable when you can predict their behavior.

But most of all, accept the fact that bad things can happen. Don’t wallow in denial and waste precious time that could be spent surviving.

When disaster strikes, will you be ready? Will you be organized, calm, and ready to adapt to whatever the situation brings? Sometimes we have some warning, and sometimes things happen out of

Preparing for an uncertain future means many things to many different people.

To some it’s about storing bottled water and other essential items, while to others it’s about learning how to make a shelter and fire. Some people believe it’s mostly about securing their finances against market fluctuations, while others feel it’s about defending themselves and their property.

Regardless of what first comes to mind when you consider this important issue, we’re all going to have to eat after a disaster strikes. None of us will be able to survive the coming crisis without the vitamins and minerals that come from food. And that food must be packaged and stored properly if it’s going to remain nutritious for many years.

Of course, there are other factors involved in stockpiling survival food for the future. We’ll eat anything if we have to, but good-tasting food will make the situation much better, as will a significant amount of variety. The food also needs to be nourishing because a crisis will produce stress and we’ll need all the nutrients we can get to deal with that. With the electrical grid likely to be knocked out for a while following a disaster, the food we store should also be simple to prepare.

And despite how good our food tastes, how much variety we incorporate into our stockpile, how nutritious it is and how easy it is to prepare, it needs to be packaged and stored in a manner that will ensure its longevity. None of us knows how long it will be until a major emergency occurs, and none of us has any idea how long that emergency will last.

Let’s take a look at several long-term food storage components, starting with the most common mistakes people make when they begin their stockpiling process.

10 FOOD STORAGE ERRORS TO AVOID

Do you know who the biggest believers in the importance of storing food and water for emergencies are? It’s probably the victims of disasters that have occurred in this country over the past 15 years or so, including Hurricanes Katrina and Sandy, tornadoes in Oklahoma, Alabama and elsewhere, and snowstorms in the Great Lakes regions.

gettyimages-452124739-1Few people would disagree that it’s a good idea to store emergency food and water, but the folks who are most convinced are the ones who wish they had been prepared for the tragedies they experienced. Many of them are now ready to face the next crisis because they realize from first-hand experience how crucial it is to be prepared.

What some people are not quite as sure about, however, are the best types of food to stockpile, as well as the strategies for storing it in a manner that will maximize its usage once it comes time to access it. There are many mistakes made in this area, and the downside is significant. A lot of hard work can go to waste because just when emergency food is needed most, people can discover that their stored food has gone bad.

There are a number of examples regarding how this can happen. Someone could have huge amounts of grains stored, for instance, but quickly learn that too much of a good thing is not really that good. Balance and variety are essential, and not merely for your digestive system. They are also a psychological help to you and your family, especially if the emergency situation lasts for days, weeks or months.

Another very important factor is the type of containers in which you store food. If there is exposure to air and moisture, it can ruin your food storage tactics. In addition, where you keep those containers is crucial because high temperatures and light can negatively influence vitamins, proteins and fats.

Other factors include your food’s nutritional quality and how frequently you rotate it. You also want to make certain that the majority of food you store does not require refrigeration because a power outage would spoil those foods quickly. Finally, keeping some food at multiple locations is important, because your home could be destroyed in a disaster, or you might not be able to get back to it right away.

Here are 10 common food storage mistakes:

1. Ignoring the importance of nutrition in stored food. This happens more frequently than one might think. Sometimes we’re so concerned about the volume of food we store that we forget about vitamin and mineral content.

2. Using sacks or other containers that are not airtight. This is wrong for a variety of reasons. Air and moisture will greatly decrease the shelf life of stored food. In addition, containers that are not airtight increase the chances that insects or critters might get into your food.

3. Failing to keep food containers in a dry, cool place. Moisture and heat are two of the worst enemies of stored food. The storage temperature for most food should be between 40 and 70 degrees Fahrenheit.

4. Failing to keep food containers out of the light. You definitely want to head to the
dark side when it comes to storing food. Light can deplete the vitamin content of food.

5. Storing too many items that need refrigeration. As mentioned, it’s very likely a crisis will include the loss of power, which means your refrigerated items will spoil quickly without a generator.

6. Failing to include enough variety. After a couple of days of eating the exact same thing, you and your family are going to want something different.

7. Failing to include at least a small percentage of “comfort” foods. In addition to satisfying your sweet tooth, comfort foods will give you and your family a big psychological lift in a crisis.

8. Failing to check expiration dates and rotate stored foods. In each container, organize food by expiration date. When an item’s expiration date is approaching, eat that food – or donate it to a shelter – and replace it with newer food.

9. Failing to keep your stockpile discreet. Advertising to others that you have a stash of survival food could make you vulnerable when a crisis hits. Keep your preparations on the down low.

10. Storing all the food in one location. This is the classic case of putting all your eggs in one basket. If your home is destroyed in a disaster, you’ll be glad you kept food and water at a secondary location.

gettyimages-151910897-1

Some folks believe that freeze-drying is the way to go with long-term food storage. While it’s effective, it’s also very expensive and strips the food of some of its vital nutrients.

Another common technique in the food storage industry is the cheaper “rapid dehydration” method that sucks all the water out quickly. But it can also pull out flavor and nutrients. Low-heat dehydration is a proven technique that keeps flavor and nutrition locked in, and that food will last just as long as freeze-drying without costing an arm and a leg.

Two main advantages to dehydrating food are that it can stay fresher longer and can be stored and transported more easily. Water in food can carry bacteria, which will make that food go bad sooner, and it also weighs down that food.

If you are a do-it-yourselfer, dehydrating food would be a great way to prepare it for your stockpile. It will be more compact and easier to store as you keep it at home, and it will be lighter and more easily packed if you need to bug out. And anytime you want a quick and nutritious meal prior to a crisis situation, all you have to do is rehydrate it and eat it without having to bother looking for an expiration date.

Figure on dehydrated meat lasting only about two months, but many dehydrated fruits and vegetables will be good for a year or so. If you dehydrate herbs, they can probably last for several years.

In order to dehydrate some of your food, you can either use an oven set at a low temperature or invest in a modern, electronic dehydrator. That way, you can make food with an expiration of one month last about 12 months. You don’t want to go much beyond a year in most cases because at that point, even though the water has been removed, it’s likely the nutrients will start breaking down.

Regardless, storage is the key. Once you’ve dehydrated various foods, place them in airtight, plastic containers such as Mylar bags. You may think you’ve squeezed all of the oxygen out of a bag, but there is probably a small amount left, so use an oxygen absorber.

As far as rehydrating that food is concerned, all you have to do in most cases is place it in boiling water and stir, providing a little time for it to thicken.

THE IMPORTANCE OF TASTE

Yes, we will eat anything if we’re starving, but consuming foods that don’t taste good to us is a real challenge. Just when we need that food the most, tasteless food could be tough to swallow – literally and figuratively.

Make sure that the food you put into long-term storage includes top-quality ingredients. Think of the recipes that have proven to be your family’s favorites through the years, and focus on them.


THE IMPORTANCE OF NUTRITION

Everybody knows it’s important to eat food that’s good for you. Well, that’s going to become even more important after the stuff hits the fan. Being able to perform at peak capacity under pressure will be essential when we’re dealing with a crisis, and eating healthy food will go a long toward accomplishing that goal.

Be certain that your survival food is jam-packed with nutritional value, preferably food that takes 100 percent non-GMO fruits and vegetables as
its starting point and ideally food that is grown, harvested and made from scratch here in America.
gettyimages-465990069-1

THE IMPORTANCE OF VARIETY

Have you ever noticed that many foods taste great if you haven’t had them for a while, but not quite as good if you ate them recently and definitely not as good if you ate them yesterday? Our taste buds – not to mention our minds – react differently to foods based on how long it’s been since we’ve eaten them.

Variety in survival food is extremely important… for taste, for nutritional value and for the psychological effect. Make sure you stockpile a nice variety of food for breakfast, lunch and dinner, not to mention snacks and desserts. These foods might include oatmeal, powdered milk, soups, stews, rice, pastas, potatoes, and plenty of fruits and vegetables.

THE IMPORTANCE OF PACKAGING

Another key factor to consider with long-term food storage is packaging. There’s not much point in stockpiling survival food if your food isn’t going to survive. It needs to stay good for a long time.

It’s vital to keep air and moisture out and to have a durable package that can take a few bumps over the years without bursting. The best way to ensure that result is to use space-age Mylar packaging that gets placed inside airtight containers, so look for sealed Mylar pouches with less than 2 percent oxygen content.

Mylar is what NASA uses in spacesuits to protect astronauts from solar-thermal radiation. So, you know your food will be protected against all the elements Mother Nature could throw at it. This barrier against air, moisture and light – the three things that will destroy food over time – is possible even with re-sealable pouches.

THE IMPORTANCE OF SIMPLICITY

Now, none of that time-consuming packaging process makes any sense if it doesn’t contain great-tasting, nutritious food capable of lasting a long time and that is simple for you to prepare. A majority of your stockpiled survival food should require only boiling water, simmering and serving.

WHAT ABOUT CANNED FOOD?

Some survival websites will tell you that canned food is very good for long-term storage, while others will tell you it’s not. Although it can have some drawbacks – weight and portability, for example – canned food is probably better than many people think… especially if you’re hunkered down and don’t have to lug it around.

While you would not want to live exclusively on canned foods, they have their place, especially when one is on a tight budget. Many folks are living paycheck to paycheck during these rough economic times. They barely have enough money to feed themselves and their families, let alone stock up on foods that can sometimes be expensive.

As a more economical option for part of your emergency food supply, put together a stockpile of canned foods. Many of the same foods that people eat on a regular basis are available in canned form, including vegetables, soups, meats, fish, stews, beans, pasta and many more. Canned foods can be nutritious and rich in protein, which people will need for keeping up their strength when they’re dealing with a crisis.

Of course, there is the issue of shelf life when it comes to canned food. Cans also take up a lot of space, and they are heavy. If you have to grab your emergency food supply quickly and head out the door, cans are not your ideal choice. In addition, epoxy resins containing Bisphenol A (BPA) are frequently used as coatings on the insides of cans, which has raised some health concerns. And while it’s extremely rare, some people have contracted botulism from canned food.

But below are seven reasons why you might want to consider having at least some canned food in your survival stash:

1. Price. When you purchase items in bulk, you can save up to 75 percent by acquiring most canned foods rather than freeze-dried or dehydrated foods. Even if you’re not able to buy in bulk, you will still save money with canned foods.

2. Long Lasting. Many canned foods have a shelf life of between one and several years. You should still rotate your supply occasionally and eat the food if the expiration date is getting close, but there’s peace of mind knowing that most canned foods last a long time.

3. Variety. People will eat the same thing over and over again if they’re hungry enough, but everyone appreciates having choices. You can acquire a wide variety of canned foods that should keep pretty much everybody in the family happy for a while.

4. Calories. The last thing you should be worrying about in a survival situation is weight watching. So what if some canned foods are high in calories? Focus on what will be important in that situation, not on how you’re thinking right now. You’re going to need those extra calories when you’re in survival mode.

5. Water. There’s very little water in freeze-dried and dehydrated foods (although there is usually a small amount), but most canned foods contain the water that will make preparation easier. Yes, that also makes them heavier, but that shouldn’t matter if you’re able to stay put to ride out a crisis situation.

6. Familiarity. Most families normally eat foods such as chicken, beef, ham, fish, vegetables, stews, beans and pasta, all of which are available in canned form, plus many more. In a time of crisis, familiarity will go a long way to “normalizing” what you and your fellow family members are going through.

7. Safe Storage. Bugs and rodents can sometimes infiltrate boxes and bags, but seldom do they break through a can.

MULTIPLE LOCATIONS

Regardless what kind of food you stockpile and how you store it, do whatever you can to keep survival food (and other essentials) in more than one location. Those who have gathered large amounts of bottled water, canned food, toiletries and a host of can openers, flashlights, batteries, radios, blankets, clothing, first-aid kits and weapons need to keep a portion of those items in multiple locations.

A home is a great place to stockpile food, and that’s where many people keep their largest supplies because that’s where they and their families are most likely to be when the stuff hits the fan. And even if they’re not home at that exact moment, they will probably be in a position to return there shortly.

Homes are not only where most people keep the majority of their emergency supplies, but also where they’ve spent time and money to secure their belongings. If a breakdown in society occurs following a disaster, they want to be as prepared as possible to protect their families and possessions.

But what if their homes are destroyed or severely damaged by whatever crisis occurs? If that’s the only place where we have our emergency goods including food stockpiled – and we either can’t get to them or they’ve been destroyed by the disaster – we will have wasted a huge amount of time and money preparing for the exact scenario in which we find ourselves.

It is absolutely essential that you keep supplies in multiple locations. If you have a year’s supply of goods at home, keep six months’ worth in at least one other place. If you have six months’ worth of goods at home, store at least three months’ worth at a secondary location.

Now the question becomes, exactly where should your second and perhaps third locations be? There are several important factors to consider. For one, these other locations need to be close enough to get to, yet far enough away that they’re unlikely to be affected by the same disaster that just did a number on your home.

Just as important, these locations have to offer the same features that your home does – a cool, dry place where food and water won’t be negatively affected by sunlight, moisture and extreme temperatures.

Of course, it’s up to you to decide where those second and possibly third locations will be, but among the possibilities are a storage unit that you can rent, a root cellar or storage bunker on your property but away from your house, inside a separate building that you own in town, within a building that a trusted friend owns, or buried in a remote area where only you would think to look.

Finally, as all good preppers know, don’t advertise the fact that you have stockpiled food and water in your home and at other locations. People
will remember that, and you could have some unwelcome visitors following a disaster.

gettyimages-182380705-1

INCLUDE COMFORT FOODS IN YOUR SUPPLY

The word “comfort” sure is comforting, isn’t it? When you think of that word, you might imagine lying in a hammock on a warm summer day, or relaxing on a porch with a beverage on a pleasant evening, or sitting by the fireplace with a cup of coffee when it’s cold outside.

Yes, it’s important to keep your body healthy by eating nutritious food that will provide you with the energy you need. That will be especially true during a crisis when you might be on the move and when your stress level will be higher.

But giving your family members and yourself an emotional lift once in a while with some foods you and they love will do wonders for everyone’s state of mind. And you can’t underestimate the value of keeping attitudes upbeat at a time when depression could easily set in.

So, what is meant by comfort foods? Anything that goes down easy, tastes great, is easy to prepare and reminds you of a time when things were better. Are most of them “healthy” and “natural?” Probably not, although some are. Some are probably high in calories and carbohydrates, and some include a little too much sugar.

But if a vast majority of the foods you are consuming are nutritious, you can afford to eat a snack once in a while that may be better for your attitude than it is for your cholesterol level.

If you asked 15 different people to list their top 15 comfort foods, you’d probably get 15 different lists. But there would certainly be some overlap. Here’s one list that comes to mind.

Hard candies. Some people’s favorites are caramel and butterscotch, but you might prefer cherry, root beer, butter rum or other flavors.

Chocolate pudding. This might be the universal kid-favorite comfort food, but adults love it, too.

Popcorn. You don’t have to be watching a movie to enjoy it, but it’s difficult to watch a movie without it.

Pizza. Are you kidding? Few people don’t like pizza, despite the great debate about which is better – thin crust or deep dish.

Mac and cheese. Another item that few kids will turn down. Many children love it when mom adds hot dog slices to their mac and cheese plate.

Candy bars. Yes, there’s too much sugar. But you don’t have to live off of them. But once in a while, a Three Musketeers, Snickers or Milky Way really hits the spot.

Peanut butter. Most people use this as a spread, but have you ever put a spoonful in your mouth and just savored it?

Hot chocolate. There should be a federal law requiring parents to serve this when their kids come in from playing in the snow.

Honey-coated banana chips. Those who’ve never tried them before rave about them after finally tasting them.

Freeze-dried yogurt bites. Ditto.

Granola bars. These are almost too healthy to count as comfort foods, but they’re included because they taste great and are so easy to open and pop in your mouth.

Trail mix. Dried fruits and nuts are tasty, and many enjoy the kind of trail mix that cheats by including M&Ms and chocolate chips.

Coffee or tea. For some folks, coffee is not a comfort food; it’s an absolute necessity. For others, it could be a pleasant reminder of more normal times.

Hostess Twinkies and Cupcakes. A nutritionist just rolled over in her grave, but as long as you don’t fill an entire bug-out bag with them, you’re probably OK.

WHAT ABOUT PET FOOD STORAGE?

Regardless of whether a disaster causes us and our families to hunker down or bug out, our pets are going to stay with us and receive as much care as we are capable of providing them. These furry creatures are part of the family and are treated that way.

Now, you might keep much of your family’s emergency food supply in space-age Mylar bags, which is a great idea because you may want that food to last a very long time. But most of your animals are probably not going to live another 25 years, crisis or no.

gettyimages-497894708-1

THE BAGS ARE LOADED

There’s good news for you. The bags in which your pets’ dry food are sold are perfectly capable of keeping that food fresh for a couple of years. The only thing to be concerned about here is making sure there are no rips or tears in the bags before you purchase them.

But just because you don’t need to remove your pets’ food from those bags and place it in Mylar bags doesn’t mean you can just toss the bags into the crawlspace and forget about them.

Give a mouse or another rodent access to a bag made of paper and he won’t need long to scratch his way in. Unless your goal is to keep mice happy and healthy following a crisis, this is not the way to go.

USE AIRTIGHT CONTAINERS

You need to pack your pets’ dry food bags in airtight plastic containers then place those containers in a cool, dark place, away from sunlight. And once you open a bag, the oxidation process will start, so make sure to use all of its contents within six months at the most.

Also, you need to rotate this pet food periodically. If the expiration dates on the bags are difficult to read, write the date that you placed it in storage on the bag with a black Sharpie. Then use the oldest food each time, assuming it has not expired.

One note to consider here. If you feed your pets “natural” dry food, you may be giving them something that is healthier for them than “regular” pet food. But due to its lack of preservatives, natural pet food will not last as long.

CONSIDER CANS

Many people prefer dry pet food to canned food, but canned food does have the advantage of lasting longer… sometimes up to five years. The storage principle is the same here. Keep it in a cool, dry place. Although cans are much more difficult to infiltrate than bags, you should still keep them in an airtight container.

FREEZE-DRIED OPTION

Another option is freeze-dried pet food. Assuming nearly all of the moisture has been removed, it should stay good for a number of years. But the plastic packages it normally comes in are not meant for long-term storage, so transfer the food to Mylar bags and then store them in airtight containers. Toss an oxygen absorber into the container while you’re at it.

HOMEMADE NEEDS HOMEWORK

For you DIYers who make your own pet food, you’re probably doing your pets a favor by feeding them a diet that does not contain additives and preservatives. But as with store-bought “natural” dog food, you really need to do your homework before canning that food in order to figure out how long it will stay good.

CONCLUSION

Whether you build your own food stockpile or purchase a ready-made solution, the bottom line is you actually have to do it, not just talk about it. And when you do, make sure it’s stored in a manner that will ensure its value and longevity. Then and only then can you rest easy, knowing you’ve done what you could to prepare for whatever comes your way.

Preparing for an uncertain future means many things to many different people. To some it’s about storing bottled water and other essential items, while to others it’s about learning how to
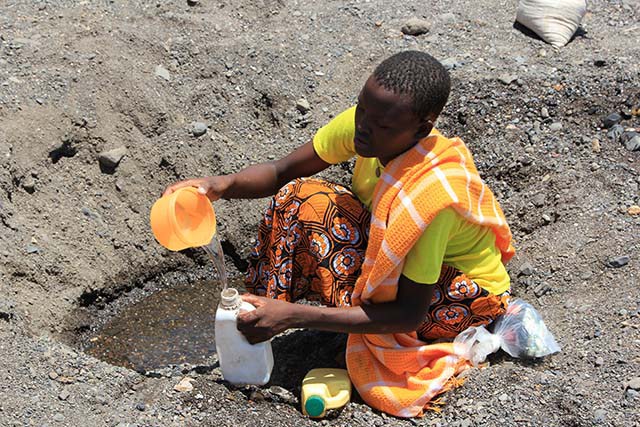
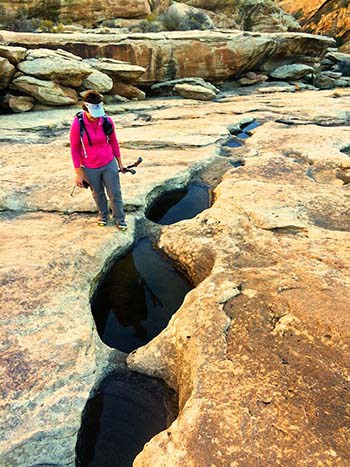
Yesterday I began a new series called, Back to Basics. People every day can simply look at events happening anywhere in the world and understand how taking some simple steps to ensure you can handle minor emergencies, isn’t crazy. Prepping to a certain level makes sense for everyone, regardless of where you live.

This series was designed to go back to the basics of prepping, obviously. Today I wanted to share tips for how to stockpile food for emergencies that anyone can use. I will focus on preppers who are just starting out, but I think some ideas in the topics below could be useful to anyone looking to ensure their family has food and does not go hungry. This article will also have dozens of links to other content on the subject for additional reading.


I believe there are 5 main components to survival that everyone needs to consider. They are simply Water, Food, Shelter, Security and Hygiene. Yesterday we talked about the need for water and how you can easily store water for emergencies that render your traditional methods of obtaining water impossible. Water is more important to life than food or at least you can live longer without food than you can water, but they are both important.

Why do you need to stockpile food for emergencies?

If you are new to prepping, you may have something that triggered your awareness of the subject. Preppers have many reasons for doing what they do and no two preppers are alike. Some are preparing for the end of the world, but most see situations in our daily lives that give a perfect reason to stock up supplies. You have only to look at the recent winter storm that affected large swaths of the Eastern Seaboard to have a perfect example of why you don’t want to be left without a means to feed your family.

emptystoreshelves

Greeks are finding food, medicine and fuel in short supply.

It seems almost cliché at this point, but invariably it always happens when a winter storm is forecast. Everyone rushes out to the store and certain food supplies are wiped out. Images of empty shelves are shown on practically every newscast and eventually prepper websites. Food shortages during simple storms are common if not expected. We don’t really even blink anymore because we are so used to this practice of waiting until the last-minute and then hitting the local grocery store on the way home from work to grab some basic necessities or comfort food.

Related – Build yourself the only unlimited water source you’ll ever need

If you can’t live for more than 3 days without going to the store, it’s time to reevaluate your family’s readiness. The statistic we hear most of the time is that the average home has only 3 days’ worth of food in it. If this is true, where would you be on day three if you had not been able to make it to the grocery store before the storm? What if instead of a snow storm, a virus outbreak had occurred and everyone was told to stay indoors to prevent infection? Each of us should have more food on hand that our families and friends will eat than is absolutely necessary to prevent surprises from leaving you hungry.

How much food do you need to store?

In the example above I used a virus outbreak as the condition that would prevent you from getting to the store. There are others though and weather could certainly be one of them. Some storms where I live have left roads impassable for upwards of a week. Could we walk to the store? Sure, but what if the stores having already been cleared of just about all of the food were closed? What if power outages prevented them from conducting any transactions? These are things you should consider.

Prepping is not something I ever consider you can accomplish. By that I mean, you are never going to be fully prepared. You may be much better prepared than some or all of the people around you, but you will never be 100% self-sufficient. Prepping should be done incrementally even if you have more money than you know what to do with because as you start to stock up food you learn lessons.

Related – The vital self-sufficiency lessons our great grand-fathers left us

A good rule of thumb for me is to start small when you are beginning to stockpile food for emergencies. You don’t need a year of freeze-dried foods to start with. Try just having a week or two of extra groceries that your family already eats. This is accomplished without any exotic storage needs usually or 5 gallon buckets of grains you have to figure out how to prepare.

Premium Fresh MREs Meal with Heaters

My wife purchases the groceries and I started out by giving her extra money to simply buy more food. I did this in the beginning because she is a much better shopper than I am and will always save more money than me. This worked great because she was easily able to fill our pantry and had plenty of meals planned to last us well over 30 days. Sure, at the end of that 30 days of food we would be getting into more exotic cans of mushrooms and soups that are better left as part of a recipe as opposed to your entire meal, but we wouldn’t starve.

What are the best types of food to stockpile?

Once we had a month worth of food and water stored up, I started looking at other options. I think each person should have a layered approach to food storage. This gives you flexibility and more importantly variety that as you go out to 6 months or 1 year or 2 will be important. My own personal goal is 2 years’ worth of food stockpiled for my family but that isn’t made up of only food from our grocery store. That can certainly be done though with a very good rotation plan.

Related – 4 Important Forgotten Skills used by our Ancestors that can help you in any crisis

Food storage should ideally cover the following:

Short Term Food Storage – The best and simplest foods are like I said above, what your family eats every day. One thing to consider is that the bulk of this food should be non-perishable in case you lose power. Canned foods are great as well as pastas, drink mixes and staples. These usually last at least a year.

Medium Term Food Storage – For the 5 – 10 year range MRE’s are a great option although they are heavier and their convenience comes at a higher price. I have several boxes of these and I like MRE’s because they are self-contained and don’t really need any water. Freeze dried camping foods like Mountain House are another great option to just add hot water to. Rice and beans make great additions to this category because you don’t really have to do anything crazy to store them as long as they are kept cool and dry.

Long Term Food Storage – When you start to look at foods that will keep for many years you get into stored grains like Hard Red Winter Wheat that you store in sealed 5 gallon buckets. Freeze dried food from any one of many suppliers out there keep for 20 years usually and are individually wrapped Mylar packets. They require water to re-hydrate but the taste can be surprisingly good. Make sure you have seasonings though….

Renewable Food Storage – This is when you have to get your inner farmer working. Renewable foods are an intensive garden, small livestock like chickens or rabbits and the occasional wild game caught either through hunting or snares. In the worst disasters, your food will run out so having a plan for that ahead of time will help you prepare.

vegetables

For a well-rounded plan, growing your own food will give you the most flexibility.

How do you plan for your food eventually running out?

I have a mix of the food storage options above. We eat on our grocery store items every day, but I also have MRE’s and a pretty large amount of freeze-dried foods stored. We also have the grains I mentioned and the all-important grain mill to grind them into flour. Several hundred pounds of rice and beans round out the equation.

Stockpiling food is only the start. We have a garden and small flock of chickens. The stored food is just to get us through the worst of the disaster. Hopefully before our food runs out whatever disaster has happened will be mitigated and life will have returned to some sense of normality. If not, we have a huge leg up that will allow us to further harvest our garden to put away food like the pioneers had to do. It is an approach that gives us some sense of security and prepares us to come out on the other side still alive.

What is your plan to stockpile food for emergencies?


On a different note, here’s some other self-sufficiency and preparedness solutions recommended for you:

The Lost Ways (The vital self-sufficiency lessons our great grand-fathers left us)
Survival MD (Knowledge to survive any medical crisis situation)
Backyard Liberty (Liberal’s hidden agenda: more than just your guns…)
Alive After the Fall (Build yourself the only unlimited water source you’ll ever need)
The Lost ways II (4 Important Forgotten Skills used by our Ancestors that can help you in any crisis)
The Patriot Privacy Kit (Secure your privacy in just 10 simple steps)

If you can’t live for more than 3 days without going to the store, it’s time to reevaluate your family’s readiness. The statistic we hear most of the time is

Is there any one of us who doesn’t drool a little whenever you see an exotic sports car tooling down the road? I don’t mean a Mustang GT either; I am talking about Ferrari, Lamborghini, McLauren – something in that range. I love these cars and if someone gave me one I would gladly take it. Of course, after I took it out for a good spin I would sell it as quickly as I could. Why? Because I can think of so many other things I need to spend money on besides the most expensive sports car I can find.

One problem I have with a lot of the Best bug out vehicle lists is that they are full of really exotic (expensive) vehicles that the average prepper simply couldn’t afford. If we could, then I guess we would all have that Knight XV Fully Armored SUV that goes for around $800,000 if my source is right. I started thinking about this subject a little more as I was shopping for my own personal Bug Out Vehicle. After much saving, searching and research I finally found what I think is a great option for me, but I wanted to talk about bug out vehicles and create a different kind of list. This list will be the best bug out vehicles you can actually afford. So if you are in the market for a vehicle that may help you get out of or survive the next disaster, zombie apocalypse or the common summer or winter storm, read on.

What is a Bug Out Vehicle?

A bug out vehicle by definition is what you would hop in if you needed to get out of dodge. If you were going to pack your family and all your survival supplies in a vehicle and race out-of-town to avoid danger that was coming for you, the bug out vehicle would be the best option for you do accomplish this task. All bug out scenarios aren’t created equally though and each person has their own needs and preferences. Fortunately for us, there are almost as many bug out vehicle options as there are situations. The list below should account for most of what I can foresee the average person needing in a vehicle.

What should the bug out vehicle allow you to do?

Could you bug out in that 2 seat sports car? Absolutely. You someone bug out on a survival bicycle? Of course and before it’s all over that might be what you are forced to finally resort to, but in my mind a bug out vehicle has to be able to accomplish a few tasks to even make the running. Ideally we have a vehicle that you can use daily that can also hold its own if forced to be put into action to get you out of a hairy situation.


It must hold 4 people – But I am a single girl you say, why would I need something to hold 4 people? I believe it is short-sighted to plan on a bug out vehicle that only carries one or two people. That might be what you are forced to live with if something happened right now, but it shouldn’t be the goal. If this is a real bug out scenario you want to be with some friends or family because there is strength and support in numbers. The best bug out vehicles won’t leave the possibility of taking a few more people with you out of the equation.

It must be able to carry your supplies – Back to the 2 seat vehicle and even a lot of mid-sized cars these days. Most have so little cargo room that you would be lucky to get your bug out bag and a pillow in the trunk but you could forget about all of your prepping supplies, ammo and food and water you have stored. I am not saying that your bug out vehicle should be able to carry everything in your house or else it is worthless, but you do want the ability to pack a good portion of your supplies or gear.

It must be able to navigate rough terrain/rough weather – The first thing that comes to mind when I am considering a vehicle that I could actually use to bug out is 4 wheel drive. I have read other forums where some will complain about the fuel you would need and how a larger vehicle could actually be worse. Some have even recommended a hybrid as a better solution to save gas and I simply disagree. In almost every horrible scenario I can imagine, even something as mundane as a hurricane evacuation, the ability to go off-road is an important advantage. Try taking that Prius across the median of a clogged highway that is soaked with rain. Can you imagine that Chevy Volt in a snow storm with downed trees? Motorcycles don’t pass the test for me on this point although if outfitted correctly, they can go through a lot of rugged terrain. The downside is cargo capacity and exposure to the elements.

It must be fairly nimble and able to negotiate obstacles quickly – Back to motorcycles again. They are perhaps the most nimble but they have their drawbacks. Also, a trailer on the back of your vehicle would give you the ability to carry a lot of gear but seriously reduce your mobility. Try backing up a trailer and turning around to avoid an ambush quickly. Most people have problems backing up a trailer when they aren’t panicked, getting shot at or worse. You could wait for Ford’s Pro Trailer Backup Assist coming in their 2016 line, but is it worth it?

What are the best bug out vehicles?

So taking all of those criteria into consideration and this assumes the market is the US, what are the best bug out vehicles that meet that criteria and won’t break the bank? Most all of these are vehicles that unlike the Knight XV are driven by millions every day and can get you to safety, all things being equal. You can also buy late-model versions of each of these for less than $20,000. Not free obviously, but not $800,000 either.

Jeep – There are several models of Jeep that boast both 4 wheel drive and have a decent amount of cargo capacity to get you where you need to go. For serious off-road enthusiasts there is a huge market of parts and accessories to make this vehicle highly customizable.

JeepBugOut

Jeep’s are tried and tested off road vehicles that could make excellent bug out vehicles.

Humvee – The average prepper knows all about these vehicles and new ones are out of the realm of possibility, but you can get surplus military Humvee right now for less than $10,000 on the GOV Planet website. If you have always dreamed of outfitting your own mini-fiefdom after the world ends, now is your chance. Of course if you just want a great vehicle that can get you and your family to your secluded retreat, this makes a compelling option at this price.

HummerBugOut

A surplus Hummer could be an incredible savings and give you a battle tested winner.

4 Wheel drive Truck with crew cab – There are too many four-wheel drive trucks to list here, but a crew cab make this a natural fit for a Bug out vehicle. You can improve the suspension, add a cargo top and have a great vehicle that you can drive every day or when the grid goes down.

BugOutFord

Trucks are one of the most common bug out vehicles for their capacity and off-road ability.

4 Wheel or all wheel drive SUV – Just like with trucks, SUV’s are everywhere but they aren’t all created equally. Some have 4 wheel drive, but all 4 wheel capability isn’t created equally. For SUV’s I would stick with Toyota 4Runner, Nissan or the Jeeps mentioned above. Obviously, the old Ford Expeditions and Chevy Tahoe can work in this capacity too and there will always be easy access to parts for each.

SUVBugOut

The family SUV can also get you out of a jam with the right upgrades.

Best Bug out vehicle upgrades

These vehicles listed above will make great, affordable bug out vehicle options for most people but if you want to extend their capabilities, you can add some fairly simple aftermarket additions to make them even better.

  • Roof top cargo racks – This will extend the amount of gear you can carry by a considerable bit. Two well-known manufacturers are Gobi and Baha.
  • Improved front and rear bumpers – This is not an upgrade for everyone because they aren’t cheap but if you want some more protection (a lot more) for your bug out vehicle, there are several manufacturers. ARB, Shrockworks and CBI make insanely tough bumpers that you can add to your own vehicle.
  • Winch kits – Sometimes you get stuck and if the end of the world as we know it happens and you are riding into the wilderness in your bug out vehicle, you won’t be able to call AAA. Having a sturdy winch could pull you out of a jam.
  • Enhanced lighting – Regular headlights are only meant to show the road immediately ahead of you at a normal distance that won’t blind traffic coming towards you. If you are out in the wilderness or a power outage or storm has rendered your world as black as night, additional lights can help you see or be seen. The current LED technology has really increased the amount of available light you can have for your BOV. Some of these lights are capable of putting out over 24,000 lumens! For comparison, your regular Cree mini flashlight has about 200 lumens. Rigid Industries is probably the best known (and most expensive) but there are cheaper options out there if you look around. For instance, Amazon has a 24 inch LED light bar for under $60. That will save you about $800.
  • Communication optionsCB Radio and Ham Radio make excellent upgrades to your bug out vehicle. Either will allow you to communicate with the rest of your group or rescue sources nearby.
  • Additional fuel storage tanks – Increase the range of your bug out vehicle by adding a larger or secondary fuel tank. Of course, there are cheaper options where you can just purchase additional fuel cans and mount them on your roof rack or bumper.

Hopefully, this gives you some ideas if you are looking for a bug out vehicle that you can afford. What are you driving?

A bug out vehicle by definition is what you would hop in if you needed to get out of dodge. If you were going to pack your family and all

Homesteading’s the fine art of getting your land legs while learning how to do most of the stuff on your own. It’s great to have your own slice of heaven by the sea or in the middle of a dark and twisted forest – I for one can vouch that, most of the time, it’s rather amusing to figure out how our ancestors did things like tending to the garden, raising farm animals, settling in for the winter, picking up fresh herbs from the garden or building simple stuff out back.

Still, as pleasure-laden, as homesteading may be or become, it’s rather a turnoff when you need to do all of the things or more when you’re sick. Even a simple cold or the flu can turn a grown man into a noodle, but imagine what happens when you become bound to your sickbed with no one around to take care of you and your house.

Yes, that may strike as being a little depressive, but, unfortunately, it can happen even to the best of us. I being struck down a couple of months ago by the stomach flu somehow wound up all alone at my hunting cabin. Wife couldn’t come up on account of the kids being sick too and no driver’s license, so I was kind of force to get ingenious about my homesteading.

Anyway, after careful considerations and some chicken soup, I came with this wonderful piece which details my journey from sickly couch-potato to a regular Paul Bunyan wannabee. Without further ado, here’s are my golden rules to successful homesteading while you’re sick.

  1. Stay in bed

Of course, my first golden rule had to be a no-brainer because of reasons. Just kidding – most people tend to underestimate the severity of their medical condition and decide to just brush it off. Don’t do that. If you’re feeling that your legs are turning into the noodle, get to bed, medicate, and sleep on it. Remember that you’re all alone out there, and if you happen to collapse while working the field or chopping wood, there’s no one around to pick you up or drive you to the hospital.

  1. Get in touch with emergency services

No matter if you’re a big city dweller or the king of your own hill or mountain, you’ve still got to figure out how to get in touch with the emergency services in case shit hits the fan. A while after I bought my hunting cabin, figuring out that I kind of get down with the flu when spring comes, I went to my local drug store and bought me a one-push emergency bracelet.

Surprisingly, the device has great coverage, even in places where there’s no phone signal. Don’t kid around with your health, especially if you decide to drop off the grid. If you can’t find an emergency bracelet, use an emergency service smartphone application like Emergency+ if you have adequate coverage. A portable distress beacon is always a great alternative, but it will need some tinkering before you can use it to alert the local emergency services.

  1. Keep an ample supply of chopped wood or fire-starting material

Golden rule number three – when you’re game, chop as much wood as you can because you won’t be able to do so when you’re sick. It would also be a good idea to keep a small wood stack as close to the home as possible to minimize exposure to the elements.

Yes, I know that’s a big no-no in the big book of prepping, but some rules are meant to be bent if in doing so increases your survival likelihood. If your stove is running on another kind of fuel, be sure to keeps some close by, but not too close to the heating device.

  1. Soup broth all around!

I know it’s kind of a cliché but hot chicken soup really help you’re sick or feeling down. Making some in your home is no big deal. Still, I would skip the cooking part and go buy some canned soup. Sure, nothing beats a home-cooked meal, but do keep in mind that you can’t prepare the broth that much in advance.  So, make sure you have enough in your pantry for whatever the case may be.

  1. No one should be without a checklist

Checklists are a marvelous way of keeping everything nice and tidy, especially if you’re the kind of person that has no love for neatness. If you find yourself alone and sick on your property, get yourself together and try to jot down a small to-do list for the next couple of days. That way, you will have ensured that you haven’t missed anything.

  1. Let someone know you’re there

You may be king of the mountain, but every king sometimes requires the aid of a royal advisor. In this case, you should let someone know where you are and, most importantly, how long you’re planning on staying. If you plan on moving there, get to know your neighbors and, if possible, ask someone to check up on you every couple of days to make sure that you’re safe and sound.

  1. Keeping your meds close

You don’t need to be sick in order to figure out that it’s really important for the meds to be within reach. I personally emptied an old wooden wardrobe and sort of turned it into a big med cabinet. Of course, you can do as you like when it comes to med storage. Don’t forget about the golden rule of med hoarding: painkillers first, anti-histamines second, and vitamin supplements last.

These are my golden rules of homesteading while I’m sick. As I’ve mentioned, all of this stuff are the results of my me-time at the hunting cabin. Sure, it may be possible that some steps might be a bit off, but, as I’ve said, this was a personal experience. Think something’s missing from the list? Then go ahead and hit the comments section and let me know what you think.

Homesteading’s the fine art of getting your land legs while learning how to do most of the stuff on your own. It’s great to have your own slice of heaven

Did you know that before the Winchester repeating rifle was invented, Walter Hunt patented the “combined piston breech and firing cock repeating gun”?

Not only that, according to the Smithsonian, he also invented the fountain pen, the sewing machine, and that little thing most of us call the safety pin. While they certainly don’t pack the power of a repeating gun, there are a number of survival uses for safety pins if you include them in your EDC kit.

When it comes to survival , the ideal thing is to have a good EDC kit and some first aid supplies or a bug out bag. But what happens if you get caught out away from home without your bug out bag and first aid kit?

We’ve listed suggested uses for keeping safety pins in your EDC kit below. Please keep in mind using safety pins for some of these things are recommended as a last resort, meaning when you have no other option.  We are NOT recommending that you rely primarily on safety pins for tasks critical to survival.

Also keep in mind this article is NOT medical advice, and anything you do is at your own risk, and neither the author nor www.SurvivalSullivan.comcan shall be held liable for any injuries or negative effects as a result of putting the advice of this article into practice.

#1. Remove Foreign Objects Under the Skin

Just about everyone has probably experienced getting a splinter or some other small sharp object stuck under their skin. Use an open safety pin similar to tweezers to remove splinters, thorns, insect stingers, ticks or even the dreaded botfly. With insects, make doubly sure you know what the risks are and seek medical advice first if available.

#2. Flush Out a Wound

Once you’ve removed a splinter or other foreign object, it’s probably a good idea to flush out the wound to ensure it’s as clean as possible. You can use a safety pin to poke a hole in a water bottle or plastic bag filled with water so that you can have a precise stream and conserve water for later.

#3. Stitch a Wound

It’s not the recommended way to stitch up that cut on your arm but in a pinch, if you don’t have a needle, you can make a safety pin work. Be extremely gentle and take care not to break it off as you pull.

#4. Secure Bait

If you find yourself in a survival situation where you need to use a trap to catch food, the last thing you want to do is risk the prey snagging the bait without setting off the trigger. You can use a safety pin to secure your bait to the trigger so there’s less chance of your prey getting away with a snack and leaving you with an empty belly.

 #5. Replace a Button

Although probably not a true survival situation, you can use a safety pin to replace a missing button on your shirt or pants.

#6. Sewing Awl

In a pinch, you can use larger safety pins as an awl for sewing heavier material such as leather, burlap, or canvas.

Straighten out the pin and use the sharp end to pierce the material, twisting it around a bit to make the hole large enough for your cordage. Push the cordage through the holes using the tip of the pin or your finger depending on which is easier.

#7. Hang Clothes to Dry

When we camp, there are times that it rains or that we need to hang wet clothes or other items overnight. If you drop your wallet in the stream or your jacket falls from your backpack into the mud. You can use clothespins to secure lightweight items to dry overnight from the inside of your tent using some cordage or even a bungee cord stretched between the poles.

#8. Fishing Hook

It’s not ideal but you can use a safety pin as a makeshift fishing hook by tying it to your fishing line and then opening the pin and bending it into the shape of a hook. Add your bait and drop the line in the water. It will only work with smaller fish obviously but it’s better than nothing in a survival situation.

#9. Secure DIY Bandage

If you are injured unexpectedly and need to bandage the wound but don’t have traditional bandages, a safety pin might be a lifesaver. Tear or cut a strip of clothing or other available clean material, wrap it around the wound and secure temporarily with safety pins.

#10. Escape Handcuffs or Locked Room

When SHTF, it’s entirely possible for you to be taken captive by someone who wants your supplies, property, or worse. In the absence of a good lock picking kit, you can use a safety pin to help you pick a lock and escape.

#11. Make a DIY Sling or Splint

If someone falls during a bug out or other type of survival situation and you need to immobilize their arm or shoulder, you can use a safety pin to attach their sleeve to another part of their clothing or put a stick on each side of a damaged finger and wrap with cloth and secure with a safety pin.

#12. Close or Attach a Makeshift Shelter

Again, in a survival situation, I really hope you’ll have better shelter building materials on hand but in a pinch, you can use safety pins to attach clothing or any other type of available cloth together to create a makeshift albeit very temporary shelter.

 #13. Reinforce Zippers

Replace a broken zipper pull on your bug out bag with a closed safety pin or use a safety pin to fasten two zippers together to keep them from working open during your bug out.

#14. Repair a Rip or Tear

Depending on the situation you are in, the landscape, and how quickly you need to move, you may not have time to properly fix a tear in your bug out bag, a loose pant leg hem, or that rip in the sleeve of your jacket from catching it on a branch. Safety pins come in really handy for temporarily keeping things together.

#15. Fix Unthreaded Drawstring

There’s nothing more important in a bad weather survival situation than staying warm. If you find yourself in extreme weather with a jacket hood or sweatshirt with no drawstring, you’ll be scrambling to keep it up and stay warm. Use a safety pin and any piece of cordage to replace the drawstring so you can keep your head covered and your hands free.

#16. Toothpick

It may not save your life, but it could save you some frustration and agony if you get a seed or something else stuck between your teeth in a survival situation. Take care not to puncture your gum and cause an additional issue.

#17. DIY Lance

If you don’t have a needle and you need to lance a boil, smashed fingernail, etc. you can heat a safety pin to sterilize it and use the tip as a lance.

Have we convinced you yet to include safety pins in your EDC kit? You can carry them just about anywhere very discreetly. Pin them inside the hem of your pant leg or the inside of a hat that is part of your EDC. Slide a couple in your wallet or pin into your shoelaces.

Do you have other survival uses for safety pins that we neglected in our list above? Ever use a safety pin for a really unusual repair before? Let us know in the comments below. We always love to hear good ideas from other preppers and homesteaders.


Other self-sufficiency and preparedness solutions recommended for you:

The Lost Ways (The vital self-sufficiency lessons our great grand-fathers left us)

Survival MD (Knowledge to survive any medical crisis situation)

Backyard Liberty (Liberal’s hidden agenda: more than just your guns…)

Alive After the Fall (Build yourself the only unlimited water source you’ll ever need)

The Lost ways II (4 Important Forgotten Skills used by our Ancestors that can help you in any crisis)

The Patriot Privacy Kit (Secure your privacy in just 10 simple steps)

Did you know that before the Winchester repeating rifle was invented, Walter Hunt patented the “combined piston breech and firing cock repeating gun”? Not only that, according to the Smithsonian, he