HomePosts Tagged "Preppers" (Page 7)

I used to think people who were constantly talking about government conspiracies, doomsday and all the other scare tactics were spouting wild theories. I still do for the most part… Recently, I got a different point of view when I re-read the article 8 Reasons Why Prepping is Good for You.When you boil preparing for unusual situations or prepping down, all it really means is that you turn back the clock and return to a simpler time when people were independent. In simpler times money was kept in the home, personal debt was rare, people cooked the food they grew and got a lot of exercise in the process. We have situations every day that we need to be ready for so let’s see how your prepping skills work out in these situations.

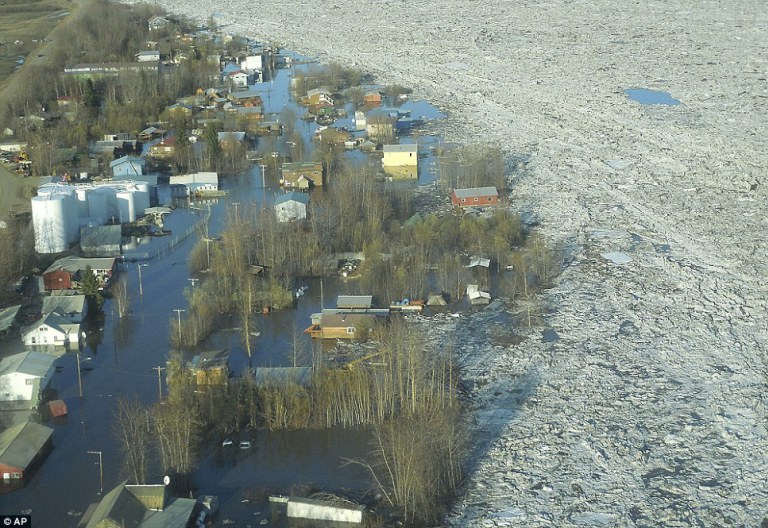
Floods – in the past, Louisiana had several days of flooding rains. Roads were flooded and people were cut off from stores and medical centers, many people were stuck in their homes. If they had stored some food, water and extra medical supplies they did better than those that didn’t.

Stuck on the Road – Accidents, storms and traffic jams on the highway have caused people to be on the road for hours and even days. If you have your go bag packed with extra blankets and food you will be glad to have it, and thankful that you learned some self-reliance.

EarthquakesEarthquakes occur more often than you think and there is very little warning when they are coming. As a veteran of a couple of earthquakes I know they have a wide range of damage. Power may go out, roads are often impassable and you are left separated from family. If you remembered to make an emergency plan with your family you will find out quicker whether they are okay or not. Communications are often jammed so if power is out you will need to have a solar-powered battery charger to try to get through on jammed lines. It can take days.

Water Contamination – Water contamination seems to pop up on news stories at least once a month. Your prepper skills would have taught you to have bottled water on hand or to have the equipment to make drinkable water on hand. Stores often don’t have often have enough for an entire community.

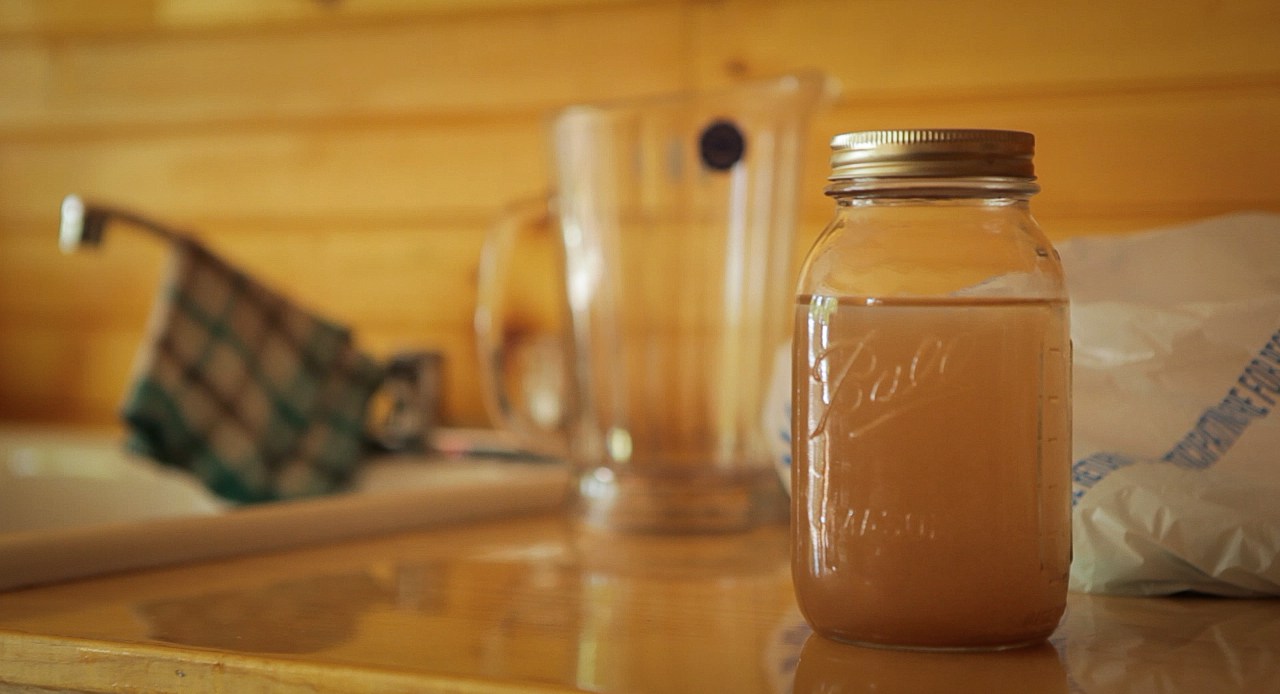
water-contamination

Do you know how to make drinking water safe if what is coming out of the tap isn’t?

Hurricanes – While hurricanes vary in strength and size, they all come with a lot of wind and rain. When Hurricane Irene struck New England back in 2011 trees came down, bridges were swept away, shopping centers were flooded and power lines went down. The damage was widespread; the effects of the storm were felt long after the storm departed. The people and companies that did the best were the ones that had back up power and extra supplies.

Fires – Fires usually require a quick exit from a building or even a large area. If you have prepared in advance, your important papers will be in a place where you can grab them quickly and go. This will not only give you peace of mind, it will make the recovery much easier on you.

71ydwsfc9bl-_sl1500

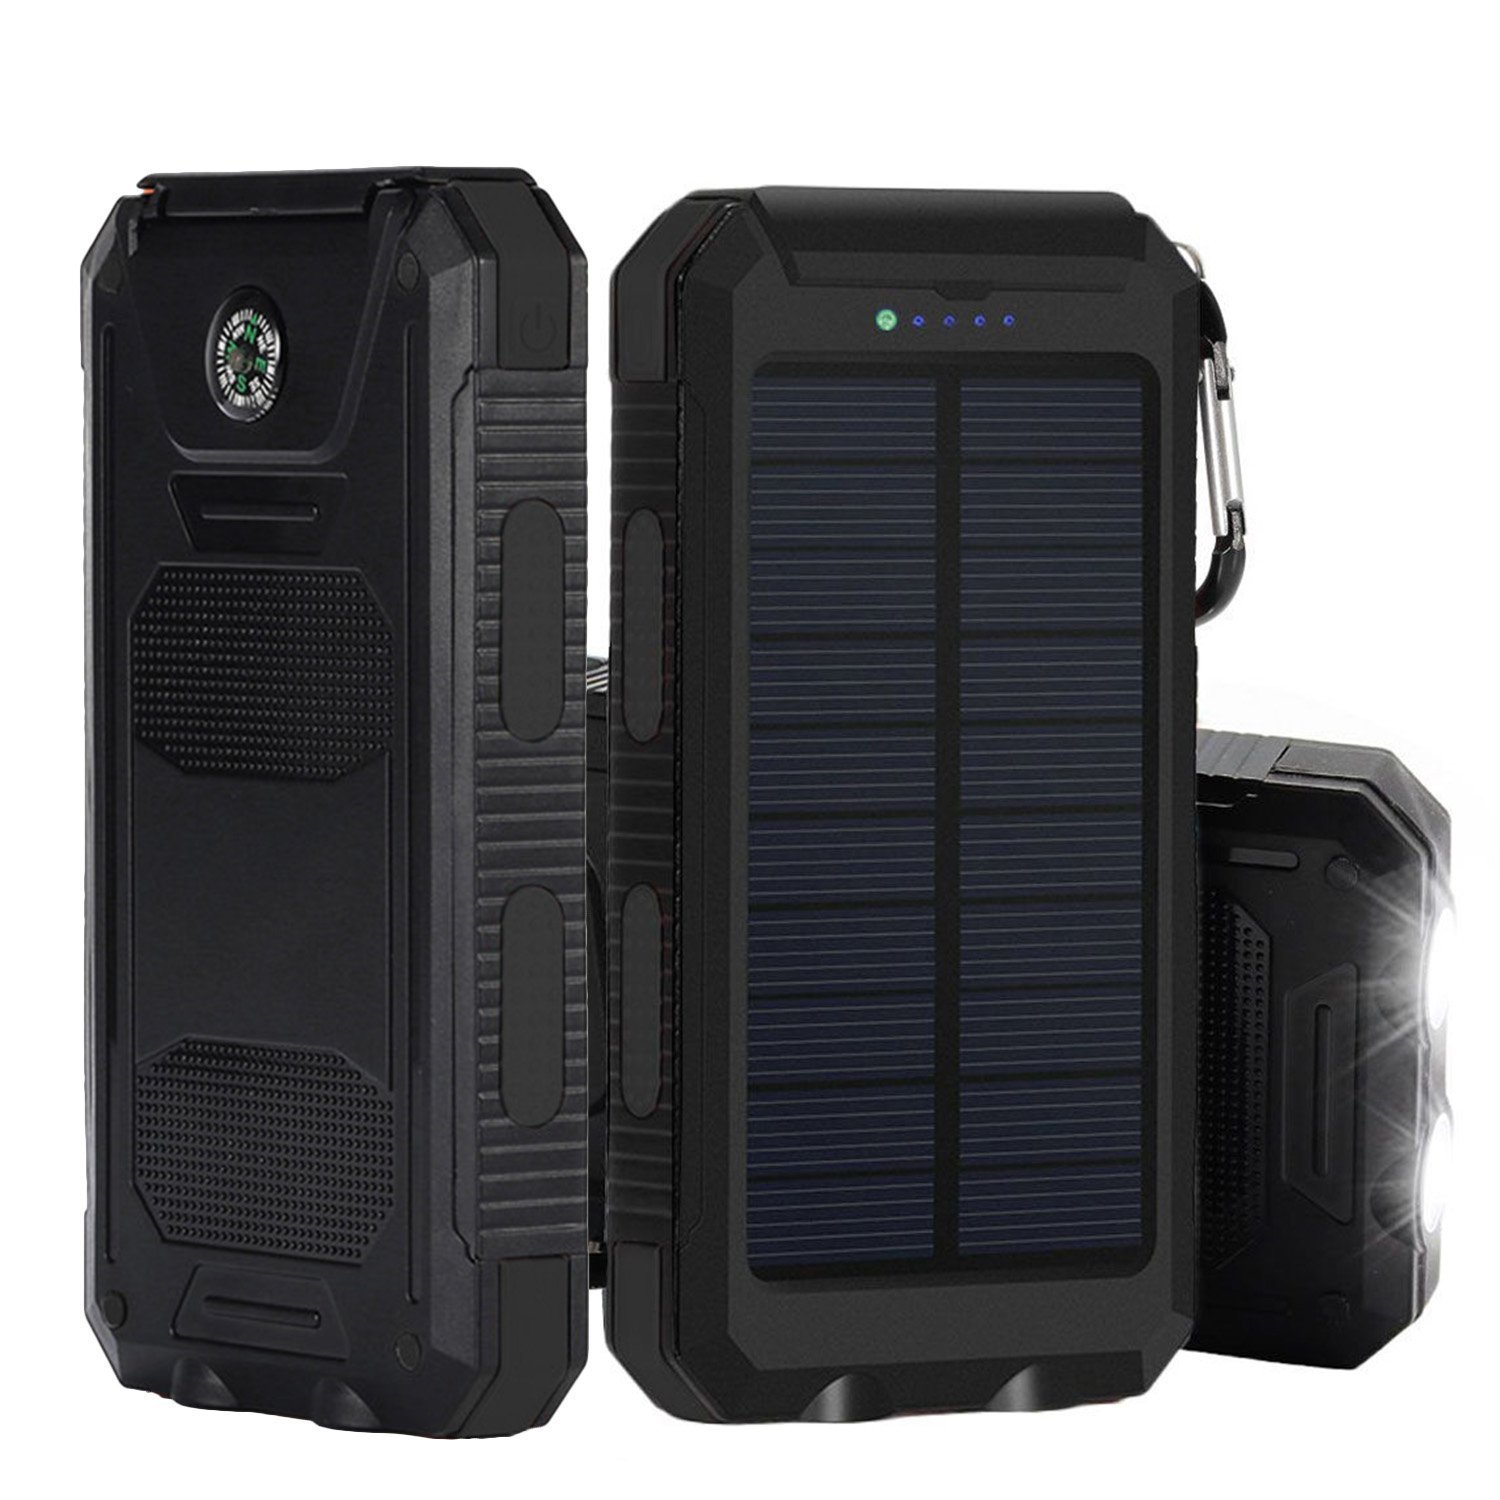
iBeek® Portable 10000mAh Dual USB Solar Battery Charger

Winter Weather – Ice storms and blizzards are some of the prettiest storms; and with that fresh look comes cold problems. The storms are very destructive. In 2008 an ice storm hit New England and New York. The roads icing were the least of the problems. Power was down for weeks; the grid had to be replaced in freezing weather. Many New Englanders are ready for storms but weeks without power tested even the hardiest people. The people who depended on power to heat, cook and shower and that had no other heat source had to go to shelters or to a family member’s home to keep warm. People stood in line in restaurants to charge their phones so they could check on friends and family. The sun shone strongly right after the storm, your solar battery charger will be very useful on one of these days.

Financial Health – There is one area of being prepared that we can use on a daily basis and that is finances. Many of us have gone into debt for things that we don’t really need. The prepper lifestyle encourages debt free-living and skills like cooking, and home medicine that save money and encourage good health.

Relationships – Any activity your family does together forges your relationships. Prepping activities are no exception. Getting prepared for unusual situations is an opportunity for everyone, especially children, to have confidence, build skills and learn independence.

Education – Prepping is like attending a new school. You still learn plenty, you just don’t sit in a classroom. Here are just a few of the lessons you get at Prepping School:

Science: Growing and preserving your own food not only teaches children where food comes from, you create family memories for years to come. I still remember picking apples, blueberries and strawberries in the field, then coming home and helping my Mom and Grandmother cook with them. We also had a garden and I remember my Dad’s tips on planting tomatoes and cucumbers.
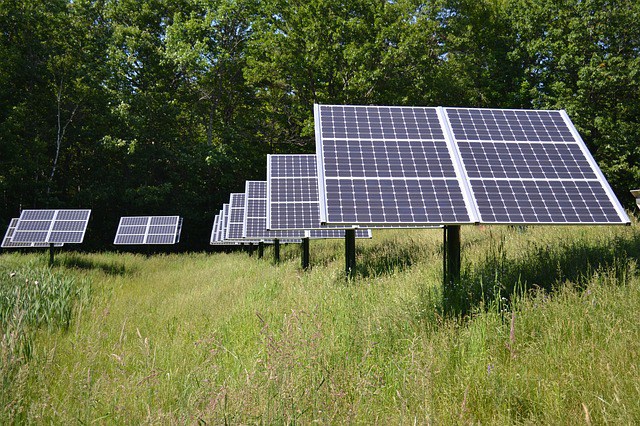
solar-835894_6401

Solar power is an option for off grid and prices are coming down.

Physical Education: Our modern lifestyle has cut out a lot of the exercise that people in a simpler time got by walking more and doing more labor themselves instead of having a machine do it. Planting a garden and then harvesting that garden require exercise and fresh air. If you hunt for your own food you walk quite a bit in the wilderness. You can also take your family on hikes to find things like the nearest water source and medicinal plants. When you map the route you are teaching and learning mapping skills and geography.

Alternative Energy – Designing and constructing a solar or wind powered system is a lesson that gives children a useful skill that will last throughout their lives. They may even start a business based on the experience. Solar, wind and hydro energies are going to be a big part of our children’s lives. Teaching them how to use them correctly is an important lesson.

Raising Animals – When you raise animals for food you have to research which food is good for them, build them a pen and make sure they have a warm dry place to stay. Their medical needs must be taken care of as well. This is a lesson in building, responsibility and science.

Health– More exercise is just one health benefits of getting prepared. When someone is hurt and cannot get to the Dr. or clinic the medical supplies you have and skills you learned prepping will be needed. This is a good science lesson for the kids. Learning to heal others could influence their career choice. When you help someone by cleaning their wounds and healing a sick person you gain confidence. It worked for my Grandmother. One of the home remedies she used was an egg poultice which was used as a drawing agent. When my Dad welded he often got metal slivers deep in his skin. He would apply Grandma’s poultice to the sliver and cover it with a bandage. A day or two later the silver would be in out and my Dad was happy.

Peace of Mind: The peace of mind just knowing you are ready is priceless.

With all the benefits of prepping, maybe we should all live like the world is ending. We would build better relationships, get more exercise and eat better.

I used to think people who were constantly talking about government conspiracies, doomsday and all the other scare tactics were spouting wild theories. I still do for the most part…

Winter Property Assessments
When we think of winter prepper project idea, we commonly think of things that can help us beat or evade the cold and less about spending time outdoors. However, there’s a lot that winter (or early spring) can tell us about our properties, both for planting decisions, siting various things around our property, and for mitigating some of the weather that comes with winter and spring. A lot of it is information that’s hard to come by in late spring and summer. Winter is also an excellent time for indoor projects. This article will talk about the outdoors and assessments, but later I’ll hit a mix of projects we can tackle at the kitchen table.

Snow Drifts

Snow drifts can be useful guides for our homes – and an excellent test of how “tight” our winter gear is. Looking at where snow piles up and which sides it accumulates on tells us where the winds blow to and from in winter. That tells us:

  • Where not to site tender crops and perennials – Those winds will create a colder micro-climate even into planting season that can stunt or kill off our plants, or delay planting season for us. They can also wreck a borderline shrub or tree for our area, whereas with a little more protection our hardy kiwifruit or cherries would have been fine and full-sized.
  • Where not to plan our backup/outdoor kitchen (nothing like standing outside grilling in a gale)
  • Which direction to face doors on new construction of sheds and animal buildings, so that snow builds up on the opposite side, limiting how much we dig to open doors and how much cold air enters every time we open that door.

  • Where we want to put gates, so that something is helping to put them in the lee of an accumulation zone, again, to limit digging while caring for livestock.
  • Where we might want to create a windbreak or series of buffers for house doors – Stack wood, build a shed, or erect a screen of some kind around the doors in our homes, either panels of soda bottles or salvaged windows, or even just mesh screen, anything to diffuse the wind. It limits how much cold air enters with us, as well as can create an initial mudroom for brushing and shaking off snow before we even get to the drip zone of our house.
  • Where we might plant a windbreak of hardy, screening shrubs and trees to protect crops (there’s a specific way to plan those)

  • Where we want to stack wood, so that we don’t have to get a faceful of rain or snow or sleet collecting it, and so we don’t have to dig/chip it out as often.

Similarly to tracking winter winds, we also want to be aware of summer winds, especially in areas where summer and autumn storms will rip away flowers or drop not-yet-ripe fruit. There are other ways for finding those directions and wind strengths.

Pooling & Running Water

Water is essential for life, but too much of a good thing can be bad. Locating the paths water takes and the places it collects and stands can do several things for us. The key to reducing water damage to buildings, the land, and our plants, and to using it most efficiently, is to locate both the areas where it pools and stands, the areas it’s running fastest, and the points of origin. The origin points are both where it’s entering our property, and how it’s getting there.

Sketch a simple plat map of the property or areas on the property, and make notes during rains, snows, and melting periods. It’s as simple as looking, although some stomping to see how sodden an area is is invaluable. Winter and spring with their typically greater wetness levels are ideal for finding a property’s water trends.

Permie S’s  – Locating the pathways of water on our property allows us the opportunity to Slow It, Spread It, Sink It & Store It. That might be creating swales or keylines to increase infiltration or to move the water somewhere we’d prefer it, building hugel beds in a system to absorb some of it and redirect some of it, or seeing if we can harness it in pools or water catchment systems at the point of origin.

Frost Pockets – Those places that water pools in a storm or melt cycle are going to be the low spots. Low spots tend to collect frost early and late in the season, damaging plants that are located there. They’re also going to periodically turn into a skating rink in winter, which can make them a poor place to park vehicles or situate the shed with the feed in it.

Cold Water – Soil temperature affects plant germination and growth. Crops like corn won’t germinate at all in cold soils, and cold-soaking rains can stunt or kill off other warm season crops as well. While it’s less of an issue in later seasons, locating crop fields where they’re regularly inundated with cold spring rains and winter snow-melt runoff can damage our density and yields, or delay our plantings by weeks or a full month and a half in some places.

Oops – It looked dry enough, and it was solid getting out … right up until it wasn’t. Knowing the sodden spots of our property ahead of planting – now or in a disaster – can help us avoid losing time or seed on soils that stay soaked late in the season and re-soak quickly in rain storms.

Standing Water & Soaked Soils – Pretty much any seed can be pre-soaked to speed germination, but that’s a temporary thing, usually numbered in hours. Seed packages mention “damp” or “moist” soil because it’s one of those “too much of a good thing” cases. Inundated soils will increase rot in both seeds and seedlings, costing us days or weeks as it dries out. Our planting can also be delayed if we site our crops in areas that don’t consistently dry out until weeks after the traditional start date for our area just because we can’t get a tractor or push tiller in.

Wet fields can also lead to delays in harvesting first-cut hay, decreasing its quality and possibly preventing later cut(s). Cutting by hand is laborious and while it allows increased access over a tow-behind, there’s still loss potential from ground rot. Wet green hays that are baled also sometimes spontaneously ignite, which can cost us not only feed, but our livestock and sheds, if not our homes as well.

While most of the water checks can be done just by visualizing the surface, in this case, it would not hurt to walk around with some hollow bamboo or a steel pipe, a tulip planter, or a skinny fencepost shovel. We want to stab down into our soils every 2-3 days after heavy rains and during the periods leading up to our planting dates (and after) to see when exactly it dries out.

We also want to repeat this process after we seed if we plan to expand later, because little is worse than heavy rain cycles that leave us staring at wasting crops from our windows as our plots turn into bogs and lakes. Tracking the water on our property during the traditionally wettest periods of the year can help us avoid that.

Pasture/Paddock Damage – Areas that collect water are a bad idea for livestock. Sodden soils don’t hold grasses and dicots very well. Hooves and claws end up tearing the plants free and destroying the roots, even when the turf starts off in good condition. Likewise, damp ground increases bacterial and viral diseases and causes additional hoof, foot and feather conditions. Once those pastures and paddocks are bare earth, it’s hard to reestablish growth if livestock stay in place. Rebuilding the turf – even a mixed “weedy” field – requires feeding off hay and grains and in most cases reseeding.

Untreated pasture problems will only compound over time.

There are fixes that work for smaller animals such as chickens, but they commonly involve planting specific things that help absorb water (willow, bamboo) and then allowing those plants time to establish so the birds maintain their size without wrecking them, or mulching to depths of 6-18”. Deep mulching isn’t a terrible idea for chickens anyway, as it helps limit waste buildup and gives cooped birds an activity (poking through the mulch for critters) but that mulch does have to be replaced. It can be anything, from chips we do ourselves from firewood cuttings to pine needles and raked leaves, but in some warm, humid areas the sheer volume needed is going to be prohibitive.

In the long run, it’s typically just better to do something else with those areas.

Exceptions

There are always exceptions to a rule. In the case of frost pockets or saturated soils, especially the cold water of early spring and resulting from winter snow melt, we might decide the delays in planting and pasture rotations are worth it. One reason might be if the surrounding areas are elevated with thin soils, and end up dry for the rest of the growing season. We might install hugels or* swale systems on the slopes surrounding a pocket for our veggies, or plant them for silvopasture or fodder shrubs, and choose to take the delay for main crop calorie staples rather than have to find a way to irrigate those.

*OR; Or is an important word. In this case, it means one OR the other, not both unless you are a hydrologist who has crunched the numbers. We can create a potential for bad things to happen by combining the two – there is such a thing as too much of a good thing.

We can also buy growing season in sodden areas if we need to by switching to raised beds – conventional soil-filled bounded beds, unbounded Eden-style or lasagna-style low beds, or hugel beds – anything elevated and able to wick up only as much water as it needs. There are tradeoffs to anything in life, though, and raised beds and aquaponics are not going to produce large scale calorie staple crops for the most part.

Similarly, we might eschew one conventional wisdom about wind direction to take advantage of a different conventional wisdom or an entirely unrelated element of our property.

It’s about prioritizing what we need most. Knowing is half the battle, though. If we don’t know what conditions can hurt or help us, and where they are, we can’t even begin to prioritize which trees or woods to harvest and which to let stand, where we want to locate small livestock, a kitchen garden, pastures or annual crop plots, or perennials.

Winter Wonderland

We can take advantage of the winter wonderland outside our doors in a lot of ways, and in another article I’ll hit some that are ideal for a shed or kitchen table. The biggie in this article, though, are the ways winter’s snow and mud can help us plan.

Here are a few more projects to consider for wet and icy months:

  • Identify the slick spots and deep mud (before we run/drive across them to escape a fire or intersect a bad guy before he closes on our homes; shipping pallets or some logs may be all we need to avoid getting wet, muddy or bogged down in wet seasons)
  • Identify animal tracks and paths (wildlife, but also how many loose domestic pets we’ll have to deal with)
  • Lay out weed exclusions for beds before the weeds even sprout
  • Locate the sunny spots for greenhouses, cold frames and hoops
  • Get rid of hornets while they’re slower from the cold
  • Check the accesses to our non-faucet water options – Maybe it’s figuring out that we need to bed down our water catchment annually and come up with a new plan, maybe it’s making sure we can get to a creek without chancing frosty shores and thin ice, or devising a method for filling up our camelbacks and buckets without getting all that close. Especially if we really do plan on hauling water from creeks, physically troubleshoot it now, on the worst days, when there’s still 911 and a running vehicle available.

Running water is undercutting ice at the edge of a creek here – that’s a slick or collapse disaster waiting to happen even as narrow and shallow as they are if we’re planning to fill jugs and buckets here.

  • Check the roots of trees near buildings and fences during washouts and melts (Are any exposed enough to worry about coming down?)
  • Whack down invasives like privet, kudzu, and baby oak sprouts now when seeds are less risk and before they get any bigger – it’ll help keep you warm
  • Figure out the change-of-season habits for deer and rabbits (don’t count on rut patterns in deep winter)
  • Find the drafts/leaks in buildings, and deal with them (Draft/leak hint: When it’s snowy/icy, look for drips and steam in an otherwise socked-in section; warm air is getting out of those spots. Insulate or patch them.)

Our yards in winter and early spring can offer some of the best information about our properties. It’s worth taking a stroll and making some notes. There are also tasks that are just easier without insects, snakes and heavy growth, and while plants are dormant. Winter can still be a time to rest, but if we want our properties to be most efficient, a few outdoor tasks here and there can make a big difference in our planning.

Winter Property Assessments When we think of winter prepper project idea, we commonly think of things that can help us beat or evade the cold and less about spending time


Escape and Evasion

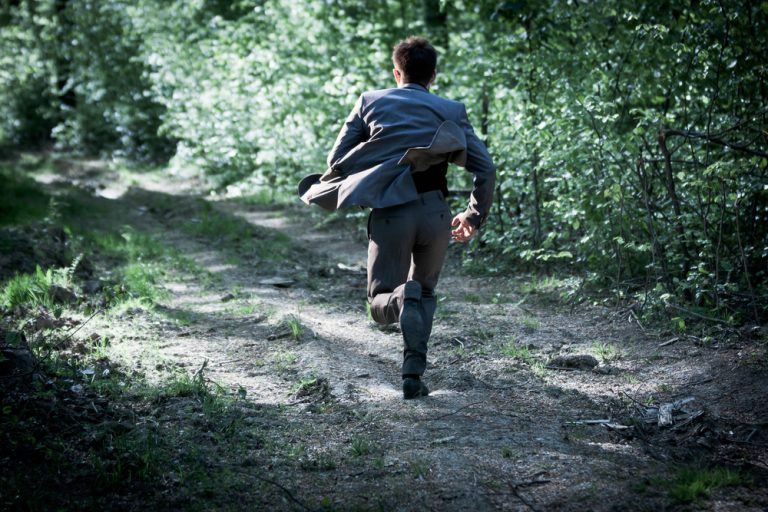
Here are some basic instructions on how to avoid getting captured if you manage to escape from kidnappers, terrorists or from a location where things have gone very wrong. We do no encourage people to break the law, but you must understand that in some situations what would be viewed as illegal actions such are breaking and entering into a building or taking supplies are your only option for survival.

Fundamentals of OTR (On The Run)

Part of your SHTF plan needs to be what to do if you have to escape from a hostile situation be it urban or rural, be it your local area or somewhere you’re visiting or doing business. Always ensure you have the basic equipment required to navigate and sustain yourself in the environment you’re in, keep it basic, keep it light and keep it concealable.

  • Your goal is survival and to reach a safe area.
  • If you have a cell phone on you consider if those after you can use it to track you. If those after you have access to the phone company’s networks dump the phone completely.
  • Consider your means of leaving the area: on foot, swim, public transport, aircraft, boat, hitch a lift, steal or hijack a vehicle.
  • After the initial escape try to leave the area as quickly as possible and keep a low profile, remember to blend in with your environment.
  • As soon as you can you need to make contact with friends, family, trusted authorities or friendly Embassies.
  • If you cannot leave the area then you’ll have to go to ground and hide, locations can include; in parks or bushes, busy pedestrian areas, public bathrooms, bars and night clubs etc. Consider what CCTV is in the area and if those after you can access it. If your hiding in parks etc. do those after you have thermal imaging equipment? Consider how long you will have to go to ground for and what are your emergency escape routes.
  • Work out where are you running to and try to leave decoys pointing to different locations; book a train ticket with your credit card but never take a train etc.
  • You will need money if you are very lucky and have a credit card hidden on your person you can use ATM’s but remember this will show your location on the grid. If you are in an area where you’re staying for a while, you could possibly have previously stashed cash with other important documents and equipment in a dead drop for emergencies, your last resort would be to steal money.
  • You will also need clean clothes, if you cannot buy them or get them from a place of charity you would need to steal them.
  • If you need to travel a long distance you will need to find somewhere to wash and stay clean.
  • You will need somewhere to sleep; in urban environments it may make sense to stay away from the usual places homeless people congregate as this would be the first place those looking for you would check.
  • If you do not have money to buy food you could possibly get it from charities, steal it or check the trash cans behind restaurants and sandwich shops.
  • To leave most countries you will need a passport or ID’s, if you have lost yours, you can try to covertly bypass border controls and then make it to the nearest friendly Embassy on the other side. At most borders there may be checkpoints on the roads but go a few hundred meters either side there is usually nothing, maybe a fence. So, if you are using a road get off it a few hundred meters before the border, skirt around the check point and rejoin the road a few hundred yards on the other side. When crossing the border do so quickly, quietly and use all your senses and be alert for any patrols or remote cameras etc.
  • Try to have or get maps, even free tourist guides are better than nothing.
  • Learn to identify north and south without a compass.
  • Always carry and try to conceal an escape compass on your person.
  • Identify and remember prominent objects in the area such as major roads, rivers, mountains, airports and buildings, these will give you reference points when on the move.
  • If you are in a rural area and want to locate people follow rivers, most villages are located around water sources.


Face to face with a street thug? Do THIS
Sometimes it doesn’t even feel like we’re living in America anymore, with…
• Outraged alt-left mobs who burn any American flag they come across…
• Trigger-happy thugs who have ZERO regard for human life…
• Radical terrorists plotting to murder Americans right here in our country…
That’s why an ex-CIA Officer made this brief self-defense video and he’s sharing it FREE with all law-abiding American citizens.

Every Heel Has His (Or Her) Achilles Heel

Escape and Evasion Equipment

The reason for escape and evasion equipment is to help you escape from captivity and stay alive for a limited amount of time. You should carry a minimum amount of non-nondescript equipment as discreetly as possible. Expensive, specialist, flashy military equipment will only draw attention to you, it will be taken away by your captors or during a search and could possibly label you as a spy or police etc. This is something you don’t want as it could lead to you being detained, tortured and executed. This list is a guide to what would be useful for you to have on your person, pick the items you think you would be able to get hold of, conceal and relevant to the situation you’re in.

  • Survival blanket: These are usually silver in color and can be used to provide warmth, shelter, collect water and for signaling.
  • Personal water filter: There are many small water filters on the market that are easily carried in a shirt pocket etc.
  • String or thin wire: This has various uses for example construction of shelters, re-closing cut wire fences, trip wires etc.
  • Wire saw: These thin wire saws can be used to cut wood, plastic and soft metals. Always try to buy those made from multiple strands of flexible wire “commando wire saws”. Beware of cheap imitations.
  • Small lock pick set: Bogata pics, diamond/needle file and cuff shims are easy to conceal and inexpensive.
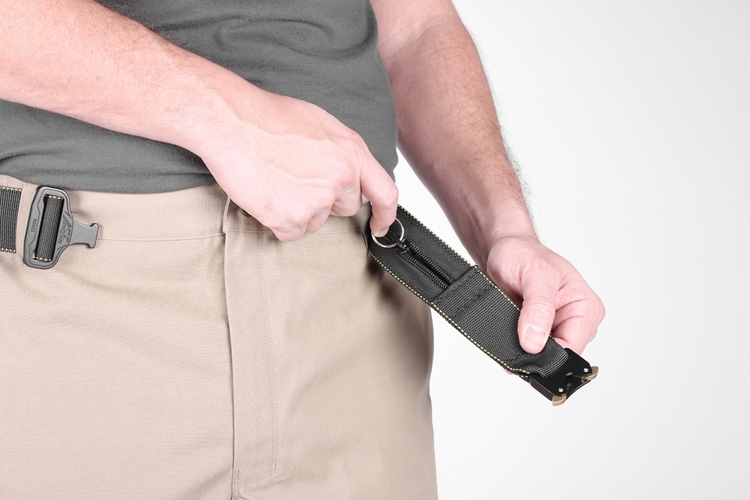
  • S.O. Tech RSB-L-BLK Riggers SERE Belt – Stash pocket allows you to hide escape tools
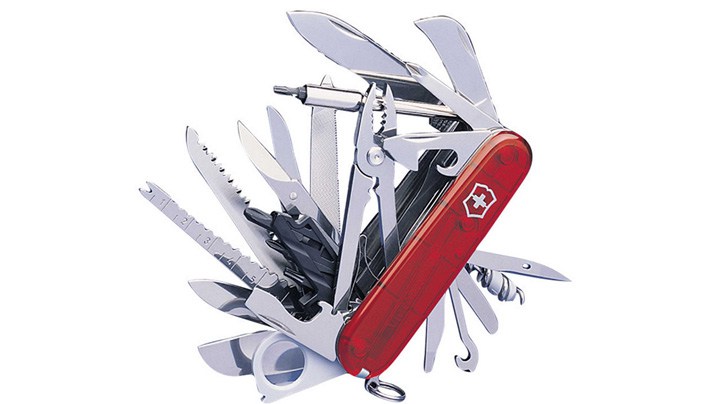
    Hacksaw blade: The blade should be broken into 2 to 3 inch pieces to make them more concealable, if possible the ends and backs of the blades can be sharpened.

  • Safety pins: Various uses including first aid, mending clothing, building shelters and picking open hand-cuffs.
  • Razor blades: Small and concealable multi-purpose blades.
  • Flint and steel/Matches: Used for fire lighting to keep you warm or cause distractions.
  • Tinder: Cotton wool or lint etc. used to help you light fires.
  • Hairnet and Condoms: Used for carrying water, the condom goes in the hairnet to stop it from splitting.
  • Water purification tabs: For purifying drinking water.
  • Compass: Chose a small and concealable compass.
  • Whistle & Mirror: Can be used for signaling and distractions.
  • Knife: Chose a small concealable knife that won’t be found and confiscated when your captured or that can get you arrested for carrying an illegal weapon. Neck knives are an option as many searchers do not check the neck or chest areas.
  • Flash Lights: Chose a small concealable flash light, forget the expensive tactical lights, this can be used for light, signaling and distractions.
  • Tools: There are many good multi-pliers type tools on the market that are excellent pieces of kit for escape and evasion but will most probably confiscate them straight away if your arrested or kidnapped.
  • Food: Try to conceal high calorie foods such as sweets, nuts and raisins etc.
  • Money: Probably the most important piece of equipment you can carry. Chose small value notes of a well-known currency, waterproof them and conceal them.


Face to face with a street thug? Do THIS
Sometimes it doesn’t even feel like we’re living in America anymore, with…
• Outraged alt-left mobs who burn any American flag they come across…
• Trigger-happy thugs who have ZERO regard for human life…
• Radical terrorists plotting to murder Americans right here in our country…
That’s why an ex-CIA Officer made this brief self-defense video and he’s sharing it FREE with all law-abiding American citizens.

Concealing your Escape and Evasion Kit

Most commercial escape & evasion and survival kits come in a plastic or metal container. This container can be used to drink from and if it’s metal you can also boil water in it. The trouble with tins and containers are that they are easy to find during a body search and will be confiscated. You want to try to conceal your equipment in your clothing.

  • Jackets: There are lots of places for you to hide equipment in jackets especially if they are lined. Wire saws, matches and money can be sewn into seams and draw cords etc. with lager equipment put into the lining. The lining itself can be used for tinder etc.
  • Travel Vests: These have lots of places to conceal equipment but there is a good chance it will be confiscated. A tactical vest is also an indicator that you are in the security business and a FBI wannabe.
  • Shirts: Sew money etc. into the seams.
  • Trousers: Sew money, wire saws, razor blades etc. in the waistband, hems and seams. Also keep a few bits of candy in your pockets.
  • Belts: Sew equipment into your belt or look at buying a commercial money belt.
  • Shoes: There is a lot of room to hide all sorts of equipment in the heels and soles of your shoes.
  • Underwear: Sew money, wire saws etc. into the seams.

Always dress down and don’t wear clothes that will draw attention to you or that will be taken off you by your captors. Again, this is just a guide to get you thinking, just take a few of the above mentioned items, conceal them on your person and they could make your life easier in an escape and evasion situation.


  Escape and Evasion Here are some basic instructions on how to avoid getting captured if you manage to escape from kidnappers, terrorists or from a location where things have gone very

In Part 1, we discussed the conundrum of water; how it was necessary, but safe water is not always available.  We listed what could contaminate water, and mentioned the six practical ways to fix this.  Then we investigated the first two of these methods.  Here is the investigation into the other four methods.

Boiling

Boiling is a very simple concept; bring water to a boil for a few minutes and anything biological is killed.  This process does not do anything for any particulates, salt or chemicals, and requires a source of heat to get and keep the water at 212 degrees F (at sea level; the temperature goes down as the altitude goes up).  A useful item to always have in your water bottle or canteen pouch is a stainless steel cup into which the bottle nests.  Not only can you boil water to kill organisms, but can melt ice or snow to get the water, and cook in it.

Bring water to a boil for a few minutes and anything biological is killed.

Chemical Treatment

As an alternate to boiling contaminated water to kill the organics, you can poison them.  Fortunately, they are more sensitive that we are, and the amount of poison needed for them is not enough to bother us.  It can taste bad, though.  The common choices are Chlorine or Iodine based.  Chlorine can be cheap (think standard bleach), but is unstable (has a short life span), leaves a bad taste, and the residue left behind is suspected of causing some cancers.  Iodine deteriorates on exposure to sunlight.  It also leaves a bad taste and is dangerous for people with some thyroid conditions.  The iodine taste can be alleviated with Ascorbic Acid (Vitamin C) after it has completed its work.  Although you can use the liquid forms of these chemicals directly, they are subject to deterioration and the potential to leak all over everything, and need care to avoid overdosing.  A tablet purification system is more practical.  The “best” treatment seems to be Katadyn MicroPur tablets, which uses Chorine Dioxide.  This formulation increases the effectiveness and durability, and keeps the chlorine taste to a minimum.  Aquamira is generally considered the number two tablet, also Chlorine Dioxide based, and the number three rated tablet is often considered to be Potable Aqua, which is iodine based (they now also have a Chlorine Dioxide product which has not been evaluated yet).

Cryptosporidium cysts have a high resistance to poisoning; Chlorine Dioxide will do it, but it can take as long as four hours.  Iodine is not reliable against Cryptosporidium.

For something completely different from tablets or liquid, there is the Potable Aqua PURE device.  Solar powered, it takes a salt and water brine mixture and produces a Chlorine and Peroxide purification liquid.

Distillation

Each chemical has a temperature at which it transforms to its gaseous form (boiling point); this temperature varies inversely with the surrounding pressure.  For water, of course, this is 212 degrees Fahrenheit at sea level (1 Atmosphere of pressure).  If you capture the gaseous form of water and cool it, it turns back to liquid water.  This process is called “distillation” and the apparatus is often called a “distiller” or “still”.  If the liquid (contaminated water) is a mixture of compounds, then some of the chemicals may “boil” (transform to gas) at lower temperatures than water (alcohol is one such chemical), and some at higher temperatures.  Thus, in order for this to be effective at purifying water, you must NOT capture, or contaminate your cooling apparatus with, any vapors prior to the water boiling AND keep the temperature below the boiling point of water until all (or at least most) of the low boiling point contaminants are gone.

And this can take a while, since some of these chemicals (like alcohol) REALLY like being mixed with water.  And you have to remove the cooling apparatus before the water has all boiled away AND keep the temperature from rising above the boiling point of water so no other contaminant is boiled off.  Theoretically, with care, you could get perfectly pure water using this methodology.  In practice, that is often not the case, but the results can be adequate.  Most often, this apparatus consists of  a tank which can be filled with contaminated water, situated over a fire or other heat source, and a way to capture only the steam from water and run it through tubing, which uses open air or a liquid bath to cool and “condense” the steam back into water.

If you capture the gaseous form of water and cool it, it turns back to liquid water.

Many of the commercially available distillers are “one piece”, so should not be relied on if there is much chance of low boiling point contaminants.  Most of the rest seem to be “screwed together”, so it might not be practical to keep the collection and condensing parts free of low boiling point contaminants.  The WaterWise WW1600 seems like it might allow you to just add-on the collection part when the water is boiling, but it looks freaky, the reviews are not very good and the price is too high for me.  There is another option, the Prime Water distiller, which appears to allow placing the collector/condenser after the water is boiling (make sure you have a way to avoid getting burned by the steam), and it is quite low-priced.  They appear to be low producing though; the models they list are specified as only putting out two or four quarts of distilled water PER DAY, and I’m not sure how easy it would be to avoid re-contaminating the output, since it is a bowl which floats in the contaminated liquid.  Then there is the Gravi-Stil from SHTFandGo, which can be set up either as a distiller or a filter, and the non-auto-fill version looks like it could be made to do the job.  Or if you already have or can get two large pots, they have the D-Stil light which looks like it would be fairly easy to use in our desired manner, and the price is not too bad.

Distillation takes a lot of fuel, and does waste some water; some might escape as vapor and as the remaining contaminants in the liquid increase, production of water will decrease, eventually resulting in having to discard it.  You might lose as much as four gallons of water for each one gallon purified, but with good temperature control and care, should be able to get the losses down significantly.

This works, but often you spend more water (as sweat) building the still than you get back from the still.

There is also the concept of the “solar still” which uses solar energy to cause evaporation (the other way a liquid can be transformed into a gas) which is then condensed back to pure water.  This can be a hole in the ground covered with an appropriate plastic film.  This works, but often you spend more water (as sweat) building the still than you get back from the still.  Nowadays, there are “one piece” solar stills.  These are essentially “balls” or “bags” which enclose contaminated water, and uses the sun to evaporate the water and condense it back into a clean container or area.  Note that you don’t want to use this system with any water with contaminants which “boils” at a temperature less than water, such as from a car radiator.  An example of this is the Aqua Mate solar still similar to those included in lifeboat survival kits to purify sea water.  A variation on this is a “transpiration” still, which captures the water given off by a living plant during photosynthesis.  Since the plant draws water from the ground, this can produce small amounts of water continuously.  If a living plant is not available, this methodology will also work on plant clippings which contain moisture, but only as long as moisture remains.  The Hydro Kit from Survival Metrics is an example of this.

UV/Solar

Ultraviolet (UV) radiation is effective against organisms, and highly portable units such as the SteriPen are available.  I don’t trust them because they require batteries or other sources of power which may or may not be available, they are electronics which are subject to failure or an EMP, and if there are any particulates in the water, it is possible some organisms will be “shaded” from the UV and survive to wreak havoc.

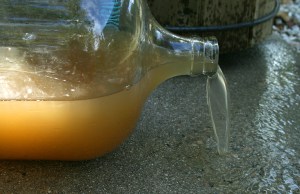
The SODIS method is very easy to apply: A transparent PET bottle is cleaned with soap. Then, the bottle is filled with water and placed in full sunlight for at least 6 hours. The water has then been disinfected and can be drunk.

Solar disinfection (often called SODIS) adds heat and sometimes other techniques to UV, only needs sunshine and would seem to be a more reliable methodology, although it takes a lot longer.  It is sometimes done with special containers, but can be approximated with standard PET/PETE (clear plastic, recyclable mark “1”, somewhat flexible) bottles with all labels removed.  PVC bottles should be avoided, as chemicals from the container can be added to the water.  Clear glass bottles will work as well.  An interesting option is the Puralytics SolarBag, which not only is an effective SODIS container, but contains a mesh which is designed to treat organic contaminants and heavy metals.

Choosing a Water Treatment Methodology

Unfortunately, there is not really a universal solution.  You need to evaluate what is likely to be in the water and go from there.  Here is a summary of the common methods and what they can usually handle:

  Filter Purifier Reverse Osmosis Boiling Chemical Treatment UV SODIS Distillation Activated Carbon
Particulate YES YES YES NO NO NO NO YES MAYBE
Bacteria YES YES YES YES YES YES YES YES NO
Cryptosporidium YES YES YES YES MAYBE YES YES YES NO
Virus NO YES YES YES YES YES YES YES NO
Salt NO NO YES NO NO NO NO YES NO
Chlorine NO NO YES NO NO NO NO YES YES
Heavy Metal NO NO YES NO NO NO MAYBE YES SOME
Volatile Organic Compound NO NO YES NO NO NO MAYBE YES YES
Inorganic Chemical NO NO YES NO NO NO NO YES MAYBE
(Taste) NO NO MAYBE NO WORSE NO MAYBE MAYBE YES

As you can see, for a fixed location with a regular water supply, a distillation or RO system can be a good choice, or if fuel will be a problem or water is limited, a large Purifier with an Activated Carbon stage.  For portable use, a small purifier with an activated charcoal stage would seem the best bet, but this could be a bit hard to find at a reasonable price, with the possible exception of the water bottle based Sport Berkey.  As an alternative, multiple methods might serve.  Boiling, Chlorine Dioxide tablets, UV or SODIS, followed by a filter with an activated charcoal stage would seem to cover everything practical.  Alternatively, a filter followed by an enhanced SODIS like the SolarBag would seem to be about the same.  For salt water, distillation or RO seem the only practical options.

Finally, don’t get a water treatment methodology and assume you are good.  Some of these things have been known to break or fail or get used up; water is not only a requirement for life, but an immediate requirement.  Always have backups; either duplicates or alternate methods.  For instance, have distillation or RO AND a Big Berkey or equivalent at a fixed location, and coffee filters, a metal cup and MicroPur tablets, a portable purifier with Activated Carbon or Sport Berkey, and possibly a SolarBag or Hydro Kit in a bug out bag or other mobile methodology.  It is a good idea to test your systems where practical.  For instance, I ran my tap water through a Sport Berkey, and there was no change to the TDS reading, although I expected at least the Chloramines to be removed.  I talked with a dealer, but she has not responded yet, so I guess I’ll have to go to the company.

Note that in addition to being able to purify your water, you should have ways to collect it for purification, and store or transport it after purification.  If you are going to be using chemical treatment, make sure your container is appropriately sized for the chemical used.  I like 1L water bottles since my chemical tablets are designed for that volume, but they are a bit hard to find, and don’t fit into some of the carriers.  Stainless steel is my favorite, but there is nothing wrong with some plastic bottles as long as you have that stainless cup it nestles into.  In small kits, I use 1L sample bags.  Whenever possible, I like to also have a hydration bladder; it might not be optimal for purification, but it is hard to beat for transport and continual hydration.  A length of surgical tubing can help you get access to water you might not otherwise be able to get to, and has other uses as well.  A clean cloth or “Survival Sponge” can help you collect water from dew or condensation.

In Part 1, we discussed the conundrum of water; how it was necessary, but safe water is not always available.  We listed what could contaminate water, and mentioned the six

Water is a critical component of life.  Go without any for three days, and your chances of being dead are very high.  We are used to water being available at every tap, water fountain and purveyor of beverages.  The only problem is, this continuous availability of water depends on a lot of infrastructure, and if some or all of that collapses, water is going to “dry up” quickly.  And if you head out into the wilderness, taps, fountains and retail sellers are few and far between.  You should always be keeping an eye out to make sure you have “enough” water and/or a way to get water.

Different Types of Water

Water is water, but not all water is the same.  There is pure water, just combinations of two Hydrogen atoms and one Oxygen atom (H2O).  Generally the closest you can get to this is distilled water.  This is useful and fairly harmless, although it is hypotonic (has a lower solute concentration than do human cells) and can cause hemolysis (rupturing of red blood cells); this is usually not a major concern even if this is all that is available to drink.  Using it on wounds may delay healing a bit; and it might be a problem for people with ulcers (bleeding in the stomach).  But this is still way better than no water.  On the other end of the scale are various degrees of contaminated water, polluted with chemicals and/or biological organisms, which can make you very sick and even kill you.  Salt water can be considered in this latter class as well, even if there is nothing else in it besides the salt.  In between are various types of water, all of which are potable (suitable for drinking without major harmful effects).

Determining what water is potable and what is not can be quite a challenge.  If it is in a sealed container and properly labeled, then it MIGHT be OK.  Labels have been known to be inaccurate (accidentally and even deliberately).  If it comes from a municipal tap, then it MIGHT be OK.  Just ask the people of Flint, Michigan about that.  If it is from a known well, it MIGHT be OK.  My dad’s well was found to contain arsenic.  And if the water is from an open source, such as a stream or pond, there is a chance it might be OK, but the odds are very high that it is contaminated.

Market failure.

Even if some water does not have anything seriously harmful in it, there might be particulates (sand, silt, plant or insect parts and the like) which would make the water unpleasant and/or things which might be only relatively harmless.

During “normal” times, pre-packaged or professionally provided water is usually tolerable, but if the water infrastructure breaks down for any reason, all water is not to be trusted as is.  Open water should always be viewed with suspicion regardless of the state of the surroundings.

Contaminants in Water

There is a tremendous variety of contaminants.  Some are “natural”, such a minerals in water drawn from a well, or silt from the bed of a river.  Some are man-made, and leaked into surface water accidentally or even deliberately; some eventually work their way into the water table.  Some are added accidentally or even deliberately by water distribution networks or packaging.  For convenience, let us group contaminates into particulates, organisms, organic chemicals (contain carbon), inorganic chemicals and salt (a special case of inorganic chemical).

Determining some specific contaminates can be done with a “pocket-sized” kit, but many require chemical tests which may be a challenge for people without lab access.  But you can get a compact “TDS” meter cheap which will tell you the “Total Dissolved Solids” in your water.  As an example, fish tank water gave a reading of 448, tap water read 229, and reverse osmosis water read 17.  We don’t know WHAT contaminants are there, but we have an idea of HOW MUCH.  Some of these meters also measure “EC” (Electrical Conductivity); pure water is an insulator and it is the ions added to it which makes it conductive, so TDS and EC are closely related.


This weird device will do just that – SAVE YOUR LIFE in a crisis.

Because requires no electricity, it is ideal for home use, on or off-grid.

Purifying Water

There are six common, practical philosophies of treating contaminated or suspected water.  Each has its strengths and weaknesses.

  1. Chemical reaction changes harmful chemicals (usually inorganic) to harmless ones (such as ion exchange), or adsorb (attract to the surface and “grab onto”) some chemicals (usually organic).
  2. Filtration removes particulates and bigger organisms; most filters allow some organisms (particularly viruses) and all chemicals through.  Salt water cannot be purified by filtration and can damage the filter.
  3. Boiling kills all organisms; it is useless against particulates, salt and chemicals
  4. Chemical treatment has pretty much the same effect as boiling, without the cost in fuel, but often adding an unpleasant taste (you are adding chemicals).
  5. Distillation is an extension to boiling which, if done correctly, should be able to deal with biological, particulate and most chemical contamination, as well as salt.
  6. UV radiation kills organisms exposed to it as long as the water is pretty clear; it is useless against particulates, salt and chemicals

There may be other methodologies which I am not familiar with, particularly large-scale, but these six would seem to be those of most interest for survival purposes.

Since no method is perfect, often two or more methods are used together.

Chemical Reaction

The most common form of this is “activated charcoal”.  This is carbon (charcoal) media which has been treated with Oxygen to create a myriad of tiny pores between the atoms, resulting in a massive surface area of potential chemical bonds.  The carbon attracts some chemicals, particularly organic ones, and they bond to the surface (adsorption).  These usually cannot be cleaned, so clog up and must be replaced fairly quickly.  Also, if the carbon media is granular, some dust sneaks out, requiring a pre-flush of the filter before normal use.  Because the intention is for the contaminants to bond with the carbon, we want the contaminants to be in contact with the carbon for a “long time”.  Thus, the better ones of these have a slow production rate, and arguably the “best” of these uses “carbon block” technology where the media is fused together into a mildly porous solid.

You have probably heard of one common Ion Exchange device, the ubiquitous water softener.  It exchanges two sodium (salt) ions for each calcium or magnesium ion.  This is for non-drinking reasons, because calcium and magnesium are often better for you than salt, and tastes better too.  For water purification, the process has two different beads which exchange inorganic ions to produce Hydrogen ions and Hydroxyl (OH) ions, which combine to form H2O (pure water) to replace the chemicals.  Of course, the ions are used up rapidly, they are for a specific list of chemicals, and the beads need to be regenerated.  And of course, this method has no effect on organisms or particulates.  These are fairly rare; an example would be the MB series filters from CustomPure.com which also include carbon filtration for some of the things Ion Exchange won’t handle. They claim it can remove “sodium” which is salt, but I doubt it would be able to handle the amount of salt in salt water.

Water Filtration

Filtration is very simple in concept.  You pass the contaminated water through a medium with holes smaller than what you want to take out.   As such, a key specification for any filter is what size the “holes” are.  This is usually specified in “microns”, or “micrometers”.  That is, one millionth of a meter.  Some claim this measurement (micron) is obsolete, but it still seems to be the measurement of choice for filters.  Some recent purifiers specify their size in “nanometers”, where 1 nanometer is .001 micron.  Keeping with the “metric” measurements, filter capacity (how much water can be processed before replacement) is often specified in Liters (L); for a rough estimate, a Liter is approximately the same volume as a quart, so four Liters is approximately a gallon.

When comparing filters, the one with the smaller holes would seem to be the better choice.  The problem is that some companies have varying sizes of holes, and claim the size of the smallest hole in their filter rather than the biggest.  Since it is easier for the water to get through a bigger hole and much of it does, this can be a seriously misleading rating.  In your final analysis, try to find out the actual percentage of contaminants removed.  This is the most accurate way of determining filter effectiveness.  Another term which can sometimes be used in a misleading manner is water “purifier”.  The correct use of this term is for a unit which removes the much smaller viruses.  Units which remove particulates and organisms as small as bacteria are simply to be called “filters”.

Some filters become “plugged up” quickly and are rated for a specified number of gallons (or liters), while others can be cleaned and restored to service or even are self-cleaning.  Reverse osmosis (RO) is a prime example of purification and self-cleaning.  It forces the water through a semi-permeable membrane and continuously washes any contaminates off of the source side of the membrane.  This is a very effective system (see the TDS meter example above), but requires the water to be pressurized, and worse, the wash water now has an even higher level of contamination than it had at the beginning.  In many systems, you “throw away” as much as four gallons of water for each gallon purified.  I’ve heard of one household system where the wash water is fed into the hot water line rather than the drain, but I’m not seeing how the pressure in that line is overcome.

LifeStraw Personal Water Filter – $20

Other filters run the gamut from several layers of cloth or a coffee filter, suitable only for large particulates, to 0.01 micron (or less) water purifiers; from pocket-sized to counter-top and bigger.  Since the smaller the holes, the slower the filtration and the more likely it is to clog up, often filter systems have multiple filters, starting with a pre-filter for “chunks”, course filters for large particulates, possibly some medium-sized filters and ending up with the finest filter.  Smaller holes require more “energy” to force the water through the holes; this can be from gravity, or more effectively, a pump or suction.

In filters (i.e., won’t remove viruses), perhaps the most compact and simplest to use is the “Lifestraw“.  This is rated at 0.2 micron, with a 264 gallon capacity.  It is light, easy to carry and reasonably priced.  To use it, stick the input end into contaminated water and suck the water from the other end just like from a straw.  It takes a few seconds of sucking to start delivering water.  There also seems to be a Lifestraw Steel model, which adds a metal body and an activated carbon filter to remove some chemicals.  This latter part is replaceable, which is good because its capacity is 26 gallons, only a tenth of the main filter capability.  Another popular compact option is the Sawyer Mini system.  This is rated at 0.1 micron, and can be cleaned to provide up to 100,000 gallons of filtered water.  It can be pressurized by squeezing a pouch of contaminated water, or used inline with a hydration pack, from a standard soda bottle, or used as a straw from an open source.

As for portable purification, an example is the pump powered MSR Guardian, rated at .02 microns and with about a 2500 gallon capacity.  Another, bigger option is the Lifestraw Family, rated at .02 microns and with a 2600 gallon capacity.  I found a particularly compact suction powered (straw) system which sounds promising; the Etekcity 1500L rated at .01 microns with a 396 gallon capacity, but don’t know anything about the company.  They have a wide range of products, so it’s not like they specialize in water purification.


This weird device will do just that – SAVE YOUR LIFE in a crisis.

Because requires no electricity, it is ideal for home use, on or off-grid.


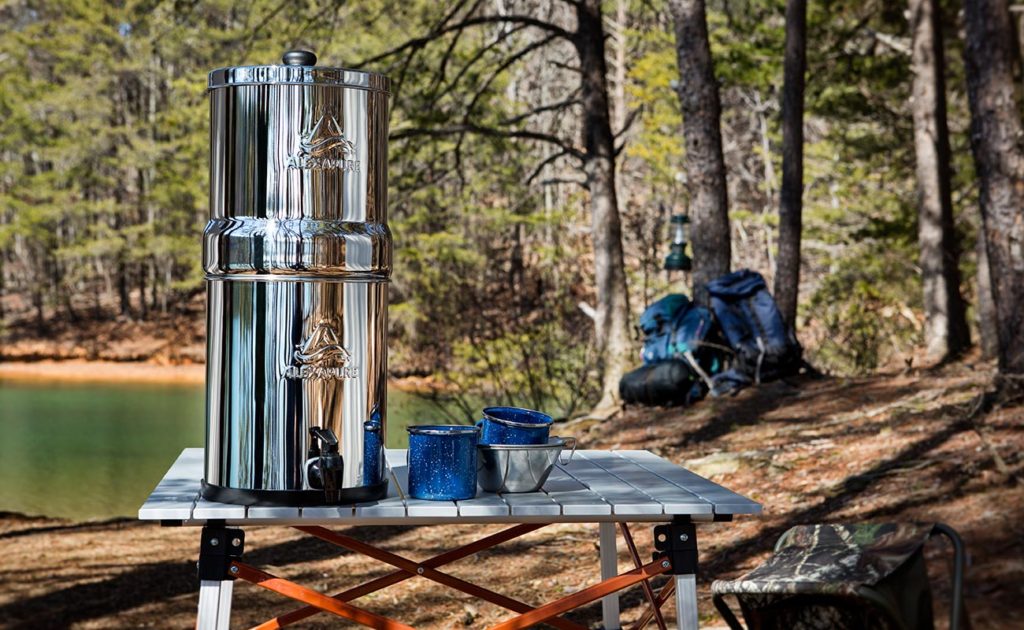
A countertop system is an option at a fixed location.  An example of this is the gravity powered Big Berkey (actually, the whole Berkey family).  This company doesn’t provide a micron rating since it can be misleading as mentioned above; they stand on their contamination removal percentages.  Their filter cartridges have a capacity of 3000 gallons per filter element, with two to four elements installed in the system.  More elements don’t filter any better, just faster.  Not only is it very effective against virus (and bigger things), but many chemicals as well.  And you can get an add on filter for each element which takes out Fluoride, Arsenic and a couple of other additional chemicals, with a capacity of 500 gallons per add-on filter.

Tune in for Part 2, which investigates the other four purification methods.

Water is a critical component of life.  Go without any for three days, and your chances of being dead are very high.  We are used to water being available at

Things had not gone exactly as planned for Louis, Julia, and their three-year-old twins Melissa and Victor. For a couple of years, they had been budgeting for supplies, learning survival skills, and even made bug out plan full of contingencies. The plan was simple but all the details were meticulously addressed by the couple, throw a few pre-packed bags into the car and drive the 90 miles to Julia’s grandparents farm.

Louis didn’t have thousands of dollars to spend on the best AR-15 that money could buy. Besides budget constraints, they were illegal to own in his home state anyway. So, Louis lovingly maintained his .357 revolver. After using his revolver to “clear the road” while getting out of town, the shook up the family quietly made the rest of the drive to Julia’s family farm.

That was until high water was blocking the road only 20 miles from their destination. Because of their maps and pre-planning, Louis and Julia knew the way around the water, along the two-lane country roads, and through the little towns to their destination. Inside, Louis was emotional after firing his weapon. He played the cool-headed strong father that his family needed. He wasn’t real keen on getting off the highway and doubling the amount of time they would spend on the road. Even though they had done a “map recon” the road ahead was not so clear. Louis figured he had enough ammo to protect his family but he wished there was a way to resupply before heading on the road less traveled…..

Many people, when first joining the preparedness community initially focus on guns and ammo. They want nice, useful, and effective weaponry and enough ammunition to last for years and years before needing to purchase more. After a few years of prepping and a few years’ worth of trips to the rifle range, those once fired brass rifle and pistol cartridges can really pile up, assuming they are collected after shooting.

With about $300 to $400 invested in reloading equipment, all those hundreds or even thousands of once fired brass casings can be reloaded for a tremendous savings over buying factory new ammunition. Sometimes the savings can be as drastic as 80% of the price of purchasing new ammo! Most preppers on a budget can really appreciate that amount of savings. So, many people will buy a single stage reloading press and keep the equipment at their primary residence, where it makes sense to store it, and cut the cost of their preps by reloading. But can reloading equipment be worthwhile to bring on a bug out?

Bugging out with reloading capacity

When most people consider reloading equipment, their thoughts are of single stage reloading presses or progressive reloaders. This equipment is a great addition to anyone’s preps. But this stuff is heavy and bulky. Also, progressive loaders are best set up in the most efficient manner and left in place, not toted around in a suitcase or ruck sack. A single stage press can be more easily mobile than a progressive loader but is still not practical to pack along, even on a vehicle bug out or for an INCH kit when space and weight are limiting factors.

That leaves a cartridge loader set for consideration as a practical way to include reloading in a bug out plan. Even though cartridge loaders and cartridge loader kits have limitations, they can be very effective tools to maintain an ammunition supply in a survival or grid down scenario. In the following discussion, these three reloading set ups will be examined for their strengths and weaknesses as related to bug out applications and some of the limitations of the different equipment will be addressed with recommendations to improve their practicality.

When most people consider reloading equipment, their thoughts are of single stage reloading presses or progressive reloaders.

The Cartridge Loader

Most people begin reloading with a single stage press. It may not be the fastest method. It may not be the cheapest option either. However, the single stage press produces the consistent, accurate, and high quality ammunition that makes people want to start and continue in reloading. The single stage press is less mechanically complicated and less expensive than the progressive loader. It is easier to maintain consistency and precision with a single stage press than it is with a cartridge loader. For these reasons, the overwhelming choice for beginning reloaders is the single stage press.

A single stage press makes a perfect set up for reloading to cut cost and maintain ammo supply at a home base. Some people will choose to buy a progressive loader after using a single stage press for a period. If the single stage press is replaced with a progressive loader in the home set up, it is a great idea to cache the single stage press that is no longer being used at a bug out location. Additionally, learning to reload and reload well on a single stage press will help the hand-loader get the best performance out of a cartridge loader. Because of size and weight considerations, the cartridge loader is the practical and effective equipment choice for reloading on the run.

Cartridge loader sets, similar to the Lee Classic Loader for example, have been in use since the proliferation of the metallic cartridge. Often, these were sold along with a new firearm just as safety locks are sold with new guns today. In the 1870’s it was likely that the local general store may not have ammo for a person’s new firearm, so the cartridge loader allowed the owner to keep firing his / her weapon after all the cases were spent. The principles of using the antique cartridge loaders and the modern ones are basically the same. The body of the cartridge loader, like the Lee Classic Loader, is assembled in different ways and struck with a dead blow or non-marring mallet to perform the different reloading tasks of depriming, forming, and bullet seating. These little kits are caliber specific, like a set of dies, and come with a little powder dipper. To get the best performance out of these kits and make them a viable bug out option, their limitations must be understood and minimized.

The Lee Classic Loader comes with the tools needed to perform the reloading steps of depriming, sizing, priming, and bullet seating. It also includes a powder dipper. However, there are a few extra things that will help with reloading ammunition on the move.
A case mouth deburring tool is small, inexpensive, and useful for cartridge prep. Also, a dial caliper is needed to check cartridge case length and overall cartridge length. Additionally, a hard-plastic case for the dial caliper is necessary to protect it from damage. Finally, the issue of measuring powder must be addressed. A receiver failure during bug out would be unacceptable.

The included powder measure is not acceptable as is, and was never intended to be a standalone powder measuring device for bug out reloading. There are many companies that will make custom powder dippers to exact specification and unless a scale is carried around this is a necessary purchase to add to this reloading kit. Even with the best custom powder dipper, some variation in powder charge from load to load is to be expected. To help minimize the variations, test the powder measure at home before adding it to the kit.

Scoop the powder gently the same way each time so that more powder by weight is not compacted into the scooper. Level it by either tapping or by scraping across the top but do it consistently. Then, weigh the results on a scale to get an average weight and learn the best and most consistent technique. With powder charges, consistency is important!

It is also necessary to add some case lubricant to the kit. Finally, the kit needs a nonmarring or dead blow mallet to power the loading tool. The overachiever could add a cylinder type case length gauge to the kit as well. This reloading set up fits in a small toiletry bag with plenty of room to spare. Add some powder, primers, and bullets for a complete mobile reloading station capable of maintaining and extending a person’s ammunition supply.

There are limitations to this mobile reloading kit. Most notably, it is powered by a hammer which makes lots of noise. A bug out may not always include active evasion but it rarely includes active attention seeking either. For the rural settings, the noise of a hammer banging away carries a long distance over an open area. And if sheltering in an abandoned building in an urban setting, the banging noise will likewise give away one’s location.

This kit is used in the interim to maintain the ammunition supply. It can be enhanced greatly by the addition of a few extra reloading tools cached at the bug out location. A triple beam balance powder scale and a powder trickler are inexpensive and would greatly improve the accuracy and consistency of ammunition loaded with the kit if these were placed ahead of time at the bug out destination. A hand priming tool would be convenient and easy to use.

Additionally, a case trimmer and a cylinder type cartridge minimum / maximum case length gauge could go a long way to increase the number of times a cartridge could be reloaded in an extended bug out. A few extra tools in cache will greatly improve the reloading ability. Of course, if a reloader had a progressive loader set up at home as a primary reloading means, the older and no longer used single stage press could also be left at the bug out destination. With these extra larger tools left at the bug out location and some components in cache, the survivalist can greatly extend his / her ammo supply.
In conclusion, many people do not consider reloading on a bug out to be viable because of the size and weight of traditionally considered reloading equipment. However, when packing for a vehicle bug out or putting together an extensive INCH kit, there is a great opportunity to include reloading equipment. By thinking outside of normal applications for reloading equipment, the resourceful prepper can benefit greatly from adding reloading to his / her tool kit. Aside from saving money in good times, reloading can stretch and extend the ammunition supply in an extended survival scenario. Aside from just stockpiling more and more ammo, give these reloading set ups some serious thought and consider how including reloading can benefit preparedness.

Things had not gone exactly as planned for Louis, Julia, and their three-year-old twins Melissa and Victor. For a couple of years, they had been budgeting for supplies, learning survival

Unless you’re a psychic, you never know when s*** is going to hit the fan. If and when a crisis occurs, the last thing you want is to be unprepared. But prepping isn’t always easy. With so much contradicting information out there, it can be difficult to separate the good information from the bad. With that said, I want to show you 10 awesome prepping tips that actually work. By following this advice, you’ll be ready for any survival situation.

#10: Build a Bug Out Bag

A bug out bag is basically an emergency kit that will provide you with the ability to survive for a minimum of 72 hours after a crisis. They should contain all of the essentials required for survival: food, water, basic first aid equipment, etc. While you can buy a bug out bag that’s already comes with items, it’s much better to build one in my opinion. Not only is it cheaper, but it also allows you to know exactly what’s in your bug out bag.
#9: Stock Up on Non-Perishable Food Items

Meal Kit Supply

There’s no sense in stocking up on foods that have a short lifespan. Why? Because you never know how long grocery store shelves will remain empty. Non-perishable food items include dried oats, dried rice, honey, powdered milk, and dried means. It’s also a good idea to invest in MREs (Meals-Ready-to-Eat). When purchased in bulk, they can be relatively inexpensive. Plus, they’re super-practical. Finally, consider investing in a food dehydrator so you can dehydrate foods.

#8: Check for Expired Food Items

This is one of the most overlooked prepping tips out there. There’s no use to having a bunch of food stored if it’s all expired. It’s much healthier to not eating anything at all than to eat something that’s expired. For this reason, I highly recommend keeping an eye out for when expiration dates are due. That way, you’ll know exactly what to throw out and re-stock on. Note, by learning advanced food storage techniques, this will become less of an issue.

#7: Rotate Clothing Based on Season

Another big mistake that a lot of people make is not rotating their clothing based on whatever season they are in. For example, during winter months, make sure that you have jackets and other insulating clothing packed in your bug out bag. Then, as the summer months roll in, swap out those clothes with lighter ones. That way, you’ll be prepared for the specific type of whether that your location is currently experiencing. This is one of those prepping tips that are super-important to remember.

#6: Focus on “The Big Three”

As a general rule, your emergency kit should be located in three places: in your car, in your home, and at your office. Why? Because you can’t predict when a crisis is going to occur. A bug out bag isn’t any good at home if you’re at work (and vice versa). By having emergency kits in all three locations, you’ll be able to reach them no matter what, and ultimately increase your chances of survival.

#5: Read Survival/Prepping Books

How to Protect Yourself Against Terrorism, Natural Disasters, Fires, Home Invasions, and Everyday Health and Safety Hazards

When it comes to survival and preparedness, nothing is more important than knowledge. I would recommend reading books on the topic. Some of the more popular ones include The SAS Survival Handbook, The Prepper’s Pocket Guide, and The SAS Urban Survival Handbook. There are many other great titles out there as well. Reading is important because it teaches the fundamentals of survival when modern technology is gone. As the old saying goes, “If you give a man a fish, you feed him for a day. If you give him a fishing pole, you feed him for life”.

#4: Invest in Iodine Solution

I would recommend investing in a 5% or 10% iodine solution and placing some in all of your emergency kits. Aside from the fact that it can be used as a disinfectant for minor cuts, you can also use it to keep your thyroid functioning normally. Remember, iodized salt is typically enough to keep your thyroid functioning properly. However, if you run out, you’ll definitely want to have some iodine solution available. A few drops per liter is typically enough. Plus, iodine can help purify water!

#3: Weigh Your Bug Out Bag

When I first put together my bug out bag, I was happy and proud of myself. Then I picked it up, “Uh oh…” I could barely lift it. Sometimes we get so caught up in putting as much stuff in our bug out bags as possible that we forget about weight. That last thing you want when bugging out is hurting your back because your bag is too heavy. That’s why it’s a good idea to weigh your bug out bag beforehand. That way, you’ll know whether or not you’ve got too much stuff.

#2: Buy a Weapon

You don’t necessarily need to buy a gun, but it’s still a good idea to invest in some kind of weapon. Whether it be pepper spray, a Taser, or a knife, you always need something to protect yourself. And here’s why: have you ever watched a video of people on Black Friday? If not, here’s a quick look:


As you can see, these people are acting CRAZY- and there isn’t really a real threat happening. Imagine if a crisis took out the power grid and the grocery store shelves were empty. You can be rest assured that people would act far, far worse. That’s why I recommend investing in some kind of self-defense weapon (preferably a gun).

#1:  Prep a Little Each Day

We’ll leave you with one final tip: prep a little each day. Some people get discouraged from prepping because they think that they need to spend thousands of dollars to do it. But this couldn’t be further from the truth. There’s nothing wrong with spending just a few dollars each day on supplies. Personally, I like to spend an extra $10 on canned foods each time I visit a grocery store. After a few months, it adds up to be quite a collection. Remember, prepping is a marathon, not a sprint. So be sure to treat it that way and you’ll do far better.

Bottom Line

These prepping tips should make the process much easier on you. The biggest takeaway from this article is to make sure that you have your bug out bag ready. If possible, try to have an emergency kit in your car, at your home, and at your office. That way, you’ll be prepared for anything, anytime. Good luck, and leave a comment below if you have any questions (or your own tips and strategies for prepping). Thanks for reading.


Unless you’re a psychic, you never know when s*** is going to hit the fan. If and when a crisis occurs, the last thing you want is to be unprepared.

There are some things we can still count on to remain the same after SHTF. A woman’s time of the month being one of them. Even if you are not a woman, including female hygiene items in your prepping is still a great idea!! If you have a female partner, sister or daughter over the age of 8, you can count on these items coming in handy. As an added bonus, if you don’t end up needing these things, They will still make great bargaining bags that can be used to trade for something you will use.

You may have noticed that Wal-Mart dedicates an entire section just to female hygiene products as do most grocery stores and pharmacies. There is obviously a very high demand for this need. With that said, there are hundreds if not thousands of female hygiene supplies out there. I am not going to list them all. I will be sticking with the basics that are affordable, accessible and most likely to be used. There is no point in stocking up on things you may never use when you can stock up on usable items instead and still accomplish the same goal.

Female Hygiene items to Consider

  • Menstrual products
  • Cleansing products
  • Disposal of products
  • Back up products
  • Other Issues
  • Putting it all together

Menstrual Products:

** 6-12 Supply of items you already use

If you are a woman, chances are you already know which products work best for you. I highly recommend keeping at least a 6 month supply of your favorite product/s on hand. To accomplish this you may wish to simply go buy a 6 months supply at once or you may want to consider buying two packages instead of one each month that you do your regular shopping.. put the extra pack away somewhere dry and water proof. Within 6 months you will have a 6 month supply on hand should SHTF. You can actually do this for up to a year or more if you wish. BONUS: These are products you would normally buy anyway, you are simply buying in advance so you are not wasting ANY money!!

If you are buying for someone else, you may not already have a “favorite” or collection of favorites. Don’t let this scare you away!! The most commonly used disposable products are liners, pads and tampons. I recommend a large box of liners, a large box of tampons and several large packs of pads (overnights will be your best bet). Pads are also good for minor incontinence (of urine and stool) and make a great bandage in a pinch.

Cleansing Products:

**6-12 supply of wipes and wash

Something often overlooked when it comes to this particular kind of feminine hygiene is cleanliness. Cleanliness is going to be especially important if SHTF to avoid infections and unpleasant odors. We need to keep in mind that showering and bathing may not be something we can do everyday. With that said, I highly recommend stashing some cleansing products with your menstrual products. In a pinch, some soap, water and a facecloth will do the trick but that is something I personally do not want to resort to for as long as possible. So how do we keep our lady parts clean and odor free? My personal favorite is playtex fresh wipes which are made for this specific purpose but baby wipes will do just as good for much cheaper. I’ve stashed 12 packages away with my tampons. Men, if you do not have a female in need of these you will still find them very handy when you run of toilet paper. BONUS: Baby wipes are good for everything, back up toilet paper, removing make-up, washing your face, cleaning up spills ect..

On top of the cleansing wipes, I also recommend keeping a bottle (or several) of feminine hygiene wash. It is specifically made for washing lady parts (or male ones) and makes you feel so much “fresher” then just regular soap. If SHTF feeling “fresh” may be a luxury not many have. A great wash for this is vagisil feminine wash but pick your own favorite to stock pile on.

Disposal of Products:

**Have a disposal plan before SHFT

By using the above products you will be creating garbage, unsanitary garbage at that it. It is very important to have a plan in place for disposing of these products. Where you live will play a big factor on proper disposal of bathroom products so it’s always a good idea to have more than one plan. BONUS: Everyone needs a disposal plan regardless.

Most of these products are burnable and by burning them we will be completely getting rid of the waste.

Flush it: My ideal means of disposal is to simply flush it down the toilet. Even without power most of us can still flush our toilets by pouring a bucket of water into it (I live near a brook and have a well). If you do not have an unlimited supply of water or your products are not flush able this may not work for you. **Keep a bucket handy for flushing!

Burn it: Most of these products are burnable and by burning them we will be completely getting rid of the waste. This is something that should be done outside under strict supervision and preferably not in a fire pit you use for cooking food. If this seems like a good option for you, take the steps to build a burn barrel or burn pit. You can do this for little money by using an old truck tire rim or by digging a deep hole (away from trees).

Bury it: These products take a long time to decompose so burying them is not the most ideal situation but if you have no other options this is something to consider. Have a shovel available for in the event SHTF. Dig as deep as possible and avoid burying near any source of water.

Reusable products: By using reusable products you will not be creating any extra garbage to be disposed of. This is one of the main reasons I do not stock pile more than a years supply of these items. Something that works for disposal for short-term might not be as doable long-term.

Store it: This should be an absolute last resort. In the event of bad weather or a stay-indoors warning, you may need to store used products until you can safely burn or bury them. For this reason, you may wish to invest in some zip lock bags. You can buy 100 of these small bags for as little as $1 so I recommend keeping several boxes of them along with at least one large heavy-duty bucket with a secure lid. Some kitty little or saw dust is a good idea, too. Store the soiled product in a zip lock bag then in the bucket, use the kitty litter or saw dust to help mask odors. Dispose of the contents properly as soon as possible. Brown paper bags are another more environmental friendly option.

Reusable Options – Naturally Cozy washable, reusable feminine hygiene and incontinence products

Back up Products:

**Always have a Plan B

Even if you decide to store a lifetime supply of these products it is still a good idea to have a plan B. Your stash could get ruined, you could be separated from it or you just might not be able to dispose of it. Whatever the reason, have a back up plan. Being under the impression that you can always run to the store to restock is probably not the best back up plan. BONUS: Having a back up plan for female hygiene will also provide extra options if you run out of toilet paper.
Pads: Consider investing in enough cloth pads to get you through 2-3 days of your cycle, this will give you enough time for washing and drying them without running out. Amazon has some really neat cloth pads available in a variety of sizes and patterns. They even have pads with wings. If buying isn’t possible, check out YouTube for some how to videos on making your own!!

Tampons: While I still recommend the cloth pads as a back up plan, if you really don’t care for pads there are internal options such as cloth tampons and menstrual cups.

Cleansing: In a long-term SHTF scenario, the wipes and washes will eventually run out but cleanliness will still be a top priority so I recommend a back up plan for this, too. Amazon is also home to many pre-made bundles of family cloth which can be used as toilet paper. You can also make your own or fill an empty container with some baby face cloths. Keep some extra soap for this purpose, baby soap is mild and does a good job.

In a Pinch: If you find yourself in a situation without disposable or pre-made products, you can use just about any soft absorbent material. Baby receiving blankets, thick face clothes, cut up towels or even an old sweater.

Storing/Washing: Reusable products will need to be washed and stored until washed. You can buy special cloth bags for storing your used products in until it’s time to wash them or you can use any kind of pail with a lid. Keep white vinegar on hand, fill the bucket half full of a water and a little vinegar to prevent stains from setting in and to cut down on odors. If buying pre-made, pay close attention to the hand washing instructions. If making them yourself, you can wash them in your machine (if it’s still working) or hand wash them in hot soapy water. Consider having a boiling pot if your products are white or highly soiled (you can boil them to kill germs). It may also be a good idea to stock up on bar wash soaps (sunlight makes a good one). They can be hung to dry.

Other Issues:

**Take into considerations all other related issues that may effect you.

There are lucky women out there who breeze through cycles without any issues and then there are women who will find themselves curled into a ball from the pain of cramping. If you find yourself in a situation where you can’t run to the store for a package of pads then chances are you also can’t run to the store for some midol or chocolate. Be prepared. BONUS: All these items should be included in your prepping for other reasons so no money is being wasted.

Pain relief: Store a big bottle of your go-to pain reliever. If you are prepping for someone else, a big bottle of Tylenol (100 tablets) and a reusable hot water bag will do the trick. (Tylenol can be used for anyone not allergic and hot water bottles can double as a warmer under the covers at night)

Cravings: Try to keep a few of your favorite sweets on hand and replace them as you dip into them. Consider hot-chocolate, it can sooth a sweet craving and has a decent shelf life. It can also be used for some baking recipes.

Yeast Infections: Yeast infections are quite common in woman so keeping an extra tube of monistat could save some discomfort.

Pregnancy: You may be prepared for your period but what if it doesn’t come? If pregnancy is a possibility you can find a list of good supplies to have here.

Putting it all together:

**Now that you are aware of what you may need it is time to put it all together.

In The Bug Out Bag: Almost every woman will at some point be caught off guard by her monthly visitor. For some woman this will happen while on the move or “bugging out“. The best place to start is by preparing a mini PMS package. I recommend including enough supply to get through one cycle. It is as easy as throwing a pack of pads/tampons, a small pack of wipes, a bottle of Tylenol (or your choice of pain relief) and some hand sanitizer into a zip lock bag then putting it in your BOB or purse. It’s fast, it’s cheap and it’s easy!! If you don’t already have the supplies on hand, consider picking them up on your next grocery trip. If you don’t have a BOB congratulations, you’ve just made your first prep!!

In The Home: Stock pile a 6-12 month supply of your favorite products, don’t forget some cleansing wipes/wash with your stockpile. Also consider having pain relief and the possibility of cravings, yeast infections and pregnancy. You do not need to do this all at once, pick up an extra pack every time you are able.

Disposal: The next time you are at the dollar store, pick up a few boxes of sandwich bags. Have a look around the house for a bucket with lid. Don’t throw out those old rims, make a burning pit. That’s it, you are done!!

Backing it up: Consider purchasing some cloth pads or reusable products. In the meantime, visit the local consignment shop and pick up some baby receiving blankets for under $1.00. These can serve as back up pads and wipes until pre-made is in the budget. Keep some Vinegar and sunlight soap around for washing and you are all set!!

That’s it. You can do this!! Do not let mother nature catch you off guard. This is one of the easiest/cheapest ways you can start preparing yourself and your family as early as today!!

There are some things we can still count on to remain the same after SHTF. A woman’s time of the month being one of them. Even if you are not

While in high school chemistry class you would have been called a geek or nerd if you ever truly believed that “I am going to use this one day,” while everyone else was saying “I am never going to use this in my future, so why must I learn it now?” I’m here to tell you today that I was that nerd that believed such things and further studied chemistry for another five years into college.

During my academic career my interests always sparked when I learned about chemicals that could be used for some medical treatment, or were able to create an exothermic reaction and generate enough heat to produce a combustion of sorts. One that was very particular to me was a chemical called Potassium Permanganate (KMnO4). Potassium permanganate was especially interesting because if mixed in the proper quantities it can be used as an aseptic treatment to prevent infection on wounds and injuries. To add to its unique properties if mixed with a locally bought form of glycerin it would create an exothermic reaction to cause a small flame to form.

Now that I have given you some background information I will tell you of my experience when chemistry class saved my life. During the fall semester of my junior year in college I joined a backpacking adventure group that was composed of individuals, whom all shared the passion to learn survival skills and backpacking techniques. Being a rookie in the world of prepping this group caught my interests. So as meetings began to start and we practiced various skills such as cooking over fires, knots, survival skills and techniques. As we continued expanding our knowledge we also planned our first outing into the back-country of New Mexico during the month of October.

We assembled our gear and packs and planned out our route with enough food to last our 30 mile trip into the wilderness. Along with the checklist of items that we were given that would be necessary for any camping trip; I thought it was necessary to pack my trauma kit, and some chemicals for a chemistry experiment. This experiment was to take place towards our highest elevation at 13,000 feet above sea level and to be as much for entertainment for the group as an experiment for me.

We trekked for two days up and further into the back-country until the only tracks we saw were our own and the native wildlife. As the group approached the summit the weather began to rapidly change and thunderclouds started to form. We had made a group decision that in order to get back into the tree line for cover, we needed to summit the peak and descend on the other side as quickly as possible, because the route back down on the ascending side if caught in a storm would become even more dangerous due to its steep and narrow trails than the route descending on the other side.

Moving with a purpose the group quickly summited the mountain while fighting the wind that was gusting approximately 60-80 miles an hour the entire time. As the group began the descend one of the female hikers tripped and tumbled down the steep rocky path and received a moderate laceration on her knee. Quickly I dumped my pack and my skills as a nurse took over. I quickly had another member pour approximately a teaspoon of potassium permanganate in a one liter water bottle and shake it until dissolved while I readied the bandages and wraps for her knee. I cleansed her cut with our prepared aseptic solution and bandaged and wrapped her knee so that she could continue down the best she could.

Shortly after our unfortunate event our luck continued to fail and heavy rainstorm began just before we reached the tree line. Quickly the group of six gathered firewood, and threw together a tarp lean-to for shelter. Wet and miserable some of us were experiencing early signs of hypothermia, and we all desperately wanted to feel some small amount of warmth. Several members tried various means to start-up a fire from lighters, storm-proof matches, to even burning their own cotton shirt to get a flame to arise and light our fire. However the wind was awe to powerful and would extinguish our flame before it could ever catch.

It was then I remembered my plans to do an experiment and rushed to my bag and removed the small baggie of potassium permanganate and small bottle of glycerin I picked up at the store. I paused before I began and looked back on my previous trials with this combination. I remembered back home in Texas at 3500 feet elevation it would take approximately 5 seconds to generate a flame, but at this elevation and wind I knew my chances would be limited. So then I figured I’d better go for broke and used my remaining supply of both ingredients. What seemed like an eternity ended up only being about a minute before the greatest sight of our lives appeared.

A huge, bright fire-ball arose from our stack of tinder and kindling, and the group simultaneously began tossing larger logs onto the fire for it to chew on before the wind would have a chance to counter its warm punch. Our fire was a great means for improving morale and keeping at bay the clutches of hypothermia. We were able to dry our wet clothes, cook a warm meal and drink some tea and hot chocolate under the tarp until the rains subsided. After the rain stopped and we were all dry and full we set up our tents and crawled into our sleeping bags for much-needed rest. Once we woke up that morning it was as if the rain had cleansed the mountain of any bad juju, and we finished our adventure safely and pleasantly back to the truck.

There were numerous lessons learned from my first trip into the back-country that I have since benefited from. Most importantly the one that I and the group agreed on was that if there hadn’t been a chemist in the group then we all undoubtedly would have had a much more difficult time fending off hypothermia than we did that night.

While in high school chemistry class you would have been called a geek or nerd if you ever truly believed that “I am going to use this one day,” while

Halloween is arguably one of the best days of the year to conduct surveillance, practice your bug out drills, and really test your prepper OPSEC. This is the only day out of the year where you are not only allowed to go on other people’s property but are actually incentivized and encouraged to do so while wearing an outfit designed to protect your identity.  Now “full disclosure” I have never gone “trick or treating” nor do I have any desire to do so.  However I have done some surveillance and drills on Halloween and these are the five things I have learned, and what I look for on my surveillance runs!

Learn your Bug Out Route

A night bug out being tactically advantageous, well this is the best experience you will get in a night setting without there being an actual catastrophe.

This is the perfect time to get a good bug out route in place.  There will be an abnormal amount of traffic in the general vicinity especially on foot. People who generally would not be out at night will be roaming the street begging for morsels while decorated in their scariest attire. Generally most preppers talk about a night bug out being tactically advantageous, well this is the best experience you will get in a night setting without there being an actual catastrophe. Adding the value of the sophistication of the numerous outfits it will feel like a real “Purge” scenario, just adding to the hype and excitement.  This will give you a real feel for what to expect in regards to the density of people, movement of traffic and the heart pumping realism of getting into the spirit of being in a WROL situation. Not to mention a great way to get the family together for an adventure rooted in the reality of a WROL situation. At the minimum you can have the family together dressed up to take on the world. Afterwards you can have a pizza, your favorite dessert and watch your favorite scary movie together as a family. What’s better than that?

Learn the Neighborhood Security

This is an excellent time to learn what the security around your neighborhood is. When going around the block you can see the openly advertised security signs, neighborhood gates, even beware of dog signs and you can see what infrastructure is set in place whether that be fences, locks, metal bars, motion detecting flood lights, barking dogs, natural topography etc. In a normal setting walking around taking note of local neighborhoods and underlying infrastructure would be seen as very suspicious but during Halloween foot traffic is quite normal so use it to your advantage. This will give you the ability to see what individual houses use as security and to see what security parameters are in place in a certain neighborhood which will give you a greater “security site picture” and a better understanding of  the overall community as a whole.

Political Signs

Which of these signs will prevent another tragedy

When walking through a neighborhood you get a lot of information about it by what kind of political innuendoes presented on the yard. There is no better way to advertise ones biases then by putting signs up for the whole world to read. So if I see signs in support of Madame Hillary Clinton and or local liberal community organizers I can make a solid case that this neighborhood is probably not in favor of values held by conservatives or libertarian like the 2nd Amendment, and preparedness. Vice versa if I were to see signs in support of a conservative Military/ LEO veteran Sheriff who is a strong supporter of the 2nd amendment chances are I will find individuals who are armed. This goes for car stickers and Flags (American, POW, American Jack, LGBT etc.). If I see a house with a vehicle with Pro/Anti constitution sticker or an American/LGBT flag raised it gives me a better understanding to the mindset of that household.

Natural Topography

bugout_survival_route_planning
Understanding what kind of terrain you will be operating in is paramount.

I can say without equivocation that natural topography is huge factor especially when thinking with a tactical mindset. Understanding what kind of terrain you will be operating in is paramount. Walking on a flat riverbed path is much different from an uphill rocky path. Knowing where water sources are, where different types of topography intersect is something that you should know or at least be familiar with. Especially when operating in low light conditions. Also remember with topography comes unique animal/plant life considerations. Snakes, Bears, spiders, deer, coyotes all of which can be found in the forest. While in snakes, scorpions, cougars, rabbits, and wild dogs can be found in the rocky desert. Also take the time to see if there is any edible/poisonous plantation in your area.  Bottom line; get to know your area, terrain, and the players involved.

Density and Movement of people

The density of groups and the pattern by which they move and interact with each other is a topic that one could talk for years about. The whole academic scholarship of anthropology is really centered on these premises. We can discuss if we as humans do this consciously or subconsciously but the fact remains that we do it. So when you’re out there take note of the general movement of people, group sizes and demographics of those groups. See if there is a certain pattern of traffic flow. Do certain groups follow other groups? The incentive in this case is for the individuals to find the most resources (candy, treats etc.). Some will go out with a game plan based upon prior experience while some will wing it while others will follow those who they feel will get the most return on their investment. You may even learn a few shortcuts you didn’t know where there before! Knowing this information will help you better understand how your local communities interact with one another and will allow you to understand how to be the best “Greyman” you can be. Lastly I’ll leave you with this tidbit; chances are if there is a favorite home or neighborhood during the “quote” holidays then it will probably be just as popular during a catastrophe.

Do certain groups follow other groups?

Now this is by no means an exhaustive list of things to note however this is a great-itemized list for starters. It’s also important to note that I don’t in any way condone any kind of actions that would violate any state, local, or federal law or ordinances.  Now with that being said you will be hard pressed to find a better day to either put your plans into motion or gather critical Intel on your local area. If you have to be out with the family dressed like a princess or zombie you mind as well give your family and yourself the ultimate doomsday experience, and capitalize on the ease of intelligence surveying, and route planning.

The final thought I’ll leave you with is this, if you don’t plan to roam the streets but would rather “stay and play” (distribute candy, treats, resources etc.) what would someone learn about your household, neighborhood or community?


Pairing the unprecedented, super-filtration power of an all-new gravity block core with a hybrid ceramic shell, it removes 99.9999 percent of impurities, including bacteria, cysts, disinfectants, volatile organic contaminants (VOAs) and heavy metals.

Because requires no electricity, it is ideal for home use, on or off-grid.

Halloween is arguably one of the best days of the year to conduct surveillance, practice your bug out drills, and really test your prepper OPSEC. This is the only day

Early long guns could be carried in two hands ready for instant use or in one hand for almost as quick use.  But you really could not do anything else with that hand or those hands.  It became quickly obvious that a hands-free way of carrying a long gun was needed, and probably the first sling was simply a piece of rope tied to each end of the gun. Times have changed and today this article will be begin with some history, but will also share how to choose the best rifle sling for your  use.

Introduction to Slings (Part 1)

In the late 17th century, as European militaries were arming more and more men with muskets, sling “swivels” started to appear on military firearms.  Generally this was a slotted ring on the bottom of the stock near the butt, and a matching ring on the underside of the forend.  A flat strap, usually of canvas, was then threaded through these rings.  There was generally some length adjustment ability.  In the 1870’s, a new U.S. military rifle was introduced which came with a fairly new concept: a sling made of leather.

As the experience with slings became more common, people found that besides allowing for hands-free carry, a properly set up and fitted sling could help achieve greater accuracy.  The model 1907 sling was the height of sling development as far as support while shooting goes, where the forward arm is inserted between the straps of the sling and “locked” in place with “keepers”.  Despite efforts to replace it, this model continued to be an official U.S. Military option until the days of the M16, which came with a simple adjustable nylon strap, returning the sling to a mere carrying device.

Note that even with a sling which is designed only for carrying, there is a technique of wrapping the sling around your forward arm which provides some of the stability of a M1907 style sling.  This technique is called “hasty sling” because it is pretty quick and doesn’t require a lot of adjustment.

Originally the sling attachment points, and thus the slings, were usually along the bottom of the gun.  This was not really a problem with early firearms, but as magazine fed guns started to appear, the sling and the magazine tended to interfere with each other a bit.  Slings along the side of the gun could fix this problem, but were by no means ambidextrous and did not work as well for shooting support.

Quick Disconnect Mounts

Civilian shooters preferred a sling which could be easily attached and detached, encouraging the development of quick detach sling attachments.  The strap is threaded through the QD attachments, which then can be easily attached to or removed from the matching mounts on the gun.  Nowadays there appear to be at least five possible true QD options to put on the end of your sling.

Which of these options can be used on a particular gun depends on what mounts are built-in or added to that gun.  It is optimal to have the same QD attachment on both ends of the sling, but it is not a requirement if having mismatched attachments is appropriate.  It is handy to have the same mount or set of mounts on similar guns, so you don’t necessarily have to have a separate sling for each one.

STUD Mount

One of the first choices was “studs” screwed into the wood or clamped around the barrel.  There was a hole through this stud and flat sides perpendicular to the hole, and the matching part had two flat flanges separated by the width of the stud, with a pin through them.  Attached, there was a flange on each side of the stud and the pin through the flanges and the stud.  Uncle Mikes has an extensive history with these swivels and still have a good selection.  They are pretty good on sporting arms, but for tactical use they are not optimal.  Early models could be “popped off” as the moving flange was merely spring-loaded.  Some later models have a threaded knob, which when screwed down to the flange, prevents it from unintentionally opening.

CUP or HOLE Mount

Another early option was a “cup” inlet into the stock with a groove around near the top.  The matching part had some small balls around the circumference, which clicked into these grooves.  A button in the center retracted the balls so the part could be removed.  An alternative mount to the cup is a hole in a piece of metal of the same thickness as the distance from the top of the cup to the groove.  This system is fairly heavy-duty and can rotate side to side, which can be both good and bad.  A few have built-in stops to prevent complete rotation, keeping the sling from getting twisted.

RING Mount

The M-LOK Paraclip Sling Mount is the M-LOK compatible variant of the older MSA – MOE Sling Attachment.

More recently, rings started appearing on tactical guns.  These can accept a quick connect hook, and there appears to be three common choices.  There is the Magpul Paraclip, slightly similar to a clothespin.  This is fairly bulky; on the one hand, it does not fit on smaller rings, but on the other hand, is very stable.  If it comes with a cross-bar lock (and you use it), it is highly resistant to unintentional release and even without using the lock I have not had a problem.  Next is the HK snap clip.  This is very versatile and flexible, but is a bit noisy and floppy, and if you twist it right, it can pop off by itself.  The third common option is the Mash Clip.  This has a structure similar to a split key ring, but rather than having to pry the layers apart, there is an area you squeeze to separate the layers.  Like the HK clip, it is a bit noisy and floppy, but is much more secure.

There are a few other hooks which might work and are available from some sling makers.  One is called a “trigger snap”.  There very well may be a version which is strong enough and secure enough for sling usage, but the ones I’ve used (on keychains and other non-sling items) release accidentally and even bend open.  Another is a freaky-looking hinged hook, which I don’t know the name of and have never seen in person.  Basically, before relying on any connector other than the common ones, investigate it thoroughly.  You want to make sure it won’t bend or break, won’t release accidentally, is acceptably easy to attach and detach, and does not get “tangled up” with the gun.

SLOT Mount

The slot mount, like the original slotted ring, is not a quick disconnect attachment.  Although it, like the original slotted ring, can approximate a QD attachment if you strap a quick connect buckle to the slot, and have the other part of the buckle on the end of the sling.

No Mount

Having no mount on your gun does not mean you must do without a sling or even without a QD sling.  One option is to have a strap wrapped around the stock or forend to which a sling can be attached.  Most often, this attachment point is a ring or a quick connect buckle.  If you have a picatinny rail on the gun, pretty much any kind of mount you want is available to be clamped on to the rail.

Combination Mounts and Adapters

There are a few “combination” mounts available, which offer more than one type of connection.  Blackhawk has a nice one to attach to a picatinny rail which offers a cup, slot and ring.  This is another way that one sling can connect to multiple guns, or different slings can connect to the same gun.  Another rare option is various “adapters”, which connect to one type of mount and provide the connection for a different QD connector.  Finally, there is the “Universal Wire Loop” which can connect to anything the wire or cord can fit through.

Sling Types

Nowadays, the most common slings are nylon or equivalent.  A few are woven out of paracord, and ones made of leather, including the venerable M1907 style, are still available.

The classic sling is attached to the gun at two points, near the butt and near the front.  These are known as “two point” or “dual point” slings.  These are pretty good for carrying a long gun, but have some problems in getting the gun into action quickly.  One option is to put one arm through the sling and hang the gun on the same side.  This is fairly quick to get into action, but very insecure; the gun can easily slide off the shoulder and down the arm, resulting in dropping the gun.  On the other hand, if you put your arm and head through the sling so that the sling bears on the opposite shoulder, this is very secure, but slow to get into action.

In the 1980s, there were attempts to improve the tactical capabilities of the sling by developing the “three-point” or “triple point” sling concept.  This added more strap, so that the shooter’s body was enclosed by the strap.  Thus the “three points” were the two points on the gun and the third point was the person carrying the gun (since the sling was “attached” to the body).  One common characteristic of a three-point sling seems to be an additional length of strap which goes between the two attachment points on the gun.  Often the forward part of the sling which was to be attached to the wearer’s body was attached along this length of strap.  The problem with this concept was that the additional strap along the gun could interfere with the mechanical operation or use of the gun.  Furthermore, some of these designs used various mechanisms to extend the gun for use or retract it for carrying, and these mechanisms could be easy to miss under stress, or a pain to return for carrying.  These designs tended to focus on transitioning from carry to use, and not providing support.

One interesting sling variation which actually attaches to the gun at three points (but is not considered a “three point sling”) is the “Ching sling“.  This was intended to approximate the support of the M1907 sling but be much quicker to get your arm into.

The next major evolution in slings was the single (one) point sling.  As you might expect, this sling is attached to the gun at just one point, usually right behind the receiver and not near the butt as was common up to this point.  The “other end” of the sling was attached not to the gun, but to the sling itself, allowing a quite secure attachment to the body.  This is a very good option for quick access, allowing a free range of movement of the gun and easily switching from strong side to weak side shoulder as needed to get around obstacles.  And if you suddenly need your hands, you just drop the gun and it hangs in front of you.  The down side is that being attached at just one point; the gun can swing around, bumping you and everything around you.  This is not a good option for long-term carrying, but is hard to beat when quick access is important.

As a solution to the weakness of the single point sling, the “convertible” sling was developed.  This is a two point sling with a ring or buckle near one end, to which the forward end of the sling can be attached, turning it into a one point sling.  This gives you the best of both types of slings.  Other improvements were elastic elements in the sling which helped to absorb shock or chest expansion, an attachment point on the sling or your belt, allowing you to tie down the forward end of the gun when in single sling mode, and wide-range quick-adjustment options.  By the time you combine these features, you get a sling which makes the three point sling obsolete.

Tune in next time for some hints on choosing a sling and a look at a few tactical choices.

Early long guns could be carried in two hands ready for instant use or in one hand for almost as quick use.  But you really could not do anything else


Practical Preparedness – Planning by Prevalence

When we jump on preparedness sites, sometimes we’re immediately struck by the enormous loads of things to buy, do, and learn. We immediately start hearing about WROL, battle rifles, ammo counts in the thousands, pressure canners, INCH/BOB bags and locations, pace count, and primitive skills. World- and nation-altering events such as nuclear war, internet-ending viruses, Nibiru, Agenda 21 and NWO, and the like pop up. They all have their places, but sometimes things get missed and it can make for a very overwhelming introduction. It can make it hard to prioritize where to spend our time and financial budgets even for those with experience and years of exposure to the prepared mindset.

To make it a little easier to prioritize, we can work in stages. We can look at what is most likely to occur in the near future and our lifetimes, and use that information to help us decide where to focus our time, efforts and resources.

Zone-Ring Systems

In permaculture, planning is based on zones. The basic premise is that you start at 0 or 1 with the self or home, and move outward through 2-4 and eventually into Zone 5. The inner rings have the most immediate contact with the resident, while the outer rings are visited less frequently. Other systems also use similar ring concepts of involvement, frequency and impact.

The same can be applied to preparedness, just like we modified a Health Wheel to fit our particular interests and needs. In this case, instead of looking at the frequency with which we’ll make contact with an area, we’ll be looking at the frequency with which things occur and impact our worlds.

Like permaculture, I’ve gone with five general categories. In this case, they are: Daily, Seasonal/Annual, 5-10 Year, Generational, & Lifetime/Eventually/Maybe. There are some examples for the average Western World resident. Later in the article there’s a few tips for planning for and around those most and least-prevalent scenarios.

Zone 1/First Ring – Daily Occurrences

A layoff can be just as devastating as a zombie invasion if you aren’t prepared.

Daily emergencies are those that strike somebody somewhere every single day in our English-reading modern life. While some affect larger groups, these tend to be personal or family related items. They’re the kinds of things the neighbors might not even notice. Some examples are:

  • Layoff, cut hours, cut wages
  • Major bills (roof, medical, HVAC, veterinary)
  • House fire
  • Major injury/developing disability
  • Theft, burglary, mugging
  • Vehicular accident & malfunction (temporarily removing transportation)
  • Temporary power outages (hours to 1-3 days)
  • Personal physical altercation (mugging, home invasion, the drunk at a bar, date rape)
  • Missing person(s), family death

When considering the financial aspects of preparedness, also consider the things that might not affect jobs, but do affect our income and-or our ability to offset daily costs. For instance, an injury that prevents gardening and picking up overtime or a second job as a stocker, pipe-fitter, or forklift driver, or a developing disability that renders an arm/hand weak or unusable and prevents needlepoint, canine grooming, or weaving.

Zone 2/Second Ring – Seasonal/Annual Occurrences

These are the things we can consult our Almanacs and insurance companies to consider. They regularly tend to affect a larger number of people. It might be a block or a street in some cases, parts of a town or county, or might impact a whole state if not a region. They’d be things like…

River ice jam flooding


  • Busted water mains
  • Boil/No-Boil water orders
  • Hurricanes, tornadoes, earthquakes
  • Wind & thunderstorms
  • Wildfire
  • Significant or extreme snowfall
  • Summer drought
  • Temporary outages (2-5 days)
  • River ice lockups and floods
  • Active shooter or bomb threat, terrorist events

Let’s hope that last stays firmly in the “annual” category or shifts back to the third prevalence ring for most of us. Let’s also acknowledge that in some places and nations, it’s already more common to be caught in crossfire of some sort than it is to live peaceful lives, and for some of them, it’s as or almost as common as paying monthly bills or going out to eat.

Zone 3/Third Ring – 5-10 Year Occurrences

These are the things that happen regularly, but infrequently. Some occur on cycles. Some, as with the natural disasters above, are a nearly predictable cycle. Some aren’t really predictable, per se, but as with tornadoes in one of the nations’ tornado alley or hurricane-prone areas, you learn to expect them. We can expect them to affect a larger area or more people in many cases.

  • Natural Disasters from above
  • Mudslides
  • Major industrial or business closures/layoffs
  • Drought (personal & widespread impacts)
  • Widespread livestock illnesses (such as the avian diseases that pop up regularly)
  • Temporary outages (3-14 days)
  • Changing life phases (child-birth & toddlers, school-age kids, driving-age youths, empty nests, retirements)
  • Fuel cost cycles

Zone 4/Fourth Ring – Generational Occurrences

The span covered by the term “generation” tends to change if you use the strictest definitions. Most account for a generation to cover about 20-30 years. Some examples of things that very much tend to be generational include:

  • Major wars (mental & physical disabilities, income effects good & bad)
  • Recessions, depressions
  • Fuel cost cycles (more extreme)
  • Serious multi-year “weird” weather (droughts, floods, late or early springs)
  • 25- & 50-year flood levels
  • Some diseases

Zone 5/Fifth Ring – Lifetime/Eventual/Possible Occurrences

A lot of these are going to affect not just a region, not just one nation, but many. In some nations and regions, they may fall under the fourth ring of prevalence instead of the fifth. Some of these are also the big-fear “gotcha’s” or clickbait types that seem to draw folks in. Some are truly believed in, and I try not to judge people on what they believe. Poles have shifted in the past, Yellowstone has erupted, we’ve had serious solar effects on power, and asteroids have struck our earth. Will they happen again in our lifetime or eventually? Some almost certainly. Some are a firm “maybe”. Some are … possible.

  • Great Depression
  • Devastating Midwest seismic activity
  • National or global pandemics in the Western world
  • Major Ring of Fire activity
  • Significant volcanic eruptions (the atmosphere-blocking ash type)
  • Major global climate change (for the hotter or colder)
  • EMP, devastating solar activity
  • Nation-crippling electronic-based virus(es)

Alternative Scale Systems

Like permacuture’s zoning, the business world can also give us some scale systems to apply. High-probability, high-reward, urgent-response items are given priority, while lower-chance and less-likely risks are tended to later. We can create the same for our preparedness.

Another way to look at the five rings would be to apply a timespan for event duration. Perhaps 3-7 days, then 3-6 weeks, 3 months, 6-12 months, and 18-months+.

Like using prevalence, using time spans creates a measurable scale that works off a “most likely” basis. Most of us, at some point inside 1-5 years, will have some sort of financial upheaval or power outage that makes the supplies in the first few rings useful.

Ensuring we have everything we need to cook, clean, stay warm (or cool), and pay bills for those periods will keep us more balanced in our preparedness, and make us better prepared for the things that are MOST likely to occur in our near future and our lifetimes.

Applying Prevalence Rings

It’s inarguable that if you’re ready for the New World Order to freeze the planet and then send out FLIR drones to drop nuclear bombs in the midst of a planned or unplanned foreign-nation bank account hack while satellites are inaccessible due to solar storms’ interference, you’re pretty much good.

That’s not a particularly practical place to start and it might not be the best plan for resource allocation unless everything else really is covered.

There are a world’s worth of things that occur on a small-scale, inside homes and towns, that happen a lot more frequently than the dinosaurs and mega-mammals die out.

I see an awful lot of people hyped on one thing that can go wrong and might one day go wrong, but they exclude all kinds of things that do actually happen.

They forget that we sometimes have disasters that mean daily life is taking place all around us, or in the rest of the county, state, nation and world. They neglect fire extinguishers and smoke detectors for the sexy-cool aspects of preparedness like the rifles and Rambo knives.

Fact is, most of us will experience something from the first tier or two in our lives at least once, and for some of us, they’re regular parts of life.

In many cases of upheaval and crisis, we’re still going to want electricity, most likely.

We will still have a job or need to find a new one, will still be expected to present ourselves showered and with money to receive services, will still have doctor’s appointments, hunting and squatting in county-state-national parks will still be frowned on, and combat gear in the streets will still be the exception rather than the rule.

In some cases, the duration of our life-altering events might only be a few hours or days. However, in many parts of the world, those hours or days can be seriously inconvenient if not downright deadly. The ability to keep a CPAP machine running, repair a down or wrecked vehicle, and continue on with life after a squirrel invasion or a tree comes down is just as important as defending the home from looters and making beeswax candles.

Being able to repel the zombie horde does me little good if my vehicle is in poor repair on a daily basis and leaves me stranded on my way to work. 5K-10K rounds of ammo times my 7 platforms sounds nice, unless I don’t keep oil, coolant, jumper cables and fix-a-flat or a mini air compressor in my vehicle so I can limp my way home to them safely – on a daily basis.

Prioritizing instead of jumping willy-nilly – and tracking instead of continuing to add to whatever my favorite prep stash is – can help prevent daily disasters from truly causing upheaval.

Overlap Between Rings

The nice thing about seriously assessing what is likely to go wrong based on prevalence in the past is that we can sometimes make just little twitches.

We don’t have to be ready for all-out neighborhood wars over food, grazing rights, and tickets to the Earth Arks to create that overlap.

A bug-out bag serves as a shelter-in-place kit as well as a “standard” wildfire or hurricane evac kit. Having a month or two of food (or far more) means we can also weather a big bill because we can skip buying groceries.

Image: How’s your insurance coverage?

Preparing by Prevalence

Resources like the Ready.gov site and our insurance carriers can help us determine what goes wrong in our area. We might be well served making maps using the information they give us about regular, fifty-year and hundred-year floods, wind storms, and snow/hurricane routes to apply to our walk-out and drive-out plans.

We can also use their information – like, what is the number-one thing that causes job-loss or vehicle and home damage in our area – to make sure we’re buffered against it.

  Practical Preparedness – Planning by Prevalence When we jump on preparedness sites, sometimes we’re immediately struck by the enormous loads of things to buy, do, and learn. We immediately start hearing