HomePosts Tagged "food storage" (Page 2)

Yesterday I began a new series called, Back to Basics. People every day can simply look at events happening anywhere in the world and understand how taking some simple steps to ensure you can handle minor emergencies, isn’t crazy. Prepping to a certain level makes sense for everyone, regardless of where you live.

This series was designed to go back to the basics of prepping, obviously. Today I wanted to share tips for how to stockpile food for emergencies that anyone can use. I will focus on preppers who are just starting out, but I think some ideas in the topics below could be useful to anyone looking to ensure their family has food and does not go hungry. This article will also have dozens of links to other content on the subject for additional reading.


I believe there are 5 main components to survival that everyone needs to consider. They are simply Water, Food, Shelter, Security and Hygiene. Yesterday we talked about the need for water and how you can easily store water for emergencies that render your traditional methods of obtaining water impossible. Water is more important to life than food or at least you can live longer without food than you can water, but they are both important.

Why do you need to stockpile food for emergencies?

If you are new to prepping, you may have something that triggered your awareness of the subject. Preppers have many reasons for doing what they do and no two preppers are alike. Some are preparing for the end of the world, but most see situations in our daily lives that give a perfect reason to stock up supplies. You have only to look at the recent winter storm that affected large swaths of the Eastern Seaboard to have a perfect example of why you don’t want to be left without a means to feed your family.

emptystoreshelves

Greeks are finding food, medicine and fuel in short supply.

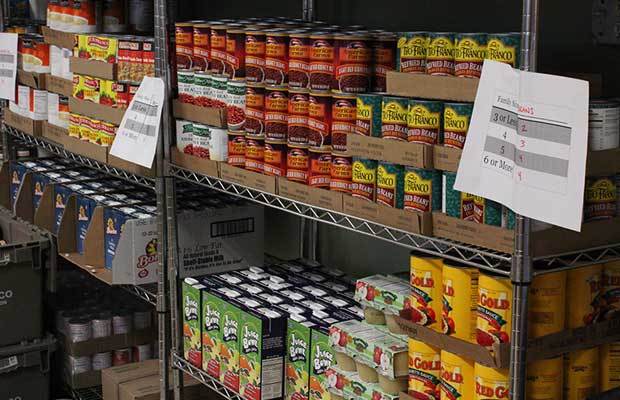
It seems almost cliché at this point, but invariably it always happens when a winter storm is forecast. Everyone rushes out to the store and certain food supplies are wiped out. Images of empty shelves are shown on practically every newscast and eventually prepper websites. Food shortages during simple storms are common if not expected. We don’t really even blink anymore because we are so used to this practice of waiting until the last-minute and then hitting the local grocery store on the way home from work to grab some basic necessities or comfort food.

Related – Build yourself the only unlimited water source you’ll ever need

If you can’t live for more than 3 days without going to the store, it’s time to reevaluate your family’s readiness. The statistic we hear most of the time is that the average home has only 3 days’ worth of food in it. If this is true, where would you be on day three if you had not been able to make it to the grocery store before the storm? What if instead of a snow storm, a virus outbreak had occurred and everyone was told to stay indoors to prevent infection? Each of us should have more food on hand that our families and friends will eat than is absolutely necessary to prevent surprises from leaving you hungry.

How much food do you need to store?

In the example above I used a virus outbreak as the condition that would prevent you from getting to the store. There are others though and weather could certainly be one of them. Some storms where I live have left roads impassable for upwards of a week. Could we walk to the store? Sure, but what if the stores having already been cleared of just about all of the food were closed? What if power outages prevented them from conducting any transactions? These are things you should consider.

Prepping is not something I ever consider you can accomplish. By that I mean, you are never going to be fully prepared. You may be much better prepared than some or all of the people around you, but you will never be 100% self-sufficient. Prepping should be done incrementally even if you have more money than you know what to do with because as you start to stock up food you learn lessons.

Related – The vital self-sufficiency lessons our great grand-fathers left us

A good rule of thumb for me is to start small when you are beginning to stockpile food for emergencies. You don’t need a year of freeze-dried foods to start with. Try just having a week or two of extra groceries that your family already eats. This is accomplished without any exotic storage needs usually or 5 gallon buckets of grains you have to figure out how to prepare.

Premium Fresh MREs Meal with Heaters

My wife purchases the groceries and I started out by giving her extra money to simply buy more food. I did this in the beginning because she is a much better shopper than I am and will always save more money than me. This worked great because she was easily able to fill our pantry and had plenty of meals planned to last us well over 30 days. Sure, at the end of that 30 days of food we would be getting into more exotic cans of mushrooms and soups that are better left as part of a recipe as opposed to your entire meal, but we wouldn’t starve.

What are the best types of food to stockpile?

Once we had a month worth of food and water stored up, I started looking at other options. I think each person should have a layered approach to food storage. This gives you flexibility and more importantly variety that as you go out to 6 months or 1 year or 2 will be important. My own personal goal is 2 years’ worth of food stockpiled for my family but that isn’t made up of only food from our grocery store. That can certainly be done though with a very good rotation plan.

Related – 4 Important Forgotten Skills used by our Ancestors that can help you in any crisis

Food storage should ideally cover the following:

Short Term Food Storage – The best and simplest foods are like I said above, what your family eats every day. One thing to consider is that the bulk of this food should be non-perishable in case you lose power. Canned foods are great as well as pastas, drink mixes and staples. These usually last at least a year.

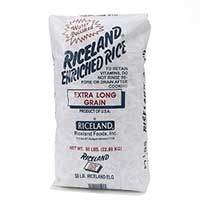
Medium Term Food Storage – For the 5 – 10 year range MRE’s are a great option although they are heavier and their convenience comes at a higher price. I have several boxes of these and I like MRE’s because they are self-contained and don’t really need any water. Freeze dried camping foods like Mountain House are another great option to just add hot water to. Rice and beans make great additions to this category because you don’t really have to do anything crazy to store them as long as they are kept cool and dry.

Long Term Food Storage – When you start to look at foods that will keep for many years you get into stored grains like Hard Red Winter Wheat that you store in sealed 5 gallon buckets. Freeze dried food from any one of many suppliers out there keep for 20 years usually and are individually wrapped Mylar packets. They require water to re-hydrate but the taste can be surprisingly good. Make sure you have seasonings though….

Renewable Food Storage – This is when you have to get your inner farmer working. Renewable foods are an intensive garden, small livestock like chickens or rabbits and the occasional wild game caught either through hunting or snares. In the worst disasters, your food will run out so having a plan for that ahead of time will help you prepare.

vegetables

For a well-rounded plan, growing your own food will give you the most flexibility.

How do you plan for your food eventually running out?

I have a mix of the food storage options above. We eat on our grocery store items every day, but I also have MRE’s and a pretty large amount of freeze-dried foods stored. We also have the grains I mentioned and the all-important grain mill to grind them into flour. Several hundred pounds of rice and beans round out the equation.

Stockpiling food is only the start. We have a garden and small flock of chickens. The stored food is just to get us through the worst of the disaster. Hopefully before our food runs out whatever disaster has happened will be mitigated and life will have returned to some sense of normality. If not, we have a huge leg up that will allow us to further harvest our garden to put away food like the pioneers had to do. It is an approach that gives us some sense of security and prepares us to come out on the other side still alive.

What is your plan to stockpile food for emergencies?


On a different note, here’s some other self-sufficiency and preparedness solutions recommended for you:

The Lost Ways (The vital self-sufficiency lessons our great grand-fathers left us)
Survival MD (Knowledge to survive any medical crisis situation)
Backyard Liberty (Liberal’s hidden agenda: more than just your guns…)
Alive After the Fall (Build yourself the only unlimited water source you’ll ever need)
The Lost ways II (4 Important Forgotten Skills used by our Ancestors that can help you in any crisis)
The Patriot Privacy Kit (Secure your privacy in just 10 simple steps)

If you can’t live for more than 3 days without going to the store, it’s time to reevaluate your family’s readiness. The statistic we hear most of the time is

As you consider the following and plan your food storage, bear in mind that your survival in any scenario will have a great deal to do with the decisions you make now about your food. Good food—and a good variety of that food—boosts morale tremendously in difficult situations. Less palatable food causes stress and much worse. Whether you and your family survive and thrive in the coming difficulties will ultimately depend on acknowledging the essential role of a healthy, varied diet and planning for it. This article will give you some real food storage ideas to use for your family.

There is a lot of advice out there to store food for uncertain times, but how much? How much food to store depends on how long the difficult times last, and only you can decide how long you want to prepare for. First off, consider your situation. How many people are you responsible for? What are their ages? When you are calculating how much food to store, everything is calculated based on an adult and teen males consuming 2500 calories per day. Pregnant and nursing women get the same number of calories. Teen girls and other women are allocated ¾ of this amount. Children under 12 years count as ½.

Consider your food storage needs

Decide what event(s) you are prepping for. Is it a civil war, world war, EMP, financial collapse, personal financial misfortune, pandemic, etc., or maybe all of the above? There is no shortage of people telling you what exactly is going to happen when. So far, they haven’t been right, but someday somebody will be. Collapse of some sort is in our future; history says so. If I’m prepping for a pandemic, I’m going to want a fair number of heat and eat or freeze-dried meals for when people are too sick to prepare food. With a financial collapse, I’ll supposedly have the time to prepare normal meals at home. With an EMP, I better be able to make meals without electricity.

Consider what you want to eat. Do you really want to live on MREs, canned soups, freeze-dried meals, and the like, all of which are really high in sodium and artificial preservatives? Is that how you normally eat, or will suddenly changing to such a diet be a shock to your body? Do you want to just buy a package deal—and trust that someone else knows what and how much you want to eat? If so, pay attention to the number of calories per day. Some of those packages contain as little as 1200 calories per day. Who is going to be happy with that? TEOTWAWKI is not the time to lose that extra weight. Mental stress alone will contribute to weight loss. In addition, are you planning on doing much more physical labor when TEOTWAWKI hits? (You should be.) How happy are those doing the heavy labor going to be on 2,000 or even 2,500 calories per day? Hint: They won’t be happy. You need to plan on double the number of calories for those doing heavy physical labor.

Defining your food storage budget

Decide what your budget is. Most people can probably manage to buy a few weeks’ worth of freeze-dried meals or MREs, but if you’re prepping for the long-term and/or for a family, and your funds are limited, you are going to have to be more careful. The biggest bang for your buck is going to come from long-term storage foods such as grains and legumes.

What new skills you are willing to learn? Are you willing to learn to bake? Are you willing to learn to bake bread—without an automatic bread machine? Are you willing to grind your own grains? Are you willing to learn to garden? What about learning to can fruits, vegetables, and/or meats? Raise livestock? It doesn’t have to be cows and pigs—chickens and rabbits are much more manageable for beginners. The answers to all of these questions should govern the decisions about what you store. If you are not willing to learn to bake bread, storing a whole lot of wheat may not make much sense. You can store white flour instead—its shelf life is much shorter and it is far less nutritious, but it will keep you alive. Pick one new skill to learn each month. The most important one is probably learning to make bread, followed by gardening.

jam-428094_640

The first items to store should be a three-month supply of foods you normally eat. Whatever it is that causes us to eat our stored food is going to be a stressful time. The last thing your digestive system needs when it is already stressed is more stress from eating unfamiliar foods. Children and the elderly are much more vulnerable in this situation and you don’t want to increase their stress (and yours!) by forcing a radical new diet on them.

So come up with your list of foods you already enjoy preparing at home and you are already accustomed to eating, preferably foods that require no refrigeration. You should really have a three-month supply of these foods. Make up a menu for one week, list every item you need for each meal, and buy thirteen of each item to have a three-month supply.

What are some real food storage ideas you can use?

Once you have done this (because how many of us really think the chaos will be over in three months and life will immediately return to normal?), consider adding longer-term storage foods. For each adult male per month, store the following:

  • Grains: 33 lbs per month. If you are grinding your own grains for bread, store 20 lbs hard white wheat (white wheat is generally preferred for its lighter, sweeter taste, and is also easier on the digestive system), 5 lbs white flour, 2 lbs rice, 3 lbs pasta, 2 lbs oatmeal, 1 lb popcorn.
  • Dry beans: 5 lbs per month. Pinto beans, white beans, black beans, legumes, lentils. Beans are among the most sensitive of long-term storage foods and must be stored in a cool, dry place. Otherwise, they will become tough and require much longer cooking times to soften.
  • Sugars: 5 lbs per month. This is only for baking and cooking meals, no desserts. It is about 3 tablespoons per day. It does not include amounts needed for canning, making jam or syrup. White sugar and honey store indefinitely. They don’t even need to be kept particularly cool, though they should be kept in a dark place if possible. You can also store brown sugar, molasses, corn syrup, pancake syrups, jams, and jellies. Often I hear people say they don’t need that much sugar. And it is true that we should all probably eat less sugar. However, bear in mind that sugar has become an important ingredient in many of our comfort foods. In addition, if you choose to store less sugar, you need to increase the amounts of other items you store to compensate for the calories.
  • Salt: ¾ lb per month. You need both plain and iodized. Most people in my food storage classes thought far less salt would be enough because they would never go through that much salt in one month. And that is true for most of us who still buy most of our food at the store. But when you are making everything from scratch, especially bread and beans, you use a lot more salt. Children need iodine for proper brain development. The rest of us need iodine for continued brain function. We generally get adequate iodine in our diets. However, when many of the commercially prepared and vitamin and mineral-fortified foods that we depend upon are no longer available, we will need to ensure we have sufficient iodine in our diets. For those who are planning to make their own bread (and we should all be planning to do that—bread is the staff of life), it bears mentioning that iodine actually retards the fermentation of yeast and thus hinders the rising of bread dough. So you really want about half of your salt to be plain and half of it to be iodized.
  • Oils: 28 oz of oil per month really is the minimum. Not only is oil an essential ingredient in many recipes, but it can also render normally unpalatable foods rather tasty. Store a variety of oils—olive oil and peanut oil for frying and baking, coconut oil for some frying but more for a long-term storage butter substitute. Avoid vegetable oil (it’s all soy, and almost all soy is GMO). Some food storage experts place peanut butter in the oil category due to its calorie content, but really, do you want to use peanut butter in your baking and frying recipes? Not generally. Peanut butter is indeed high in calories and high in protein and as such makes an excellent addition to the pantry. It just shouldn’t be classed with the other oils. Call it comfort food and store a goodly amount of it, at least 1 lb per person per month. Store all oils in a cool, dry place. And for longest-term storage, store all oils in glass—they will last much longer than in plastic.
  • Dry milk: Store 1.75 lbs of dry milk per month. This amount includes not one drop for drinking—this is only for baking and cooking. If you want to be able to drink some milk, you will need to store more. If you want to improve the flavor of your powdered milk, stir in 1 teaspoon of sugar and ½ teaspoon of vanilla extract per quart of milk. And of course, make sure your milk is well-chilled. Dry milk is the most sensitive of all long-term storage foods. It must be kept dark—light will degrade the vitamins and cause deterioration in flavor. It must be kept cool, and of course, it must be dry.

Once you have stored the basics, start adding in other items.

  • Baking essentials–baking soda, baking powder, yeast, powdered eggs, cocoa.
  • Canned items—fruits, vegetables, and meats.
  • Spices—pepper, cinnamon, chili powder, cumin, mustard, ginger, herbs (oregano, basil, thyme, sage).
  • Condiments—Ketchup, mustard, relish, soy sauce, salsa.
  • Comfort foods—chocolate chips, candy, gum, Jell-O gelatin, and pudding mixes.

As you build your food storage, you also need to be learning to use it so that you will be accustomed to eating these foods—and enjoying them. It takes practice to learn how to make good bread. And your body needs time to get used to eating whole grains. Make the switch from white flour to 100% wheat in your diet, and you might find yourself with a serious case of the trots.

While doing all of the above, consider your garden. Spring is just around the corner and the time has never been better for learning how to grown your own. Fresh salad greens, home-grown tomatoes, carrots, potatoes, and who can’t grow zucchini and green beans? Eating from your garden will add variety to your diet while making your long-term storage go a whole lot further.

Storing food for future uncertainties isn’t exciting. Nobody gets worked up over a bucket of beans or a bag of wheat. And that is probably because the vast majority of preppers and those reading this site have never been without food and have never seen starvation. I know I haven’t. But I am a student of history. Bad things happen when people don’t have any food, when they don’t have enough food, and when they don’t have nutritious food. Don’t let bad things happen to your family. Be proactive. Store a wide variety of long-term storage foods and learn to use and like them now. Recognize that your future and that of your family depends greatly upon the decisions you make now about your food. Start today.

As you consider the following and plan your food storage, bear in mind that your survival in any scenario will have a great deal to do with the decisions you

It’s crazy to think that Rottweilers and Poodles are in the same family of animals. Or for that matter, Great Danes and Toy Chihuahuas. They are as different as they come. One is 200 pounds, the other is 2.

In much the same way, have you ever realized how many different breeds of people fall under the “survival” umbrella (this is the smooth transition to topic)? In case you haven’t, there are tons. And each type of “survivalist” is unique in their own weird ways. Recently, I’ve been reminded again, of just how funny it actually is. Walk with me:


food-storage-momFood Storage Moms
– these are the sweet middle aged moms who equate the idea of survival with having a basement full of canned foods (some of which they probably canned themselves). Probably also soccer moms. They know the importance of stocking those cupboards full!


apocalyptists1-150x150Apocalyptists
– swear that someday soon just about everybody is going to be torched in a giant nuclear explosion, drowned in a flood, frozen to death in another ice age, or abducted by aliens. These guys are the converts of Independence day, I Am Legend, and all the other wonderful Hollywood portrayals.


tactical-hoo-rah1-Tactical Hoo-Rahs
– these are the guys that treat everything like it’s the battlefield. They borrow all the acronyms, abbreviations and terminology from their military days. These guys are all about stockpiling firepower, blowing things up, and beating the bad guys.

primitive-skills-

Primitive Skills – the hippies of the group. These are the folks that farmers markets are made of. They love to make their own clothes, build their own homes, grow their own food, and in all other possible ways be “at one” with our mother earth. These guys often have learned a tremendous amount about living off the land.


camping-nut1Camping & Hunting Nuts
– LOVE spending time in the outdoors. They can’t get enough of hunting, tracking, animal calls, hiding in bushes, and analyzing poop. They like the adventure of making do and doing without, so they do it for fun. To these guys, the concept of “survival” is being alone in the wilderness.


paramedics-Medical Mavens
– pride themselves on being able to perform CPR, first aid, emergency surgeries, treat and dress wounds, triage the victims of mass destruction, and anything else medical. To them, the apex of “survival” is being able to put people back together.


right-wing-extremists-Right Wing Extremists
– swear that the government is slowly taking away our freedoms, and that people are being led down the path of “following the system” without questioning. Everything is a conspiracy, nothing should be trusted–especially if it’s the Feds. The less government there is, the better.


boy-scoutBoy Scouts
– are a close relative of the camping/hunting nuts. Their brand of survival is also largely “wilderness survival.” They become more “prepared” by passing off merit badges dealing with the safe and proper way of: building a fire, using a knife, making camp, disposing of waste (paper and otherwise), splitting wood, navigating by map, and more.


doomsday-economists1Doomsday Economists
– these guys prophesy of the times when paper money will be completely worthless, and burnt to keep warm. They put their faith in stockpiling raw goods and precious metals. They invest in foreign markets, and keep their wealth spread around, so that it can’t be lost all at once.


I’m sure there are more, but this is just a small cross-section of some of the more prominent survival subsets that I’ve noticed. I’ve had the privilege of rubbing shoulders with people from all groups, via Twitter, Facebook, blog posts, and in face to face conversations.

It’s eye opening because it really does illustrate how different people choose to deal with problems (or potential problems). And  it’s comical. It could easily be a t-shirt.

Am I A Rottweiler, Poodle, or Mutt?

The more I rub shoulders with different mindsets, the more I realize that I borrow from them all. But that’s such a safe answer. Everybody would say that crap. To make myself be more specific, I would say I’m a mutt of roughly:

  • 2 parts Right Wing Extremist–I love the idea of opportunity and I hate the idea of homogeneity, and I think our founding fathers would roll over in their graves if they had any idea that nation they raised had flip-flopped.
  • 1 part Camping Nut–Nothing is more fun, relaxing and just plain liberating to me than being outdoors, and away from the bustle. Although I’m really not much of a hunter or gamesman, it’s just fun to step into the natural world.
  • 1 part Primitive Skills–Tame the land. Learning to use all my natural surroundings for a purpose has always struck a chord within me. Some of my most prized possessions are homemade. High on quality, high on satisfaction, low on cost.

But I’m constantly learning and evolving. We all are. Next year I could largely be a “food storage mom” maybe, who knows? But no matter what brand of survival we are or may call ourselves, it’s important to realize that there truly are practical and absurd things about each.

You can’t save a kids life with CPR if all you’ve been doing is collecting guns and blowing stuff up. And by the same token, you can have the Merck medical book memorized and still starve to death without a little food storage. Rather, learn from them all, realize the limitations and craziness inherent to each, and contribute where you can. To sum it up–be real about the journey you are on. Because after all, it will be real soon enough some day.


It’s crazy to think that Rottweilers and Poodles are in the same family of animals. Or for that matter, Great Danes and Toy Chihuahuas. They are as different as they

For a long time, preppers have been accused of being little more the paranoid hoarders. However, a lot of evolution has occurred in the field of disaster preparedness. Rather than blind action and backpacks full of gear, we have a hierarchy of the most important things to have on hand in a disaster.

When it comes to prepper storage, we are going to look at three items that are going to make a world of difference for you and your family in tough times.

Long Term Food Storage

Forget about the golden rule in a serious disaster. You see, the gold makes the rules only when there are resources to buy with that gold. Because of our just in time delivery systems our cities and towns are going to run out of food and supplies in a hurry.

We have seen the shelves go bare after small hurricanes and snowstorms. Imagine if trucking and shipping stop and all those resources are gone.

Better than having gold is having food. You see, everyone is going to want food, they are going to need food. Most people have no idea how you are going to get food after a disaster.

If you are going to store food you should know what a years’ worth of food, per person, looks like. To keep it simple you are going to need about 2 million calories per person. Really it should be a little more but from there you can work your way back.

When you talk about 3 months or 6 months of long term food storage you should only be working with shelf stable foods. The best practice is to buy these items in bulk and then bucket them up with oxygen absorbers in mylar bags inside of 5 gallon buckets.

There are few sighs of relief equivalent to putting up food for hard times. Its just one of those things that feels good deep down inside.

Heirloom Seeds

Depending solely on a garden is a huge mistake. If you think you are going to grow all the food your fmaily needs, you are mistaken. In fact, if it were that easy, you’d be doing it already.

Growing food is hard but I think you should invest considerable time and effort into it. It should be a massive supplement to your food storage diet. This will increase the vital nutrients in your diet and will put you in a position to add variety, as well.

Along with stockpiling long term food storage you should also have some version of a survival seed bank. These can be bought in sealed cans and stored in your fridge. They will keep for a very long time.

Don’t get crazy and buy a bunch of varieties of plants. Instead, focus on the seeds that produce the most food per plant. This is key if you are short on growing space. Think of things like

  • Tomatoes
  • Peppers
  • Cucumbers
  • Squash
  • Zucchini
  • Herbs
  • Greens
  • Green Beans

These plants all produce ad nauseum and that is exactly what you want out of a survival garden. You want too much produce. The extra goes into cans to be called on in the winter.

Emergency Water Plan

Another important prepper storage consideration is water. Water is a little different than food and seeds. You see, water is part of a larger emergency water plan. This plan has a number of components.

Because we only have three days without water before we die, you want as many ways of getting water as you can muster. We are going to look at all those ways on a high level so you can understand how sourcing, catching and sanitizing water are all just as effective as storage.

STORING WATER

The first step that most people make when considering emergency water is to store bottles or jugs in their home. This is a good method, to a point. Storing water take tremendous space and it also is very heavy when you get to a sizeable amount.

Water storage should certainly be a part of your plan but not the whole plan.

CATCHING WATER

One of the most effective means of storing water is to do so in 55 gallons, or larger, rain barrels. These barrels hold a tremendous amount of water and that makes a huge difference. With just 4 of these barrels you can carry 220 gallons of water!

This type of catchment is great because it just happens, you don’t need to do anything but maintain the barrels

FILTERING WATER

Have a method, or two, to filter water is also important. Sometimes water quality can be questionable, and filter can help you out with that.

SANITIZING WATER

Non scented bleach, aqua tabs, tincture of iodine are all options for sanitizing water and making it safe to drink. After filtering you could also boil that water and it will be safe, as well. However, quick methods like these tabs are also very effective.

SOURCING WATER

The planet is 75% water. There is a water source near you. You should get to know that source now and make plans to tap it in times of disaster.

Easy and Effective Storage

Now that you have an idea of what you should be storing, you might be wondering, where do I put it all? Well, that is where we move to the topic of a root cellars.

Expanding the home or over cluttering it is not a great option. What good are preps if you cannot get to them quickly? Besides, its good to spread your preps around. Having food and supplies in more than one location can make a huge difference if things get bad.

If you are looking for a quick primer on building your own root cellar The Easy Cellar by Tom Griffith can help you get started.

Ideally you can use this eBook to build a custom root cellar that will allow you to store your water, food storage, seeds and even extend the shelf life of produce! When we talk about prepper storage a root cellar is key. In fact, all aspects of storage are vital to having success.

Having the right resources to call on in times of disaster is not only prudent but it is becoming very popular. The writing is on the wall and people are taking notice.

With some basic materials and good plans, you can create your own easy root cellar and create your own prepper storage.

Other self-sufficiency and preparedness solutions recommended for you:

The vital self-sufficiency lessons our great grand-fathers left us

Knowledge to survive any medical crisis situation

Liberal’s hidden agenda: more than just your guns

Build yourself the only unlimited water source you’ll ever need

4 Important Forgotten Skills used by our Ancestors that can help you in any crisis

Secure your privacy in just 10 simple steps

We are going to look at three items that are going to make a world of difference for you and your family in tough times.

Under the spring sun amid a cool breeze you are probably looking over your garden at the many small sprouts or purchased plants that are in the ground. It might seem like you are years away from harvest. The truth is Spring is the time of rapid harvest.

Spring plants come up quick and they can be very prolific. When you start to think about it you might start considering a simple easy cellar for your spring harvest.

Some of the first plants to harvest are things like English peas and radish. They are both unique because they do not can or preserve well. If you have a generous harvest of these, you might be interested in a means of storing them long term. Radish being a root vegetable means they are great stored in a root cellar.

Garlic, new potatoes, asparagus and turnip greens are all things that have very short season to harvest. If you planted your garlic in the fall you are gonna be into a serious harvest of garlic in a hurry. Sure, you can store that harvest in your cabinets, or you can create a simple root cellar to store that garlic for months.

How Much Space for this Cellar?

The best part about building a cellar is that you can do it any way you’d like. Basically, you can build your root cellar the size you need to be effective. Are you going to use this cellar just for food storage, that’s a great idea!

Roots like carrots, potatoes and turnips can last over 6 months if you have built your root cellar properly. They are that effective.

Even small urban homesteads can section off enough land to make an easy root cellar. It also doesn’t have to be incredibly expensive.

If you have a harvest to store its in your best interest to consider a root cellar.

Don’t forget, you have summer harvest right around the corner.

What About That Summer Harvest?

Maybe you’re not intimidated by that spring harvest. Perhaps you just eat all that fresh food and you don’t have much left. That could be the case. Some people are wild about those baby greens like arugula.

That said, once those zucchinis, squash, pumpkins, tomatoes and cucumbers start popping up things get crazy in a hurry. We are all guilty of leaving the zucchini plant for too long and then returning to find a blimp of a vegetable waiting for you.

The summer gets out of hand in a hurry. Before you know it, you are giving bags of produce away and you are sick of eating all that great food you grew.

That is because you haven’t a place to store that food long term or even a place to store all that canned ratatouille and tomato sauce.

Don’t forget, a root cellar is not only a great place to store root vegetables but also canned foods. Storing your canned tomato sauce and pickles in the root cellar will both save you space inside and give a new space for storing other things.

How About Even More Storage?

Don’t just start digging a hole. Get yourself some proper instruction. This guide is filled with tips on how to build an underground root cellar and even an emergency bunker!

This resource is designed for those of you who are looking to take the first steps in building and managing their own root cellar. There are also some other perks.

  • How to effectively store your food supply for 3 months to prevent them from spoiling.
  • How to effectively store water to enable your family to have access to clean water for months.

Don’t forget, this storage situation also means that you are going to be able to store even more things in your root cellar. If you are considering a root cellar maybe you also have dried food storage. Well, no one has room for all that dried food storage.

A root cellar keeps a nice consistent temperature and is a great way to store that long term food storage. What other preps can you store in a root cellar? Well, its up to you.

Now is the time to take action and get these building projects under way. The beauty of this root cellar is that your walls and floor is made for you already. Aside from some framing you have most of the cellar built for you by nature!

Conclusion

We all know that there are several reasons to grow more of your own food. From price to pesticide there has never been a better time to expand your food sourcing efforts. You will be amazed at the difference a few fruit trees; 6 chickens and an expansion of that garden can have on your life.

But what’s the point of all that if you don’t have a means to store all that extra food? Learning how to can, preserve and having a place to store that extra food is a crucial part of the process. That is where this root cellar comes in.

Even if you don’t live on 20 acres it doesn’t mean you wouldn’t benefit from a little more climate controlled storage space. With a little help on the DIY build you can make that happen in your own yard or on your property.

Once you get the go ahead, you are going to be on your way to some serious storage space and a more self-reliant lifestyle.

Let me know how that worked for you.

A root cellar keeps a nice consistent temperature and is a great way to store that long term food storage. What other preps can you store in a root cellar?

I don’t need to remind just how darn important it is to know what to cook when the power goes out. There are so many recipes on the grand world-wide-web that you need only type in “gimme food” in Google to figure out your next step.

The trouble with these “whip-up” dishes, as I like to call them, is that they have a very limited shelf life, despite being bagged and refrigerated. In my searches for the next cannable superstar (be sure to check out my article on canning and pickling pork meat), I’ve stumbled upon a most interesting recipe – the so-called Poor Man’s Hamburger. According to its description, it should be an Amish dish, although I find it very hard to make a connection.

Anyway, the recipe’s pretty straightforward and if you have a good pressure canner, you can keep this stuff in your pantry for at least three months if not more. The weird part about preparing this recipe is who or rather what gets the spotlight – though it’s a meat-based dish, the gravy’s actually the one who steps into the limelight.

Crazy, right? Not in the very least! As you’re about to see, the gravy you get is what you might consider a great SHTF asset – it can very easily be combined with the meat of all sorts (chicken, beef jerky, spam) but it can also be eaten, well, plain, as a sort of early-morning broth.

Before we get to the cooking part, I should warn you that this recipe takes time. If you have something big planned that day, I will leave it for another day, preferably a lazy Sunday. So, without further ado, here’s what you’ll need to do in order to prepare Cannish, aka the canned version of the Amish Poor Man’s burger.

Gathering your utensils and ingredients

For this recipe, you’ll need the following tools:

  • Canning jar (the bigger, the better).
  • Plastic container (I would go for a 35 quart because you’ll have a lot of stuff to mix)
  • Food processor.
  • Oven grill (if you don’t have one, you can always use the top part of an old BBQ which you can place it over a tray).
  • Mouth rim (you’ll need this to shape your burger patties).
  • Skillet (for cooking the gravy).
  • Aluminum foil.
  • Lots and lots of patients.

As for the ingredients, go raid the pantry or the local farmer’s market of the following supplies:

  • Celery (around five cups).
  • Onions (five cups will do).
  • Saltines (I used one and a half pounds of saltine or six packs).
  • Eggs (two dozen).
  • Milk (five cups).
  • Lots of salt and pepper.
  • Ground beef (this recipe calls for at least 30 pounds. That’s around two or three big-ass rolls).
  • Canned mushrooms (five cans).
  • All-purpose flour.

Yes, I know it’s a very long list, but as I’ve told you, this is the kind of recipe that kind of makes you spend the entire day in the kitchen. Still, do bear in mind that will also be some waiting time, which would be right after you stick those burger patties into the over. All done with the tools and ingredients? Great! Let’s get right down to business.

How to prepare Cannish

Step 1. Grab a cutting board, a sharp knife, and get to chopping. Have your food processor ready, because everything you’ll chop or crush from this point forward will require a little bit of mixing.

Step 2. Leave the chopped onions and celery aside for the moment. As for the saltines, you can either use a mortar and pestle to crush them or place everything inside a zip-lock bag and use a rolling pin to beat the living daylights out of it. When you’re done, add them to the food processor, and give them a good mix (I scrambled them for 10 or 15 seconds to make sure that there are no chunks left).

Step 3. Grab yourself a large bowl and crack open two dozen eggs. Whisk the shit out of them.

Step 4. Measure five cups of milk.

Step 5. It’s now time to put everything together. Place the plastic container on your work table and add your chopped celery & onions, saltines, whisked eggs, and milk.

Step 6. Get dirty! You have two choices for the mixing part – wooden spoon or hands. I personally prefer the latter (make sure you’ve washed your hands before dipping them in the mix).

Step 7. Add some salt and pepper to the container (I used two tablespoons of rock salt and one and a half tablespoon of grounded black pepper) and continue mixing.

Step 8. Stick the container in the mix in the fridge for 30 minutes. It will be easier to handle once you get to the patty-making part.

Step 9. Get your ground beef out of the freezer and use a knife to remove the membranes. Add the meat to your plastic container and use your hands or a wooden spoon to bind the mixture. FYI, it’s easier to do this if you dip your hands in ice-cold water. Fill a small bowl with cold tap water and keep it next to your container.

Step 10. Start making patties. Take a handful of meat and stick in the metal rim. If you’re skilled patty—maker, you can ditch the ring, and form them by hand. Don’t make them too big or thick. Remember that your goal will be to place each cooked patty inside the canning jars. You shouldn’t also take into account that this type of meat is packed with fat, which will kind of end up in the oven tray.

Step 11. Stick the formed patties in the fridge for 15 or 20 minutes. To prevent them from sticking to each other, create patty layers separated by baking parchment.

Step 12. Get the patties out of the fridge and arrange them on your grill. If you use the exact amount of ingredients, you’ll end up with 28 or 29 burger patties.

Step 13. Preheat your over to 375 degrees Fahrenheit.

Step 14. Place the BBQ grill with a tray in the oven and bake for 35 minutes. Don’t forget to flip the patties after 15 minutes. Depending on your rig, this step can take anything from 2 to 6 hours. In my case, it took about three and a half hours to bake all the burger patties. When they’re done, place them in a large roasting pan. Cover it with two layers of aluminum foil. Allow the burgers to cool down.

Step 15. In the meantime, get a skillet and prepare the gravy. Here’s how to do it. Get one and a half cup of fat from the patties and add it to the skillet. Set your heat to medium-low. After the fat begins to warm up, and half a cup of all-purpose flour.

Use a spoon to stir. Don’t rush it! Gravy’s something that takes a lot of patience. If you see that the mix is about to go up in flames, lift the pan off the stove, and put it back again. You’ll know that the gravy base is done when it turns light brown.

Step 16. It’s time to prepare the mushroom soup. In a big pot, pour the contents of five mushroom soups cans. Using an empty can as a measuring cup, add five cups to the shroom soup and bring it to a boil.

Step 17. While the shroom soup’s still hot, grab a ladle and carefully add it to the browned flour mixture. The secret to not ending up with burned gravy is to stir while pouring shroom soup with the ladle. It may take a while longer, but it’s worth it. If you feel that the mix is too thick for the spoon, use a whisk instead.

Step 18. When you’re done adding every last drop of shroom soup, give the mix a good whisk, and let it bubble for five more minutes before killing the flame.

Step 19. Take a breather. Smoke if you have them. After the gravy cools down a bit, it’s time to put everything together.

Step 20. Give those canning jars a good wash. You can either submerge them in a tub filled with water and dish detergent or boil the Hell out of them before using. Your call.

Step 21. Place five burger patties in each canning jar and cover with gravy. Put the lid on, tighten it, and allow the jars to cool down overnight before placing them in the fridge or pantry.

Congratulations! You’ve just made your first batch of canned Amish Poor Man’s burgers. Your kitchen probably looks like a scene from WW2 or something, but who cares when you have delish marinated burgers. If stored probably, you won’t have to worry about running of food, at least for a couple of months. Although the canning part allows you to store this stuff in any place outside of the fridge, I would strongly advise you to keep your jars refrigerated and to consume it in two months’ time.

Another thing about this recipe is that it will take a while to figure out how to make the gravy base. For my part, I had to discard the contents of two skillets and ended up using more than three cups of fat before I was able to make a ‘stable’ base. As I’ve mentioned, the trick is to gently stir the mix and to lift the skillet every now and then. If the weather’s nice, you can always skip the oven part and cook your patties over a charcoal barbeque.

As for the mix, if you can’t find any saltines, you can always replace them with other types of crackers. Just make sure that they’re salty. The dish can be eaten hot off the oven but, if you want to get more kicks out of it, stick in the fridge and leave it overnight. By morning, the patties would have sucked in all that delicious gravy. You can heat them up in your microwave or in a pan with boiling water.

That’s it for my Cannish recipe! What do you guys think about this SHTF dish? Hit the comments section and let me know your thoughts.

Before you go, you may also like:

This is more than just about your guns…
How to survive any medical crisis situation with ease
10 Easy Steps to Secure your privacy
Secret Military Solution For Power Independence

DIY Unlimited water source
Why a food reserve is way better than the Federal Reserve
Lost Skills of our Ancestors that still work today

Anyway, the recipe’s pretty straightforward and if you have a good pressure canner, you can keep this stuff in your pantry for at least three months if not more.

I would lie if I said that I don’t envy all those wonderful homesteaders who managed to put a couple of bucks outside for the root cellar. Yeah, those things are really great (if you have them, of course) and not to mention very useful during any kind of shit hits the fan situation – a hole in the ground, some stones, a couple of shelves, and you’ve got yourself a gigantic fridge capable of storing veggies, legumes, pickles, and whatnots.

Ingenious, that’s what it is! However, if your home doesn’t come with a root cellar, building one from scratch takes a lot of time, energy, and, yes, a shit-load of money.

Fortunately, there is a way to tap into Mom Nature’s icy powers without the need to fork over too much cash. Being a very determined guy, I have searched high and low for ways to recreate a root cellar without actually having to build one. Sounds crazy, right? Not in the least, as you’re about to see.

The idea to write this short and sweet piece came to me after watching a documentary on National Geographic about ancient food storage methods. Can’t remember the name of the show, but there were these two guys traveling around the world and interviewing homesteaders about how they make food last longer.

In the last part of the show, there was this man from China who was quite a bit of a local celebrity, thanks to his top-notch Kimchi. For those of you who don’t know, Kimchi is Asia’s version of pickled cabbage. However, instead of using canning jars, homesteaders would place the thinly-sliced cabbage inside a ceramic jar, which would later seal with wax before burying it in the Earth.

So, with this in mind, I snooped around the Internet and found a simple and cheap way of making a mini version of the root cellar using only an old metal barrel. Here’s how to whip up a backyard cellar in order to store your veggies.

Gathering the necessary materials

For this project, you’ll need the following:

  • A shovel.
  • A barrel (I would go with a galvanized metal barrel because they’re easier to clean and fare much better underground compared to the plastic ones).
  • Rocks (shape and size don’t matter).
  • Straw.
  • Several pieces of plywood to cover the lid.

Ready with the gear? Neat! Let’s get to work, then.

How to build a mini root cellar in the backyard

Step 1. Find a suitable place to dig a hole. I would advise you to place your barrel\future root cellar in a sunny spot. You should also make sure that there are no water pipes or electrical lines running nearby.

Step 2. Once you found a suitable location, grab your shovel and start digging. The hole will need to take the shape of the barrel. As for depth, it all depends on the size of the barrel. Just be sure that the rim stays on top, with the remaining underground.

Step 3. After you’ve finished digging the hole, remove any deep roots or pebbles from the bottom. Moreover, ensure that the end of your pit is dry.

Test the ground – if it feels moist to the touch, it means that there’s water underneath which is a big no-no. I know it’s annoying, but if this happens, you will need to find another location for your root cellar. Mark the spot in case you’re thinking about adding a well to your property.

Step 4. Fill the bottom with the rocks you’ve brought.

Step 5. Place the barrel on top of the rocks. Ensure that the body of your barrel remains below the freezing line while keeping the rim up top.

Step 6. Place some earth around the barrel to seal it in. Don’t put on the lid yet.

Step 7. Prepare the veggies or fruits for storage. If you’re not sure about the thingamajig’s cooling action, you can try it out on a couple of potatoes.

Step 8. Place a handful of straw on the bottom of the barrel.

Step 9. Place your veggies on the straw. You can add more vegetables if you like. Just remember to put some straw between your veggie layers.

Step 10. Put the lid on the barrel, put the plywood boards on top, and cover with dirt. Congrats! You’ve just made your first backyard root cellar.

Additional Consideration on Mini Root Cellars

Building’s the easy part, but knowing what and how to store – that’s a bit challenging. The first rule of the game is never to mix your veggies with fruits. If you plan on storing fruits, you should consider placing a second root cellar.

The reason why fruits and veggies should never be placed in the same barrel is because of ethylene, a plant hormone which induces ripening in fruits. The same substance that makes fruits yummy-yum-yum will cause your veggies to ripen and rot a lot faster.

A root cellar built in this fashion will allow you to store food at a decent temp (somewhere between 32- and 40-degrees Fahrenheit), with humidity at around 95 percent.

For this reason, you’ll be able to store even short-lived veggies such as cauliflower, brussels sprouts, celery, kale, endive or leaks. If the seal holds, you can look forward to a scrumptious carrot-based dish even after six months. As far as fruits are concerned, you should ensure that your root cellar has a bit of moister compared to the one used to store veggies.

After consuming every veggie or fruit from the barrel, I would recommend giving it a good wash with the power hose and use plenty of detergent. I can’s put my finger on it, but I believe that this kind of contraption can also be used the summer to keep your fruits and veggies cool.

In most cases, the mini root cellar can extend the shelf life of fruits and veggies by at least a couple of months, with one exception – kale. If you’re planning on storing some kale, keep in mind that you can’t keep it in for more than two weeks.

Think I’ve missed something? Have another way of building a root cellar in your backyard? Hit the comments section and let me know.

If you didn’t start digging, you may also want to check out this offer coming from our partners at Easy Cellar. As well as the many benefits of having one in your backyard.

A hole in the ground, some stones, a couple of shelves, and you’ve got yourself a gigantic fridge capable of storing veggies, legumes, pickles, and whatnots.

I admit that I’m somewhat of a hoarder when it comes to food. No shame in this, only the fact that I’m on round-the-clock freezer and fridge cleaning duty. Yeah, I know it’s kind of a bummer to take a garbage bag and throw away that awfully good food just because you consider your family’s needs nor the fridge’s capacity (true story).

Anyway, after cleaning the fridge this morning, a thought stroke me: what if there’s some magical way of telling if the food’s safe to eat or not? Well, that would spare the trouble of having to clean the damned thing each week, not to mention the fact that I would probably save a lot of money.

As a prepper, you probably know by now that food past its prime is unsafe to eat, no matter how SHTF-ish the situation gets. This is the reason I’ve spent the rest of my day searching for a way to tell apart rotten from safe to eat food. Yes, I needed to ask Google for directions because I’m really bad at colors and, because of this damned cold, my sense of smell is close to nonexistence.

So, before you grab your garbage back to summer-clean your fridge, freezer or both, you may want to take a closer look at my kick-ass list on how to figure out if your food’s still good or packing a six-shooter.

  1. Soggy edges

Could never tell for sure how off my veggies were. I always assumed that as long as they don’t give off a funky smell, they’re good for eating. Dead wrong! Apparently, soggy edges, especially in green-leafed veggies like lettuce, kale, spinach, watercress or cabbage is, in fact, the first sign of spoilage.

Yes, I know that it’s a no-brainer, but as I discovered, people usually disregard this part, telling themselves that the veggie’s safe to eat if you cut around the soggy part. So, if you see any sogginess, brown patches or if the vegetable sort of deflates, it means that it has gone bad and, therefore must be thrown in the trash can.

  1. Discoloration

Of course, nothing spells “spoilage” better than an unnatural color. However, in some cases (red bell pepper) it’s hard to tell if that’s part of the vegetable’s life cycle or a tell-tale sign of spoilage. The best way to see how fresh your veggie is would be to make a small nick on the green part. Pull it aside. If it’s green on the inside, it means it’s safe to safe. On the other hand, if it has a brownish tint to it, do yourself a favor and throw it in the trash.

  1. Molding

While you’re cleaning your fridge and freeze, you may want to take a closer look at the bread and any other pastry you may be hoarding. See, no matter how well you keep your bread, there’s always that chance of mold growing on it. If you see any, throw it away as fast as you.

Heard a doozie some time ago that moldy bread may be safe to eat, at least for a couple of days, if you remove the moldy part and stick the loaf in the oven for 10 minutes. That’s a big no-no, and I would advise you to throw away the bread as well as the other stuff it came in contact with.

  1. Limpness

Veggies such as green beans have a limp-type of aspect after being kept in the fridge for too long. If you see any of that, it means that the legume is way past its prime, meaning that it has lost all nutritional value and could severely compromise your health if consumed. Yes, I know that most of you are in the habit of quick-freezing green beans and other stalky veggies.

Still, the freezer’s not always the best option for long-term food storage. Sure, it can extend the shelf-life by a couple of weeks or even months but, eventually, all of it will go bad. In case of veggies look for paleness and a thick layer of ice. As for meat, ice plus a violet tint equals garbage bag.

  1. Foul smell

The nose always knows! If you pick off any strange odor coming from your food, then it’s more than safe to assume that it really has gone bad. Meat will give off a rotten smell, while veggies will smell just like forest fungi. The same smell can emanate from eggs and eggplants. Keep in mind that eating rotten stuff can result in food poisoning or worse.

  1. To float or not to float?

In some cases, it’s quite difficult to figure out if they’re spoiled or not. Take eggs for instance. If there’s no expiration label on them, it’s nearly impossible to tell the difference between a fresh and an old one. Luckily there’s a test you can use to figure out if the eggs are safe to eat or not. Fill a bowl with cold water and place all your eggs inside. If they went under and lay flat on their sides, it means that they’re fresh. If not, then you should consider going to the store to buy a new carton.

  1. Discoloration in meat

There’s a bit of an argument on this one. While some say that meat discoloration is solely the result of poor packaging and exposure to air and, therefore safe to it, others argue that meat turned grey or brown should be tossed in the trash. Can’t say for sure which side is right, but my humble opinion, it’s not a good idea to begin experimenting on food. Best to throw away anything that has an unusual color.

That’s it for my short and sweet guide on how to tell if the food’s still edible or not. As always, if you feel that’s, I’ve missed something crucial, do hit the comments section and speak your mind.

Before you grab your garbage back to summer-clean your fridge, freezer, or both, you may want to take a closer look at my kick-ass list on how to figure out

There’s nothing more American than bacon, and don’t even try to deny that. We love it, cherish it, and with good reason since breakfast isn’t the same without those mouth-watering, fat-laden pork strips. I know that for the most part bacon’s a big dietary no-no, but what would life be if we couldn’t indulge on simple things like bacon?

Yup, you’ve guessed it – since he’s a big fan of bacon and, to that end, he has searched high and low for all kinds of wacky ways to make those juicy strips last longer. That’s the trouble with bacon I guess – you’ve got to cook it as fast as possible. Otherwise, you will end up with some bad to the bone meat (insert guitar riff here), along with a lot of crushed breakfast dreams and hopes.

Anyway, since yours truly hasn’t better things to do around the house than looking for ways to preserve food, in one of my scavenger hunts, I’ve stumbled upon a kick-ass bacon storage method. Of course, I couldn’t resist the urge of writing about it and sharing it with you wonderful people. What stroke me the most was the method’s simplicity.

Come to think of it; it’s almost elegant. What’s even better is that, according to the guy who recommended it, by following a couple of simple steps you can potentially increase the bacon’s shelf life by at least 15 years if not more.

As far as the ingredients are concerned, I’ve only tried it on a single batch of common supermarket bacon. Still, if you’re the kind of person that fancies pancetta or prosciutto over bacon, you could try canning those as well (as someone who a lot of cooks, I can tell you that there’s virtually no difference between the three types of meats, except for the fancy names).

Well, time’s a-wasting, and you’ve grown tired of hearing me talk about my buds and exploits. So, without further ado, here’s the well-kept, military-grade secret of storing bacon.

Ingredients and materials:

  • Bacon (as much as you can find).
  • Pressure canner (I use a traditional one).
  • Canning jar (be sure they’re sterilized).
  • Parchment paper (use the unbleached kind. I don’t have some nearby, use masking paper instead).

How to prepare

Step 1. Get your pressure cooker ready. If you opted for the no-power version, it would be a good idea to bring it to a boil before placing the canned bacon inside. As for the electric version, plug it in, pour water inside, and set the pressure between 10 and 15 PSI.

Step 2. Take the parchment roll and use a pair of scissors or sharp knife to cut a long piece (it should be at least 18 inches in length).

Step 3. Get your bacon out of the fridge and separate the slices.

Step 4. Arrange the bacon slices on the parchment. Don’t leave any gaps between them. You’ll see in a moment why this is essential.

Step 5. After arranging the bacon on the parchment, fold over both paper and bacon in half. By the way, someone suggested that you can make the bacon last longer in the fridge or even in a space without refrigeration by coating each piece with a very thin layer of maple syrup.

‘Twould be better to do this after placing the bacon on the parchment paper. Otherwise, the pieces will be a sticker and, therefore, harder to arrange on paper.

Step 6. Upon folding the paper into half, grab the other hand and start rolling it. Just like you do with the newspaper when the dog goes number two on your grandma’s Persian rug. Tuck in the excess paper at both ends to ensure that the parchments don’t unravel inside the jar.

Step 7. Put the Bacon Parchment of Absolute Truth and Might inside a CLEAN and STERILIZED canning jar. Regarding the latter part, there are various ways to do it. If you’re just as lazy as I am, fill a tub with hot water, pour liquid detergent, and dump your canning jars inside. Let them soak for about half a day.

Afterward, take them out and rinse out the excess detergent. Still, if you want to take the high road, you can always boil the living Hell out of those jars before using them for canning. The choice is entirely up to you.

Step 8. Put the lid on each jar and tighten them gently. You won’t need to apply too much force as your pressure canner will do all the heavy lifting.

Step 9. If the water inside your pressure canner has reached the boiling point, carefully place the cans inside. Put the lid on, set the pressure to 10 PSI, and let them simmer for approximately 90 minutes.

Step 10. When it’s over, kill the fire, pop the lid off the pressure cooker, and carefully remove each jar. Place them on a wooden support or something and allow them to cool down. Word of caution – don’t try to force-cool the jars. Heard my mother-in-law say that ‘cooked’ jars are liable to blow up in your face if you run them under cool water or submerge them in ice.

Your best choice would be to leave them be for the time being. Another thing I should mention is that the canned bacon will leave quite a lot of fat on the bottom of the jar. Don’t concern yourself with that part, ‘cause it’s normal.

That’s it! You now know how to can bacon, prepper-style. As I’ve mentioned, this method extends the bacon’s shelf life by at least 15 years. Perhaps even more. To store, either place the canning jars inside the fridge or stick them in the pantry you usually keep your emergency supplies.

Works both ways. To eat, pop the lid, unroll the bacon, cook, and enjoy. I personally like to eat plain canned bacon – it’s less smoky compared to the fresh variety, but has a gentle aroma that reminds me of meatloaf.

What’s your take on this awesome canning method? Let me know what you think in the comment section.

What’s even better is that, according to the guy who recommended it, by following a couple of simple steps you can potentially increase the bacon’s shelf life by at least

Food will always be king and the reason we have enjoyed the prosperity we have is because of easy access to food. In America, we waste 50% of the food we produce. That is astounding and gross. To those who survived the great depression of the 30’s the idea that any food could be wasted would be unbelievable.

So, how do we go from food being wasted to experiencing something like a global famine?

We have pressed the soil, resources, and planet itself, to a point where all are ready to break. The breadbasket of America and other massive agricultural areas are operating on soils depleted of nutrients and as the worlds, demand continues to grow there is massive pressure to achieve big yields year over year.

Let’s look at 4 factors that are going to affect a famine that starves billions.

Disease

There are some dangerous diseases affecting crops all over the world. UG99 Wheat Rust is a disease with no known cure that is affecting grain populations in America and Mexico. This disease could affect nearly 20% of all wheat crop is in danger of being infected but nearly all wheat crops could be infected by the disease.

There are other’s out there like Mad Soy Disease which is affecting soy crops in Brazil but has been isolated to the northern regions of the nation. We live in a world where people and commodities spread and diseases with them.

It would seem like its only a matter of time before big cash crops are leveled by disease

Soil Quality

The condition of the Earth’s topsoil is abysmal. It is estimated that 1/3 of all growing areas are losing topsoil faster than it can be reproduced. This means that every year farmers must pump loads of fertilizer and other nutrients into the soil in hopes that the plants will have enough to survive.

This drastically affects the quality of the produce and grains that are grown each year. Ideally, you want soil that is full of nutrition and it will impart that nutrition into your food. Instead, we are left with food that is mass produced but exponentially less nutritious than the food being produced in the past.

Before long, our foods will be more chemical and less nutrient or, worse yet, the crop yields will suffer dramatically.

This will lead to worldwide malnutrition and human disease.

Natural Disasters

We pull hundreds of millions of gallons of water from the ground to water these crops. Around the farmland, we decimate the trees and wild-lands. This land is then paved and is no longer capable of absorbing water.

Massive flooding is the outcome and it’s now affecting our growing areas. Without expansive wild areas to absorb the water from large storms, the water rushed to agricultural areas and worst of all it stays there.

The Earth’s natural disasters and our drainage limitations are putting us at a huge risk. The last bomb cyclone in Nebraska left 1,000,000 acres of land underwater and killed almost the same amount of calves.

With spring rains coming this could have lasting and devastating effects on food production. It only takes a few of these large-scale agricultural areas to be disrupted, plantings reduced or eliminated altogether, before the world has to tighten up on supply and people start going hungry.

Personal Food Security

With these three issues potentially having drastic effects on the food system, its safe to say you need a backup. In fact, you need a few. You want to buy, store and grow your way to personal food security. Of course, this is going to take planning and knowledge.

  • Gardening

Whether you go the route of building a food forest, hydroponically growing food, green housing or traditional food growing.

  • Livestock

From things as complicated and as expensive as raising cattle to simply raising chickens for eggs, you need to consider what you can do in terms of raising food-producing animals

  • Food Storage

Food storage is all about planning and rotation. In order to excel at this, you need to know the basics and remember, store what you eat!

  • Preservation

From dehydrating to canning, you will also want to know the majority of these skills and use them to both extend your harvest in the garden and build food storage

  • Foraging

There are food growing all around us, but you need to understand when and where to find them. These will be ancillary calories, but they will help.

  • Hunting

Though season dependent, hunting and trapping can both be impressive ways to put meat on the table or in the freezer.

Getting Started

There is a bit of a knowledge barrier and a lot of practice that goes into all of these. You need a trusted resource that will offer you information on these topics. You could peruse the internet and read various websites to get information on these topics.

A better move is to have a tangible resource that has all of this information in it. This puts a reference tool at your fingertips whether the lights are out or not!

Wouldn’t it be great if something like this existed? Well, you may want to look for The Doomsday Book Of Medicine. This book includes information about the above info and all the info you will need to reach a level of personal food security.

Oh yea, this is also packed with other information about prepping beyond food. You can find it all HERE.

I am not saying it’s the only resource but it’s damn sure a good one!

Conclusion

As the population grows, we are going to face a greater strain on the food system. Nature is hitting back against our modified mono-cultured crop systems and things like wheat, corn and soy production will be disrupted.

This time of excess cannot go on forever. We simply cannot pull out naturally occurring nutrients and replace them with chemicals as a long-term solution. Its time to take control of your own food production. You can do this.

With the right resource, you will find yourself escaping the coming famine and building your own personal food security. The Doomsday Book Of Medicine helps you all the way.


In America we waste 50% of the food we produce. That is astounding and gross. To those who survived the great depression of the 30’s the idea that any food

When Hurricane Sandy hit the Eastern board of the United States, it left millions of households without power, and most importantly, food. With preparations for the expected power outage, the food outage would not have been a problem even if grocery stores, crops, livestock, and plants had been flooded, all thanks to proper food storage.

Food is essential for survival. Whether it be an earthquake, hurricane, super typhoon, floods, or any natural calamity, you may lose access to water and food supply. As such, most people go for keeping emergency food storage. While for others, storing food is important for small emergencies. The question is, how do you effectively store food? Reports come in with stored food filled with salmonella, E. coli, and other microorganisms, which, instead of saving you, would put you in the hospital. More than keeping the right amount of food, storing them right is crucial. Here is a survival guide to food storage to keep you and your family safe.

1. Know The Right Types Of Food

Know which foods to store and how to store them. Keep your emergency survival food supply varied but make sure to have honey, salt, milk, and wheat in your supply. To encourage variety in your supply, go for other grains, beans, tomatoes, cheese, and even onion. If you are storing foods in jars, make sure that the jars are airtight sealed to avoid the development of bacteria within. Marinated foods should go into the freezer and kept there until used.

3892719681_0ee52ef98c_z

The types of food you store could go on and on but what you store is extremely important. Go for non-cook foods that could be served even during a power outage. Have MREs (Meal Ready To Eat) stocked as well as canned goods. Keep spices as well to give flavor to the food you will be preparing in times of emergency.

2…And Consider The Size!

Size matters, and so does the quantity. The volume of food should be enough for you to keep in the storage room. Choose containers that can be easily stacked, avoid transparent containers, and do not forget to put labels on everything. The labels should have the contents of what is inside the container and the date it was processed; including the date it was stored. This way, you would easily know when to use it and when to replace it.

3.Timing Is Everything

Yes, you have to get the emergency survival food supply going but you should not rush into getting this done ASAP. Take the time to learn the basics of food storage and keep it consistent. Start from a small food supply and add items to it slowly. You may start by using your refrigerator as your storage area. Utilize your freezer and learn the canning process to utilize your cupboards as well. If you have learned the proper storage and restocking techniques, this is the key to start working on a larger room for food storage.

4358926764_51d156245b_z

4. Find The Perfect Storage Place

One of the many food storage tips you will hear is finding the perfect storage place. Your storage room should be cool, dry, and well ventilated. If you plan to store dried goods, you have to prioritize the temperature you have in your room to avoid spoilage, which is a waste of money. A cool storage room inhibits the growth of ethylene, a ripening agent, along with other decay producing enzymes. The storage room you choose also dictates the quantity of the emergency food supply you will be able to store. Keep your room small, having too big of a storage room makes it hard to do inventories in. Remember that this is your personal emergency food supply in case of natural disasters so keep it properly stored.

8452840660_4bc9292927_o1

5. Restock!

If you have worked on your emergency food supply, you should know that these would only last for a couple of months up to a year. Create a regular rotation to replace the older items on the storage supply. Remember to replace everything that you have used up and those that are spoiled. Make it a part of your regular routine to keep the food fresh.

Remember that everything that goes in first must be the first to go out, starting from the ready-to-eat foods. Canned foods, which have rust on the lid, are already spoiled so be aware of these signs such as molds, discoloration, and smell.

10457086584_a32b742559_z

6. Keep It Listed

Start a food plan with a checklist of food you need. Not only will this help your shopping faster, this will also help you keep track of the items that have been used up and needs to be replaced, from the canned goods up to the frozen food. Without a list or inventory, your food stock may go down to a single can of beans or to a jam-packed storage room.

6629253387_4cca7d39f3_z

7. Consider The Humidity

Consider the humidity in the room. Have the foods properly stored in their original packages. This packaging is designed for the food to be in great condition given a room temperature or even too much humidity. Humidity also increases the probability of molds to appear on your stored food.

8. Avoid Sunlight

To keep the longevity of food, avoid storing them in direct sunlight. Exposing food in direct sunlight promotes oxidation, decreases the nutritional value, and most importantly, spoils it easily. To keep this from happening, cover the windows and other areas which may allow sunlight to go through. Watch out for foods rich in vitamins A, D, E, and K because they are quick to degrade under sunlight.

5341991330_bb0a6a94bf_z

9. Clean, Clean, Clean

Storing food effectively is based mostly on the proper handling of food when you store them. Wash your hands, clean the room, clean the containers, and don’t let any insects get inside the storage room. Keep the fresh produce, raw foods, canned goods, and ready-to-eat foods separated from each other.

Nowadays, having food storage is not a choice but an essential part of every household’s survival plan. This list will help you start your food storage right.

When Hurricane Sandy hit the Eastern board of the United States, it left millions of households without power, and most importantly, food. With preparations for the expected power outage, the


Food storage has generated a lot of controversy over the decades and will do so over the next decades if SHTF fails to arrive.
How do you tell if someone is a vegan? They tell you!!!

[Disclaimer: I have been a vegan for the last five years and I was a vegetarian for twelve years prior to that].

Meat canning/storing is not my thing nor my focus. That said I have zero intent to be 100% vegan in SHTF but frankly the concept of not being mainly vegan in SHTF for everyone who is prepping is likely unachievable and unhealthy. In SHTF I plan on eating meat, fish, and eggs but not dairy other than goat cheese (I am serious anti-casein- the protein in dairy). In fact I would eat anything to avoid starvation in SHTF and I plan to.

I store what I want to eat and so should everyone. This article is just looking at my specific case and specific circumstances here outside Toronto. Obviously if you live in warmer climes you can plan on a mixed farm and enjoy fats from pork and cattle. This would not really work in an area with a growing season of six to seven months maximum so here are my thoughts on long-term food storage issues in places like Canada.

Fat

Living in Canada one thing I always worried about when storing food for SHTF was fat (fat is oil). I am nowhere near walrus or seal meat so what could I do? Nuts are a possible idea and certainly I have black walnut and acorn near at hand and have experimented with both as a source of fat as well as protein. They take time, effort, and knowledge. Harvesting might be dangerous or impossible depending on the scenario. Squirrels and rodents I should be able to get but they have little to no usable fat. Same with deer but I think they will be very rare near any city for years after SHTF.

Carrington Farms Organic Extra Virgin Coconut Oil

Storing nuts and oil seems pointless given the really short shelf life of both. Of course, with notice, I’d hit Costco and buy bulk cooking oil, olive oil, and nuts but five years into SHTF those supplies would be gone or be rancid.

My answer is currently storing coconut oil. Not just any coconut oil but extra-virgin. A little goes a long way in supplying calories and essential fats. Storage is as simple as buying a small bottle or tub (I prefer glass) and placing one in each 5 gallon bucket.

How long does coconut oil last?

This supply can be used and stored relatively easily in most temperatures provided you keep the container size small. Once opened it will go rancid the same as other sources of fat. It can be frozen, heated, and repeat without any issues provided the container is unharmed.

The link above also gives useful information on telling if the coconut oil has gone off. I had expired peanuts and experimented with various methods of cooking and spicing to get rid of the horrible taste. Nothing worked. Expired oil is truly awful!

Protein

This is worth storing in small amounts. Nothing like a tin of SPAM added to white rice and beans for taste and protein in the apocalypse. Yet really the amount of protein should be very, very small. The SAD (Standard American Diet) truth is most people eat far too much protein for their own health. Excessive protein leads to kidney failure and a lot of other avoidable diseases.

Protein for me is in the category of condiment or small requirement. I mean small here! In SHTF one tin of tuna would be added to one week’s worth of meals per person. Would this make me as weak as a vegan? In SHTF I hope so and you can look up how weak vegan athletes are yourselves. As an ex-ultarmarathoner I can tell you most endurance athletes long ago went vegan or vegetarian.

Most of my added protein would come from beans and quinoa. Long term they are easily stored and reasonably priced. Quinoa in bulk is often available at Costco for $34 Canadian. Yet honestly protein from my garden will supply almost all of my needs and protein is the least important issue in SHTF yet the one many preppers are storing the most aggressively. They would be healthier and better off financially storing kale seeds!

Carbohydrates

I do not use sugar and have not for years. Still I like to think about my preps and it dawned on me a few bags of sugar would actually make a lot of sense in SHTF. A bit added to flour really helps the taste of bread and it is very cheap and stores easily. Again most of my carbohydrates would come from the garden and home-grown potatoes are wonderful! For storage I have lots of white rice and some pastas. This area I am not very worried about.

Of course being Canadian I also store maple syrup which is the best carbohydrate in the world, eh! I have spiles and tubes (food grade) to harvest maple syrup in SHTF once the ability to move around becomes safe. Anyone living near maple trees really needs to think on this and also other sap trees.

Smart Long Term Stores

Can you sprout? It is very easy and very helpful in many SHTF scenarios. Make sure you can do it and have the equipment to do it daily in SHTF. Why not store grains and seeds long-term that you can eat, sprout, and plant? This is as easy as buying organic chia seeds (they need clay pots for sprouting) and putting them in a Mylex™ bag inside some of your food buckets. Most dried beans are easier to cook and healthier to eat after sprouting for a couple of days.

Pink Gourmet Himalayan Salt

Vitamin C is a key ingredient for us all to live a good and healthy life. Storing it is an issue. Sure have lots of vitamin tablets but consider canning or strong lime and lemon juices. I cannot grow oranges up here but if you can then start now. I plan on using apples a lot in SHTF and storing blackberries and raspberries. These skills will be essentially long-term in SHTF so I have started now. Basic good quality bottles of jam is another essential and smart long-term storage item that I’d have in every food bucket. I cannot stand marmalade but I can added it to white rice easily enough so I store marmalade.

Salt

I am guessing everyone has salt but what about iodine? Those of us who live a long way from the ocean or on land that never was ocean will become iodine deficient in SHTF. Is your salt also a supply of iodine? It needs to be unless you live near the ocean.

I add very little salt to my diet at present but I have a small package of iodized salt in all my buckets for long-term use. I am expecting convenience foods to disappear in SHTF and the large and excessive amounts of added salt we all eat at present will be a memory. Plan for a lot of salt and make it iodized. If you check your preps and it is sodium chloride with nothing else listed and/or does not say “Iodized Salt” then put that aside and use for barter.

Dried Spices

Pepper, garlic, onion, turmeric, etc. are all easily available and store well enough for years If you have not put one in each of your storage buckets you might regret it after a year or more of living off your stored rice and beans. You can also store a lot of small plastic bags (UK coin bags are great for this) and divide up very small amounts for barter in SHTF. There are many spices available and buy one each time you shop. Variety is the aim once salt and pepper are dealt with. Hot spices are great but bottles tend to go off over time so grab handfuls at fat food places. Put them in a Mylex™ bag with lots of oxygen absorbers as their packaging is fast food not apocalyptic! Basil and arugula should be available to you via seeds as should mustard. A quick survey of your local area would find many greens available that will spice up food and help you stay healthy. Purslane and Dandelion are weeds for me but a snip them frequently to add to my salads now. Avoid harvesting near rods, polluted rivers, and dog walking areas!

stockpiling challenge

Conclusion

What do you store as long-term food and why? If you mess this up there’s no quick trip to Costco’s available in SHTF to fix it. Take a hard look at what you have now and think about how you will use it in SHTF. Can you make different textures and flavors easily? Will this food supply vitamins, fiber, carbohydrates, fats, and proteins in variety? Can the food stored be easily extended by wild foraging and/or gardening? When you open it will you be using the entire amount before it goes bad? Sure 5 gallons of X in the bucket makes you feel secure but can you use all 5 gallons before it goes rancid? Pack small Mylex™ bags inside the big buckets so you have both choice and shelf life after opening.

Hopefully my errors and mistakes here will get picked up in the comments section. I am not going to explain or justify my current diet nor why I feel casein is not a great thing to eat. This is about food storage and SHTF not current nutrition! Bon appetite!

  Food storage has generated a lot of controversy over the decades and will do so over the next decades if SHTF fails to arrive. How do you tell if someone is