HomePosts Tagged "First Aid"

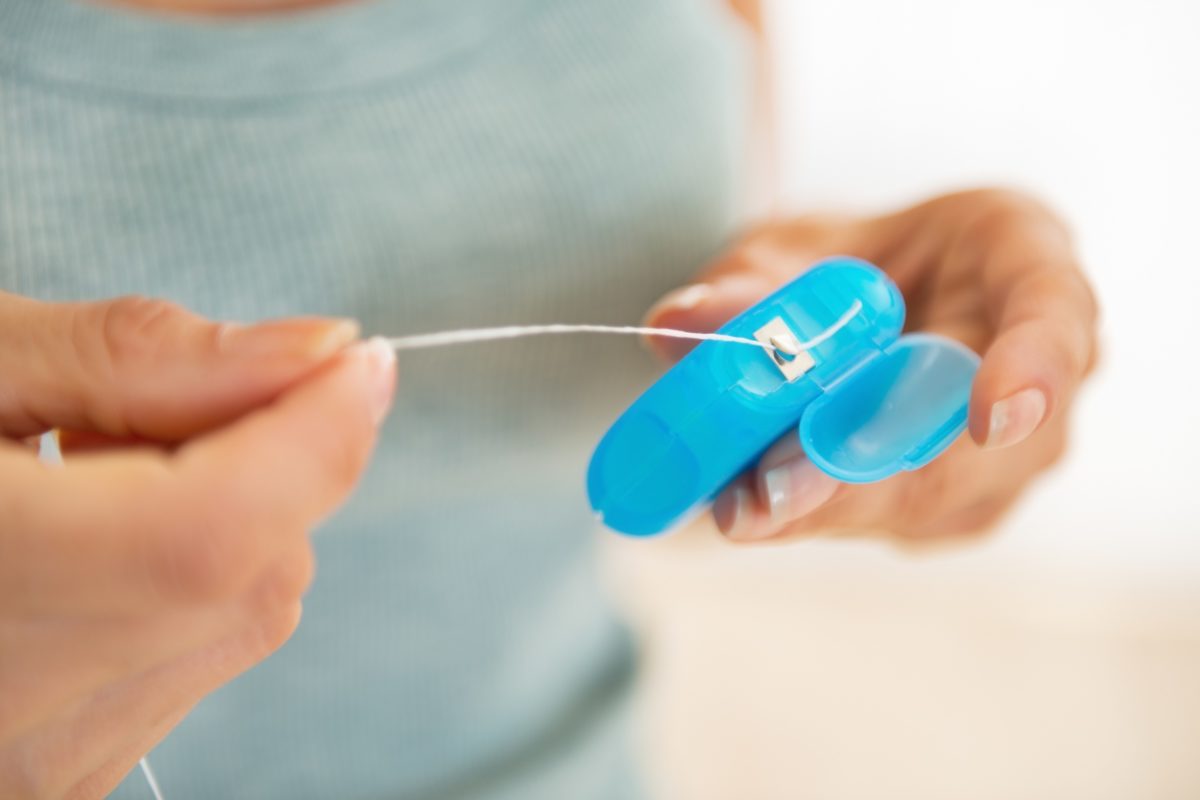
You’ve probably heard this one before – brush and floss before hitting the sack. I can wholeheartedly say that dental floss is the best thing to happen for yapper health right after ceramic implants. Have you ever stopped to wonder if the same stuff we use to floss our teeth can be used for other purposes?

Of course you did, and I have to admit that most of you can become very inventive when it comes to, let’s say, repurposing floss (you really should that news piece about that guy who ended up in his hospital after his SO tied him to the bed with dental floss for a wild sex game).

Anywho, floss is very handy to have around, especially when the shit hits the fan. It doesn’t take too much imagination that dental floss can be successfully employed as cordage when the need arises.

From crafting weapons to drying your clothes above the firepit, dental floss is a powerful ally, one that can help you get stuff done without too much effort. So, what are the survival uses of dental floss? Well, keep reading, and you will find out. Maybe I’ll even manage to surprise you.

Weapon-making

Though I can’t say that I’m very comfortable around weapons, bladed or otherwise, in case of an SHTF situation, you can craft yourself a sturdy weapon which can be used for hunting, self-defense, and both. Easy enough to do it – take a long pole and tie your survival knife to one of the ends using as much dental floss as necessary. You can also use floss as a bowstring if you can find a piece of wood with the right curvature.

Fishing

No fishing lines? No problem. Just cut a long piece of dental floss and tie the hook to the other end. If you don’t have anything on hand to act as a floater, you can always inflate a condom and attach it to the dental floss line. You can create your custom fishing box – just like a tinder box, but with fishing implements – using a small oval container (I fashioned mine from an old coconut shell coated with resin), a few hooks, dental floss, a floater, and some piece to act as a weight.

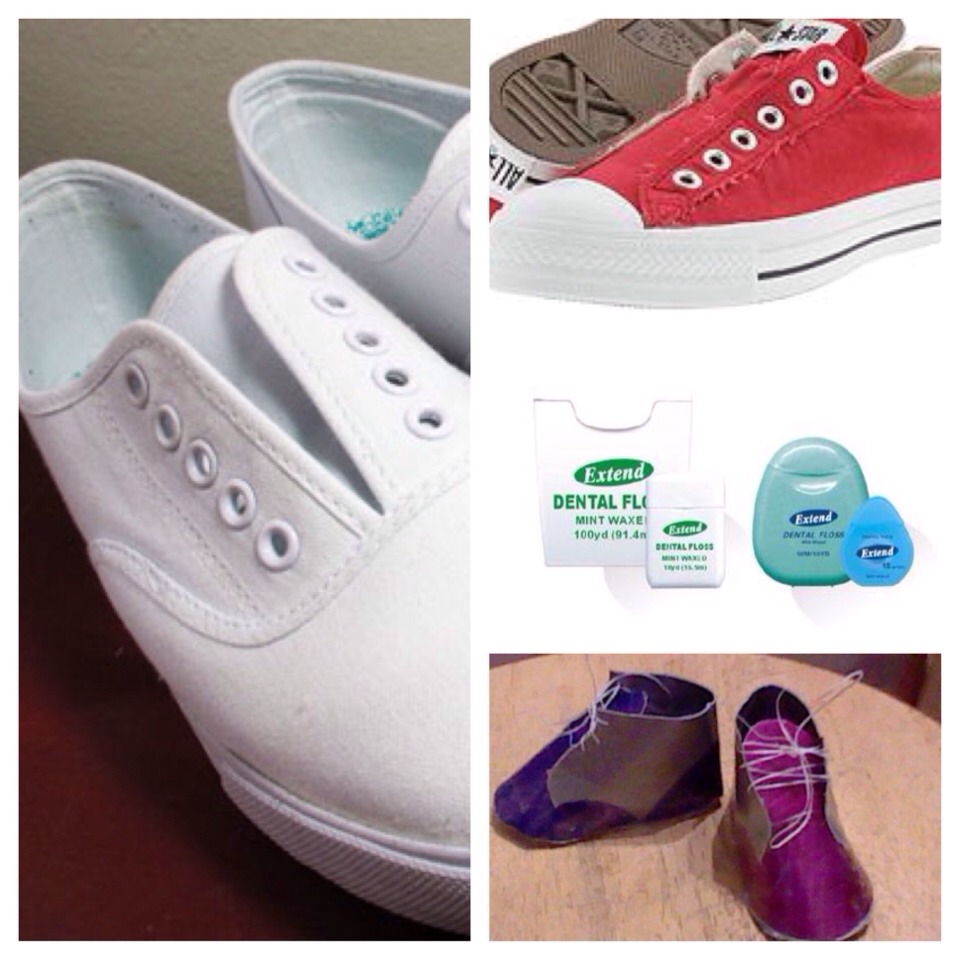
Tying your shoes

There’s nothing worse than a ripped hiking boot shoelace. But wait! It gets even better – no reason to cry over ripped shoes when you’ve got a spare, but that usually never happens. So, if you’re out and find yourself with nothing to tie your shoes, just grab a long piece of dental floss, cut it to size (use the other shoelace as a reference point) and carry on.

Drying your clothes

Anything can happen when you’re in a survival-type situation. I personally abhor anything that ends in me having to sit for any number of hours with soaking-wet clothes. Of course, you can always use the extras in your B.O.B, but that still leaves you with wet apparel.

The best and quickest way to dry them would be over a fire. Take two long sticks and insert them into the ground just about the firepit. Use your survival knife or another sharp implement to create grooves at each end of the stick. Cut a long piece of dental floss and connect the two sticks. Now that you have a clothesline, the only thing left would be to start your fire and hang your clothes out to dry.

Making a simple alarm

Whether you’re alone in the woods or have a small mountain refuge, you’ll need some sort of alarm system. Of course, when you’re still in contact with the rest of the world, you can always hit the local hardware store to purchase an alarm. However, when you’re out there, things take to change a little, in the sense that you will need to improvise.

To make a simple alarm for your overnight camp, plant a couple of sturdy sticks around your location and connect them using dental floss. Attach a couple of cans or empty container, and that’s about it. You may not be able to see what comes your way, but you’ll certainly be able to hear it long before it can set foot inside your tent.

Mend ripped clothing

I know that sewing is not on your top 10 favorite activities list, but any prepper should know how to repair his clothes, especially when there’s no one around to do it for him.

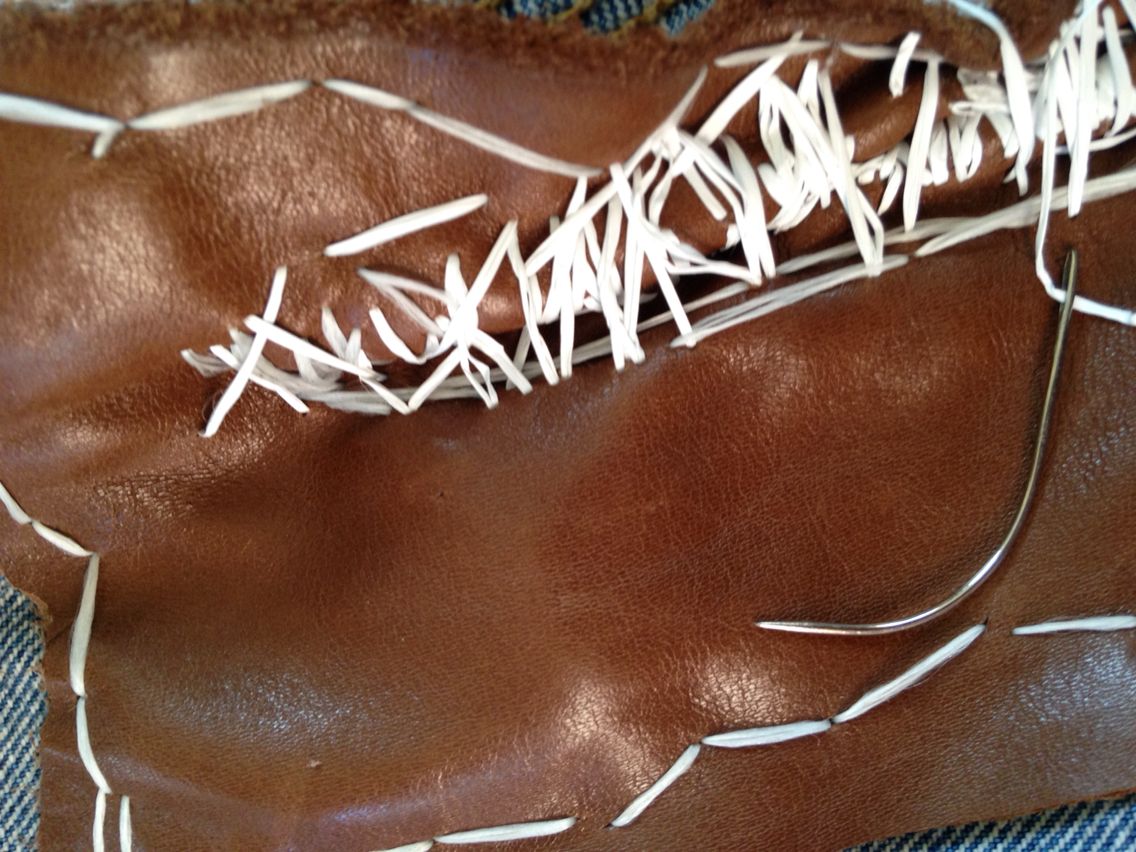
Sewing kits should be a part of your B.O.B. However, in case you’ve forgotten to throw in some needle and thread, you can always use a fishing hook and some dental floss to patch up your clothes. If your first-aid includes a suturing kit, you can also break open a pack and use the sterile thread to seal holes in your clothes.

Stitching up wounds

And because I already broached the subject of suturing, if you’re unfortunate enough to wind up with a big bleeder, you can always use dental floss to make stitches. As for the needle, grab a fishing hook from the kit, and throw it in the fire. You will also need something to hold the hook during the procedure – if your first-aid kit doesn’t come with a pair of straight scissors, you can always use your multitool’s plier.

After cleaning the wound with whatever you have on hand (I would recommend clean water and mouthwash), grab the needle by its midsection, run it through the first incision line, cross the gap, and piece the other edge of skin from beneath.

Pull the thread, grab the longer end, loop the thread four times around the pliers, open it a bit, grab the smaller end, and pull. Repeat the procedure until you close the wound. Congrats! You now know how to make simple interrupted sutures.

That’s it for my 7 cookie ways of using dental floss in an SHTF situation. Have something more to add to the list? Hit the comments section and let me know.

Before you go, you may also like:
Put This Spice In Your Shoes To Fix Toenail Fungus
The vital self-sufficiency lessons our great grand-fathers left us
Knowledge to survive any medical crisis situation
Liberal’s hidden agenda: more than just your guns
Build yourself the only unlimited water source you’ll ever need
Secure your privacy in just 10 simple steps

You’ve probably heard this one before – brush and floss before hitting the sack. I can wholeheartedly say that dental floss is the best thing to happen for yapper health

There is undeniable proof that some plants, not all of them mind you, have outstanding healing properties. One cannot turn to modern medicine each time he finds himself in an SHTF situation.

Sure, med stockpiling helps (check out my article on best over-the-counter painkillers), but you shouldn’t lose sight of the fact that most are made from artificial compounds that tend to put way too much strain on the liver and tummy. In fact, if you read the little label on every pain med, you would see that even the lightest one like Ibuprofen should be taken after a hearty meal.

So, here I am, talking about the remarkable properties of natural remedies. As a prepper, I’ve learned that Mother Nature is quite offering when it comes to healing plants.

Anyway, in searching through my drawers, I came upon this nice little notebook that belongs to my grandpa. Very nice, filled with great memories but, most importantly, some tidbits on healing plants that should be grown around the yard.

Needless to say, I started working on my backyard pharmacy project as soon as the nice weather settled in. For those of you who are not too fond of gardening or believe it to be a waste of time, energy, or money, think again. You really don’t need to be a rocket scientist to figure out that if something goes wrong, home-grown stuff will be more valuable than gold (that’s why I’ve decided to dig up a veggie garden the next time I head up to my hunting cabin).

Anyway, getting back to today’s topic, these plants I found in grandpa’s scrapbook are really something. I mean, beyond the fact that they can be used to give taste even to the blandest dish, they’re also neat in treating all sorts of health issues. Moreover, they’re stupidly easy to grow, require little care, and, if you have a head for business, you can probably make a lot of money by selling them (extra gigs really pay off).

So, if I haven’t bored you to death already, here are my choices in plants that you should definitely consider growing in your backyard.

  1. Basil

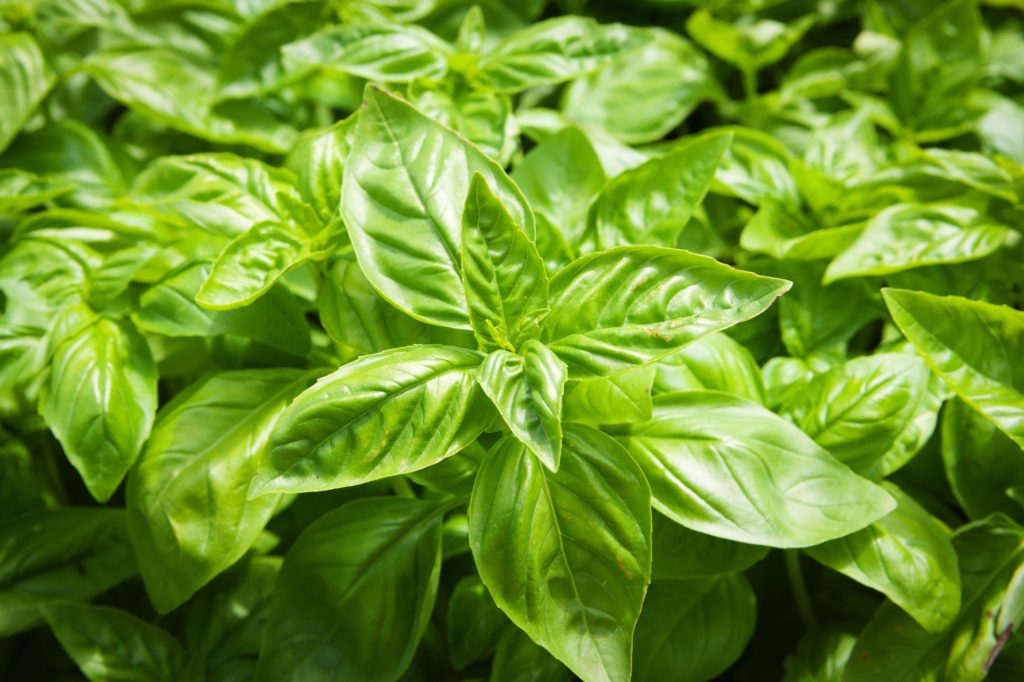
Entire books can be written on this topic, but I’m just going to stick to the facts. Basil is great for seasoning (I prefer the green kind over the dried variety), as its aroma is reminiscent of lime.

Apart from that, studies have shown that dishes made with fresh basil, tinctures, and teas are great for bringing down the cholesterol level, as well as reinforcing the blood vessels. Since I’ve acquired a taste for Italian dishes, I’ve used basil in virtually every pasta dish I cooked (even dropped a couple of leaves in my Tiramisu, but that’s another story).

Anywho, basil can be grown both indoors and outdoors, and it requires little attention. Just be sure the plants get at least six hours of sunlight per day. Don’t water them too much because they don’t need that much moisture.

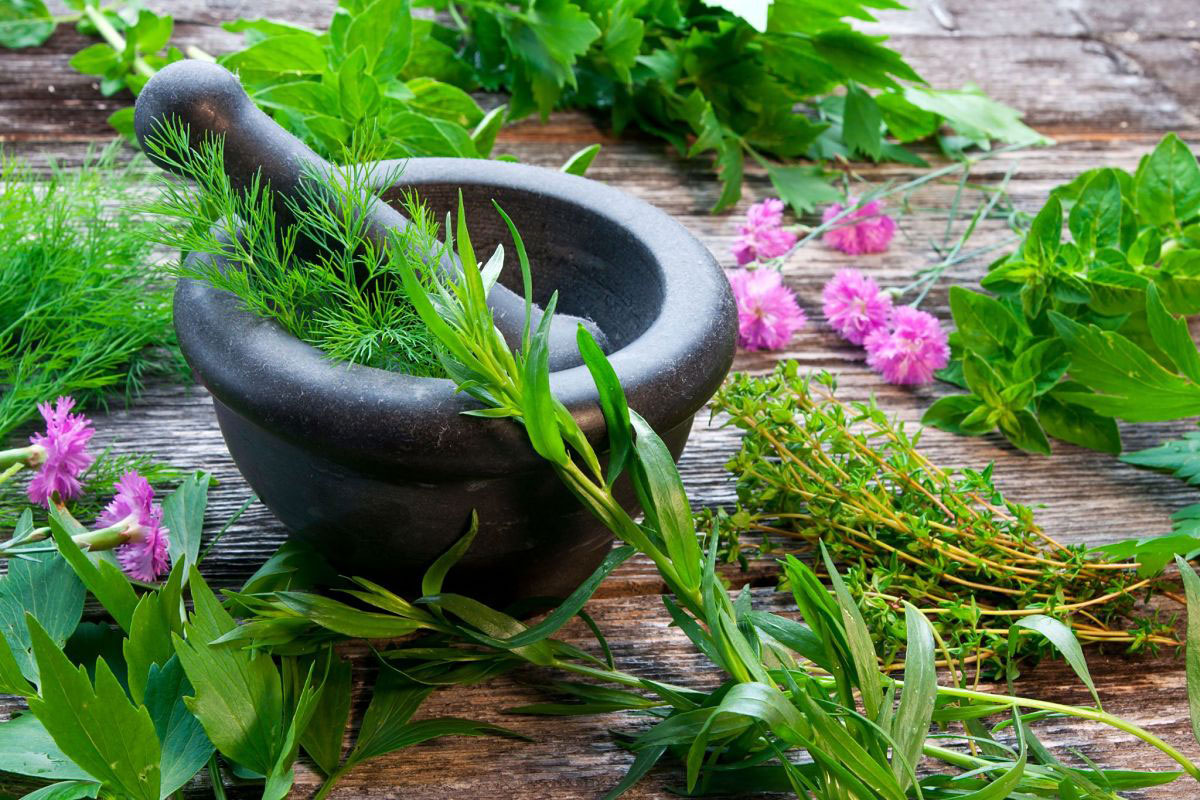
Tea made from basil is great for soothing the nerves. Just wash a couple of leaves, crush them in a mortar, and infuse them in hot water for a couple of minutes. That’s it. You can add some honey and ginger for some extra spiciness.

2. Sage

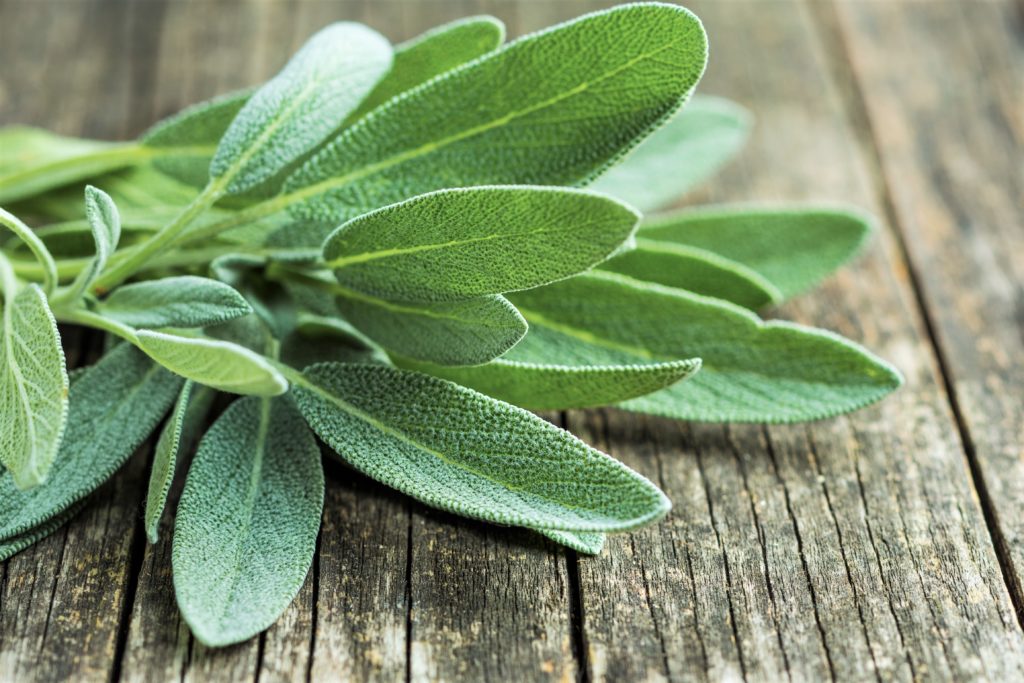
No, not that kind of sage. I was referring of course to the herb which gives a strong, almost earthy-like aroma to your dishes. Grandma always uses to put sage in all her meat dishes (you should try adding some dry sage to your pork chops next time).

Just like basil, it’s very easy to grow around the house. The only trick to sage is to don’t overwater and overfertilize the plants. Teas and tinctures made from sage are great against pharyngitis, tonsillitis, and for sore throats, in general. The plant’s crushed leaves can be made into a poultice, quite efficient at dealing with cuts, bruises, sores, and burns.

To make tea from sage leaves, rip two or three, wash them thoroughly, and put them I cup. Add boiled water and allow them to infuse a couple of minutes.

3. Rosemary

This plant will always remind me of The Sleeper, one of Poe’s most awesome poems (“The rosemary nods upon the grave, the lily lolls upon the wave.” Sorry for that flight of fancy, guys. Anyway, rosemary is great for any kind of dish, especially pork cuts and fish.

As a natural remedy, it boasts quite a record: detoxes the body, relieves migraines, improves blood circulation, rids you of morning breath, and also helps with any bouncy-bouncy (sex) related problems. Granny wrote down that rosemary works best if it’s grounded into a fine powder. Take a teaspoon of this stuff every morning, before breakfast. Keep into under your tongue for 15 minutes then swallow.

4. Parsley

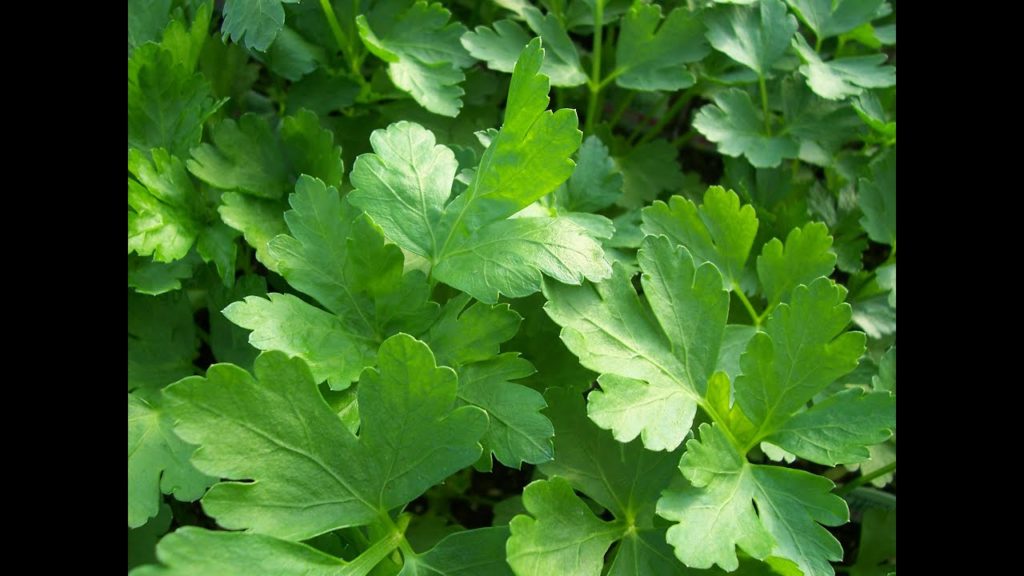
No soup or broth would ever taste the same without parley. I myself make sure to have an ample supply of this plant, regardless of the season. As a health aid, parsley’s packed with vitamins A and C. More than that, the increased iodine content makes parley not only great anti-rad food but also a great thyroid regulator.

If you have kidney stones, juice made from freshly-picked parsley leaves can alleviate some symptoms, especially going to the toilet for the number one part. Just stick a handful of parsley leaves into the blender, add a small cup of water, and some lemon juice.

Mix it, pour it into a mug, and drink it on an empty stomach. You should also know that parsley’s also good for the ladies if it’s first eaten by gents (wink, wink).

There is undeniable proof that some plants, not all of them mind you, have outstanding healing properties. One cannot turn to modern medicine each time he finds himself in an

As preppers we stock up on supplies that we think we will need in an emergency. The order of priority for these items is usually tied to what our bodies need to survive. We can only live for 3 days (on average) without water so we make plans to purchase storage containers and water filtration systems to cover that base. We next need food, so we stock our pantries full of store-bought and freeze-dried food for a situation where the grocery store is either unreachable or out of food. Security and shelter round out the list of initial survival concepts you want to take care of but what else is there?

There are so many aspects to preparedness, but one of the more important ones to consider is medicine. If the grid goes down, the pharmacy will be in the same boat as that grocery store. If you are still able to purchase items (grid up), they may be sold out with no reasonable hope of resupply. You don’t want to find yourself in a situation where you need simply medical supplies to treat illness or injury and aren’t able to procure them for your family. Thinking about your families’ health from an injury standpoint isn’t as sexy as buying a good SHTF weapon, but knowing which medicine to stock up on for an emergency will allow you to plan for disruptions and possibly keep your family more healthy when they need it the most.


What are important types of medicine to stock up on?

This list certainly won’t take the place of a hospital pharmacy and it surely won’t give you the skills you need to treat every injury, but even the most basic of medical supplies and a little knowledge could help you out. When shopping for medicines or thinking about first aid, I consider what types of injuries you could encounter in a disaster.

Disasters both natural and man-made bring death, disease and injuries. The medicines you need to stock up on should take some of these into consideration while not addressing every conceivable ailment under the sun. To achieve a basic level of preparedness I would recommend having the following items on hand.

Pain Medication / Fever Reducer

By pain medication I am referring to over the counter pain relievers. This can help with anything from headaches, sore muscles from too much exercise after SHTF or injuries. Acetaminophen (Tylenol) is good for relieving pain and fever. It is generally less irritating to the stomach and is safer for children but can be toxic to the liver if you take too much of it.

Aspirin, Ibuprofen (Advil, Motrin) are examples of non-steroidal anti-inflammatory drugs (NSAIDs). These reduce inflammation caused by injury, arthritis or fever. They can also assist with pain associated with menstruation.

Children shouldn’t be given aspirin as it has been shown to cause Reye’s syndrome and can cause other bad effects. For pain medication I would have at least a bottle or two of your favorite pain reliever. For smaller children who might take liquid or chewable tablets I would stock up on that also. You don’t want your child to experience a fever without having medicine to bring that fever down if needed. The medicines above can be useful for both reducing inflammation, relieving pain and reducing fevers. I personally like aspirin for headaches but we do have large bottles of the other two on hand as well.

Anti-diarrheal

One of our readers put this as his top 4 or 5 items to have in his bug out bag and I can understand the rationale. The last thing you need to worry about in a bug out scenario is pulling over every twenty minutes or trying to find a safe place to let it all out. Diarrhea besides being messy as all get out can dehydrate a person quickly. Dehydration leads to weakness, irritability and confusion. Not the state you want to find yourself in an emergency.

There are two main types of medicines that help stop diarrhea, thickening mixtures (psyllium) absorb water and gives number 2 a little more volume. Antispasmodic products slow the spasms of your lower intestine. Loperamide is the active ingredient in products like Imodium and Pepto Diarrheal control. I have also seen loperamide hydrochloride in pill form in dozens of first aid kits. Fortunately, I have never had to use them but have them just in case. Better safe than sorry.

Antibiotics

Sooner or later someone you know will need something a little stronger than a clean bandage. Antibiotics are used in the treatment of bacterial infections. A cut from a rusty piece of metal when the grid is up isn’t life threatening. Without something to fight the infection in a grid down world, a bacterial infection could spell death. Antibiotics do not work on viruses though, so they won’t help you out with every illness.

How do you know when to use antibiotics?

The answer depends on what is causing your infection. The following are some basic guidelines from Familydoctor.org:

  • Colds and flu. Viruses cause these illnesses. They can’t be cured with antibiotics.
  • Cough or bronchitis. Viruses almost always cause these. However, if you have a problem with your lungs or an illness that lasts a long time, bacteria may actually be the cause. Your doctor may decide to try using an antibiotic.
  • Sore throat. Most sore throats are caused by viruses and don’t need antibiotics. However, strep throat is caused by bacteria. Your doctor can determine if you have strep throat and can prescribe an antibiotic.
  • Ear infections. There are several types of ear infections. Antibiotics are used for some (but not all) ear infections.
  • Sinus infections. Antibiotics are often used to treat sinus infections. However, a runny nose and yellow or green mucus do not necessarily mean you need an antibiotic.  Read more about treating sinusitis.


Obtaining extra antibiotics could be difficult without a willing doctor or an active prescription. A common alternative to pharmacy antibiotics is fish antibiotics. Largely made with the same compounds, fish antibiotics are available without a prescription.

Colloidal Silver

Colloidal silver isn’t loved by the medical or scientific establishment, but that doesn’t mean it does not work. Colloidal Silver or CS as it is referred to by some is said to be an excellent antibiotic with the side benefit of being able to be made with simple materials by anyone. You should research for yourself whether or not this is a prepper supply you want to store and there are well documented cases of people who have abused this. I have some in my medicine cabinet.

Additional medical supplies

  • Oral re-hydration solution – To offset the effects of dehydration caused by illness or diarrhea, make your own by adding 6-8 teaspoons of sugar and 1 teaspoon of salt to 1 liter of water. Best to boil the water, add the sugar and salt while it is still warm to dissolve completely and let cool.
  • Multi-vitamins – I know the experts say that vitamins don’t do anything for you, but I believe if your body is deprived of vitamins supplementing with a good multi vitamin is a good idea.
  • Bandages – Probably more than you would ever expect to need. Bandages on wounds need to be routinely changed and the wound cleaned (based upon injury of course, consult a medical resource book for frequency) and you can easily go through dozens with one injury.
  • Rubbing Alcohol and Hydrogen Peroxide – Both alcohol and hydrogen peroxide are useful for cleaning wounds but each have many other benefits in the prepper’s first aid kit.
  • Cough Drops – Sure there are natural alternatives to cough drops, but you can buy a few hundred for less than $10
  • Anti-itch creme – Itching sucks.
  • Honey – Natural honey can be used to treat wounds and never goes bad if you have it stored properly. Plus it tastes great on that oatmeal you have stored in your pantry too.
  • Knee Braces and Ace Bandages – A lot of injuries will simply take time to heal. A good knee brace can make getting around possible for someone with mild injuries. Ace bandages can help with sprains.
  • Any prescriptions you take regularly – An entire post could be written about obtaining supplies of life-saving medical prescriptions. The sad fact is that in a grid down world, many people who can no longer access prescriptive medicine may die. There are alternative treatments, homeopathic remedies and natural substitutes for some specific medicines, but these should all be researched thoroughly on your own. At a minimum you should have at least a one month supply of any medicine you must take. If the disaster allows you to make it to another medical provider you have some time.
  • Thermometer – Get the old-fashioned kind if you are worried about EMP, although the newer digital thermometers are really nice too.
  • Blood Pressure Cuff – Helpful in situations although requires some training on how to use one properly. Don’t forget the Stethoscope to hear the heartbeat. – Hat tip to Ty for these last three great recommendations.

When does medicine go bad?

Yes, medicine does go bad, but it may not be bad in the way you think or as quickly as you might believe. For one thing the expiration date on medicine does not mean that the medicine is bad after that date. Medicine does start to lose its effectiveness over time though so keeping your medicine up to date is the best approach to having a good supply of medicine in your home.

How quickly a particular medicine loses its potency will vary by the medicine and the conditions where it is kept. Moisture and heat are not friends to medicine so a cool dry place out of sunlight is the best location. Medicine that has changed color, texture or smell even if it has not expired shouldn’t be taken. If pills stick together or are harder or softer, show cracks or chips they likely need to be replaced.

This is really just a start at some of the most obvious medicine to stock up on but each person has their own needs. What is your plan if you can’t get to the doctor?

These are some of the most obvious medicine to stock up on but each person has their own needs.

I really have to say that although I’m the kind of guy that would rather stick to a cup of tea when the cold hits, having a couple of pain meds around really helped me pick up the pace when I wasn’t quite feeling like myself.

The need for a painkiller becomes even direr in case of an SHTF situation. Sure, pain meds are great when you need to deal with a pulled muscle or soreness after an intense hike, but they become vital when you have an injury to tend. Because I was foolish enough to carry heavy boxes during my time as an intern, I now have a very sore back and a taste for pain relievers, especially ibuprofen.

Now, the problem with painkillers is knowing how to pick your poison. There are tons of pain meds on the market but, unfortunately, to some, most of them are regulated by Federal Law. That means no Vicodin if you haven’t received a Schedule II or III from your doc.

Every so often, the popping-pills-just-because-they’re-for-pain style has landed more people in the ER compared to those who experienced a nasty med side-effect. Yes, it can happen. If you read the label carefully, you will see that even stuff as basic as aspirin comes with a truck-full of side-effects.

True story: my late aunt was once rushed to the ER because she heard ringing in her ears for three days straight. Turns out that she was in that one percent of patients who have experienced auditory hallucinations after taking aspirin.

So, before you go out buying every over-the-counter painkiller you can find (won’t even consider discussing the heavy stuff like Vicodin) you will need to do a little research about known side-effects. Painkillers aren’t good if they end up causing more pain or killing you! So, before taking pills like Tic-Tacs, be sure to check in with your doc to see what kind of pain meds agree with your body.

Related – Even SWAT Teams are helpless against THIS

The list may be shorter than you think. One more thing before we tackle today’s topic – never, ever, buy meds online. Don’t get fooled by those flashy ads, giveaways or price cutbacks. The chances are that you will end up with sugar pills or God knows what. Also, if you care about your body, you would do well to stay away from stronger painkillers, even though you can order them online without a prescription.

Now, for those who are interested in stockpiling more pain meds, here’s my list of must-have over-the-counter painkillers and what they’re good for.

  1. Ibuprofen

Commercial name(s): Nurofen, Advil, Motrin.

Recommended daily dose (adult): 800 milligrams per dose or according to the doc’s prescription.

Recommended daily dose (child): 400 milligrams per dose or according to the doc’s prescription

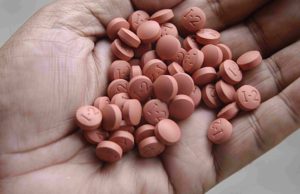
Probably the most common painkiller on the market is the over glorified Ibuprofen. Because it is an NSAID (a nonsteroidal anti-inflammatory drug), Ibuprofen is very effective at decreasing swelling and fever in addition to taking away the ouchie. It’s commonly used to treat stuff like tooth pains, muscle aches, cramps, headaches, and minor back pains. Careful about using Ibuprofen, though.

Some studies have pointed out that this med can cause renal failure if the patient has kidney problems. You should also refrain from using Ibuprofen if you have heart issues, as it is known to produce blood clots in a patient with cardiovascular issues.

Don’t be like yours truly and take it on an empty stomach because you’ll end up with one Hell of a tummy ache. A box of 30 x 800 mg pills costs around 14 bucks and, the best news is that you can buy as much as you want because no one is going to ask you about a prescription.

Related –4 Important Forgotten Skills used by our Ancestors that can help you in any crises

2. Aspirin

Commercial name: Aspirin®

Recommended daily dose (adult): one or two tablets every 4 hours or two tablets every 6 hours

Recommended daily dose (child): same as adults. In case of children under 12, check with your doc.

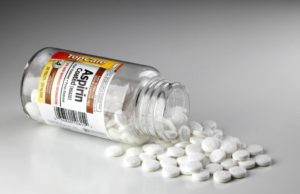
You can’t get any more basic than aspirin when it comes to over-the-counter pain meds. Although it can be used in case of an emergency for reducing fever or swelling, aspirin is mostly used for muscle pains, headaches, toothaches, and cold-induced fever.

Be sure to drink plenty of water when taking the pill.

FYI: if you’re a hiking buff like me, you can reduce some of that soreness by taking aspirin in conjunction with paracetamol. Together, they’re great painkillers and will speed up your recovery. Be sure to take them before the soreness kicks in. Otherwise, you would end up just taking two pills.

3. Acetaminophen

Commercial name(s): Tylenol, Calpol, Panadol, Paracetamol, Bromo Seltzer, Actamin, and Tempra.

Recommended daily dose (adult): 1000 milligrams at one time.

Recommended daily dose (child): 5 doses in 24 hours based on the child’s weight.

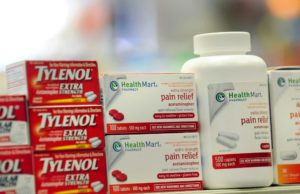
Though it’s placed in the same pot as Ibuprofen (considered to be an NSAID), acetaminophen has more in common with aspirin. It’s very effective at relieving paint and breaking the cold- or flu-induced fever. Its effectiveness can be boosted when used with aspirin. Careful about taking too much because it can severely damage your liver.

Related –The vital self-sufficiency lessons our great grand-fathers left us

4. Naproxen

Commercial name(s): Naprosyn®

Recommended daily dose (adult): 750 milligrams for the first dose, then 250 milligrams every 8 hours.

Recommended daily dose (child): 1 gram per day or 5 milligrams per kilogram twice a day.

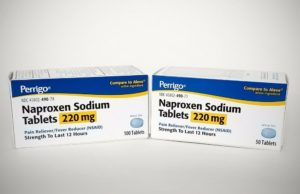
Naproxen is an NSAID commonly used to relieve pain and to bring down swelling and fever. Since it’s considered to be more kick-ass compared to Ibuprofen, it’s also used to treat other conditions such as tendonitis, gout, rheumatoid arthritis, and back pain (hooray for me!).

Be careful about taking too many pills, as it can lead to kidney failure. The best thing about using Naproxen over Ibuprofen is that the first starts working in 30 minutes or less, whereas the latter begins to act in 45 to 60 minutes.

Enough meds for you? Well, take it from someone who learned this the hard way: there’s no such thing as too many painkillers around the house. So, what are you waiting for? Go and stock, but remember to check in with your doc first before doing anything stupid.


Self-sufficiency and Preparedness solutions recommended for you:

The Lost Ways (The vital self-sufficiency lessons our great grand-fathers left us)

Survival MD (Knowledge to survive any medical crisis situation)

Backyard Liberty (Liberal’s hidden agenda: more than just your guns…)

Alive After the Fall (Build yourself the only unlimited water source you’ll ever need)

The Lost ways II (4 Important Forgotten Skills used by our Ancestors that can help you in any crisis)

The Patriot Privacy Kit (Secure your privacy in just 10 simple steps)

One thing before we tackle today’s topic – never, ever, buy meds online. Don’t get fooled by those flashy ads, giveaways or price cutbacks.


First off, properly splinting any part of the body requires careful attention to details, knowledge, and practice. We strongly recommend only qualified medical personnel perform splinting (or any advanced medical treatment for that matter). However, due to any number of unknown factors, qualified medical attention may not be available. With that disclaimer out of the way, let’s get started.

General rules regarding splinting of an injury

If you suspect a broken bone, dislocation, or sprain, the suspected area should be splinted and possibly immobilized.

Splinting is not a permanent treatment of an injury, although it does reduce the chance of further escalating the injury.

How does a Splint Work?

A splint consists of a rigid material accompanied by the use of adhesives or tying material to hold the rigid material in place. This prevents the targeted area from movement, which reduces the possibility of future injury. The rigid material should be placed from one side of the injury to the other and secured on the ends. Once secured, the entire affected area is commonly wrapped to ensure a secure hold. Be sure however to not block circulation by over-tightening the splint.

How is a Splint Made?

Splints can be quickly made from a wide variety of basic materials. Common splint materials can include: sticks/branches, layers of newspaper or cardboard, cut up pieces of a foam sleeping pad, thin strips of metal, etc. Basically, anything straight and rigid can be used as a splint.

For digits, a couple of standard Popsicle sticks, (or any similar object) wrapped with tape usually does the trick.

Splinting Fingers

Fingers and thumbs are commonly splinted body parts, as we tend to unfortunately put our hands where they don’t belong. For digits, a couple of standard Popsicle sticks, (or any similar object) wrapped with tape usually does the trick. Before splinting, carefully straighten the digit and first treat any surface wounds. If you know a digit is dislocated, it should be set back into place before being splinted. Once the digit is stabilized, cooling it with ice will help to reduce any swelling.

Select a straight, rigid, relatively flat object such as a ruler, paint mixer, layers of cardboard, sticks, etc to use as a splint.

Splinting Wrists

Wrists are incredibly complex body parts and can suffer a wide variety of injuries. Without proper medical attention, it can be difficult for the average Joe to identify the specific injury suffered and exactly how to treat it. If you or a partner suffers a wrist injury however, something still needs to be done about it until it can be properly treated.

With any wrist injury, first carefully clean any surface wounds in order to prevent infection. Select a cylindrical object roughly 3 to 4 inches long and 1 to 1 ½ inches in diameter (depending on hand size). This is placed in the hand, adding stability to comfort the victim. Select a straight, rigid, relatively flat object such as a ruler, paint mixer, layers of cardboard, sticks, etc to use as a splint.

Place the splint over top the round object so it’s touching the fingers on the inside of the hand. Carefully tape around the split and forearm. Encircle the top of the hand and splint. Depending on the injury, the thumb can be left free or splinted along with the wrist. Cool the area with ice if possible to reduce any swelling.

Splinting Arms

If the injury is a forearm, it should be splinted with a straight, rigid object, secured above and below the injury using the same process as the wrist above. If unsure of the exact location and extent of the injury, err on the side of caution and splint the entire forearm, including the wrist.

Use any piece of cloth and fold it into a triangle. Carefully bend the uninjured forearm to a 90° angle, placing the elbow snugly into the folded part of the cloth.

All other arm injuries should generally be splinted with a sling in front of the body. Use any piece of cloth and fold it into a triangle. Carefully bend the uninjured forearm to a 90° angle, placing the elbow snugly into the folded part of the cloth. Tie the sling between the shoulder and wrist. Lastly, tie another piece of cloth around the victim’s waist and sling, immobilizing the arm against the side of her/her body. In the picture to the left, we used a ½ torn up shirt we had lying around that we had previously used to make some char cloth.

Splinting Legs

Lower leg and ankle injuries should generally be immobilized together with the foot placed in a neutral (standing) position. To do this, use long, rigid objects such as branches/sticks, pieces of metal, foam from a sleeping pad, etc. These should be run along both sides of the leg between the knee and bottom of the foot. Secure the splint above and below the affected area. Take care when securing around the ankle, by wrapping underneath the foot to the side of each splint. When finished, the foot should be immobilized from the knee down. Once splinted, weight should not be put on the leg, as this can lead to further injury.

Upper leg injuries are far less common and typically cannot be treated solely in the field or at home. In order to avoid further damage, a splint should be placed on both sides of the leg between the hip and knee. Carefully secure it above and below the injury, wrapping the entire splint. Cooling the area afterward will help to reduce pain and swelling. This type of injury can be very serious, and professional medical treatment should be sought as soon as possible. Meanwhile, the individual should not put any weight on the leg, instead using crutches.

Takeaway

Once again, with any potentially serious injury, we highly recommend seeking professional treatment.

When assembling your bug out bag, or any preparedness kit for that matter, having the right tools for the job is essential. Rather than hunting down the right stick for an injury, we urge you to consider adding a SAM splint to your kit. These universal splints are inexpensive, compact, incredibly lightweight and completely mold-able to fit nearly any injury. They can be used repeatedly, offering a lifetime of various uses.


  First off, properly splinting any part of the body requires careful attention to details, knowledge, and practice. We strongly recommend only qualified medical personnel perform splinting (or any advanced medical

Soot. Cinders. Slag. The ghost of wood past. Yes, I was indeed referring to wooden ash – we know it, we get it, but we do sure hate cleaning it after the magic of sitting by the firepit’s gone. If you’re the proud owner of a fireplace or anything that runs on split logs and fire, then you know just how frustrating it is to remove the ash from the grate.

Let me role-play for a while (gonna be Morpheus from The Matrix). *ahem* What if told you that there’s a way to turn ash into your ally? More than that, what if I told you that wood ash is the very best thing that could happen to a household after baking powder and diatomaceous earth? I know it sounds rather far-fetched. Perhaps even a bit crazy, but, as a matter of fact, the survival potential of wood ash is known since the dawn of time.

For instance, ancient Egyptians would use a mix of water and ash to deal with pests. The same mixture would also act as a deodorizer, wishing away foul smells (and they kind of needed it, especially those who insisted on wearing those ridiculous-looking wigs).

Anyway, because I’m what my wife calls a slug bug, I sort of did some research of ways to deal with wooden ashes (I simply cannot stand the thought of wasting a couple of hours cleaning every stove and pit and then digging holes around the yard to bury the ash).

And so, after snooping around for a while, I discovered that wood ashes are not only great for getting rid of pests or making deodorants but also for many other jobs, much of them having to do with everyone’s favorite topic – SHTF.

So, without further ado, here’s how wooden ash can help you in any shit hits the fan situation.

1. Water filtration

If you’re out of water filtration pills or have no other source nearby, it may be possible to whip up a water filtration system using an old plastic bottle, fresh ashes, pebbles, sand, and two pieces of cloth. The trick is to arrange them in layers: pebbles, sand, cloth, ash, pebbles, sand, ash, cloth, sand, and pebbles again. Use this to sort of strain your dirty water a couple of times. Proust!

2. Getting rid of ice quick and fast

Many don’t know this, but wooden ash is packed with potassium chloride, aka salt. So, using a handful of wood ash on your driveway or front porch has the same effect as using salt. Knock yourself out!

3. Making the fridge stink go away

There’s nothing more repulsive than having to open the fridge only to nail it shut afterward on account of the rancid smell. You don’t need to get everything out and wash the inside with water and dish detergent. Grab a small plate from the pantry and fill it with ash. Stick it inside the fridge, and the smell will disappear in a couple of hours.

4. Keeping your food fresh

No power? No problem. Dig a hole in the ground, fill the bottom with rocks and straw, and put your veggies and fruits inside. Cover with as much ash as you can find and you’ve got yourself a tiny root cellar. Long before the fridge was invented, homesteaders would place veggies, fruits, and even meat in big clay pots, fill them with ashes and sealed with wax.

5. Making a strong decontamination agent

Although it’s highly unlikely for you to get anywhere near radiations, you should know that it’s possible to create a strong decontamination agent using boiled ash. In a big pot, put some water, wait for it to boil, and had a handful of soot. Stir until the ash is dissolved.

Use a coffee filter to strain the stuff. The resulting liquid, also called lye water, can be used to scrub clean your body if get into contact with harmful radiation. By the way, lye water can also be used to clean and sanitize marble, plates, silverware, clothes, floors, and even wooden floors.

6. Remove humidity from emergency food pantries and root cellars

If you discover that your root cellar or pantry where you’ve stashed the emergency supplies are far too humid, you need not spend hundreds of bucks on a dehumidifier. Grab yourself a metal bucket and put some ash inside. The soot will instantly remove all extra humidity from the air.

7. Field toothpaste

Oral hygiene should always be on the top of your list no matter if you’re at home or lost in some neck of the woods without water and food. Anyway, if you ever feel like your teeth are about to go on a strike because you forgot to wash or floss, dip your finger in fresh ashes and rub it against your teeth. It has the same scrubbing effect as baking soda or salt. Sure, it’s a bit messier compared to toothpaste, but at least your gums are clean.

8. Gardener’s best friend

If you ever get around to growing your veggie garden, don’t let those pest or animals ruin your dream. You can get rid of most of them by putting a small ash pile at the base of each plant.

10. No more trips to the vet for ticks, lice, and fleas

I sometimes find it difficult to run to the vet each time one of my cats or dogs come home with fleas or ticks (and yes, it happens very often since we keep them inside only during the winter and early spring.

If you want to save some money of those vet bills, it may be possible to create a strong flea\tick\lice repellent using water, fresh white ash, and a little bit of vinegar. Combine all three inside a bowl or something and stir. The result is thick, off-white paste. My cats and dogs hate it and spreading it on their furs is a nightmare. However, this stuff is as effective as anything you get from the pet shop.

Hope you’ve enjoyed my article on survival uses of wooden ash. Think I’ve missed something? Hit the comments section and let me know.

Before you go, you may also like:

How to survive any medical crisis situation with ease
Secret Military Solution For Power Independence

Lost Skills of our Ancestors that still work today

What if I told you that wood ash is the very best thing that could happen to a household after baking powder and diatomaceous earth?

Do you have these seven basic first-aid items? Recent events reveal the importance of carrying first aid items at all times. The discussion of rendering emergency first-aid to someone often falls into the two categories of general first-aid and trauma first-aid. The U.S. Army discovered that trauma first-aid would be more common in a combat environment. Consequently, they adopted the Improved First Aid Kit (IFAK), which became known as the Individual First Aid Kit. The IFAK is essentially a trauma kit. Therefore, there are seven items to find as a foundation to build any size first aid kit from a personal kit to a group kit.

1. Tourniquet

Nearly all of the survival and preparedness experts agree that a tourniquet is a core item for any first-aid kit. A tourniquet helps stop bleeding to a severely injured extremity. However, improper application of a tourniquet can cause more injury, permanent loss of a limb, or even death under extreme circumstances. Thus, you should get certified first-aid training through the Red Cross or other authorized medical training organizations on the proper use of a tourniquet.

There are several versions and styles of the tourniquet. The tourniquet that is easy to employ is the CAT Tourniquet. CAT is an acronym that stands for Combat Application Tourniquet. These are currently in use with military and law enforcement organizations. There are other kinds of tourniquets, such as the ratchet tourniquet, the rapid application tourniquet (RAT), and the stretch-wrap-and-tuck (SWAT) tourniquet. However, whichever one that you prefer, a tourniquet should be an item in any first aid kit.

2. Cutting Device

Emergency first-aid may require cutting clothing away from an injury. Therefore, cutting is an essential task in first aid. An option for a cutting instrument is the Leatherman® Skeletool® RX. It is small enough that it will fit into most first-aid pouches on the market. However, if you cannot afford this multitool, then a quality pair of medical shears or scissors are a good option. Cutting is an essential task for rendering aid to a traumatic injury. A decent cutting instrument is helpful to enable this task. Therefore, a cutting tool of some type should be in any first-aid kit.

3. Disposable Medical Gloves

The wearing of medical gloves is vital for both the one giving first-aid and the one receiving the aid. Medical gloves help to reduce the transferring of germs into a person’s open wounds from the hands of the one rendering aid. They also reduce the risk to first-responders from absorbing blood-borne pathogens through the skin of their hands that an injured person may have in their system.

4. Self-Adhesive Bandage Wrap

Self-adhesive bandage wrap is a critical part of your first-aid considerations. The primary reason for its usefulness is that it can be applied to a wide variety of emergency medical applications. Self-adhesive bandage wrap is useful for making hasty pressure bandages, wrapping cuts with gauze, securing slings, and making slings. There is no glue-type adhesive. Therefore, these bandages work well in arid environments.

5. Quick Clot Gauze

Quick Clot is a recent development in the medical field. It officially goes by the name of hemostatic gauze. The clotting agent, Kaolin, helps to enable the blood to thicken. Therefore, it is terrific for stopping the bleeding on deep cuts, gashes, and penetration wounds to the body upon which a tourniquet is not necessary. Z-Medica is the manufacturer of Quick Clot products. Quick Clot should be part of your first-aid kit considerations.

6. Disposable Medical Face Mask

Many airborne contaminants and pathogens are floating in the air. We breathe them in and exhale them out every day. A medical mask should be part of your baseline considerations when building any first-aid kit. These masks do for the respiratory system that the medical gloves do for the hands. They help reduce the risk of breathing out germs into the open wounds of a person or breathing them in if the patient has an illness. Some types of medical masks have a clear plastic shield attached to prevent blood-borne pathogens from entering the body through the eyes. Therefore, a disposable medical face mask should be part of your first-aid kit loadout.

7. Israeli Compression Bandage

Bandages have been part of first-aid kits since their development. The military understands that the availability of bandages is a matter of life and death for the battlefield wounded. The increase in adverse situations in our contemporary era calls for the availability of bandages in everyday life. Consequently, an essential kind of dressing is the pressure bandage. A person knowing how to apply a pressure bandage to a severe bleeding injury efficiently is a critical task to master.

The best compression bandages on the market are the Israeli Compression Bandages. They are effective and easy to apply to an injury. The older, Vietnam era, pressure bandages were useful but could be cumbersome to use in a stressful situation because of the way they had to be wrapped and secured. Thus, you should consider keeping an Israeli Compression Bandage in all of your first-aid kits. Furthermore, you should always get first-aid training from a reputable organization, such as the Red Cross, before attempting to apply any pressure bandage.

Final Thoughts

First-aid kits are becoming an essential element to possess in the lives of everyday people. The rise in violent criminal activity in our nation has made people more aware of the necessity of keeping first-aid kits available. The seven items in the above discussion should be the foundation upon which to build your own first-aid kit. You need to get certified first-aid training through a reputable source before attempting to render any kind of medical aid to someone. The only exception should be those already well-rehearsed in giving first-aid to someone, such as military personnel, combat veterans, medical and law enforcement personnel. Once you receive training in first-aid, build your kit, then, keep it handy and ready for use.

The post Do You Have These Seven Basic First-Aid Items? appeared first on SIGMA 3 Survival School.


Other self-sufficiency and preparedness solutions recommended for you:

Healthy Soil + Healthy Plants = Healthy You

The vital self-sufficiency lessons our great grand-fathers left us

Knowledge to survive any medical crisis situation

Liberal’s hidden agenda: more than just your guns

Build yourself the only unlimited water source you’ll ever need

4 Important Forgotten Skills used by our Ancestors that can help you in any crisis

Secure your privacy in just 10 simple steps

Do you have these seven basic first-aid items? Recent events reveal the importance of carrying first aid items at all times. The discussion of rendering emergency first-aid to someone often

For some newbies, the topic may elicit some bravado – “wow, an open wound. Neat! I was looking forward to testing out my new suturing kit.” It’s never like that; the worst thing that could happen to you in an SHTF situation is being forced to deal with an injury of this caliber. Of course, it’s even shittier if you’re the one who has been wounded and no one around to provide medical assistance.

Learn how to both diagnose and treat any medical problems you are going to encounter. Learn more about it here.

I want to share with you some tricks and tips that will be of great use to you in open wound management. Pray to God that it will never come to that, but you never know where life takes you.

Open Wound Management for NMPs (Non-medical personnel) and preppers


You know what’s the real golden rule of prepping? Shit can happen anywhere. And, unfortunately, it does. Scrapes, bruises, and nicks are very common around a household, especially when you have kids or if you’re that kind of person that has butter fingers. There’s nothing special about treating small cuts – apply pressure, wash, clean, and disinfect.

That’s all there is to it! Still, considering the crazy world we live in, even a trip to the corner store can turn into a deadly, Indiana Jones-like expedition. This is the very reason why you should always be ready to tackle any kind of emergency, no matter its nature.

As far as today’s subject is concerned, a good friend of mine, who also happens to be a thoracic surgeon in his spare time, one told me that the best thing you could do about an open wound would be to leave it alone.

Related Knowledge to survive any medical crisis situation

Yes, I know it sounds crazy and rather dangerous considering that germs are always looking for ways to get inside our bodies, but there’s a good reason why doctors approach open wounds in this manner. Let’s backtrack a bit.

Regardless of the medical emergency, the first thing you need to do is to assess the patient. Check breathing, pulse, and state of consciousness. Many first-aid manuals state that the patient should not be moved unless he’s in immediate danger.

For instance, if a person is involved in a car accident, you should attempt to yank him out of the vehicle before the gas ignites it. So, if your patient is in danger, carry him to safety as fast as possible before assessing his condition.

In dealing with open wounds, hypovolemic shock and loss of consciousness are your opponents. When a person loses 20 to 40 percent of blood, his organs will begin to shut down one by one. Passing out is a distinct possibility.

However, if the blood volume cannot be restored, that person will die. Hypovolemic shock is a very common occurrence in case of open wounds. This is why the next step you will need to take would be to stop the bleeder.

Ask the patient to lie flat on his back and elevate the wound (if it’s on the leg, raise the his\her leg above body level). You may need to improvise some sort of stand; a rock, an old crate, a trashcan or anything that will help you raise the wounded limb.

Next order of business would be to figure out where’s the bleeding coming for – if an artery was severed or lacerated, then the blood will come out spurting. On the other hand, if it’s a vein, the blood coming out will flow.

Related 4 Important Forgotten Skills used by our Ancestors that can help you in any crisis

Why do you need to know this? Because each scenario comes with a different approach. For instance, in case of a venous hemorrhage, it’s enough to pack it with sterile gauze in order to stop the bleeding.

On the other hand, if you’re dealing with an arterial hemorrhage, apart from packing it with sterile gauze, you will also need to compress the upper part of the artery to control the bleeding, giving your body enough time to perform what docs call hemostasis (stopping the bleeding).

Treating Open Wounds

Once you have assessed the patient, elevated the wound, and identified the bleeder, it’s time to act. At this point, it’s important to stop the bleeding. It doesn’t matter if the wound’s filled with dirt or anything. You can concern yourself with those things after your patient no longer loses blood.

To do that, apply a sterile gauze right on the wound and apply pressure. If the wound continues to bleed, use another gauze. Stack as may gauzes or clean cloth as you see fit. Keep the pressure constant, even if you feel like your hands are about to give up on you.

In the meantime, if the patient’s conscious, ask him or her to drink water. Plenty of it! Remember that your goal is to replenish the liquids lost through the wound.

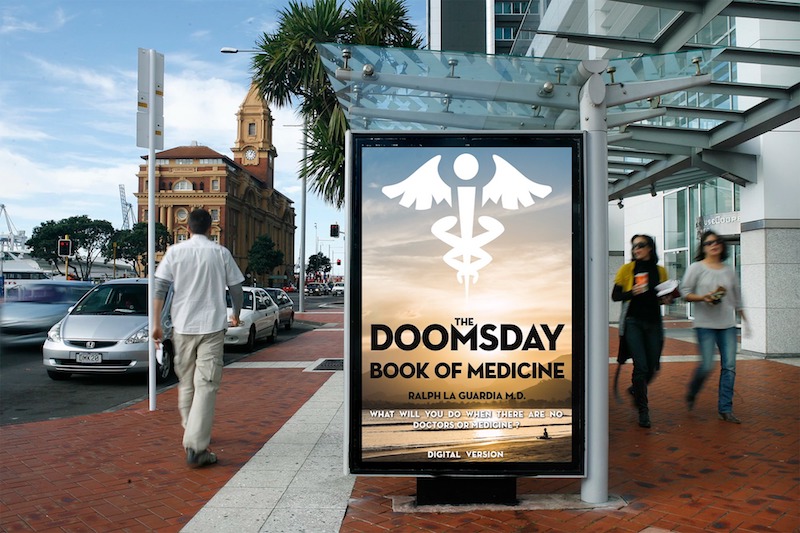
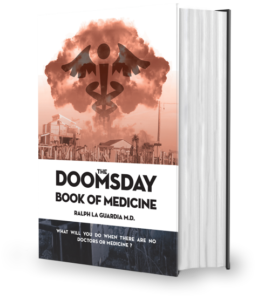
This is the only place where you can get DR. RALPH LA GUARDIA’S THE DOOMSDAY BOOK OF MEDICINE

Keep pressure on the bleeder and add more gauze or cloth, if necessary. Once the bleeding has subsided, it’s time to tend to the wound. One of the most common mistakes I’ve encountered is yanking the bandages. Don’t do that – the barrier formed by clotted blood and those little cells that repair leaks is keeping the patient from bleeding.

Still, you will need to clean that wound to prevent infection. To do that, grab a bottle of sterilized water and pour over the bandage. Once the gauze has enough moisture, you will be able to remove it without too much difficulty. Stay calm! You’re almost to the finish line.

After removing the bandage, take a closer look at the wound site. Do you any dirt? Piece of wood or metal sticking out? If it’s just dirt, use plenty of clean water to wash the area. However, if there’s anything sticking out of the wound like a metal spike or, even worse, a protruding bone, leave them be.

Between washing, using a saline solution to flush the wound. In case your first-aid kit doesn’t include a syringe with saline solution, you can make some using a clean plastic bottle, water, and a tablespoon of fine rock salt. Mix, shake the bottle and use your survival knife to cut a small hole in the plastic cap. Use this liquid to flush the wound.

Remember when I told you about my doc friend who said that in most cases it’s better to leave the wound open? Well, that’s exactly what you must do. When you’re done cleaning and flushing the wound, apply a sterile gauze over the site to keep the area clean. You may also want to waterproof the site – wrap a sterile glove or an unfolded condom.

Now, in case the wound is smaller (one or one and a half inches between the skin flaps), you can attempt to suture it. Bear in mind that suturing is a last resort solution – you should only do this if you know that help will not reach you in time. In one of my articles, I’ve talked about how to do simple interrupted sutures.

Be sure your first-aid kit includes a suturing pack. Keep monitoring the wound for signs of infection – skin discoloration, oozing or acidic smell. If you’re lost in the wild, a quick way to keep infection at bay and stop tissue necrosis would be to use maggots. Yes, it sounds utterly disgusting, but those little suckers are great at eating dead tissue.

Wrap-up

Keep your priorities straight – assess, elevate, identify bleeder, hemostasis, wash, flush, and continue monitoring. Sounds like a no-brainer, but I can bet that you won’t feel that way once you’re facing a wound that won’t stop bleeding. You should also tell the patient to drink plenty of liquids.

Bleeders can go out of hand if the patient goes into a panic. That’s why it’s important to talk to him or her. Tell your patient that everything’s going to be okay and that help is on its way. Above all, don’t let him close his eyes. If you see that the victim is about to faint, pour some water over his face, and ask him to keep talking to you.

That’s basically all that you can learn as a non-medical person about open wound management. If you’re interested in learning more, check with your local Red Cross chapter. They’re bound to have a free advanced first-aid course. Any thoughts? Hit the comments section and let me know.

Other self-sufficiency and preparedness solutions recommended for you:

Healthy Soil + Healthy Plants = Healthy You

The vital self-sufficiency lessons our great grand-fathers left us

Knowledge to survive any medical crisis situation

Liberal’s hidden agenda: more than just your guns

Build yourself the only unlimited water source you’ll ever need

4 Important Forgotten Skills used by our Ancestors that can help you in any crisis

Secure your privacy in just 10 simple steps

For some newbies, the topic may elicit some bravado – “wow, an open wound. Neat! I was looking forward to testing out my new suturing kit.” It’s never like that;

A Medical Chest: Is it important?

OF COURSE.

Whether your bugging out with a group or bugging out alone it is extremely important to have someone with some degree of medical knowledge and/or skill. If you’re bugging out with a group and you’ve got a plan in place, but no designated “medic”, you have a problem. If you’re bugging out alone and you don’t have any basic medical knowledge, again, you have a problem.

It’s easy enough to say “I never get sick” or “Ill tough it out” when it comes to an illness or injury in everyday life, but if you’re bugging out, everyday living will cease to exist. Whether you’re hunkering down in a bunker or climbing up foothills or mountains, sh*t is bound to happen. Maybe someone in your family brought in a simple cold. It doesn’t take long for that simple cold to turn into a sinus infection, which once your immune system is beat down enough, can turn into pneumonia. Consider you’re climbing in the foothills or hunkering down in a forest and you drink some bad water…maybe your Lifestraw has already filtered its limits, or maybe your water wasn’t heated for long enough. Bacteria can take hold of your body’s systems within days, sometimes hours, and cause unfortunate and inconvenient effects such as vomiting, diarrhea, dehydration and eventually, death. You get my point.

So what can you do to prevent this? Well, stay healthy, take your vitamins, and boil your water. Stating the obvious, right? Prevention is great, but like I said, and I’ll say it again, sh*t happens. A contingency plan for those SHTF moments is the key to efficiency and more importantly, survival. You can create a top-notch medical kit addition to any bugout bag or kit easily and cheaply. All it takes is basic medical knowledge and a small pack to potentially save you, your family or your friends in a SHTF situation.

The Doomsday Book Of Medicine: A Guide for When Help is Not on the Way

I wish that there was a six star option

“I’m a dentist, and I have just enough medical knowledge to be dangerous. This marvellous book has so far exceeded my expectations that I am amazed that so much useful knowledge can be packed into one book! Hats off to Dr. La Guardia! The information in this book can be used immediately to improve your health, and expand your treatment options in many areas even if there is never a crisis event for you and your loved ones. The panorama of medical, herbal, and traditional treatments in one easy reference makes this one a MUST HAVE! for everyone interested in healthy options and preppers/survivalists in particular. Cannot recommend it more highly. If you can only buy one medical reference book, this is IT!

 
Absolutely THE BEST prepper medicine book!”
DR. DALE W HUDSON

The Basics of a Medical Chest:

Ibuprofen: So Underrated. It’ll help with mild pain, but more importantly, it can help take down and break a fever. How fun is it trying to function at your day job with a fever that turns into a massive headache that turns into hot flashes and cold sweats? Now imagine dealing with that while you’re lumbering through the wilderness. Not fun.

Pepto Bismol: Once again, underrated. Not only will this reduce your burning desire to throw up those repulsive MRES, but it has the potential to get diarrhea under control. Having to stop every 5 minutes to see a bush about a horse? Inconvenient AND unpleasant.

Benadryl: Works for both people and dogs, making it a vital part of my personal bag. Hiking through the woods and your dog steps on or eats a wasp? I know I don’t want to carry my almost 50 pound dog for very long, how about you? 1 MG per pound of body-weight will take care of that problem. It can also be used to ease a dog’s anxiety, just lower the dose a bit. If you’re traveling or hunkering down with someone who has an allergy whether it be to a food or animal, a quick response with a dose of Benadryl can make a bigger difference then you would expect. I carry a bottle of Benadryl and a tube of Benadryl Cream for topical use.

Medi-Lyte: Uncommon, but not unimportant. I used to work in the oil fields during the big boom, and this was something I always kept stocked for my guys. It is used to replace electrolytes from excessive loss of liquids. I’m talking sweat, vomit, whatever. You can purchase 500 tablets on Amazon for twenty bucks. 100% WORTH IT. Oh, and try two tabs for a hangover, it’ll do wonders ????

Hydrocortisone Cream: Once again, suitable for both you and your dog. Hiking out in the woods comes with a price. While an occasional bug bite is not something that will really bother you, being covered in them probably will. The same goes for your dog. Mosquito bites, tick bites, flea bites, poison ivy, weird rashes; it covers it all. Literally.

Triple Antibiotic: This one is basically the jack of all trades. Use it on burns, cuts, scrapes, and anything else you’re worried about getting infected. I would suggest only using it the first 1-2 days after the injury is sustained. After scabs are formed it won’t do much and there is no point in wasting precious supplies.

Everyday Allergy Meds: Sudafed, Zyrtec, Claritin, because there is nothing worse than trying to walk long distance or climb bluffs or mountains with a runny nose.

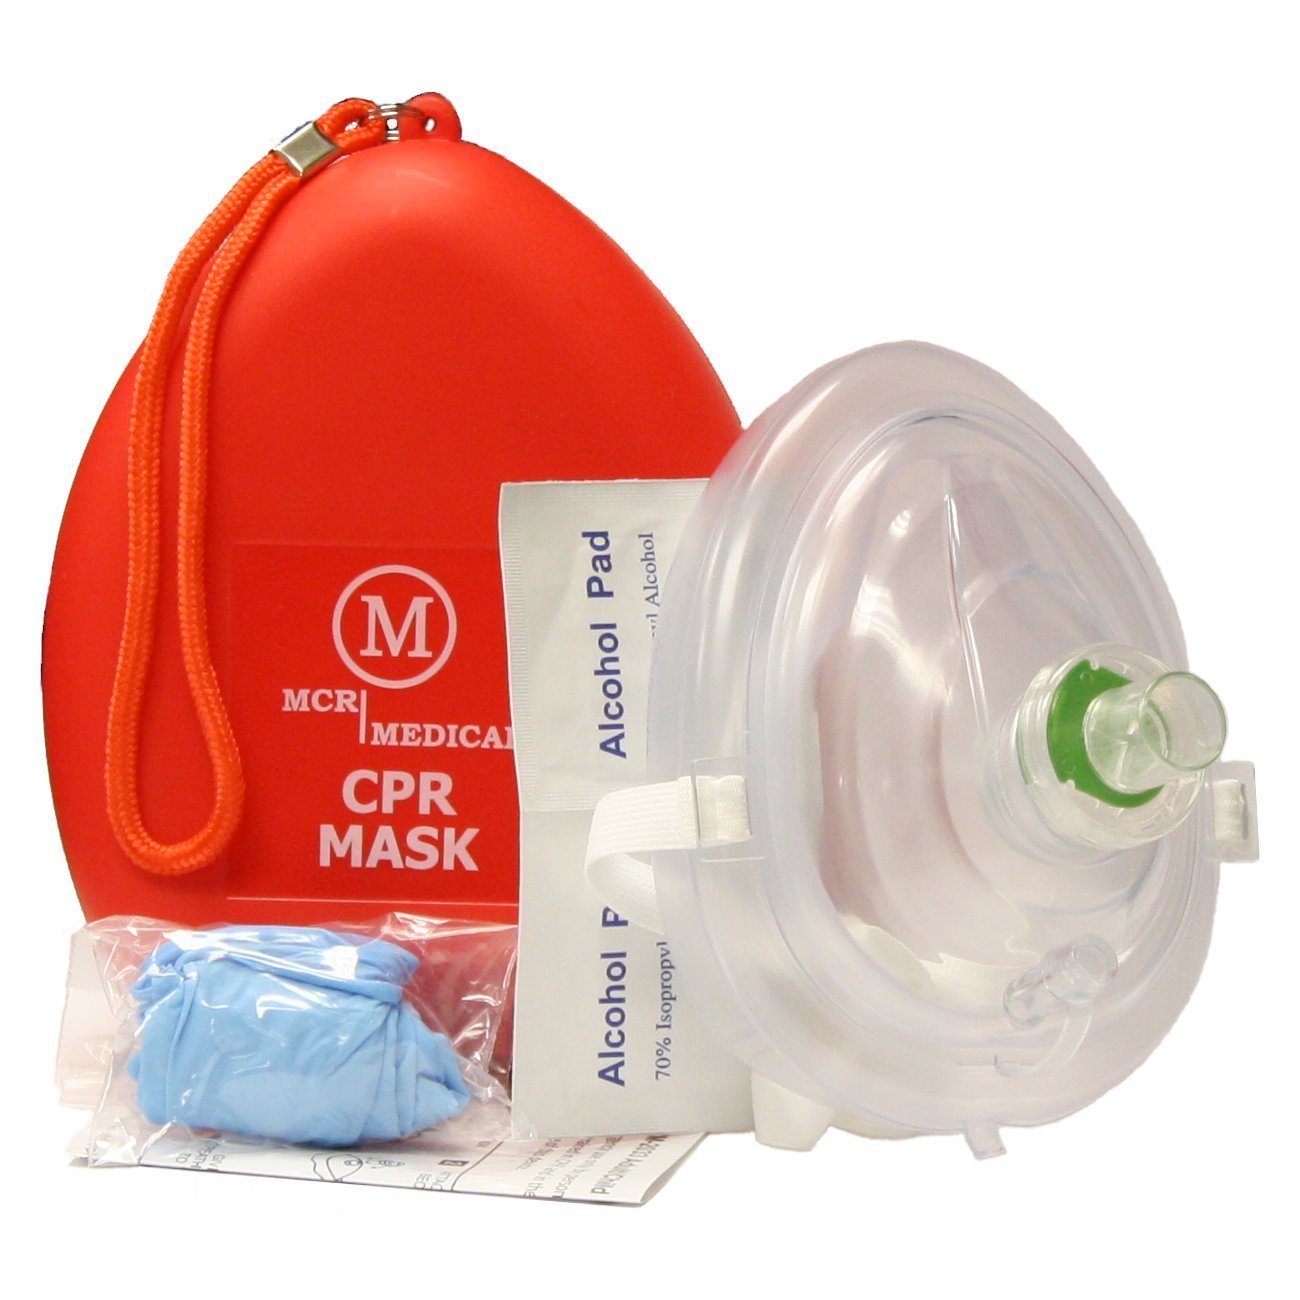
CPR Rescue Mask, Adult/Child Pocket Resuscitator

CPR Mask and Sterile or Nitrile Gloves: I don’t care how well you know someone; do you really want to take a bath in their bodily fluids? I didn’t think so. Carry a CPR mask with you in your medic bag and remember the basics from CPR Class, compressions and breaths, 30:2. Compressions should be done by finding the middle spot between the nipples and pumping your overlapped hands down onto their body. They won’t tell you in your average CPR class, but I will; you will hear ribs cracking, if they survive they will be in pain from it, and it is not easy on the body to lean over and perform compressions on someone. You will be sore. Saving someone’s life though- 100% worth it. If you haven’t taken a basic CPR class yet, don’t be a dummy. It’s 50$ on average and takes only a few hours of your time.

Hot Hands: There is nothing worse than being sweaty, cold, and out in the wilderness. Once you’re cold it is very hard to get warm, but a hot hands pad can make the world of difference. Toss one onto the top of your head and cover it up with a hat. My dad has told me since I was little; heat rises. Keep your head warm and your body will be warm.

Various sized Band-Aids, bandages, ace wraps and anti-bacterial wipes: Obvious, but easily overlooked. I was on a mountain climbing trip in Montana this fall, and I got stuck coming down at night. Not smart, and not fun. I tripped on a tiny rock and my ankle bent and twisted. The next morning I had a 7 mile hike to a primitive forest service cabin across two mountain ranges and I could barely walk without my ankle giving in. An ace wrap and some duct tape made the world of difference.

The Not-So-Basics:

I don’t expect you guys to have giant stockpiles of these things lying around, but I can guarantee you if you dig through your cabinets and junk drawers you’re bound to find one or two of these things lying around. Please also remember I am not a doctor, and I’m not god, so take everything I say with a grain of salt. Having these things does not guarantee a life saved.

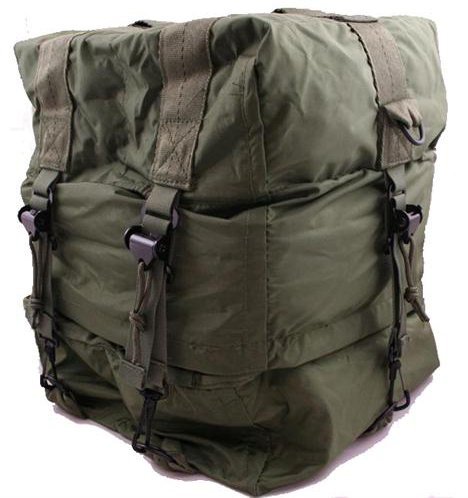
Elite First Aid Fully Stocked GI Issue Medic Kit Bag, Large

Epi-Pens: Unfortunately, these have gotten harder to come by recently, on account of obnoxiously high prices, but if you or your family member has an allergy that requires you to carry one of these, don’t leave it behind when you bug out. Not only could it save your life for what it was intended, but it could save someone in your groups life should they encounter an unexpected allergy source.

Muscle Relaxers: If you’ve done any hiking, walking or running long distances you know how exhausting it can be on your body. Imagine doing it for days at a time while trying to find the perfect camp location. These come in handy to both relax your body and your mind, making it much easier to carry on hiking or even sleep. Personally I can take one of these and continue on with my day, but I’ve heard stories of people taking them and falling asleep within the hour, so remember that everyone responds differently.

Antibiotics: I know I can’t be the only one that’s been prescribed antibiotics and not taken all of them. Do you have a stockpile of half taken antibiotics? In everyday life it’s not a good idea to take half of a dose and leave the rest behind, as it puts you at risk for antibiotic resistance, but if you’re in the wilderness or an emergency situation and you need antibiotics, I think you can afford to take that risk. The same goes for your basic antifungals.

Higher Dose Pain Relievers: If you have left over pain killers from a surgery or injury, pack them up and take them along. I will let you imagine all the possible injuries that may require their use.

Israeli Pressure Bandages: These bandages have been carried by the Israeli Army for ages for a good reason. They compress, clot, and cover a wound. The instructions are on the packaging, and they are fairly simple, lightweight, and about 10$ a piece on Amazon. Worth it.

Suture Kits: Also available on Amazon, although they are usually labeled “for veterinary use only.” They will work in time of need. It’s basically a needle and thread. Buy a few and practice stitching up an orange, or if you’re looking for a little more “real world” (and gross) experience, a pigs foot. It’s pretty much what you see on TV. Unless you went to medical school, you will not be an expert, but if it’s absolutely and undeniably necessary, you’re better than nothing.

I have all of these things in my bugout bag, and it only takes up a very small portion of it. Scrounge up what you can from what you already have, and buy the rest when it’s convenient or on sale to keep costs low. If you’re low on space, take the pills out of the bottles and package them in plastic instead, but remember that the bottles can have other uses in your bag.

I have no doubts that with even 1/2 of these items in your bag you will be better off than your average prepper. Never underestimate the power of basic medical knowledge and preparation. Good luck out there!


Other self-sufficiency and preparedness solutions recommended for you:

The Lost Ways (The vital self-sufficiency lessons our great grand-fathers left us)

Survival MD (Knowledge to survive any medical crisis situation)

Backyard Liberty (Liberal’s hidden agenda: more than just your guns…)

Alive After the Fall (Build yourself the only unlimited water source you’ll ever need)

The Lost ways II (4 Important Forgotten Skills used by our Ancestors that can help you in any crisis)

The Patriot Privacy Kit (Secure your privacy in just 10 simple steps)

A Medical Chest: Is it important? OF COURSE. Whether your bugging out with a group or bugging out alone it is extremely important to have someone with some degree of medical knowledge

When it comes to prepping, there is a lot of talk about what material needs we should have on hand. A bug-out bag, freeze-dried food, water, transportation, first-aid kit, weapons for protection and a place to bug-out to. The idea is to have the basic needs of food, water and shelter readily available. The problem is; when the SHTF not everyone gets to just go merrily about their way, to easily head out and get gone. In fact, it is quite likely that many of us will sustain significant injuries that need to be tended to. Whether it is ourselves, our loved ones, or the friends who will be with us, we will need to know how to take care of each others injuries and illnesses.

It’s official. This is now the prepper’s “go to book” saving them time and money on costly doctor visits. Details and how to get your copy here.

I am an Emergency Medicine Physician Assistant with more than 20 years of Emergency Room experience, the majority of it in Level I Trauma centers (where the most severe cases…crashes, gunshots, severe work injuries, falls from heights, etc. go). Prior to becoming a PA, I was an EMT. I have a great deal of experience dealing with trauma victims and worked in an ER where we saw multiple gunshots daily. I have lectured at several colleges in the Chicago area as well as being responsible for teaching EMT, Physician Assistant, Medical and Podiatry students. I have also been an instructor for the American Red Cross teaching First Aid, CPR and Advanced Cardiac Life Support (ACLS) classes.

There is a lot of information out there about what makes up a good medical kit for your bug-out bag. Everything you need can be either assembled by you or purchased as anyone of a variety of pre-stocked kits. While the kit you have with you when you bug out is obviously important, it is also completely useless if you have not taken the time to learn how to use it. The truth is you can stop most bleeding with direct pressure. Sometimes you need a torn shirt, some duct tape and a pair of trauma scissors. You don’t have to be MacGyver to do it. You do need proper training.

Pamela Rauseo, 37, performs CPR on her nephew, 5-month-old Sebastian de la Cruz, after pulling her SUV to the side of the road. The baby was rushed to Jackson Memorial Hospital, where he is reportedly doing OK.

That said; EVERYONE who expects to deal with the aftermath of when the SHTF needs to know basic CPR and at least basic Trauma First Aid. That means taking classes and practicing what you learn. I can tell you stories about people attempting to administer first aid who had no training, but I won’t. Suffice it to say the outcomes were less than desirable.

The Doomsday Book Of Medicine – What To Do When There’s No Doctor Or Medicine Around

Let’s think about some injuries you can expect in the woods, hiking or running to find cover. Or for that matter, just being in a place where help is not going to come anytime soon. Falls are very common and can result in anything from a scrape to sprains to more serious injuries like fractures and head injuries. So ask yourself; do I really know how to treat a sprain? What about a fracture? Do I know how to stop bleeding and properly clean a wound? Have I ever done those things? Would I be able to actually do the job the right way should I need to? What if it was something life threatening? Could I save a person’s life?

If the answer to any of the above is NO, then you can have all the gear in the world at the ready, but YOU are not ready to bug-out!

I’m going to give an example of injury event that can be a tragedy if you are not properly trained to treat it. Remember, this is about knowing: both what TO do and what NOT TO do.

You and your companion are moving quickly through a heavily wooded area and your companion falls. When you reach them, you see a branch has impaled their arm. They are essentially stuck to a tree because of a branch sticking all the way through their arm. Your companion is in shock and not even aware of the extent of the injury. They are confused. There is blood coming from their arm and also from a gash on the right side of their head which is bleeding profusely. You think you see bone exposed through the head laceration and it seems that one of their legs has something wrong. Closer examination shows you that the ankle is sitting at a strange angle. What do you do now?

If you are like most people, you freak out, try to compose yourself so you don’t freak out your companion, get really pale and nearly pass out and then reach for your cellphone to call 911. Oops, no connectivity, so no help coming. So what now? The first aid kit! You have a first aid kit with a manual in it to walk you through caring for these injuries. You dig out the kit, open and it and check the book only to find it’s great for small cuts and bruises and simple things, but it has nothing remotely close to what you’re dealing with now.

Suddenly, you realize that maybe it wasn’t such a good idea to cancel that first aid class you had signed up for but decided you were too busy/tired to take. Besides, someone else will know what to do or I’ll call 911 anyway, I’ll never need to use it.

WOW! Talk about contrary to prepper philosophy. Or is it? It would seem that Emergency Medical preparedness training is a no-brainer, but in reality, most prepper sites and stores that cater to preppers are focused on the medical equipment you need rather than the training required to use it.

So anyway, I can’t teach you the how to do it in this article. I can give you a good idea of what good, accurate care and treatment of this fall will require. And yes, you can look all these things up on the internet. However, unless you learn from a real, live person who can guide you and correct mistakes you will surely make as you learn, you are never going to be able to really address the problems this very real scenario depicts.

STOP, LOOK, and LISTEN.

The very first thing required in any trauma/accident situation is an evaluation of the site of the accident. Stop, take a breath and look at where you are about to go. Is it a safe place to enter? In the urban world this is akin to a Paramedic called to the scene of a gunshot victim. In that situation, the Paramedic cannot help the victim until the Police have arrived and determined that the Paramedic is safe from the danger of being shot herself when she goes to help. At that point the scene is declared “safe” and the Paramedics can get to work.

In the wilderness or woods, the dangers are different but still just as potentially deadly. Is the ground stable? Are there dangerous branches or rocks that could fall onto you as you make your way to your companion? Will you slip and fall as well if you attempt to help? Do you need to take time to tie off before going to the person? What about wildlife? Are you in danger of animal or insect attack when you go to help? Can you find a way to make the scene safe?

Only after you treat the area as if it were a busy street corner will you be safe. You have to STOP, LOOK, and LISTEN.

Once the scene is determined safe, or made safe the next thing is to get to the injured person and take stock of the situation by doing an initial survey of them. This is done by looking and speaking to them without touching them. Encouragement to stay still is recommended at this point. Usually saying “Hold on, try not to move, I’ll be right there,” is a good start.

Look carefully at the person and where they are lying. Do you see any blood? Where is it coming from? What about limb deformities? If so, which ones. Are there any objects that will cause difficulty in treating the injuries? Can they be cleared or do you need to find a way to work around them.

Now it’s time to your ABCDE’s: Airway/Head and Neck, Breathing, Circulation, Disability/Deformity, and Exposure assessment.

Airway: If the person is conscious and talking, then they have a clear airway, but they might have a neck injury which will require stabilization. In the case of any significant fall, or one with an accompanying head injury, be sure that the cervical (neck) spine is stabilized. If the person is unconscious or can’t talk, be sure that the airway is clear of obstruction before going further. Gently lowering the jaw while holding the forehead steady will allow you to see if anything is causing an obstruction. Look for broken teeth, blood, dirt or some foreign body causing an obstruction. Remove any obstruction you can see. Do not blindly probe their mouth. You could push an unseen object backward and cause an obstruction where none had previously existed.

Breathing: Is the person breathing on their own? If they can talk, they are breathing. Is there any reason to suspect a possible lung injury? Do they have any evidence of a chest injury that could have broken a rib? A broken rib can puncture a lung and lead to air in the chest collapsing the lung on that side. You can check this several ways. One is to watch the rise and fall of the chest and see if both sides rise equally. Another is to put your ear on one side of the chest, then the other and listen for breath sounds to be equal on both sides. If you notice that the trachea, the tube that runs down the middle of your neck, is pushed to one side; that is a clear sign of a lung injury. The best case scenario is that you have a stethoscope in your kit that will allow you to hear the actual breath sounds easily. If there is a lung injury, this is a true emergency and will need to be treated quickly, but that is a procedure that requires specialized training.

Circulation: Check for obvious bleeding, but also in the case of extremity injury, is there good blood flow to the far portions of the extremity? Is the color of distal (far) limb pink or pale/bluish? Is it warm to the touch or cool/cold? Pink and warm = good. Anything else indicates blocked blood flow which may be due to arterial injury or compression. Arterial injury needs repair soon. Compression can often be correct by adjusting the limb to an appropriate angle.

Disability/Deformity: Is neurologic function intact or are they confused, unable to answer questions or showing other signs of significant head injury? Are there limb deformities, obvious chest or facial depressions indicating broken bones? Depending on what you find, a variety of things may be needed from re-evaluation of the airway, to splinting or bandaging.

Exposure: How long has it been since the injury took place? Are they becoming chilled or hypothermic? Cold =shock. Putting a warm cover over an injured party ASAP is essential even in hot weather.

The important thing to do now is stay calm and determine what needs to be treated first. If there is copious bleeding indicating probable arterial involvement (this can also be characterized by blood that sprays with each pump of the heart) apply direct pressure and if necessary a tourniquet that can be tightened and released easily. If there is no major bleeding issue, then recheck the airway and breathing. If there is chest deformity and/or other evidence of a collapsed lung, that is the next thing to deal with unless there is now evidence of airway obstruction or the person is not breathing on their own. The former requires clearing the airway, the latter requires rescue breathing. The collapsed lung requires specialized training you can’t get from the internet or a book. Any other injuries can wait. Remember; the brain starts to die after 3 minutes without oxygen. Airway is first unless bleeding is so profuse that not stopping it would mean there would not be enough blood to circulate oxygen.

Back to our fall victim; we have bleeding, limb deformity, confusion and a fall. The fall means we have to have high suspicion of a neck injury and the confusion could be shock or it could indicate a more serious injury such as concussion or a brain bleed. We also have a penetrating injury which may have been an insult to a major artery. This person is seriously injured and qualifies as a trauma patient. Ideally, we would get this person stabilized and out of there ASAP, but that is not an option. Instead, we have to stabilize and create a sheltered space as close to where we area as possible so we can begin to treat the various injuries.

Assuming there are no immediate life threats (Excessive bleeding or collapsed lung/blocked airway) we begin by stabilizing the neck. A towel, shirt or thick cloth of some kind can be rolled and taped carefully in place to accomplish this. Next stabilize and splint any limb deformities so that we can move the victim with the least amount of discomfort to them. Continue to talk to them to assess their mental status. At this point, things get tricky…

People’s first instinct when presented with something sticking out of or through a body part is to remove it. STOP! Don’t do it! Not only is it exactly the wrong thing to do, it could quite possibly be the thing that kills the person. I know it is scary looking and seems like the danger comes from it being stuck in the person, but at this point the person is alive and has survived impalement. Leaving the object embedded is not dangerous at this point; it is actually the safest thing to do. As long as the object is left in place, it is acting to tamponade (stop) the bleeding. That is, it is putting pressure on any lacerated vessels and preventing any major bleeding. Yes there will be some oozing around the injury site, but it will be minimal as compared to what happens should the object be removed. NEVER REMOVE AN IMPALED OR IMBEDDED OBJECT FROM A PUNCTURE WOUND unless you have been trained to handle this procedure. This is another procedure that requires specialized training courses.

But what about infection, you ask? Yes, infection risk is high, but it is not a life threatening problem at this time. A neck injury or brain injury will need prior attention as will the bleeding from the head wound. Antibiotics are something you can give, but not at this time because the victim has a decreased mental status and it is not clear if they can swallow a pill without causing an airway obstruction or aspirating it into a lung.

For the time being, the safest and most efficacious thing to do is to cut both ends of the branch so that your companion can be maneuvered to the sheltered spot. Start with the end of the branch still attached to the tree and try to keep the arm as immobile as you can while doing so to minimize pain. You can then trim the protruding opposite side.

Don’t cut the ends short. Leave enough to be able to grasp both ends firmly to assist removal when it is time. Use your gauze or Ace wrap to secure the branch so that it moves as little as possible during transport to avoid causing undo pain.

Continue to monitor the ABC’s and mental status and address what need to be done ASAP. Once you have done as much as you can, find a way to get this person out of there and to an emergency care center as quickly as possible otherwise, they will likely not survive for very long.

This all started out as a fall but resulted in multiple injuries placing your companion in danger of dying. With the proper training, you could swing the odds much more in favor of a good outcome. So before you buy that cool medical kit, or put one together on your own, get out there and get trained. If you know someone who has been trained and can teach you the emergency survival techniques you’ll need, ask them to teach you. Meanwhile there are a multitude of courses in first aid, tactical lifesaving, wilderness emergency medicine, survival medicine and CPR. Don’t forget to look into classes that teach herbal remedies. Know what plants can ease pain or prevent infection, they may be the only medications you’ll have available.

So go out and get prepared. Learn.


Other self-sufficiency and preparedness solutions recommended for you:

The Lost Ways (The vital self-sufficiency lessons our great grand-fathers left us)

Survival MD (Knowledge to survive any medical crisis situation)

Backyard Liberty (Liberal’s hidden agenda: more than just your guns…)

Alive After the Fall (Build yourself the only unlimited water source you’ll ever need)

The Lost ways II (4 Important Forgotten Skills used by our Ancestors that can help you in any crisis)

The Patriot Privacy Kit (Secure your privacy in just 10 simple steps)

When it comes to prepping, there is a lot of talk about what material needs we should have on hand. A bug-out bag, freeze-dried food, water, transportation, first-aid kit, weapons

These are two resources I came across on the web today.

The Basics of Wound Care is a booklet that you can download that goes into pretty graphic detail about identifying and treating a wide variety of wounds. If pictures of really nasty wounds cause you to get sick, you better just download this one and let somebody else read it.

Another really great book is Practical Plastic Surgery for Non-surgeons and at first I thought to myself, who is going to be augmenting breasts (yes, that is covered in the book) after the SHTF? Which in retrospect could be a barter-able skill… I am kidding.

The book does go into a lot of great information for treating wounds and injuries and is broken into chapters. If you don’t get the entire book, you can just download the individual chapters that seem most appropriate to you. I would recommend, Suturing, Basic Surgery, Gunshot Wounds and Burns.

To download the entire Plastic Surgery for Non-Surgeons book, click here.

But you can also download an individual chapter.

Let me know if you found this interesting or just a waste of time. But then, who doesn’t like some free knowledge. Just let me know what you think about the quality of information shared for free in these two books.


Hello, my name is Dr. Ralph La Guardia, I am a physician, an internist and I am also board certified in both geriatrics and bariatrics.

However, my true passion is integrative medicine, which is the combination of traditional and alternative medicine. I have taken the best treatments of both disciplines to develop a highly effective method of treating medical problems of all types. 

I am also a prepper and I have written the most complete medical guide ever written called

The Doomsday Book Of Medicine

My reason for writing this book was to fill the gap in the disaster literature for medical treatment. I read all the books on survival medicine and I am here to tell you, they are all rip offs. They are nothing more than first aid manuals, often written by authors with absolutely no medical training. I am sure their intentions were good, but the results were horrific.

These so-called medical guides were full of worthless advice like this: if you are bitten by a snake, call poison control. They tell you to stockpile your medications, try to tell your insurance company that you need a year’s worth of your diabetes or blood pressure meds, and let me know how that goes for you.

I have been in private practice for over thirty years. During that time, I read countless books and thousands of articles in obscure medical journals, looking for alternative cures. I tested what works and what doesn’t and will teach you all of it, for every medical problem from head to toe, everything from fevers to diabetes to pneumonia to snake bites.

Get this book now and begin to learn such secrets as

– What is 8 times more effective at preventing the flu than a flu vaccine?

– The antioxidant that is 6,000 x more powerful than vitamin c.

– The amino acid that not only treats anxiety and depression but also helps alleviate alcohol and drug craving.

– The common weed that is not only the perfect food but also can be used to make biofuel for your vehicles, after gasoline is no longer available.

– The common cleaning product that will not only cure your arthritis but also make your bones so rock hard that surgeons have difficulty cutting thru them.

There has never been a book like this, so easy to read and so jam packed full of life saving medical information that cannot be found anywhere else.

I give you practical advice “from the trenches” that you can find nowhere else.

For each problem, I teach you what it is, and more importantly I give you scores of ways to treat each problem without prescription pharmaceuticals, often with everyday items already in your pantry or medicine cabinet.

You can prepare for a crisis in endless ways, stockpiling food, guns and ammo and finding a secure “bugout” place that you can make impregnable, but what are you going to do if you or one of your loved ones get sick, really sick, life threatening sick … then what?

You won’t know how to diagnose what is going on, and more importantly you won’t have any idea how to treat it. You will sit there hopeless as your loved ones succumb to an illness or an injury and be totally helpless.

What are you going to do when your meds run out? How are you going to stop your child’s burning fever? How are you going to help a loved one with a severe burn, or a broken bone, or a snake bite? What are you going to do when they are coughing and cannot stop, is it flu or pneumonia? And you have no antibiotics left.

I was sick of people with good intentions getting ripped off by worthless medical guides, so I decided to do something about it and I wrote The Doomsday Book of Medicine; over 800 pages jammed full of medical information written in an easy to read format that requires absolutely no medical knowledge.

I teach you how to both diagnose and treat any medical problem you are going to encounter. And more importantly, I give you many ways to treat it. I also teach you how to make your own medical chest that you can stock with over the counter nonprescription items, so you too can treat any medical problem that you or your loved ones may find themselves in.

You don’t have to wait for a crisis to use this book

Most of my readers use it in their everyday lives to treat any medical problems that might occur. It is their “go to book” saving them time and money on costly doctor visits. Not only is this book the most complete medical guide ever written for non-medical people, it is also a manual that you can use to keep your body vigorously healthy and disease free.

I’ll teach you how to grow nutrient dense foods that will nourish your mind and body. You will learn the secrets of the soil that will make your body impregnable to disease. You will learn essential health practices, the right way to take vitamins, and why they currently aren’t working for you. You will learn the essential tools for treating most diseases you are likely to encounter.

No other book on the market today will teach you all of this as well as how to make your own wound care solutions, saline solutions, eye irrigant, natural insect repellent, sunscreen, fecal transplant solution, hydrating fluids and even toothpaste.

The Doomsday Book Of Medicine is jammed packed with over 800 pages of medical secrets that you can find nowhere else. It took me over 30 years in private practice, and endless research to find all of these cures, and now for the first time they are all presented in one easy to read format.

The Doomsday Book Of Medicine is your answer to the vital question: what are you going to do when there are no doctors or medicine available?


Other Self-sufficiency and Preparedness solutions recommended for you:

The Lost Ways (The vital self-sufficiency lessons our great grand-fathers left us)
Survival MD (Knowledge to survive any medical crisis situation)
Backyard Liberty (Liberal’s hidden agenda: more than just your guns…)
Alive After the Fall (Build yourself the only unlimited water source you’ll ever need)
The Lost ways II (4 Important Forgotten Skills used by our Ancestors that can help you in any crisis)
The Patriot Privacy Kit (Secure your privacy in just 10 simple steps)

I was sick of people with good intentions getting ripped off by worthless medical guides, so I decided to do something about it and I wrote The Doomsday Book of

What do climate change, an asteroid attack, and a pathogenic pandemic have in common? Aside from each having it’s place within at least one doomsday movie? They are also the first three on a list of nine ways the world could actually end provided by CBN.

The list goes on to include fatal fungus, an engineered disease, nuclear war, a robot takeover, and overpopulation.

While all of these events are possibilities, many scientists believe that number nine on the list, a snowball effect, is most plausible. If two or three of these things happen in accordance with each other, the effects would be devastating. And that is why being prepared is of the utmost importance.

A Basic Bug Out Bag

In the event of any of these situations perhaps the most important item you will want to have with you is a Bug Out Bag. In case you don’t know what this is, think of it as a large backpack full of everything you might possibly need in a survival situation. While what you pack depends entirely on your own personal needs, there are some essentials that should be in every bag.

  • food and water
  • shelter
  • bedding
  • a heat source
  • personal hygiene essentials
  • survival and self defense tools
  • a communication devise
  • multiple light sources
  • traveling essentials
  • a first aid kit

Bug Out Bag Academy provides a list of 75 items fitting into these categories that can help in building a basic bag; however there is one area where this list is lacking, and that is in medicinal supplies. Having weapons, shelter and food won’t do you much good if you get sick and have no way to treat illness. While there are many modern medicines that can be of aid, there are also ancient Chinese Herbal remedies that can come in handy.

A Brief History of Chinese Medicine

The Chinese began studying natural remedies, as early as the 2 century B.C.E. and by the 12th century A.D. they were experts in everything from acupuncture to herbology. As the years have gone by Chinese scholars have continued to improve upon these ancient methods, bringing us what is today known as Chinese Medicine. This time-tested practice is perfect for a doomsday situation because it focuses on using natural ingredients that can be more easily obtained than western medicine should disaster strike. According to Final Prepper there are seven essential Chinese remedies you should include in your doomsday first aid kit.

7 Chinese Remedies for Preppers

agastache_cana_lg

Giant Hyssop

Giant Hyssop – Commonly found in pill form, this herb is a fantastic remedy for any stomach ailment. It can help relieve diarrhea, vomiting, and abdominal pain. In some cases it has also been used to treat headaches and heat stroke.

White and Red Flower Oils – These two herbal concoctions are useful in soothing a wide range of aches and pains. White flower oil is traditional seen in a balm form, made up of wintergreen, eucalyptus, menthol, peppermint, camphor, and lavender. Its soothing smell helps relieve headache pain and clear the sinuses. Red flower oil consists of menthol and camphor oils and can help ease the pain of arthritis, sore muscles, and seasonal aches and pains.

Jujube Seeds – These seeds come from the delectable jujube fruit, a historically valuable medicinal source as well as a loved part of traditional Chinese cuisine. They can be purchased at any store that specializes in traditional Chinese remedies. When ground into a fine powder over a heat source they are a fantastic cure for insomnia. Already prepared powder can be purchased as well.

Loquat Syrup – This herbal remedy comes in the form of a thick ointment made up of an array of ingredients including apricot seed extract, loquat leaf, licorice root, honey, and white olives. It is commonly used to sooth a sore throat resulting from a cough, cold, or bronchitis. This remedy is especially valuable because it is considered to be safe for children.

yunnan-baiyao-capsules

Yunnan Baiyao

Ching Wan Hung – This red ointment is made of a variety of herbs, including myrrh, lobelia, frankincense, dong quai, quince fruit, beeswax, and sesame oil. It is commonly used to treat skin irritation resulting from first, second, and third degree burns, rashes, bedsores, poison ivy, poison oak, and sunburns. Its distinctive color can stain clothing, so it is important to keep the treated area covered with gauze or some other barrier that is changed daily.

Yunnan Baiyao – Sometimes known as Yunnan paiyao, this powdered herbal combination is fantastic to help stop bleeding and encourage immediate healing. It can also be combined with a small amount of alcohol to treat bruises. The various companies that make this remedy guard their recipes faithfully, however this concoction is known to contain Chinese yam and ginseng.


Conclusion

These 7 basic herbal remedies store longer than modern medicine, and are often easier to come by than their western counterparts. They can all be ordered through Solstice Medicine Company along with many other traditional Chinese supplements, remedies and medicines. By including them in your But Out Bag you will ensure that you are prepared for most any first aid situations that may arise.

This time-tested practice is perfect for a doomsday situation because it focuses on using natural ingredients that can be more easily obtained should disaster strike.