HomePosts Tagged "Bug Out Bag"

Sure, shoveling a couple of tin cans and ready-to-eat packs inside a pantry or emergency household kit may be a no-brainer, but what happens when a real emergency blows your way and you’ll need to eat those stuff to stay alive? More than that, are you really sure that everything stays fresh until the time for unboxing comes? There are a lot of things to consider when creating a long-term food stockpile: shelf life, type of food, the very environment where you choose to store the food, and, the containers themselves.

As you know, emergency food should be stored in a cool and dark environment to keep them from getting rotten. Still, that leaves you to deal with other unforeseen dangers such as rodents clawing your way into your food stash, insects, and, of course, indirect environmental factors that can make long-term storage food stored in metal cans go bad. Last but not least, moisture can severely affect your food, even if it’s neatly wrapped in packages.

What I like to do in this case is to take the original pack and place it inside individual zip-lock bags before placing them inside airtight plastic containers.

You can even throw in a couple of desiccant silica gel packs to remove any moisture remaining inside. For a while, I thought long and hard about finding a more permanent solution to the excess moisture issue inside the pantry I use to store my food and I eventually ended up buying a dehumidifier. It works very well, and mine takes triple-A batteries (you can switch them with rechargeable power cells).

Now, regarding today’s topic, some foods are more endearing than others. For instance, lentils can be stored for at least 5 years. On the other hand, rice, if deposited in a proper environment, can last for 30 years if not more. This is why I’ve always pushed for smart stockpiling, aka buying only those stuff with a very long shelf life that could, theoretically, last forever.

This is not something new under the sun. In fact, if you remember your history lessons when Carter and Lord Carnarvon popped open Tut’s tomb, they found perfectly edible food stored inside wax-sealed angoras. And it’s not the only example – the Chinese and even the Mayans. So, what are these wonder foods that can be kept for decades at an end in the pantry before going rotten? Stick around to find out.

  1. Carrots

Packs with flavonoids and tons of other nutrients, carrots are excellent for stews, broths, and even by themselves. What most people don’t know is that those bright-orange wonders can be stored for decades. Dehydrated carrots have a shelf life of 25 years or even more. The trick is to place them in air-tight containers right after removing all the water to minimize contact with the air. I recently found out that it’s way easier to remove the water if you chop them into small pieces.

To whip up a quick batch of dried carrots:

  • Peel them off.
  • Wash and rinse.
  • Blanch them in a pot.
  • Put them on a tray.
  • Preheat the over to 125.
  • Place the carrots inside and allow them to dry. It takes about 4 to 5 hours depending on your oven.

Don’t forget to still every hour. Take them out of the oven and allow them to dry before tossing them inside a zip-lock bag.

2. Pasta

Mamma mia! Who doesn’t adore a plateful of pasta with meatballs? I, for one, am very much in love with pasta. It’s the type of food that can be cooked in every way imaginable. Even better, pasta, especially the deep-frozen variety, has a very long shelf life (at least 20 years).

Still, if you store them in a moist-free environment, you can take them out and whip up a quick pasta dinner even after 40 or 50 years. I read somewhere that pasta products can even last for a century and even more if placed in special storage containers like aluminum-lined mylar bags.

3. Salt

No meal’s complete with a sprinkle and tinkle of salt. This awesome condiment, which has been around since the dawn of time, does not ever go rotten if stored in the proper conditions. You need not worry about bacteria getting inside, because salt has a way of dealing with them.

Still, the only thing you should concern yourself with is moisture. If the container isn’t properly sealed (been there, done that), then it’s bye-bye salt and hello mush. I usually keep my salt in a heavy-duty plastic container in which I throw a pack or two of desiccant silica gel wrapped in plastic just to be sure.

4. Baking soda

There’s nothing baking soda can’t do or fix – you can use it to bake delicious cookies, cakes, and clean stuff around the house. Before I went to the doctor to get my molar fixed, I used to gargle baking soda in the morning before brushing my teeth (great for morning breath as well).

If you’re a computer buff, just like myself, you can use a light baking soda mixture to remove persistent stains from plastic computer cases (also works wonders on those yellow spots!). As you’ve guessed it, baking soda has no expiration date, provided that you store it in proper conditions – no moisture and sunlight.

5. Soy Sauce

Care for some Chinese? Well, if you’re a fan of Asian cuisine then you must know that no dish must be without soy sauce. The salty, smokey, flavor gives that sea-foody taste to each meal. Are you ready for the good news? Soy sauce never goes bad. Ever!

Since it’s packed with sodium, that stuff will never spoil due to bacteria. Watch out for moisture and exposure to sunlight though. To protect that black gold, pour the contents of a bottle into a sealable and air-tight glass jar. You can line up the jar’s mouth with aluminum foil and plastic wrap for extra protection.

6. Powdered milk

I know that nothing beats the taste of real cow’s milk, but the bacteria inside it make it impossible to store it over long periods. On the other hand, powdered milk is not pretentious and very handy to have around the house for dishes and drinks. If stored in a moisture-free environment, powdered milk can last forever. I usually store powdered milk in a large plastic container with a couple of moisture-absorbent packs inside.

7. Instant drinks (coffee, cocoa powder, and tea)

No emergency stockpile should go without easy and quick-to-prepare drinks. I cannot and will not imagine a world without coffee or tea. Since they’re dehydrated, all instant drinks can last up to 10 years if you remember to store them in a moisture-free room.


8. Honey

Yes, dear? No, I was talking about bee honey, the one you use to make cookies or sweeten your drinks. The high sugar contents inhibit bacteria from developing. And, if stored properly (lid screwed on tight, no sunlight and moisture), a jar of honey can last for 100 years or even more!


9. Stock and bouillon

These are great during those cold winter days when you want to whip up a bowl of soup or your favorite comfort food. Everything boiled and set to cool down before being placed in bottles or something can last for ten years or more. A funny thing happened to me the first time my wife and I prepare bouillon for our stockpile.

So, the pantry which I used to store my food had a slight design issue – heat seeped through one of the holes in the wall. After the bottles cooled down, we placed them inside and forgot about them for a couple of weeks. One night, I heard this long bang coming from the pantry. Half-asleep and almost naked, I ran up to see what the Hell was happening.

When I opened the door to peek inside it was like stumbling upon a crime scene – two of the bottles exploded and there was tomato sauce everywhere. After a while, I realized that the heat made the bouillon bottles blow up. So, make sure your pantry is insulated. Otherwise, someone might think you’ve killed someone and hid his body inside the room.

10. Sugar

Spice and everything nice – these are the ingredients to create the perfect prepper. Very much like baking soda and honey, sugar can be stored indefinitely. The only problem is that it tends to harden over time. No problem. Just place it inside a large container and use a spatula or a spoon to break down those big chunks.


11. Beans

Delicious, nutritious, and easy to prepare, beans are at the very top of the food pyramid. Although you’ll probably end up passing more gas than usual after a bean-based dish, it’s nevertheless a versatile food. More than that, if you’re careful enough to store them in proper condition, a single bag of beans can last up to 30 years. There’s one catch about beans – you will need to reseal the bag from time to time. This is why I switched to aluminum-lined mylar bags instead of plastic, airtight containers.


12. White vinegar

What happens when the wine goes bad? You get up from the table and argue with the waiter, of course. Kidding – wine has this outstanding quality of transforming into vinegar, which is one of the most useful items found in your pantry, apart from salt and baking soda.

Vinegar can be used in salad dressings and other dishes, but it’s also a great helper around the house (my wife uses it to remove cat hair from the carpet and I use it in very small amounts to remove pigeon droppings from the car’s hood). White vinegar never goes rotten, so you can store as much as you want without a problem.


13. Maple Syrup

Fancy some pancakes with maple syrup for breakfast? My kids go absolutely bonkers over this dish. Can’t say that it’s really good for their teeth but, hey, try arguing with a hungry and screaming toddler. Just like honey, maple syrup has high sugar contents, which means that it can be stored for long periods of time (50 to 80 years, by some accounts).

However, you should know that there’s a huge difference between maple syrup stored in plastic and the one stored in glass bottles. The first, even unopened, has a shelf life of 5 to 18 months, while the later can last as much as half a century.


14. Ghee

I don’t know if most of you are familiar with this ingredient. Ghee is a type of base which is prepared from boiled butter. Basically, you get ghee by removing all the water from the butter. Great for Indian dishes and preparing low-calorie foods. If you store it in an airtight container, ghee will never go bad on you.


15. Corn starch

Momma always used to say that if the food looks too watery, add some cornstarch to make the spoon stand up on its own. Corn starch is very useful around the house – you can cook with it, clean up stuff, and even use it in combination with water to soothe sunburns. Stock up on cornstarch now because this stuff will never go bad.

Okay! To wrap this up in a neat and elegant manner, check out this small list of all the foods and their shelf-lives. Hope you’ve learned by now that smart stockpiling is all about knowing your food and not shoveling them in a pantry and throwing away the key.

Food Shelf Life (years)
Carrots (dehydrated) 25+
Pasta 20+
Salt Forever
Baking Soda Forever
Soy Sauce Forever
Powdered milk Forever
Instant drinks 10+
Honey 100+
Stock & Bouillon 10+
Sugar Forever
Beans 30+
White Vinegar Forever
Maple Syrup 50~80
Ghee Forever
Corn Starch Forever

Other self-sufficiency and preparedness solutions recommended for you:

The vital self-sufficiency lessons our great grand-fathers left us
Knowledge to survive any medical crisis situation
Liberal’s hidden agenda: more than just your guns
Build yourself the only unlimited water source you’ll ever need
4 Important Forgotten Skills used by our Ancestors that can help you in any crisis
Secure your privacy in just 10 simple steps

Sure, shoveling a couple of tin cans and ready-to-eat packs inside a pantry or emergency household kit may be a no-brainer, but what happens when a real emergency blows your

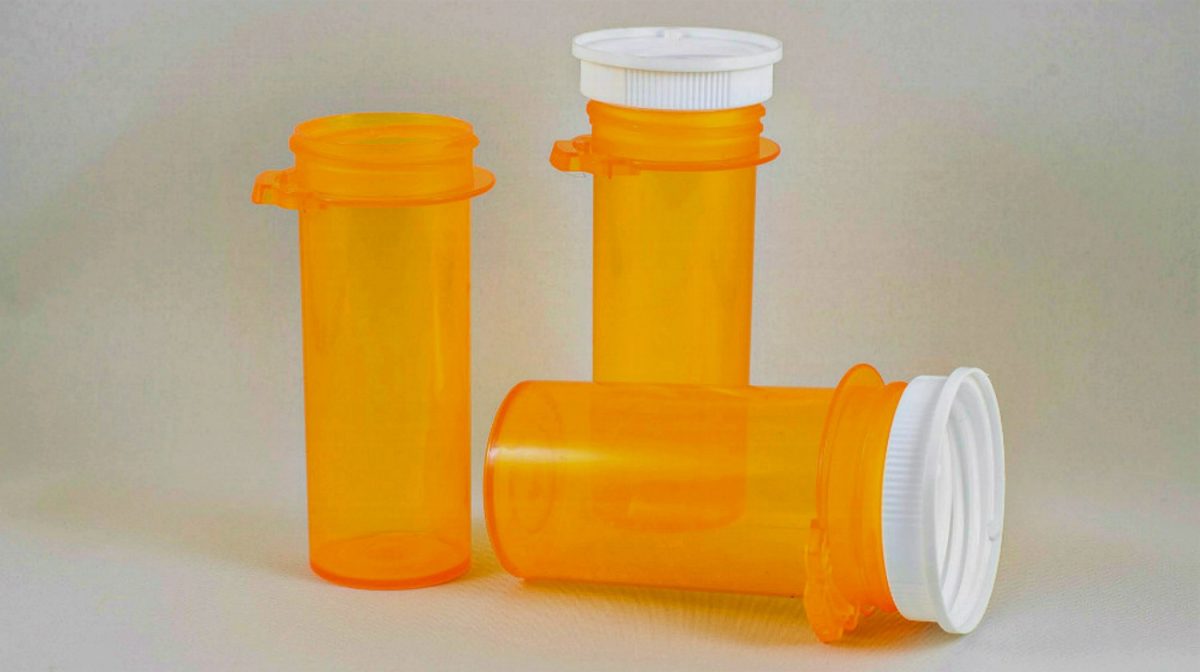
“It’s never lupus,” as the iconic Dr. House put it. Don’t know too much about that, but I have a saying of my own – “it’s never just a pill bottle.” Yup, you’ve guessed it. Today I’m going to show you a couple of nifty ways to reuse your old med bottles.

Some are them are no-brainers, while others are quite ingenious. Heck, when it comes to human ingenuity, even something as insignificant as a match can be turned into a unique item. So, because talk’s cheap, here are 11 ways to use your old pill bottles around the house.

Big life lesson – when you reach the point where two paychecks aren’t enough; you have to make some sort of change. I won’t deny the fact that with all my prepping training I still end up spending a couple of thousand dollars each year buying all sorts of crap.

Well, ever since my lovely wife realized that money kept flying out of my wallet, she used a clever trick to put something aside for rainy days – stuffing dollar bills in old pill bottles. Yup, took me a while to figure it out.

Long story short, the cash pill bottle trick worked, and we managed to put aside enough to buy our son a new smartphone. So, if you’re just like me when it comes to burning dough, use an old pill bottle as a piggybank.

Make a small emergency candle

You can make a 4-hour emergency candle by filling an old pill bottle with wax, lamp oil, tallow, or fat obtained from melted bacon. Stick a wick inside, allow it to soak the fuel, and set it ablaze.

Fishing kit

If you don’t have the resolve to make a paracord grenade, you can at least try to make e small fishing kit using a pill bottle, some cordage, hooks, and a couple of feet of fishing line.

Here’s how to do it. Wrap the paracord tightly around the pill bottle, place your fishing implements inside, and put the cap back on. You can attach a small carabiner to the cordage if you want to hang the fishing kit to your bug-out bag or belt.

Travel-size shampoo and conditioner

You really don’t need to throw a whole bottle of shampoo, conditioner, or shower gel in your luggage or bug-out bag. Pour as much as you need inside pill bottles, put some plastic wrap on top, and screw the cap in place.

Store key to ammo locker or safe

You know how the saying goes: if you want to hide something, put it in plain sight. If you’re worried about your children finding the key to dangerous storage lockers like the ammo cabinet, propane tank locker, or fire-proof safe, use old pill bottles to hide the key. You should also fill them with small pebbles or kitty litter to give off the impression that they’re really pill bottles.

Create a waterproof money container

Since I’ve mentioned something about saving money, you can create your own waterproof cash container by repurposing a bottle. Remember that cash will always be king, and that’s why it would be wise to have a small amount on you. To make a money container, you’ll need a small drill, epoxy glue, paracord, and, of course, some money.

Start by drilling a hole in the pill bottle’s cap. Draw the paracord through it and apply some glue. Put your cash inside, screw the cap back on, and that’s it. You can also make a square knot at the base of the pill bottle to ensure that the thing doesn’t fall off your bug-out bag or belt.

Make a small med kit

Although nothing can replace your B.O.B’s first-aid kit, it is possible to make a smaller and more portable version using a pill bottle. You can also use the steps for crafting a waterproof money container for your mini-med kit.

As for the contents, I added a couple of aspirins, some Ibuprofen, Alka-Seltzer, one Iodine prep pad, and one alcohol-soaked prep pad. Of course, you’re free to add or remove items.

Make a perimeter alarm

I don’t know about you, but I always like to install some sort of perimeter alarm when I want to camp for the night (I usually end up using the beer cans I brought along for the ride).

If you’re not much of a beer lover, you can make your own perimeter alarm using a couple of pill bottles filled with kitty litter or pebbles. Put a couple of stakes in the ground, connect them with some dental floss or string, and tie the filled pill bottles.

Store seeds for later use

If you want to protect seeds from the sun or extra moisture, store them inside clean and dry pill bottles. Don’t forget to label them.

Make a field sewing kit

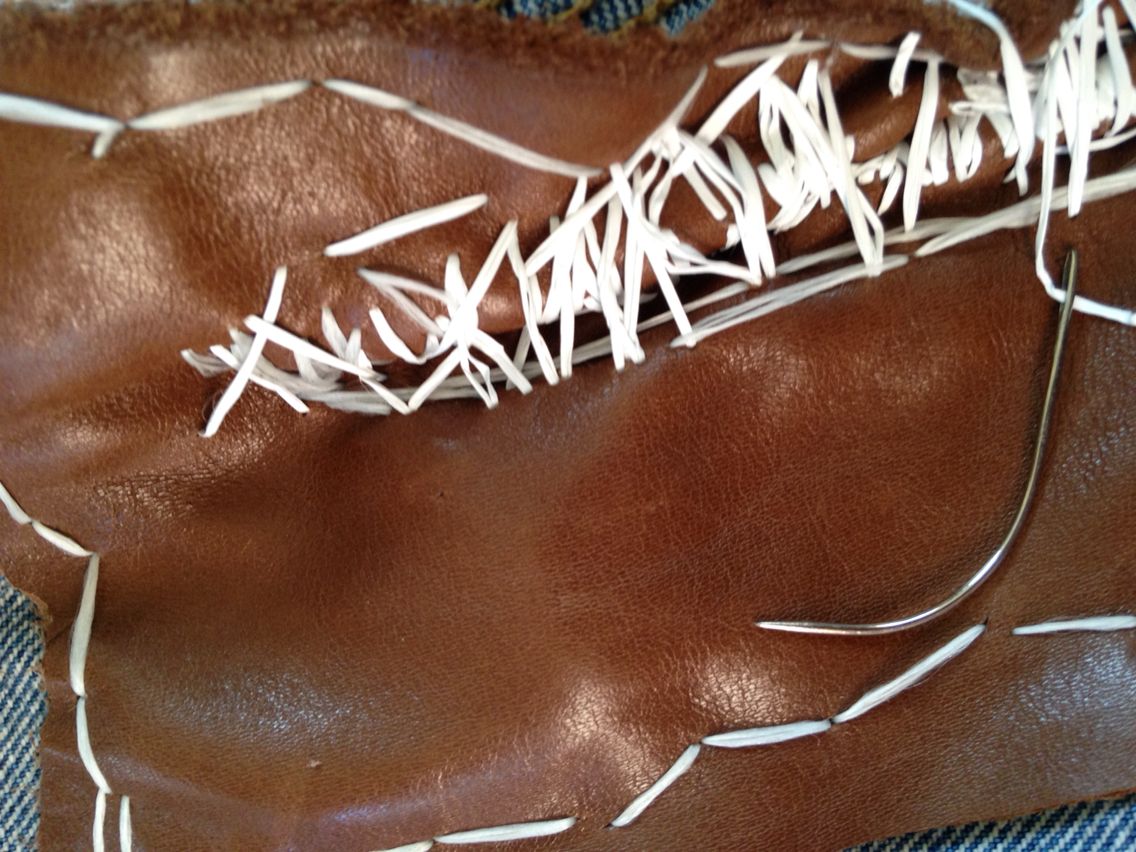
There’s no way of telling what could happen in the field. And, during a shit hits the fan situation, your clothes will get torn to shreds. Sure, you can always patch them with some zip ties or dental floss, but you can also take the high road by using your sewing kit.

You can quickly make one from an old pill bottle. Place a needle, some thread, and a couple of patches. Put the cap back on and store it inside your B.O.B.

Make a deodorizer

If you want to ward off those nasty smells from your clothes, place some dried-up lavender flowers inside a pill bottle. Use a needle or a small knife to poke a couple of holes in the lid.

Finally, place it inside the wardrobe and, voila, no more rancid smells. You can also make one for the fridge. However, for that one, I would advise replacing the lavender leaves with apple cider vinegar, baking soda, or diatomaceous earth.

That’s about it for my take on repurposing an empty pill bottle. Would you like to add anything to the list? Hit the comments section and scribble away.

“It’s never lupus,” as the iconic Dr. House put it. Don’t know too much about that, but I have a saying of my own – “it’s never just a pill

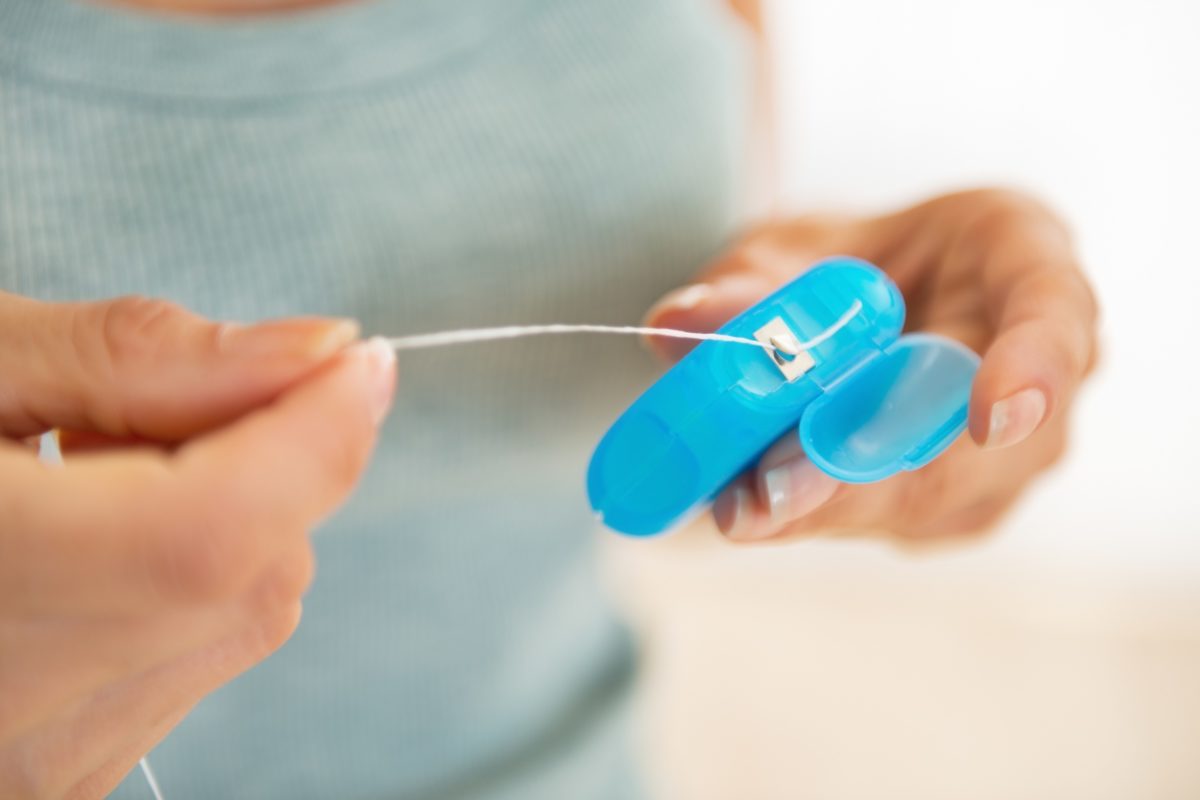
You’ve probably heard this one before – brush and floss before hitting the sack. I can wholeheartedly say that dental floss is the best thing to happen for yapper health right after ceramic implants. Have you ever stopped to wonder if the same stuff we use to floss our teeth can be used for other purposes?

Of course you did, and I have to admit that most of you can become very inventive when it comes to, let’s say, repurposing floss (you really should that news piece about that guy who ended up in his hospital after his SO tied him to the bed with dental floss for a wild sex game).

Anywho, floss is very handy to have around, especially when the shit hits the fan. It doesn’t take too much imagination that dental floss can be successfully employed as cordage when the need arises.

From crafting weapons to drying your clothes above the firepit, dental floss is a powerful ally, one that can help you get stuff done without too much effort. So, what are the survival uses of dental floss? Well, keep reading, and you will find out. Maybe I’ll even manage to surprise you.

Weapon-making

Though I can’t say that I’m very comfortable around weapons, bladed or otherwise, in case of an SHTF situation, you can craft yourself a sturdy weapon which can be used for hunting, self-defense, and both. Easy enough to do it – take a long pole and tie your survival knife to one of the ends using as much dental floss as necessary. You can also use floss as a bowstring if you can find a piece of wood with the right curvature.

Fishing

No fishing lines? No problem. Just cut a long piece of dental floss and tie the hook to the other end. If you don’t have anything on hand to act as a floater, you can always inflate a condom and attach it to the dental floss line. You can create your custom fishing box – just like a tinder box, but with fishing implements – using a small oval container (I fashioned mine from an old coconut shell coated with resin), a few hooks, dental floss, a floater, and some piece to act as a weight.

Tying your shoes

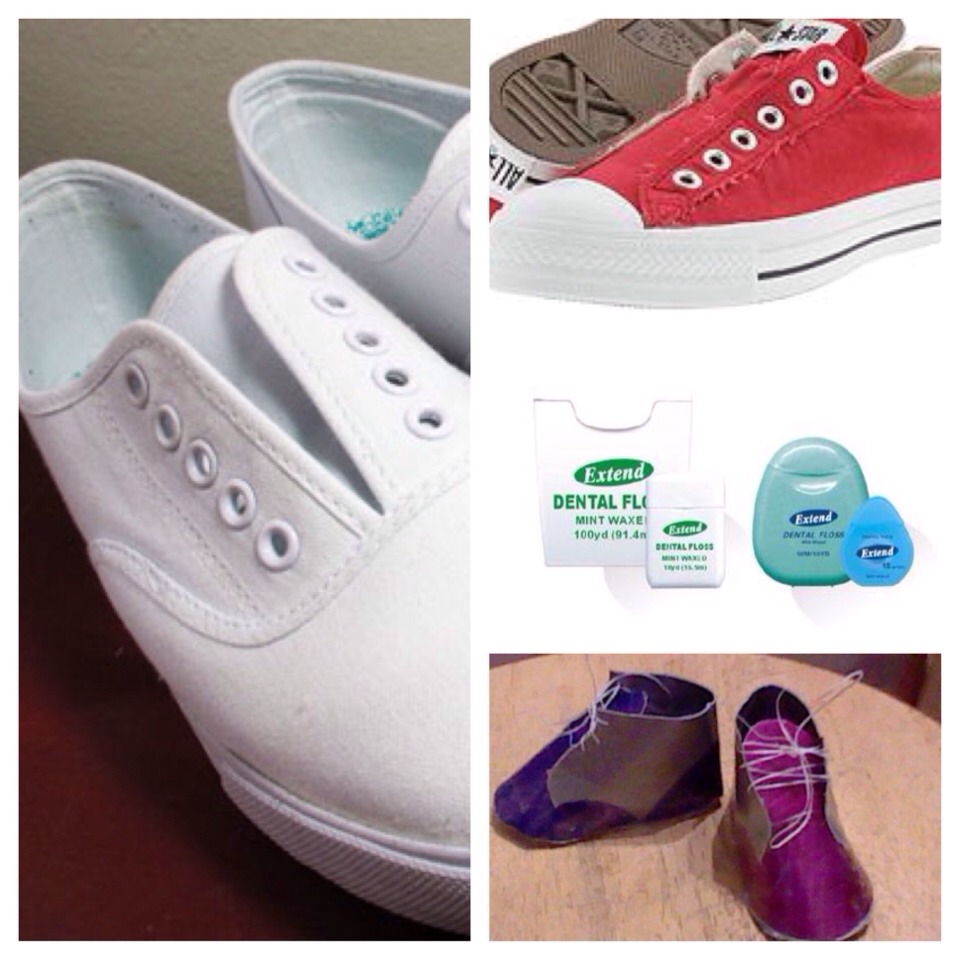
There’s nothing worse than a ripped hiking boot shoelace. But wait! It gets even better – no reason to cry over ripped shoes when you’ve got a spare, but that usually never happens. So, if you’re out and find yourself with nothing to tie your shoes, just grab a long piece of dental floss, cut it to size (use the other shoelace as a reference point) and carry on.

Drying your clothes

Anything can happen when you’re in a survival-type situation. I personally abhor anything that ends in me having to sit for any number of hours with soaking-wet clothes. Of course, you can always use the extras in your B.O.B, but that still leaves you with wet apparel.

The best and quickest way to dry them would be over a fire. Take two long sticks and insert them into the ground just about the firepit. Use your survival knife or another sharp implement to create grooves at each end of the stick. Cut a long piece of dental floss and connect the two sticks. Now that you have a clothesline, the only thing left would be to start your fire and hang your clothes out to dry.

Making a simple alarm

Whether you’re alone in the woods or have a small mountain refuge, you’ll need some sort of alarm system. Of course, when you’re still in contact with the rest of the world, you can always hit the local hardware store to purchase an alarm. However, when you’re out there, things take to change a little, in the sense that you will need to improvise.

To make a simple alarm for your overnight camp, plant a couple of sturdy sticks around your location and connect them using dental floss. Attach a couple of cans or empty container, and that’s about it. You may not be able to see what comes your way, but you’ll certainly be able to hear it long before it can set foot inside your tent.

Mend ripped clothing

I know that sewing is not on your top 10 favorite activities list, but any prepper should know how to repair his clothes, especially when there’s no one around to do it for him.

Sewing kits should be a part of your B.O.B. However, in case you’ve forgotten to throw in some needle and thread, you can always use a fishing hook and some dental floss to patch up your clothes. If your first-aid includes a suturing kit, you can also break open a pack and use the sterile thread to seal holes in your clothes.

Stitching up wounds

And because I already broached the subject of suturing, if you’re unfortunate enough to wind up with a big bleeder, you can always use dental floss to make stitches. As for the needle, grab a fishing hook from the kit, and throw it in the fire. You will also need something to hold the hook during the procedure – if your first-aid kit doesn’t come with a pair of straight scissors, you can always use your multitool’s plier.

After cleaning the wound with whatever you have on hand (I would recommend clean water and mouthwash), grab the needle by its midsection, run it through the first incision line, cross the gap, and piece the other edge of skin from beneath.

Pull the thread, grab the longer end, loop the thread four times around the pliers, open it a bit, grab the smaller end, and pull. Repeat the procedure until you close the wound. Congrats! You now know how to make simple interrupted sutures.

That’s it for my 7 cookie ways of using dental floss in an SHTF situation. Have something more to add to the list? Hit the comments section and let me know.

Before you go, you may also like:
Put This Spice In Your Shoes To Fix Toenail Fungus
The vital self-sufficiency lessons our great grand-fathers left us
Knowledge to survive any medical crisis situation
Liberal’s hidden agenda: more than just your guns
Build yourself the only unlimited water source you’ll ever need
Secure your privacy in just 10 simple steps

You’ve probably heard this one before – brush and floss before hitting the sack. I can wholeheartedly say that dental floss is the best thing to happen for yapper health

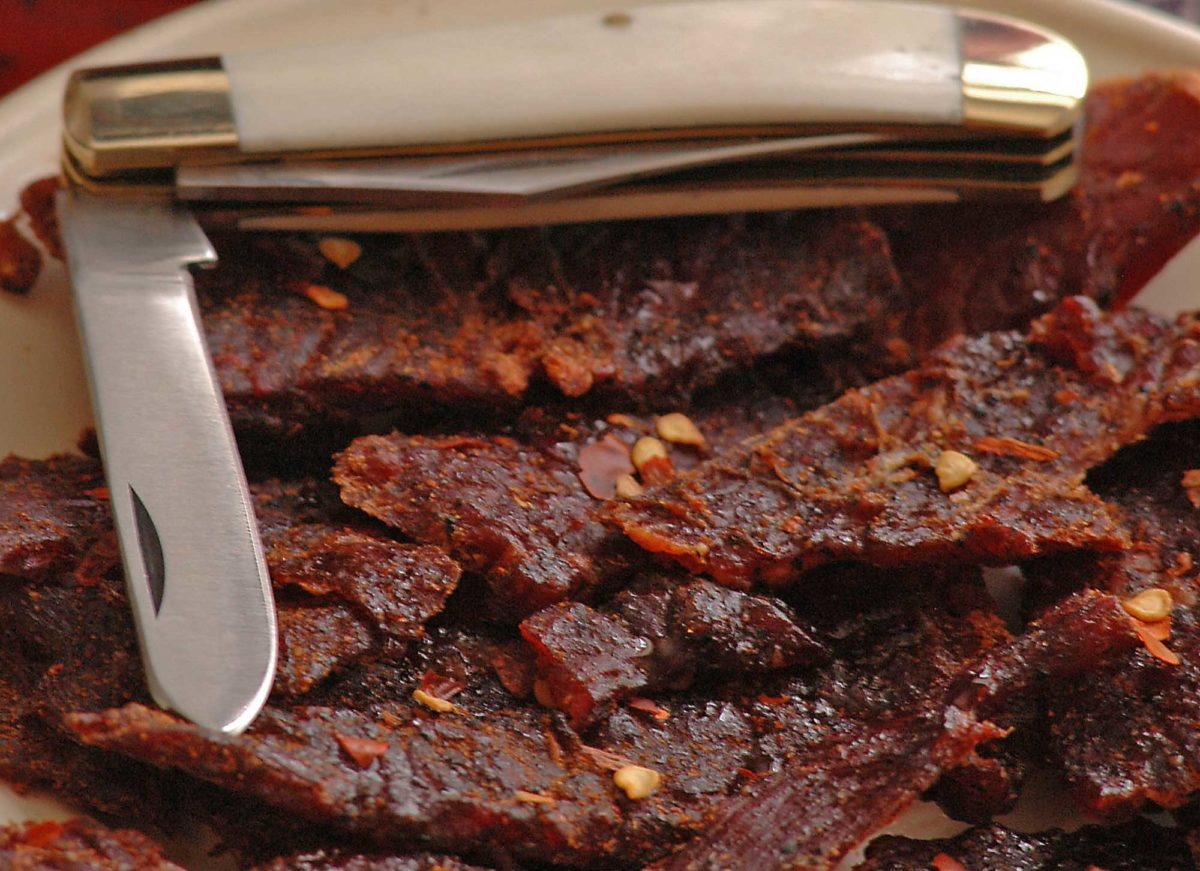
Beef jerky…the stories I could tell you about this stuff. I’m just going to say that I would marry beef jerky if that were possible (thinking about moving to state or country). Anyway, beef jerky’s awesome and, from where I stand, has but one caveat – not enough of it to go around. I mean, c’mon, I know it’s supposed to be emergency food or trail food, but who in God’s name eats just one 20g bag? It’s like saying “hey, it’s game night, and I’m gonna drink just one beer or eat one bag of chips.”

As far as a survival food is concerned, jerky’s the right call since it’s packed with just enough protein and fats to keep that engine of yours running. Sure, they’re salty AF and feels like you’re chewing on a rubber band, but it’s amazingly delicious. Since most of you are busy with your jobs and have neither the time nor the mood to replenish your beef jerky stocks, I thought about sharing with you my mouthwatering homemade beef jerky recipe.

It’s super easy to make and, most importantly, it mostly requires ingredients you probably have in your pantry. Why make beef jerky at home when you can always order some online? Because, let’s face it – as cheap as store jerky is, it’s pretty hard to find one that’s exactly the way you like it. Some are chewy, others salty as Hell and some, well, taste like crap.

First of all, preparing your own beef jerky puts you in full control of the dish, from choosing the beef cuts, all the way to the cooking part. Second, by choosing to cook rather than buy, you can make it as salty or sweet as you like. Last, but not least, beef jerky’s one of those recipes that don’t require an advanced degree in rocket science in order to prepare.

So, without further ado, here’s how to make some delish beef jerky at home.

Ingredients and Utensils

For this recipe, you will need the following:

  • Angus beef sirloin. I use around two pounds of beef for this recipe. Once you get it dried, you end up with one large zip-lock bag of beef jerky.
  • Worcestershire sauce (three-quarters of a cup).
  • Soy sauce (three-quarters of a cup).
  • Smoked paprika (one tablespoon).
  • Honey (one or two tablespoons).
  • Ground black pepper (two teaspoons).
  • Hot chili flakes (one or two tablespoons, depending on preference).
  • Garlic powder (one teaspoon).
  • Onion powder (one teaspoon).

That’s it for the ingredients. As for kitchen utensils, you will need a large bowl to mix your ingredients, an oven tray, baking paper, a pair of scissors, and, of course, a zip-lock bag for the jerky. All done gathering your utensils and all of the ingredients? Take your time. I ain’t going anywhere. When you’re ready, here’s how to put everything together.

Preparing mouthwatering beef jerky

Step 1. Take your beef cut out of the bag and wash it thoroughly. Dry with a couple of paper towels or place in a strainer.

Step 2. In a large bowl add your Worcestershire sauce, soy sauce, smoked paprika, honey, ground pepper, hot chili flakes, powdered garlic, and powdered onions. Whisk the ingredients using a fork or, well, a whisk.

Step 3. Cover the bowl with some plastic wrap and place it inside the fridge for half an hour.

Step 4. It’s now time to tend to the meat. Using a very sharp butcher’s knife, cut the meat into thin strips – if it’s easier, make stake-sized bits.

Step 5. Take a big zip-lock bag from the pantry and put the beef inside.

Step 6. Get the bowl out of the fridge and pour over the beef. Seal the bag and place in the refrigerator. Leave the meat to soak up all those juices for at least a couple of hours. Ideally, you should leave it overnight. Remember – the longer you marinate your meat, the tastier it will be. I usually keep it in the fridge for one or two days.

Step 7. When you’re ready to cook the meat, preheat the oven to 176 degrees – yup, you’ll need ultra-low heat. The idea is to dry the beef cuts, not to bake it.

Step 8. Take the marinated beef out of the bag.

Step 9. Place the meat on an oven tray covered with baking paper. Use a paper towel to soak the excess marinade.

Step 10. When the oven reached the desired temperature, stick the tray in the oven and cook for 4 to 5 hours. Every hour or so, flip the beef cuts.

Step 11. When they’re done, take them out of the oven, allow the cuts to cool down, and cut them into thin strips using a pair of scissors or a knife. Bag and tag!

Another Way to Prepare Beef Jerky

Don’t go anywhere, because this was just the warm-up. Okay, so you now know how to prepare beef jerky at home. But can you do the same, say during a shit hits the fan situation? Beef jerky is, more or less, the beauty of the best – thought it looks totally unpalatable, it’s actually delicious, nutritious, and, on top of that, it can be made anywhere and with any type of meat.

Now let’s imagine for a moment that you’re lost in the woods and you run out of food. Obviously, you’ve got to do something about it. Now, if you still have your bug out bag with you, whip out a snare and wait. Keep in mind that beef jerky can be made with any kind of meat.

However, if you want your trail snack to contain all the proteins and fats your body needs to keep on going, you would want to stick with red meat or fish. When you’re done with the gutting and butchering parts, here’s what you will need to do in order to prepare jerky.

Step 1. Find a clean spot to set up your working area.

Step 2. Use your survival knife or a very sharp rock to cut the flesh into very thin strips (half a centimeter). Don’t forget to cut across the grain, not with the grain (those muscle fibers will make meat harder to chew).

Step 3. While the meat’s still wet and tender, season it with your condiments of choice. I like to keep stuff like ginger, cumin, sugar, salt, pepper, and chili in small pill bottles. You can also make your own mix which you can use to season the meat. Put a little bit of sugar if you have some in your bug out bag.

Step 4. It’s now time to create some sort of drying rack. Look around for twigs, long stick or branches. If there’s nothing available, you can always hang the meat cuts by a low-lying branch using heavy duty zip ties. Just be careful to place that meat within eyeshot because it’s bound to attract some unwanted attention (flies, mosquitoes, and, yes, even bears).

(Optional) If you want to a little smokey flavor to your meat, place it over a small campfire. Don’t leave there too long, though. You’ll want to dry your meat, not cook it. Of course, there’s nothing wrong with some BBQed game, but it tends to spoil faster.

Step 5. If you manage to improvise a drying rack, flip the meat every couple of hours. Depending on weather conditions, like wind, humidity, and temperature, it can take up to four days for the meat to lose all moisture.

Yes, I know it’s a painstaking process. More so because you’ll need to be on the lookout for critters. On that note, when it’s time to hit the sack, don’t forget to bring the meat inside your tent or improvised shelter. Obviously, you won’t be able to keep an eye out while you’re asleep.

Step 6. After a couple of days have passed, take a look at the meat. You’ll know it’s ready to eat when the meat has a brittle aspect. If you prepare jerky from red meat, the color you’re looking for is a purple-brown. On the other hand, if you’re using white meat, the jerky will turn pink-grey when it’s done.

Step 7. All that remains to be done is to cut the meat into thinner strips and to store it in a zip-lock bag or an airtight container.

Wrap-up

Taking all these facts into account, I would have to say that jerky is indeed the ultimate survival food. Given the right storage conditions, a batch of jerky can last for at least a couple of months, if not for a whole year.

Now, as far as the oven-drying version is concerned, I would advise ditching the salt. Yes, I know that salt and jerky is a marriage made in Heaven, but the soy sauce adds and smoky taste to the meat, which means that it doesn’t need extra. Of course, if you’re not a big fan of soy, you can always replace with two tablespoons of rock salt.

I don’t know about you, but I like to add some kick to my jerky. If you want your snack to be spicier, you can add half a teaspoon of Tabasco in addition to the chili flakes. Yes, I know it sounds pretty hardcore, but hey, at least your jerky won’t be bland.

One of my friends told me that it’s also possible to prepare beef jerky using a dehydrator. Remember my powdered eggs recipe? Well, the method’s more or less the same. The only advantage of using a dehydrator instead of a regular oven set on ultra-low heat is that it reduces the cooking time by at least one, maybe two hours. If you have one of those gadgets in the kitchen, you should definitely try it out.

One more thing – the meat itself. Though I highly recommend using sirloin for this recipe since the cut will be, well, chewier, you can use whatever meat you prefer. Just be sure it has the same amount of fat as sirloin. Haven’t tried it yet, but from what I heard, jerky prepared from fish like rainbow trout, tuna or salmon is absolutely divine. Trouble is that it’s very hard to get ahold of a good recipe and most of the stuff on the market looks way too nasty.

So, here’s where I take my love. Hope my little winding has managed to convince you that making your own beef jerky is better than having to go through hundreds of Google pages in order to find the right one. As always, don’t think of cooking as something you need to do – have fun around the kitchen. Play some tunes. Work on your air guitar skills; whatever floats your boat. What do you think about my beef jerky recipe? Hit the comments section and let me know.

Beef jerky…the stories I could tell you about this stuff. I’m just going to say that I would marry beef jerky if that were possible (thinking about moving to state

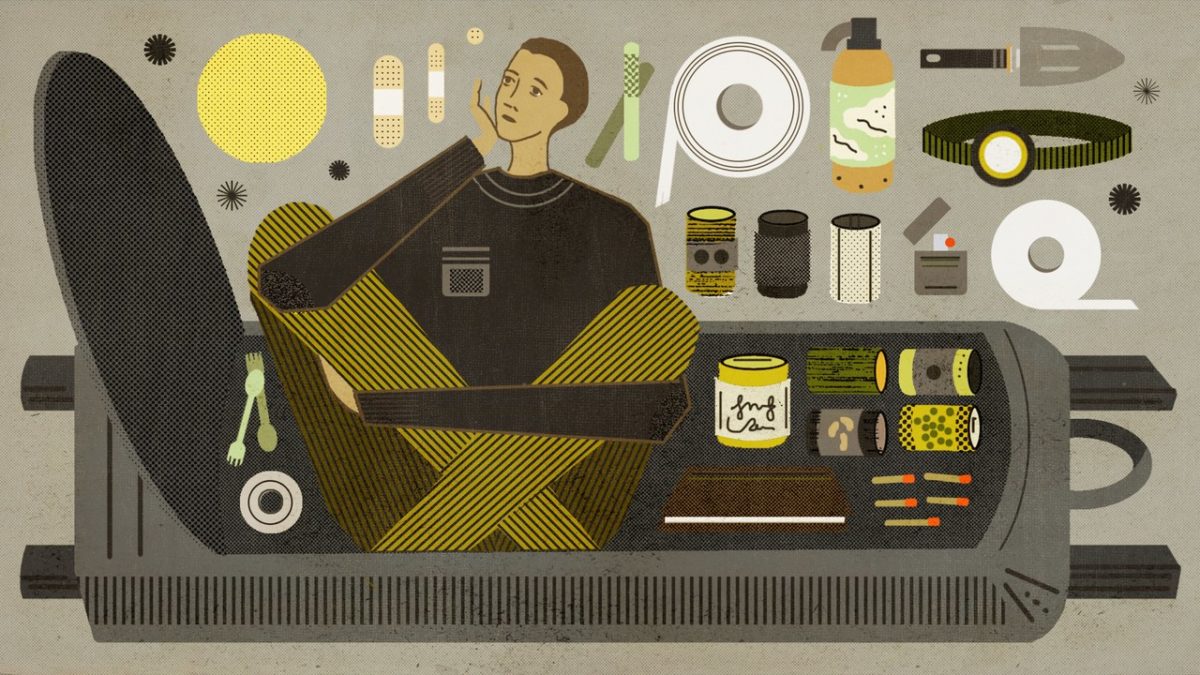
A couple of days ago, I had some friends over for a backyard BBQ. Several beers and patty flips later, one of them hits me with the oddest prepping question ever: “say, do you have any of odd stuff in your dark chest of wonders (that’s what I call my household survival kit)?”.

I really didn’t know what to answer. I mean, most of the objects us preppers carry and hoard (and don’t you try to deny that!) can be peculiar to some. Take magnesium rods, for instance. Aside from preppers, ex-military, and maybe some people who really don’t know how to spend their money, no one even considers owning such an object. Why would they?

Anyhow, for the time being, I considered the matter settled. But the question popped into my head again. Naturally, with my wife and kids fast asleep, I tiptoed downstairs and took a quick inventory of my prepping (what else could a man do on a Saturday night?).

Wouldn’t you know it, there are some things in there which may pass as peculiar to some, but handy nonetheless. So, after some careful consideration, I’ve decided to do a short piece about the odd and useful stuff every prepper should have around the house or hunting cabin or whatever. So, without further ado, check out my list of 5 outlandish items worth their weight in gold.

  1. Foldable pruning saw

If you’ve ever got around to do a bit of gardening, then you know how hard it is to get rid of vines or saplings. Yeah, long before I ever knew such a tool existed, I had to use a hacksaw or my survival knife to deal with stubborn outgrowths. Fast-forwarding a bit, during a yard sale, I came across this rather brutish tool.

I kid you not that when I first saw it, my first thought was “torture implement.” However, the guy selling the saw said it’s for pruning and not for chopping off fingers or garrotting someone. I feel a bit silly for thinking that no tool’s going to help me get rid of the backyard vegetation.

Needless to say, I pretty much came to enjoy messing around the garden now that I had the right tool. So, if you need to get rid of branches, saplings, twigs, vines, go for a foldable pruning saw. While you’re at it, you may want to consider adding one to your B.O.B – they’re awfully useful for quite a lot of jobs, and yes, in case of an emergency, they can be used for self-defense.

2. Quadruple-O Steel Wool

Here’s another doozie for you – 0000 steel wool. It’s sort of a byproduct of metalworking and very useful if you want to start a fire very fast. Yup, as you’ve probably guessed it, it’s highly flammable, which means that I wouldn’t store it next to a heat source or something. What I like to do with quadruple-O steel wool is to use in conjunction with char cloth.

For that, I’ve crafted my own version of the tinder, an old-school and ingenious way of whipping up a quick fire when you lack matches or lighters. My tinder box contains a small piece of 0000 steel wool wrapped in char cloth. I’ve bought mine from Amazon, but you can probably find them in every military surplus or sports store (they usually come in a pack that resembles smoking filters for rolling tobacco).

3. Guitar strings

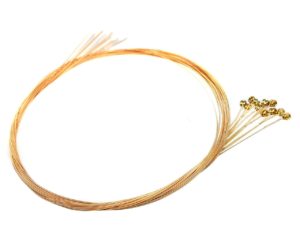
Never quite got around to learning how to play the blasted thing, but I do stock up on strings as often as I can. There’s great for all sorts of things – setting up snares, cutting dairy products like hard cheese, or even hanging heavier pictures or wall decorations.

A while ago, my wife got for her birthday this awesome stone replica of the Dendera Zodiac. The trouble was that the plaque’s heavy as shit, which means that a regular string or wire won’t do. I managed to find a workaround by using a bass string – those are thicker compared to solo guitar strings.

4. Pencil sharpener

Having one pencil sharpener around the house is no big deal. Even though the PC industry has skyrocketed, there are those, including yours truly, which prefer to stick to pen and paper. Hell, some of the articles you see here were laid on paper before getting them live. Now, I know this may sound a bit strange, but I got a whole box of pencil sharpener tucked away in the garage.

No, I don’t have that many pencils to sharpen, but they do have their uses. For instance, if you run out of tinder, you can always use a pencil sharpener to make more. Moreover, the blade can be salvaged and made into a trap.

Of course, if you know your way around weapon crafting, you can always take a bunch of pencil sharpener blades, and fashion yourself a club or something. Of course, the mount is melted down and turned into nail (I melted a box of bladeless sharpers and used the metal to forge me a bushcraft knife).

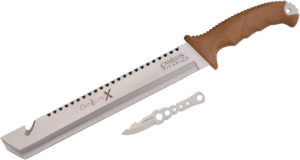
5. Machete

I really like knives. The bigger, the better. Anyway, a machete’s useful for pretty much any job that requires extra muscle. I personally like to use it for chopping small wood and some last-minute weed-whacking.

Like with any other knife, you should definitely aim for quality. It’s true that this type of blade might be too cumbersome for your B.O.B, but no one’s stopping you from getting one the next time you go for a hike. Just be sure to get one that’s made from carbon steel and not stainless.

Think the list needs some improvement? Let me know what you think in the comments section.

Most of the objects us preppers carry and hoard can be peculiar to some. Take magnesium rods, for instance. Aside from preppers no one even considers owning such an object.

Honey! I think I shrunk the…toilet paper stockpile. Don’t like it? Try this one for size: an empty toilet paper roll by any other name would smell as sweet. Welcome, weary traveler, to yet another kick-ass presentation on how common household items can save your life, “can” is the leitmotif of this here article.

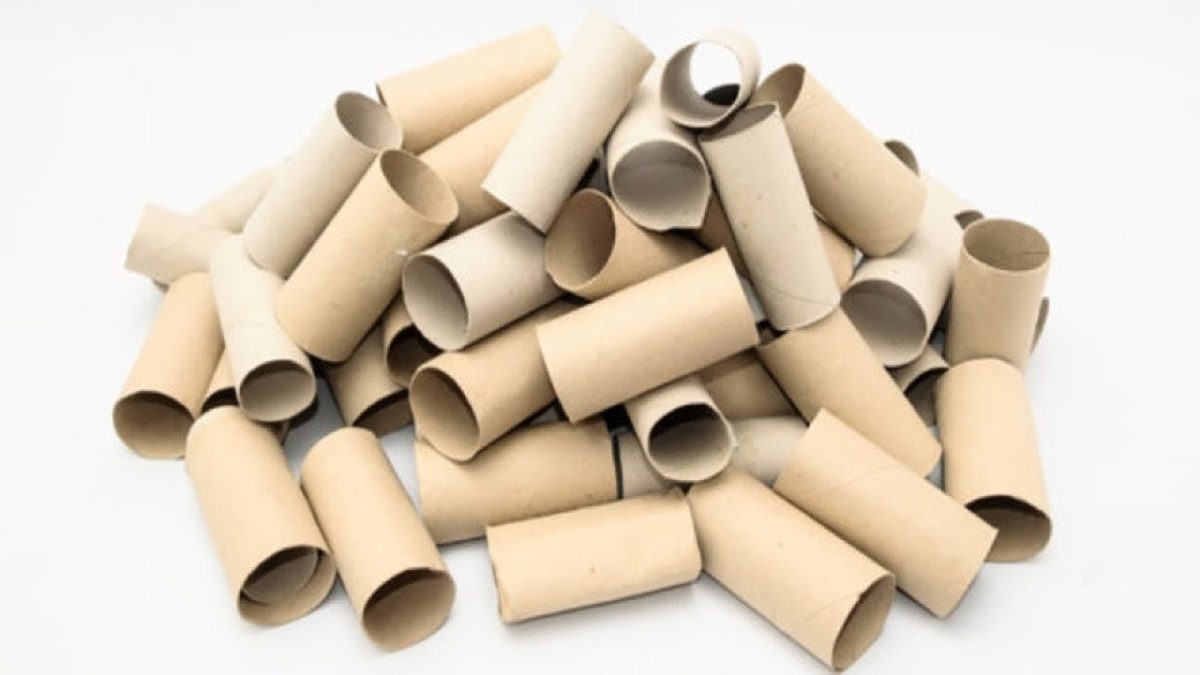
Yup, you’ve guessed it – today I’m going to talk to you about the afterlife of TP rolls. You know those carton cylinders we used to stole as kids from the trash to make “spyglasses”? Well, believe it or not, even though they’re the ghost of TP past, they can still be of some use to us. Luckily, most of those purposes revolve around our favorite topic which is survival.

So, without further ado or a-pun, here are 7 clever ways to use empty TP rolls in SHTF situations.

  1. Keeping your important docs safe, sound, and dry

In any shit hits the fan situation, there’ll be a lot of running, climbing, digging, and falling. Clothes and footwear can be washed and hung up to dry; even most electronics have some sort of waterproofing. Unfortunately, the same thing cannot be said about important documents such as driver’s license, photo ID, house deed or other things you may be carrying in your B.O.B. One easy way to make sure your precious docs don’t get totaled by water is to place them inside an empty TP roll.

Use some plastic food wrap or tin foil to seal both ends, and you’ve got yourself a weatherproof doc pouch. Well, it’s more of a roll rather than a pouch, but you get it. You can use the same trick to keep other things dry like headphones, lighters, matches or whatever.

  1. Hunting and trapping very small game

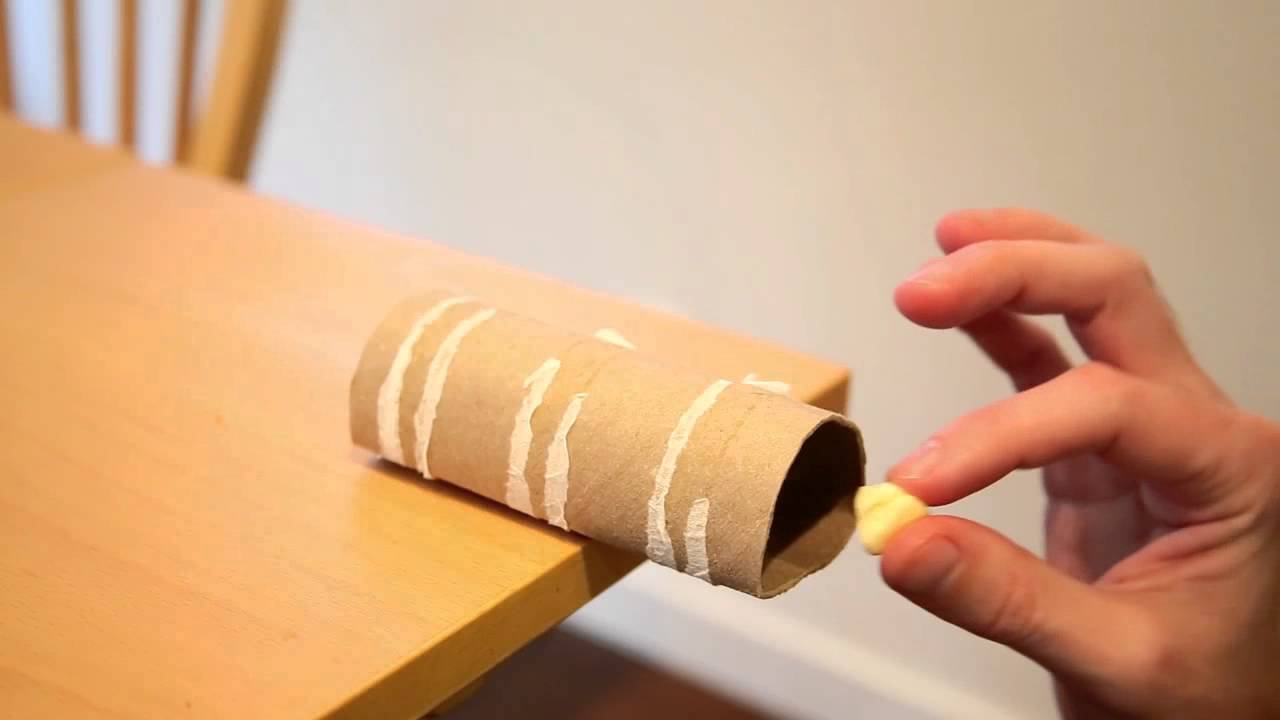
I know the perspective of gutting a small and innocent critter sounds horrific, but in an SHTF situation, you won’t have much of choice. If you’re hunting and trapping skills aren’t good enough as to allow you to create deadfall pits or body-gripping snares, you may be able to craft a small and very efficient one using an empty TP roll, some glue or double-sided tape, and something sweet.

Apply some double-sided tape to one of the openings and place the bait on the open end. Works great for small critters such as field mice. When Jerry sees the morsel, he’ll charge the tube to grab it. Once he enters the tube and takes the bait; he’ll try to get out the other end. As the double-sided tape is transparent, he won’t suspect a thing.  As for the killing and gutting part, I’ll leave that one up to you.

  1. Making a fishing box

Remember the part where I’ve told you that every heavy-duty B.O.B should contain some sort of fishing kit? Well, if you don’t plan on spending too much money on portable fishing kits, here’s how to make your own using an empty roll of TP. First of all, you will need to waterproof your container. For this, you will need some resin. Use a brush and coat the entire roll.  You will need to apply at least three layers of resin. Allow it to dry before proceeding to the next step.

Now, secure one end of the roll using a plastic or metal cap (go see your local thrift store for those). Apply some epoxy before putting on the cap. Now add a similar cap on the other end.

Don’t use epoxy because this will be the opening. Assemble your fishing kit: hooks, line, weights, small blade, flotation device, and place them inside the toilet roll. If you want to make the fishing kit look even more awesome, you can wrap it in paracord and add a small karabiner to the screwable cap (stop laughing). Enjoy!

  1. Voicing your concerns

In an SHTF situation, you may not be able to use your gadgets to make the rescuers aware of your presence. Although your B.O.B should contain at least one type of signaling device, like a whistle, signaling gun, flares or all three of them, it may possible to use an empty toilet paper tube to amply your screams for help. Yes, I know it’s sounds something a child may do, but every little bit helps. Remember that there are times when salvation comes not from intricate life-saving gadgets, but from a simple and silly thing like a TP roll.

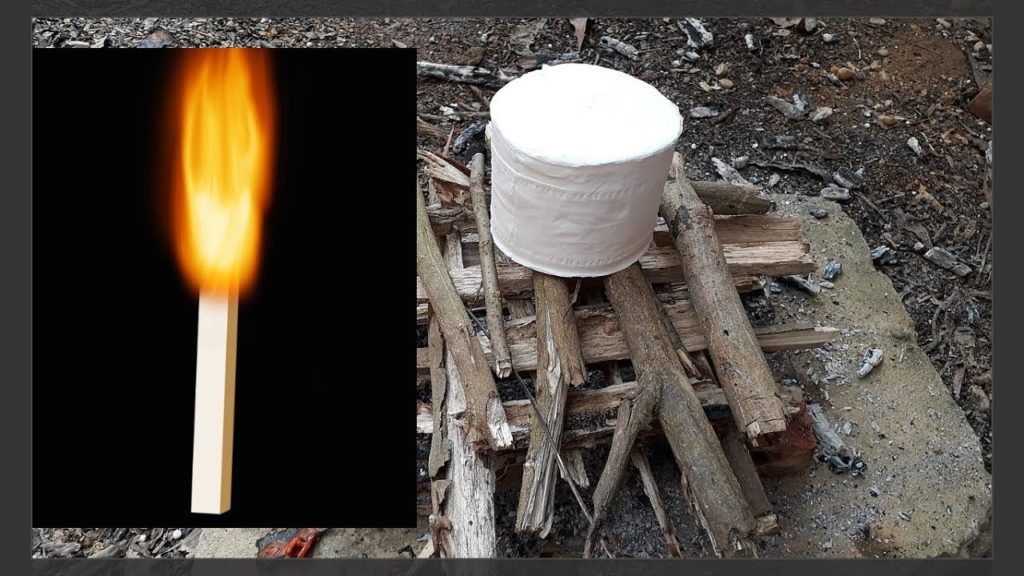
  1. Gimme fuel, gimme fire

As you know, nothing’s more soothing than watching those dancing flames in the night. No matter how shitty things get, you can always rely on a campfire to make you regain your composure. In case you’ve lost your tinder box or have nothing else on hand to start a fire with, you can always use a TP roll as tinder.

  1. Prescription glass protection case

As a person who needs to wear glasses around the clock, I haven’t had much use for protective cases. Still, in a situation that call for protection, you can always place your prescription glasses or sunglasses inside an empty TP roll.

  1. Keeping your cords together

There’s nothing more frustrating than opening your bug out bag and seeing all those cords tangles. Even worse is the fact that you’ll have to spend hours on end to untangle them. Sure, that’s not a problem when you’re at home, but you won’t have the luxury of time during a potentially life-threatening situation.

A simple way of keeping your cords together and prevent tangling is to make a small crease on the side of a TP roll and to tuck the cord inside. Draw one end of the cord through this crease, and that’s it. You’ll never have to untangle another paracord again. You can also do the same with power cables and strings. Remember the golden rule: if it looks stupid, but it works, then it’s not stupid!

That’s it for my ways to repurpose TP rolls. Feel that something’s missing from the list. Hit the comments section and let me know.


Other self-sufficiency and preparedness solutions recommended for you:

The Lost Ways (The vital self-sufficiency lessons our great grand-fathers left us)

Survival MD (Knowledge to survive any medical crisis situation)

Backyard Liberty (Liberal’s hidden agenda: more than just your guns…)

Alive After the Fall (Build yourself the only unlimited water source you’ll ever need)

The Lost ways II (4 Important Forgotten Skills used by our Ancestors that can help you in any crisis)

The Patriot Privacy Kit (Secure your privacy in just 10 simple steps)

Honey! I think I shrunk the…toilet paper stockpile. Don’t like it? Try this one for size: an empty toilet paper roll by any other name would smell as sweet. Welcome,

Ever stopped to think just how useful a bar of soap can be? No, you can’t shave it and turn it into plastic explosive as Frank Burns from M*A*S*H said, but there are lots of other stuff you can do with it beyond washy-washy. No matter if you’re using the old rectangular bar, the liquid variety or dishwasher detergent, each and every one of them could save your skin one day.

Most seasoned survivalists and bushcraft experts carry at least one bar of soap with them and, as you might expect, it’s not only for washing soiled jammies or getting the dirt off your hands.

Since soap is another one of those household items that should get its own statue in the survival hall of fame, I’ve decided to do write this short and sweet piece on how soap may serve your bushcraft purposes.

So, because talk’s cheap, here are 5 ways you can use soap to get out of a potentially life-threatening situation.

  1. Shampoo

I know that most of you don’t really see the purpose of washing your hair during an SHTF situation, especially because, I don’t know, priorities tend to shift. Still, hygiene’s very important, and you really wouldn’t want to end up with lice in your hair and worse.

Don’t know for sure if the rest of you people have even considered the thought of adding one bottle of shampoo to your B.O.B or at least an all-purpose shower gel (great for hair, body, carpets, upholstery and anything in between), but I really don’t see the point of getting one if I have one or more soap bars.

Sure, you won’t get curls or fluffy hair, but at least your head’s clean and lice-free. By the way, if you find yourself without shampoo\shower gel, you can also use liquid soap or dishwashing detergent to wash your hair. Just be careful not to use that dishwasher stuff on more sensible body areas because you’ll end up with sores (true story).

  1. Removing ice from the driveway nice and fast

No rock salt or kitty litter? No problem. You can create your own ice-busting concoction using regular liquid dish soap, water, and a bit of alcohol (don’t get your hopes up because you’ll want to rub alcohol for this concoction). Here’s what you’ll need to do: take a bucket and fill it halfway with hot water. Add one tablespoon of rubbing alcohol and one tablespoon of undiluted dishwashing liquid soap. Mix and use this concoction to remove ice from your driveway.

  1. A sure-fire remedy for poison ivy poisoning

Do you know what’s worse than having a bear on your ass? Having to resist the urge to scratch after getting into contact with poison ivy. What’s even worse about this type of poisoning is that the blisters can spread if you pop those oil-filled pustules.

How to solve this? Using dishwashing liquid soap, of course. Since the stuff’s designed to deal with oil stains, it will eliminate the excess oils from the area, thus stopping the blisters from spreading. Moreover, using liquid soap on poison ivy blisters increases the healing rate of your skin.

  1. Keeping them nasty bugs away from your food

Now that spring’s finally arrived, we turn our attention to things more romantic like picnics, BBQs, and campfire sing-alongs with your intoxicated buddies. The only thing that annoys me the most, apart from having to clean that bathroom (sorry, hun) is insects crawling over my food.

Yes, I should know by know that a picnic’s not exactly, well, a picnic, but I do hate to share meals with overly insistent ants, and God knows what.

After doing a bit of snooping on the Internet, I found out that you can actually protect your food from pests using diluted dishwashing soap. It sounds crazy, but believe me, it works. And no, the food will not have a soapy taste to it. To prepare your own pest repellant from soap, get yourself one of those spray bottles and fill it with others. Add two teaspoons of dish soap, shake, and spray the table area.

Yes, you can even spray the food – in its watered-down form the stuff’s safe to eat. Only don’t use too much of it because your food will certainly end up tasting funny.

  1. Getting rid of sticky things in your hair

Well, what can I say? Shit can happen even at home. Doesn’t matter how hard you try to maintain hygiene, because there’s always that moment when you forget that you just dunked your hands in Vaseline, but that itchy spot on the top of your hand just refuses to go away. For moments like this, be thankful for the fact that dish soap exists.

This stuff’s powerful enough to remove anything from the flue, Vaseline, nail polish, gum, and, yes, even peanut butter.

However, do keep in mind that dish soap was made for washing dishes and not to be used as a shower gel. Here’s what you will need to do in order to get rid of that nasty stuff from your hair. First of all, stop scratching because you’ll only spread around the stuff, and rip some hair locks in the process.

Now, pour a tablespoon of your favorite dish soap into your palm and apply it over the sticky area. Rub the area for 5 to 10 minutes. After that, wait a while for the soap to sit and do its job. After that, get into the bathroom, rinse your hair with plenty of water.

You can also use a little bit of shower gel or shampoo to ensure that there’s no more dish soap in your hair. I know it sounds nasty, but then again you really had to scratch that itch.

That’s it for my short and sweet list of how survivalists use soap, regardless if its liquid, solid or the kind used for washing dishes. Do you believe my list lacks certain applications? Hit the comments section and let me know.


Other self-sufficiency and preparedness solutions recommended for you:

The Lost Ways (The vital self-sufficiency lessons our great grand-fathers left us)

Survival MD (Knowledge to survive any medical crisis situation)

Backyard Liberty (Liberal’s hidden agenda: more than just your guns…)

Alive After the Fall (Build yourself the only unlimited water source you’ll ever need)

The Lost ways II (4 Important Forgotten Skills used by our Ancestors that can help you in any crisis)

The Patriot Privacy Kit (Secure your privacy in just 10 simple steps)

Ever stopped to think just how useful a bar of soap can be? No, you can’t shave it and turn it into plastic explosive as Frank Burns from M*A*S*H said,

You know that S really HTF and broke it when you have no other choice than to drink water out of muddy puddle you found on the side of the road. Perhaps a call-to-action to some but, to most of us is what makes survival gritty. Fortunately for us, there’s plenty of ways to make that unpalatable water safer to drink, and not all of them rely on water purification tablets or sterilization bottles.

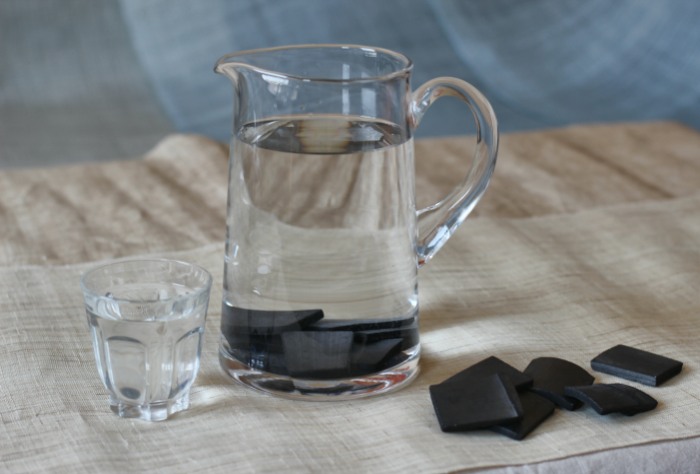
In an SHTF situation, it’s possible to filter water by using charcoal and nothing else. Yes, I know that the charcoal and water really don’t mix, but truth be told, this is the second-best water purification method after boiling. What I like about this little experiment is that it really brings out that cavemanish side of us which we desperately try to suppress and hide.

So, if you’re stuck out there in the wild, with no water-filtration sippy cup, no purification tablets, and not sources of water other than puddles and stinky ponds, here’s what you will need to do in order to whip up a charcoal-based sterilization system.

Word of warning before we start – through the time-honored method is great at getting rid of most bacteria and dirt, I would advise you to start looking for another water source. Works like a charm for a day or two, but wouldn’t bet my kidneys on it for anything longer than that.

Materials needed

  • Empty plastic bottled (I’ve tried it on an old Coca-Cola bottle).
  • Canteen.
  • Survival knife.
  • A handful of pebbles.
  • A handful of sand.
  • Charcoal
  • Water carrier (cup, mug or anything to store the purified water).
  • A clean piece of cloth or a bandage.

Making a charcoal-based water purification filter

Step 1. Gather all your materials. You can use a piece of charcoal from your campfire. Still, seeing that some necks of the woods are filled with tourist, there’s a slight chance of stumbling upon an extinguished fire pit, thus sparing you the trouble of starting a fire.

Step 2. Use your survival knife to cut the bottom of your plastic bottle. Don’t discard the keep.

Step 3. With the cap still on, put a couple of pebbles inside the bottle.

Step 4. Use the pommel of your knife to stuff the peddles.

Step 5. Add a layer of sand. Again, use the back end of your knife to make sure everything’s neat and tidy.

Step 6. Add the piece of cloth or bandage and arrange it.

Step 7. Toss in your charcoal. You may have to smash it in order to fit inside the bottle.

Step 8. Add another piece of cloth or bandage.

Step 9. Add more sand.

Step 10. Put some pebbles on top, and you’re all set to go.

More on the makeshift water filtration system

See how simple that was? Congrats on your first charcoal-based water filtration system. However, there’s one more thing you’ll need to do – test it. Do bear in mind that although the system’s great at removing most of the dirt, slime, and bacteria from the water, it won’t get rid of everything. So, in order to test your charcoal filter, fill your canteen with water from a puddle or other water source. Be careful to avoid picking up too much dirt or other things floating in the water.


Put an empty water carrier underneath your water purification system and begin pouring water from the canteen. Don’t fret or pout if the water inside the carrier is still dirty. It takes about three or four attempts to get clear water. Just keep trying. The results will certainly speak for themselves – not like you got any other choice.

Design-wise, it’s very important not to forget about the cloth pieces. Apart from charcoal, they also play a key role in the whole water purification system. What happens if you add a single layer or forget about them? You end up with charcoal-black water, and that’s a major turn off.

Careful when choosing the pebbles and sand. If possible, remove as much of the dirt and dust from them before sticking them inside your bottle. As far as the sand part is concerned, if you cannot find any, you can also replace the sand layers with more cloth and pebbles.

For the best possible results, I would 2-liter plastic bottles. You should also consider attaching some sort of handle near the open end to make the filtration device easier to hold. If you want to add an extra layer of filtration, cut a small hole in the plastic cap and fill the inside with a thin piece of bandage or cloth. You may have to wait a while longer for all the water to drain in the carrier, but at least it’s a bit cleaner.

Again, this water filtration method is designed for short-term use, not for the long-run. If you’re still lost, try to look around for other water sources. For instance, some tree holes contain a fair amount of water, but you’ll need to whip up some sort of siphoning system (that’s why I included a small tube in my B.O.B). You can always crush the stems of fleshy plants for extra water.

One more thing – choosing the right pieces of charcoal. Sure, all charcoal is the same, but for this to work, you will need to scavenge two intact pieces. You will end up with zilch and a lot of dirty water if you use crushed charcoal. Ideally, you should at least keep one or two pieces of charcoal inside your tinder box, but you can also make some by starting a fire.

That’s about it on how to make an efficient charcoal-based water filtration system. It’s a very basic rig, but it gets the job in a shit hits the fan situation. Do you think my design needs some improvement? If you feel like something’s missing, don’t be a stranger and hit the comment section. Would also like to hear your thoughts on other ways to purify water in the field.

See also the video below that shows you how the charcoal works in purifying the water:

Fortunately for us, there’s plenty of ways to make that unpalatable water safer to drink, and not all of them rely on water purification tablets or sterilisation bottles.

There’s more to zip than meets the tie. No? Let me try another one on you. Tie me a river? Zipper me timbers? I give up. Anyway, in case you haven’t figured it out by now, today’s top is zip ties – very common and handy household item, especially when things get way too intense in the bedroom.

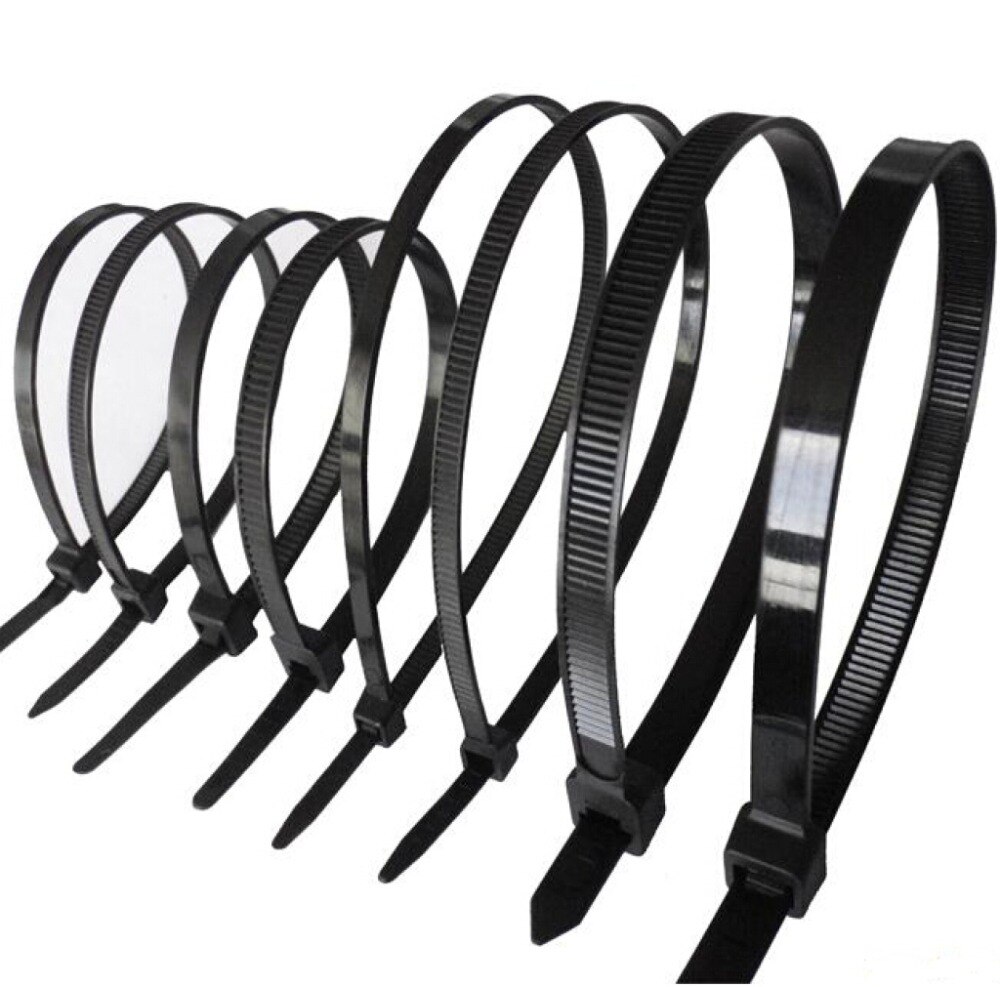
Joke aside, I believe that everyone should have at least one bag of heavy-duty zip ties around the house since they’re very useful for all manner of odd jobs – I personally use them to prevent my PC cables from getting tangled. Sometimes I even use them to organize my paracords.  Now, as you’ve guessed it, zip ties can be a great help in a shit hits the fan situation. So, without further ado, here are 25 survival uses for them zippy ties.

Splinting and securing bandages

Not every SHTF ends with you being rescued the minute you hit the “dial” button on your phone. Sometimes, you will need to fend for yourself before the cavalry comes to pick you up. Scrapes, bruises, wounds, and fractures are possible, especially when you’re forced to cross a hostile terrain.

Normally, you would use cordage (string, rope, shoelaces or dental floss) in case you need to splint a limb, toe or finger. If you don’t have anything else on hand, use one or two zip ties to secure the splint. Don’t forget to snip off the excess. The same method can be employed to ensure that the bandages stay where they’re supposed to stay and that would be the wound.

In a major medical emergency (e.g., profuse bleeding, protruding wounds), a heavy-duty zip tie can double up like a tourniquet. Only use this as a last resort or if you don’t have anything else on hand to control the bleeding like plastic tubing, surgical glove, condom or cordage. Indeed, a zip tie can be used to “clamp off” a bleeder but, in the long run, it ends up doing more damage than the wound itself.

Repair damaged gear

Missing stuff from your bug out bag like a sewing kit for instance? No problem as long as you have a bag of zip ties. They can be successfully employed to mend any kind of gear – parka with a missing button, zipper with no tab, holes in the backpack or heavy rain poncho; snip off the ends and you’re good to go.

Keeping B.O.B items within reach

Many survival items come with lanyard holes, but not all of them. That shouldn’t be much of an issue if you remembered to pack some zip ties in your bug out bag. Just run that plastic tie through anything resembling a hole and attach the item to your belt or to a mini carabiner (that’s how I keep my survival lighter).

Restrain someone

If you get caught up in the fight, use a heavy-duty zip tie to restrain the bad guy until the authorities arrive. Well, you can also use them for other restraint purposes, but I ain’t going to touch this one.

Keeping boots where they belong

One of the worst things that could happen to you during hacking is shoelaces going sour on you. Don’t have extras in your backpack? Grab a zip tie, run it through the holes, and you’re all set.

Prevent pants from falling off you

Lost your belt or had to use it for other purposes? Yup, grab a heavy-duty zip or more, run it through your pants’ belt loops, and tie it. Won’t win you a fashion contest, but at least you won’t have to go around butt-naked.

Craft a shelter

You can use zip ties to secure the beams to each other when you’re building a shelter. They’re also useful in anchoring your makeshift shelter to a nearby tree or to the ground.

Mark trails

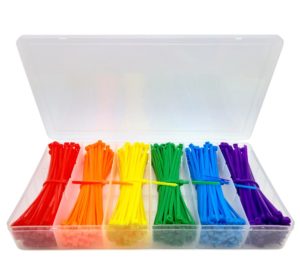
If you have a pack of brightly colored zip ties, you can secure them to low tree branches or rocks in order to mark off a trail. They also serve the purpose of signaling, letting your rescuers know that they’re going the right way.

Make a net

It’s possible to weave a net using small zip ties – very useful for all kinds of purposes such as berry-picking or storing game before reaching the campsite.

Make a trap

You can whip up a simple trap using a zip tie, a bent sapling, and some bait. Moreover, heavy-duty zip ties can be used to hang large or medium game from a branch – makes skinning and butchering easier. If you plan on curing meat, draw a heavy-duty through the flesh, and hang the cuts on a branch or an improvised line.

Repair a broken bag

If the zipper or purse lock refuses to work, grab a zip tie and secure the ends. Yes, I know it looks awful, but hey, at least your stuff will stay inside the purse\backpack\bag\tote.

Hang clothes

Don’t have any cloth hangers around the house? You really don’t need to hit the store to buy some more; just use a couple of zip ties to hang them in the wardrobe.

Patch holes in your fence

As the proud owner of a dog which has way too much energy, I spend at least a couple of hours every week mending the chain link fence. As replacing the entire grid would cost me a pretty penny, I usually use heavy-duty zip ties to patch the holes; thanks, Nero. You’re the best!

Keep your B.O.B organized

Use small zip ties to secure paracord and to keep your cables organized. Remember that it’s an emergency survival kit, not your sock drawer!

Extra traction in cold weather

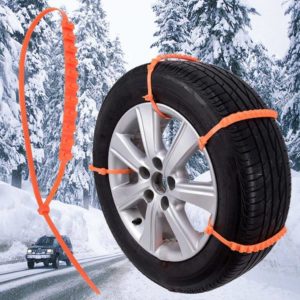
Although I wouldn’t advise you to drive around town with zip ties attached to your wheels, in an emergency, you can use two or three to gain extra traction on icy roads. Works best in conjunction with kitty litter and sand.

Quick-draw mod for pocket knives

A pocket knife is not only great for carving wood or cutting meat, but also a great ally in hand-to-hand combat. As a self-defense teacher once said, the first ten seconds of any armed encounter will determine the outcome of the fight. A pocket knife is an excellent close-quarter weapon, but getting the blade out takes a couple of seconds.

To gain an edge in combat, you can add a quick-draw mode to your pocket knife. Here’s what to do: take a piece of the zip tie and secure it to the finger hole. Snip away the excess. Yes, I know it looks dumb, but that little piece of plastic will get the blade out as soon as the knife leaves your pocket. Try it and see if there’s any difference.

Keep your travel bags safe

If you plan on going abroad this year, forget about using a padlock to secure your suitcase. Use a heavy-duty zip tie instead. Travel locks can be easily removed. The same thing cannot be said about a fastened zip tie which will take more than a pair of a bolt cutter to unfasten.

To be extra safe, use at least four of that stuff. You should use zip ties that match the color of your suitcase for concealment purposes. Don’t forget to tighten them before reaching the airport and to snip off the excess.

Leg protection

Mother Nature’s is very good at hiding stuff in plain sight. This includes poisonous plants like ivy or nettle. Now, if you’re about to cross an area with tall grass or plenty of puddles, use a heavy-duty zip tie to lash the pants to your ankles. That tie will make sure nothing gets inside your pants.

Make more room in your bug out bag

If your bug out bag comes with a bedroll, mylar blanker or sleeping bag, use a couple of heavy-duty zip ties to secure the bundle and to compress it. You can do the same for your rain poncho.

Makeshift bandana

Hair getting in your eyes? Use a bandana. You don’t have it anymore? Not a problem. Use a piece of zip tie to prevent those curly locks of your from getting into your eyes. If you have longer hair, it’s possible to use a pencil and then zip tie to make a bun.

Keeping your tomato vines in line
As a gardener, I can truly say that zip ties are what one might call a God-sent gift. Without those little plastic loops, my tomato vines would grow all over the place. That doesn’t sound so bad, I know, but I do have this obsession with keeping my garden organized; the same thing cannot be said for my clothes or socks.

Make a headlamp from any tac light

Although your tac light should come with a head attachment, in some cases the manufacturers forget to include that thingamajig. Anyway, if you find yourself unable to hold your electric torch, use some heavy-duty zip ties to secure the tac light to your head. Furthermore, you can use the same trick to tie a regular flashlight to your bike’s handle if the one you have can’t handle the darkness.

Hang a solar still

In one of my previous articles, I showed you how to make a simple solar still using a plastic bottle and a tin can. When it’s ready, use a piece of zip tie to secure your still to a nearby low-lying branch.

Patching your tent

Because I’ve been hiking ever since I could remember, I have at least one fully functional tent around the house. Now, the thing I realized about these mid-range tents is that the rivets closing the hatch tend to break after a couple of uses.

No problem if you’re still in town, but kinda shitty when you want to hit the hay and can’t close the hatch – bears are not a problem if you keep the fire running, but the mosquitoes won’t spare you.

Now, if you have issues with your hatch, use a couple of zip ties to close it. Yes, you may need a survival knife or a pair of scissors to get out of the tent, but at least those damned mosquitoes stay outside, where they belong.

Use around the house

Zip ties are great for keeping cables anchored to the wall or other kinds of odd jobs. For instance, I like to use them to dry the meat my wife will use to prepare beef jerky. If you have a little smokehouse, you can replace metallic hooks with zip ties to hang the meat.

They’re also double up as padlocks – if you have a gun cabinet, you can use one or two heavy-duty zip ties in conjunction with a lock to keep the guns out of children’s reach.

That’s it for my article on ways to use zip ties in a shit hits the fan situation. Anything missing from the list? Head to the comments section and let me know.

Not every SHTF ends with you being rescued the minute you hit the “dial” button on your phone. Sometimes, you will need to fend for yourself before the cavalry comes

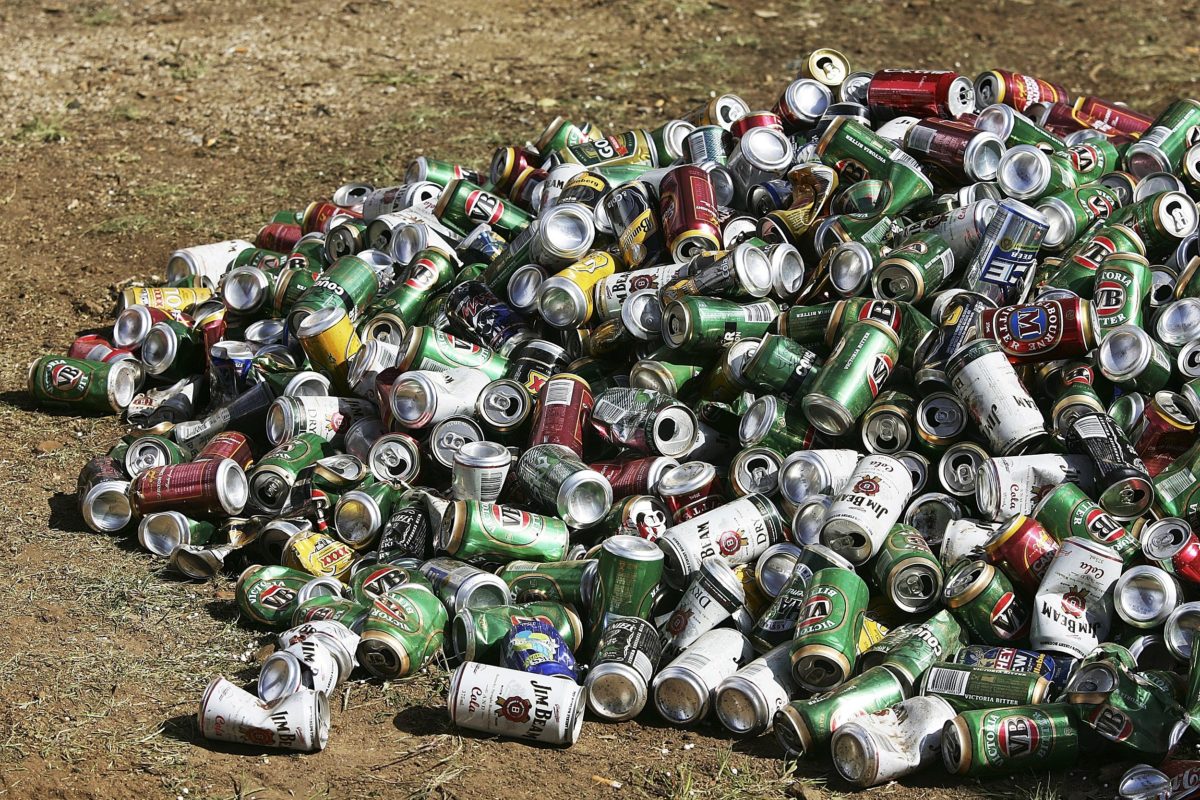
Fact: there’s no limit to what you can with a beer can. Why? Simply because it’s called a beer CAN, not a beer CAN’T. Yes, I know it’s a shitty pun, but there’s truth in what I’ve said – a metallic beer container can serve all kinds of purposes, long after the beer’s gone (sad face). Anyway, a couple of days ago, I had myself a little pow-wow with some of my buddies.

Not all preppers, but we do get along even on stuff that is not exactly related to survival. However, in talking with them, I found out that there are in fact people out there who really know how to get creative when they have to deal with what we come to an SHTF-type of situation. And because no boys’ night should be without beer, we kinda ended up talking about ale till the crack of dawn.

I’m truly sorry for not being able to share a bottle of suds with you people, but at least I can make it up to you by showing you a couple of ingenious ways to use empty beer cans in a shit hits the fan situation So, here’s my top X choices in reusing cans.

  1. Perimeter alarm

Halt! Who goes there? Maybe’s just the wind of a highwayman ready to deprive you of your valuables. Just joking. A perimeter alarm is a must-have if you’re planning on spending a night in the woods. Of course, I don’t think there are any cutthroats nearby, but there may be wild animals prowling the area.

No need to invest tons of money in one of those fancy, laser-triggered alarms when you can make one yourself using a couple of empty beer cans and some cordage. You can always replace regular cordage with dental floss if you plan on using it for other purposes.

  1. Poor man’s survival kit

If you can’t find it within you to spend a couple of bucks on a professional or military-grade survival kit, you can always make one yourself using an old beer can. Just cut a hole on the side and fill it with stuff like weatherproof matches, lighter, dental floss, shoelaces, fishing utensils or whatever.

  1. Camping Stove

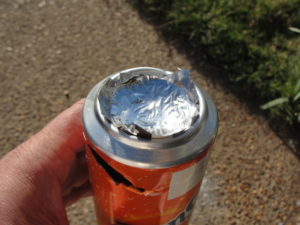
As they say, survival can be a beach. If you find yourself in a tight spot with nothing to cook your dinner or warm up the inside of your tent, craft a small camping store using an empty beer can. Flatten the top, cut a hole on the side, and place a small candle on the base. Soup may take forever to cook, but at least you’ve got something to keep you warm during the night.

  1. Lantern

All out of matches? Tac light’s batteries died out on you? No problem. I got you covered. It may be possible to make a meager lantern out of an empty beer can and a small candle. Cut a hole in one side of the beer can. Fit a small candle inside. Attach a stick to the ring, fire up the candle, and, voila, you now have a small lantern. May it be a light for your in dark places, when all other lights go out (and I did not quote from The Lord of the Rings).

  1. Starting a fire

Remember that article about how to start a fire using a water bottle? Well, believe it or not, you can do the same with an empty beer can. Basically, you will need to harness the reflective power of the can’s butt in order to focus sunlight on tinder. Here’s what you will need to do. While the sun’s still high (not that kind of high), grab an empty beer can and place it on the ground. Just below its butt, place a handful of tinder. Rotate the beer can in order to focus the sun rays on the tinder.

If nothing happens after 15 or 20 minutes, it means that the can’s butt is not polished enough to reflect the sunlight. Not a problem – grab a handful of sand or rock salt and start giving that butt a good shine. Allegedly, you can also use chocolate to do the same thing, but I haven’t tested that yet. Place the can again on the ground and rotate it in order to focus the light. When you see smoke coming out, add some more tinder, and blow on it.

  1. Makeshift kettle

Cowboys went through a lot of trouble to make sure that they start each day with a hot cup of coffee. As you know, that meant carrying a heavy cast-iron pot. Well, times have changed, but our need for a hot drink remains the same. Now, if you find yourself stranded in some neck of the woods and nothing to boil water in, you can always pour water in an empty beer can and place it close to the embers. That’s also a great water purification method.

Here’s how it works. First of all, find a way to wash the beer can. Second, pour water into it and place it directly into the fire. Please bear or beer in mind that it will take a while for the water to boil, so sit tight. Once you hear bubbly sound coming from the can, use a stick or a pair of prongs to remove the can from the flame. Wait for it to cool down, pour in your canteen, and enjoy. You know what? This kind of victory calls for another beer. Cheers!

  1. Making char cloth

If you the thought of packing some char cloth has never crossed your mind, don’t worry because you can make some using an empty beer can. Get a fire running. In the meantime, fill a can with cotton, punk wood or bark. Fold both ends and toss in the fire. In a couple of minutes, the beer can will begin to disintegrate. When you see that you’re running out of a can, remove it from the fire, wait for it to cool down, retrieve the char cloth, and celebrate.

That about covers it for my list of great ways to reuse an empty beer can. Feel that something may be missing from the list? Get scribbling and let me know.

Fact: there’s no limit to what you can with a beer can. Why? Simply because it’s called a beer CAN, not a beer CAN’T.

Rock beats scissors and paper thrashes rock, but nothing beats paperclips. If I were to erect a statue for one of the many household objects that saved my sorry can more than I can count, I would definitely do it for the paperclip.

Yup, the same goggle-eyed Microsoft Word assistant that obstinately wanted to help you is the best possible tool a prepper could hope to have should he find himself corned and SHTF.

Forget about lockpicking – sure, paperclips can serve that purpose as well, but there are many other ways these bendable delights can help you. Seeing that you people are always on the lookout for multipurpose B.O.B items, in today’s article, I’m going to show you the many uses of an office paperclip. So, without further ado, here’s my roundup of paperclip survival uses.

  1. Crafting a compass

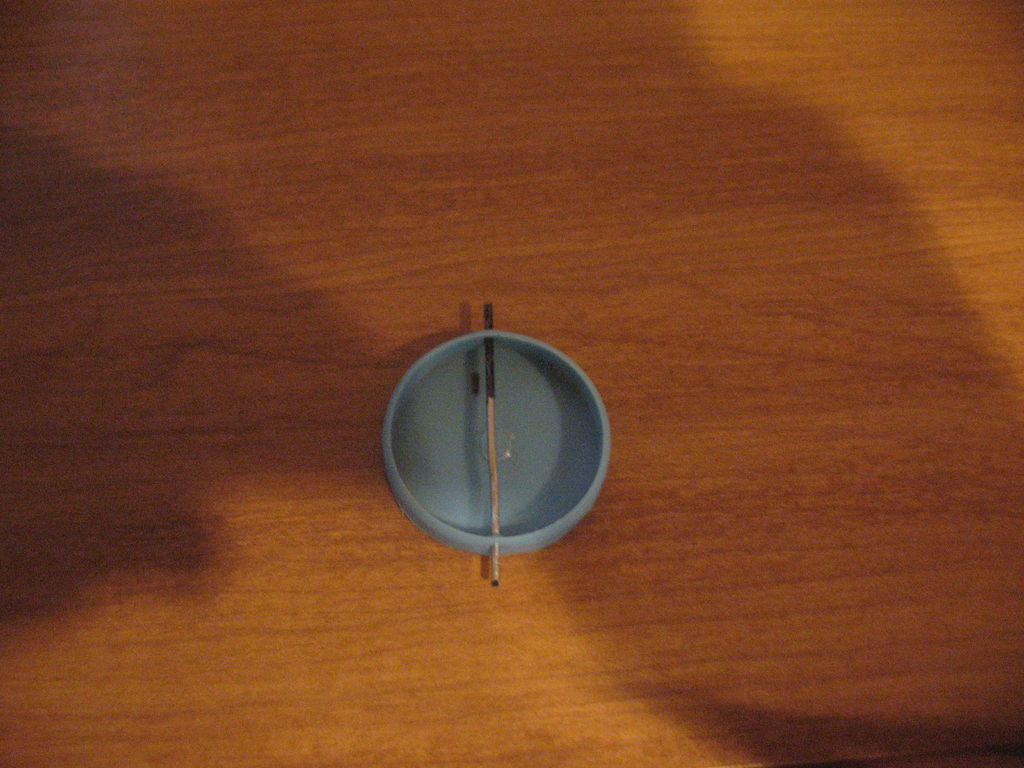
In the darkest night or brightest day, the compass will always point the way. But what happens when the compass goes missing or, worse, damaged by a fall or something? Well, it may be possible to get back on the road again using a makeshift compass. Even better, you can do this anywhere using only your B.O.B. Here’s how to make your own compass. Bend the paperclip until you get a long segment. Use your multitool or sharp rock to cut it.

Then, take out your survival knife and magnetize the paperclip segment (most survival knives are made from steel which is known for its kick-ass magnetic properties). You can also use the cap of a Philips screwdriver or any piece of magnetized metal.

After adding some kick to the paperclip segment, grab a bowl or any kind of water container and fill it with water. Take a small leaf, put the metallic filament on it, and place it in the bowl. The small fragment will point out the north-south direction.

  1. Signal-boosting

As you know, the worst thing that could happen to you in any SHTF situation is not being able to get in touch with the emergency services or your family.

This can happen for any number of reasons – land features (yup, some land formations won’t allow phone or short-wave signals to get through, acting like some sort of cage), carrier not having enough coverage or signal amplifier in that area might have been damaged, electromagnetic interferences, and the list goes on. You can’t do much about the smartphone since with the emergent 5G technology you will need more than a paperclip for a signal boost.

However, if you have a walkie-talkie or one of those hand-cranked portable AM\FM radios, it may be possible to amplify the signal long enough for you to get in touch with, well, anyone.

Take a paperclip out of your B.O.B and bend it until you get an L-shape. Attach your make-shift booster to the nob on the upper part of the device’s antenna and give it another try. Also works wonders for portable radios, especially when you need to tune in to NOAA’s weather radio or, perhaps, one of your local emergency broadcast stations.

  1. Reset gadgets to factory settings

I don’t know about you, but I always had this mortal dread of gadgets dying on me during an emergency. And it happens more often than you realize. With all these new updates and drivers clogging up the memory of our smartphones, there’s no wonder that the damned thing stops working. And the last thing you’ll want in an SHTF situation is to debug your gadget.

Now, if you haven’t already switched to one of those survival phones (more battery, almost indestructible case, and fewer apps and updates), there might be a way to jump-start your phone in the field, provided that your battery still has some juice left in it. Take a small paperclip and bend it until you get a small segment.

Pop open the phone’s back cover and remove the battery. Look around for a small hole. It should have a little “reset” label on top of it. Use the tip of your bent paper clip to push the button. Keep it pressed for at least five seconds. The phone will reboot and return to factory settings – make sure you have enough battery, as this procedure will siphon at least 10 percent. You can also do the same for other devices like laptops or tablets.

  1. Making small field repairs

Since paperclips are made from malleable steel, it doesn’t take too much imagination to realize that they can be used for just about any kind of odd job. For instance, if you’re the proud owner of a pair of prescription glasses, you may be able to replace a missing frame screw with a small piece of a paperclip.

Thorn clothes can also be fixed by securing the holes with a long piece of paperclip bent into the desired shape with a multitool. Don’t have a smartphone stand? No problem. Grab one of those heavy-duty paperclips and start bending it until you get a little seesaw-style stand.

In case you lost your fishing tools, you can always improvise some hooks using paperclips. Just secure them to the other end of a dental floss thread, and you’ll be enjoying a fish dinner in no time.

  1. Hunting small game

They call it “survival of the fittest.” I’d rather go with the wittiest. In any SHTF situation, securing another food source become a priority, and hunting’s the way to go. Don’t go for the big game, because you won’t do shit without a hunting rifle and those things are far too heavy to carry around – the chances are that you won’t have enough time to grab your pea-shooter before scooting.

Anyway, for hunting small game like rabbits, birds, ferrets, and badgers, a blow-dart gun will provide you with all the firepower you’ll ever need. As for ammo, take out a couple of paperclips, straighten them out using your multitool, and sharpen them.

For the weapon itself, you can use a small plastic tube or a hollowed-out piece of reed (bamboo stems are also good for crafting blowguns). Place you darts inside, bait your game, aim for the head, and fire. Won’t look pretty but at least food’s back on the menu.

  1. Small bone-splinting jobs

Nothing’s worse than stubbing your toes in a piece of furniture (those of you who have the midnight munchies will certainly know the struggle). However, there are far nastier things that could happen in the field, especially during one of those charming SHTF situation. Now, in case you someone manage to stub your toe or break a finger, you can whip out a field splint using two straight pieces of paperclips.

Put one below, one above, and use a clean cloth to secure the splints to the damaged finger or toe. Don’t forget about rubbing a bit of baking soda or washing the area with a saline solution to cut down on the swelling. Yes, I know it looks like exactly the same thing you would get after visiting a sleazy back-alley clinic, but at least you get to keep your kidneys and fingers.

  1. Cleaning fingernail dirt

Yeah, I know that the last thing on your mind during a survival situation is a manicure, but hygiene’s very important, no matter how shitty things get. And, in this case, it’s more about preventing some nasty medical conditions than adhering to some outdated beauty rituals.

Fact one: your hands will get into contact with lots of stuff. Fact two: no matter what you do, you’ll always end up with dirt under your fingernails. Which brings us to fact number three – if you don’t remove the dirt fast enough, you can end with pleasant things like tetanus. Want more? How about panaritium? Never heard of it?

Well, it’s an infection caused by a bacterium that seeps in the tissue beneath your fingernail. The result – inflammation and, in most cases, abscess pockets forming underneath. Do you know how panaritium is treated? Surgical removal of the nail, which in your case must be done with whatever you have on hand and without any kind of anesthetic. So, If I were you, I would take out a piece of a paperclip and start removing that dirt as soon as possible. You’re welcome!

  1. Crafting mini skewers

In the hopes that I didn’t frighten you too much with the above statements, here’s another crafty way of using skewers for those rare and relished moments spent with friends and family – cooking over a firepit.

If you’re a camper, then you know that as much as you try convincing yourself and others to bring all the stuff needed for the great outdoor cookout, there’s always something left behind or overlooked. It’s easy to forget skewers after packing everything but the kitchen’s sink.

For those great moments spent around the campfire, you can improvise tiny skewers from paper clips – just bend one of those heavy-duty office paperclips until you get a long and straight piece. Goes along great with marshmallows, but call also be used to cook meat – my wife enjoys making mini chicken and pork skewers.

  1. Keeping your keys together

If you find yourself with no space on the keychain left for another key or token, you can always make more room by making a paperclip loop and attaching it to the chain. Keep in mind that this is a temporary solution. I would advise you against putting heavier stuff on this improv loop and to keep then entire chain inside your pocket.

You can always turn it into a more permanent solution, by looping two or more paperclips and welding them together (makes for a nice DIY keychain).

  1. Zipper tab replacement

If I were to make a list of the most annoying things that could happen in the field, a broken zipper tab would take second place right after ripped shoelaces. Fact is that most of us remember to pack at least one extra pair of shoelaces before going camping or whatever, but never to pack replacement zipper tabs. Sure, if it’s an interior pocket, then it’s no reason for concern.

However, if the zipper tab of your parka or backpack break or go missing, that’s when shit really hits the fan. Still, if you have a pack of paperclips inside your B.O.B, a broken tab shouldn’t be a problem – just remove the broken part, make a loop out of a paperclip, attach it to the zipper, and you’re good to good.

You can do the same for your parka, side pockets, and other things that come with a zipper.

That’s it for my kick-ass list of mind-boggling ways to repurpose a dull pack of office paperclips. If you have other uses in mind, don’t be a stranger and hit the comments section.

Before you go, you may also like:

This is more than just about your guns…
10 Easy Steps to Secure your privacy
Secret Military Solution For Power Independence

DIY Unlimited water source
Why a food reserve is way better than the Federal Reserve
Lost Skills of our Ancestors that still work today

Rock beats scissors and paper thrashes rock, but nothing beats paperclips. If I were to erect a statue for one of the many household objects that saved my sorry can

Life in plastic is, without a doubt, fantastic, especially when you find yourself in a shit hits the fan situation. Can’t say that I’m a big fan of plastic. Anyway, one has to agree that plastic’s not that good for the environment, and yes, we should do our best to recycle as often as possible. As for today’s topic, a plastic bottle, no matter, if it’s Coca-Cola, sprite or the common milk jug, can serve a lot of purposes, apart from storing liquids. So, without further ado, here are 8 ingenious ways you can use a plastic bottle in a shit hits the fan situation.

Improv trash can

When you’re hiking or camping, you won’t always have the luxury of having a trash can around, especially if you decide to go off the beaten path. Now, if the trash starts piling up, you can always use an empty plastic bottle as a trash can. Normally, a carry a small bottle with me filled with a little bit of sand and water to use as an ashtray.

Watering can for flowers and veggies

Don’t have the time to go and look for a new watering can? No problem. Grab the largest plastic bottle you can find, poke some holes in the lid, and use it to water your daisies or veggies.

Emergency mask

If you need to traverse an area filled with toxic fumes, it may be possible to improvise a mask using a plastic bottle, some charcoal, an empty tin can, and duct tape. Here’s what you will need to do. Use a pair of scissors to cut the bottom of a plastic bottle. Next, remove one of the bottle’s sides so that you can create a space for your face. Place some duct on the jagged edge to protect your forehead.

Now take an empty tin can and poke a couple of holes in the bottom. Use the scissors to cut the bottom of the can. Place a clean gauze on the bottom of the tin can and sprinkle some charcoal. Remove the bottle’s cap, position the tin can with charcoal, and use some duct tape to secure it in place. Congrats! You’ve just made your first dust mask.

Solar still

Since I already covered water purification using charcoal, sand, pebbles, and a plastic bottle, I’m now going to show you another way to make water safe to drink. In the field, it’s possible to construct a small solar using a plastic bottle and an empty beer can. Here’s how to do it. Take a 2-liter plastic bottle and snip the bottom. Using your fingers, fold the edges inwards, as to create a small pocket.

Now take an empty beer can and completely remove the top (leave the rim) using a survival knife. Pour some water in the beer can, put the water bottle on top, and place in the sun. After a couple of hours, you will see some condensation on the walls of your bottle. Lift your bottle, unscrew the cap, and pour the water trapped in the pocket in a clean glass.

Craft a raft

A large body of water to cross but can’t find anything that floats? No problem, as long as you have some plastic bottles at your disposal. Grab a couple of beams or large pieces of wood and arrange them in a rectangular shape.  Secure your beams using hammer or nails or tie the joints with your cordage of choice. After creating the frame, create compartments using boards or anything you have on hand.

Fill these compartments with as many plastic bottles as you can. Don’t forget to secure them to your boat. When you’re done, find yourself a pole or a very long piece of wood to use as a paddle. Cast that makeshift raft of your in the water and enjoy the trip up shit’s creek but with a paddle.

Waterproof tinder box

No place left to store your fire-starting gear? Well, if your tinder box is out of commission, you can always keep your stuff in a plastic bottle, to make sure everything stays dry.

Fire-starter

On the topic of fire-starters, you can use a clean plastic bottle in order to concentrate the sun rays on some kindling or tinder. Rip the label, fill the bottle with clear water, and rotate it in order to focus the beam. It will take a while, but it beats sitting there and praying for fire.

Fish and small animal trap

If you don’t know how to make a simple body-gripping trap, you can always turn a plastic bottle into one. To do that, use a pair of scissors or your survival knife to cut the top of the bottle. Remove the cap, reverse the top, and place it inside the trap. Use some duct tape to secure the top part of the bottle. For small fish, you need to place that thing inside a stream or something. If the water’s clean, that thing will be invisible. For a small game like field mice, place something sweet inside the bottle.

Makeshift kettle

Because boiling is the most efficient way to sterilize water, it may be possible to do that in the field with a bottle. To make an improv kettle, start by removing the top part of the bottle using your survival knife or a very sharp rock. Place the dirty water inside. Now, start a fire using your method of choice and pile as much fuel as you can find. When the fire picks up in the head, place a couple of small stones inside the flame and wait.

When they begin to change color, using some tongs or anything else, retrieve the stones and drop them in the water bottle. Wait for the water to boil, allow it to cool down, and serve.

That’s it for my article on ingenious ways to repurpose plastic bottles. Anything missing from the list? Head to the comments section and let me know.

Life in plastic is, without a doubt, fantastic, especially when you find yourself in a shit hits the fan situation. Can’t say that I’m a big fan of plastic. Anyway,