HomePosts Tagged "BOB"

Food is one of the crucial items for your bug out bag and INCH bags. You should know the difference between a bug out bag and an INCH bag.

An INCH bag stands for I’m never coming home. Essentially, it is a larger survival kit with all of the necessary items you will need to survive the SHTF scenario. The plan is to sustain you indefinitely or until you can reach a safety point, such as a predetermined location.

On the flip side, a bug out bag (BOB) holds three days of rescue items. They are ideal for civil unrest, hurricanes, fires, snowstorms, and other disasters. You do plan to return home when the coast is clear.

There are hundreds of choices when it comes to what types of food you can put in your bags.

There are a few things you want to consider when making your choices:

  • Calorie Ratio to Weight of Item: That can of soup might sound like a good idea, but it weighs a lot. You want food that has a small weight with higher calorie. You want as many calories per ounce as possible.
  • Macronutrients: You want more fats and proteins than carbohydrates. However, don’t forget the carbs because they do give you bursts of energy that you need for your journey ahead. Fats and proteins fill you up faster and add more calories.
  • Shelf Life: Yes, a fresh apple would take amazing, but you can’t store them in your bag waiting for an SHTF You need food that lasts for a long time. It is important that you keep a list of expiration dates, so you know when to rotate the items.
  • Preparation: The food items you select shouldn’t be hard to prepare. It is nice to have some comfort foods, but the food you select should be easily prepared. All you might have access to is a campfire or no form of cooking at all!

The List

  1. Raisins and Peanuts: If you’ve spent any time hiking, you know that raisins and peanuts are a standard food item. They are rich in calories and require no preparation efforts. You can pick the kind that has chocolate peanuts – everyone loves chocolate! However, it can melt if you are in the heat. It is best if you get individually locked bags rather than those huge bags. One cup of peanuts and raisins equals close to 700 calories.
  2. Freeze Dried Meals: Many preppers like to keep freeze dried meals in their bags. They will fill you up quickly. All you have to do is pour some hot water into the bags. Then, you seal up the bags for the recommended time. Some meals are enough for more than one person.
  3. Peanut Butter: A tablespoon of peanut butter can have up to 190 calories. That is a lot! Instead of lugging around a jar of peanut butter, look for individually peanut butter packets or cups.
  4. Dried Fruit: There are so many choices for dried fruit, from apricots to apples. They are full of sugar, so it can help to give you a boost of energy when you’re feeling low. Your local store should have a great selection. Pineapples, bananas, mango, and berries won’t weigh too much in your bag.
  5. Protein Bars: When you are walking for a long time, you need energy and protein to keep going. Protein bars are a favorite among hikers. You can eat them on the go. Most of them are pretty delicious. The only downside to protein bars is that they can get messy, especially if they contain chocolate. You can fit a few protein bars into your bar, taking up very little space.
  6. Beef Jerky: Jerky is another food item that doesn’t take up too much space or weight of your bag. You can munch on jerky as you are walking. Beef jerky is sold in dozens of flavors and packaging. It is a great source of protein. However, beef jerky also has a higher level of sodium, which could cause dehydration if you eat too much. Make sure that you limit yourself.
  7. Emergency Meal Bars: These bars are similar to MREs and protein bars, rolled into one. Emergency meal bars can have 2,500 calories in one bar! The flavor isn’t always amazing, but your goal is survival. Taste isn’t most important. They store easily in bags and make a good choice for an INCH bag to save space.
  8. Granola Mixes and Bars: Stores have whole sections devoted to granola bars and mixes. You can find bags with different things in the granola, a great choice for breakfasts and snacks. Granola bars are great food ideas for on the go. Even kids love granola bars! They store easily and come in multiple, delicious flavors. Some have nuts, oats, chocolate or raisins!
  9. Tuna and Salmon Pouches: You want different sources of protein for your bags. Cans of tuna are out of the question; they tend to weigh your bag down. The stores sell pouches of tuna and salmon, not mixed. They are great eaten cold or warmed up. You can put some tuna on a cracker for a snack. The pouches of tuna and salmon are relatively inexpensive, costing around one dollar each. They also come flavored, such as BBQ and lemon pepper.
  10. Dried Soup, Chicken and Beef Bouillon: If you want to make soup on the go, you need some bouillon cubes. They can easily be stored in envelopes and paper bags. All you have to do is add hot water. Just like MREs, you can find packets of dried soup that just requires hot water to reconstitute.
  11. Instant Oatmeal: If you have a tin cup to heat water, you can make yourself instant oatmeal. Instant oatmeal contains mostly carbs, but it is a great kick start to your day. There are multiple flavors available, taking up very little space in your bags. I would suggest keeping them in a plastic, zippered bag. Instant oatmeal pouches are easily torn.
  12. Meal Replacement or Protein Powders: Protein powder tends to be disgusting, but it is a source of protein and nutrients for you. All you have to do is add the powder to water. Add scoops to a plastic baggie and store them in your bag. You can also keep electrolyte powders in your bag that you just add right to the BOB bag. They will keep you hydrated.
  13. Instant Noodles: Who doesn’t like Ramen noodles? Instant noodles are super lightweight, but they make a great meal. Instant noodle packets are high in carbohydrates. The flavor packet has salt. Eating actual meals can feel comforting after a long journey or a hard day.
  14. Sardine Tins: There is some weight to sardine tins, but the tins themselves are quite small. There is a lot of protein, calories, and fats in these little cans. The weight might be worth it if you want an extra source of nutrients.
  15. Salami or Pepperoni: The idea of pulling out a log of pepperoni or salami might seem comical. However, you can find bags of sliced pepperoni. It does contain more salt than other meats, but you want some variety in your BOB and INCH bags.
  16. Tortillas: Bread is too bulky to take with you, so tortillas are a better choice. Tortillas contain plenty of carbohydrates, and you can use them with other food. It is a great addition to tuna or salmon to complete your meal.
  17. Ready to Eat Rice Pouches: Rice pouches are great for quick dinners now, and they are a great addition to your BOB for a real meal. Remember, these pouches have a lot of sodium and carbs. You shouldn’t pick rice pouches for an every meal type of item. However, you can add them with your tuna pouch to make a complete
  18. Instant Mashed Potatoes: When you want to have some comfort food, mashed potatoes fit that bill. Since you can’t bring along potatoes and create homemade potatoes on the trail, it has to be instant mashed potatoes. All you need is hot water. Add some instant mashed potatoes with a can of shredded chicken for a delicious dinner.
  19. Spam Pouches: Here is another idea for a source of protein, even if it is slightly strange. You have to enjoy the taste of Spam to want to include it in your BOB or INCH bag. Spam pouches can be heated in a cup of hot water.
  20. Dehydrated Hummus: Hummus is a favorite treat for many people. It is usually kept refrigerated, so most people don’t think about it as an option for a BOB. You can find packs of dehydrated hummus that requires you to add water.
  21. Crackers: Many of the items on the list are better with crackers. Yes, they are a bit bulky, so you have to consider what type you are bringing and the amount. Crackers make life better! They give you a better way to eat your dehydrated hummus and peanut butter pouches.
  22. Bags of Beans: Pinto beans are a favorite among preppers. They do take the effort to prepare, so that should be a factor. You need a pot that you can put over a fire. A bag of beans will need to cook for at least an hour in water over a fire. However, there is plenty of protein in a single bag of beans.
  23. Cereal and Breakfast Bars: If you need a boost of energy, cereal and breakfast bars are great choices. They typically contain oats and some fruit. They can give a bit of flavor and excitement to your pack!
  24. Sunflower Seeds: When you are on your journey, you want a lightweight and delicious snack that contains healthy fats. Sunflower seeds are a comfort food that can soothe stress and satisfy your hunger until you find somewhere you can set up camp to cook. Other seeds to consider are chia and flax seeds, which are lightweight and contain extra oil.
  25. Dehydrated Vegetables: Did you know that you can dehydrate your vegetables at home? All you need is a dehydrator, Mylar bags, and oxygen packets. Dehydrated veggies are easy to reconstitute with water and make great additions to dinners and lunches.
  26. Chocolate: There isn’t much protein in chocolate, but it contains sugar which gives you a burst of energy. The energy wears off quickly, but it will satisfy your cravings. It is a welcome relief after just eating canned and prepackaged food for multiple days. If you don’t want just to take plain chocolate, Tootsie Rolls are a great choice. Tootsie Rolls are great for hot summer months. Believe it or not, World War II soldiers carried them to eat. You want to make sure that you grab the long ones to conserve space
  27. Nuts: I mentioned peanuts and raisins, but there are other nuts you can try. Pistachio, almonds, and cashews are almost the top choices. You do have to be careful and look at the sodium content. Salted nuts do help to replace the salt lost because of extra sweating, but it can make you more thirsty. Too much sodium leads to dehydration.
  28. Cereal: Chances are you won’t have access to fresh milk while on the go. Dried cereal still adds carbs to your diet and gives a feeling of comfort. If you have kids along on the journey, Cheerios are a beloved cereal.
  29. Honey Straws: Honey is a delicious, unique source of sugar and energy. You need the energy to survive an SHTF Honey straws or hard sugar candies can give you that little burst that you need.
  30. Coffee Singles: Even if you are on the go, you still want to have some caffeine and coffee on the go. You can purchase instant coffee and Coffee-Mate To Go for flavoring and sweetness. Make sure that you have a cup with you that lets you heat your coffee over the fire or however you want to cook your coffee!
  31. Pop Tarts: I know you are thinking that those aren’t healthy at all. You would be right. Pop Tarts are mostly artificial sugar. However, they give you some energy and carbs if you need a pick me up. Plus, kids are pretty quick to eat them.
  32. Peanut Butter Crackers: I mentioned peanut butter and crackers separately, but you can purchase these together to save space. Premade peanut butter cracker sandwiches are found in the store and are relatively cheap.

There are so many choices for foods you can include in your bug out bag and INCH bags. You don’t want to pick all of these items. Find the ones that you think makes the most sense and you find the most enjoyable. Remember, a BOB is enough food to last you 72 hours. Most experts recommend a week or two of food for an INCH bag. After that, you should have supplies to start gathering your food by hunting and fishing.

Food is one of the crucial items for your bug out bag and INCH bags. You should know the difference between a bug out bag and an INCH bag. An INCH

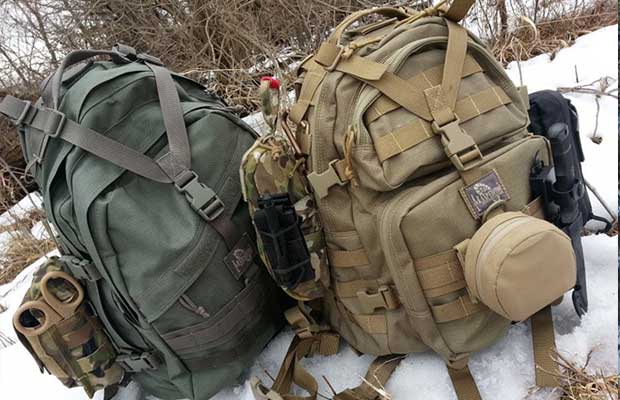
Do you have your bug out bag packed and waiting for you in the hall closet? Is your bug out bag tested and ready to go in a moment’s notice? Do you have a bug out bag at all or wonder, what is a bug out bag? Maybe you are just starting on the journey into preparedness and like a lot of other people, you are focusing on getting your bug out bag ready and have encountered the dilemma that so many of us have struggled with ourselves.

Bug Out Bags can be pretty expensive if you don’t know what you are doing and you may find yourself looking at all of the options and wondering, how much should a bug out bag cost? Do you need to go broke to provide a level of safety and security or is there a better way?

I am always looking for ways to improve my gear or readiness level and the subject of bug out bags is one that gets a lot of attention. There are millions of lists of items you “must have” in your bug out bag; even the prepper journal has our own bug out bag checklist and as you probably know, companies are already offering pre-built bug out bags for those who simply want to buy everything in one pack and forget about it.

Actually, this isn’t really a new phenomenon but I was out scouring the internet the other day and saw a company selling Bug Out bags with “everything you need” to be “ready for anything” for the low price of $2299.00.

I couldn’t believe the price they were asking people to pay so I went out and looked at the items that were included in their bug out bag and starting pricing them each out on Amazon. Aside from a lot of things I consider to be unnecessary (2 whole rolls of duct tape?), they had very expensive items in their bags when you could have easily substituted quality made, but cheaper equivalents. The bag weighed 44 pounds too which isn’t too shabby, but not the greatest either.

I started thinking that many people go about planning a bug out bag with the items they need, but neglect to look at the bigger picture and how I might be able to save someone from a potentially costly mistake. This article is my effort to demonstrate how you don’t need to spend $2200 or $1000 or even $700 to create a perfectly suitable bug out bag. Of course this assumes you have none of the items you need and would have to purchase everything.

What is a bug out bag?

Let’s start by defining what I mean by bug out bag and describing how I envision its use in a SHTF scenario. A bug out bag is what you grab when you are heading out the door and you don’t know when you will be coming home. It should contain all of the supplies you will need to live for at least 72 hours. That point is crucial in understanding the items I chose and by comparison what I think could be left out. It is not the bag that will make you “ready for anything” because that is an unobtainable goal. Properly configured though; a good bug out bag should help keep you alive.

What do you need in a good bug out bag?

Now that we know what a bug out bag is designed for, let’s go over the items I think you need to achieve that goal. I am leaving off firearms from this list.

  1. The bag itself – something to carry all of the stuff you need.
  2.  Water
  3.  Container
  4. Filter/Purification
  5. Food – Usually enough for 72 hours (2000 calories a day)
  6. Way to cook the food?
  7. Utensils
  8.  Shelter
  9. Change of clothing (appropriate to season)
  10. Rain protection
  11. Sleeping Bag or system
  12. Something to keep the elements off your head
  13. Tarp
  14.  Tent
  15.  Tools
  16.  Knife
  17.  Multi-tool
  18. Means to make fireFire starter/Lighter
  19.  Tinder
  20.  Light
  21. First Aid
  22. Optional items – Nice to have
  23.  Toiletries
  24. Wipes – For washing up
  25. Toilet paper
  26.  Gloves
  27. Cordage – 50 Feet
  28. Tarps or rain fly’s are lighter options than a tent and take up less space.

How can you save money on a bug out bag?

OK, so now I have a list of items that I think are pretty much the necessary minimums for keeping you alive and healthy for three days. Could I add more stuff in there? Sure, but it will cost you in weight and dollars. The bag contents I have below are under $500 (just barely) and weigh about 20 pounds. Weight is a very important consideration for your bug out bag for two main reasons. First, if your bug out bag weighs too much it will hurt you eventually. It might not hurt when you try it on around the house, but after walking 10 miles down the road with it, you will regret every single unnecessary ounce in there.

With too much weight comes limited mobility. The heavier the pack, the harder it is for you to move quickly. Moving quickly might be needed in a SHTF scenario. So, what items do I have chosen to create a bug out bag that is less than $500 (again assuming you have none of these supplies already) and weighs about 20 pounds?

Bug Out Bag

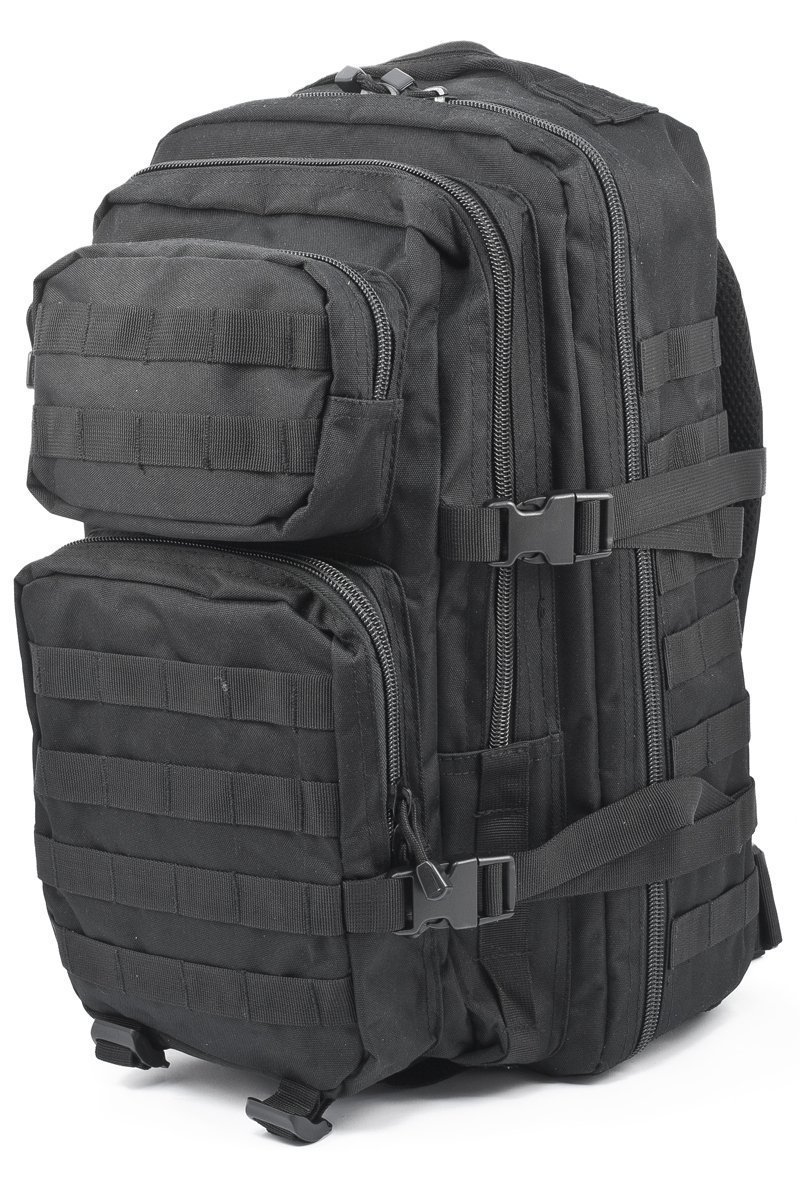
  • There are millions of options out there, but you could try the Mil-Tech Army Patrol Assault Pack for only $30 and 43.2 ounces.

Water

  • Container – I use the 32 ounce plastic Nalgene bottles for convenience. They run about $10 and weigh 8 ounces.
  • Filter/Purification – Sawyer Mini Water Filtration System. $19, no moving parts to break and only 6.4 ounces

Food

  • Simple Fuel – For the most calories in a compact space, try Mainstay emergency ration bars. Each has 3600 calories and two should last you 72 hours. $16 and 41.6 ounces for two (7200 calories)
  • Way to cook the food or at least heat water? – Solo stoves use small sticks that you should be able to find most anywhere. The Solo stove is $70 and weighs 12.8 ounces.
  • Utensils – Plastic Spoon, Fork, Knife – Grab a set the next time you are at the Fast food place, or a nice Lexan 3 piece Camping utensil $6 and 2.4 ounces.
  • Coffee/Tea – If you plan on this a nice titanium mug runs about $20 but only weighs 2.7 ounces

The bag itself can contribute significantly to cost and weight. Ask yourself if you need to spend $200 on a bag that will sit in your trunk.

Shelter

  • One change of clothing (appropriate to season). Remember you aren’t going on vacation here.
  • Rain protection – A poncho is the most versatile and cheap form of rain gear you can buy. Trash bags don’t count. You can purchase a camouflage Waterproof ripstop poncho for $15 and it weighs 17.6 ounces. Add a poncho liner for cold weather.
  • Sleeping Bag – Probably the most expensive item but the Elite Survival systems Recon 3 is $156 and 48 ounces. This also will take up the most room in your pack.
  • Something to keep the elements off your head
  • Tarp – A sturdy camouflage tarp is only $12 and weighs 32 ounces. Not too light, but still lighter and more compact than a tent.

Tools

  • Knife – Ka-Bar Knife – $59, 12.8 ounces and enough to do small and large chores.
  • Multi-tool – Leatherman Wingman Multi Tool – $29 and 10.4 ounces
  • Means to make fire
  • Fire starter/Lighter/Tinder – Grab 2 Bic lighters, some dryer lint and throw them in a Ziploc bag. $2 for the lighters and a couple ounces.
  • Light – Petzl Tikka 2 LED Headlamp – $29 and 3.5 ounces.
  • First Aid – Adventure Medical Kit – $25 and 9.6 ounces.

Optional Items

  • Toiletries
  • Toilet paper – You can easily grab a half roll from your home and put it in your pack. Low weight and no extra cost.
  • Wipes – For washing up – These are a little heavier at 19.2 ounces at $5.00
  • Gloves – Simple leather/cotton work gloves – $6.00 and only 3 ounces.
  • Cordage – 50 Feet of paracord should be more than enough – $5.00 and 2 ounces.

What additions or substitutions should I make to my bug out bag?

What about cost? You can save money there too. Instead of that $70 Solo Stove, you could make your own alcohol stove for practically nothing. Instead of the Nalgene you could simply use an old water bottle.But I can’t live without my kindle your say or I must have a two-man tent because I will need privacy. Of course everyone is different and this is only a guideline. I think the items I have here are a good place to start. Can you shave even more weight off this pack? Of course. You could start removing items like unnecessary Band-Aids in the first aid kit. You could forego the package of wipes and just use a washcloth; you could get a smaller knife, use a survival bivvy instead of the more expensive sleeping bag.

I am worried about the quality of some cheaper items. Will this bug out bag last?

Ah, that is the million dollar question isn’t it? What is this bag for? How do you envision using it? Could this be simply a ready to go bag in case there is a flood or hurricane coming? If so, will you be bugging out most likely to someone else’s house or a hotel in a safer area? If that is your plan, then you could forget items like tents and sleeping bags possibly. The bag itself doesn’t have to be military spec either if you are just planning for temporary displacement.

If on the other hand, you are planning for SHTF, Mad Max Road Warrior roaming the countryside, then maybe you should give a little more thought to gear selection and quality. All of these decisions have trade-offs and they almost always come down to weight and cost. Better quality usually will cost you more, but the question for you is ‘Is it necessary’?

I know there are a lot of data points in here. My list above worked out to a Bug Out Bag that you could buy right now. The total of the contents on that list, not counting clothes was $498.63. The weight came in at a total of 20.65 pounds if my math is right. It may not be the perfect bag for everyone, but it is a start.

Let me know what you think about your Bug Out Bag. Is there anything missing from this list that you have to have?


Other self-sufficiency and preparedness solutions recommended for you:

Healthy Soil + Healthy Plants = Healthy You

The vital self-sufficiency lessons our great grand-fathers left us

Knowledge to survive any medical crisis situation

Liberal’s hidden agenda: more than just your guns

Build yourself the only unlimited water source you’ll ever need

4 Important Forgotten Skills used by our Ancestors that can help you in any crisis

Secure your privacy in just 10 simple steps

I couldn’t believe the price they were asking people to pay so I went out and looked at the items that were included in their bug out bag and starting

Getting yourself noticed should be an important life goal, but there are times when screaming at the top of your lungs could mean the difference between getting back to safety and kicking the bucket. In an SHTF situation, apart from making sure you have food, plenty of water, and some shelter, you’ve got to make sure that the rescuers know where you are.

Sure, that fancy smartphone of yours seems like the most obvious choice, but what happens if you run out of battery or you lose it? Anything can happen out there, that’s why you should think about including other means of signaling for help. In today’s article, I’m going to show some neat trinkets that could save your neck should you ever find yourself in a life-threatening situation.

This book teaches you about the secrets of a healthy soil that will make your body impregnable to disease. Get your copy here

So, without further ado here are 10 signaling device you should definitely think about including in your B.O.B.

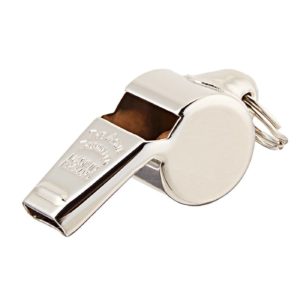
Whistle

Remember that irritating whistle your P.E. teacher used to make you run faster? Well, you should consider getting one, but not for the same reason, of course. If you’re stuck in some neck of the woods with nothing to make your rescuers aware of your presence that piece of plastic could indeed save your life. And, c’mon – even in a crowded intersection, you can still hear someone blowing on a whistle.

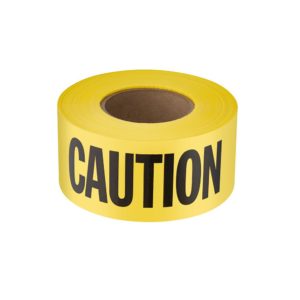
Roll of surveyor tape

Those flashy rolls road worker or surveyors use to mark off a path will come in handy if you get lost. Just rip a small piece, write something on it like where you are or where you’re head, and tie to a tree or pole. I would recommend getting something in a flashy color like electric blue, flash pink or even jaundice yellow. Even if you’ve never been in the woods before, you would still notice a piece of tape tied to a tree.

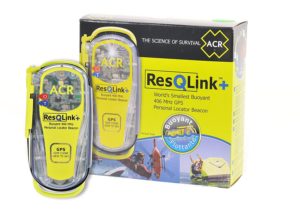
Personal locator beacon

This is one of the personal favorites. It works just like in the movies – you hit a button, and the thingamajig will notify the authorities of your location. Compared to the other stuff you’ll read about in this list, a P.E.B is a bit pricier (between $250 and $400, depending on the manufacturer and options), but a very useful item in case you get lost.

Most P.E. Bs operate over a short-wave frequency (125 – 405 MHz), which means that the signal can be picked up by anyone screwing around with a short-wave radio.  Now, apart from the fact that you must be willing to dig deep into your pockets to purchase one, you will also be required to register your PLB with the local authorities. Otherwise, they won’t recognize your signal and can’t provide aid.

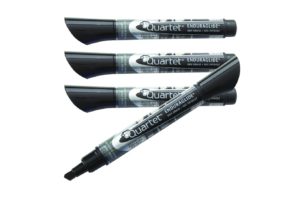
Chisel tip marker

When I was in school, we used these types of markers for our calligraphy class – they’re great for painting gothic letter if you’re interested in that sort of thing. Anyway, in case you have no other means of letting your rescuers know where you are, take one of these babies out and start making drawings on trees. You can write to them on any surface. More than that, neither snow nor rain could wipe them away.

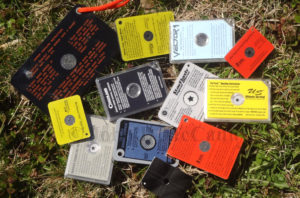
Compact emergency survival mirror

I know that in case of an emergency any kind of reflective surface would do, but it’s rather impractical to carry around a real glass mirror since it might shatter. That’s why I find these compact emergency survival mirror very fast – they have a smooth and clear surface, which means that they can reflect anything from sunlight to a flashlight, and given the fact that they’re made from plastic, the only thing capable of breaking them would be to actually step on them. Some of these mirrors can also be used to focus sunlight onto tinder or char cloth in order to start a fire.

Rescue Lasers

Yup, the same stuff a teacher would use to point out various things on the blackboard can be used in case of an emergency. Rescue lasers are compact, sturdy, and consume less battery than any LED bulb. You can choose whatever color you like, but I would stick to the flashy ones like neon green or bright blue. Bear in mind that this handy tool comes with a price to match – the cheapest one I saw was around 100 bucks.

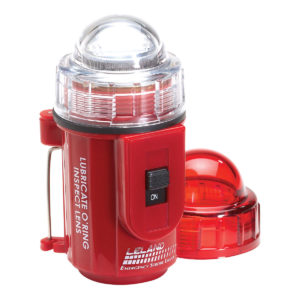
ELSs (Emergency Light Strobes)

ELSs look just like a P.E.B, except for the fact that they do not transmit your location over short radio. However, the light from one of these thingamajigs is so intense that you would have to be blind or something to ignore it. If you’re into beacons, you might consider and ELS over a PEB, since they’re much cheaper (around 20 bucks).

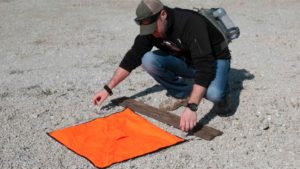
Compact emergency signal panels

Remember those disposable rain ponchos from the sports store? Well, here’s the signaling version of the poncho – an expandable signal panel that can fit inside your pocket. If you’re lost, lay it in the sun to let the rescuers know that you’re there and still breathing.

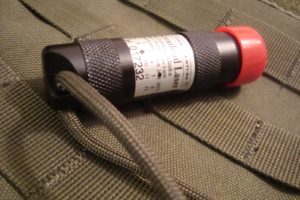
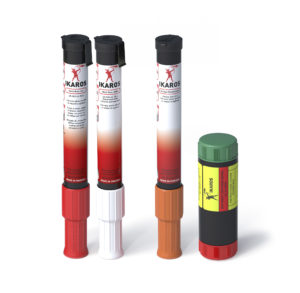
Emergency flares

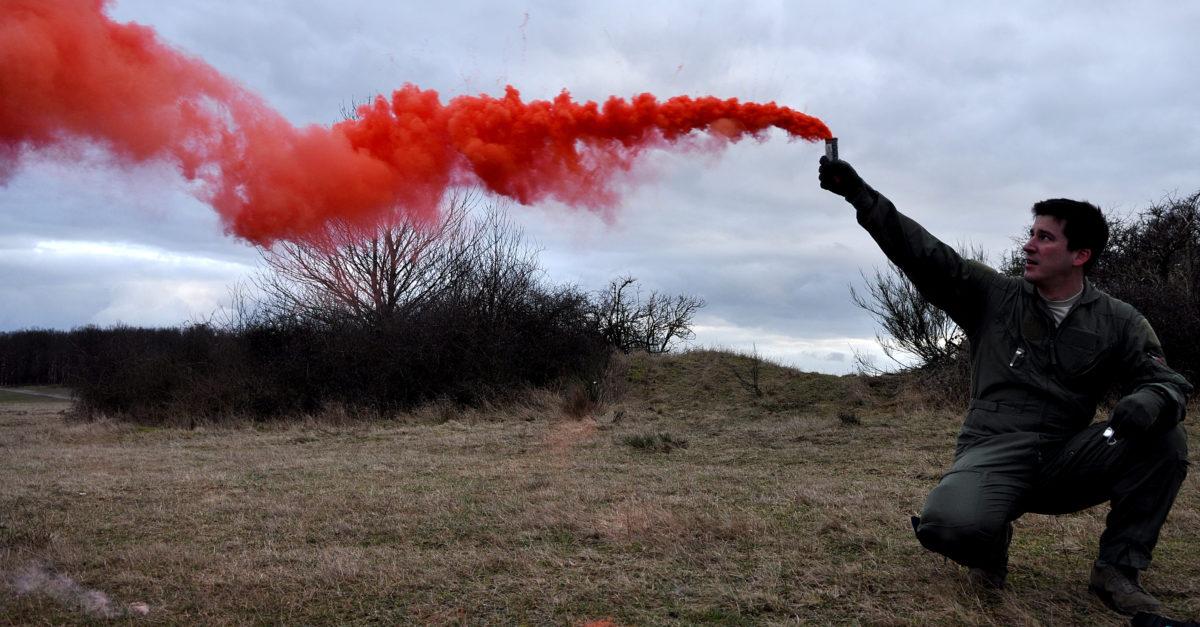
I personally try my best to stay away from those things after my son broke one in the living room and set the carpet on fire. However, except for this rather unsavory experience, flares are great for marking your location. Since most of them are weatherproof, you can use them in various scenarios: daytime, nighttime, heavy rain, snow storms. You can also start a fire with one of those thingies if you don’t have any matches or a lighter.

Light sticks

Need some light? Pop open one of these things and the darkness will literally melt away. Great for cave explorations or getting some light on that path during a storm. You can also use them to signal for help. They’re ludicrously cheap (I purchased a 12-hour light stick with multiple colors for two bucks).

Well, that about covers my 10 most favorite signaling devices. Think something’s missing from the list? Get to the comment section and let me know.


Other self-sufficiency and preparedness solutions recommended for you:

The Doomsday Book Of Medicine (Everything from the soil up and from head to toe)

The Lost Ways (The vital self-sufficiency lessons our great grand-fathers left us)

Survival MD (Knowledge to survive any medical crisis situation)

Backyard Liberty (Liberal’s hidden agenda: more than just your guns…)

Alive After the Fall (Build yourself the only unlimited water source you’ll ever need)

The Lost ways II (4 Important Forgotten Skills used by our Ancestors that can help you in any crisis)

The Patriot Privacy Kit (Secure your privacy in just 10 simple steps)

Getting yourself noticed should be an important life goal, but there are times when screaming at the top of your lungs could mean the difference between getting back to safety

One of the wisest things you can do with any aspect of prepping is to have direct first-hand knowledge of how to use whatever skill, tool or gear you are counting on to save your life. This applies to so many things, but it bears repeating. If you purchase a generator to keep the lights on for your family, you should start that puppy up once a year at least. Make sure you know that it works first of all, that you have the proper fuels and lubricants and know how to make it run. If you don’t know all of that, your generator might be worthless.

Its similar with food and long-term food storage. If you are like so many others that have purchased large bags of Hard Red Winter wheat, have you ever eaten any of this? Do you have a grain grinder? Have you ever taken a turn at grinding enough grain to make a single loaf of bread? If not, it is so much better to do this while the grocery stores are still open. Better to find out now that you don’t have something vital to your food preparations than after the world has collapsed around your ears. It is so much more advantageous to know what works and what doesn’t while you still have options to make changes.

I found myself with the same opportunity a couple of weeks ago with what I plan to use as my Bug Out Bag.

Our family decided to go on a backpacking trip for a few days into the wilderness. For this trip we would be staying overnight in the woods obviously and had to carry almost everything to keep us alive for a couple of days, possibly more on our backs. This scenario mirrors almost identically a bug out situation where you are forced to evacuate your home with nothing but what you can carry. A traditional Bug Out Bag is designed to contain enough supplies (food, shelter) to keep you alive for 72 hours. As it so happened, that was about the length of time we were in the woods.

My pack weighed about 45-50 pounds and some of that was due to my taking on weight that my wife couldn’t carry. This could happen to you if someone becomes injured or unable to continue. Even at my initial load it would have been about 40 pounds. That is fine, but not ideal for me I don’t think. Can I carry more weight? Of course. Do I want to be carrying more weight if I am running and potentially hiding for my life? No. What did I have in my pack? Here’s my list below:

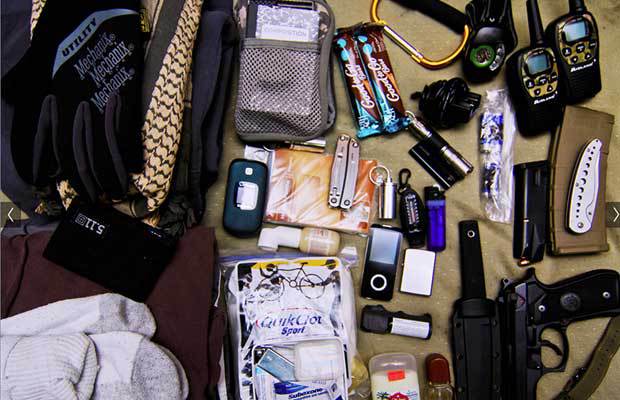
I am sure there were other little knickknacks but the point is that I wasn’t bringing what I would consider to be a lot of useless stuff. I also had a .45 strapped to my side.

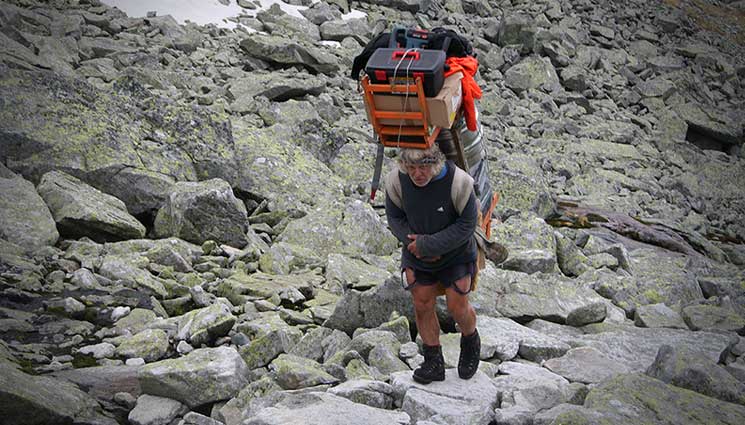
I have discussed this topic before in our post “Is your Bug Out Bag Going to Get You Killed?” where I cautioned anyone who thinks that they can strap on 50 pounds let alone hauling a load like the Sherpa in the picture above of gear and run out into the woods . This trip gave me some additional ideas as I reflected on my pack for the duration of our hiking. I started to think about this weight on my back being both all I could depend on as well as something that could easily be my downfall.

Weight A Minute!

Now, there are a lot of people out there who reacted pretty strongly to my post and thought that weight = security. The most important thing they said was to take everything you need and if it got to be too heavy, or if you had to abandon anything that was a choice you could make on the road. I agree with that concept as a last resort to some extent, but I don’t think that should guide your initial load out decisions. Weight is probably the single most dangerous aspect about any bug out bag for a couple of reasons.

Too much weight can hurt.
Real World Bug Out Bag

First off, weight over time can slow you down. This isn’t anything surprising to most people I know but you would not believe how many of you out there (I was like this too) will fall for the trap that says if I am in a serious enough situation, I can carry more weight because my life will depend on it. That sounds good as you sit in your house and read this post on your computer or your smart phone. 50 pounds doesn’t sound like much does it? When is the last time you strapped 50 pounds on your back and tried hiking up a mountain? It is different from walking out your driveway.

The “conventional” hiker/backpacker wisdom I hear all of the time is that the average person should not plan on carrying more than 25% of your overall body weight. Let’s assume for the sake of this discussion that you weigh 200 lbs. 25% of 200 is 50 lbs, right? Ta Da! There is that magic number! So, according to conventional wisdom, anyone who weighs 200 pounds or more should be able easily lug around 50 pounds on their back. While this is technically possible (I know because I have done it on many occasions) that doesn’t make it the wisest thing you can do.

I have also heard the argument that a military load out is heavier than that and this is certainly true however; do you want to start out carrying the most weight you possibly can? Now that we mention it, are you in the same physical shape as a 19 or 20-year-old soldier? I know there are 60-year-old men who do this all of the time, but the average person isn’t like that.

Weight in your pack slows you down and wears you out. Can you physically handle the weight? Maybe, but should you? Do you need to? Will that weight be on your back when you are trying to run? Will your bug out route take you up hills or mountainous terrain?

Take a look at professional hikers. For instance, the people who hike the Appalachian trail or the Pacific Crest trail in one long stretch are called thru hikers. They have taken hiking to a new level because if you’re expecting to put your body through that kind of stress (2,160 miles), you seriously have to consider each and every piece of gear. Their average pack load for the essentials, not counting food is around 14-16 pounds. Do you think you could hike further, faster and more comfortably if you lost 30 pounds from your bug out bag? I know that I certainly could have. Does that mean you make sacrifices? I am certain you do and a 16 pound pack is made with the goal of arriving at a resupply point many times along your route. It does consider fatigue and injury though which are two other factors you will have to address at some point with a larger pack unless you are a super hero.

Can you dance with that thing?

On our trip I was hiking up and down mountains on very narrow trails gaining over 1000 feet in elevation each way. We frequently encountered downed trees that we either had to go over or under. This same pack I was wearing wasn’t only heavy but it threw off my balance and added to my silhouette. When I tried to scramble over logs, I had to make sure I had a good hand-hold or else the pack weight might pull me back down the mountain. Simply ducking under a tree wasn’t so simple anymore and frequently I had to get down on my hands and knees to just clear a log. Normally, I wouldn’t have broken stride because I could just dip, go under and back out. My big pack added almost two additional feet of clearance obstacles at points behind me and would catch on a lot more than I normally would.

Getting back to the injury topic, with the extra weight and loss of balance I was less sure-footed so I had to go much slower to prevent getting hurt. The nimble hoping over rocks was replaced with carefully treading and watching each foot fall. If we are out day hiking I keep a steady pace, but with the big bag my kids were lapping me. All things to consider.

Walk the walk

It is so important that you get out somewhere and try out your bug out bag for 72 hours. This is a simple weekend camping trip and will show you so much about your pack that you simply don’t consider when you are throwing stuff in there. My mistake when I first started to pack my bug out bag was to list all of the gear I could possibly use, find the gear I could afford and throw it into a pack that was reasonably priced. This led me to a pack I didn’t really want to lug around and if I had to in a high-stress environment I can see bad things happening.

Remember, this hiking trip you are taking to practice with your bug out bag should be fun. You won’t be running for your life, fleeing your home and weighed down with guns and ammo. Making informed decisions about your bug out bag now will save you when you truly do have to Bug out. Could I work out more, get stronger and carry that bag more easily? Absolutely and that would help, but the average person has the grab and go plan for their bug out bag. Are you able to grab what you have and thrive or will you be dragging butt quickly after you walk out the door with your world on your back?

Our family decided to go on a backpacking trip for a few days into the wilderness. For this trip we would be staying overnight in the woods obviously and had

When you are assembling your Bug Out bag, most people begin with scouring the internet looking for ideas. If you are like me, this will invariably lead to a long list of supplies for your bug out bag that sound great, but weigh a ton and have very specific uses that you may not encounter. What I wanted to do was create a simple bug out bag checklist you can use to get a jump-start at building your own bug out bag that has taken into consideration a few of the lessons I already learned when I did this myself.  This bug out bag checklist is also available as a downloadable PDF so that you can print this out and keep it with you as you build your own bag.

What is a Bug Out Bag?

Let’s start out with the obvious and cover what a bug out bag is. Actually, it might be easier to say what a Bug Out Bag is not before we get too deep. A bug out bag is not an RV. This is not your luggage for a two-week vacation in Cancun. Your bug out bag is not something to replace your tool shed and you will not be able to carry everything you want on your back. If you plan to walk to some remote retreat location with everything you need to live for two years on your bag, you are sadly mistaken.

A bug out bag contains the essentials you need to live if you are forced to leave your location. This bag will have everything you need plus some additional supplies, but careful thought and consideration should be given to what you are putting in this bag. Why? Because you will have to carry all of this stuff and the more you add, the heavier it gets. I wrote a post a while back about weight considerations called “Is Your Bug Out Bag Going to Get you Killed?” and if you need more convincing about weight, maybe you should read that article first. For the rest of you I will assume that you want to carefully consider the supplies you need in this situation. For people like you I have created this simple list of Bug Out bag contents, a downloadable PDF and a little explanation for each.

The properly loaded Bug Out Bag should give you everything you need to live for 3 days at a minimum so that is the framework of this list. I won’t be packing two weeks’ worth of food in here and most of this list might be considered the bare necessities by some.

What do you need to know before you pack your bug out bag?

First of all, I like to ask the question of why I am bugging out in the first place. This helps me frame the purpose of use of my bug out bag a little, but not drastically. Like I said above, the Bug Out Bag or BOB is for saving your life. It will not and should not be thought of as the magic box with all you will ever need. The list of supplies we could put in here is enormous if you start from the perspective of thinking of everything you could possibly need in an SHTF scenario.

I believe that the items below should go in virtually every bug out bag that is assembled regardless of the reason you are Bugging Out in the first place. Will you pack different items if the economy has collapsed as opposed to a Hurricane? Probably, but the essential Bug out bag items will stay the same; you will just add to what we have contained here.

What Items do you need to put in your bug out bag?

71g6dcvobkl-_sl1200

A good bug out bag will hold all of your gear and be tough enough to stand up to abuse. Comfort helps too…

Water

Water is essential to anyone’s survival so you must have a plan for carrying it, obtaining fresh water along the way and treating is so that you can drink it without catching a disease that will knock you on your butt at the worst possible time. If you don’t believe me, just think about the last time you were away from home and you got sick.

Water Bottle – I like Nalgene bottles because they carry a lot, but are very lightweight when empty and the opening fits at least one of the water filters I recommend, the MSR Miniworks EX Microfilter. You can’t boil water in a Nalgene Bottle though so you need options for that which we discuss in the Tools section.

Water Filter – There are two that I like. The first is the MSR Miniworks Microfilter that I mentioned above. The second filter that is great for your bug out bag is the Sawyer Products Mini Water Filtration System. Both will do an excellent job of converting water that you collect into drinkable water. What about UV pens or Water treatment tablets or chlorine? I don’t like the taste with treatment tablets or chlorine and I don’t want to depend on anything that needs batteries for my drinking water. Do you run the same risks with mechanical systems? Sure, but I am betting the filters above will last me long enough to keep me alive for a few days.

Extra Capacity – I like the regular Nalgene bottles, but to save trips to the creek, I also pack a backup water container in the Nalgene Wide Mouth Cantene (32-ounce). This allows me to fill up two bottles and that normally lasts me all day unless I am in extreme heat environments. This Nalgene canteen collapses down to virtually nothing so space or weight when it is empty isn’t an issue.

Food

OK, water is covered for the most part, now we move to the next most important survival item and that is food. This topic is simple, but everyone has their own idea of what surviving is. I have seem some people recommend cans of tuna, pop tarts and ramen noodles in your bug out bag. This will certainly work. You can also add dehydrated meals designed for camping too. I am focusing on two things when it comes to food in your bug out bag. The first is how long you can store it and the second is how simple is it to prepare/vs. nutritional value.

Tuna fish and Pop Tarts are simple, and don’t require any heating so they are a plus, but I don’t want tuna in a hot car all summer. I also don’t want to have to worry if they have gone bad but I think the biggest thing is that if you are running for your life with everything you need to survive strapped to your back you are going to need some serious calories.

For my bug out bag I like two options depending on where I have my bag stored. For warmer conditions like in the trunk of my car, I like Mainstay Emergency Food Rations. These really are emergency food bars and withstands Temperatures of -40° F to 300°F (-40°C to 149°C). It isn’t gourmet dining, but it will take the extremes of summer (unless you live on Mars) and give you a ton of calories.

The second (and preferred) option if I have my choice would be Mountain House Freeze Dried meals designed for camping. I get the pouches that feed two just in case and grab the highest calorie packs you can get. The Breakfast Skillet is excellent and at 680 calories will fill you up and give you much-needed energy for hiking with that pack. I think the Chilli Mac is even higher and also tastes great. You don’t need anything for these but a spoon and hot water. Just fill the bag up with the recommended amount, let it sit and dig in. You can pack 9 of these in your pack or 6 and those pop tarts.

Clothing & Shelter

Food and water, check. OK the last leg of the survival pyramid is shelter and in this we will count clothing as well as something to keep the elements off you.

Clothes – This is simple, or it should be. You want a good pair of long pants, long sleeve shirt, change of underwear and a spare pair of socks. What if it is hot? Shorts are nice, but not necessary because you are already living without the convenience of air conditioning most likely so you will already be sweating. Why long pants? Because they will provide more protection for your legs. Same with the shirt and in the warm weather, you don’t need to get a sunburn.  What if it is cold? You will be wearing warmer clothes anyway so this should already be on your person and not in a pack. Layers is the best way to go about clothing but remember, this is just to save your life. You don’t need to be pretty and you won’t die if you have to wear the same pants for two days in a row. It’s the same with underwear.

I would also add some rain protection in either a rain coat or poncho.

I wouldn’t leave the house without sturdy shoes I can walk for a long time in and you should pack appropriate headgear for the season too. In the winter I like a beanie to keep my head warm, but again I will most likely be wearing this and won’t have it in the pack. Gloves are also a nice addition and I have something that will keep my hands warm in the winter, but something designed for work regardless.  A good pair of leather gloves should be added as well to protect your hands.

Rain fly’s are lightweight options to a full size tent.

Shelter – This is just to keep the elements off you and won’t replace a warm and toasty house. Shelter can go from the extremes of a tent to the simple tarp. Not that a tent is extreme, but tents add a good bit of weight, take time to set up and tear down and are really noticeable from a distance normally. For camping I take a tent, but for Bugging out I would consider a tarp like the ENO Pro Fly Rain Tarp instead of a full tent. Tarps are much lighter and give you protection from the elements much like a tent. You won’t be able to keep out bugs though – again, this is about life saving, not the ultimate in comfort.

Sleeping bags are another weight consideration that take up a good bit of space. My tent and sleeping bag are easily the heaviest and largest items in my regular backpack for camping. You can buy very lightweight and compact sleeping bags, but expect to pay at least $400 to save the weight and room in your pack for all the other goodies you need. In the theme of survival again, I would recommend a Adventure Medical Kits SOL Emergency Bivvy instead of a sleeping bag. These are cheaper than a regular bag at around $15, fit in the palm of your hand and only weigh 4 ounces.

Fire & Light

For fire you can get tricky or keep it safe. For me, I recommend several good Bic disposable lighters stored in a waterproof bag. Easy and virtually foolproof. Additionally, I carry a Swedish Firesteel as a back up. You can also pack all sorts of other implements but chances are that if you can’t start a fire with a lighter or a firesteel you won’t be able to start a fire anyway.

For lighting I recommend headlamps for everyone. This is a perfect hands free option to light your way that is great even for kids. I personally have Petzl E91 Tikkina 2 Headlamps for every member of my family. They are bright enough for any task, sit on your head and are adjustable. Plus, they take regular AAA batteries and not some weird off nomenclature or rechargeable batteries that some of the higher end headlamps do. Rechargeable is a great idea as long as it is in a common size that has multiple uses.

Self Defense

Baofeng – Excellent starter Ham Radio for disaster communications.

The items above should be able to keep you alive if you are out in the elements by yourself. If you are out in the elements with other people, you should consider something for self-defense. The choice of implements for protection vary by the situation you are in and what you could be faced with. I have guns so that is my go-to option for self-defense. If the reason I was bugging out was total bedlam, anarchy I would take a rifle and a pistol. If this was a temporary bug out due to a weather event or something that I thought was temporary I might only take a concealed pistol. Regardless of what the situation is, you will need something for your self-defense. I’ll leave the choice up to you.

Communications

The communications options are limited to the scenario you are in. If we have a minor event where you can reasonably expect life to return to normal sometime, a spare cell phone battery might be all you need or a way to charge the phone you have. If cell service is down your only real option would be walkie talkies which have a very limited range or HAM radios. I recommend carrying a hand-held HAM radio capable of broadcasting and receiving on UHF and VHF and a dual band antenna that can give you more range.

For the radio I recommend the Baofeng UV-5RA because they are solidly built, offer any feature you can reasonably need for grid down communications and only cost around $35. You just can’t beat that! Pair this radio up with a Slim Jim antenna and 50 feet of coax cable and lastly an adapter connector and you can easily talk or listen to anyone broadcasting 50 to 100 miles depending on where you are. Just loop some paracord around the antenna, throw that up into a tree and you are all set. You have to learn how to use this equipment, but it is in my opinion the single best Bug Out Bag option for communicating if the grid goes down.

Tools

The tools I consider bringing taking into account weight is a multi-tool like a Leatherman, a good pocket knife like a Tenacious G10 from Spyderco and a larger multi purpose knife like a Gerber LMF II. What about bolt cutters, pry bars and chain saws? I don’t think those are good for a bug out bag. Should you have them at home? Sure, but the chances you will need something like that are slim. What if the SHTF you ask and I have to break into a warehouse for shelter? I hear you, but I simply don’t think it is worth the weight.

The Multi-tool will meet most of your needs for fine tools with pliers, small saw and a wrench. If you plan on rebuilding an engine with it though…

Other tools are something to cook/boil water with a good first aid kit and some paracord.

For boiling water and cooking I recommend a JetBoil Flash. The whole kit and fuel fits nicely in one small, relatively lightweight container. With this you can boil water for your freeze-dried food or to disinfect it. It’s also really good for coffee too.

Adventure Medical Kits make a really decent ultralight first aid kit. This won’t allow you to perform surgery in the woods or remove a bullet but cover most of the bases. I would augment one of these per bag with a bag of Quick Clot and some larger pressure dressing bandages. Tampons and Maxi pads are also great blood stoppers… obviously.

Hygiene

I know some people throw the entire medicine cabinet in their bug out bags, but again I am only thinking about survival not going to the prom so the basics –  bar of soap, toothbrush, toothpaste, chap-stick, floss, hand sanitizer. What about women? I have added a couple of extra niceties to my wife’s BOB only because I know that will improve her outlook should we be forced to bug out. Your mileage may vary.

Miscellaneous

For miscellaneous I would add some duct tape which you can wrap around your water bottles, lighters or just about anything else, bandannas which have a thousand uses and spare batteries for any gear that requires them. What about important documents? I am still on the fence about that but I plan on writing about that later. I just don’t see an Ellis Island type of situation happening where you need to show your birth certificate, but anything is possible. I can see having ID with your current address to prove where you live.

I know some of you will ask, what about the bag? Great question, but the bag is going to depend on what you carry. I would gather your bag’s contents first and then select the bag based upon what you plan on carrying.

When you are assembling your Bug Out bag, most people begin with scouring the internet looking for ideas. If you are like me, this will invariably lead to a long