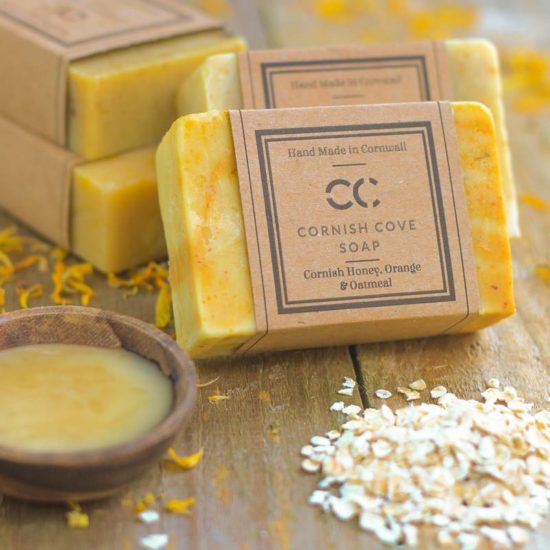
The good part about getting older is you stop trying to prove anything to anyone, including yourself. All you are in the pursuit of is collecting experiences – beautiful, fragile little soap bubbles that you store in your heart, and every once in a while you pull one out and gaze at the delicate pictures it shows you. No soap? No worries. That’s what we’re here for.
There are several ways to make soap, all of which start with lye.
One of the simplest ways to make some soap is, after using a frying pan over a hardwood camp fire, take some of the ashes from the fire and sprinkle them on the fat in the pan, add some water. They will combine and make you a small batch of soap. You cannot use softwoods like pine to make lye because of their high resin content, so stick with hard woods like oak, maple, and as, for example.
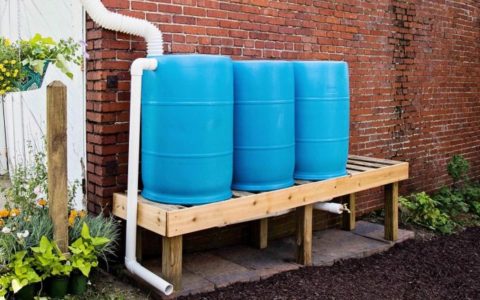
Larger quantities of soap can easily be made by constructing a lye-leaching container.
To make a lye-leaching container you have to:
- use a wooden barrel, or a plastic or a steel container. Lye has a pH of 13 and will eat through aluminum, it is a very dangerous, strongly alkaline solution.
- Drill or punch holes in the bottom of the container to allow drainage
- Fill the bottom of the container with a layer of gravel on top of which will be a two or three inch layer of straw or dried grass, on top of that will go your wood ashes.
- Tamp down the ashes to compress them and make a depression in the middle of the ashes.
- Now the top of the container has to be open so you can pour water onto the ashes and allow that water to dissolve the lye from the ash and then pass through the straw and then the gravel for a second filtration.
- You should fill the depression with water and then wait several hours as the water slowly trickles out the bottom.
The first batch produced will be the strongest. You can get a second batch of lye by using the same barrel’s contents and passing water through it. This second pass lye has to be re-passed through the barrel to make it strong enough. The lye is then combined with animal fat to make soap; you have to keep adding enough fat to consume all the lye. ere are actual tables called saponification tables that tell you the required ratio of fat to lye. You can also use any vegetable oil instead of animal fat.
Remember, oils are just liquid fat at room temperatures.
Caution: If you get lye in your eyes you have to douse them with milk; if you get lye on your skin douse it with vinegar to neutralize it. Lye is a very caustic substance… meaning it burns like hell! Anything at either end of the pH spectrum will be dangerous…either a strong acid with a very low pH or a strong base or alkali with a very high pH. Lye has a pH of about 13, which is very strong. Lye will easily eat right through things like aluminum.
HOW TO MAKE ACTIVATED CHARCOAL
Activated charcoal can be made from charcoal you have made in your improvised oven and then it needs to be treated with acid and reheated again. From the stage of making charcoal you can also make black powder or wood alcohol or just leave it as charcoal if you want to smelt any metals, since charcoal burns much hotter than wood and thus has been used in forges since ancient times.
The best way is to start with the smallest pieces of wood, so cut up your wood as best you can. Eventually, you are going to have to grind these small pieces up into a fine powder, so it is critical to start with very small pieces of wood. A hardwood sawdust would be an ideal place to start.
Whatever you use for making the oven to burn your charcoal, it has to have two common features — it has to be able to be sealed to prevent oxygen from entering, or you will just completely burn the wood and form ash but no coal. Secondly, you need to have a vent hole, large enough to allow the volatile chemicals in the wood to escape after they have been changed into gases yet small enough to prevent oxygen from being drawn in.
You have to design a setup so your closed oven can be suspended over a fire, allowing it to heat up without the presence of oxygen, to boil off the water and eventually cook off all the volatile chemicals that are in the wood; once these two are gone you will have your carbon and ash left.
Since water boils off at about 212 F at sea level ( as you go up in altitude water will boil at a lower temperature), the first thing you will see exiting your vent hole will be steam.
- Once you see steam coming out you should cook the wood for at least another four hours. This is not written in stone and depends on the amount of wood you have in your oven and the heat production of your fire, etc.
- After four or five hours have passed and you think you are finished making your charcoal, remove the oven from the fire. This step is critical. You have to wait until the oven has completely cooled down before you open it, otherwise the char will burst into flame if it is hot and exposed to a sudden rush of oxygen by you opening the oven.
- At this point you have made charcoal, and if you want to go on to make black powder or use it for smelting an ore, you are ready to do that.
- For our purposes we need to acid-treat the charcoal and reheat it before we have made activated charcoal.
- For an acid a good source is battery acid, which you can buy in any auto supply store. Be advised, this acid is very dangerous and has to be handled very carefully to avoid serious acid burns. You should be wearing an apron, goggles, gloves, and a mask over your nose and mouth to keep from inhaling any noxious fumes.
- Pour the acid into a glass cooking pan, put each piece of coal into the acid bath and allow it to soak for about five minutes, then carefully remove the charcoal and drain off the excess acid and place the charcoal back into the oven.
- Keep repeating this process until you have soaked all of the charcoal in acid.
As an alternative to battery acid, which is strong sulfuric acid, you can use hydrochloric acid which you can buy in pool supply stores as muriatic acid. It is used to clean the linings of cement swimming pools or you can find it in hardware stores. You can also use nitric acid, but that is harder to find and usually you can only get it from chemical supply stores that probably won’t sell it to you.
- Now put all the acid-treated charcoal back into your oven
- Reseal it and reheat it for another four or five hours until it is completely heated.
- Just like in the earlier step, you need to allow the oven to cool down before you open it and expose it to oxygen or you will have another flash fire as the activated charcoal catches fire.
- Carefully open up the oven, remove the charcoal and grind it up into as fine a powder as you can, and now you have made activated charcoal.
Note: for the purposes of home water purification, if you are making your own activated charcoal, coconut husks are supposedly the best material to use for this. The problem with that is, where are you going to find coconut husks unless you stockpile them now for later use, unless of course you live in a tropical area then it will not be a problem. If you do happen to live in a tropical environment with many coconuts available you should also learn how to make coconut oil which has many medicinal as well as nutritional uses.
An alternative method for making your own activated charcoal involves
- using two steel barrels, one fifty-five gallon and one thirty-five gallon with its lid, and a few thick, long pieces of rebar.
- Cut two one foot by one foot holes in the fifty-five gallon drum’s sides and then take the thirty-five gallon drum and drill nine or ten holes in its bottom.
- Now fill the fifty-five gallon drum with your firewood.
- Fill the thirty-five gallon drum with the wood you want to make into charcoal and seal it up so the only holes are those in its bottom, facing the fifty- five gallon drum fire.
- Slide the thirty-five gallon drum onto the long rebar rods and place it on top of the fifty-five gallon drum.
- Now, light the fifty-five gallon drum’s wood on fire.
- Cook it as above for four or five hours and then remove the thirty-five gallon drum from the fire and allow it to properly cool and once it is cooled, open it and there is your charcoal.
The difference with this and the previous method is the gas in the thirty-five gallon drum has nowhere to go but out into the fire below, thus stoking that fire and letting it burn even hotter, so in effect you are circulating the wood gases back into the fifty-five gallon drum’s fire to make it even hotter.
There are many other methods available to you on YouTube and other websites.
Or you can just get Dr. Ralph La Guardia’s The Doomsday Book of Medicine, and have it all in one place.
Follow the link and find out more about this book. It will simply teach you how to build your own healthcare system. That means prepping for day to day problems and issues. Because becoming a final prepper takes practice. You don’t have to wait until it’s too late to open a survival book.
Get this book now if you want something to change.
Spoiler alert – it’s all about good soil. And it’s not a metaphor, even if it also works like that.


