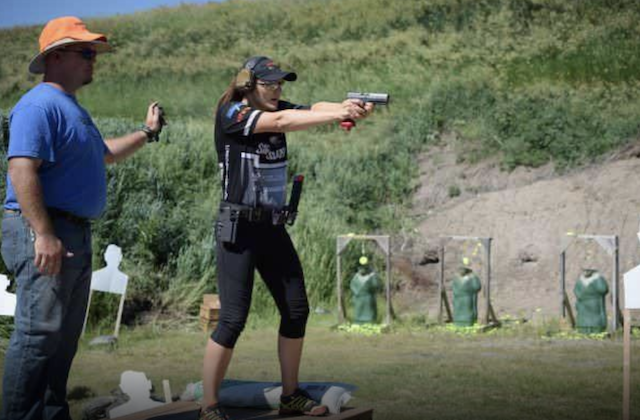
I think it’s fair to say that we all wish we were better shooters, and we all have things we can improve on. Having a drill we can dedicate to will advance our shooting capabilities tremendously.
Well, over the past several years I’ve been lucky enough to train with some of the best instructors around, and even been allowed to share some of my own meagre knowledge with students looking to further their shooting skills.
Towards that end, I’m always interested in the best shooting drills to improve my own skills, as well as the best stuff to use when I’m teaching someone else. Which brings us to our topic for today.
These are the drills I work on every time I’m practicing at the range, and they train skills that are important for all types of shooting, from defensive-focused shooting to competition. These are the shooting drills that will make you a better shooter, and make sure you’re ready for anything that life, or a competition match director, can throw at you.
Let’s get to it.
The Proper Shooting Mindset
First thing’s first, we have to talk about the right mindset to get into before you start. Before I start my training or begin a class, I always want to focus on my goals. Am I trying to get ready for a competition, or am I working on drawing from a holster? Do I need to get my split times down, or do I need to practice reloads?
There are so many things that go into shooting well in any environment, and if we start changing lots of things at once, it can be difficult to know what’s helping and what’s not.
It’s also easy to develop bad habits if our form isn’t correct, so I always want to start and end each training session with accuracy. Ten rounds, smallest group possible, unlimited time. Simple, basic, and absolutely critical.
At the end of the day, hitting the target is the most important thing (after being safe) so I want to make sure I’m always working towards getting better there. This is something I started because of Mickey Schuch from Carry Trainer.
If you’re not familiar, definitely check out his stuff. Carry Trainer routinely posts videos of entire classes online, and he has a lot of good other stuff besides.
Taking a full minute or more to try and get ten rounds on paper as close as possible from a short distance is a great way to practice fundamentals and give yourself a kind of reset between other drills, especially with a handgun.
Recommended Training Gear
There are a few things I think everyone should have when training with firearms for serious use: good targets, snap caps, and a shot timer.
Steel targets are great, and for paper targets make sure you get either an IDPA-style target or something like the B27-style human silhouette targets.
Snap caps or dummy rounds, even empty cases, can be used in a variety of ways from setting up malfunction drills to dry-fire training. I keep some in my range bag at all times. Speaking of range bags, we have a great acrticle detailing the best range bags on the market right here.
For a shot timer, I use the Competition Electronics Pocket Pro. This allows me to time myself between shots, and to see measure my reaction times when readying or drawing the gun and shooting or reloading and shooting.
Reloading Drills and Transitions
Whatever kind of gun you have, be it pistol, rifle, or shotgun, you need to practice reloading it under pressure.
In a match, this is going to be one of the biggest things you can do to improve your stage times aside from getting all clean A-zone hits. In a combat situation, reloading can be the difference between life and death. Here’s Doug Koenig, who is a better shooter than I will ever even come close to being, showing you the basics.
Now, there are four types of reloads you need to be aware of, and you need to practice all of them.
First the empty reload Also called a slide-lock reload, or an “oh shit!” reload. This is where the slide or bolt is locked back on an empty magazine and you need to replace it.
A variation of this that’s more competition-focused is a speed reload.
Speed reloads are usually only done when you’ve identified a transition point in a stage, say moving from one shooting box to another, and you want to reload during that transition, even though you aren’t yet out of bullets.
Next, we have the tactical reload. This is more of an administrative task and is done during a lull, or when you’re in cover. This is also called a reload with retention.
Basically, you get to a point where you realize you’re about to be out of ammo, so you duck into cover, and swap a fresh mag for your almost-empty one.
When you do this, you should be retaining the partially-empty magazine in your support hand as you bring up the new mag, and then transitioning the partially spent mag to a pouch or pocket after seating the new one.
This is different from the speed reload where you just let the partially-empty mag hit the ground and leave it.
New York Reload
As anyone who played Call of Duty will tell you, switching to your pistol is always faster than reloading. A New York Reload (I swear I didn’t makeup the name, it’s a Massad Ayoob thing) is simply transitioning from one firearm to another.
Mas used to teach this specifically in regards to switching from a primary pistol to a backup revolver, but I think in more modern contexts its better to practice it as a transition from a rifle or shotgun to a handgun.
To practice, load a round in your long gun and at least one in your pistol. Put one shot on target with the long gun, let it fall across your body on a sling, and then draw your pistol and place one to two rounds on target.
This one is good for competition as well as self-defense, and is a good way to get used to work on clearing your holster as well.
Rifle/Shotgun Malfunction Drill
Any gun can fail, no matter how close to Perfection it may be, so it’s important to know what to do when yours eventually goes down.
With a long gun, I think your malfunction drill should be a NY reload. If you’re carrying a rifle and a handgun, you’re probably knowingly heading into harms way one way or another, and speed is of the essence when addressing a malfunction.
Transitioning to a pistol gets you back into the fight quickly, and allows you to stop the threat. Then you can go see what’s wrong with your rifle.
To practice, load up a mag with a snap cap somewhere in the mix, and when your gun goes click instead of bang, transition to your pistol and get your hit with that, then address the malfunction.
CCW Malfunction Drill
For the average civilian carrying a handgun, things are a little different. Your first option should be a speed reload in the event of a malfunction. Drop the mag, rack the slide, insert new mag, continue on.
What if you don’t have an extra mag and your gun goes click instead of bang? Tap, rack, bang!
Smack the heel of your hand into the baseplate of your magazine to ensure its seated, pull back on the slide or charging handle, try to shoot your target again.
To practice this, get out your snap caps and mix one in with your range ammo in a mag, or better yet, have someone else do it. Make sure you don’t know when the dummy round is going to come up. When it does, practice your malfunction clear and get another shot on target as quickly as possible.
Shooting Drills
These are drills you can practice with any firearm, and help you to get proficient with weapon manipulation and handling. In a high-stress situation, whether you’re in combat or competition, or even sitting in a deer stand scoped in a trophy buck, you’re going to default to your lowest level of proficiency.
In other words, your worst performance on a flat range is probably still going to be better than you can do when the heat is on. Keep that in mind at all times. These drills are essential for making sure that even your very worst is still good enough.
Up Drill/Draw
This is the simplest thing you can do, but it also cements the basics. Start with your pistol holstered, or your rifle/shotgun in a low ready. When you’re ready, bring the gun up and put one round in the center-mass or A-zone of your target. Bring the gun down or holster. Continue doing that until you get bored and then keep doing it a while longer.
This seems simple, but this is the foundation of everything you’re going to be doing, and working through an entire magazine this way will do wonders for you in the long run.
Failure Drill
Also called a “Failure to Stop” drill or a Mozambique drill, this is the classic two to the chest, one to the head drill that we see taught all over.
For this drill, start from a low ready or a holster. I like working with a shot timer, but you can easily get a buddy to call start, or just go on your own time.
Bring the gun up, put two rounds into the upper chest as fast as you can, and then follow it up with one carefully aimed shot to t-box. What’s the t-box? I’m so glad you asked.
The t-box is God’s off switch, specifically put into human beings so that other human beings can shut them down should the need arise. It gets its name from its shape. Imagine drawing a T-shaped box around someone’s eyes and nose. That’s the T-box.
A round of pretty much any caliber enters through there, and nerve impulses simply stop. A simple “headshot” isn’t always enough to stop an attacker, and I know of several cases of people taking shots to the jaw, forehead, or what have you and continuing to not only walk and talk, but fight back.
The point of this drill is to give you a rock-solid way to put an attacker down, no matter the amount of drugs, adrenaline, or religious fanaticism that may be involved.
Those first two shots are meant to slow the attacker down, allowing you to then place that third carefully aimed shot right where it needs to go to stop the threat. If you want to get an idea for the targets you’re aiming at, you can use a standard 8.5”x11” piece of printer paper for a chest zone, and a 3.5”x5” index card for the t-box.
Remember when you’re doing this, we aren’t looking for two rounds touching on the chest target. The goal here is to just simply shoot the bad guy (or gal) before they shoot you, and do so in a place that’s easy to hit, and will take their mind off shooting you.
Rule one of any gun fight is simple: Don’t Get Shot. The easiest way to follow rule one is to shoot them before they can shoot you. All the other high-speed tactical operator stuff is irrelevant if you can’t get this part down.
Box Drill
Stepping up to something a little more difficult, we have the box drill.
This is essentially a failure drill on two targets at the same time. Start with two targets spaced two or three yards apart, with your gun lowered or holstered.
Bring the gun up, place two upper-chest shots on one target, then place two upper chest shots on the second target, then t-box the second target, before transitioning back to t-box the first target. This should form a rectangle or box with your shots, hence the name.
This is a good practice for dealing with multiple attackers, and will help with transitioning from target to target. This is good for competition scenarios, and great for keeping you alive when you get jumped in a dark alley.
I am also a firm believer in the idea that anyone worth shooting once is worth shooting more than once, and practicing this will keep you from potentially freezing up after firing the first shot. It happens more often than you’d think.
Where to Go From Here…
Practical experience trumps everything you can do on your own on a static range. Take a class, join IDPA or USPSA, and get out there and shoot. Shoot dynamically, and shoot often. Don’t be afraid to push yourself, because that’s how you get better.
It’s also a hell of a lot of fun.
Another thing to remember: fast is good, accurate is better, fast and accurate is best. Focus on getting your accuracy down first, and get the movements down, and speed will come. Trying to be John Wick when you’re starting out is a good way to cement bad habits, and it’s a lot harder to unlearn bad habits than it is to take the time to learn good ones to start out with.
Parting Shots
These are the drills I work on almost every day, and this is what I work on with everyone I teach. These are simple, foundational things, but they will absolutely make you a better shooter, and may even save your life if you have to wield a firearm in self-defense.
What do you think of these drills? Do you have another that you think should be included? Let us know!
The post The Best Gun Drills To Become A Better Shooter: Benefits Of Each Drill appeared first on GunBacker. Kudos and thanks. We’re just paying it forward.
Other self-sufficiency and preparedness solutions recommended for you:
Healthy Soil + Healthy Plants = Healthy You
The vital self-sufficiency lessons our great grand-fathers left us
Knowledge to survive any medical crisis situation
Liberal’s hidden agenda: more than just your guns
Build yourself the only unlimited water source you’ll ever need
4 Important Forgotten Skills used by our Ancestors that can help you in any crisis


