Survival bread used to be a common staple and it still is popular today as survival food. It can also be called other names like hardtack, pilot bread, and army bread. No matter what you call it, survival bread is a timeless recipe that can provide you with a cheap nonperishable option in emergencies.
The Easy Survival Bread Recipe
What you will need:
- 2 Cups Oats
- 2 ½ Cups Powdered Milk
- 1 Cup Sugar
- 3 Tablespoons Honey
- 3 Tablespoons Water
- 1 3oz Pkg Lemon Jell-O
Follow some quick and easy instructions to have it ready in less than thirty minutes:
Preheat the oven to 350 degrees. Combine the oats, powdered milk, and sugar in a medium bowl. Combine water, honey, and Jell-O in a medium pan, bring to boil, and then remove from heat. Add the oat/milk/sugar mixture slowly and mix well. Shape the dough into a thin brick-sized loaf and put it on a cookie sheet. Bake the loaf for 15 to 20 minutes. Allow the loaf to cool and then wrap in aluminum foil.
Why Make Survival Bread
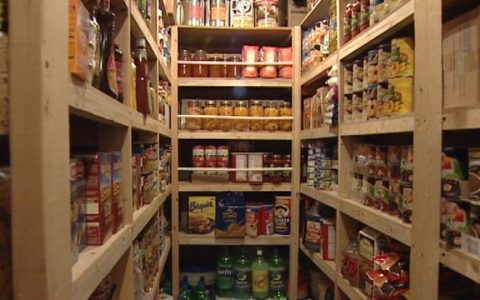
Food storage can be a major problem and survival bread is just one of the many solutions to that problem. Our ancestors figured that out, as you can tell by survival bread’s storied history. Why reinvent the wheel when it comes to long-term food storage? The bread is shelf-stable and will stay edible indefinitely. The loaf is packed full of nutrients and calorie content- enough for one adult for an entire day.
The loaf is very dry, but that is one reason why it has such a long shelf-life. Water can help make survival bread more palatable and easier to chew. One of the names for survival bread is ‘hardtack’ because it can be tough to chew.
A few more reasons to chew on:
- Survival bread keeps indefinitely
- Making it gets you to practice in the kitchen (a rare occurrence, if you are like me)
- It fits in any long term food storage plan
- It pairs well with just about anything
- The ingredients are cheap and useful for other baking needs or prepping projects
Give the recipe a spin and let us know what you think in the comments below.
Survival Bread with Jello?
It sounds odd, but the Jell-O adds a little bit of flavor and helps the breadstick together in its hard loaf form. You can actually use whichever flavor Jell-O you prefer, but I like Lemon, personally, and think it goes well with the texture of the bread. It doesn’t serve up a tart dessert treat like lemon meringue pie, but it does the trick. The honey also does wonders with helping hold the loaf together and adding much-appreciated flavor.
Survival Bread in a Can
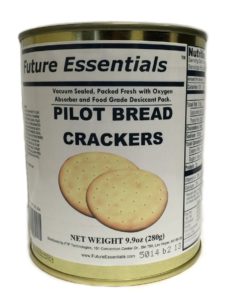
It used to be widespread, but finding canned survival bread these days can be elusive. Every once in a while, you can find some online. You cannot control the moisture content in a pre-made product, obviously. In order to get the bread to come out of the can, they have to increase this moisture content- which has the drawback of giving it shelf life. Still, the shelf-life is a whopping 30 years, which is a whole lot longer than typical bread.
If you can find some online it may be worth picking up since it is so easy to add to your food storage plan. In a world of fast-perishing foods, survival bread in a can must not make much of a profit for food producers since it is a scarce commodity now.
The Final Word
Survival bread is a great inclusion in any long-term food storage plan. You can tweak the recipe to your family’s liking to be sure that everyone enjoys the bread. Break it out when you are heating up some MREs or canned goods as a side item. Pair survival bread with peanut butter for a great emergency snack. It is easy to make, tastes good, and is shelf-stable, add it to your plan. Keep exploring; stay prepared, and be safe.
Other self-sufficiency and preparedness solutions recommended for you:
The vital self-sufficiency lessons our great grand-fathers left us
Knowledge to survive any medical crisis situation
Liberal’s hidden agenda: more than just your guns
Build yourself the only unlimited water source you’ll ever need
4 Important Forgotten Skills used by our Ancestors that can help you in any crisis
Secure your privacy in just 10 simple steps


