People who are interested in preparedness routinely end up looking further into the future than an event and the aftermath, and eventually end up looking at sustainability and self-sufficiency. Whether we want to augment an affordable beans and rice diet or we want to never need a supermarket again, growing food rears its head. There are lots of factors that go into gardening and crop raising. It starts with the very seeds we plant, so I’d like to look at two of the seed sources we see in the preparedness fold, and how to test seeds to find out if stored seeds are still viable.
How to Procure seeds
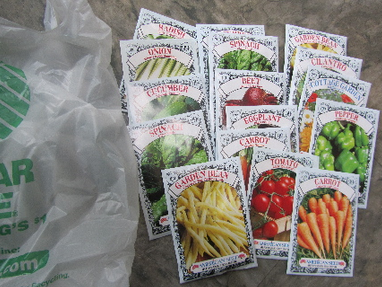
Seed kits and especially the long-storage seed vaults can be had good and bad, like any other one-size-fits-all gear or a multi-tool. There are some charts available that tell you how long regular ol’ seeds last, in a fridge or at a constant temperature in a closet. Various vaults and long-storage kits will provide their own estimates.
I tend to think there are a lot of people making a lot of money off fear purchases. I dislike the claims of feeding a family for one year without specifying the calorie contents possible (veggies are diet food). I feel a little better about the “Plants an Acre!” claims, although method affects that, too. I think a lot of the packaging of those kits are window dressing with little effect – and it should be noted that with a lot of kits, their “use by” date is derived from the longest lasting seeds inside. They may boost storage time some, but it may not be enough of an expansion to warrant paying for a “vault” or Mylar instead of a Ziploc freezer bag.
Nobody agrees about seed shelf life across the board, but that’s pretty common in both life and gardening specifically, and there are always exceptions. Maybe freezer, fridge, 65-75-degree shelves make a difference to other people’s spinach, but mine and a lot of my brassicas tend to hit 50% germination at 3-5 years no matter what storage location I go with, fancy kit or saved seed in a junk-mail paper packet.
There’s also the factor of climate.
Very few seed kits or vaults are tailored to Arizona, Alabama, Alaska, or the Adirondacks (some have regional planning). There are some tried and true varieties that will thrive almost anywhere if you have good garden soil – if; not intended for tilling a clay or sand yard for the first time without serious amendments – and some that are a little more lenient toward poor soils. Few kits, however, account for both the short growing season of North Dakota and the sweltering heat and humidity of South Carolina. There’s likely to be something in there that anybody can plant, but you may not be able to use everything in the kit.
Crunch numbers to see what applies to your region, what you’re growing seasons allow for, and figure out how much of the cost is seeds you can’t or are unlikely to use.
Crunch the numbers on the types of seeds you’re getting, too, and be aware that most seed kits provide way more tomatoes than I could keep up with and very, very few calorie and protein crops, so you still need additional seed stocks (deer corn and pigeon peas not crazy talk). Something like a third or half of those “More than 20K seeds!!!” may be leafy greens of some kind – not only near-nils in calories, but also with seeding rates of 3-5 seeds at 2-3” and then thinning to 6+ inches. In other words, not a lot of food value for a lot of seeds, but they go far toward ballooning numbers for advertising purposes.
I’m sure there’s a ton of examples for when buying more expensive kits meant for long-storage would be worth it. I can actually think of a couple. I can also think of a couple of little kits or bucket kits that are just nice, handy, fairly economical ways to get a start. I just want people to be aware of the limitations so those can be considered as well. It may end up that you’re better off buying the seeds you specifically want instead of a kit or vault.
I’d also like people to consider whether they can survive to the next planting, growing and harvest seasons in their regions before they delve on a long-storage seed kit – and from that, decide if they’d be better off applying their budget elsewhere.
Sale seeds may or may not be a great alternative. Grandma and great grandpa didn’t need fancy packages to keep seeds for a couple of years, but they did typically keep them cool.
Early on in the season, seeds have come right from growers and packaging plants, where they were somewhat cared for. By the end of the season and the start of next spring, seeds have spent months or a year going from blazing hot to cold on a daily basis in a lot of storefronts, or at least hitting 30-40-degree swings, with exposure to high humidity in a lot of the garden centers. Like coffee that goes in and out of a freezer, this degrades the seeds. The more extreme the conditions and fluctuations, the more at-risk the germination rate is.
I do buy the 10/$1, 4/$1 and $1 seed packs at the beginning and end of seasons, but I limit myself to $5-10. I am more likely to take advantage of end-of-season seed sales from an internet provider (that I already trust) where there is some expectation that my seeds have been stored properly over the spring and summer than I am a brick-and-mortar shop, especially the ones with seed racks right by doors where they’re getting the greatest temperature fluctuations for 6-8 months. I do buy my field-plot seeds at the end of the seasons from bulk distributors, and so far they’ve been fine for next-year planting.
If it works for you, great. If you’re buying them without doing germination tests, maybe check that out before you go whole-hog with a garden or really depend on producing food.
Use germination to test seeds
Germination testing isn’t difficult. It’s highly valuable in determining how viable your seeds are – and for how long. I will understand if somebody doesn’t want to pop a $200-$300 seed vault or set of #10 cans, but if it’s already several years old – and as good as some claim – go for it anyway. General commercial seed packets will be fine after opening as long as they stay dry. There’s no change in storage life opened or unopened for them.
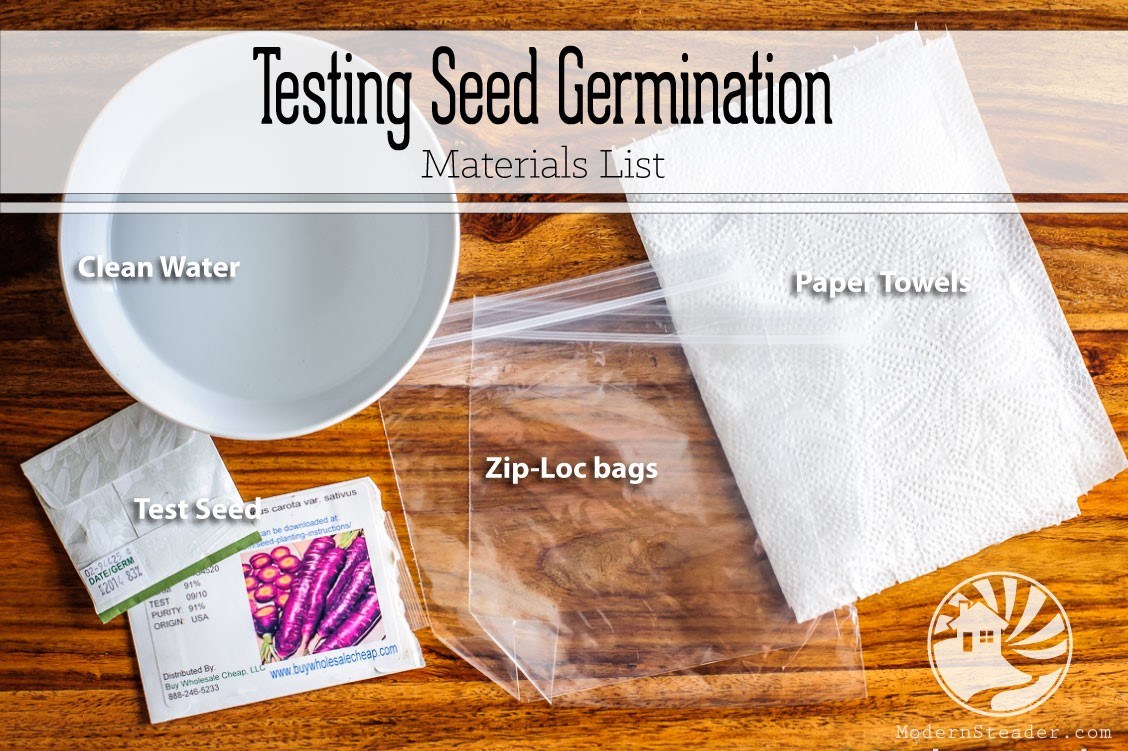
To do the test, snag some plastic storage bags or bowls, paper towels or smooth dish cloths/hankies or some fast food napkins, and a dry erase marker for “good” dishes, a Sharpie for disposables or Ziploc bags. If your seeds need scarification or stratification, do it. A lot of seeds benefit from a pre-soak for 4-24 hours, even if it’s not a requirement. For a germination test, I have no problem giving everything the best chance, even if I don’t plant them as soaked seeds in real life.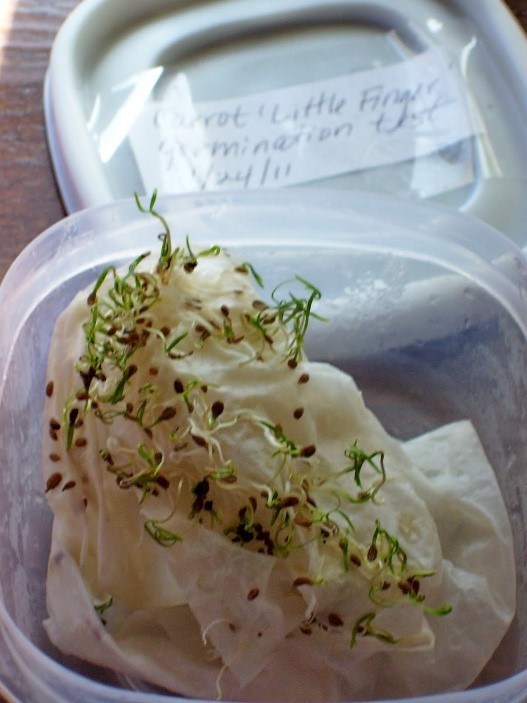
For a plastic bag, mark it so you know which variety and intended planting year it’s from (or the year you saved it) as well as the date you’re starting the test and the days it should take to germinate. Dampen your napkin or paper towel, toss in your seeds, stick them somewhere warm, and cover them in dark cloth (or stick a bunch of bags in a stock pot with a good lid).
For “good” bowls, use the dry erase marker on the container or snag a disposable plastic container like a milk jug or old blinds to cut up and mark with the same information. If you’re sure it’s not going to get rattled and your seeds will stay segregated, you can line a baking sheet with a smooth towel, put a drying rack on top of it, and cover that with an additional damp towel. For bowls, damp hanky- or bandana-like cloth or paper towels go in the bottom and you cover them with another damp towel. These dry out faster than Ziplocs, so they’ll need checked twice a day or more frequently.
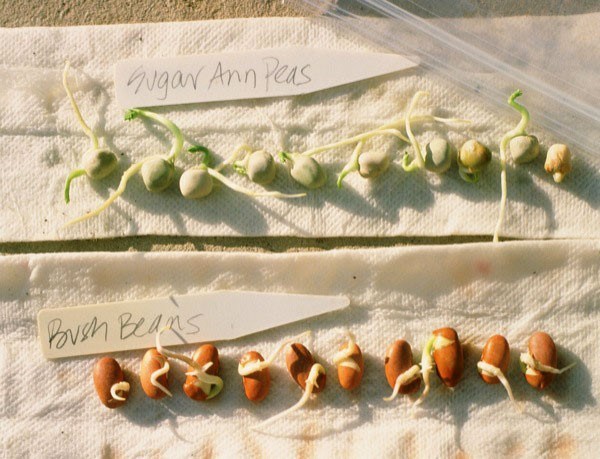
Keep an eye on the seeds for mildew and so that you can update your notebook with how many have sprouted and the age of the seeds tested. Eventually, you’ll develop an average for seed shelf life in your storage conditions even within general classes and types like spinach, squash, buckwheat, crowder peas, and grass grains.
Running the numbers
Sets of ten are easiest to reach a rate for without doing any math at all – add a zero, that’s your percent (8 of 10 sprout – 80% germination). Multiples of ten give a better baseline, and it’s simple conversions for them. The “real” way to figure out the rate is to divide and then multiple by 100. Say 32 of 50 sprout, then…
32/50 = 0.64, then 0.64 x 100 = 64; a 64% germination rate.
If you’re good with eyeballing estimating and relationships, just go with that. 32 of 50 is 3 of 5, 6 of 10, so 60%. It’s close enough. This is to make your life easier, not harder.
Applying the results
There are some seeds that are just finicky and some that may germinate but the survival to transplant or harvest size is a little low. If you’re hitting a 50-75% germination rate routinely, get some help to make sure there are no test problems. Mold under 7-14 days means you need to find a slightly less-warm spot and possibly reduce some of the moisture.
If the test’s fine and those are your germination rates for a specific package, you need new seed for storage. Whether it’s age, manufacturer, or storage conditions, yours don’t have too much life left to give. In most cases, it’s going to be a combination of these factors that degrades seed shelf life.
When you plant and start seeds with those germination rates, you may want to double the seeding rate, because you know half aren’t going to even sprout.
Germination testing isn’t a one-off. Doing it once and never again doesn’t work. If these are your storage seeds, you need to be testing batches every 1-2 years, because viability drops off. That said, unless they’re saved seed (which I test at harvest time) you don’t really need to do a germination test on anything intended for planting this year or last year. Unless they got soaked or baked sometime or have had a really hard life, they should be fine.
Local help helps more – generally
Two of the greatest assets for growers is the nearest county, university, or state extension office, and the local Master Gardener’s association. They’re right there. A lot of our states have a whole handful of regional variables, but most have somebody who’s familiar with them – and might have somebody right there in your backyard.
Use them. The more local the advice, especially about pests and growing season and crop varieties that thrive, the better the advice is going to be.
Do, however, beware of five monkeys in a cage – the “we’ve always” syndrome; we no longer use leaches as healers or wipe only with our left hands, and those kinds of advances apply elsewhere as well. We now have all kinds of growing methods that do not involve tilling in lime, but that remains fallback advice north, south, east and west. (If any amendment is part of your gardening plan, you’re going to want to stock up on that, too.)
Advice should be taken with a grain of salt and additional information sources should be sought out, for anything, but if you’re strolling around or looking at pictures of a highly productive garden, and you’re growing using the same methods in the same place, these people might be worth listening to – from where they get their seeds and baby trees, to how they handle them.
Additional seed tips
There’s another round of seed tips coming up, specifically dealing with tracking seed varieties and their yields, and storing seeds for convenience, efficiency and contingencies. With any luck, some of the points raised in this one will help you decide for or against certain seed sources and you’ll be able to rest more comfortably knowing the results of germination tests, as well as be able to find somebody to help if you’re having garden problems.


