The majority of Preppers are well equipped in survival skills, including finding food, keeping warm and making temporary shelters, but how many of you are prepared for a total life-long power cut? Would your home stand up to being totally cut off from the grid?
This is where survival retreats come in. Many people choose to have an emergency shelter to prepare for a SHTF scenario, others just want a back-up place to go in case they lose their primary residence, or perhaps some just want to get off the grid and be less visible.
Preparing such a location, is a great way to ensure your safety should you ever need somewhere to escape to. But regardless of that, even if you don’t end up using it as a retreat, it can have many different purposes – to store your personal survival cache, or even just a great place to meet up with family and friends.
Whatever your reason for wanting an emergency shelter –there are so many different options, from
shipping container homes, homes made from trailers and old school buses, to log cabins.
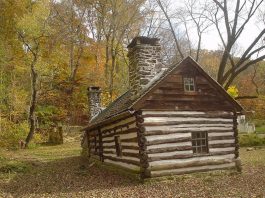
Many Preppers already have an off-grid shelter prepared just in case of an emergency, and one of the cheapest and most natural ways to do this is to build a log cabin. To build a cabin from scratch is going to take you months, possibly years. But there is a way to get around that time-frame if you don’t have that much time to dedicate to a build.
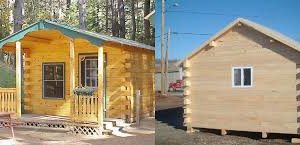
You can build an emergency prepper shelter in just a couple of days if you choose to buy a log cabin kit. The main purpose of your log cabin is literally just for shelter and warmth, so you don’t need to build anything fancy. You can get an extremely basic one, which will be perfect to live off-grid in for as little as $20,000.
Building your own cabin can be an extremely rewarding process, and will provide you with your own place to get away from it all, soak up the natural world and practice your survival skills, but this is a serious undertaking and you need to do your research properly. So, how do you know which cabin kit is right for you, and which suppliers to trust with your build?
There are four main steps to buying a survival kit; understanding kits and what you should know before buying, how to choose a supplier, what’s included in your package and the total cost. I’m going to share over 30 years of experience with you to help you get the best deal.
Step One: Understanding Kits
There are so many different kits available, it’s difficult to know which one to choose but really, it’s just a matter of personal preference.
The first choice you’ll need to make is whether you want milled or bespoke logs. Milled logs are those that are all identical and uniform in shape because they have been machine processed. Bespoke logs are hand peeled which preserves all the natural characteristics of the logs. Bespoke log kits are rightly so, more expensive than milled.
Once you’ve chosen the finish type, you’ll need to choose the lumber and profile of the log. The four-main species of trees used for log cabins are pine, cedar, spruce and cypress. The most common is pine because it’s so readily available. Cedar is also very popular but comes at a premium price.
The next step is to choose how the corners of your kit will join. The traditional round logged cabin is joined using a Scandinavian Saddle Notch, other common joins include the dovetail notch, butt and pass, tongue and groove and corner post.
The log profile is how the log is finished; round logs, half-logs, square logs and D-logs. D-logs, with a tongue and groove join are the most popular, because they are so easy to slot together.
You’ll also have the choice between air-dried and kiln dried logs. It’s important that the logs are dried to prevent warping and bowing, kiln dried logs are more expensive due to the energy intensive process they go through. Whichever you choose, the logs should have around a 10% moisture content before building.
Step Two: Choosing a Supplier
With over 300 suppliers to choose from across the US, how can you be sure you’re choosing a reputable and professional company to buy your kit from?
There are a few ways to tell if a company is reputable, and therefore offering quality kits. The first is to look at whether they are a member of the Log and Timber Homes Council, or another association which requires the supplier to meet certain standards.
Once you’ve found out if they’re registered, ask if you can visit the factory where the kits are made and if possible, visit a model home. You’ll get a good feel as to whether the people building your cabin are real craftsmen or just technicians. You can also ask to talk to previous customers to hear their experiences and reviews.
Additionally, to these standard checks, other things to keep an eye out for are whether the logs and blueprints are graded and stamped. Whilst this is sometimes included in the price of a regular kit, with other companies it can come as an extra, but ensuring plans and logs are stamped and graded gives you assurance that the materials and plans are quality.
You should also ask whether the company offer an installation service, and on-site assistance if you require it. You may have no intention of taking them up on this service, but the very fact that the offer it shows they are confident in the level of quality of the product they are offering.
The last thing to consider is the warranty. Any decent company will offer you a minimum of 10-year warranty.
Step Three: Kit Contents
Kits normally come in three different stages of completion; shell only, dry-in package and turn-key packages. The kit you opt for will most likely depend on how much you want to pay, and the completion of package you want.
A shell only package, also known as the log wall system, comes with all the logs and beams that you’ll need to construct the basic shell of a cabin. You’ll have to source the windows, doors, possibly the roof and all exterior and interior finishes.
The dry-in package usually provides you with all the materials you need to create an air-tight log cabin, including all the logs, windows, doors, floors and roof, as well as all the exterior finishes.
A turn-key package will provide you with everything you need to complete you cabin, including interior finishes. This option provides you with everything you need for the cabin to be ready to use straight away.
Depending on which kit you opt for, you’ll receive some of, or all the components you need to build a log cabin shelter.
Step Four: Total Cost
The most important cost you need to look at is the turn-key cost. This is the complete cost of the cabin including the logs, roof, floor, windows doors, interior fittings and labor cost.
The shell package will cost you in between $50-80 per square foot, the dry-in package around $70-$130 per square foot, and a turn-key package in between $130-$180 per square foot.
You should compare like-for-like packages in cost, there is no use comparing a shell price from one company to a turn-key price with another. Figure out what the additional costs will be for the shell package before making a comparison.
One thing to keep in mind with any package is this will not be the total cost of your survival cabin. The golden ratio to use is 1:2. So if the kit costs $20,000, you can expect your final cost to be closer to $40,000 if you intend to carry out all the work yourself. If you employ someone to build the cabin for you, use a 1:3 ratio.
Is a Log Cabin Kit Right for Your Emergency Shelter?
Having an emergency shelter is a wise idea, if the day comes that for some reason your main place of residence is no longer a viable place to be.
In the mean-time, it doesn’t have to go to waste – it can have multiple uses such as somewhere just to go a hangout on the weekends with friends, or a place to store all your survival supplies.
A kit might work well for you if you really want an emergency shelter, but don’t have months or years to spend building a log cabin. All the difficult work is taken out of the build, and it is delivered straight to you ready to assemble. The assembly of a kit can be done in just two or three days with a handful of people.


