The Overlooked Necessity
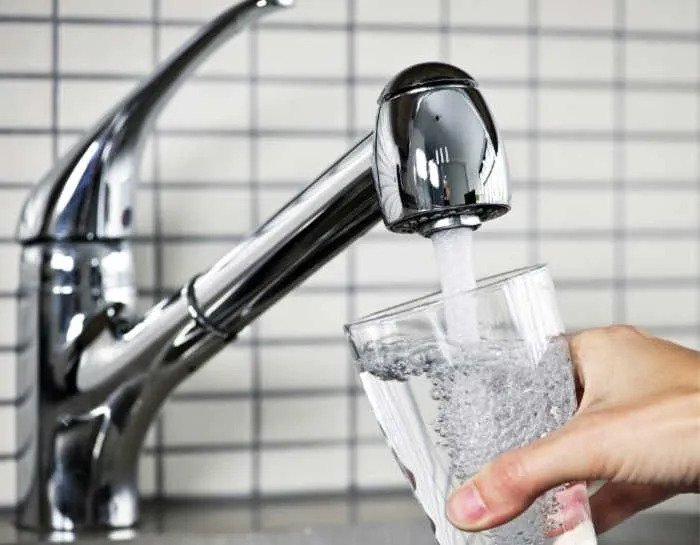
We take it for granted—turn on the faucet, and water flows freely. But what happens when those faucets stop working? Whether due to power outages, contaminated supply lines, or natural disasters, a water emergency can strike with little warning. Being prepared isn’t just smart—it’s essential.
I’m passionate about water preparedness because I’ve seen firsthand how quickly communities can face critical shortages. Just recently, while getting my hair cut, I noticed Hurricane Michael’s devastation playing on the salon television. I asked my stylist—a newlywed living paycheck to paycheck—if she had any water stored at home. Her answer? “No, not yet.”
While we may live far from hurricane zones, no community is immune to water emergencies. In 2013, our area experienced a 500-year flood. These extreme events are becoming more common, and they all share one critical threat: compromised water systems.
How Much Water Do You Really Need?
I recommend storing 4 gallons of water per person per day. Some consider this excessive, but this accounts for drinking, cooking, and basic hygiene needs. You may also need to assist neighbors who haven’t prepared.
Many people assume their water heater’s 50 gallons provide adequate backup. However, if your municipal water becomes contaminated—whether from infrastructure failure or other causes—that reserve becomes unusable. Remember Flint, Michigan, where poor decisions by local authorities resulted in widespread lead poisoning through the water supply.
Water Calculation Formula
To determine your household’s minimum water requirements:
- Number of people × 4 gallons × Number of days = Total gallons needed
- For a family of four preparing for a two-week emergency: 4 people × 4 gallons × 14 days = 224 gallons
This calculation provides a realistic baseline for adequate preparedness. While FEMA suggests a minimum of 1 gallon per person per day, experience with actual emergencies demonstrates this is rarely sufficient for maintaining hygiene and cooking needs during extended disruptions.
Water Storage Options
Bottled Water
Calculate your household’s needs for one week, two weeks, or a month. Cases of bottled water (12-ounce, 16-ounce, or 20-ounce) provide convenient storage. While not the most cost-effective solution, they require no preparation and are ready for immediate use.
Example: A family of four requiring 4 gallons per person per day would need 112 gallons for a one-week emergency. This translates to approximately 851 16-ounce bottles or 71 cases of 24-count water bottles.
Budget-Friendly Alternatives:
- Take advantage of case sales at grocery stores during off-seasons (typically winter)
- Look for store brands that offer similar quality at 30-50% lower costs
- Collect recyclable bottles one at a time during regular shopping trips
- Consider joining wholesale clubs for bulk pricing on larger quantities
WaterBricks
These 3.5-gallon containers weigh approximately 26-27 pounds when filled. With just ½ teaspoon of Water Preserver, the contents remain safe for five years before rotation is necessary.
Example: Six WaterBricks provide a three-day emergency supply for two people at the recommended 4 gallons per person per day. Their stackable design means they require only 4 square feet of floor space when arranged in a 2×3 configuration.
Budget-Friendly Alternatives:
- Monitor emergency preparedness websites for seasonal discounts and clearance events
- Look for group purchase opportunities through preparedness forums and community groups
- Check for open-box or display models at reduced prices
- Consider similar food-grade stackable containers from restaurant supply stores
Repurposed Containers
Thoroughly cleaned milk jugs can serve as temporary storage. While they may eventually leak, they’re better than nothing and can be used for personal hygiene if needed.
Example: A standard plastic milk jug holds approximately 1 gallon. A thorough cleaning process includes rinsing with hot water, washing with dish soap, sanitizing with 1 tablespoon of unscented household bleach per gallon of water (let stand for 30 minutes), and thoroughly rinsing again before filling.
Budget-Friendly Alternatives:
- Systematically save your own containers from consumed products
- Request clean, empty containers from family members who regularly use these products
- Connect with local recycling programs that may allow collection of clean containers
- Partner with neighbors to gather and prepare containers as a community project
55-Gallon Barrels
Blue water barrels complete with pumps are available at retailers like Walmart for under $50 in some areas. Remember to leave room for expansion if your climate experiences freezing temperatures, and don’t forget to purchase the necessary bung and siphon pump.
Example: One 55-gallon barrel provides approximately 13.75 days of water for one person at 4 gallons per day. For a family of four, this same barrel provides about 3.4 days of water. The barrel should be placed on a sturdy platform at least 3-4 inches off the ground to enable proper siphoning.
Budget-Friendly Alternatives:
- Purchase during emergency preparedness month (September) when sales are common
- Look for community emergency management programs that subsidize barrels for residents
- Check online marketplaces for lightly used food-grade barrels
- Connect with local food manufacturers who may offer empty food-grade barrels at reduced cost
Two-Liter Soda Bottles
These durable plastic bottles are excellent for water storage and typically last longer than milk jugs without developing leaks.
Example: A standard 2-liter bottle holds approximately half a gallon. Twenty 2-liter bottles provide 10 gallons of water storage, enough for 2.5 days for one person. These bottles can be stored upright in plastic crates for organization and stability.
Budget-Friendly Alternatives:
- Save bottles from your own beverage consumption
- Establish a neighborhood collection program where neighbors save bottles for each other
- Implement a gradual collection strategy, adding 2-3 bottles per week to your storage
- Create a rotation system where oldest bottles are used for plants while new ones join storage
Bathtub Emergency Water Storage
For last-minute water collection before an anticipated emergency, bathtub storage offers significant capacity.
Example: An average bathtub holds 40-60 gallons of water. Special liners like the WaterBOB can be placed in bathtubs before filling to ensure cleanliness. This method provides a 10-15 day supply for one person or 2.5-3.75 days for a family of four.
Budget-Friendly Alternatives:
- Keep clean shower curtain liners as emergency bathtub barriers
- Maintain clean plastic sheeting available for multiple emergency uses
- Make DIY bathtub liners using food-grade plastic sheets
- Use clean plastic tablecloths as temporary emergency liners
Water Purification Solutions
Berkey Sports Water Bottles
These portable purification systems are ideal for travel or emergency situations. Each bottle can be refilled up to 640 times with municipal water, making them valuable assets for your emergency kit.
Example: A family of four with one Berkey Sports Bottle per person can purify enough water for 2,560 days of drinking water (assuming 1 bottle capacity per day per person for drinking only). The compact size means they can be stored in vehicle glove compartments, emergency kits, or backpacks.
Budget-Friendly Alternatives:
- Watch for seasonal sales events that often occur during preparedness months
- Consider purchasing as a group with friends or family for potential bulk discounts
- Look for refurbished units that offer the same performance with significant savings
- Start with one bottle for the household and add more gradually as budget allows
LifeStraw
Compact and effective, a single LifeStraw can purify up to 1,000 gallons of water—a substantial resource during extended emergencies.
Example: One LifeStraw provides approximately 3,785 days (over 10 years) of drinking water for one person, based on the recommended daily intake of 64 ounces. These ultralight devices weigh only 2 ounces and can filter particles down to 0.2 microns, removing 99.9999% of bacteria and 99.9% of protozoa.
Budget-Friendly Alternatives:
- Monitor outdoor retailers for end-of-season clearance events
- Watch for “buy one, give one” promotional events that offer discounts
- Consider slightly older models that may be available at reduced prices
- Look for bundle packs that reduce the per-unit cost substantially
Big Berkey Water Purifier
I’ve tested mine extensively, including the red food coloring test, which it passes perfectly (no colored water emerges from the spout). Ensure all filters are correctly installed for optimal performance. These systems can be lifesaving if your water supply becomes compromised.
Example: A standard Big Berkey with two Black Berkey purification elements can process up to 6,000 gallons before filter replacement is needed. For a family of four using 1 gallon per person per day for drinking and cooking, these filters would last approximately 4.1 years. The system can purify up to 7 gallons per hour, adequate for meeting immediate family needs.
Budget-Friendly Alternatives:
- Purchase during annual Black Friday or preparedness month sales
- Consider slightly smaller models with the same filtration technology
- Look for floor models or demonstration units at preparedness expos
- Explore payment plans offered by some emergency preparedness retailers
High-Capacity Tanks
For those with adequate resources and space, large-capacity tanks provide substantial security. I invested in a 250-gallon tank for approximately $350. Though expensive, the peace of mind knowing my household has sufficient water for an extended emergency is invaluable.
Example: A 250-gallon tank provides approximately 62.5 days of water for one person at 4 gallons per day, or 15.6 days for a family of four. These tanks typically measure about 48″ x 48″ x 31″ and should be installed on a flat, reinforced concrete pad. They should include a proper venting system, overflow capability, and ideally a gravity-fed spigot that functions without electricity.
Budget-Friendly Alternatives:
- Consider smaller intermediate capacity tanks (50-100 gallons) as budgetary stepping stones
- Watch for agricultural supply sales that often feature water storage equipment
- Look into rain collection systems that serve dual purposes for conservation and emergency backup
- Explore community preparedness grants that may subsidize larger water storage solutions
DIY Water Filtration Systems
Creating your own filtration system can be an economical alternative to commercial purifiers.
Example: A three-stage filtering system using a 5-gallon bucket can be constructed with gravel, sand, and activated charcoal layers. While not as effective as commercial options for removing pathogens, these systems can remove sediment and some contaminants. When combined with water purification tablets or boiling, they provide adequate emergency filtration.
Budget-Friendly Alternatives:
- Use common household materials like coffee filters as pre-filters
- Construct using recycled food-grade containers from your kitchen
- Source materials gradually to distribute the cost over time
- Share construction costs with neighbors to create multiple systems simultaneously
Chemical Purification Methods
Chemical treatments provide a lightweight, portable purification option that requires minimal equipment.
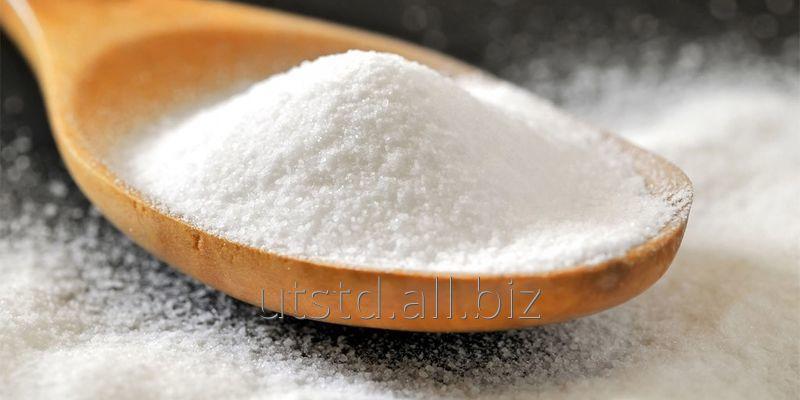
Example: Standard household unscented bleach with 6% sodium hypochlorite can purify water at a ratio of 8 drops (approximately 1/8 teaspoon) per gallon of clear water. After adding bleach, the water should stand for at least 30 minutes before use. A single 32-ounce bottle of bleach can treat approximately 3,072 gallons of water—enough for 768 days for one person drinking 4 gallons per day.
Budget-Friendly Alternatives:
- Store regular household bleach properly and rotate supply every 6 months
- Keep chlorine tablets (such as pool shock) as a concentrated alternative
- Use household iodine from first aid kits for short-term purification
- Keep commercially available water purification tablets in vehicle and home emergency kits
Implementation Strategy
Starting Small: The 30-Day Water Security Plan
If you’re on a limited budget or have space constraints, begin with this targeted approach:
Week 1: Collect and clean 2-liter bottles or purchase one case of bottled water. Begin with the goal of storing just 3 days of water for each household member.
Week 2: Add basic purification options like household bleach or purification tablets. These are inexpensive but provide critical capability to make questionable water safe.
Week 3: Expand storage with a few WaterBricks or similar containers. Focus on containers that allow for long-term storage without leaking or contamination issues.
Week 4: Incorporate a simple filtration method like a Berkey Sports Bottle or LifeStraw. These portable options provide flexibility during evacuation scenarios.
Scaling Up: The Six-Month Water Independence Plan
As resources permit, progressively enhance your water security:
Month 2-3: Invest in a 55-gallon drum system with necessary accessories. This significant capacity increase represents a major milestone in preparedness.
Month 4-6: Add a quality countertop filter system for daily use and emergencies. Using this system regularly ensures you’re familiar with operation when an emergency occurs.
Month 7-12: Consider high-capacity storage options if space allows. These larger systems provide community-level resilience during extended emergencies.
Testing Your System: The Quarterly Water Readiness Drill
Conduct quarterly drills with your household to verify system effectiveness:
- Turn off the main water supply for 4 hours
- Rely exclusively on your stored water for all needs
- Document water usage rates for each activity (cooking, hygiene, drinking)
- Evaluate what worked well and what needs improvement
- Adjust your storage and purification strategy accordingly
Emergency Water FAQ
How long can I store water before it goes bad?
Commercially bottled water has a recommended shelf life of 1-2 years, though it remains safe indefinitely if properly stored. Water stored in proper containers with preservatives can last 5 years. Water in cleaned soda bottles should be rotated every 6 months.
What’s the best container for long-term water storage?
Food-grade plastic containers designed specifically for water storage provide the best combination of durability, safety, and longevity. Look for containers made from HDPE plastic (recycle symbol #2) that are opaque or blue to prevent algae growth.
How should I treat suspicious water during an emergency?
Follow this treatment hierarchy:
- Filter to remove particulates and larger organisms
- Boil vigorously for at least 1 minute (3 minutes at elevations above 6,500 feet)
- Add chemical treatment (bleach, iodine, or purification tablets)
- Let stand for the recommended treatment time before consuming
Should I store water in my garage?
Avoid areas with temperature extremes. Garages in moderate climates may be acceptable, but temperature fluctuations can degrade plastic containers over time and potentially leach chemicals. Basements or climate-controlled areas are preferable for long-term storage.
Final Thoughts on Water Preparedness
Water security represents the foundation of all emergency preparedness efforts. Without adequate clean water, all other preparations become significantly less effective. The strategies outlined in this guide provide a comprehensive approach to ensuring your household maintains access to this critical resource regardless of external circumstances.
Remember: Water preparedness isn’t about fear—it’s about responsible self-reliance. Start small if necessary, but start today. When others are scrambling during an emergency, you’ll have the security of knowing your basic needs are covered. Your future self will thank you.
Have questions about water preparedness or want to share your own experiences? Comment below or join our preparedness community forum to continue the conversation.
Essential Preparedness Resources You Can’t Afford to Miss:
The Lost Survival Medicine Cabinet: Discover the forgotten remedies our grandparents used to treat everything from infections to injuries without pharmaceuticals. These techniques could save your family when medical help isn’t available.
The Self-Sufficient Homestead Blueprint: Our exclusive guide reveals how to transform any property—even a small suburban lot—into a sustainable food production system that operates completely off-grid.
The Government Crisis Response Plan They Don’t Want You to See: Our investigative report exposes the actual government emergency protocols and why individual preparedness has become more critical than ever.
Unlimited Clean Water Forever: The innovative system that transforms even contaminated water sources into unlimited pure drinking water—no electricity required and virtually maintenance-free.
The Forgotten Skills Masterclass: Learn the critical self-reliance abilities that kept our ancestors alive through wars, depressions, and disasters—skills that 99% of Americans have lost but could make the difference between survival and catastrophe.
The Digital Privacy Fortress: Ten powerful steps to protect your personal information from surveillance, tracking, and data breaches during times of social instability.


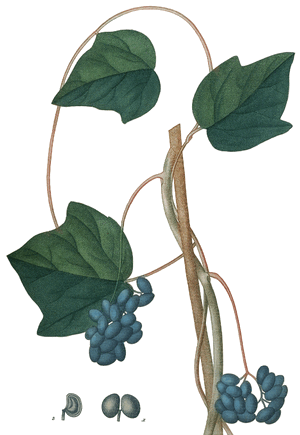 Menispermum canadense, commonly known as Moonseed, is a woody vine that grows 8-20 feet long. Young stems appear green to brownish-red with slight hairiness, while older stems become hairless and woody. The smooth leaves measure up to 6 inches long and 8 inches across, often hanging downward.
 White Snakeroot plants feature coarse-toothed, round-based leaves with pointed tips and can reach up to 3 feet (1m) in height. Clusters of white flowers grow atop the stems throughout summer and fall.
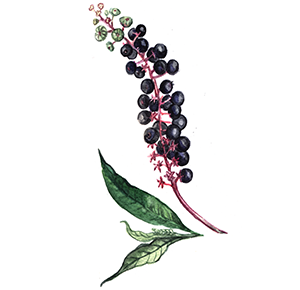 Phytolacca americana, commonly called Pokeweed, is native to eastern North America and the midwest but has spread throughout Canada, the United States, Europe, and Asia.
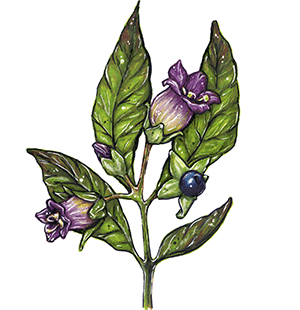 Atropa belladonna—commonly known as Belladonna or Deadly Nightshade—is a poisonous perennial herbaceous plant in the nightshade family. Found throughout Europe, Northern Africa, Western Asia, and scattered across North America, it’s considered one of the most poisonous plants known to humanity.
 Found throughout most of the eastern and western United States, rhododendron leaves are easily mistaken for bay leaves. Using these leaves to season an emergency meal could prove disastrous.
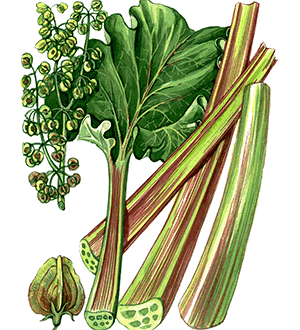 Dangerous plants aren’t only found in the wilderness—they can be growing in your own backyard. Rhubarb, for example, produces edible stalks but extremely toxic leaves. The high concentration of oxalic acid in rhubarb leaves can cause severe health problems if consumed.