What Storage Container Works Best?
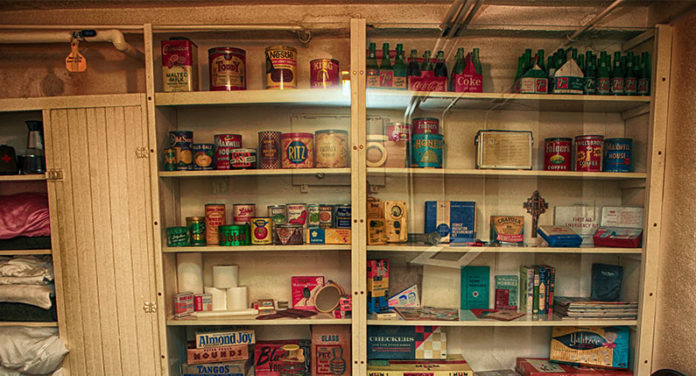
A large part of prepping is the art of storing provisions and other necessary items in anticipation of a time when they will not be readily available, due to a breakdown in society and its usual services.
Many articles are written about what to store, but very little is written about how to store the things you are collecting. We suggest, and this article explains, that your choice of storage materials is very important.
The best storage container depends on what it is you’re trying to store, and the environment in which you’ll be storing it. For example, you might be okay storing some items in cardboard boxes indoors, but clearly, you’d probably never use cardboard boxes for outdoor storage. Or while you might be okay with storing clothing in plastic containers, you might not want to store food items in the same containers.
Here are some issues to consider when choosing storage containers.
What Are You Protecting For/Against
Some of the biggest reasons for using containers; other than the simple convenience of having everything together, is to protect against one or more external factors.
The most common considerations are
- Heat or Cold
- Humidity or Water
- Oxygen
- Light (particularly UV light)
- Insects, Pests, Rodents, etc.
- Grouping items together into convenient and compact collections
- Miscellaneous External Factors
Understanding the factors you are protecting against will help guide you toward the appropriate container choices.
Container Life
Do you want a container that will last six months, six years, or six decades? Probably no one reading this would settle for a six-month life and indeed, most of us would consider six years too short too, but somewhere in the ‘more than six and less than sixty-year range, we’ll likely find a sweet spot.
How do containers age and wear out? Anything that sees the sun will be impacted by the UV rays from the sun. Many natural products will dry out or go brittle or in some other way lose their desirable properties. Plastics will lose their plasticizers and start to crack and break. Metal might rust. Rubber will perish. Wood might rot (or be eaten by termites or chewed through by rodents).
In addition to unavoidable age-related wear and tear, containers might also fail due to things like accidental mishandling and breakage. Drop a glass jar onto a concrete floor and it will probably smash, and you just know that sooner or later, everything made of glass will be dropped – and even if the glass object is already on the floor and therefore unable to be dropped, something will instead drop on it.
Depending on the product you are storing, and where you are storing it, these life-related issues will impact to varying degrees.
Container Reusability
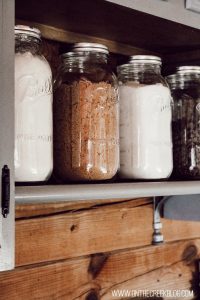
Do you want a container that can be reused countless times, or are you happy with a single-use container? A tin of food is an example of a container that is single-use, and a Mason jar is an example of a container that can be reused very many times indeed (albeit with new lids each time if you’re using them as a long-life canning alternative.
In the middle between the single-use and the virtually unlimited use are containers with a varying number of potential reuses – items with plastic hinges, cardboard flaps, flexible metal detents, plastic bags that will eventually get holes in them, or whatever.
One other aspect of container reusability would be what ongoing use you can get from the material the container is made from. There’s not much you can do with a cardboard container, but with many other materials; you can use them for other purposes. Metals may be able to be worked into other shapes for other purposes. Glass could be melted down and then blown or molded into other shapes, and the same is possible for plastic too.
Container Repairability
Maybe you have a container with a limited life, but which can be either readily repaired or have key wear items easily replaced, and so given repeated life extensions. The lids in a Mason jar are an example, and gaskets in other lids are another example.
A wooden box can probably be repaired with extra pieces of wood, a hammer, and some nails. Maybe superglue can be used to repair other items. Glue – super or ‘regular’ – can also fix some types of breakages in glassware and ceramic items.
And in other cases, cracks don’t even matter too much. A crack in a water container would be a problem, but in a container that is simply storing clothing, not so much.
But in choosing your containers, consider not only their susceptibility to wear and damage, and but also their ability to be repaired, and make sure you have the tools and materials to carry out such repairs.
Permeability
Are you storing something that needs to be fully sealed in (or a similar concept has external things fully sealed out)?
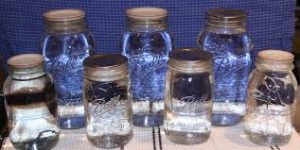
Water, for example, ideally should be fully sealed into a container to avoid evaporative loss and environmental contamination. Many food items need to have external things (usually but not exclusively oxygen) fully sealed out.
If so, the permeability of the container becomes an important issue. Many plastics and obviously most natural products (wood, fabric) are somewhere between moderately and very porous.
If you want impermeability to gases; then you either should look for mylar or nylon-type plastics, or glass, or metal.
Interaction with Contents
If you are storing acidic food, you don’t want it in an aluminum container. If you are storing a liquid, you don’t want it in cardboard (obviously enough). If you are storing water, you don’t want it in a wooden cask or barrel because it will absorb poisonous chemicals and flavors from the wood. You might also not want water in many plastic containers due to the danger of the plasticizers and release agents leaching out of the plastic and into the water.
Environmental Issues
Will the container be inside or outside? Does it need to be non-reactive to water? Does it need to insulate its contents from temperature extremes? Does it need to be impervious to rodents and other creatures? Will it need to be strong to resist wind and other external factors? How about UV issues? Rust? Rot?
Clear or Opaque
Do you need (or would you like) to be able to see the contents inside the container? On the other hand, will light harm the contents of the container?
Container Sizes, Shapes, and Weights
Sometimes the size, shape, and weight of the container are relevant issues, other times not so much. A portable product should, of course, be in containers that aren’t too bulky or heavy to be moved.
If you are space-constrained for storing certain items, you want containers that are efficiently sized (ie usually with square rather than rounded corners and sides) and with little unused storage space inside them.
Multi-Purpose Use
Ideally, you want containers that can be used to hold different things at different times, rather than containers that only work for one thing.
Sometimes it is unavoidable to have containers that can only be used for one thing, because of the nature of the product, you store in it. It is hard to reuse a gas container (particularly a plastic one) for drinking water, but there’s no reason why it couldn’t be reused for transporting wastewater.
Container Materials
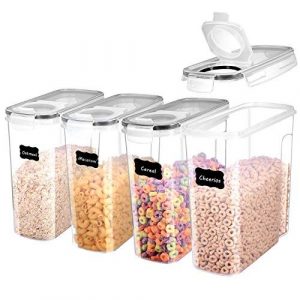
Containers can obviously be made from many different materials. Some of the most common are plastic, glass, metal, and wood or cardboard.
But this list should be further subdivided. Plastics should be divided into permeable or barrier, food safe or not, and their ability to resist high/low temperatures and UV. Metal varies from iron to steel to stainless steel, as well as aluminum and more exotic materials. Even wood or cardboard comes in many different grades (food quality or not, painted or not) suitable for different types of applications.
Other materials include fabrics and other natural materials, stone, earth, pottery/ceramic/porcelain, and even concrete.
In addition, containers commonly have a different material for their opening section and/or hinge and/or the seal between their top and bottom.
Two Are Twice as Good as One
Sometimes the ideal approach to storage involves using two containers. For example, putting items first into plastic bags (nylon or mylar) and then putting many of the filled and sealed bags into large multi-gallon plastic pails and sealing the pails.
Even though the pails may not be food-safe, that doesn’t matter. The plastic bag protects the food inside from the pail, while the pail, in turn, protects the relatively fragile plastic bags from other external environmental factors.
Smaller is Better than Bigger
Which do you think is better – one huge container that is sufficient to hold all of whatever it is you are storing or multiple smaller containers?
We suggest having multiple smaller containers is the better choice for several reasons.
First, when you open a container, the life of the item in the opened container may start expiring much more quickly. So if you have a multi-year supply of whatever, but the item will only last three months once the container has opened, you’ll want each container to hold no more than three months of product.
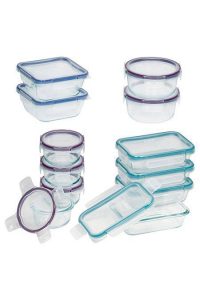
Second, smaller items are more conveniently moved and shifted and managed. You don’t want awkwardly bulky and heavy items that only a strong adult can manhandle – what happens if the strong adult is absent or unwell or indisposed?
A related third factor is the risk of injury. No one is likely to risk serious injury if they drop a ten-ounce container on their foot, but if they drop a ten-pound (or a 100 lb) container on their foot, that might become a life-threatening injury (particularly if healthcare is not conveniently at hand).
A fourth factor is to protect against random unexpected container failure causing the loss of your total supply of something. As you of course know and are planning/preparing for ‘shit happens’ in many different forms. Perhaps one of your containers might have a bad seal or a hairline crack or something in it. If the container has 10% of your supply of whatever inside it, then that’s a disappointing loss, but if it has your entire supply of the item inside, and the failed container has caused the contents to spoil, then that’s a very serious loss.
In this case, the adage to not put all your eggs in one basket is quite literally true!
This also leads to our next point.
Multiple Storage Locations
We suggest not only storing your provisions in multiple containers but also storing them in multiple locations. If you do this, then events that might cause physical harm to the storage location no longer endanger your entire inventory of stored provisions. Maybe there’s a fire, maybe a flood, or even a tornado. Perhaps a tree falls onto the building or a car crashes into it, maybe there’s a landslide, or maybe a satellite falls out of the sky and lands on the storage area! Maybe the zombie horde manages to wrest control of one of your supply dumps from you, maybe anything at all.
No matter what might happen, if you have your stores split over two locations rather than one, your risk is reduced so that, hopefully, a worst-case scenario sees you losing only half rather than all your provisions.
Be sure that your multiple storage locations are safe and appropriate. You’re just substituting one risk for another if you take some of your provisions and remove them from your protected retreat and instead place them in a shed on the far side of your property, making them vulnerable to anyone passing by.
Containers We Like
We really like glass. It is one of the most unreactive materials and has an extremely long life assuming it isn’t broken (its biggest weakness). Glass containers with glass stoppers are the best of the best, but you might find yourself needing to accept some other types of seals such as metal or plastic, possibly with or without a rubber or plastic or natural material seal.
You really need to think through the potential challenges of glass breaking. For example, if there’s any chance of earthquakes or other events causing containers to fall off shelving, you need to either ensure the integrity of the shelving or avoid using glass.
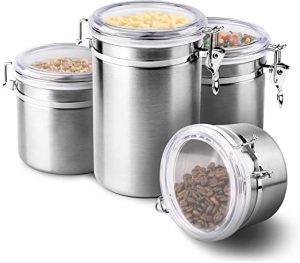
For inert products, we like wood and metal, and our favorite metals are either stainless steel (very expensive) or aluminum (a great compromise between strength and weight, but beware of having acids in contact with aluminum). Note also that in some types of fire, aluminum will either melt or even start burning. The average house fire reaches temperatures of 1100°F, and aluminum melts at 660°. Steel, on the other hand, doesn’t melt until temperatures go above 2500°.
For large liquid storage, either metal or concrete containers seem to be the best solution.
While we acknowledge the convenience and ubiquity of plastic, we try not to use anything plastic in our long-term storage. Plastic bags – particularly made with a mylar or nylon component – are probably okay, but most other plastics just have too many issues in our opinion.
Many times, with food storage, it is a great idea to add a desiccant, and/or oxygen absorber, to the container of bulk food before sealing it.
Summary
It isn’t enough just to own a lot of provisions and other ‘stuff’. You need to very carefully plan out how and where you store your supplies so as to avoid nasty surprises and problems.
Other Self-sufficiency and Preparedness solutions recommended for you:
The Lost Ways (The vital self-sufficiency lessons our great grand-fathers left us)
Survival MD (Knowledge to survive any medical crisis situation)
Backyard Liberty (Liberal’s hidden agenda: more than just your guns…)
Alive After the Fall (Build yourself the only unlimited water source you’ll ever need)
The Lost ways II (4 Important Forgotten Skills used by our Ancestors that can help you in any crisis)
The Patriot Privacy Kit (Secure your privacy in just 10 simple steps)
A large part of prepping is the art of storing provisions and other necessary items in anticipation of a time when they will not be readily available, due to a

