Home2024

A large part of prepping is the art of storing provisions and other necessary items in anticipation of a time when they will not be readily available, due to a breakdown in society and its usual services.

Many articles are written about what to store, but very little is written about how to store the things you are collecting. We suggest, and this article explains, that your choice of storage materials is very important.

The best storage container depends on what it is you’re trying to store, and the environment in which you’ll be storing it. For example, you might be okay storing some items in cardboard boxes indoors, but clearly, you’d probably never use cardboard boxes for outdoor storage. Or while you might be okay with storing clothing in plastic containers, you might not want to store food items in the same containers.

Here are some issues to consider when choosing storage containers.

What Are You Protecting For/Against

Some of the biggest reasons for using containers; other than the simple convenience of having everything together, is to protect against one or more external factors.

The most common considerations are

  • Heat or Cold
  • Humidity or Water
  • Oxygen
  • Light (particularly UV light)
  • Insects, Pests, Rodents, etc.
  • Grouping items together into convenient and compact collections
  • Miscellaneous External Factors

Understanding the factors you are protecting against will help guide you toward the appropriate container choices.

Container Life

Do you want a container that will last six months, six years, or six decades? Probably no one reading this would settle for a six-month life and indeed, most of us would consider six years too short too, but somewhere in the ‘more than six and less than sixty-year range, we’ll likely find a sweet spot.

How do containers age and wear out? Anything that sees the sun will be impacted by the UV rays from the sun. Many natural products will dry out or go brittle or in some other way lose their desirable properties. Plastics will lose their plasticizers and start to crack and break. Metal might rust. Rubber will perish. Wood might rot (or be eaten by termites or chewed through by rodents).

In addition to unavoidable age-related wear and tear, containers might also fail due to things like accidental mishandling and breakage. Drop a glass jar onto a concrete floor and it will probably smash, and you just know that sooner or later, everything made of glass will be dropped – and even if the glass object is already on the floor and therefore unable to be dropped, something will instead drop on it.

Depending on the product you are storing, and where you are storing it, these life-related issues will impact to varying degrees.

Container Reusability
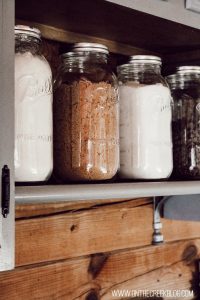
Do you want a container that can be reused countless times, or are you happy with a single-use container? A tin of food is an example of a container that is single-use, and a Mason jar is an example of a container that can be reused very many times indeed (albeit with new lids each time if you’re using them as a long-life canning alternative.

In the middle between the single-use and the virtually unlimited use are containers with a varying number of potential reuses – items with plastic hinges, cardboard flaps, flexible metal detents, plastic bags that will eventually get holes in them, or whatever.

One other aspect of container reusability would be what ongoing use you can get from the material the container is made from. There’s not much you can do with a cardboard container, but with many other materials; you can use them for other purposes. Metals may be able to be worked into other shapes for other purposes. Glass could be melted down and then blown or molded into other shapes, and the same is possible for plastic too.

Container Repairability

Maybe you have a container with a limited life, but which can be either readily repaired or have key wear items easily replaced, and so given repeated life extensions. The lids in a Mason jar are an example, and gaskets in other lids are another example.

A wooden box can probably be repaired with extra pieces of wood, a hammer, and some nails. Maybe superglue can be used to repair other items. Glue – super or ‘regular’ – can also fix some types of breakages in glassware and ceramic items.

And in other cases, cracks don’t even matter too much. A crack in a water container would be a problem, but in a container that is simply storing clothing, not so much.

But in choosing your containers, consider not only their susceptibility to wear and damage, and but also their ability to be repaired, and make sure you have the tools and materials to carry out such repairs.

Permeability

Are you storing something that needs to be fully sealed in (or a similar concept has external things fully sealed out)?
Water, for example, ideally should be fully sealed into a container to avoid evaporative loss and environmental contamination. Many food items need to have external things (usually but not exclusively oxygen) fully sealed out.

If so, the permeability of the container becomes an important issue. Many plastics and obviously most natural products (wood, fabric) are somewhere between moderately and very porous.

If you want impermeability to gases; then you either should look for mylar or nylon-type plastics, or glass, or metal.

Interaction with Contents

If you are storing acidic food, you don’t want it in an aluminum container. If you are storing a liquid, you don’t want it in cardboard (obviously enough). If you are storing water, you don’t want it in a wooden cask or barrel because it will absorb poisonous chemicals and flavors from the wood. You might also not want water in many plastic containers due to the danger of the plasticizers and release agents leaching out of the plastic and into the water.

Environmental Issues

Will the container be inside or outside? Does it need to be non-reactive to water? Does it need to insulate its contents from temperature extremes? Does it need to be impervious to rodents and other creatures? Will it need to be strong to resist wind and other external factors? How about UV issues? Rust? Rot?

Clear or Opaque

Do you need (or would you like) to be able to see the contents inside the container? On the other hand, will light harm the contents of the container?

Container Sizes, Shapes, and Weights

Sometimes the size, shape, and weight of the container are relevant issues, other times not so much. A portable product should, of course, be in containers that aren’t too bulky or heavy to be moved.

If you are space-constrained for storing certain items, you want containers that are efficiently sized (ie usually with square rather than rounded corners and sides) and with little unused storage space inside them.

Multi-Purpose Use

Ideally, you want containers that can be used to hold different things at different times, rather than containers that only work for one thing.

Sometimes it is unavoidable to have containers that can only be used for one thing, because of the nature of the product, you store in it.  It is hard to reuse a gas container (particularly a plastic one) for drinking water, but there’s no reason why it couldn’t be reused for transporting wastewater.

Container Materials

Containers can obviously be made from many different materials. Some of the most common are plastic, glass, metal, and wood or cardboard.

But this list should be further subdivided.  Plastics should be divided into permeable or barrier, food safe or not, and their ability to resist high/low temperatures and UV. Metal varies from iron to steel to stainless steel, as well as aluminum and more exotic materials. Even wood or cardboard comes in many different grades (food quality or not, painted or not) suitable for different types of applications.

Other materials include fabrics and other natural materials, stone, earth, pottery/ceramic/porcelain, and even concrete.

In addition, containers commonly have a different material for their opening section and/or hinge and/or the seal between their top and bottom.

Two Are Twice as Good as One

Sometimes the ideal approach to storage involves using two containers. For example, putting items first into plastic bags (nylon or mylar) and then putting many of the filled and sealed bags into large multi-gallon plastic pails and sealing the pails.

Even though the pails may not be food-safe, that doesn’t matter. The plastic bag protects the food inside from the pail, while the pail, in turn, protects the relatively fragile plastic bags from other external environmental factors.

Smaller is Better than Bigger

Which do you think is better – one huge container that is sufficient to hold all of whatever it is you are storing or multiple smaller containers?

We suggest having multiple smaller containers is the better choice for several reasons.

First, when you open a container, the life of the item in the opened container may start expiring much more quickly. So if you have a multi-year supply of whatever, but the item will only last three months once the container has opened, you’ll want each container to hold no more than three months of product.
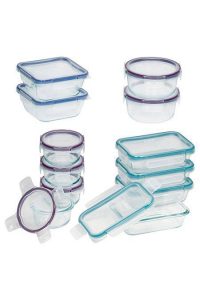
Second, smaller items are more conveniently moved and shifted and managed. You don’t want awkwardly bulky and heavy items that only a strong adult can manhandle – what happens if the strong adult is absent or unwell or indisposed?

A related third factor is the risk of injury. No one is likely to risk serious injury if they drop a ten-ounce container on their foot, but if they drop a ten-pound (or a 100 lb) container on their foot, that might become a life-threatening injury (particularly if healthcare is not conveniently at hand).

A fourth factor is to protect against random unexpected container failure causing the loss of your total supply of something. As you of course know and are planning/preparing for ‘shit happens’ in many different forms. Perhaps one of your containers might have a bad seal or a hairline crack or something in it. If the container has 10% of your supply of whatever inside it, then that’s a disappointing loss, but if it has your entire supply of the item inside, and the failed container has caused the contents to spoil, then that’s a very serious loss.

In this case, the adage to not put all your eggs in one basket is quite literally true!

This also leads to our next point.

Multiple Storage Locations

We suggest not only storing your provisions in multiple containers but also storing them in multiple locations. If you do this, then events that might cause physical harm to the storage location no longer endanger your entire inventory of stored provisions. Maybe there’s a fire, maybe a flood, or even a tornado. Perhaps a tree falls onto the building or a car crashes into it, maybe there’s a landslide, or maybe a satellite falls out of the sky and lands on the storage area! Maybe the zombie horde manages to wrest control of one of your supply dumps from you, maybe anything at all.

No matter what might happen, if you have your stores split over two locations rather than one, your risk is reduced so that, hopefully, a worst-case scenario sees you losing only half rather than all your provisions.

Be sure that your multiple storage locations are safe and appropriate. You’re just substituting one risk for another if you take some of your provisions and remove them from your protected retreat and instead place them in a shed on the far side of your property, making them vulnerable to anyone passing by.

Containers We Like

We really like glass. It is one of the most unreactive materials and has an extremely long life assuming it isn’t broken (its biggest weakness). Glass containers with glass stoppers are the best of the best, but you might find yourself needing to accept some other types of seals such as metal or plastic, possibly with or without a rubber or plastic or natural material seal.

You really need to think through the potential challenges of glass breaking. For example, if there’s any chance of earthquakes or other events causing containers to fall off shelving, you need to either ensure the integrity of the shelving or avoid using glass.
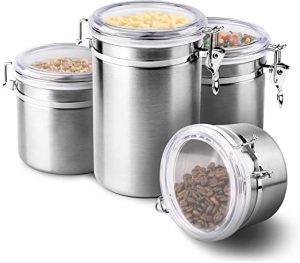
For inert products, we like wood and metal, and our favorite metals are either stainless steel (very expensive) or aluminum (a great compromise between strength and weight, but beware of having acids in contact with aluminum). Note also that in some types of fire, aluminum will either melt or even start burning. The average house fire reaches temperatures of 1100°F, and aluminum melts at 660°.  Steel, on the other hand, doesn’t melt until temperatures go above 2500°.

For large liquid storage, either metal or concrete containers seem to be the best solution.

While we acknowledge the convenience and ubiquity of plastic, we try not to use anything plastic in our long-term storage. Plastic bags – particularly made with a mylar or nylon component – are probably okay, but most other plastics just have too many issues in our opinion.

Many times, with food storage, it is a great idea to add a desiccant, and/or oxygen absorber, to the container of bulk food before sealing it.

Summary

It isn’t enough just to own a lot of provisions and other ‘stuff’. You need to very carefully plan out how and where you store your supplies so as to avoid nasty surprises and problems.

Other Self-sufficiency and Preparedness solutions recommended for you:

The Lost Ways (The vital self-sufficiency lessons our great grand-fathers left us)
Survival MD (Knowledge to survive any medical crisis situation)
Backyard Liberty (Liberal’s hidden agenda: more than just your guns…)
Alive After the Fall (Build yourself the only unlimited water source you’ll ever need)
The Lost ways II (4 Important Forgotten Skills used by our Ancestors that can help you in any crisis)
The Patriot Privacy Kit (Secure your privacy in just 10 simple steps)

A large part of prepping is the art of storing provisions and other necessary items in anticipation of a time when they will not be readily available, due to a

Last week on National Geographic’s American Blackout we got to see a lot of common problems presented as the result of a power grid collapse that lasted 10 days. One problem that everyone faced, but didn’t receive a lot of air time was the lack of drinking water.

National Geographic did not demonstrate any methods for obtaining water other than going to the store, or as in the case of the people trapped in the elevator and eventually the roof of a building, collecting some from a bucket that had been left in the rain. Since water is one of the most important elements for our survival I wanted to go over some methods of storing water and treating water that could help you in a disaster situation. You must have water if the grid goes down and you expect to live.

Read more: Knowledge to survive any medical crisis situation

If you find yourself without power as they did in American Blackout, food and water were their priorities. Safety and security weren’t big issues until people started living without food and water. The nice veneer of society will vanish in a few days max even if we are only living through a power outage. Can you imagine if there was sickness or a disease pandemic? Can you envision how chaotic a hurricane knocking your town into the ocean would be? The situation presented in American Blackout gave us a lot to learn I think, but as far as disaster goes, a power grid failure would not be anywhere near as severe as a lot of other possibilities.

Now, I am not try to trivialize the scenario at all. A national power grid failure would be catastrophic but only because people aren’t prepared. I think it’s very telling when you consider how many lives might be altered forever just by not having some electricity. I think it is sad that our world is so dependent upon electricity that millions potentially would starve, riot and die because they were forced to live like our not too distant relatives did. Can you imagine the pioneers if you presented this situation to them? OK, just imagine how horrible it would be if there was no electricity… No what?

Where to find water

Water is everywhere normally unless you live in the desert. That is one reason why not too many people I know recommend living in Phoenix if the grid goes down. For the rest of us that live in closer proximity to lakes, rivers, ponds and streams we have a lot of options for finding water if we are faced with the task of collecting enough to drink. In American Blackout, the people who lived in the city had no water in the pipes because the electricity needed to pump water up into tall buildings was nonexistent. That doesn’t mean there isn’t any water in the city though.

Read more: Build yourself the only unlimited water source you’ll ever need

I was surprised they did not have someone manning a hydrant letting people fill up jugs of water. The sheer volume of water contained in the fire hydrant systems of large cities if used properly could have probably lasted a week. Could you have taken showers and washed your car? No, but it is a source of water that could have been tapped into if you pardon the pun.


Water Hydrants are a source of water in an emergency

I could go into making a solar still or collecting the condensation off the leaves of plants with a bag or getting water from a tree even, but that is for another post. I want to talk to the majority of us that have water all around us and we simply need to get it and make it safe for drinking. In that I’ll start with the obvious and that is you should have water for everyone in your family on hand at all times. Water is cheap (relatively) and it is easy to find. You drink it every day now and there is no reason to be without a minimum of one week worth of water no matter who you are or where you live.

I talked about ways to store water in our Power Blackout checklist post last week and you should have a similar plan right now for your family. Don’t wait until the power goes out to run to the store and try to find a gallon or two.

Water in a suburban setting is most easily collected from rain. Once you have rain barrels set up you don’t have to do anything. When it rains, your barrels will fill up and all you would have to do is make sure it is filtered or disinfected. Water can be used from any stream or creek or lake. What about the golf course down the street? You can drain your water heater in a pinch just by opening the drain valve at the bottom. The trick is to look around you for locations that have water in your neighborhood that you might need to access in a grid down scenario, but don’t neglect stocking up on your own. The stream down the road might be dry.

How to carry water

A cart like this with some modification is an excellent option for carrying heavy water with easy

A cart like this with some modification is an excellent option for carrying heavy water with ease.

Humans on average need a gallon of water per day to stay hydrated and provide cooking and hygiene. I think that amount is slightly off because it can’t be the same amount for small children, but who cares. We will use it for a guideline and obviously that guideline has to be adjusted for the scenario you find yourself in. If it’s the middle of summer, temperatures are soaring and you are doing a lot of manual work that amount could easily double. What if you are sick and are throwing up? It’s best to always have more than the average amount of water on hand and you need to have a plan for getting water and bringing it back to your location.

Let’s say you live near a body of water (lake, stream, well, fish pond) and the power is out. How are you going to get water to drink? You could just walk down there and fill up your Nalgene bottle and walk back, but that is going to take a lot of time and energy for something that won’t last long. You need a way to carry a considerable amount of water at one time to reduce your trips and cut down on your risk of being caught out.

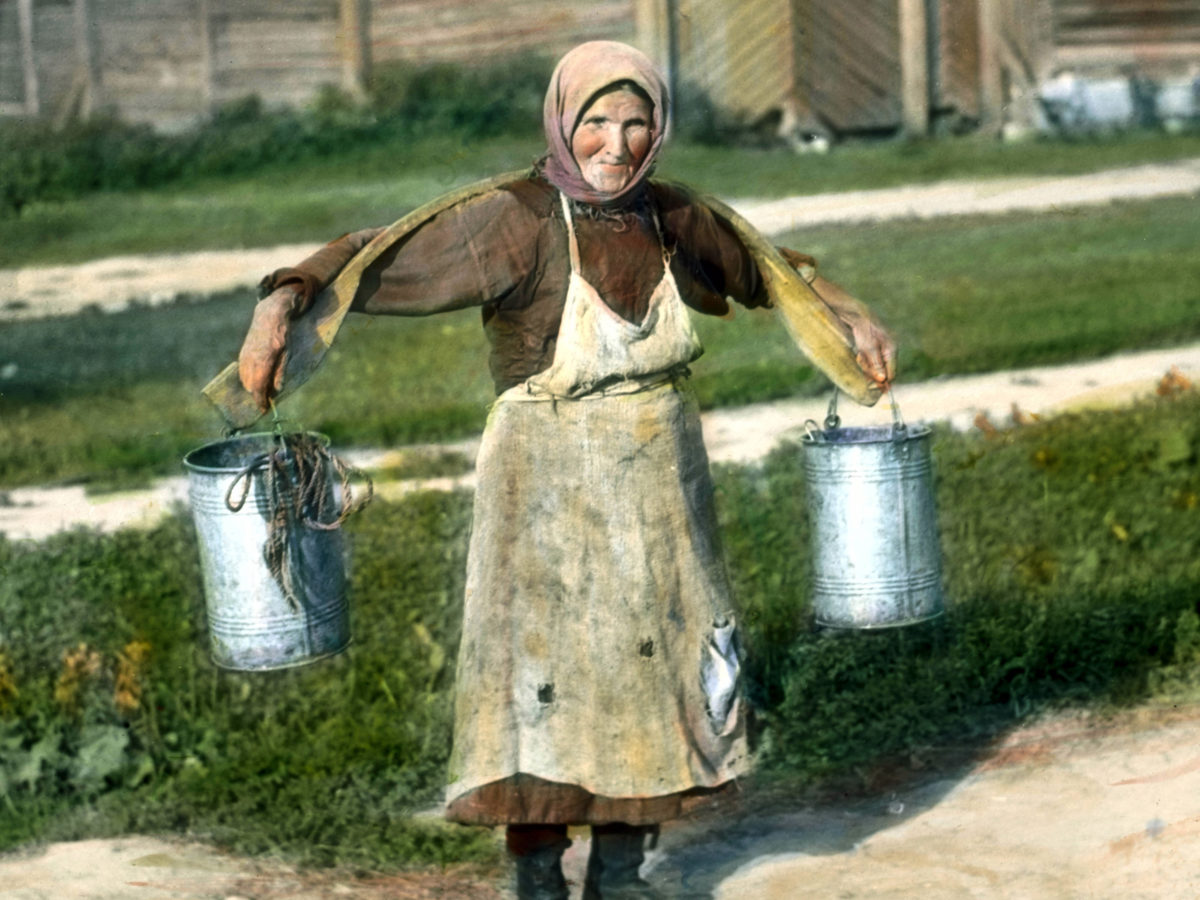
You need to plan now for containers that will hold several gallons of water at a minimum, but carrying these will be difficult without a wagon, cart or improvised method of weight distribution. One of my readers commented that they were planning on using a deer cart to tote their bug out gear and I think that makes a great option for carrying water too. Like the woman in the picture above, running out for a drink of water might not be as simple as it used to be. You have to plan to carry enough back so that you won’t need to go out for another couple of days hopefully.

How to treat water

There are many ways of filtering water and making it safe to drink and I have listed several down below.


Berkey Filters are excellent Prepper resources.

Filters – Hands down my favorite method of treating water. Why? Because it is the simplest and takes the least amount of energy for the return on investment. I recommend two types of filters to be part of your preps. For my home, I use a Berkey Light water filter. I simply dump a couple of gallons in the top and clean water comes out the bottom. Obviously, you want to ensure you are filtering as much gunk out of your water before you bring it into your filter so as to keep your filter elements clean for as long as possible.

Read more: The vital self-sufficiency lessons our great grand-fathers left us

For portable alternatives, I have a pair of MSR water filters. These work great and have kept us in plenty of cool clean water on several backpacking trips with our family. You just pump the water through the pump and clean fresh water is delivered to your water bottle.

Boiling Water – Boiling is probably the oldest method of disinfecting water but it works! All you need is a container (preferably not plastic) and heat. Bring your water to a boil and let the water boil for a couple of minutes and that’s it. The boiling will kill any bacteria and you can drink the water. Let it cool off first

Ultra violet light – there are UV pens that they sell for camping that are supposed to kill any bacteria in water. I have never used these so my assumption is that it may kill the bacteria, it won’t help the taste or make the water technically cleaner. Saving your life is what is most important though so if you have to drink some water that has stuff floating in it…as long as you don’t die from a water borne illness you can live to fight another day.

Chlorination – Chlorine Bleach is probably the most common household item that you will have that can be used to disinfect your drinking water but it is a little tricky. Chlorine is affected by the temperature of the water you are treating. Always try to filter any water that may be cloudy with contaminants such as lake water first. You can use paint filters or a bandana if necessary. If the water is room temperature (meaning not cold or hot) you would add two to four drops of chlorine bleach per quart. Shake well and let the container sit for 30 minutes. After 30 minutes, smell the water. It should smell like chlorine and this is normal. If it doesn’t smell like chlorine add another drop or two and let it sit for 30 additional minutes. By drops we are talking about an eye-dropper size drop, not a dollop.

Distillation – Distillation is another option but requires more equipment than the average person will be able to acquire much less put together in an emergency. Another option is the SODIS method which uses UV light (sunlight) to treat water stored in clear containers. There is a lot of information about this method online and here.


Other self-sufficiency and preparedness solutions recommended for you:

Healthy Soil + Healthy Plants = Healthy You

The vital self-sufficiency lessons our great grand-fathers left us

Knowledge to survive any medical crisis situation

Liberal’s hidden agenda: more than just your guns

Build yourself the only unlimited water source you’ll ever need

4 Important Forgotten Skills used by our Ancestors that can help you in any crisis

Secure your privacy in just 10 simple steps

Last week on National Geographic’s American Blackout we got to see a lot of common problems presented as the result of a power grid collapse that lasted 10 days. One

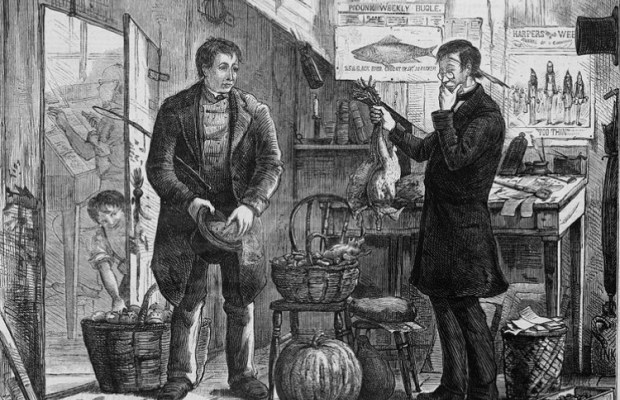
During the great depression when the dollar collapsed, basic items became currency. Any trip to the market would be better accompanied with items such as tobacco, or alcohol to be used as barter and trade items, rather than a pocket full of dollars purely because of the fact that they were worth so much more.

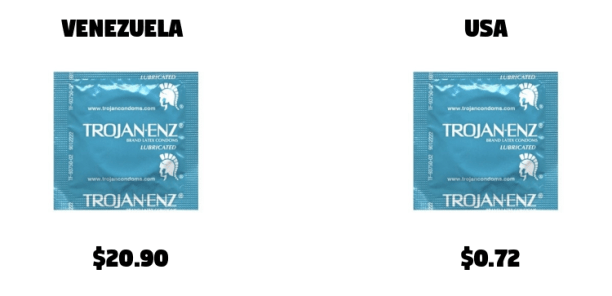
Bring the clock forward 80 years and we’re still seeing the same high value placed in everyday items over physical cash in countries that have suffered economic breakdowns, or have been crippled by war. Venezuela, currently the world’s worst economic collapse of this time, has seen an extraordinary surge in the value daily items due to its crippling inflation. A pack of popular brand condoms is more than USD$70 in Venezuela’s capital, Caracas. That value, in comparison to Venezuela’s current USD$4 per month minimum wage, gives brand name condoms and almost-golden value.

But they are not the only items that have become valuable for trade and barter in economic collapse environments. In this post we take a trip through time to find what items have been used as trade items instead of hyperinflated currencies, and what, at best, we can predict will be future household items that you should consider stocking, should times start to get tough again.


Why do items become more valuable than money in tough times?

Currency resembles a nation’s economic health. In an economic collapse such as the Great Depression, or Venezuela’s economic collapse, the value of currency is damaged. Things become more expensive over time as import, trade and manufacturing sectors weaken. As time goes on, the price of things rise and daily household items become more expensive. When the price of things rise, and the dollar falls, we get inflation.

Inflation is happening to us right now, and for many economically healthy countries, there is still an inflation index. For instance, the 2018 inflation rate for the US is 2.38%. In a year a pack of chewing gum that costs $1 this year, will cost $1.02 next year. According to reports, Venezuela’s inflation rate is more than 4,000%. That means our $1 pack of chewing gum will be $41.

If you couple this, with a supply and trade industry that is ruined by economic collapse, dead markets, and widespread job loss, things start to have a lot of value. This is also interlinked with banks closing down, creditors taking their money out of businesses, and the supply of cash seemingly halting as there is no way to draw money out of that great savings account some people have. As the value of currency declines, but the demand for items that aren’t available as much as they used to be rises, trade and barter in those items starts to occur. For instance, that packet of condoms could buy your groceries for the week. Or a bottle of alcohol could represent a valued trade for a month’s supply of toilet paper.

What do you have with you right now?

For most preppers, looking at what they currently have is important. It is the basis of what we have and what we know right now, that prepares us for anything that might happen tomorrow, next week or next year. For most of us, if an economic collapse happened right now, we’d be in big trouble. A lot of us do the regular shopping every week for household supplies and food to eat, and most of our money, whether it be daily transactions or savings money, is in the bank.

The last thing you want to be left with is an empty kitchen cupboard.

So think about this: if a rapid economic collapse was to occur tomorrow, and banks and food stores were to close, would you have enough supplies to live? What daily things do you use that would you desperately should they run out?

For a lot of preppers, thinking about this circumstance warrants having enough prepper supplies to be well off in a circumstance like this. Most of you who are reading this would have already attempted some form of prepping, whether it be just enough to get you buy for a few weeks, or a whole year’s worth of survival supplies for you and your family.

No matter what size your prepper supply is, the duration of an economic collapse will determine whether you have to start considering trading and bartering for goods and essentials. That is the problem with a financial collapse, we can’t really predict how long they will last or determine their severity. All we can do is make sure that we are best prepared for the issues that they bring.

A lot of what prepping is about is being self-sufficient, so that should something happen where supplies are cut off, you can still eat, drink, wash, cook, drive and live life. It differs from survival in that survival would be the things you do during an event itself. However as preppers, we act before something happens, so that we are ready for it, should it happen.

A lot of what prepping is, and the concept of barter and trade is done between homesteaders, both in the past and in this day and age. Homesteaders live in the country and are the prime example of people able to survive in a downturn as they are able to produce their own food, have their own water solutions, and have a trading system already developed between them and their neighbors.

As a homesteader, trade can be in the shape of helping out a neighbor with certain skills you might possess (carpentry and woodworking for instance), or it could be to trade fresh eggs from your chicken pen in exchange for fresh milk from someone’s cow. In an economic downturn, having skills and assets like this not only gives you the ability to diversify your income but also a way to offer something to trade should you be short of supplies.

How to successfully barter and trade


Let’s say you have something someone needs. There is a big risk that comes with this in a post-collapse as there are people who no doubt feel they don’t have to abide by the rules that create a formal civilization (otherwise known as a world Without Rule Of Law, or WROL).

For the most part, I feel like bartering in a SHTF situation will only be amongst friends, neighbors, and people in your circle. Unless there is formal marketing in a popular street set up where you can run a stall, or barter for foods with your own goods, I don’t think there will be many barter or trade situations with strangers.

That’s good because if word got around that you have stockpiles of supplies lying around, you could be at a real risk of being the target of hungry, desperate scavengers, or just plain old greedy gangs or groups of people. This is the problem with being a prepper, it can be dangerous if you are the one with all of the food in a city or town of starving residents.

While this could be a likely risk in a worst-case collapse, the more realistic risks are those of getting ripped off by someone that is ultimately better at bartering than you are or coming across thieves. How can you avoid the risks of bartering in a post-collapse world? I think there are a couple of things, which might seem obvious to most, that you should ensure you do in any transaction where trade isn’t done with money and where sales are governed by laws of misrepresentation and fraud.

To avoid the risks associated with bartering, one of the most important things you can do is make sure it is in a public environment, or have others with you. Any thieves or just basic intimidators are likely to only try their tactics if there is no one else around. Having that backup would just reinforce the fact that you are there to trade by a fair set of rules.

Know how much you need, and how much you are willing to give before you even think about bartering.

Second, know the value of the things you are trading for. If there is something you don’t know the value of, or to see if it is quality or not, take a specialist with you that knows about it. For instance, if you know nothing about motorbikes, you wouldn’t just buy a motorbike on your own without conducting a load of research or taking someone that knows what is right and what is not. The same applies to bartering, ensure you know the value of the things you are trading for. This is an important factor if you are considering trade as a way to survive in a SHTF situation, as the price of things will inevitably change, and you need to be up-to-date with those prices, otherwise, someone is going to buy things from you, and sell it elsewhere for twice the price.


When you are negotiating a trade, make sure you have an idea of what you are willing to pay and accept for yours and their items. Make sure you are clear on what it is you need by looking at your current supplies and making a list of what is necessary. No doubt any good trader will try to barter useless items they might say you need or will find useful, scrap them. You are trading for what you need, not what you enjoy.

If you are trading a service, or even just basic items, be clear on the terms of the trade, what you are trading for and the quantity of each item. Having a very clear set of terms is easy when trading items, but when you are doing a service or skill, such as fixing someone’s car, there are a lot of variables that can go wrong, such as if the car stops working a few days after you fix it, if new parts are needed who will pay for them, if it works, but not to your customer’s satisfaction what happens?

When it comes to agreements about services, there is an entire field of contractual disputes and laws. For the most part, having your own set of terms and being clear about them is the best way to be sure of an easy agreement, if it is available, one of the best things you can do is write down the terms, so that should any dispute occur once the agreement has commenced, you can refer to your contract in writing.

Related: A Storm Is Coming  (Even the most prepared Americans will be blindsided by what’s about to happen.)

The difference between investment items and trade items

A lot of prepper blogs recommend investing in precious metals such as silver and gold. This is primarily because prepping is about investing. You invest time, invest research and invest in a supply that you hope will pay off for you and your family should a natural disaster, economic collapse or any other SHTF situation ever occur.

For precious metals, I don’t think there will be much worth for them during one of these situations. As a trade item, it bears no useable feature, unlike bullets, diapers, condoms, food and water, which are items that are traded as valued items in collapsed economies. But don’t get me wrong, gold is an important item for preppers. Why? Because while gold and silver is not very useful during a SHTF situation, it becomes very useful as society starts to rebuild itself. Seeing gold as an investment to sell is a much stronger and practical preparedness strategy that seeing it as a barter item during the event.

The reason why I use gold as an investment item rather than silver, is that out of the past eight significant biggest economic declines, six of them had significant increases in the value of gold, whereas the value of silver fell. The price of gold correlates with the value of currency. Gold benefits when there is an economic downturn. When stock markets fall, investors buy gold, in turn, driving the price up.

Trade items, however, are different to investment strategies such as gold, as they are survival items used during an event, as a means of exchange, and are a method of investment to ensure that you are able to trade efficiently, should an economic system crumble. There are, however, different investments you can make, rather than just in a stock of supplies.

As a way of bartering, you might be able to trade a service or skill you have, which might be in plumbing, electrical work, woodwork, or some other specific skill you have. Not only can this be done for food and supplies, but you can also trade that skill for cash-in-hand work, which gives the skill the benefit of being able to be used if you were to lose your job in an economic downturn.

So while you are preparing for rough days ahead and checking up on your prepper supply of non-perishables, water, and supplies, it might be worth stocking up on something can actually be free, which is to learn a new skill. There are a lot of valuable skills out there, from gardening, material work, animal husbandry skills, nursing skills, repairs or even defense. Whatever your hobbies might be at the moment could also become a formidable skill, should society change to the point where that skill comes in demand.

What are good bartering items to be used in a SHTF situation?

Cigarettes are a must-have trade item in a post-collapse. They were also a much-needed during the Great Depression and in Sarajevo during the Bosnian War.

I have a lot of things in my prepper supply that would be very valuable should everyday supplies start to run out. But the issue is, do I want to part with them? Probably not, especially if they are something I need.

So it puts me in a hard place where I would have to balance need over the value of trade. But we can prepare for that circumstance by preparing a seperate section in our supplies for trade. This might be a small collection of things you use every day, which can be added upon as time goes on and you find new goods to add to the list.

There are a lot of preppers that keep an excess amount of everything, adequate to what they need, rather than stockpiling a separate pile of tradeable items. However, separating those supplies ensures that you don’t dip into your trade items should the SHTF, and that you can identify how much value you might have in your trader’s wallet, for the lack of a better term.

If you are just starting out in your collection of trade items, or you are looking to add to that supply, I have compiled a list below of 30 items that I have found have found will become valuable commodity items in economic collapse and SHTF environments, and why they would be useful. Many of these items have been used as trade and barter in historical post-collapse events for instance, during the Great Depression, in Venezuela’s economic collapse, or in Sarajevo during the Bosnian War.


Medicine: This covers things such as antibiotics, painkillers, and allergy medications. Venezuela’s financial collapse has seen the value of medicine soar, with hospitals having to purchase medication from black market importers just to treat patients. Foods Even in a disaster, food is one of the first things to run off the shelves as most people won’t have a pre-stocked food supply. Things such as non-perishable foods will be the most valuable.

Alcohol: During the Great Depression, alcohol was in prime demand with people distilling rum and gin themselves. As a commodity, alcohol can also have medicinal and hygienic purposes.

Fuel:  As fuel supply lines shut down and stations close, fuel comes in limited supply in SHTF situations. It is important for those using generators and vehicles.

Propane Gas: Many homes rely on gas for hot water and cooking. One small bottle can last for a month with a gas cooker system to boil (purify) water and cook foods.

Batteries: Rechargeable and normal batteries are useful for a number of things, but as the power starts to go out there will be a reliance on flashlights increasing the need for batteries.

Condoms and Contraceptives: As mentioned at the beginning of this post, condoms in Venezuela are going for USD$70 a pack. People are still active when the SHTF

Baby Supplies: Baby food, diapers, baby aspirin, and ointments. All baby supplies are a commodity that is used every day and needs a constant use supply. While reusable diapers exist, things such as nappy rash ointments and baby aspirin are much-needed items.

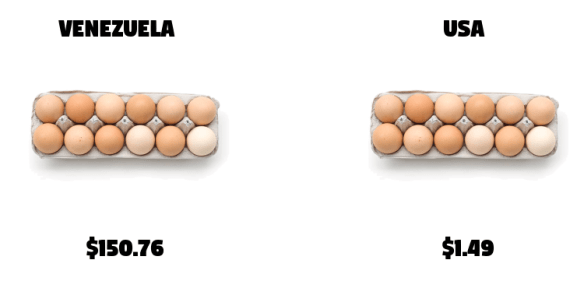
Chickens: Chickens are egg producers and live off scraps. If you can manage to feed and water them, the eggs they produce will be worth their weight in gold. In 2016, a dozen eggs cost USD$150. If you have a rooster you can produce excess chickens to sell to others.

Feminine Hygiene Products: These are must-have items for personal hygiene that are needed every day in stores. Tampons in Venezuela are the cost of three months’ minimum wage.

Toilet Paper: Life’s luxury in fine white sheets. Toilet paper is hard to replicate with magazines, newspapers, or tissues and is something that most people will run out of very quickly.

Vitamins: The change in diet as people start to eat less, or a void of fresh foods will leave many without access to the right nutrients and vitamins in a healthy diet

First-Aid Supplies: Bandages are not so important in this as any piece of clothing can be used. First-aid supplies needed will be things such as antiseptic wipes, band-aids, antibacterial creams, suture kits, and specialist first-aid treatment equipment.

Tobacco: For some, this is obviously going to be a much more necessary item. I am a non-smoker, however, I can see how, if, in limited supply, tobacco would be a great item to have for those in need.

Soap and Shampoo: Personal hygiene is another commodity that we use every day, and as supply routes slow or stop, stuff that we use to clean our hands and bodies every day will quickly run out.

Seeds: are a trade-able item that works well for those that know how to cultivate good gardens in order to grow their own foods. Give the right person seeds and they can grow a farm and tap a sustainable food supply.

Can Openers: When the SHTF the last thing that’s left after fresh foods run off the shelves or expire are canned foods. For those that don’t have them, cans are a key to food.

Powdered Gravy: Freeze-dried food, non-perishable food, and basic grown foods can taste very bland, but gravy adds a much better taste to things that wouldn’t generally taste great.

Lighters and Matches: Sure, there are a number of ways to light a fire, but in the home, lighting a gas cooker is a lot easier with lighters than two sticks.

Candles: An easy way to provide light at night when the power grid crumbles and a considerable item for SHTF environments.

Powdered Milk: Powdered milk is so scarce in Venezuela that it is sold by black market vendors at 100 times its normal shelf price.

Pasta Pasta: in packets can be kept for quite some time and in Venezuela’s economy, is sold by black market vendors at 200 times the original price.

Shoes: I wouldn’t say it is a good idea to start stocking every pair of shoes, but if you have old ones, it might be worth keeping them. The cost of shoes in Venezuela ranges from 300% to 900% higher than the same brand in The US.

Water Filters: If the grid goes bust and you are caught without a water filter you might be in trouble. There are going to be a lot of people out there without a clean water supply and no way to purify water (without cooking it), so a few cheap water filters will no doubt be worth some money.

Coffee: is a world trade commodity already. Just like smokers will pay for cigarettes and tobacco, coffee is equally an item that can be used to trade and will be rarely available given the lack of country imports in an economic collapse.

Flashlights: At the moment, high-quality flashlights are cheap to pick up (less than $10). But when the grid goes down, everyone is going to be needing them, and it is highly likely not everyone will have one.

Duct Tape: Duct tape is one of those items that is well-known throughout the survival world for its endless amount of uses. Whether it be patching up clothes, fixing leaks, or gaping wounds, duct tape is a good bartering item.

Generators (solar and fuel): If you have recently bought a backup generator, keep the old one for now. When the SHTF everyone is going to want secondary power methods and will be willing to pay a lot for it.

Construction and Repair Tools: As an economic downturn sets in people are going to start doing more of their own projects to increase their self-sufficiency, fix the home, or for car repairs and other odd jobs. You might have the tools they need. But you might want to use these as a way to provide a service.

Solar Lights: Solar lights are a great commodity to stock because they are cheap (at the moment) they are sustainable (no power needed) and they provide what we need at night in a sustainable manner.


I have made this list based on research on what items have become valuable in past economic collapses and SHTF situations where supply lines shut off and resources become limited. I am sure that a lot of advanced preppers out there that have a good stockpile of food, water, and supplies will no doubt have many of these items in their stockpiles already. I also have many of these items not only in my own stockpile but in a separate section designed to be a backup, to be used either as a trade or to help out others should they need it. I feel as though a ‘help others’ stockpile is a good way to make a community and build a team of people you can work with to regain existence as a self-sufficient community.

While these items have been seen as valued items in the past, or are currently highly valued items in SHTF places in the world (such as Venezuela), I would not call this list definitive by any means. There are a lot of other items that have had and will have an equal value to these in an SHTF scenario. If you do know of any other items for trade and barter that you have identified, or you believe will become useful in an SHTF situation, please leave a comment below to inform the community.

Related: A Storm Is Coming  (Even the most prepared Americans will be blindsided by what’s about to happen.)


Other Self-sufficiency and Preparedness solutions recommended for you:

The Lost Ways (The vital self-sufficiency lessons our great grand-fathers left us)
Survival MD (Knowledge to survive any medical crisis situation)
Backyard Liberty (Liberal’s hidden agenda: more than just your guns…)
Alive After the Fall (Build yourself the only unlimited water source you’ll ever need)
The Lost ways II (4 Important Forgotten Skills used by our Ancestors that can help you in any crisis)
The Patriot Privacy Kit (Secure your privacy in just 10 simple steps)

During the great depression when the dollar collapsed, basic items became currency. Any trip to the market would be better accompanied with items such as tobacco, or alcohol to be used

The electromagnetic pulse has become one of the great supervillains of our day, and understandably so, whether released from the atmosphere or generated from a high-altitude nuclear explosion. Such weapons will change the game as a whole.

Imagine a world forced into self-reliance, near-total convenience, and dependence. If almost 100% of electronics had stopped working, others may have adapted. Others will dive into a pit of desperation. Many experts paint horrifying portrayals of this situation that are unfolding here in America.

There are places we go in our daily, comfortable lives which seem secure. The same areas may become coffins in the event of an EMP. I want to think about some of those places, and why they are so dangerous.

In some of these situations, you’ll see you should take measures to help with your survival. You can just be out of time, in certain cases.

HOSPITAL ICU

With monitors, breathing tubes, and the many other accouterments that would be in place to keep you alive the most terrifying place to be when an EMP strikes would be in the intensive care unit. For most this would be an area of recovery for those injured or healing after surgery.

Your access to medicine and treatment would go down significantly because the hospital would be plunged into chaos. Emergency evacuations would take place, as would a whole host of calamities. It would be easy to neglect the patients.

Depending on the situation, you can die right away but without oxygen or anything else that keeps you alive you’d suffer for those seconds. The reality could be even more frightening if you were better off than those around you. As you’d just hover over death before you’d been identified. If they discovered you.

IN A CROWDED SUBWAY

The subway’s calamity is too much to tackle on a good day! The subway cars are electrically driven as are the doors and lights.

There would be hundreds if not thousands of people on those cars. We will be packed in like sardines and a huge amount of fear will ensue when the car stops and the lights go out. Citizens would push and shove, and the trampling and smashing would likely cause a few casualties.

Stay close to exits when you take your seat in the subway and make sure you understand how to use them. This gives you first dibs at the exit. Use your EDC phone or flashlight to shed light on the situation too. That’d ease the tension.

ON A BOAT IN THE OCEAN

There are somewhere between 12 and 13 million registered boats in the nation. For many, this is the best possible version of relaxation. Whether it’s heading down river or out passed the continental shelf, boating can be a tremendously rewarding experience. Though these machines run on the same kind of electronics as anything else.

During an EMP attack, boats or any other form of electronics may be made inoperable. Just imagine when you were 10s of miles off the east coast for a second. You will immediately be exposed to the ebb and flow of the tides. Your strong boat has no masts and sails to return you to the home country’s sandy shores.

But no question, right? It would be the coast guard out to save you, wouldn’t they? Even though their vessels were inoperable, too. Depending on the ocean’s path you could be stuck for days, weeks, or even months. You may have a small survival kit on your boat but for weeks under the searing sun, how do you get clean water and food. How about a stormy ocean’s battering waves?

You would have to fish for food and create some sort of still in order to remove the salt from your water. If you had the right materials aboard, building a solar could still work.

IN ANY KIND OF AIRCRAFT

You are going down. Plain and simple. The Americans always fly. The tragedy would happen if anything like this were happening during the day or night at any time. An approximate 4,000 commercial flights are open in the sky at any time. This does not include in-air private or military flights. When those planes drop, it would be like a nationwide bombing campaign. Some plains have protective levels against solar EMPs.

If you were on one, remaining calm and following the instructions of others more experienced than you would be your best bet. The shock of the accident will kill you in most situations, so it could be safer. You wouldn’t want to be buried under debris or stuck and burned alive by jet fuel.

Read the security manuals provided when boarding a craft, and take note of the different exits. If you do survive a crash, these could become your only way out.

NEAR A NUCLEAR POWER PLANT

Per the energy information administration:

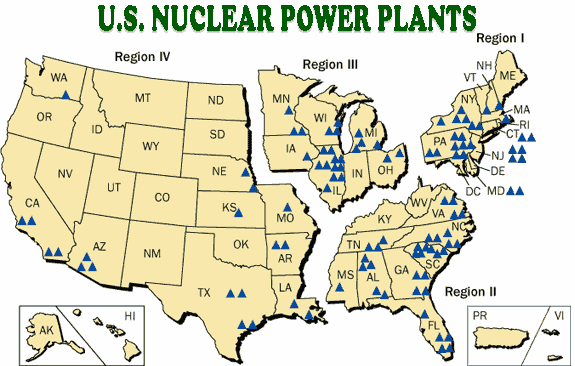
There are 61 commercially operating nuclear power plants with 99 nuclear reactors in 30 states in the United States.

We all witnessed the very real consequences of nuclear power in the Fukushima reactor disaster. We are ill-equipped to handle a disaster of this magnitude. In fact, we are ill-equipped to handle a disaster at all when it comes to nuclear power. How do we cool 99 reactors when we failed to cool one using the OCEAN?!

Or take a look at the map of US Nuclear Power Plants:

us nuclear power plant map 2


If you are living or staying in close proximity to a nuclear power plant be sure to get as far away as possible in the event of an EMP attack. How would you know? Glad you asked. This link: Nuclear Power Plants will tell you the location of all the power plants in your proximity. You just need to click on your state.

It’s difficult to imagine a version of the world like the one you’d see following an EMP. It will be left empty and deserted. The surviving souls who wandered through this partially incinerated and partially radiated landscape would be in a desperate struggle for survival.

The electromagnetic pulse has become one of the great supervillains of our day, and understandably so, whether released from the atmosphere or generated from a high-altitude nuclear explosion. Such weapons

When non-preppers think about how to survive the end of the world, they usually think about hoarding supplies, finding a secure place to store them and hunkering down to wait it out. It’s a nice fairy-tale, but in the real world, when SHTF, true survivors have to know how to hit back.

While it is important to stock up on supplies that you might need to survive TEOTWAWKI, having all the supplies in the world won’t help you if you can’t get to them when an apocalypse event strikes. What about defending all your supplies from desperate people trying to get them? What about protecting yourself and the people you care about? What if a flood or fire break out and you end up stranded with nothing? Even if you do manage to make it back to your supplies and feel safe, what happens when the inevitable occurs and your supplies run out?

Fitness is the First Step to Survival

The truth is, prepping is about skill and knowledge, first and foremost. Knowing what matters most is the true key to apocalypse survival, and having the skills to do whatever it takes to keep going isn’t about buying stuff; it’s about building your skill-set. That’s why the first step in learning how to prepare for the end of the world is always getting your body ready to handle whatever might come your way. In reality, every moment is an opportunity to train for the end of the world.

The Elements of Physical Fitness

Diversify your training to see the greatest results.

Endurance. Strength. Flexibility. Creativity. These are the essential elements of apocalypse survival and training. The good news is that there are plenty of opportunities in your everyday life to increase your overall capacity to execute these skills – if you make the time for it. Here’s a quick guide on how to physically prepare for SHTF:

  • Endurance. There’s just no way to build your stamina without getting after it, every day. Endurance is quite literally a marathon sport. Even if it starts with a simple walk, find a way to get moving and keep moving every day. Aim to continually increase the amount of physical activity you do, the kinds of activities you try and their level of difficulty.
  • Strength. Bodyweight exercises are a great way to strengthen and tone without a ton of equipment, while there are a range of targeted activities like CrossFit and Krav Maga that can help you home in on and improve your weakest skills.
  • Flexibility. It may not seem very tough, but staying limber is essential to staying alive. Stretch while you strengthen, and you’ll be able to do more and recover faster after intense physical activity.
  • Creativity. Diversify your training to see the greatest results. Try different combat methods and improvise with the environment around you to identify your strengths and weaknesses while making it easier to respond effectively, whatever your situation or surroundings.

Apocalypse Training Techniques

Learn how to defend yourself in a lethal situation without a weapon.

Ultimately, fitness training for SHTF situations is about applied knowledge, not book learning or simulations. The people you’re fighting against when SHTF won’t follow the rules of sparing or good sportsmanship. At TEOTWAWKI, you’ll be fighting for your life with whatever you have available. That means you need to be prepared to fight on all fronts.

Train in three ways for maximum effect:

  • Functional Training. Use what’s around you to build practical strength, like tires, ropes and more. This idea is the cornerstone of CrossFit and parkour training.
  • Combat Training. Learn how to defend yourself in a lethal situation without a weapon. Mastering a martial art that’s specifically designed for tactical fighting like Krav Maga can be your greatest protection in an apocalypse situation.
  • Tactical Training. Firearm training is a no-brainer. Having a gun won’t help you if you don’t know how to properly use it or don’t consistently practice and improve your shooting skills.

When deciding how to build your skills in each of these three areas, think about the ultimate goal of any technique you learn. Your primary objective is to survive, not simply one-up your assailant. Find tactics that will help you stay one step ahead of an opponent both mentally and physically. Approaching your training this way is how to survive the end of the world. Survival isn’t about winning a trophy or a championship belt. It’s about making it out alive.

Tactical Survival Training for TEOTWAWKI

Focus on developing the kind of skills that will serve you under pressure when preparing for the end of the world. PHOTOGRAPHER: Lauren Harnett

If you really think about it, it makes sense to focus on developing the kind of skills that will serve you under pressure when preparing for the end of the world. You won’t be facing rainbows and words of encouragement in the end of days. When training with firearms, spend the majority of your time building and practicing fundamental skills so they become natural reflexes when you’re fighting for your life, rather than focusing on tricks and complicated techniques that will take time to recall.

The tactics you have to think about are the ones that will do the most damage when it’s time to make a split-second decision in a fight or flight situation. It’s better to stick with tactical techniques that complement what naturally happens in your body and brain when adrenaline spikes. This means sticking with methods that retain your accuracy and control, even when you’re under serious stress.

Practice the Basics. Then Practice Differently.

The tactics you have to think about are the ones that will do the most damage when it’s time to make a split-second decision in a fight or flight situation.

The first key to effective firearm use is mastering the basics, including your stance, grip, target acquisition, sights, trigger control, follow-through and ability to disarm an opponent. Here’s a quick breakdown of each and what you should focus on to improve your fundamentals.

  • Power Stance. Improving your overall fitness level will help you find a stable, mobile and balanced stance when shooting your gun, but it takes practice to find the power stance that will protect you from recoil, while letting you stay agile, aggressive and in control.
  • Grip. Make your grip firm, tight and with your thumbs curled down. Firearm expert and master trainer Massad Ayoob calls this the “crush grip,” and it’s one of the five elements he considers most crucial to have in your arsenal before firing a gun (Ayoob, 2012).
  • Target Acquisition. This skill covers the rapid vision transition that must occur after you’ve spotted a target and before you shoot. Practice adjusting the focus of your eyesight from a natural target to your sights quickly so you program the movement into your eyes’ muscle memory.
  • Sight Alignment and Picture. Two essential yet separate elements of proper shooting, sight alignment requires that your front sight be centered between the rear sights with your rear sights horizontally aligned, while sight picture is the relationship of your sight alignment to your target for accurate execution. Understanding the relationship between sight alignment and picture takes practice and depends on your individual gun.
  • Trigger Control. Your grip will go a long way toward improving trigger control, which is the act of pulling the trigger without pushing the nose of the gun up or down, jerking the trigger or otherwise disturbing your aim. Smooth and consistent squeezing is key.
  • Follow-Through and Reset. Follow-through is about squeezing the trigger until it stops moving, while reset is about getting the trigger ready to fire again. After your follow-through, practice releasing the trigger to the point of reset and firing again. Sometimes, the trigger break and follow-through positions are the same, sometimes not. Your trigger reset is rarely the same position where the trigger rests when untouched. Practice to determine both the follow-through and reset positions of your specific guns.
  • Disarmament. Whether you’re facing a knife, gun or concealed weapon that you can’t identify, you have to know how to disarm an assailant coming at you with a weapon – not only to protect yourself from other people, but also to anticipate how someone else might try to disarm you and prevent it.

There are a few simple drills that can help you get the basics ingrained in your brain, round out your shooting skills, and give you the confidence and versatility you need to shoot well when SHTF. Remember to practice shooting both moving and still targets, work with both two-handed and one-handed grips, and incorporate movement into your tactical training. If you aren’t shooting, move.

You should test out different kinds of firearms, including rifles, shotguns and handguns, and practice drawing and shooting them all until you find the weapons that work best for you. Your gun will do you no good if you can’t draw it fast enough and shoot it accurately. Practice in low light environments, try shooting multiple targets to improve your agility, and practice safely shooting from behind cover and concealment. All of these techniques can give you a huge tactical advantage in a lethal confrontation.

Mental Readiness: The Real Key to Apocalypse Survival


Mental preparation is about conditioning yourself to handle the inevitable emotions during an apocalypse. Fear, concern, hopelessness, helplessness, defeat. Being better prepared than most can itself be a liability, since you can’t save everyone and trying to could ultimately end your own life. How will you determine when to stand firm, when to offer help and when to move on?

Mental preparedness doesn’t mean being weak. In fact, working on assessing, identifying and controlling your emotions will improve your ability to stay assertive, aggressive and in control instead of breaking down in the face of disaster. Often, appearing aggressive is enough to keep weaker would-be threats at bay, without the risks of direct engagement.


Having a strong mind and body and the right functional, combat and tactical training will go a long way to getting your ready for TEOTWAWKI – much more than stockpiling supplies can ever do. I hope this article gave you a good understanding of where to put your focus to really prepare for SHTF. If you get after it and train to improve a little each day, you’ll be better prepared than most when the end of the world arrives. Good luck.

When non-preppers think about how to survive the end of the world, they usually think about hoarding supplies, finding a secure place to store them and hunkering down to wait

Bread is a truly wonderful food. It tastes good no matter what you do to it — whether you’re toasting it and slathering it with butter, or covering it in eggs and making French toast for breakfast. Heck, it’s even delicious when you’re eating it completely plain. Bread is a super versatile item in the kitchen when cooking or baking, but what you may not have realized is that even when you’re not eating it, bread can be used for so many other things around the house. There are so many weird things you can do with bread that, after reading this, you’ll want to make sure you always have a loaf in your kitchen, just in case. Basically, to quote the great Oprah Winfrey, “I love bread. I love bread.”

It doesn’t matter if you’re using white bread, multigrain bread, whole wheat, sourdough, or rye — any type will work for these life-changing hacks. Bread of all kinds can be a valuable tool when it comes to cleaning your house (seriously!), and it can actually bring certain foods back to life (more on that in a minute). Honestly, I’m not quite sure why bread hasn’t been labeled a superfood yet, because it deserves the title.

Check out these weird things you can do with bread, and prepare to see this item differently for the rest of your life.

Remove Stains

Sometimes, cleaning requires products full of chemicals and bleach that will destroy everything in its path. Other times, though, you’ll be just fine with a natural cleaner — in fact, you may even be better off. According to Country Living, bread is an excellent natural cleaner. White bread or rye bread rolled into a ball is basically an eraser that can lift stains off walls, wallpaper, kitchen cabinets, and more. The site advises dabbing gently at the surface with the rolled-up bread ball, and you’ll notice the smudges and marks disappear.

Soak Up Grease Spills

Bread doesn’t just get rid of smudges or tiny marks. It’s also incredibly helpful in soaking up annoying grease stains, which can be difficult to get rid of. Simply take a piece of bread and lay it over the stain, pressing gently until it goes away.

Treat Calluses

According to Fluster Buster, bread is a lifesaver when it comes to fixing calluses and other various foot ailments. For calluses and corns, you can soak a piece of bread in apple cider vinegar, then place it on the callus. Tape the bread in place, cover it in plastic wrap, and let it sit overnight.

For boils, you can soak a piece of bread in some milk, then apply it to the affected area, tape it in place, and allow it to dry overnight — it will drain out the liquid.

Prevent Vegetables From Smelling Weird

You know how some vegetables get super smelly when you cook them? (I’m looking at you, broccoli and cauliflower.) You can eliminate that odor with bread. Simply place a piece of bread on top of the vegetables in the pot to get rid of the stinky smell.

Revive Stale Marshmallows

Marshmallows are delicious — until they get stale and hard. But if that happens, don’t toss the bag just yet. According to Food and Wine, you can put a squishy piece of bread in a plastic bag with the marshmallows, seal it, and give them a few days to sit. They should become fluffy again, just like magic.

Remove Splinters

Removing splinters with tweezers can be painful. Using bread, you can make a poultice that gets the job done. According to Genius Kitchen, you can fold a handkerchief along the diagonal, place the bread on the handkerchief, pour boiling water over the bread (don’t let it get dripping wet), and then let it cool slightly. Place it over the splinter. Tie the ends of the handkerchief around the part of your body where the splinter is, elevate that body part if possible, and keep the bread on there as long as you can. You can repeat if necessary, until the splinter is close to the surface of your skin and easily removable with tweezers.

According to The Farmer’s Almanac, you can also soak bread in cool milk, press out the milk, and apply the bread to the affected area, then tape it there, and let sit for a few hours or overnight. After, the splinter will have risen close to the surface of your skin, or (if it’s not that deep of a splinter), it may be removed from your skin completely. Easy peasy!

Clean Old Paintings

If you have old paintings in your house, you’ll notice that they might get full of smudges, dust, or dirt. The best way to clean them is actually with bread. According to The Brick House, you can rub the soft spot of white bread all over the painting. Be gentle, and just run the bread over the surface. It kind of works like a sponge to pull off grime and dust.

Make Bread Art

If you really want to get creative, look into bread art. There are basically a million different ways to mold bread into something aesthetically pleasing. You might not want to eat it when you’re done, but you will want to put it on display for everyone to see!

Cut Onions Without Crying

No one enjoys cutting onions because of how much they burn your eyes, leaving you teary. Apparently though, bread can help. If you put a piece of bread in your mouth while cutting, it will absorb the sulfates that cause the tears.

The Farmer’s Almanac also suggests spearing a piece of stale bread with your knife and sliding it up to the end of the blade near the handle to absorb the sulfates.

10 Fix Burnt Rice

Burning rice happens to the best of us. Unfortunately, it’s not very tasty… at all. But bread can make things better! The Healthy Home Economist recommends putting a slice of bread on top of the rice, covering it, and letting it finish cooking. Use a regular slice of bread instead of crust. The bread will absorb any burnt taste that might be there.

11 Pick Up Broken Glass

Picking up tiny pieces of broken glass can be made easier with a piece of bread. Simply press it gently on the area, and it will snatch up all the teensy pieces.

12 Clean A Coffee Grinder

To clean out a coffee grinder, The Farmer’s Almanacrecommends pinching off three or four small pieces of stale bread, grinding them in your grinder, dumping the crumbs, and then wiping the inside of the grinder clean. Voila!

13 Keep Cake Fresh

Once a cake is cut, it can get stale quickly. To keep it fresh, simply put a piece of bread against the cut part and leave it there.

14 Skim The Fat Off Soup

If you notice a lot of fat on the top of your soup, you can easily get rid of it by skimming a piece of bread along the top. It absorbs the oil and grease quickly in a mess-free way.

Honestly, I’m beginning to feel like there’s no problem in life that bread can’t fix.


Other self-sufficiency and preparedness solutions recommended for you:

The Lost Ways (The vital self-sufficiency lessons our great grand-fathers left us)

Survival MD (Knowledge to survive any medical crisis situation)

Backyard Liberty (Liberal’s hidden agenda: more than just your guns…)

Alive After the Fall (Build yourself the only unlimited water source you’ll ever need)

The Lost ways II (4 Important Forgotten Skills used by our Ancestors that can help you in any crisis)


Bread is a truly wonderful food. It tastes good no matter what you do to it — whether you’re toasting it and slathering it with butter, or covering it in

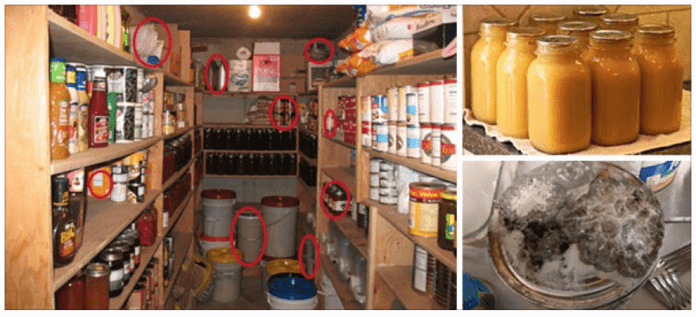
Building a survival stockpile is a challenge on many levels. Trying to afford it, is one challenge. Trying to ensure that it will provide your family with the necessary nutrition, is another challenge altogether; one which can contradict the first one. Making sure that the food and other supplies you have purchased will still be good when you need them is another issue altogether. Forgetting any of these many issues can leave you without the stockpile you need.

The result of all this is that we all make errors in building stockpiles, especially in the beginning. Of these errors, the most critical ones are those where we buy things that don’t last. The real danger here is that we have food that we think is good, but it turns out we don’t. Unless you check your food on a regular basis, this could end up being very dangerous, as the food is unavailable during a crisis, when we need to use it.

It’s imperative that we all check our stockpiles on a regular basis, at least once a year. This is part of my personal new year’s activities; something I try to accomplish sometime during January of every year. Even the best-preserved foods can go bad if something goes wrong in the preservation process. Checking them in January allows me to fit the replacement of those items into my plan for the year.

Some items just aren’t going to last, no matter what you do. Then there are those items you might have in your stockpile, which really aren’t going to do your family much good anyway, due to their lack of nutrition. Getting these items out of your stockpile and replacing them will help your family to be better prepared when the time comes.

Gasoline

Remove This From Your Stockpile Immediately

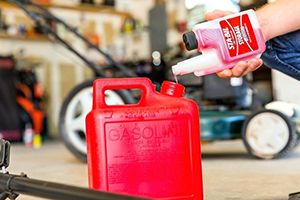
Gasoline could end up being one of the most important things you can stockpile. The problem is, it doesn’t store well. Untreated gasoline can only be stored for about six months.

Even treated gasoline doesn’t do all that well, as you can only expect it to still be good for about a year. After that, many of the most combustible elements will have evaporated out, even in a sealed gas can.

Still, you need to have gasoline in your stockpile. The way to do that is to constantly rotate your stock so that none is over six months old. I have a 55-gallon steel barrel, laying on a stand on its side, which I use as a gas tank. Every month I take a tank’s worth of gas out of the drum and put it in my car, replacing that with fresh gas. In this way, I always have a good supply of fresh gas and I burn off the old gasoline.

Please note that my 55-gallon steel drum is a much better storage container for long-term storage of gas than plastic gas cans are. Gas cans are much more likely to leak, as well as absorb the gasoline, changing the chemical structure of the can itself.

Kerosene

Kerosene can also go bad when stored for a prolonged period of time. Condensation is the number one culprit, but not the only one. It will also develop a sludge, created by bacteria and mold that live in the kerosene, feeding off of it.

The solution for keeping kerosene for a prolonged period of time is to rotate your stock, just like I was talking about with gasoline. Always use an opaque plastic container, specifically marked for kerosene.

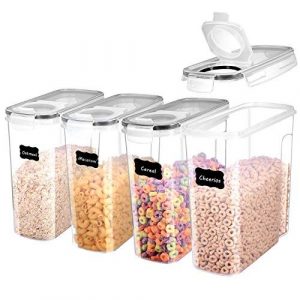
Breakfast Cereal

Breakfast cereals are a staple in most American households. Sadly though, most breakfast cereals hold very little nutrition for their volume. This makes them very poor food to be stockpiling. You would be better off storing whole grains and granola, which can be mixed together and eaten like cereal.

The other problem with breakfast cereal is that it goes stale very easily, even in a sealed container. Packing breakfast cereals in five-gallon buckets with oxygen absorbers don’t solve this problem, as that doesn’t do a thing about any moisture that might be contained in the bucket or the food itself, as I found the hard way. Adding silica desiccant packages can help, but as I already mentioned, there are other options that are better.

Ground Wheat Flour

Ground wheat flour is difficult to store for prolonged periods of time, due to the propensity to have insects or insect eggs in it. This is actually where the idea of sifting flour first came from. In many countries, you have to sift flour, because of insects getting into it while it is stored.

Storing wheat flour in vacuum-sealed bags, inside of five-gallon buckets, with oxygen absorbers helps. But even then, the flour has a limited shelf life. The difference is that it is about eight years, instead of eight months. But if you store whole grain that way, it will last for 20 years. The natural husk of the grain provides excellent protection from insects, and once you grind it, will provide you with healthier baked goods.

Snack Foods

To put it simply, there is no such thing as a snack food that is worthwhile as survival food. Granted, if that’s all you’ve got, it will provide you with carbohydrates and probably fats. But it will also provide you with a lot of chemicals to go with it. Those foods just aren’t designed to sustain life. The space you’re storing them in can be better used for other things.

Summer Sausage

Sadly, summer sausage just doesn’t store well for a prolonged period of time. I originally thought it would, especially since it normally comes vacuum-packed. But that isn’t enough to keep it from going bad.

What happens to summer sausage is that the curing process that is used to make it doesn’t stop. The nitrates and nitrites added into curing salt help to dehydrate the meat, but also work to break it down, turning what would normally be very tough meat into tender cured meat. But that process doesn’t really stop. The breakdown continues, turning that nice summer sausage into something much mushier.

As best I know that mushy summer sausage isn’t dangerous to eat. I’ve actually eaten it. But the texture and flavor of that sausage aren’t going to be the same. To me, it was really weird to eat.

Chocolate

As a confirmed chocoholic from a family of chocoholics, this one is even sadder than sad. Nevertheless, you can’t keep chocolate for a prolonged period of time, unless you can keep it cold. The problem is that heat causes the natural oils to seep out of the chocolate, messing up the texture and flavor. Eventually, you end up with something that looks more like white powder. It’s not dangerous to eat, but it’s not the chocolate you started out with.

Applesauce in Jars

Remove This From Your Stockpile Immediately

Canned goods are generally good virtually forever. But there are some exceptions. One of these is applesauce canned in plastic jars.

Glass jars probably wouldn’t cause the same problem, but commercially canned applesauce is generally put into plastic jars. This allows the applesauce to discolor and the flavor to change. After about a year, it’s just not the same.

I have eaten canned applesauce that is more than a year old, without any negative side effects. But since we’re talking about stockpiling here, I don’t want to see what will happen to that applesauce in five or ten years.

Powdered Milk in “Cans”

Most canned powdered milk (and a few other things) comes in cardboard “cans” rather than metal ones. While this is fine for short-term storage, it’s not what you need for storing that milk for 10 or 20 years. The cardboard can become water-damaged, insects can eat their way through it and the milk can spoil.

Fortunately, the milk isn’t the problem; just the packaging. If you vacuum seal the powdered milk in Mylar bags and store it in sealed five-gallon buckets, it will last as long as you want.

Damaged Canned Goods

I’m a firm believer that canned goods can last forever; long past the supposed “expiration date”. At the same time, I recognize that it doesn’t always do that. I know this because I’ve had canned goods go bad; not many, but some.

This problem generally happens with acidic food and can only happen when there is an error in the canning process. The cans for these foods are lined with an acid-resistant film, protecting the metal can from the acid. But if the film doesn’t cover the entire inside of the can or if the film becomes nicked in processing, then the can is no longer protected from the acid in the food. That acid will eventually eat through the can, allowing air and bacteria into the can, where it spoils the food.

Of course, if you are checking your stock on a regular basis, you’ll see any cans with puffy lids, that are leaking, or which have mold on the outside of the cans. When these are found, they must be removed and any cans nearby checked, especially those stored below. At times, the damage will allow acids that spill out, which will attack the unprotected outer side of the cans it spills on.


Other self-sufficiency and preparedness solutions recommended for you:
The vital self-sufficiency lessons our great grand-fathers left us
Knowledge to survive any medical crisis situation
Liberal’s hidden agenda: more than just your guns
Build yourself the only unlimited water source you’ll ever need
4 Important Forgotten Skills used by our Ancestors that can help you in any crisis
Secure your privacy in just 10 simple steps

Building a survival stockpile is a challenge on many levels. Trying to afford it, is one challenge. Trying to ensure that it will provide your family with the necessary nutrition,

I am not a fan of wasting food because I feel bad for the people who don’t have any but also because I don’t know what will happen in the future and I want to be prepared for anything. These are my reasons why I pickle besides the fact that I love them and I could eat them with any food.


What is pickling? Pickling is the process of preserving foods in a high-acid solution, either by adding vinegar or naturally using fermentation. Spoilers cannot grow in a high-acid environment. This state of high acidity is achieved in two ways: using salt and vinegar (though when you pickle with vinegar, you add salt as well).

RelatedThe vital self-sufficiency lessons our great grand-fathers left us

Pickling With Salt

PickingCucumbers

Pickling locks in the fresh taste from your garden

Pickling with salt falls into two categories: dry salt and brine. The dry salt method combines dry salt with vegetables in quantities above what you would add for seasoning purposes. Liquid (watery juices) is pulled from the vegetables, and this liquid combines with the salt to create a brine — a salty, watery solution. With the premade brine method, a vegetable is placed in a combination of salt and water. In both cases, the vegetables are covered in brine for a prescribed amount of time. In this submerged, airless state (below the brine line), the vegetables ferment. Fermentation is the process by which the natural bacteria in foods convert the sugars into lactic acid. Lactic acid is a natural preservative. Depending on its strength, microorganisms will not grow in lactic acid because of its low pH (high acidity). As a result, low-acid foods such as cabbage can be canned safely in a water bath canner and stored on the shelf for up to a year after fermentation is complete. Lactic acid also supplies that yummy sour taste — hence the name sauerkraut.


Pickling With Vinegar

Pickling with vinegar is a much quicker process. In vinegar, the vegetable does not ferment. Usually, the vegetable rests for a short time in a brine (to add crispness and flavor), is drained, often brought to a boil in a vinegar solution, packed into jars, covered in the remaining hot vinegar solution, and water bath canned for long-term preservation. The acetic acid in vinegar brings up the acidity of the vegetable to a point where no microorganisms can thrive. Acetic acid, by the way, is flavorless and colorless. When a recipe calls for vinegar that is 5 percent acid, that means the vinegar is 5 percent acetic acid.
Related4 Important Forgotten Skills used by our Ancestors that can help you in any crisis

When making pickled foods, it is critical that you use very fresh ingredients. If you start out to make sauerkraut with an old, soft cabbage, your end product will be mushy. Basically, crisp into the brining pot means crisp out of the brining pot. (And this is true of all preserving: Don’t put up foods that are on their way out. Preserving is not a way to postpone eating something that has been aging in your refrigerator. Rather, preserving is capturing a food’s optimum freshness in time.)

The only ingredients necessary for pickle are the food you are planning to pickle, either salt or vinegar or a combination, and water. Salt is key, and it matters which kind you use. Use pickling or canning salt or kosher salt. Pickling salt (sometimes called canning and pickling salt) is pure granulated salt. It is free of anticaking agents, which can cause the pickling liquid to turn cloudy. Table salt with iodine (iodized salt) is not a good choice. It won’t hurt you, but it will undermine the appearance of your pickles, as additives.

Related – SHTF Foods – How to Pickle Navy Style

do not dissolve completely. I often use kosher salt because it just tastes saltier to me. However, kosher salt has large crystals, which do not dissolve as quickly as pickling salt. When making a premade brine, you have to either heat kosher salt and water together to ensure the salt is totally dissolved or combine the salt and water together in a bowl and swish it around until all the crystals are dissolved. Another factor regarding kosher salt is volume. The large crystals of kosher salt take up less space in your measuring spoon than the smaller pickling salt crystals.

Sea salt is produced by the evaporation of saltwater. It comes in fine and coarse -textures and a variety of colors. The problem with pickling with sea salt is consistency. Because it is an unregulated product, you just don’t know what minerals are in there or how they are going to affect your pickling. Disregarding the fact that it is expensive, sea salt is not the best choice for pickling. Rather, on the occasions when I indulge myself with one of those lovely jars of pink sea salt, I use it to garnish foods.

DSCF2924

It is critical that you use fresh ingredients.

Water is also important. During fermentation, hard water (mineral-rich water) and heavily chlorinated water can interfere with the formation of lactic acid. You can tell you have hard water if it stains the toilet and heavily chlorinated water if it smells like a swimming pool. In this case, you have two options: Either buy distilled water, or bring your tap water to a boil for 15 minutes, cover it, and then let it sit for 24 hours. You will detect a scum on top and sediment on the bottom. Skim off the scum and pour the water into another container, leaving the sediment behind. However, if your water is good to drink, it is good to pickle with.
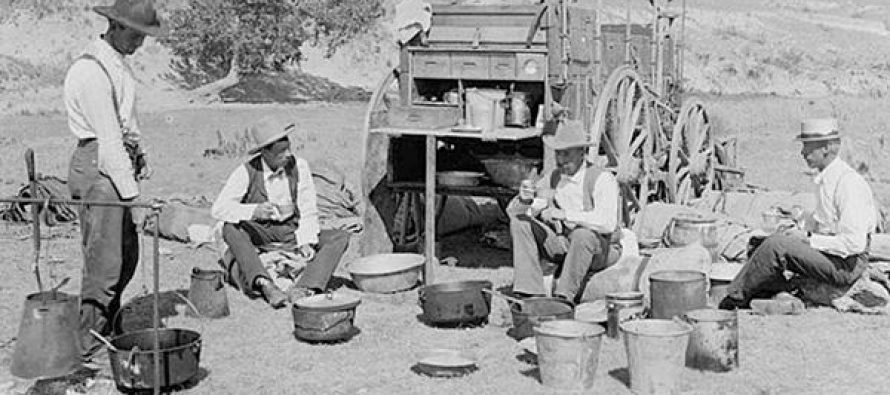
 

And finally, vinegar. Again, it’s all about that 5 percent acidity. I use Heinz distilled white vinegar, cider vinegar, and white wine vinegar. Distilled white vinegar is made from grain alcohol. It is clear, pungent, and flavorless. Because of its clarity, distilled white vinegar is preferred when appearance matters, especially when pickling pale vegetables. Cider vinegar is distilled from hard cider (fermented apple juice). It has a light golden color and a soft tart taste. It is milder than distilled white vinegar but causes the vegetables to darken somewhat. White wine vinegar is my favorite, probably owing as much to my Italian heritage as anything else. The taste is fruity and strong.

RelatedBuild yourself the only unlimited water source you’ll ever need

Other ingredients you will encounter in pickling are sugar (white and brown), herbs, spices, and garlic. Of these, unrefined sugar is fine to use if you prefer it. Fresh herbs should be just that. Don’t use fresh herbs that are browning or slimy. Spices should be fresh, too. It’s a shame they are so expensive, because the fact is, after a year you should chuck your spices out, as they diminish in flavor. (Just sniff. If you can’t smell anything, the spice or dried herb is finito.) You should use aged, cured garlic. While very fresh garlic is a delight to eat, it will discolor during pickling. Garlic that has cured at room temperature for two to three weeks is best (and that is primarily what you get at the supermarket).

I don’t use firming agents (to crisp up vegetables), but for the record, there are two: lime and alum. Lime is calcium hydroxide. Obviously, it must be a food-grade product and not that used for agriculture, which is not meant for consumption. In Le Marche, where my dad is from, the large green olive called the Uliva d’Ascoli is cured in lime. Highly prized by the ancient Romans, it is an incredibly sweet, mild olive that the locals peel like orange and stuff with a meatball mixture and then fry.

Alum is potassium aluminum phosphate or ammonium aluminum sulfate. I know of some canners who lay a grape leaf in the bottom of their jars to firm up their fermented pickles, but I am not one for adding anything to a recipe that I don’t have to.
ceramic_pot

Ceramic crock for pickling

What Kind of Equipment Do I Need?

For dry salt fermenting, the most important item is a 1-gallon stoneware, glass, or food-grade plastic crock. I bought mine — a ceramic crock — at a gourmet kitchen supply store. It has 1⁄2-inch-thick walls. I think it was being sold more for decorative purposes — and indeed, I store kitchen utensils in it when I am not using it for fermenting. You’ll need a glass, stainless steel, or ceramic bowl for brining. Avoid all metal bowls besides stainless steel, as salt and vinegar can react negatively to them. You should also use stainless steel pots for heating vinegar solutions. Do not use aluminum, copper, brass, galvanized steel or iron pots for fermenting or heating pickling liquids.

When bringing foods, such as cabbage, you must be sure the food stays submerged in the brine. A simple way to accomplish this is to place a food-grade, resealable bag filled with extra brine (the salt and water solution) directly atop the food. It is heavy enough to keep the vegetables below the liquid, and if you spring a leak, it’s no problem, because only brine will dribble into your crock.

To process jars, you just need a water bath canning setup.

The Basic Steps for Pickling

These are: brining (which draws water and air out of the vegetables), packing in jars, in some recipes covering with a hot vinegar solution, and in many recipes water bath processing.

Store pickled foods as you would other home-canned products: in a cool, dark place. Pickles should age for about 8 weeks to set the flavor.


Other self-sufficiency and preparedness solutions recommended for you:
The vital self-sufficiency lessons our great grand-fathers left us
Knowledge to survive any medical crisis situation
Liberal’s hidden agenda: more than just your guns
Build yourself the only unlimited water source you’ll ever need
4 Important Forgotten Skills used by our Ancestors that can help you in any crisis
Secure your privacy in just 10 simple steps

I am not a fan of wasting food because I feel bad for the people who don’t have any but also because I don’t know what will happen in the

As you already know, prepping is also about using what’s at hand. But a real prepper knows what to store in order to have it all at hand. Take sodium bicarbonate for example.

Sodium bicarbonate is very useful in treating stomach acid problems such as gastritis and peptic ulcer disease. Gastritis means inflammation of your stomach lining.

Think about it, the stomach is a gastric pit with a pH that can fall as low as 2. This gastric acid pit can dissolve meats, yet it does not dissolve itself…why? The reason is the lining of the stomach secretes a mucous film filled with sodium bicarbonate that helps protect its cells from the acid produced by other cells in the stomach.

Sodium bicarbonate is a very strong base or alkaline solution…the opposite of an acid. It effectively neutralizes the stomach acid before it reaches the wall of the stomach. When this does not happen, the acid eats away irritates the stomach lining, and leads to gastritis.

When this is long-lasting and severe it will erode a hole in the lining, which is an ulcer.

In a postapocalyptic scenario, there will be many opportunities for treating various conditions with a simple, inexpensive substance such as sodium bicarbonate. It can effectively replace all the medications you will presumably not have available to you, such as the H2 blockers and the Proton Pump Inhibitors that many people currently take such as Pepcid, Zantac, Prilosec, Protonix, Prevacid, etc.

This is a safe and effective way to raise the pH of your stomach and your entire body.

Remember, pH is the way an acid/base balance is measured in your body. A pH of 7 is neutral (water), anything lower than 7 is acidic, and anything higher is alkaline or basic. Since the stomach pH is very low because of the acid it is secreting…and if there is a problem such as gastritis or even ulcers…then we need to raise that pH to allow healing.

Note: Do not take sodium bicarbonate if the powder is not fully dissolved, and never take it when your stomach is full of food and you are bloated. It has the potential to release gases and rupture your intestines.

But let’s not forget what we’re here for. Here’s 9 Beneficial Effects of Sodium Bicarbonate:

1. Increasing pH (making you more alkaline) will help the body’s immune system kill off bacteria.

2. PH controls the speed of our body’s biochemical reactions. pH is responsible for rate control in enzyme reactions in our body as well as the speed of electrical conduction of nerve impulses. Even our mitochondria (the cell powerhouses) suffer under acidic conditions. Enzymes work ideally in a narrow pH range; this is because changes in pH change the way chemical bonds function.

3. Sodium bicarbonate is effective in treating poisonings, chemical exposures, and even overdoses of pharmaceuticals, by canceling out the cardiotoxic (heart-damaging) and neurotoxin-damaging nerves) effect. Most of the body’s waste and toxins are acids, thus your body needs to combine them with alkaline buffers like sodium bicarbonate to neutralize them and excrete them. An increasing acid load lowers the pH and leads to many of the degenerative diseases that Americans currently suffer from such as reflux, kidney stones, diabetes, hypertension, cancer, gout, and heart disease, to name a few.

Sodium bicarbonate is capable of absorbing heavy metals and toxins such as dioxins and PCBs (polychlorinated biphenyls). Most patients have dioxins in their body’s tissues. These accumulate over a lifetime and persist in people even without continued exposure. Dioxins are known carcinogens or cancer-causing agents, and greater exposure translates to a greater risk of developing cancer and other health problems. Sick patients often have elevated levels of these and other toxins in their tissues since we are constantly exposed to toxins that have entered our waters and our food chain.

4. Sodium bicarbonate is also effective in radiation damage. It will help prevent radiation damage to the kidneys. Currently, the United States Army is using it for this to protect its troops.

5. Sodium bicarbonate also helps treat radiation-exposed soils to neutralize the damage, where it can be mixed with the top two or three inches of soil where it has been found to bind up radioactive particles for removal and remediation of the soil. At Los Alamos National Laboratory in New Mexico, researcher Don York has used baking soda to clean soil contaminated with radioactive uranium. He has shown that sodium bicarbonate binds with this uranium, enabling him to separate it from the soil. Using this method he was able to remove approximately 92 percent of the uranium from contaminated soils.

For us Preppers this is huge; with a generous enough supply of sodium bicarbonate stockpiled, you will be able to make your survival garden once again capable of producing life-sustaining food.

6. Hay fever and chemical and food allergies are also improved with alkalinization of your body with sodium bicarbonate.

7. Headaches and pain relief: Sodium bicarbonate has potent analgesic (pain relieving) properties. Take one teaspoon dissolved in a glass of water. It works very well for migraine headache relief. Migraines are frequently caused by neck pain, sinus and allergy problems, and magnesium deficiency. When taking any medication for a migraine (I highly recommend Excedrin: which is Tylenol, aspirin, and caffeine. (As long as you are not allergic to any of the ingredients or are on a blood thinner of some type, which would be highly unlikely in a post-apocalypse scenario). Take it immediately, as soon as you feel the headache starting.

Most migraineurs learn this eventually; migraines, once they start, cannot be ignored, they always worsen until you are down and vomiting and clutching your throbbing head. Ice packs or anything cold you can apply to your forehead and top of your neck where it meets the base of your skull will help. A dark, quiet area will also help.

8. Earwax: A mixture of sodium bicarbonate and warm water when flushed into the ear gently with a turkey baster or something similar will dissolve and dislodge the wax blocking your ear. Do this several times until it opens up. Some people use some warm mineral oil to get the same result.

9. Constipation and colitis symptoms have been known to improve with the use of sodium bicarbonate enemas. Mix half a cup of sodium bicarbonate in a quart of warm water put it in an enema bag and instill it into your colon. is will act as a natural cleanser and help any bowel irritations as well. I also highly recommend Epsom salt orally for constipation.

As you already know, prepping is also about using what's at hand. But a real prepper knows what to store in order to have it all at hand. Take sodium

Take a look at what our pioneer ancestors ate and the chances are you’re not going to envy them very much. Compared to the food on offer in any modern American grocery store, the frontier diet was pretty basic. Choices were more limited and meals were a lot more basic.
As preppers, though, we should be giving the pioneer diet a close look. After all, these were meals that could be cooked from simple ingredients without a lot of equipment. They didn’t rely on modern preservation methods – no freezing, refrigeration, or synthetic chemicals. Maybe most of all, the pioneers ate food that was ideal for a physically active lifestyle that involved a lot of hard work outdoors.

Let’s be honest here: Who was physically tougher – a modern professional who eats all the latest health food crazes, or a 19th-century farmer living on a simple, traditional diet? That isn’t a hard question to answer. Now think about your lifestyle after the SHTF. It’s going to be a lot closer to that pioneer farmers than to anything the modern diet evolved to suit. If you want to stay healthy and well-fed in a crisis, you could do a lot worse than turning to the recipes our frontier ancestors used. Here are a few to get you started.

Soda Biscuits

Making bread takes time and effort – and a good bit of skill. Soda biscuits are much easier. They don’t take long to make, they’re tasty and they’re versatile. You can serve them with meat and gravy, or dip them in syrup as a dessert or sweet breakfast item.

Ingredients:

  • 4 cups flour
  • 1 tsp baking soda
  • 1 tsp salt
  • Milk or buttermilk

Put the flour in a mixing bowl and add milk, one tablespoon at a time, until you have a stiff dough. Mix the baking soda with a tablespoon of milk and then mix that with the dough. Add the salt and knead it thoroughly to get everything well mixed.

Roll the dough out to about half an inch thick and cut it into biscuits. You can use a cookie cutter or just slice it into squares or triangles. Bake in an oven preheated to 425°F, or in a Dutch oven, for about 12-15 minutes. When the sides are brown and the biscuits are no longer doughy, they’re done.

Corn Dodgers

Pioneer Recipes Every Prepper Should LearnThese small cornbread pieces can be eaten as a snack or served with stew, chili, or even thick soups. They’re tasty, filling, and simple to make.
Ingredients:

  • 2 cups cornmeal
  • 2 tablespoons butter
  • 1 tablespoon sugar
  • ½ tsp salt
  • 2 cups of milk
  • 1 tsp baking powder

Mix all the ingredients, except the baking powder, in a hot Dutch oven. Once the butter has melted and it’s all thoroughly mixed, remove from the heat and let it stand for about five minutes, then mix in the baking powder. With a tablespoon, drop spoonfuls of the mix into another Dutch oven or skillet and cook until the edges turn brown.

Mormon Johnnycake

Pioneer Recipes Every Prepper Should Learn

Is it a pancake? Is it a dumpling? Who cares? These are light but filling, very tasty, and extremely versatile. Spread with syrup, or break into chunks and drop into a stew before you serve it.

Ingredients:

  • 2 cups cornmeal
  • ½ cup flour
  • 1 tsp baking soda
  • 1 tsp salt
  • 2 cups buttermilk
  • 2 tablespoon molasses
  • 2 eggs if you have them

Mix all the dry ingredients; then add the milk and molasses. If you have eggs, they’ll make the finished product even fluffier. Once the batter is thoroughly mixed, pour it into a greased 9” skillet and cook on high heat for around 20 minutes.

RelatedA Gold Storm Is Coming  (Even the most prepared Americans will be blindsided by what’s about to happen.)

Potato Cakes

Pioneer Recipes Every Prepper Should LearnPotatoes are robust vegetables that are easily stored through the winter. They’re also a great source of carbohydrates and can be used to bulk out flour reserves by making tasty potato cakes. These are great with apple sauce or even maple syrup.

Ingredients:

  • 6 large potatoes
  • ½ cup milk
  • 1 cup flour
  • 2 eggs 2 tbsp salt

Wash, peel, and finely grate the potatoes. Mix the other ingredients into a batter then combine that with the grated potatoes. Heat some shortening or lard in a pan, then drop in spoonfuls of the potato mixture and cook, turning once, until the cakes are golden brown on both sides.

Pioneer Gravy

Pioneer Recipes Every Prepper Should LearnGravy adds a lot of flavor to simple foods, especially biscuits and potatoes. How do you make gravy when all you have is preserved ingredients, though? Simple: Use jerky!
Ingredients:

  • Chopped jerky
  • Lard or grease Flour
  • Salt and pepper
  • Milk

Heat grease in a skillet and fry the jerky until it’s crispy. Scoop out the jerky (it makes a tasty snack when it’s cooled). Mix the flour and milk into a batter, then pour it into the grease and slowly stir it until you have a smooth gravy. Put the jerky bits back, unless you’ve already eaten them, and season with salt and pepper.

Related –  A terrifying disaster is upon us (What you can do to keep your loved ones safe during the coming chaos)

Dutch Oven Sweet Rice

Pioneer Recipes Every Prepper Should LearnSweet dishes are always good for both energy and morale, but it’s hard to store enough dried or preserved fruit to make them regularly. You can turn a prepper staple into a tasty pudding, though – rice.

Ingredients:

  • Cooked rice (1 cup per person)
  • Milk (1/3 cup person)
  • Eggs (1 per 2 people)
  • Salt
  • Sugar (1tbsp per person)
  • Raisins
  • Nutmeg
  • Vanilla

Put the milk and rice in a Dutch oven, and add the other ingredients to taste. Heat, stirring slowly until the eggs are thoroughly cooked.

Recipe books did exist in the pioneer days, but they weren’t like modern ones. Quantities, temperatures, and cooking times were often vague because even a domestic coal stove didn’t allow the near-scientific precision you can get from a modern oven. You had to vary cooking times to suit your own stove, and that goes double when you’re cooking on an open fire. It takes practice to judge when things are done when they’re cooking too quickly or slowly, or when they’re in danger of burning. Master that, though, and you’ll find these pioneer recipes are a great way to make quick, tasty, and nutritious meals even when you’re reduced to basic food supplies.


Other Self-sufficiency and Preparedness solutions recommended for you:

The Lost Ways (The vital self-sufficiency lessons our great grand-fathers left us)
Survival MD (Knowledge to survive any medical crisis situation)
Backyard Liberty (Liberal’s hidden agenda: more than just your guns…)
Alive After the Fall (Build yourself the only unlimited water source you’ll ever need)
The Lost ways II (4 Important Forgotten Skills used by our Ancestors that can help you in any crisis)
The Patriot Privacy Kit (Secure your privacy in just 10 simple steps)

Take a look at what our pioneer ancestors ate and the chances are you’re not going to envy them very much. Compared to the food on offer in any modern