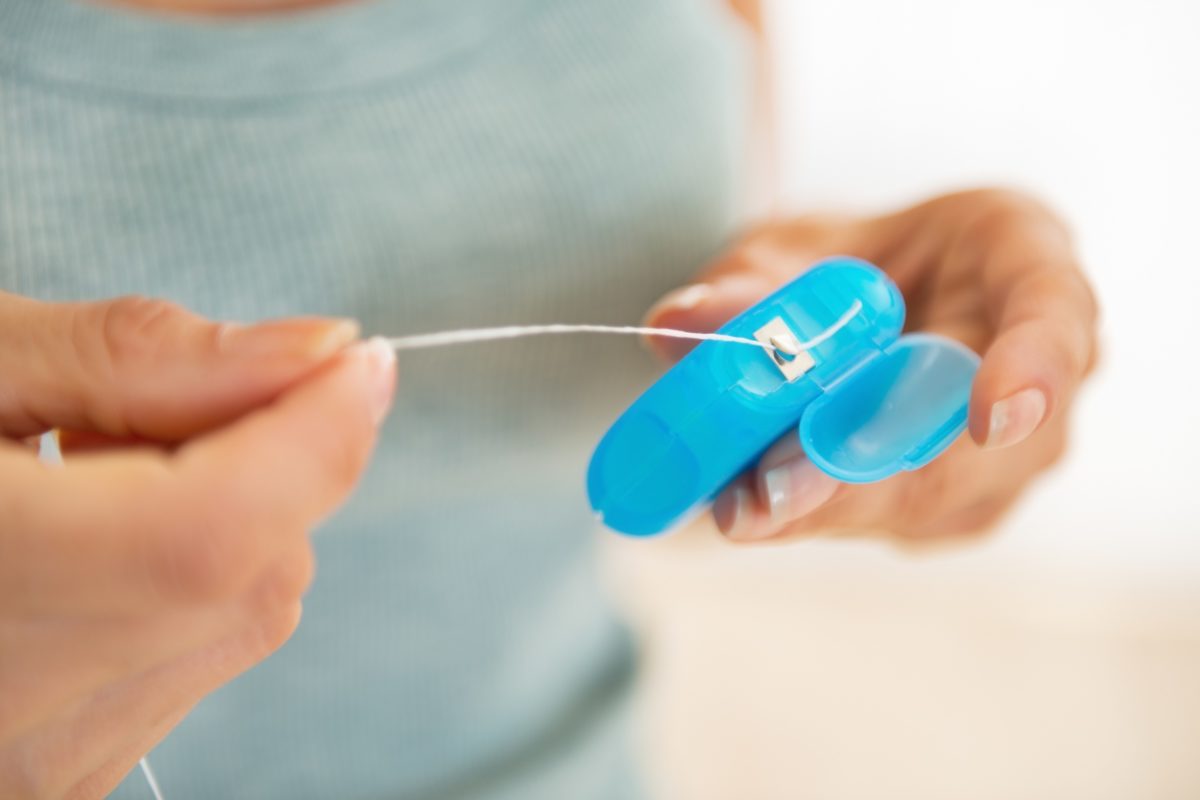
You’ve probably heard this one before – brush and floss before hitting the sack. I can wholeheartedly say that dental floss is the best thing to happen for yapper health right after ceramic implants. Have you ever stopped to wonder if the same stuff we use to floss our teeth can be used for other purposes?

Of course you did, and I have to admit that most of you can become very inventive when it comes to, let’s say, repurposing floss (you really should that news piece about that guy who ended up in his hospital after his SO tied him to the bed with dental floss for a wild sex game).

Anywho, floss is very handy to have around, especially when the shit hits the fan. It doesn’t take too much imagination that dental floss can be successfully employed as cordage when the need arises.

From crafting weapons to drying your clothes above the firepit, dental floss is a powerful ally, one that can help you get stuff done without too much effort. So, what are the survival uses of dental floss? Well, keep reading, and you will find out. Maybe I’ll even manage to surprise you.

Weapon-making

Though I can’t say that I’m very comfortable around weapons, bladed or otherwise, in case of an SHTF situation, you can craft yourself a sturdy weapon which can be used for hunting, self-defense, and both. Easy enough to do it – take a long pole and tie your survival knife to one of the ends using as much dental floss as necessary. You can also use floss as a bowstring if you can find a piece of wood with the right curvature.

Fishing

No fishing lines? No problem. Just cut a long piece of dental floss and tie the hook to the other end. If you don’t have anything on hand to act as a floater, you can always inflate a condom and attach it to the dental floss line. You can create your custom fishing box – just like a tinder box, but with fishing implements – using a small oval container (I fashioned mine from an old coconut shell coated with resin), a few hooks, dental floss, a floater, and some piece to act as a weight.

Tying your shoes

There’s nothing worse than a ripped hiking boot shoelace. But wait! It gets even better – no reason to cry over ripped shoes when you’ve got a spare, but that usually never happens. So, if you’re out and find yourself with nothing to tie your shoes, just grab a long piece of dental floss, cut it to size (use the other shoelace as a reference point) and carry on.

Drying your clothes

Anything can happen when you’re in a survival-type situation. I personally abhor anything that ends in me having to sit for any number of hours with soaking-wet clothes. Of course, you can always use the extras in your B.O.B, but that still leaves you with wet apparel.

The best and quickest way to dry them would be over a fire. Take two long sticks and insert them into the ground just about the firepit. Use your survival knife or another sharp implement to create grooves at each end of the stick. Cut a long piece of dental floss and connect the two sticks. Now that you have a clothesline, the only thing left would be to start your fire and hang your clothes out to dry.

Making a simple alarm

Whether you’re alone in the woods or have a small mountain refuge, you’ll need some sort of alarm system. Of course, when you’re still in contact with the rest of the world, you can always hit the local hardware store to purchase an alarm. However, when you’re out there, things take to change a little, in the sense that you will need to improvise.

To make a simple alarm for your overnight camp, plant a couple of sturdy sticks around your location and connect them using dental floss. Attach a couple of cans or empty container, and that’s about it. You may not be able to see what comes your way, but you’ll certainly be able to hear it long before it can set foot inside your tent.

Mend ripped clothing

I know that sewing is not on your top 10 favorite activities list, but any prepper should know how to repair his clothes, especially when there’s no one around to do it for him.

Sewing kits should be a part of your B.O.B. However, in case you’ve forgotten to throw in some needle and thread, you can always use a fishing hook and some dental floss to patch up your clothes. If your first-aid includes a suturing kit, you can also break open a pack and use the sterile thread to seal holes in your clothes.

Stitching up wounds

And because I already broached the subject of suturing, if you’re unfortunate enough to wind up with a big bleeder, you can always use dental floss to make stitches. As for the needle, grab a fishing hook from the kit, and throw it in the fire. You will also need something to hold the hook during the procedure – if your first-aid kit doesn’t come with a pair of straight scissors, you can always use your multitool’s plier.

After cleaning the wound with whatever you have on hand (I would recommend clean water and mouthwash), grab the needle by its midsection, run it through the first incision line, cross the gap, and piece the other edge of skin from beneath.

Pull the thread, grab the longer end, loop the thread four times around the pliers, open it a bit, grab the smaller end, and pull. Repeat the procedure until you close the wound. Congrats! You now know how to make simple interrupted sutures.

That’s it for my 7 cookie ways of using dental floss in an SHTF situation. Have something more to add to the list? Hit the comments section and let me know.

Before you go, you may also like:
Put This Spice In Your Shoes To Fix Toenail Fungus
The vital self-sufficiency lessons our great grand-fathers left us
Knowledge to survive any medical crisis situation
Liberal’s hidden agenda: more than just your guns
Build yourself the only unlimited water source you’ll ever need
Secure your privacy in just 10 simple steps

You’ve probably heard this one before – brush and floss before hitting the sack. I can wholeheartedly say that dental floss is the best thing to happen for yapper health

Many Preppers are simply individuals or families preparing for SHTF, while others may be organized into groups, conducting extensive training exercises. Unfortunately, while preparedness activities are typically focused on food storage or “bug out” locations, we often miss implementing real-world scenarios and “play like you practice” training.

This article focuses on both the adverse effects of sleep deprivation and how the military, emergency responders, and Preppers benefit from using sleep deprivation during training.

It uses guidance from U.S. Army Field Manual (FM) 6-22.5, extensive studies by COL Gregory Belenky – Director of Neuropsychiatry at Walter Reed Army Institute of Research, as well as sleep studies performed at the U.S. Army Ranger School at Ft. Benning, Ga., the Naval Training Center in San Diego, Calif., and Ft. Jackson Army Training Center in South Carolina.

Related: Put This Spice In Your Shoes To Fix Toenail Fungus

Specifically, while FM 6-22.5 acknowledges that anything less than 7 – 8 hours of sleep per 24-hour period will result in at least some loss of performance, there is actually “no minimum sleep period,” particularly for troops engaged in manual or physical duties.

FM 6-22.5 and other authorities recommend that sleep considerations for commanders are actually of higher priority than that for troops because commanders are in a “decision-making” capacity where their decisions could affect unit survivability.

A wealth of scientific research shows that sleep deprivation can be an integral part of any training evolution as it helps prepare members for later stressful conditions during actual operations, helps “weed out” those who may later exhibit psycho-social disorders, and can help to later reduce both physical and mental stress casualties during basic operations.

In the case of SHTF, your family or Prepper group would almost certainly be under extremely stressful conditions, when the general public is at its weakest and most vulnerable.

When human beings are placed in stressful situations, they will always revert back to what they have practiced the most. Any sports coach or military trainer worth his or her salt will tell you that you will always “play like you practice,” meaning that if you practice sloppily, you will perform sloppily.

When it comes to groups and teams that may be called upon to perform under stressful conditions, nothing is more important than realistic training… including sleep deprivation.

EFFECTS OF SLEEP DEPRIVATION

In his studies of “lack of sleep” among trainees at the Naval Training Center (NTC) in San Diego and Army Ranger candidates at Ft. Benning, COL Gregory Belenky – Director of Neuropsychiatry at Walter Reed Army Institute of Research – finds that sleep deprivation clearly degrades complex cognitive performance – like word fluency and decision making in rapidly changing circumstances – which declines by 25% for every successive 24 hours one is awake. Conversely, physical strength and endurance are virtually unaffected.

Belenky notes that during their 58-day training, Ranger candidates average between 3.2 and 3.6 hours of sleep in a typical 24-period, with much of the sleep coming in brief and fragmented “naps.” His studies at the Naval Training Center showed that personnel at the squad and crew level averaged 7-8 hours of sleep per night, while battalion- and brigade-level personnel averaged only 4 hours of sleep.

Over the course of Naval Training Center training evolutions, he noticed that junior personnel improved their performance, while the performance of higher echelon personnel diminished. He attributed this to findings that show that “thinking” is more greatly affected by sleep deprivation than simple, physical tasks.

What this strongly suggests is that trainees involved in simple, physical tasks will not be adversely affected by sleep deprivation, but sleep does become necessary when recruits/candidates must absorb important, academic information. Therefore, a delicate balance should be reached allowing adequate sleep during academic challenges with the application of sleep deprivation during physical, field operations.

Belenky references the term “droning,” referring to sleep-deprived Ranger candidates who could “put one foot in front of the other and respond if challenged, but have difficulty grasping their situation or acting on their own initiative.”

He found that sufferers of sleep deprivation experience a reduction in speed, but accuracy was relatively preserved. In essence, even when sleep deprived, a soldier could still shoot accurately but have difficulty figuring out where he is on the battlefield.

Sleep deprivation can cause changes in alertness, mood, motivation, and initiative, and in a very recent study of Army recruits at Ft. Jackson, S.C., it was found that physical fitness is important not only for typical physical performance but to reduce the effects of sleep deprivation during actual deployment in a stressful environment.

BENEFITS OF SLEEP DEPRIVATION IN TRAINING

In order to survive in emergency situations, we must be able to react and perform. For Preppers, this should involve real-world training that is challenging and stressful. We have seen time and again that even homeland emergency situations require responders to perform at heightened levels for hours – and even days – at a time. Pre-exposure to those levels of intensity is paramount.

Related: Put This Spice In Your Shoes To Fix Toenail Fungus

In emergency situations, performance is enhanced when responders acquire “instinctive reactions” – what military trainers would call “muscle memory.” This is acquired only from intense, repetitive training.

While the adverse effects of sleep deprivation are well documented, strict focus on those effects prevents many from realizing the benefits of inducing sleep deprivation during training.

Don Stevenson is a former member of the Australian Army and a current fitness consultant specializing in fitness solutions for law enforcement and the military. He insists that sleep deprivation is an integral part of military and emergency responder training.

As Belenky’s studies found that “mood” is adversely affected by sleep deprivation, Stevenson insists that, “personality conflicts and morale problems will be multiplied by fatigue as troops become short-tempered.” This can be a useful tool during initial (basic) training as commanders are able to “weed out” candidates and recruits with psychiatric and/or psychological problems who might later become liabilities for the unit.

Other studies show that sleep deprivation and a “willingness to endure hardship” is an integral part of training as it helps trainers identify those individuals who might not be able to cope with stressful conditions.

While FM 6-22.5 directs that the “ideal sleep period is 7 to 8 hours of continuous and uninterrupted sleep each night,” and that anything less “will result in some loss of performance degradation,” it acknowledges that “there is no minimum sleep period.”

Being exposed to sleep deprivation during initial training helps military and emergency responder recruits and candidates learn to recognize the effects of sleep deprivation on themselves and their battle buddies. Even at the troop level, commanders are able to ensure the placement of personnel who are able to recognize the effects of lack of sleep and troops learn to help each other work through it, and how to perform in stressful situations.

ACCOMMODATING SLEEP DEPRIVATION

FM 6-22.5 advises that the best way to evaluate a trainee’s sleep situation is to observe his or her behavior, and lists indications of sleep loss including increased errors in decision-making, irritability, bloodshot eyes, difficulty understanding information, attention lapses, decreased initiative/motivation and decreased attention to personal hygiene.

Among the “physical signs” of sleep deprivation, Stevenson lists vacant stares and bloodshot eyes, blurry vision, slurred speech, slow responsiveness, unstable posture, dizziness, and difficulty performing movements.

For “behavioral signs,” the list includes neglect of routine tasks, poor work output, lack of motivation, poor communication, poor judgment, confusion, irritability, moodiness, and daydreaming.

It is important to expose fellow Prepper trainees to sleep deprivation as long as it is in a supervised training environment. This allows both commanders and trainees to understand how sleep affects performance and how to address many of the problems that come along with fatigue in a stressful environment. As Stevenson suggests, “The better educated your troops are the more likely they are to continue performing when fatigued.”

For actual operations outside of the training environment, Stevenson gives helpful hints for commanders when faced with sleep-deprived troops.

1. Adopt a more relaxed leadership style.

2. Give simple directions and limit tasks.

3. Repeat orders and check for comprehension. Have them repeat it back to you.

4. Use a buddy system. Pair up personnel, to keep an eye on each other. No standing post alone!

5. Rotate personnel, especially those performing demanding tasks.

Perhaps surprising to many, FM 6-22.5 recommends that commanders be placed more prominent in the hierarchy of sleep needs. As adequate sleep is necessary for speed and accuracy in decision-making, commanders should receive “top priority” as leaders who are responsible for making decisions critical to mission success, troop safety, and unit survival. This can be a difficult one for some commanders as they feel like they should be “as tough as” their troops. Such thinking is outdated and dangerous.

Persons on guard duty, performing tedious tasks, monitoring equipment, or cadre evaluating trainees should be given second priority. Last on the scale are those performing physical work, which would include trainees (as long as they are not receiving “academic” instruction).

Stevenson recommends the following sleep requirements for prolonged combat effectiveness. (Note that physical tasks do not require the same sleep as mental tasks).

For Physical Tasks:

Up to three days = no sleep required

Up to six days = 1.5 hours of sleep required

Up to nine days = 3 hours of sleep required

For Mental Tasks:

Up to one day = no sleep required

Up to 2 days = 1.5 hours of sleep required

Up to 3 days = 3 hours of sleep required

SUMMARY

In the case of SHTF, sleep deprivation should not necessarily be something that members want only to accept, but rather deal with as they would deal with other logistical considerations.

While less than 7-8 hours of sleep within a 24-hour period affect higher-order mental abilities and situational awareness, sleep deprivation should not necessarily be a factor in basic training environments, unless training evolutions involve the retention of important knowledge. Simple, psychomotor activities – like hiking or gathering firewood – fit well even in a sleep-deprived environment.

There does seem to be some debate as to whether or not brief, fragmented “naps” help to mitigate sleep deprivation in an operational environment. But most agree that the “quality” of sleep is what is important. This firmly holds true to the old military adage “Never stand when you can sit, never sit when you can lie down.” Even a 20-minute high-quality nap can be beneficial to performance.

Above all else, when it comes to sleep deprivation, “lead from the front” does not apply. Commanders should not allow themselves to become victims of their own training. In both real-world and training environments, commanders, cadres, and evaluators need more sleep than those in actual training or those performing physical tasks.

Equally important for Preppers are the findings that a high level of physical fitness helps mitigate sleep deprivation’s effects. Clearly, Preppers should focus on physical training now to help mitigate the effects of sleep deprivation in time of SHTF.


Other self-sufficiency and preparedness solutions recommended for you:

Put This Spice In Your Shoes To Fix Toenail Fungus

The vital self-sufficiency lessons our great grand-fathers left us

Knowledge to survive any medical crisis situation

Liberal’s hidden agenda: more than just your guns

Build yourself the only unlimited water source you’ll ever need

Secure your privacy in just 10 simple steps

Many Preppers are simply individuals or families preparing for SHTF, while others may be organized into groups, conducting extensive training exercises. Unfortunately, while preparedness activities are typically focused on food

In a survival situation iodine is essential to have readily available, especially if there is a nuclear event of any type (see the section on Potassium Iodide supplementation for full details). Iodine is also essential to have due to its ability to disinfect water. After treating water with iodine you should let it stand for half an hour; this will allow enough time to kill off all the viruses and bacteria. If the water is cold (less than 68 degrees F) then you will have to give it four hours to be sure it is sterilized.

If you check the list of some of the most powerful nutrients to boost your immune system, Iodine stands out from the crowd.

Symptoms of hypothyroidism include fatigue, cold intolerance (you always feel cold), constipation, hair loss, bags under your eyes, and if severe enough, the thyroid gland will swell (goiter). A goiter is evident when looking at a person you will see a swollen area at the front base of their neck, below their larynx or Adam’s apple.

There are other more far-reaching effects of hypothyroidism including stopping ovulation and infertility in women, and increased risk of other cancers including prostate, endometrial, breast, and ovarian.

As a Prepper, iodine is one of the most useful items to have on hand; it is relatively inexpensive, and I also recommend you stockpile a good supply of potassium iodide for any radioactive exposure from a nuclear event as well as other forms of iodine such as Nascent Iodine for daily use, etc. Other sources of iodine are mostly from sea vegetables like kelp, seafood, and shellfish.

Note: The iodine content of iodized salt cannot be used as a source of iodine, since the amount you would need to raise the iodine levels in your blood would be fatal.


Symptoms of Iodine Deficiency

A deficiency of iodine can have serious effects on the body. The symptoms of its deficiency include the following:

  • Depression and frustration
  • Mental retardation
  • Poor perception levels
  • Goiter
  • Abnormal weight gain
  • Decreased fertility
  • Coarse skin
  • Chances of stillbirth in expectant mothers
  • Constipation
  • Fatigue

Iodine is an essential mineral you must get from your diet.

Here Are 9 Healthy Foods That Are Rich in Iodine

1. Seaweed

Seaweed is a good source of antioxidants, vitamins, and minerals. It’s also low in calories.

Seaweed is one of the best natural sources of iodine. However, the amount can vary significantly based on seaweed type, the region in which it grew and its preparation.

Three popular seaweed varieties include kombu kelp, wakame, and nori.

– Kombu Kelp

Kombu kelp is a brown seaweed sold dried or as a fine powder. It is often used to make a Japanese soup stock called dashi.

In a study that surveyed seaweed samples from various Asian countries for their iodine content, it was found that kombu kelp contains, by far, the highest amount of iodine compared to other species of seaweed.

Kombu kelp can contain up to 2,984 mcg of iodine per seaweed sheet (1 gram). This provides almost 2,000% of the recommended daily intake.

Excess iodine consumption is well-tolerated in the majority of people but could result in thyroid dysfunction for those who are susceptible.

– Wakame

Wakame is another type of brown seaweed that is slightly sweet in flavor. It is commonly used to make miso soup.

The amount of iodine in wakame seaweed depends on where it is grown. Wakame from Asia has higher amounts of iodine than wakame from Australia and New Zealand.

One study found that the average amount of iodine in wakame seaweed from various parts of the world was 66 mcg per gram or 44% of the daily recommended intake.

– Nori

Nori is a type of red seaweed. Unlike brown seaweeds, it has a much lower content of iodine.

Nori is the type of seaweed that is commonly used in sushi rolls.

The iodine content in nori varies between 16–43 mcg per gram or about 11–29% of the daily value.

Seaweed is an excellent source of iodine. However, the amount it contains depends on the species. Kombu kelp offers the highest amount of iodine, with some varieties containing nearly 2,000% of the daily value in one gram.

2. Cod

Cod is a versatile white fish that is delicate in texture and has a mild flavor.

It is relatively low in fat and calories but offers a wide variety of minerals and nutrients, including iodine.

According to the Icelandic Food Content Database, fish low in fat have the highest iodine amounts.

For instance, 3 ounces (85 grams) of cod has approximately 63–99 mcg, or 42–66% of the daily recommended amount.

The amount of iodine in cod can vary slightly depending on whether the fish was farm-raised or wild-caught, as well as the region where the fish was caught.

Higher amounts of iodine are found in fish low in fat compared to fatty fish. For instance, a lean fish like cod can provide up to 66% of the daily value.


3. Dairy

Dairy products are major sources of iodine, especially in American diets.

The amount of iodine in milk and dairy differs greatly based on the iodine content in the cattle feed and the use of iodine-containing disinfectants during milking.

A comprehensive study measured the iodine content in 18 different brands of milk sold in the Boston area. It found that all 18 brands had at least 88 mcg in 1 cup (8 ounces) of milk. Some brands even contained up to 168 mcg in one cup.

Based on these results, 1 cup of milk can provide 59–112% of the recommended daily amount of iodine.

Yogurt is also a good dairy source of iodine. One cup of plain yogurt provides approximately half of the daily recommended amount.

The amount of iodine in cheese varies depending on the type.

Cottage cheese is one of the best sources of iodine. One cup of cottage cheese provides 65 mcg, while one ounce of cheddar cheese provides about 12 mcg.

Although the exact amount of iodine in dairy products varies, milk, yogurt, and cheese are major sources of it in the American diet.

4. Iodized Salt

Currently, both iodized and unionized salt is sold in the United States.

The addition of iodine in table salt began in the US in the early 1920s to help decrease the occurrence of goiters, or swelling of the thyroid gland.

There is approximately 71 mcg of iodine in 1/4 teaspoon of iodized salt, which is 47% of the daily recommended intake. However, salt also contains sodium.

In the last few decades, iodine intake has decreased in the US. This is likely due to the push of major health organizations to restrict daily sodium intake to prevent or treat high blood pressure.

Nevertheless, salt only seems to raise blood pressure in salt-sensitive individuals, which is about 25% of the population.

Iodized and unionized salt are commonly sold in grocery stores. Consuming 1/2 teaspoon of iodized salt per day provides enough iodine to prevent a deficiency.

5. Shrimp

Shrimp is a low-calorie, protein-rich seafood that is an excellent source of iodine.

Additionally, shrimp provides key nutrients such as vitamin B12, selenium, and phosphorus.

Shrimp and other seafood are good sources of iodine because they absorb some of the iodine naturally present in seawater.

Three ounces of shrimp contain about 35 mcg of iodine or 23% of the daily recommended intake.

Shrimp is a good source of protein and many nutrients, including iodine. Three ounces of shrimp provide approximately 23% of the daily value.

6. Tuna

Tuna is also a low-calorie, high-protein, iodine-rich food. Furthermore, it is a good source of potassium, iron, and B vitamins.

Tuna is also a good source of omega-3 fatty acids, which may lower your risk of heart disease.

Fish higher in fat offer lower amounts of iodine. Since tuna is a fattier fish, the amount of iodine found in tuna is lower than in leaner fish varieties, such as cod.

However, tuna is still a relatively good source of iodine, as three ounces provide 17 mcg or about 11% of the recommended daily intake.

Tuna offers less iodine than lean fish but is still a relatively good source. Three ounces of tuna provide about 11% of the daily recommended amount.

7. Eggs

Eggs are also a good source of iodine.

For fewer than 100 calories, one whole egg provides a lean source of protein, healthy fats, and a wide assortment of vitamins and minerals.

However, the majority of these nutrients, including iodine, come from the yolk.

Egg yolks are a good source of iodine because it is added to chicken feed. Yet since the content of iodine in chicken feed can vary, the amount found in eggs can also fluctuate.

On average, one large egg contains 24 mcg of iodine or 16% of the daily value.

The majority of iodine in eggs is found in the yolk. On average, one large egg provides 16% of the daily recommended amount.

8. Prunes

Prunes are plums that have been dried.

Prunes are a good vegetarian or vegan source of iodine. Five dried prunes provide 13 mcg of iodine or about 9% of the daily value.

Prunes are commonly known for helping relieve constipation. This is because of their high content of fiber and sorbitol, a type of sugar alcohol.

Prunes are high in many vitamins and nutrients, including vitamin K, vitamin A, potassium, and iron.

Because of the nutrients prunes offer, they may help improve heart health, decrease the risk of colon cancer, and even help manage weight by reducing appetite.

Prunes are packed with vitamins and nutrients. Five dried prunes provide a good vegetarian source of iodine by meeting 9% of the daily value.

9. Lima Beans

Lima beans are commonly associated with the popular Native American dish succotash, which mixes lima beans and corn.

Lima beans are a good source of fiber, magnesium, and folate, making them a heart-healthy choice.

They are also a relatively good vegetarian or vegan source of iodine.

Due to the variation of iodine in soil, irrigation water, and fertilizers, the amount of iodine can vary in fruits and vegetables.

However, on average, one cup of cooked lima bean contains 16 mcg of iodine or 10% of the daily value.

Lima beans are high in fiber, magnesium, folate, and iodine. One cup of cooked lima beans provides about 10% of the daily value of iodine.

The Bottom Line

Iodine is an important mineral, though few food sources are rich in it.

This is why many people around the world are at risk of developing a deficiency.

The foods highest in iodine include seaweed, dairy, tuna, shrimp, and eggs. Additionally, most table salt has been iodized, providing an easy way to add iodine to your meals.

The foods listed in this article are not only some of the best sources of iodine, but they’re also very nutritious and easy to add to your daily routine.

Do you want more info like this? But all in one place? In case you’re a curious prepper, this information is from a book that can be used immediately to improve your health and expand your treatment options in many areas, even if there is never a crisis event for you and your loved ones. You can find more about this book here


Other self-sufficiency and preparedness solutions recommended for you:

Put This Spice In Your Shoes To Fix Toenail Fungus

The vital self-sufficiency lessons our great grand-fathers left us

Knowledge to survive any medical crisis situation

Liberal’s hidden agenda: more than just your guns

Build yourself the only unlimited water source you’ll ever need

Secure your privacy in just 10 simple steps

If you check the list of some of the most powerful nutrients to boost your immune system, Iodine stands from the crowd

Potatoes are often overlooked by preppers. And I really can’t understand why.

They are inexpensive, simple to store without energy, high in carbohydrates (exactly what you need in a crisis), and if you want to, you can make plenty of dishes like bread.

In addition, potatoes hold the distinction that they are one of the easiest and most prolific crops to grow. Not only do they develop well under a range of circumstances, and provide the opportunity to choose from a range of different rising outlets, but it is possible to have two harvests a year in certain climates. Potatoes will grow one of the best crops post-apocalyptic.

If you are not in a position to cultivate your own potatoes and have either been blessed with green-thumbed friends’ bushels of spuds or find incredible sales on these starchy vegetables, you might always be in a pickle on what to do with more potatoes than you and your family will consume.

Certainly, potatoes have a greater shelf-life than any other crop.

1. Extended Dry Storage – Root Cellars

Potatoes can be stored easily through the winter, making them a good source of protein when there isn’t much else available or growing. We have all seen our potatoes gradually rot or sprout in the oven, and what are the perfect strategies to extend your dry storage?

Your first move is to sort the potatoes out. You can NOT store any potatoes that have a noticeable injury, like bruises or cracks on the flesh. Such potatoes can rot even quicker than others, which could transmit rot or fungus to the rest of your potatoes. The failure of your whole potato shop would be extremely disheartening.

The right storage place is a vital part of ensuring your potatoes don’t rot. A root cellar, basement, or seldom opened cabinet in your kitchen will suffice. It’s important that your potatoes are not exposed to moisture and light.

dehydrated_potatoes2Storing your potatoes in slices:

You don’t want to have the potatoes trapped in an airtight container because you want to hold out moisture and light. Good ventilation is important. Store them under any layer of potatoes in ventilated buckets, or even wicker baskets with a sheet of paper. Not only does the newspaper help hold the potatoes apart for proper aeration but it will also act to remove moisture in the air.

Your storage room will preferably be between 35 and 50 degrees Fahrenheit. Lower temperatures may alter the flavor of the potatoes, and higher temperatures will result in decay progression.

Test your daily spuds. Here are some indicators you might be mindful of the future issues.

  • Withered skin
  • Soft to the touch
  • Green coloration
  • Sprouting
  • Mold
  • Bad smell

When it comes to potato preservation, one strategy in the prepper arsenal is to take the steps to treat the potatoes for long-term storage. This is a relatively easy procedure that requires a couple of weeks which should make sure you have potatoes that are much less vulnerable to rot.

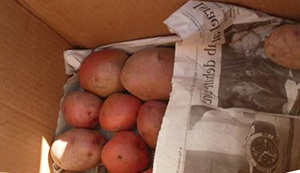
Your potatoes spread out on a few layers of newspapers in a dark and cool area. Temperatures will vary from 50 to 60 degrees Fahrenheit. Keep the potatoes for just over two weeks unchanged. What this does is thicken up and dry the skins of the potatoes a litter better for extended storage.

Avoid washing your potatoes prior to storage, and make certain you don’t place them near fruits. Fruits emit a chemical called ethylene which may allow your potatoes to sprout.

2. Dehydrating Potatoes

We’ve all loved a dinner of potatoes coming out of the box like dry white flakes. The potatoes reconstitute into mashed potatoes with a bit of water and milk is far more common in appearance.

You should take action to flake or break the potatoes to dehydrate. As with both, the mechanism is quite close.

If you have a vegetable steamer and dehydrator, this should render the process extremely quick.

dehydrated_potatoes2Storing your potatoes in slices:

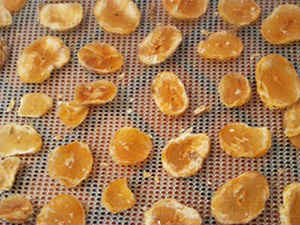
  • Thoroughly wash and peel your potatoes. If you prefer to keep the potato peels on the spuds then you can do so
  • Slice the potatoes evenly, using a mandolin slicer, so that they are 1/8” thick
  • Layer your potatoes on the vegetable steamer and steam the slices for 5 minutes
  • Move the potatoes to the trays of your dehydrator
  • Set your dehydrator to 130 degrees Fahrenheit, and dry the potatoes until they are thoroughly dried out

Once dried you can vacuum pack your potato slices or store them in airtight containers. To reconstitute them simply boil them until they are soft. You can also put a handful of the dried potatoes into a soup to simmer slowly with the rest of your ingredients.

Storing your potatoes as flakes will also allow you to create individual servings that could prove to be worth their weight in gold should you need to rely on them.

Storing your potatoes as flakes:

  • Thoroughly wash and peel your potatoes
  • Chop them up into cubes
  • Place the cubed potatoes into a pot with just enough water to cover, and boil them over medium heat until they are soft
  • Drain the water and mash them until they are smooth; be sure not to add any milk or butter, or even salt
  • Layer your mashed potatoes out the trays of your dehydrator, lined with parchment paper
  • Set your dehydrator to 140 degrees Fahrenheit and dry for up to 8 hours, or until all the moisture has been removed from the potatoes
  • Remove chunks of the dehydrated potatoes and pulse them in your blender until you get the desired size of flakes
  • Store your potato flakes in airtight containers or jars until you need them. Properly stored, they’ll keep for up to a full year

Reconstitute them by adding boiling water, milk, butter, and other seasonings to taste.

3. Freezing Potatoes

cubed potatoes freeze

Freezing is certainly one way to store your potatoes for later use, but it isn’t always the most realistic option for those who are worried about a lack of energy. It is necessary, as a prepper, to make the most realistic choices, choices that are similar to those currently living off the grid.

While a freezer is not an impossibility when you live off the grid, it is a massive vampire of energy and is not always ideal for storing food which can be stored using alternative methods.

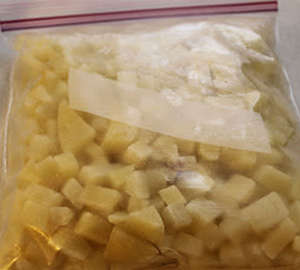
You should peel and cube your potatoes to freeze, and then par-boil them so they’re not too firm for quick mashing. You can store your potato cubes in freezer bags until drained and cooled, or use a vacuum sealing system to store them in individual portions that can be used when needed.

4. Canning Potatoes

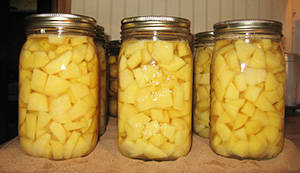
canned potatoes

You probably think of that bumper crop of green beans or cooking up a batch of jam to preserve when you think of canning. Even potatoes can be canned and this serves as a good storage method; particularly if you lack dry storage space in your root cellar.

The method of canning potatoes is just as you can for other products. To prepare your potatoes, you will peel and dice these to around 1⁄2″ cubes. Boil the potatoes, but not too soft, until just done. Drain and then spoon into your prepared jars. Add a teaspoon of salt to quarter-sized pots, then cover with boiling fresh water. Seal the jars according to the standard methods.

Smaller potatoes can be packed whole in large pots. Simply open, heat up, and enjoy yourself when you need them.

Sometimes the strong potato is underestimated and given a poor name because it is high in calories and carbohydrates. They are more than just the starchy beginning of fries though. The Irish Potato Famine, let us not forget. When it matters most they will keep you and your family alive.

Potatoes are often overlooked by preppers. And I really can’t understand why. They are inexpensive, simple to store without energy, high in carbohydrates (exactly what you need in a crisis), and