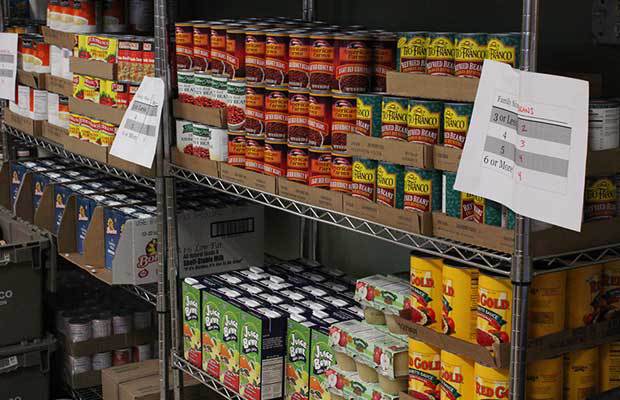
Home2021 (Page 5)

One of the biggest hurdles to actually doing something that can save your life is getting started. I know many people who research topics, watch movies, create lists and pages and pages of bookmarked websites that they can pull up at a moment’s notice. For every idea they have a source. For every plan, they have written information, sourced in binders with color coded tabs. This could be the same for you and your food supplies that are all written neatly in a binder or on a downloadable excel spreadsheet or parked on a DVD you bought online from a survival expert.

My question is what if the world as you know it ends tomorrow? What if the proverbial poop hits the fan and all your lists are just that; worthless words on pieces of paper. What if your highly organized blueprint for survival is nothing more than electrical impulses burned to a hard-drive that will never run again? What if in your efforts to be thorough, you didn’t actually do anything and now you family is looking to you for guidance? Since you have been talking about Prepping for 3 years, you have something prepared for this day, right?

I know that this isn’t the majority of people who read Final Prepper, but there are those out there that become overwhelmed by information and keep thinking over the details in their mind of what they want or need to do until it’s too late. We call this analysis paralysis and in the world of survival, this can get you killed. If you haven’t begun storing food for your family because you haven’t finished watching a DVD or your excel spreadsheet isn’t completely accurate with the quantities and current prices for all 1000 food items you need, you should try something else. What I want to give you is a simple food supply plan that can feed a family of 4 for a month, can be purchased in about one trip out and will cost you a few hundred dollars. Use this plan if you haven’t started anything yet or simply need a jump start on your emergency food supply list for your home. Trust me, your family will appreciate this if something terrible happens and you will be able to look them in the eye again.

What Foods to Buy?

Rice is a cheap and easy emergency food supply

Rice – Rice is one of my favorite storable foods because it is relatively easy to buy even in big quantities and I don’t know if I have ever met anyone who wouldn’t eat rice. Rice stores easily as long as you keep it cool and dry just in the bag. For longer storage you can seal your rice in Mylar bags, throw them in buckets and you are looking at years of shelf life. For your emergency needs though I would go to Sam’s or Costco and by a 50 lb. bag of rice or two. A 50 pound bag contains 504 servings of rice and will lay flat on your shelf for years. We use our rice though so it is always in rotation. Cost – Approximately $20

Beans – Beans, beans the magical fruit. Beans are another food that has a long storage life and is relatively cheap. Beans are the first part of Beans, Bullets and Band-Aids for a good reason. Beans don’t need too much care and like rice store easily for years. You can use them for a good source of fiber, but you should make plans to deal with excess gas if everyone is going to start eating beans once a day… A 10 lb. bag of beans costs around $7 and makes 126 servings. Buy several bags for your pantry and don’t forget the chili and soup mix.

Canned Meat – The best way to cheaply store meat is in cans and for a little variety and additional flavor for your meals, we stock up on canned tuna and chicken. Depending on the size you will need about 35 cans to cover your family for 30 days but these stack nicely and you can always work them into your weekly meals. Canned chicken will easily store for longer than a year so rotation shouldn’t be a problem.

Canned Veggies – 40 cans of your family’s favorite vegetables will give you the nutrition they need and something they will eat. Make sure you aren’t buying mushrooms or olives (unless your family loves them) if you don’t want to see turned up noses when the power has been out for a week and you are trying to get creative with dinner. 40 cans of vegetables will cost roughly $40 and like the meat will store for years.

Canned Fruit – Some people purchase other items for dessert, but canned fruit has a long shelf life and I have to recommend this for your sweet tooth over most other things outside of fresh fruit. I purchased 5 big #10 cans of pears, peaches, and mixed fruit. Each has about 25 servings and will be a nice addition to the rice, bean and chicken stew… 5 cans will cost around $25.

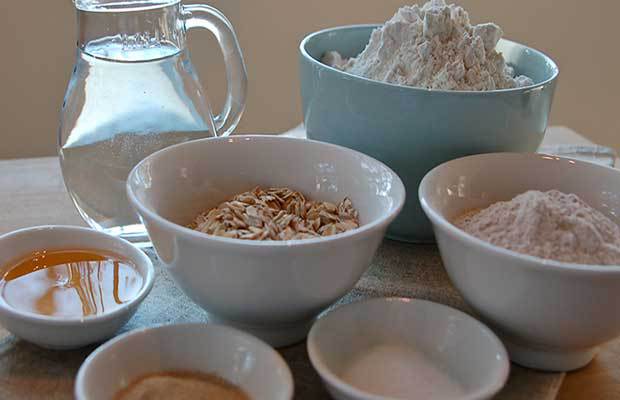
Oatmeal – Breakfast is served, unless that is you are raising chickens and already have fresh eggs everyday which I also highly recommend if you have the ability to do so. Oatmeal is great for breakfast cereal, its cheap and will store a pretty long time. Oatmeal needs a little more care than your rice or beans, but if you have this stored in Mylar you would have breakfast for years. The old cardboard tubes of Oatmeal has 30 servings, costs about $2 each. Buy 4 and you only need water to make this edible. Unless you have the next item.

Honey – Honey as you probably know has been called the perfect survival food. This is because it has an infinite shelf life. That isn’t something we usually have to worry about though because it gets used as a sweetener to replace sugar in tea, over that oatmeal above and you can even use honey to treat wounds. The normal 5 lb. jar of honey is about $15 right now and has 108 servings. Buy two of these.

Salt/Seasoning – Salt is another good storage item because if you keep it dry it will also last forever. Salt is needed by your body and in my opinion; it makes almost everything taste better. You can buy a case of salt in 4 lb. boxes for about $12. Buy a case and you will have enough for a year of seasoning. You can also purchase pepper and other spices you normally use to make that soup or chili above taste better.

Vitamins – The experts say vitamins don’t help you but I tend to believe that some nutrients even in vitamin form are better than nothing. If you aren’t able to maintain perfect nutrition, a simple multivitamin could keep you healthier than not. If you have kids get them some chewable gummy vitamins to keep their health up too. A bottle for each of you would cost about $8.

Water – I know this list was about emergency food supplies, but I will throw water in here too because if you are going to the trouble of taking care of food, you should knock out water at the same time. Each person needs about 1 gallon per day (assuming you aren’t working in the heat all day) for normal hydration and hygiene. A family of 4 would need 120 gallons of water to live for 30 days so you can either buy a whole bunch of bottled water or get 5 gallon plastic water storage containers. If you have the space, a fifty gallon water barrel would be easier, but you won’t be able to move that once it is in place.

What Next?

If you purchase all of the food supplies above it will set you back around $500 buy will cover your family as far as food and water for 30 days. Is this enough to weather any disaster? No, but it is that start you were looking for and you can really knock out all of these items in one day. One day of shopping and storing water would give you the peace of mind you need to ensure your family is taken care of. Can you go out and buy a 30 day supply of freeze-dried food just as easily? Maybe but the key is to do something now. Act before you need this food and take care of your family.

Next steps would be to work on medical supplies, and security. Once you have those, there is also other lists of prepper supplies you should consider. If you want to read a more comprehensive plan, you can also check out our Prepping 101 – Step by Step plan for How to get started Prepping.

One of the biggest hurdles to actually doing something that can save your life is getting started. I know many people who research topics, watch movies, create lists and pages

A couple of days ago, I had some friends over for a backyard BBQ. Several beers and patty flips later, one of them hits me with the oddest prepping question ever: “say, do you have any of odd stuff in your dark chest of wonders (that’s what I call my household survival kit)?”.

I really didn’t know what to answer. I mean, most of the objects us preppers carry and hoard (and don’t you try to deny that!) can be peculiar to some. Take magnesium rods, for instance. Aside from preppers, ex-military, and maybe some people who really don’t know how to spend their money, no one even considers owning such an object. Why would they?

Anyhow, for the time being, I considered the matter settled. But the question popped into my head again. Naturally, with my wife and kids fast asleep, I tiptoed downstairs and took a quick inventory of my prepping (what else could a man do on a Saturday night?).

Wouldn’t you know it, there are some things in there which may pass as peculiar to some, but handy nonetheless. So, after some careful consideration, I’ve decided to do a short piece about the odd and useful stuff every prepper should have around the house or hunting cabin or whatever. So, without further ado, check out my list of 5 outlandish items worth their weight in gold.

  1. Foldable pruning saw

If you’ve ever got around to do a bit of gardening, then you know how hard it is to get rid of vines or saplings. Yeah, long before I ever knew such a tool existed, I had to use a hacksaw or my survival knife to deal with stubborn outgrowths. Fast-forwarding a bit, during a yard sale, I came across this rather brutish tool.

I kid you not that when I first saw it, my first thought was “torture implement.” However, the guy selling the saw said it’s for pruning and not for chopping off fingers or garrotting someone. I feel a bit silly for thinking that no tool’s going to help me get rid of the backyard vegetation.

Needless to say, I pretty much came to enjoy messing around the garden now that I had the right tool. So, if you need to get rid of branches, saplings, twigs, vines, go for a foldable pruning saw. While you’re at it, you may want to consider adding one to your B.O.B – they’re awfully useful for quite a lot of jobs, and yes, in case of an emergency, they can be used for self-defense.

2. Quadruple-O Steel Wool

Here’s another doozie for you – 0000 steel wool. It’s sort of a byproduct of metalworking and very useful if you want to start a fire very fast. Yup, as you’ve probably guessed it, it’s highly flammable, which means that I wouldn’t store it next to a heat source or something. What I like to do with quadruple-O steel wool is to use in conjunction with char cloth.

For that, I’ve crafted my own version of the tinder, an old-school and ingenious way of whipping up a quick fire when you lack matches or lighters. My tinder box contains a small piece of 0000 steel wool wrapped in char cloth. I’ve bought mine from Amazon, but you can probably find them in every military surplus or sports store (they usually come in a pack that resembles smoking filters for rolling tobacco).

3. Guitar strings

Never quite got around to learning how to play the blasted thing, but I do stock up on strings as often as I can. There’s great for all sorts of things – setting up snares, cutting dairy products like hard cheese, or even hanging heavier pictures or wall decorations.

A while ago, my wife got for her birthday this awesome stone replica of the Dendera Zodiac. The trouble was that the plaque’s heavy as shit, which means that a regular string or wire won’t do. I managed to find a workaround by using a bass string – those are thicker compared to solo guitar strings.

4. Pencil sharpener

Having one pencil sharpener around the house is no big deal. Even though the PC industry has skyrocketed, there are those, including yours truly, which prefer to stick to pen and paper. Hell, some of the articles you see here were laid on paper before getting them live. Now, I know this may sound a bit strange, but I got a whole box of pencil sharpener tucked away in the garage.

No, I don’t have that many pencils to sharpen, but they do have their uses. For instance, if you run out of tinder, you can always use a pencil sharpener to make more. Moreover, the blade can be salvaged and made into a trap.

Of course, if you know your way around weapon crafting, you can always take a bunch of pencil sharpener blades, and fashion yourself a club or something. Of course, the mount is melted down and turned into nail (I melted a box of bladeless sharpers and used the metal to forge me a bushcraft knife).

5. Machete

I really like knives. The bigger, the better. Anyway, a machete’s useful for pretty much any job that requires extra muscle. I personally like to use it for chopping small wood and some last-minute weed-whacking.

Like with any other knife, you should definitely aim for quality. It’s true that this type of blade might be too cumbersome for your B.O.B, but no one’s stopping you from getting one the next time you go for a hike. Just be sure to get one that’s made from carbon steel and not stainless.

Think the list needs some improvement? Let me know what you think in the comments section.

Most of the objects us preppers carry and hoard can be peculiar to some. Take magnesium rods, for instance. Aside from preppers no one even considers owning such an object.

Why zucchini ? One good reason? It is the season.

This food is low in saturated fat and sodium, and very low in cholesterol. It is also a good source of protein, vitamin A, thiamin, niacin, phosphorus and copper, and a very good source of dietary fiber, vitamin C, vitamin K, riboflavin, vitamin B6, folate, magnesium, potassium and manganese.

The health benefits of zucchini include improved digestion, slows down aging, lowers blood sugar levels, supports healthy circulation and a healthy heart, improves eye health, boosts energy, benefits for weight loss, improves thyroid and adrenal functions, protects against oxidation and inflammation.

If you are a vegetable gardener, chances are you have experienced such an abundance of zucchini so great that even a ravenous family of squash lovers could never keep up with it. Right now, the garden is simply loaded with the prolific dark green veggies. And if not, you can pick up baskets full of them at a great price at your local market.

Some zucchini trivia

Biologically, zucchinis are closely related to cucumbers and watermelons. Zucchini is technically a fruit and not a vegetable.

They have been consumed in Central and South America, as well as Italy, for thousands of years, but only became popular in North America over the past 50 years, perhaps when gardeners realized what a bounty they could receive in a tiny amount of garden space. Zucchini is part of what is known by the Native Americans as the “Three Sisters” – three plants that grow well together – corn, summer squash, and beans.

Zucchini is packed with nutrients.

Here are some of the nutritional benefits of zucchini.

  • A huge 1 cup serving of zucchini, including the skin, contains 20 calories, 1.5 grams of protein, 4.2 grams of carbohydrates, and 1.4 grams of fiber.
  • Zucchini was proven in studies to be a top food source for antioxidants such as lutein, zeaxanthin, beta-cryptoxanthin, alpha-carotene, and beta carotene.
  • Zucchini is extremely high in natural pectin, which provides protection against diabetes and can help regulate insulin and blood sugar levels.
  • Zucchini contains Vitamins C, B6, B2, A, and K, as well as manganese, potassium, magnesium, folate, and phosphorus.

Growing zucchini is easy!

Zucchini is not just easy to grow – it can actually take over your garden if you’re not careful! Some people plant zucchini away from other parts of the garden for this reason. You should allow plenty of room for the vines to spread. If you are using the square foot gardening method, thin to one plant per square foot.

Here are some ways to use zucchini.

Zucchini is one of those multi-purpose harvests that can be used in a variety of ways. Whether you prefer it sweet or savory, there’s a place for zucchini in your kitchen.

If you end up with one of the baseball bat zucchinis hiding under the leaves in your garden, cut out the center and remove the seeds. Very large zucchini can become woody and flavorless. Try using over-large zucchini in recipes that call for shredded zucchini – this helps to mask the texture.


Try using shredded zucchini in place of recipes that call for shredded potatoes. You can also mix shredded zucchini half and half with shredded potatoes to make hash browns or potato patties.

Slice a zucchini in half and fill it with all manner of sweet or savory fillings to make baked zucchini boats.

Uncooked zucchini spears are great for dipping and make a tasty addition to a veggie tray. If the zucchini is a small, tender fruit, you can leave the peel on for an extra hit of fiber. For a bigger zucchini, it’s best to peel it for use raw, because the skin will be tough and unpleasant in texture.


With the garden in full zucchini overload, we’ve been scrambling to figure out ways to use it that are just a little different than the usual sauteed or grilled versions.

Here are our top, kid-tested zucchini recipes.

Zucchini Fritters

Ingredients:

  • 2 cups of coarsely shredded zucchini
  • 1 cup of shredded cheddar cheese
  • 1 cup of whole wheat flour
  • 2 tsp of garlic powder
  • 2 tsp of onion powder
  • 2 tsp of MSG-free seasoning salt
  • fresh ground black pepper to taste
  • 1/8 cup of cooking oil

Directions:

  1. In a large bowl, mix together flour and seasonings.
  2. Stir in zucchini and cheese, using your hands to combine well.
  3. Meanwhile, heat the cooking oil until it sizzles when a drop of water is added.
  4. Form the zucchini mixture into patties and place them in the hot oil, taking care not to splatter yourself.
  5. Fry on each side for about 3-4 minutes or until a dark golden brown.
  6. Drain the fritters on a paper towel.
  7. Serve with sour cream or yogurt garlic dip (see recipe below)

Baked variation:

  1. Form the zucchini fritters as instructed above.
  2. Preheat the oven to 400*F
  3. Lightly oil a cookie sheet.
  4. Place the fritters on the cookie sheet and brush them lightly with oil.
  5. Bake for approximately 10 minutes on each side or until dark golden brown.


Yogurt-Garlic Dip

Ingredients:

  • 1 cup of plain yogurt, drained until thick
  • 1 tsp of garlic powder
  • 1 tbsp of dried rubbed dill weed

Directions:

  1. With a fork, mix the seasoning into the yogurt.
  2. Place in the refrigerator for at least one hour to allow the flavor to develop.
  3. Serve with fresh veggies or zucchini fritters.


Zucchini-Carrot Muffins

Ingredients:

  • 1 1/2 cups of shredded zucchini
  • 1/2 cup of shredded carrot
  • 1/4 cup of milk
  • 1 tbsp of white vinegar
  • 1 1/2 cups of whole wheat flour
  • 1/2 cup of white flour
  • 1/2 teaspoon baking soda
  • 1/2 teaspoon baking powder
  • 1/2 teaspoon salt
  • 2 tsp cinnamon
  • 1/2 tsp of nutmeg
  • dash of powdered clove
  • 2/3 cup melted coconut oil
  • 1/2 cup muscovado sugar
  • 1 tsp of vanilla extract
  • turbinado sugar to taste


Directions:

  1. Grease muffin tin with butter or additional coconut oil.
  2. Preheat oven to 375*F.
  3. In a small bowl, add the vinegar to the milk and allow it to sit for 5 minutes.
  4. In a large bowl, mix together oil, sugar, and vanilla, then stir in the milk mixture, the carrots, and the zucchini.
  5. In another bowl mix together flours, spices, salt, baking powder, and baking soda.
  6. Stir the dry ingredients into the wet ingredients until just combined – you will have a lumpy batter.
  7. Let the batter sit for 10 minutes to allow it to rise.
  8. Spoon the batter into the prepared muffin tin, sprinkle lightly with turbinado sugar, and then bake for 20 minutes or until a knife inserted in the middle comes out clean.


Zucchini Chips

Ingredients:

  • 1 pound of zucchini, thinly sliced
  • 1 tbsp of olive oil
  • 1/4 cup of grated Parmesan cheese
  • 1/4 cup of Panko bread crumbs
  • salt and pepper to taste


Directions:

  1. Preheat the oven to 450* F.
  2. Line a baking sheet with tinfoil, then lightly spray it with oil.
  3. Place the zucchini on the baking sheet then lightly brush with olive oil.
  4. In a bowl, mix together Parmesan, bread crumbs, salt, and pepper.
  5. Sprinkle the mixture on top of the zucchini slices.
  6. Bake until the zucchini is browned and crisp, about 25 minutes.
  7. Serve immediately.


There are several ways to preserve zucchini.

You may have so much you need to save it for later. Here are 3 ways to put it back.

Dehydration

Zucchini can be dehydrated either in thin slices or shredded. Either way, prep your zucchini, then mix well with salt. Place the salted zucchini in a colander over a bowl and put it in the refrigerator for a minimum of two hours. (I usually leave it overnight). This will remove a great deal of the moisture. Put a thin layer of zucchini on the shelves of your dehydrator and dry overnight on low, or until the zucchini is completely dry. When you’re ready to use it, reconstitute it by covering it in boiling water for 15 minutes. Drain and use as you would fresh zucchini.

Freezing

Unlike most vegetables, there is no need to blanch zucchini before freezing it. Simply shred it, drain it (don’t add salt in case you want to use it in sweet dishes like zucchini bread or muffins) and then place it on a cookie sheet in a single layer. Put this in the freezer for two hours, then relocate the frozen shreds into large freezer bags.

Canning

Zucchini really doesn’t take to canning well. However, you can use it in place of cucumbers for your favorite pickle or relish recipes. The large zucchinis that are a little bit tougher actually work better for zucchini pickles because they hold their firmness better.

Ingredients:

  • 3 pounds of zucchini
  • 1/2 cup of onion, thinly sliced
  • 6 cloves of garlic, smashed
  • 6 tsp of pickling salt (or another non-iodized salt)
  • 2 cups of apple cider vinegar
  • 1 1/2 cups of white vinegar
  • 2 cups of turbinado sugar
  • 1 tsp of mustard seeds
  • 1 tsp of black peppercorns
  • 1/4 teaspoon ground turmeric
  • 6 dried chili peppers or 2 tsp of crushed chilis
  • 6 sprigs of fresh dill


Directions:

  1. Thinly slice your zucchini (about 1/4 inch or less in thickness).
  2. Salt the zucchini, add the onion slices and place it in a colander over a bowl in the refrigerator for 2 hours to remove the liquid.
  3. Meanwhile place into each sanitized jar: 1 tsp of salt, 1 red chili, 1 clove of garlic, and 1 sprig of dill.
  4. In a saucepan on the stove, combine sugar, vinegar, turmeric, mustard seeds, and peppercorns. Bring to a boil.
  5. Making sure the jars are still warm from being sanitized, fill them with drained zucchini and onion mixture, allowing 1 inch of headspace.
  6. Pour the boiling liquid over the contents of the jar. Wipe the rims and cap your jars with snap lids and rings.
  7. Process in a water bath canner for 15 minutes (pints), making adjustments for your altitude.


What do you think?

Do you grow zucchini in your yard? What do you like to make with zucchini? Please share your thoughts in the comments.


Special thanks to Daisy Luther for this wonderful article. 

Why zucchini ? One good reason? It is the season. This food is low in saturated fat and sodium, and very low in cholesterol. It is also a good source of protein,

I really have to say that although I’m the kind of guy that would rather stick to a cup of tea when the cold hits, having a couple of pain meds around really helped me pick up the pace when I wasn’t quite feeling like myself.

The need for a painkiller becomes even direr in case of an SHTF situation. Sure, pain meds are great when you need to deal with a pulled muscle or soreness after an intense hike, but they become vital when you have an injury to tend. Because I was foolish enough to carry heavy boxes during my time as an intern, I now have a very sore back and a taste for pain relievers, especially ibuprofen.

Now, the problem with painkillers is knowing how to pick your poison. There are tons of pain meds on the market but, unfortunately, to some, most of them are regulated by Federal Law. That means no Vicodin if you haven’t received a Schedule II or III from your doc.

Every so often, the popping-pills-just-because-they’re-for-pain style has landed more people in the ER compared to those who experienced a nasty med side-effect. Yes, it can happen. If you read the label carefully, you will see that even stuff as basic as aspirin comes with a truck-full of side-effects.

True story: my late aunt was once rushed to the ER because she heard ringing in her ears for three days straight. Turns out that she was in that one percent of patients who have experienced auditory hallucinations after taking aspirin.

So, before you go out buying every over-the-counter painkiller you can find (won’t even consider discussing the heavy stuff like Vicodin) you will need to do a little research about known side-effects. Painkillers aren’t good if they end up causing more pain or killing you! So, before taking pills like Tic-Tacs, be sure to check in with your doc to see what kind of pain meds agree with your body.

Related – Even SWAT Teams are helpless against THIS

The list may be shorter than you think. One more thing before we tackle today’s topic – never, ever, buy meds online. Don’t get fooled by those flashy ads, giveaways or price cutbacks. The chances are that you will end up with sugar pills or God knows what. Also, if you care about your body, you would do well to stay away from stronger painkillers, even though you can order them online without a prescription.

Now, for those who are interested in stockpiling more pain meds, here’s my list of must-have over-the-counter painkillers and what they’re good for.

  1. Ibuprofen

Commercial name(s): Nurofen, Advil, Motrin.

Recommended daily dose (adult): 800 milligrams per dose or according to the doc’s prescription.

Recommended daily dose (child): 400 milligrams per dose or according to the doc’s prescription

Probably the most common painkiller on the market is the over glorified Ibuprofen. Because it is an NSAID (a nonsteroidal anti-inflammatory drug), Ibuprofen is very effective at decreasing swelling and fever in addition to taking away the ouchie. It’s commonly used to treat stuff like tooth pains, muscle aches, cramps, headaches, and minor back pains. Careful about using Ibuprofen, though.

Some studies have pointed out that this med can cause renal failure if the patient has kidney problems. You should also refrain from using Ibuprofen if you have heart issues, as it is known to produce blood clots in a patient with cardiovascular issues.

Don’t be like yours truly and take it on an empty stomach because you’ll end up with one Hell of a tummy ache. A box of 30 x 800 mg pills costs around 14 bucks and, the best news is that you can buy as much as you want because no one is going to ask you about a prescription.

Related –4 Important Forgotten Skills used by our Ancestors that can help you in any crises

2. Aspirin

Commercial name: Aspirin®

Recommended daily dose (adult): one or two tablets every 4 hours or two tablets every 6 hours

Recommended daily dose (child): same as adults. In case of children under 12, check with your doc.

You can’t get any more basic than aspirin when it comes to over-the-counter pain meds. Although it can be used in case of an emergency for reducing fever or swelling, aspirin is mostly used for muscle pains, headaches, toothaches, and cold-induced fever.

Be sure to drink plenty of water when taking the pill.

FYI: if you’re a hiking buff like me, you can reduce some of that soreness by taking aspirin in conjunction with paracetamol. Together, they’re great painkillers and will speed up your recovery. Be sure to take them before the soreness kicks in. Otherwise, you would end up just taking two pills.

3. Acetaminophen

Commercial name(s): Tylenol, Calpol, Panadol, Paracetamol, Bromo Seltzer, Actamin, and Tempra.

Recommended daily dose (adult): 1000 milligrams at one time.

Recommended daily dose (child): 5 doses in 24 hours based on the child’s weight.

Though it’s placed in the same pot as Ibuprofen (considered to be an NSAID), acetaminophen has more in common with aspirin. It’s very effective at relieving paint and breaking the cold- or flu-induced fever. Its effectiveness can be boosted when used with aspirin. Careful about taking too much because it can severely damage your liver.

Related –The vital self-sufficiency lessons our great grand-fathers left us

4. Naproxen

Commercial name(s): Naprosyn®

Recommended daily dose (adult): 750 milligrams for the first dose, then 250 milligrams every 8 hours.

Recommended daily dose (child): 1 gram per day or 5 milligrams per kilogram twice a day.

Naproxen is an NSAID commonly used to relieve pain and to bring down swelling and fever. Since it’s considered to be more kick-ass compared to Ibuprofen, it’s also used to treat other conditions such as tendonitis, gout, rheumatoid arthritis, and back pain (hooray for me!).

Be careful about taking too many pills, as it can lead to kidney failure. The best thing about using Naproxen over Ibuprofen is that the first starts working in 30 minutes or less, whereas the latter begins to act in 45 to 60 minutes.

Enough meds for you? Well, take it from someone who learned this the hard way: there’s no such thing as too many painkillers around the house. So, what are you waiting for? Go and stock, but remember to check in with your doc first before doing anything stupid.


Self-sufficiency and Preparedness solutions recommended for you:

The Lost Ways (The vital self-sufficiency lessons our great grand-fathers left us)

Survival MD (Knowledge to survive any medical crisis situation)

Backyard Liberty (Liberal’s hidden agenda: more than just your guns…)

Alive After the Fall (Build yourself the only unlimited water source you’ll ever need)

The Lost ways II (4 Important Forgotten Skills used by our Ancestors that can help you in any crisis)

The Patriot Privacy Kit (Secure your privacy in just 10 simple steps)

One thing before we tackle today’s topic – never, ever, buy meds online. Don’t get fooled by those flashy ads, giveaways or price cutbacks.

Portable backpacking camp stoves can be an invaluable tool for preppers for many obvious reasons.

  • Sometimes you don’t have the ability to build a campfire, and sometimes you don’t have the time.
  • Some stoves use natural fuels more efficiently than a traditional campfire
  • Sometimes it’s just nice to be able to whip out a small stove and make a quick hot drink or heat water for a freeze dried meal.

Whatever your reason, be it camping, long-distance hiking, bugging out, or a grid down emergency, or even something else, a small camping stove should be part of your survival kit. However, there are a great many different ones out there, all using different types of fuel. We are going to look at six, all of which can be easily tossed into a bugout bag, or stashed with your camping gear.

The Top Backpacking Stoves for fast cooking when you need it the most

Etekcity Camping Stove

Etekcity Camping Stove

This lightweight little gem uses common 7/16” thread butane or butane/propane canisters that are widely available in camping and backpacking supply stores. While relying on stored fuel for SHTF is limiting, this fuel is easy to stockpile, and the reality of a camping stove in your emergency gear is more focused on the short term than long term use. In other words, this is the stove you use to heat your food when you are bugging out, or when the power goes out.

Because of the small burner size of this stove, you aren’t going to be whipping out your favorite cast iron skillet and frying up some bacon with it. It will work best with lightweight camping cookware or military mess kits. This further drives home the fact that this is a strictly short term or emergency stove. You are basically going to use it to heat water or reheat canned foods. You can do more complex cooking tasks with it, but you are sorely limited by the kind of cookware you can use on it.

Overall though, if you need a basic stove to toss in your BOB, or in the back of your car for an emergency, and have the kind of fast cooking foods in your cache that work best with this kind of stove, you will be just fine.

Find the Etekcity on Amazon

 Canway Camping Stove

Canway Rocket Stove

So-called “rocket stoves” have long been one of my favorite choices for an emergency stove. Capable of burning almost any dry organic matter (leaves, twigs, pinecones, etc…), they allow a prepper to use fuel that would commonly be ignored, which increases the utility of such stoves.

The Canway stove is an inexpensive and easy to pack away stove. Because fuel can be readily scavenged in most places, you really only need to pack a way to start a fire (although it couldn’t hurt to pack a small amount of wood or such, so you are certain of having fuel).

Like any camping stove, you are somewhat restricted on the weight you can put on it. But again, our goal here is a portable emergency stove. One big disadvantage would be operating in very wet climates or deserts where fuel might be scarce. However, those are fringe situations, so for most folks under most circumstances, this is a great little stove. I’d prefer something with a different fuel source if I were certain of not being able to find fuel.

Find the Canway on Amazon

Coleman Bottle Top Propane Stove

Coleman Stove

A classic camping stove, the Coleman bottle top stove is a bit clunky for a BOB, but it fits in great with other emergency gear if you are already invested in equipment that uses one pound disposable propane bottles.

And therein lies the rub. If you are already using those bottles, great. If not, this is not the stove for you. It is a tad clunky, and while that is a benefit for rough handling, the stove and bottle take up precious room in a BOB that could be used for other things.

Honestly, this is a stove better suited to keep in your vehicle, at home, or in your rural cabin. The bulky nature of the propane canisters alone should be enough to keep it out of any emergency kit that doesn’t include a vehicle to haul it around in. On the other hand, it is a great stove using a common fuel supply. Just use it where it works best, and not where it will be an irritant.

Find the Coleman on Amazon

Lixada Camping Stove

Lixada Camping Stove

This combines two of my favorite stoves – a wood burner, and an alcohol stove. While not as efficient as a proper rocket stove, the wood burning option is just too good to pass up. Plus, it uses the kinds of small sticks and such that often get passed over for campfires.

But what is really
great about the Lixada stove is the alcohol burner unit. Almost identical to the stoves issued by the Swedish Army during the height of the Cold War, these alcohol stoves burn common isopropyl or denatured alcohol, are indoor safe, and are more than suitable for common on the go cooking tasks.

Having used nearly identical stoves, I really enjoy the fact that a small bottle of fuel alcohol can last for a number of days, while still giving me the ability to have plenty of hot drinks and meals.
In fact, I’ve used these kinds of stoves extensively in the sometimes unpleasant climate of the Puget Sound, and keep one for indoor use when the power goes out.

By combining an easy to transport stove that uses wood or alcohol, Lixada gives the prepper a lot of great options for an emergency or camping stove.

Find the Lixada on Amazon

Esbit Folding Stove

Esbit Folding Stove

Esbit and similar solid fuel tablet stoves have been used by military and campers around the world for decades. The ultimate in minimalist stove design, these pocket sized stoves can be tucked away almost anywhere, along with their fuel. This might be the ultimate bugout bag or small survival kit stove, but it of course will have some drawbacks.

The upside to a stove you can stick in your coat pocket is that well, it is a stove you can stick in your coat pocket. You aren’t likely to cook a gourmet meal over this thing, but you can make plenty of hot water, heat up canned foods, and the like, but as with every other stove we’ve looked at, your big limitation is on cookware, rather than the energy output of the stove.

That said, an Esbit also makes a great backup stove. Since a stove and enough fuel to cook with for several days takes up about the space of an AR-15 magazine, you would be well advised to at least pack one as a spare, or stick one in your glovebox. You never know when a stove will come in handy.

Find the Esbit on Amazon

Bushcraft Essentials XL Outdoor Stove Bushbox

Backpack Camp Stove

The Bushcraft Essentials XL stove is by far the most expensive one on the list, but what I like about it is it’s probably the easiest one to fit into a backpack or pocket. The German-made stove is quick and easy set up; you just unfold it and the stainless steel plates drop right into place.

The other great thing about this stove is you can use pretty much any organic matter as fuel so you don’t have to worry about carrying extra fuel. When your done cooking, just fold it up and slide it into your pack.

Find the Bushcraft Stove on Amazon

Choosing An Emergency Camp Stove

If you are looking for a stove for your bugout bag, all the stoves reviewed here, except for the Coleman are perfect for sticking in a bugout bag or small survival kit. Which one you choose is largely up to you.

There is a lot to be said for a stove that  allows burning scraps of wood or other biomass, but that won’t always be an option. For instance, if you are keeping a stove for a grid down emergency, a biomass stove won’t work very well indoors. An alcohol stove on the other hand will.

Stoves using some sort of fuel source have the advantage of a reliable, packaged fuel that can generally be counted on to do the job. Of course, once that fuel is gone,
your stove isn’t of much use, and fuel containers can take up valuable space in an emergency kit.

On the flip side, carrying enough fuel for several days or even a couple weeks generally won’t take up much room, and as it is a consumable, your pack will grow lighter with each use.

Your choice in an emergency stove boils (hehe get it, boils?) down to what kind of space you have set aside for a stove, and what your personal choices are in fuel, and these are only choices you can make.

Ultralight Backing Stoves: Are they part of your Bug Out Survival Gear?

Emergency camping stoves do not have to be expensive, or complicated. Many are made for military or backpacking markets, which lead to lightweight, easy to use and efficient products that do the primary job of heating water or prepared foods very well.

While you are somewhat limited by the small size of these stoves, you’ll find for emergency and grid down situations; they will be the difference between a hot meal
or one that tastes like cold MRE’s and sadness.

The peace of mind a good stove in your emergency kit is invaluable, and just knowing that it is there if you ever need it can be a real relief. The morale boost of a hot meal in an emergency, or the life-saving ability to boil water cannot be measured in dollars, but rather measured in personal satisfaction.

If you don’t already have a stove in your emergency kit or BOB, you should. If you already do, then you are that much ahead of the game!

Portable backpacking camp stoves can be an invaluable tool for preppers for many obvious reasons. Sometimes you don’t have the ability to build a campfire, and sometimes you don’t have

By now most casual preppers and survivalists have become at least moderately aware of the basic essentials of survival.

  • Water
  • Shelter
  • Food

The more hardcore survivalist has gone on to ponder more advanced scenarios and techniques necessary for long-term sustainability. First by building upon the three basics outlined above and making those immediate necessities something that can be readily available at all times. Essentially making your makeshift shelter into a long-term survival situation.

Most of those preppers have contingency plans for just about everything. Plans to pivot from bug-out to survival and finally to homesteading in the event that there is nothing to go home to. Idea’s for repelling hostile invaders and trading goods and services with non/semi-hostiles, cross-country egress routes, underground bunkers. On and on the preparations go.

One thing that I have heard bandied about regularly is exactly what the most valuable commodity would be in a post-apocalyptic scenario. If we are suddenly plunged into a Mad Max meets The Walking Dead, every-man-for-himself world, what exactly would be the most valuable commodity?

Precious Metals? For sure Gold, Silver and Platinum will be of considerable value in the early days of a doomsday situation as people will expect that everything will return to normal soon enough. People looking to take advantage of a temporary situation will likely trade surplus gasoline for gold early on. When society doesn’t rapidly rebound, watch for the value of precious metals to slowly be eclipsed by the following items.

Gasoline? Without mechanics to keep the cars running gas will slowly lose value. Unless we learn to make more, this will eventually run out regardless of what we do.

Ammo? Similar in scope to gasoline, this too will eventually run out unless we have the knowledge to make more.

Water? While water will always be of considerable value as it doesn’t take very long to die of dehydration without it. Those who control the water supply will certainly be in a position of great strength, but there is one commodity that makes all of the aforementioned ones attainable by anyone will the willingness to crack down, while we have the chance.

It is the contention of this article that the one commodity that will be in the shortest supply, and one that people will most likely be short on from day one is…

Knowledge.

Of the hundreds of thousands of books written over the centuries, I would wager to say that most people will not think much about throwing a couple of the most important tomes in their bug-out-bag. In the event of a catastrophic collapse, most of the ones we’ve left behind may well be gone by the time we find our way back to where the Libraries once stood.

Sure, we will all know how to make fire, how to shoot, hunt, build a cabin, find water, and may even become great traders within our realms of fellow survivors but what do we do when we need a Judge, or a Doctor, or a Sheriff?

Eventually, the rule-of-law will have to be re-established. We can’t just keep shooting intruders, regardless of how reasonable it may look on TV. The reality of our situation will likely be nothing at all like that. People will expect due process, fair trials, juries of their peers, and in fact, the long term existence of mankind will depend on those kinds of civilities being employed.

I fully understand that part of the “attraction” of going off-the-grid is the fact that one will no longer have to answer to bureaucrats, politicians, and would-be tyrants. However, in a lawless society, or even a major city under an extended period of martial law, the murderous thugs and wannabe king-pins would rise among us in fairly short order without those bureaucrats and politicians. As stated before, we can’t just keep shooting people!

How many of us could re-build a government or even a simple judicial system that functions fairly and justly, with just the knowledge we already have locked inside our cranium?

I’ll be the first to admit…I’m not there yet!

The Survival Medicine Handbook: A Guide for When Help is Not on the Way

There is so much to know that we overlook in our current state of comfort.

What is the extent of our knowledge of first aid? We might be able to stitch a wound, but what if we had to amputate a limb, deliver a baby or perform an emergency surgery?

What about Self-Defense? Are we trained in hand-to-hand combat? Can we even run a hundred yards, let alone miles?

How many of us give as much consideration to our actual physical fitness and our ability to perform the tasks that may one day be the difference between life and death as we do to the gear we have in our bag?

Can we even do basic vehicle repairs, with a manual, a full toolbox, and three buddies leaning over the hood on a Saturday afternoon, let alone in the bush with a pair of pliers and a hammer?

We might be able to shoot a gun, but can we make a gun? Can we reload our own cartridges?

It is my belief that the preacher, the carpenter, the mechanic, the blacksmith, and the country doctor will have just as prominent a role in the new world, that we may one day find ourselves forging afresh, as any Wall Street Trader or Politician does in our current reality.

I have, of late, taken to learning many of these types of things of which I formerly had very little knowledge. I have taught myself to make knives and bladed weapons, primitively if necessary, from scrap metal and lumber. I have begun studying The Constitution, The Federalist Papers, and other founding documents and I have resumed my lifelong study of The Bible with zeal, among other things.

Currently, in our safe secure homes, we have the wealth of knowledge of the ages right at our fingertips via the internet. In fact, we don’t even have to read to learn, we can just watch Youtube! There is literally no reason whatsoever for us to not become as intellectually prepared for as many things as we can, while we can.

Read, study, learn and pack some books if you can. You never know if there will be any to come back to. The long-term survival of your offspring will depend more on what you know than on what you have.

By now most casual preppers and survivalists have become at least moderately aware of the basic essentials of survival. Water Shelter Food The more hardcore survivalist has gone on to ponder

In recent years, beekeeping has grown as a hobby to help families grow healthier plants while also helping the families be more self-reliant.

You might be thinking that beekeeping is going to be too advanced but in reality, it takes about the same amount of time and means as gardening or other outdoor hobbies.

Check out these tips on how you can start your own beehive at your home and reap the rewards!

Keep your hive off the ground.

Where Will You Keep Them
Bees are like any other pet that you might have and need a place to stay. Think about where you’ll put them in your yard. Is your yard big enough for a beehive? Are they going to be a problem for children? Do you have zoning laws that speak to beekeeping? All these are questions you’ll have to answer.

You’ll also need to consider your neighbors. While it might be OK with the city laws, no one wants to be the troublemaker in the neighborhood. Consider if your neighbors have allergies to bees, if the hive will be too close to their yard, etc. Many times, making a beehive a different color helps them be unrecognizable and out of the mind of your neighbors. You can also set up hedges or walls around your hive forcing bees to come back to the hive at a higher level – flying above the human height range.

A Strong Hive
A strong population is crucial to successful beekeeping. The typical population will reach 75.000 bees during the summer and around 30,000 gathering bees. A good colony is docile when managed and shouldn’t swarm very often. A good colony will produce 50-100 pounds of surplus honey each season. Avoid collecting a lot of honey in the fall – this is what bees use during the winter to survive.

Keep Your Hives Off the Ground
When you’re planning the location of your hives, it’s recommended that you have your hives off the ground to protect them from other animals. A simple stand made of 2x4s will do the job. Not to mention having them higher on the ground will be easier on your back and help you keep the bottoms cleaner.

Learn How Bees Naturally Form a Hive
Bees will typically create hives in cavities of about 2-3 cubic feet. Typically the honey will be stored on top of the hive and around the outside. The main brood food for the bees is usually stored below the honey. The queen bee will usually lay her eggs and raise her young at the very bottom of the nest. Knowing and researching the basic structure of a hive will help you know where to harvest and where to let things be. This will also affect how you design your bee hives – instead of combs hanging down off of a board, you’ll have to imagine that it’s a sphere like a natural hive.

Protective Gear

You’ll Need Protective Gear
Obviously, you’ll need some type of veil to keep bees from becoming entangled in your hair. You’ll also want to get a sturdy lightweight jacket (ideally that attaches to your veil). You don’t necessarily need a jumpsuit to do light beekeeping work. A jumpsuit is a great idea when you’re going to be doing a lot of manual labor with the hive – moving it, rearranging them, etc.

The Smoker
A beekeeper’s smoker is one of your most vital tools. It’s basically a cylinder with a bellows attached. A slow burning fire is inside the cylinder (made of pine needles, smoker fuel, old burlap, etc.). When you gently squeeze the smoker it will push a puff of smoke towards the bees and two things will happen. First, they will try to get away. Their natural instinct is to get out of the way of fires and they’ll leave if at all possible. Worker bees will duck into the hive trying to eat as much honey as possible before the bail. The second thing that the smoke will do is interfere with the bee’s communication signals. This will allow you to do your work in the hive without a hive that can communicate and swarm.

Building the Hive
You can either purchase a pre-built hive or build your own. Basically, the hive consists of long sheets that lay side by side like folders in a cabinet. They can easily be pulled out and scraped off.

What Type of Bees
The most common bee for beekeeping beginners is the Italian Honey Bee. They are gentle, very productive, and easy to manage. They are the most common bee available for purchase. Carniolans are dark bees and demand slightly more time. They are very gentle and winterize better. Their population builds fast in the spring and you’ll need to plan accordingly. Russian bees are also gentle and somewhat erratic. They are slower to build in the spring but build fast when they do.

Your Advice
Now, we’ve covered some basics you should consider when figuring if beekeeping is for you. There are a lot of other items to consider including a starter hive, equipment and more.

In recent years, beekeeping has grown as a hobby to help families grow healthier plants while also helping the families be more self-reliant. You might be thinking that beekeeping is going

There are many reasons to check for gold on your property. If you live in a gold mining area you might be sitting on top of the mother lode. However, most people find gold in the form of buried treasure.

During the civil war, Southerners would bury their household silver, gold, and other valuables when the Northern army came near. I know a man who still buries his extra cash in jars in the backyard. I don’t envy the family when his day comes. They’ll definitely need a metal detector.

If you own gold, you know that storing it can be a problem. It can be difficult to find a secure spot that won’t be found by thieves or family members. Even a safe is not secure if you are forced to open it.

For this reason, many people – in the past, and even today – have resorted to burying their gold and other valuables. Sometimes the owner fails to tell his heirs where it is hidden, or even that it exists. Every property is a potential goldmine, especially older properties.

My Own Experience with a Metal Detector

We bought my son a metal detector for his birthday a few years back. A little exploring in our front yard discovered an abandoned oil tank. It was so rusted that I am surprised it hadn’t caved in from kids playing only a foot above it.

Later, our first trip to the beach with his metal detector turned up an iPhone, a gold watch and a few quarters. Talking to others with metal detectors, we heard a number of stories about the items they had found; gold wedding rings, keys, coins, jewelry and a lot of metal trash.

One retiree claimed to hunt almost daily and was able to supplement his retirement income nicely. He enjoyed finding hidden treasure of all kinds and said that the hunting kept him moving and healthy.

What Can You Find with a Metal Detector?

You can find gold, silver, tin, aluminum, steel, and any other metal. Did you bury your money in a jar and can’t remember where it is? You can find that jar lid and any other junk metal or treasure with a basic metal detector. Some of the more expensive detectors are tuned to detect only gold or possibly silver. This keeps you from having to sort through a lot of bottle caps, but it can also cause you to miss other valuables.

If you’ve buried your emergency food supply in the backyard I can find it, as long as there are some canned goods or other metal included. This is a good point to remember if you are considering burying your cache.

Better metal detectors can find metal that is buried up to four feet deep, so dig your hole deeper or stash only non-metal items. Another way to foil a hunter with a detector is to bury your metal valuables or food deeper, cover it with a foot or more or soil, then bury some decoy metal on top of your cache. If you are lucky, they will find the decoy and move to another spot.

What Features Do You Need?

There is a wide variety and price range of metal detectors available on the market. What do you really need to find gold or other valuables on your property? We purchased a basic-model metal detector for our son and it did everything we needed.

For me, easy tuning, the ability to discriminate between target metals and background minerals, and a solid rugged build would be the most important features.

There is a learning curve with most metal detectors. You need to learn to tune the detector to pick up the types of metal you are looking for and tune out background noise. It takes a little practice to be able to do this quickly and recognize the signals for various metals.

For a beginner, an inexpensive model can be purchased for under $100. You can spend much more, but I recommend a basic model until you learn whether treasure hunting is for you.

As a prepper, you are probably aware of the importance of having some gold and silver in your investment portfolio. Preppers prefer to own physical gold for obvious reasons, but you don’t need a lot of money to get started in gold.

One way to build up your gold stores is to regularly use a metal detector as we have discussed here. You may have days where you find nothing, but the days where you find lost coins, jewelry, or a hidden stash will make them all worthwhile. Over time you will build up a collection of gold items to provide your family with a little security when things get tough.

During the civil war, Southerners would bury their household silver, gold, and other valuables when the Northern army came near. For this reason, many people – in the past, and

The sh*# has hit the fan and the power is out. Despite all warnings, you didn’t stock up on matches, lighters, or a flint. It’s getting cold outside, and you could really use a warm meal. What now? There are many ways to build a fire without matches or lighters, but in my opinion, the best way is to make a fire plough. While it does take some stamina, it is very effective.

One of my favorite survival movies is Cast Away in which Tom Hanks plays an everyday guy named Chuck Noland. In a very powerful scene, Chuck struggles for hours to make a fire using a bow drill. While that is a good way to build a fire, it is very difficult (as it is for Chuck in the movie). Finally, he gives up on the drill and tries another method: the fire plough.
Follow these instructions and you’ll be warm and eating a bowl of hot soup in no time.

    1. Prepare some kindling. There are many things you can use such as tree bark, dead plants or grass, wood shavings, or just some shredded paper. The drier the better.
    2. Find a piece of softwood. You might get it off a piece of furniture or from an abandoned building. As long as you can make a mark on it with your fingernail, it is soft enough. Make sure it’s no more than two feet long, no more than six inches wide, and no more than an inch thick.
    3. Find a very hard stick, about a foot long and a half an inch thick. With this one you shouldn’t be able to leave a mark on it with your fingernail, otherwise it is too soft.
    4. Kneel down over the soft wood. Rest one end of the hard stick on your thigh and the other end on the wood. It should slant either right or left (depending on whether you are right or left-handed) at about a 45-degree angle.
    5. Get a good grip on the stick and start rubbing it up and down the soft wood, making sure the keep the path straight as it forms a groove. The “ploughing” should be hard and fast. This is where your stamina comes into play. Ignore your burning muscles and keep at it!
    6. Soon a pile of wood shavings will form at the end of the wood. Eventually the wood will be hot enough to ignite the wood shavings into embers.
    7. Immediately place your kindling on the embers and gently blow on it until the kindling ignites.
    8. Triumphantly shout, “Fire!”

For a video of the same process you can view this below.

The sh*# has hit the fan and the power is out. Despite all warnings, you didn’t stock up on matches, lighters, or a flint. It’s getting cold outside, and you

One common misconception about emergency preparedness is that food storage quality doesn’t matter as long as you have some food stored that will last for a long time without spoiling. Having something stored is better than nothing but it is also crucial to fill your body with nourishing ingredients during an emergency. This will keep you satisfied and in top form. Eating lesser-quality foods can leave you susceptible to sickness and diminish your mental and physical health. You are storing food to protect your family against starvation but you also want to protect them from sickness and diseases caused by harmful ingredients. Do this by knowing what goes into the food that you buy.

Long-term emergency food storage is made to last a long time. Some companies in the industry cut corners and add a variety of artificial preservatives, dyes, and flavors in order to lengthen the shelf life of their foods. If you are committing to protecting your family be sure to make the best, healthiest choices possible. When selecting your food storage beware of artificial ingredients. Here are other red flags to consider as you look around.

Avoid Hydrolyzed Yeast Extract and Similar Flavorings

Spices2[1]

Fresh Ingredients are more flavorful

Hydrolyzed yeast extract is a controversial ingredient found in many packaged foods and is common in food storage items. It is primarily used as a flavor enhancer and is created by breaking down yeast cells. The FDA classifies yeast extract as a natural ingredient but according to many health experts, yeast extract is a cheaper alternative to monosodium glutamate (MSG) and actually does contain some MSG. (1) Some health and consumer advocates say that labeling something as containing yeast extract is the way food companies avoid saying that a product contains MSG.(2)

MSG has many negative side effects. Consumption of MSG has been linked to a variety of scary conditions including headaches, numbness in the face and neck, heart palpitations, chest pain, nausea, weakness, appetite control problems, and other negative symptoms.(1)  Whether or not you have had a sensitivity to MSG in the past, it is best to avoid this ingredient in your storage food altogether.

For a good list of other additives that are linked to MSG check out the following article:

“Hidden Sources of MSG.” Truth in Labeling. Truth in Labeling Campaign

Consider GMO-Free Foods

When looking for emergency food it is equally important that the ingredients are free from genetically modified organisms or labeled GMO-free. The use of genetically modified foods is another controversial topic in the world of food and nutrition. It is best to avoid GMOs while the debate is still going on, particularly if this is a long-term purchase.

Genetically modified organisms are created by taking the genetic material of one organism and inserting it into the genetic code of another. This bold practice is becoming more and more widespread despite being widely acknowledged as a risky and understudied process. Many experts opposed to genetically modified foods argue that there has not been adequate testing on human subjects. Despite the increasing insertion of GMO ingredients into mainstream foods, there are still too many unknowns about the health effects these human-engineered foods could have. Some health groups like the Center for Food Safety have gone so far as to claim that genetically modified foods can increase the likelihood of antibiotic resistance, immune suppression, and even cancer.(3) Why put your family at risk with untested ingredients when you will have other worries to contend with in a survival situation?

Because the use of GMOs in manufactured foods is becoming such a widespread practice, very few emergency foods are free of GMO ingredients. However, there are a few companies that produce foods that are GMO-free. If this is an issue that is important to you, be certain that the emergency food is certified GMO-free. Some companies may claim to be free of genetically modified ingredients but without the certification have no proof.

Other Health Considerations

Other health considerations include checking amounts of cholesterol, trans fat, and sodium in the food storage. Packaged foods often have high amounts of these three things and emergency foods are no exception. High-quality emergency food brands limit cholesterol, trans fat, and sodium amounts but you need to read the labels to be sure.

Make Sure Your Food Storage Ingredients Will Stand The Test Of Time

Emergency food should be able to last and still be healthful. As you look for the right emergency food be aware that some food storage companies haven’t done their research on ingredients that spoil versus those that keep. As a result, they incorporate ingredients into their emergency food that go bad after a relatively short period of time. Canola oil, for example, will only last a year before it goes rancid, thus spoiling whatever food storage in which it is used. Novice food companies use canola oil in their granola to make the clusters stick together and uneducated food buyers end up with a worthless product after just a year.

Bottom line: it’s important to know what goes into your storage food. Take the time to do some research on the food you are buying; be sure it will contribute to the health and well-being of you and your family in a disaster.

Taste Matters

flourish

Taste Matters

You have made your checklist, done the research, and narrowed down your options; now it comes down to taste and appeal.

Emergency-preparedness gurus often publish lists of specific items you need to store for an emergency. One popular guideline suggests something like this: for a year’s worth of food storage each person needs 350 pounds of grain, 75 lbs of milk, 65 lbs of sugar, etc. These types of specific food guidelines can be a helpful starting point but one size does not fit all. That guideline is useless for people who have food sensitivities such as gluten or dairy intolerance. Review the first chapter of this guide and consider what is best for your family.

Regardless if you choose canned, bulk or long-term storage foods, the most important principle we stress is to store the food that your family eats the most. Having food routines that carry over from your life before will make the hard adjustments easier in a disaster situation. Buying things you don’t regularly eat just for added variety on the shelf may sound like a good idea. Unfortunately, these will likely be the last foods you reach for and if not regularly rotated could be expired, possibly ending up not usable at all.


Do you remember going to dinner at a friend’s house as a kid? Even if it was a close friend everything about the dinner seemed foreign to you from the way they folded their napkins to the saltiness of their gravy. Even the smell of their cooking was different from the dinnertime smells in your kitchen at home. Little differences like this mattered and affected your comfort level. Eating food from different cultures can sometimes put us in this situation, too. Routines, especially involving food, can be powerful in an emergency situation. Food affects the way we feel. If unfamiliar, food can make a scary situation that much worse.

Many food storage suppliers offer entrée options that are familiar favorites like macaroni and cheese, enchiladas, and various soups. Look around at all available options and make selections based on what your family eats on a regular basis.

Store Food that Tastes Good

good_spices

Store Food that Tastes Good

At first glance, taste might not seem like a very important factor when purchasing emergency food. It’s easy to justify buying food that you don’t normally eat and telling yourself, “It will be an emergency. Whether I like the food I’m eating or not will be the least of my worries.” However, making sure your food storage is appealing and tastes good to you and your family is more important than it initially seems. Having food that’s delicious and comforting, especially in an emergency situation, will bring peace of mind. Another good thing about having food storage you like is knowing that your family will eat it and it won’t go to waste.

If you have kids, buying good-tasting food is even more important. Kids are picky eaters. If it is hard to get your child to eat during a regular night at the dinner table, think of the desperation you will feel trying to get your child to eat in an emergency situation. This is not just about preferences, either. In emergency situations, kids have a particularly hard time forcing themselves to eat, especially if the food is unfamiliar. On the other hand, if the food is something your child loves, it will really help.

Food that is familiar and tastes good has the power to make us feel relaxed, comfortable, and cared for, even in stressful situations. Ideally, you would occasionally replace your regular meal with something from your storage food so that your family gets used to eating it.

Sample your Options

Since long-term food storage is made by others it is important to sample before buying. Never make a food storage purchase without first sampling one product from each of the companies you have narrowed down. Most food storage companies have small sample packs of their larger food kits available that are fairly inexpensive. Test a few and choose the ones that most suit your family’s tastes. This not only gives you an idea as to how the food will taste, but you will see what is involved in the preparation.

When ordering a sample ask the company if the food they are sending to you is the same as what is in the larger packages. Sometimes companies send out higher quality food in their sample packages to trick buyers into thinking that their food is better than it really is.

Variety is Optimal

When building your food supply, make sure to include a variety of all types of food storage. No one wants to be stuck eating canned beans for six months. Eating the same foods for a long period of time can also leave you deficient in the vitamins and minerals you normally get from a wider variety of foods…

Start collecting different entrée options and then add in “good” calorie side dishes for variety. You can also expand your food storage assortment by purchasing more canned goods, bulk items, and other supplementing items. A wide food variety is enjoyable and will also provide options should you develop an intolerance to a particular food.

Dietary Needs

If you or a family member has special dietary needs, some food storage companies offer gluten-free, dairy-free, and vegetarian options. You want to store food similar to what you regularly eat that has already been adapted to your needs.

Plan on Extra Water

When purchasing items for your storage plan consider your additional water needs. Unlike canned food, bulk foods need water for recipes and preparation; freeze-dried and dehydrated food also needs water for reconstitution. We take for granted that every day we have water immediately on hand. Figuring out how much water you use every day and calculating how much you need to store for food preparation can become overwhelming. Water storage takes up a lot of space and is hard to accomplish. Your best option is to first store what you can. We recommend that you also invest in a quality water filter and locate an alternate water source.

Don’t Forget the Treats

The idea of storing a few luxury items that you are used to having and would not like to do without is commonly overlooked. These items might be coffee, chocolate or other specialty foods that are part of your routine. Having luxury items may seem trivial but a simple treat or comfort snack will be invaluable in a survival situation. Not only will it be good for morale, but you could also use it as a bartering tool should the situation come to that. Having treats stored for an emergency benefits everyone.

Pet Considerations

For people with pets, it is a common practice to store several months’ worth of food at a time in case of emergency. Because dry pet food can go rancid relatively quickly it’s a good idea to continually rotate through your stock. Canned pet food can last as long as regular canned foods but is typically pricier than dry pet food.

Dry pet food is a good option and can be purchased in larger quantities. This pet food contains fats and oils and will spoil if not stored correctly. Dry food stored in large plastic, glass, or metal bins can help protect the food against insects but exposure to light, air, humidity, and heat speeds up the rate at which the food degrades. The fats and oils can stick to the bottom and sides of the container leaving a film that can become rancid over time. This further contaminates other bags of food added to it and could lead to a health risk for your animal.

It is best to wash and dry the container thoroughly prior to adding new food. You could also keep the dry food in its original packaging when placing it in one of these containers. Make sure to get the air out of the bag after each use and seal with a good lid. If these dry foods are unopened or stored well the shelf life can be up to one year. Always check the “best buy date” for your particular brand.  The recommended “use by” date for an open package is six weeks. If you repackage this food into food-grade buckets and add oxygen absorbers you may increase this to up to 2 years, depending on the food. Further measures must be taken to avoid spoilage for longer storage.

Legacy Premium is proud to introduce the first healthy, well-balanced dog or cat food storage with a 10-year shelf life. Our pet food storage is stored in heavy-duty Mylar pouches complete with oxygen absorbers; pouches are stored in stack-able, waterproof, and rodent-proof plastic buckets that are re-sealable and BPA-free.

Food storage can be a big purchase so take the time to figure out what foods you and your whole family will want to eat. An emergency is not the time to try new foods, nor is it the time to force your family to eat food they do not like. Food should be a comfort rather than a negative factor adding to the stress of a bad situation. Hopefully, this is food insurance that you never have to use but if you do, you want it to be good, healthy food that is enjoyable to eat.


One common misconception about emergency preparedness is that food storage quality doesn’t matter as long as you have some food stored that will last for a long time without spoiling.

If the catastrophic event you’ve been preparing for does one day come about, it will be a fearsome test of your survivalism. Like any test, some will not pass. But in this case the consequences for valued loved ones might be heart-rending. Preparation may be the answer, but whether it’s civil war, war with a foreign power, economic collapse, or social unrest, centralized money will have in one way or another been the root cause. Because whatever the event that tears apart the fabric of this country, the policies fueled by our fractional-reserve banking system-inflated fiat currency, and its petrodollar role, will certainly have taken us there.

Individual interests tend to focus in different directions than centralized ones. There are few parents, for example, who if given a choice would elect to have their children go hungry, thirsty, sick, or uneducated so they could spend money-making war with their neighbor. Their interests are naturally aligned to prioritize the well-being of their children. In a centralized government the vast majority of decision-making power does not rest with us or the people around us. In the absence of this authority decisions must by necessity follow money. And wherever the money is, whether it is in governments, corporations, or private individuals, if it is not with us it is always by definition aligned separately from our interests.

Through currency inflation, centralized money is not only then a means of extracting wealth from all who use it, but also a tool to further the interests of the centralized entities controlling it. Because money naturally moves public policy and broad societal and cultural changes in the direction in which the money flows; like an irresistible tide. There will of course be broad patterns to the directions that the flow of corporate money causes both popular culture and public policy to move in. Centralized money will flow towards policies and social changes that lead to the further centralized accumulation of money. A broad swath of society drifting with this current will move with amazing synchronicity, as if connected to invisible strings all pulled by the same hand. In the bigger picture, compared to this centralization, the leader, party, or system of government you believe you are electing may not even matter. It doesn’t have to be a conspiracy. Every act of this centralized tide of money will be in its own interest. That power will centralize this way should not be hard to imagine. It’s already doing so.

The Creature from Jekyll Island: A Second Look at the Federal Reserve

Decentralized money is a key part of any model capable of ensuring a better alignment between the decision-making process and individual interests, the alignment that best ensures a tangible focus on the well-being of the people and environment immediately around us. This may seem like a radical idea, but it was only this century that bank promissory notes (in effect a type of currency issued by each bank) gave way to the centralized Federal Reserve system.

This finer point of decentralizing cash among different currencies is often lost. Though currencies like Bitcoin may be decentralized in their technical operation, they are still single currencies that permit one individual’s stored value to be speculated away by another person who did not earn it. They are still a means of wealth extraction.

A truly decentralized system of currency carries its value around with it independently of the guarantee of any centralized entity or of any single network to uphold that value. Gold and silver are options of course, but gold is heavy and having the waiter at your favorite restaurant divide your gold bar into change is inconvenient.

Technology may soon come to the rescue, enabling individuals to store and exchange value using a sophisticated system of IOU exchange in which value is stored in terms of IOU contracts held between members of the community. Such a system would track the collective collateral of the community, using that aggregate value to back the value of an IOU between two parties so that value can be transferred to a third. This system will allow the value of the currency to be guaranteed by the community itself as a whole when trading externally. During actual physical exchange the existence of sufficient collateral to cover an IOU document could easily be verified. In the absence of a telecommunications or other network the recipient will simply choose whether or not they trust the certificate embedded into the IOU, and whether they trust the community that issued it before deciding to accept the IOU as payment in a transaction. Like we do now.

These IOUs will of course be documents you can print out. But imagine they look like dollars. And the certificate of authenticity from your community, the community guaranteeing the value of the IOU … imagine that certificate looks just like the fraud protection features of the dollar. And finally, imagine that your signature is a serial number. All of this brings us to a pretty counter-intuitive realization. The ideal system of currency is printing your own money.

Printing your own money is a key part of the peer-to-peer, decentralized, user-centric, and collaborative economy we’ll have to depend on to create stable prosperous employment that can survive a currency collapse.

How specifically will a peer-to-peer, decentralized, user-centric, and collaborative economy serve your local community?

  • Design of products for local manufacturability by unskilled workers will create a more inclusive economy.
  • Design to allow for operation in areas disconnected from any infrastructure will create more equitable development.
  • Injustice results when demographics are under served. Key requirements of massive collaboration are algorithms that harvest the collective wisdom and motivations of groups. Collaborative motivation algorithms will identify the most powerful interests of each demographic to align services with their collective interests. Collective intelligence algorithms will quickly identify the most effective services to achieve those interests for each demographic. After identifying the most effective services for each demographic, peer-to-peer, user-centric, decentralized infrastructure would enable separately customized services to be deployed regardless of infrastructure limitations, thereby best serving the needs of each individual in each demographic.
  • In addition, we need to simplify work and simplify collaboration in ways that lower the bar to involving more people in internships and other training programs, as well as simplify the deployment of business models for collaborations that allow participants to earn a living wage. This will benefit all demographics through, for example, making education more effective, cost efficient, and accessible, through the creation of job opportunities, and through increased access to services like health care.

With this blueprint, independent communities can quickly build all the services they need in a way that’s customized directly for them, and that prioritizes their own family and loved ones rather than the interests of centralized bureaucracy that undermines their needs.

In this article I’ve laid out a vision for taking back control of a country that’s gone way off course. For me, this vision was one that demanded to be shared. As part of the audience who understands the magnitude of what may be coming, if this vision inspires you, take the opportunity to share and inspire others as well. Some of them just might be the makers who dream big enough to build it. The blueprint is there. The next step is yours.

If the catastrophic event you’ve been preparing for does one day come about, it will be a fearsome test of your survivalism. Like any test, some will not pass. But

Bug In or Bug Out?

For me my first choice is a bug in at home though I am not sold on it as a definite concept. For this reason I have one prime bug out location (BOL) at a cottage and two secondary ones at friends’ homes. This is really a personal choice. For all those that say you are 100% dead staying at home in SHTF there are more saying you will 100% die in the woods. The truth is between the two extremes but for me I need a roof and walls so I have them at home and at the cottage. If you bug in will it work long-term? If you bug out can you get there and can you be assured of survival on arrival?

The Bug Out at the Primary Residence or Your Primary Bug Out Location (BOL)

If you do not have a wood fire and close, dense forests then I’d not even consider this. Same is required for several local water sources. Having a great knowledge of the neighborhood helps even if the neighbors are literally a knife throw away! For me I keep them both equally stocked as I am still figuring out the pros and cons of each and likely will be doing so until, and if, the actual SHTF occurs. “Two is one, one is none” seems a good rule except for BOL where many people have one main choice. So rather than having one, either bug in it home or bug out then in at a BOL, I have two. Costs more of course but if you are really preparing for the end of civilization it seems a better idea to me than focusing on only one main alternative.

Food

You should have a year’s supply of food stored in the house and the same buried nearby that you can access even if you cannot use your house. That would be a minimum for a SHTF scenario. As you go beyond this (I’d aim for twenty years supply. I have two at present) keep a year’s worth in the home or BOL and the rest in ground cached nearby in multiple locations but accessible if you cannot safely enter the home.

If you are focusing on preparing for a Winter storm, train derailment, etc. then you are preparing for something other than the end of civilization. I always prepare for the worst possible case as it makes the more likely events very easy to navigate through. This should cost you about a thousand dollars. Buy Mylar bags and oxygen absorbers. Buy strong food grade buckets and consider the gamma lids for all of them but at least four of them. Unscrew the middle, empty, add a plastic bag, and you have a toilet!

groceries

You should have a year’s supply of food stored in the house.

Buy oats, flour, pastas, sugar, extra virgin coconut oil, rice, beans, and grains (each bucket has most of these as you do not have only one or two types of food in a bucket. If you have to grab a couple and run at least you have a bit of variety) in bulk and freeze them for 72 hours to kill the critters and then decant into one gallon or smaller Mylar bags. Add in yeast and salt and spices to every bucket and you are good to go. Have a good mix of types rather than just white rice and pinto beans (these are a great staple but have a variety available).

On average each five gallon bucket is approximately one month’s food for one person but with decent foraging and careful use you can stretch this to two months. You will lose weight but so is everyone else. They stack well but are obvious so plan where you keep them carefully. Mine has asphalt added to their outside for the driveway sealing I’m never going to do. Consider the Mylar bags only in your attic placed so they cannot be seen if anyone looks into the space if the attic is not a room. Consider tins and cans stocked in under the bed containers placed under the stairs and well covered by the usual junk people have. I have a huge amount of tins and jars padded by blankets in the bottoms of boxes filled with old cassette and video tapes. If able put tins and bottles inside wall spaces which I have not as yet done.

I do rotate food but not the long-term stores. I have about ten cardboard buckets filled with a variety of everyday foods we normally eat and replace the filled pantry from these and then repurchase. This adds up quickly and we believe tins do not really expire if not used before their expiry dates.

Tools for Survival

product

BioLite Wood Burning Campstove – Powers most USB-chargeable devices including smartphones

A full range of gardening tools and prepping supplies is an absolute requirement as is seeds. Seeds go off so get the expensive Mylar sealed ones but spend only $10-20 on these a year. Buy a few every year and store carefully. You cannot have too many nor can you wait until SHTF to learn gardening. It is a lot of fun and not as hard as I figured it would be before I started out. Consider raised garden boxes and have lots of tarps and nails to cover these if the SHTF is radiological. Have poles and clear plastic to construct a greenhouse if, like me, you do not need one at present. Learn how to harvest seeds now and not in SHTF. I have mixed success with beans and amaranth and incredible success with most herbs. I am still learning but it is easy and fun once you get into it. I absolutely will not be gardening until after the first Winter post SHTF. This would be making myself a target.

Have three plans to cook food and make sure all three are not dependent on modern civilization. I have a wood house fire, a BioLite, and a solar cooker. I also have propane for those none long-term events when I don’t really want to cook in the living room. Have at least two good quality cast iron pans and the ability to boil water in 5-10 pint amounts on an open flame.

Have good quality foraging and wilderness skills books. Open these up frequently and look at them and try to use them. Have a large store of plastic bags and bottles. Learn how to boil can as a minimum and have a plan to dehydrate via solar large quantities of fruits and vegetables. Your pre-collapse buckets will eventually run out and your job is to use them as little as possible for as long as possible. Have some ability and knowledge to harvest tree sap for drinking and for boiling down into sugars if you live in a suitable area. Know how to harvest bark and cook it. It is tasty and full of sugars. Again do not wait until SHTF to find the axe is rubbish for this or you do not know how to peel it correctly from a living tree.

For me livestock is not possible for various reasons but if you can you should explore this and make sure you can feed them well in SHTF even if the stores never open again. Fishing rods, lines, hooks, and nets are set up at home and the cottage for us and we know how to smoke them (the fish I mean!).

If you do not sprout seeds already may I suggest you start to do so? It is easy, healthy, and tasty. Again they go off over time so buy yearly but keep all of them. Some is better than none. They also turn into plants and require very simple equipment you should have now rather than try to improvise in SHTF.

Water

berkeyfilter

Berkey Filters are excellent Prepper resources.

Have at least two sources of water within easy walking range. Have a wheel barrow and buckets to transport it to cut down on the time and effort this part of your new life will take. If this is not possible you need to store thousands of gallons of water not a few cases of bottled water.

Have the ability to clean and use the water using various means. Initially I am using stored water and then the Berkey Water Filter. This is expensive but I do feel a good Berkey with four black and four white filters at my home are well worth the investment. We used it in a previous home for all our water but here it is wrapped up in a plastic tote waiting for the day I need it again. Next year the BOL gets one as well as it is an essential and essentials should work very well, for years, and be ready to use at your destination not carried there. Tablets and portable filter systems are for traveling only in my opinion. I have a lot of them so I can use them for daily living if the need arises.

Good quality rain barrels, tarps, and food grade plastic pipes should be readily available to convert rain into water for drinking, bathing, and the garden. Again I have these but they are not set up as I am not keen on screaming “prepper” to anyone who walks by the house or cottage. You should also have a large supply of large clear soda pop bottles. I do not use the stuff myself but collect them from others who do for “starting my plants”. Prefilter, lie in the sun, and consume in a couple of days. SODIS water treatment is clearly explained on the web and is an easy back up plan to provide large quantities of water if the Berkley fails.

Heating

As I said I’d not consider staying anywhere without wood heating but I live near lots of woods and in a climate that gets a bit cold in the Winter. Cold enough to freeze your nose hairs! I have a decent tent system and on top of the mattress in front of the fire it will work great especially with the sleeping system we have. I have not duplicated this at the cottage as I’d rather travel with the ability to be warm but I see the need to spend the cash at some point in the near future.

men

Wood-stoves in Northern climates will save lives in a SHTF event.

I have lots of black bags to seal the windows (see Security) and lots of cheap survival blankets to put up for heat reflection and clear plastic for the doorways. It is my number one concern as death will come swiftly to the unheated up here. In the Summer (yes it does get hot in Canada) the basement of the home stays cool and the cottage stays cool as it is on a rock system by a river.

We have decent Winter clothing in both places and SHTF clothing ready to go in the basement. I went with merino wool for the base layers but have cheaper layers to wick if I feel the need to change clothes in the Winter. I plan on getting smelly in SHTF (see Security) initially and during the Winter a weekly spot wash is all I can see doing.

Power

I would love to put up solar panels at the home and the cottage but until more people do it is just a big, fat target on me. The one home in our neighborhood with solar is not defensible and I cannot see how they expect to stay there if armed and cold people show up. One day perhaps when 25% of the homes do this I will but until then it is simply not worth the risk.

I plan to have no lights at night. Up at dawn, work hard, sleep at night when not on watch from day one in SHTF. For millennia that was the human experience and I see clinging to our current lifestyle in any form in SHTF as being risky. I can use solar lights to generate light that is brighter than the current house lights but that is for emergencies only. I am not even sure if I’d risk it then but I have it and it works. I use a few small solar panels that easily get enough power for this when set up on the 300 square foot balcony and the Biolite stove produces a bit.

I am flirting with a gas generator but for SHTF I cannot see the use. We no longer have a sump pump in the basement so really it would be for the fridge and freezer in a temporary Summer blackout.

Transportation

Our car is the bugout vehicle of choice and we keep 40 liters of gas on hand all the time but if I cannot use it then we have decent bikes with small panniers. Walking would be our main transport method so the wheel barrow is an essential bit of kit as well as good quality back packs. Other than the local area I am not planning traveling much at all in SHTF. Kayaks at the cottage would be helpful in the warmer months if a distance travel was needed but I’d not risk it without a clear destination and honestly in SHTF my local area will be the extent of my concerns.

Security

Guns run out of ammo and using them might not be a good idea if people fire back. The noise would also likely attract a lot of unwanted attention. Plus in Canada it is not as easy to equip yourself like GI Joe as it is in our neighbor to the south. I also think it creates a false sense of security but that is just my opinion. If I find a gun in SHTF I’ll carry it and use it. I have some plans on how to do that but it is not really a legal thing.

The home is defended mainly by passive means. Heavy duty iron fencing and another six-foot wooden one going up in the Spring. Having dogs means this sort of fencing is actually above suspicion and welcomed by the neighbors. Barb wire and solar motion lights go up in SHTF as I am not that sociable at the best of times. Doors, windows, and frames have the fixes easily done and available on the web but the wood pile by the garage is basically entering the ground floor in early SHTF. Stacked high and deep on tarps it won’t allow anyone to get in. We can leave the house by the ladder on the balcony as and when we feel it is safe to do so. It does mean I can be burned out but the house is concrete and looks small and uninviting compared to the neighborhood which are wood and much larger. Passive alarms on any entry point and wooden hurricane boards are further things that go up in SHTF.

Operation

The cottage goes for not looking inhabited and the already ransacked method. As a nurse I have a collection of body bags and a few of these around the place with rotting meat inside would likely put off most people along with the danger contamination signs and tape.

Both places have food and supplies in ground away from them in case of loss of the building (fire or intruders) and I have plans to evacuate and retake both places. This is situational and has some legal issues so I am not discussing it here but stay and fight to me seems more risky than running from the determined and taking it back later on. I’d definitely allow any intruders who have driven me from the place to find a large amount of alcohol that is poorly hidden. As hard as it might be to not drink it myself in SHTF I want to make sure a large group of intruders can get well drunk in this circumstance.

Both places have lots of black heavy-duty garbage bags and duct tape. All doors and windows get blacked out but, again, I am not planning to use light sources at night. In the first few months of SHTF I am also not planning to have the fires going at all and later on only at night. If it hits in the Winter this will have to change but we can stay warm enough without a fire for a week or more. Making cooking smells or showing smoke is just not worth it in the early phase of SHTF and we have planned food, clothing, and sleeping accordingly. Use a wood fire at night if possible and have no daytime smoke.

Active methods of security are bows and lots of arrows. The home entry points are blocked so anyone determined enough to scale the 9-12 foot balcony might be asked politely to not do so. We also have a lot of throwing knives and attached to long sticks, they can be useful to spear fish or any other thing dumb enough to try to get into the home. Classic historical methods of deterring intruders from your ‘castle’ and they work silently. A well-aimed piece of fire wood is also off-putting. One thing I have determined that intruders are dealt with in ways that mean they cannot every return to try again.

In both areas we have good relations with our neighbors and plan to help them out a bit depending on the SHTF. We know them and their habits and have studied them carefully for a few years. We absolutely have not revealed ourselves as preppers nor would do so in SHTF. I am hoping for a Winter event so this aspect dies off rapidly but you need to have neighbors who are allies not enemies. In a bad SHTF they are all enemies so mainly we plan to hide out and defend as best we can.

Going outside will be carefully done. The radios are only for emergency use and we would only use planned routes and times of travel to avoid people. Having worked twelve-hour nights for years it will be no issue going outside at 3am and being back by 5am. Each outside trip will be in the same outer clothes each time and no these will never get laundered. Hair and beards will grow as if we cannot heat water to clean them. After a couple of weeks your hair does not really need washing anyhow (yes we tried that!). Food intake will be rationed so we will lose weight except the day before any planned heavy work or travel when we will have a decent 4000-5000 Calorie day. This will also be a Sunday thing for us but mainly 1500-2000 calories a day the rest of the time. Fat people will stand out very quickly in SHTF.

Have one in ground food cache and two in home ones that are okay but you would happily surrender to an intruder if over powered. Giving them something very reluctantly might save you or not but is worth a try. Getting a week’s worth by emptying your “only” stores should make them happy. In a slowly evolving SHTF we will ask for food and water. We will line up for it and use anything supplied locally. Not doing so is a big red flag that you do not need the help.
After the first year we plan to advertise our health care skills if the area is stable and generally join in with whatever community is there. As both towns are old ones with a long history of water trade and lumbering I cannot see someone not starting a community in them once the population has again dropped to a normal historical size for the terrain. Skills are more important than equipment and we both have great health care skills. We also have a lot of equipment and know how to replace it. People will need to give birth and have bones fixed and cuts sutured.

Obviously offering these services will only be done when our community has sorted itself out without our help. I have no desire to be the leader nor am I willing to risk our preps before stability has occurred. I also have no desire to join a prepping community as I cannot see myself being part of either a paramilitary or hippy organization. Maybe I’ll meet some eventually that seem more suitable and I would happily store food and supplies in their BOL but I’d rather be a lone wolf than submit to some else’s authority however benign.

Location

We carefully choose our home and cottage. Both are out of the obvious way especially the cottage and both have large garden areas and plentiful trees and water very nearby. Even this step seems not enough and we are floating the idea of relocating a lot more northwards when we retire in 5-6 years. The cottage can be easily sealed off from vehicle travel and should be the primary bug in location for us. What puts me off this is knowing that the locals will drive around on ATVs with guns for a while after SHTF has happened looting all the cottage places even those not on lakes and remote. The cottage supplies are mainly buried except for old and dirty tools that work great. I see it as a Summer place and the home as the Winter place. I’m actually planning to loot abandoned lake cottages myself by kayak or snow shoe in early SHTF if at the cottage.

Walk everywhere around your locations and make careful notes as to where all water sources are including swimming pools. Note all fruit trees and clusters of wild edibles. Over time note when these are ready for harvest and learn how to store and process them. For us in Canada it is vital we know our black walnuts and acorns. The protein and fats from them is utterly essential to have.

Know all the roads and trails and rail links. Where are the out-of-town food warehouses and how can you get to them easily? If you have local bus and train services where do they normal park when not in use? Diesel is always a useful addition and our local trains have lots of spades, axes, and other goodies stored in them. Police, Fire, and Ambulance buildings should be known and considered for entry. Even if ransacked already likely you can find useful things inside.

Future

I’d like to be able to install solar and wind power after an SHTF but the cost is too much for me at present so I am looking at ways to do so from scavenging materials. Overall prepping is a hobby for me and I am hoping it never becomes my life but if it does then I will do what I can in the now to help my loved ones survive and a new community arise.

Bug In or Bug Out? For me my first choice is a bug in at home though I am not sold on it as a definite concept. For this reason I