Home2021March (Page 2)

Imagine women giving birth centuries ago or imagine you suffer from some critical injury or serious ailment. Centuries ago, there was not the concept of technology and there certainly weren’t the advances in medical science we have today. Your best option would be to call the tribal medicine doctor or shaman. Someone who knew how to use a leaf as a bandage and how to break and pull a tooth out with a stone. Could you survive? Could you stay healthy? Could you even live long enough to see the next sunrise? Thinking of those types of situations now, it hardly seems possible, but we humans are tenacious and if it was impossible,  then how did mankind make it this far? If modern medicines and advances in science are the only reason we are combating serious diseases now, then how did we make it this far?

The answer to this question is simple – Mother Nature has her own secrets.  There are many who fear that humans won’t be able to survive without the conveniences of modern medicine. Granted, we won’t be able to save life on the scale that we can now, but there are natural options.  Humans made it pretty far along the span of history without any complicated and advanced sciences. For sure there is something much greater reserved in nature. Today we will discuss 10 must-have natural remedies that will offer comfort and healing when the possibility of modern medicine is gone.

Apple Cider Vinegar

Everything from stomach related disorders, to boosting vitality, to counteracting diseases. Taken before supper, it even assists with weight reduction! Likewise, the vinegar is one of those ‘100 uses’ wonder items. The benefits of apple cider vinegar come from its powerful healing compounds, which include acetic acid, potassium, magnesium, probiotics, and enzymes.

Honey

Yes, the gift of God, the food of heaven, honey is one of those natural remedies that you need to have around in your house. The food of God, honey is both good for medicinal purpose and equally serves as a dessert. It includes vitamins, trace enzymes, amino acids, and minerals like calcium, iron, sodium chloride, magnesium, phosphate, and potassium.

Garlic

Consuming garlic on a daily basis (in food or raw) helps to lower cholesterol levels because of the anti-oxidant properties of Allicin. It is also immensely beneficial to regulate blood pressure and blood sugar levels

Coconut Oil

Coconut milk and coconut oil on wooden table

To date, there are over 1,500 studies proving coconut oil to be one of the healthiest foods on the planet. Coconut oil benefits and uses go beyond what most people realize. Research has finally uncovered the secrets to this amazing fruit; namely healthy fats called medium-chain fatty acids (MCFAs), these unique fats include: Caprylic acid, Lauric acid, and Capric acid

Hydrogen Peroxide

A slightly different solution, hydrogen peroxide is good for skincare and nurturing. We’re talking about 35% FOOD grade, which is NOT the same as what you normally purchase. The 35% grade can actually burn your skin if you put too much in one spot. But you can dilute a drop or so depending upon the requirement in a glass of water and you have a prophylaxis or potential cure.

Flax

Chia seeds are viewed as the ideal natural nourishment since they contain an excessive number of advantages to list here. More to it, who might trust that what gives off an impression of being simply one more “weed” with entirely blue blooms would be a characteristic of well-being.

Steam Water – Distilled Water

The most important health benefit distilled water offers is the elimination of waterborne contaminants that may potentially be found in water. Drinking contaminated water is one of the fastest ways to spread disease, toxic metals, and industrial pollutants.

Red Chili

Red chili pepper

Looking for immediate skincare of for some nerve pain relief, the red chili is your spicy go-to product. Beware heavy eating can bring about some serious trouble. Proceed with caution.

Bergamot

Bergamot is also a good source of vitamins and is said to have super anti-oxidant and other unique properties that enhance well-being and promote anti-aging. Exemplified by all the dancing and bike riding you see 100-year-old Italians doing.

Aloe Vera

This is viewed as an attempted and demonstrated must have mending plant that as a rule is related to skin medicines, particularly consumes, yet it is much more flexible than simply that. Make ointments and medicine from a mix of coconut oil, aloe, and nectar for astounding skin revival properties.


In her work entitled The Forgotten Power of Plants, Dr. Nicole Apelian describes in more than 300-pages the most powerful medicinal plants and step-by-step instructions on how to turn them into powerful remedies.

Check out the off-grid recipe section that will give you the best natural alternatives to every pill in your medicine cabinet.

Imagine women giving birth centuries ago or imagine you suffer from some critical injury or serious ailment. Centuries ago, there was not the concept of technology and there certainly weren’t

We buy a lot of things to prepare for the unexpected…or expected, that SHTF will be at our doorstep one day. For some, this is further in time, for others comes every day with floods, hurricanes, bad weather conditions and much more.

You may have in mind items for when the SHTF like duct tape, canned food, survival knives, but there is one item you might consider including in your prepper list: the trash can.

Why Trash Cans?

You already use trash cans. They are everywhere (inside and outside) which make them easy to access in an emergency. Trash cans are a heavy-duty item; they stand up to frequent use and they’re durable as hell. Even indoor cans, like those you’d use in an office, have potential uses you probably haven’t considered.

Here are just a few ways you can use trash cans when the grid goes down.

1: Collect Rain Water in Trash Cans

In an emergency, a trash can may be your best bet if you are running out of stored water. You can turn your trash bin, perhaps used to store other prepping supplies up to that point, into a rain barrel. This project requires two holes cut at the top and bottom for the downspout and faucet, PVC piping to construct a downspout, gasket fittings, and tubing for the faucet. Fittings may be secured with washers and sealed with silicone caulking.

My recycling bin is going into action immediately as a rain barrel if the grid goes down. After a thorough cleaning of course.

Keep all needed items with a compass saw for cutting the holes without a power drill and rain barrel-making instructions in a Ziploc bag near your trash can. Rainwater should always be treated before consumption, so figure out ahead of time if you are going to use chlorine, filters, or boiling methods to purify your drinking water.

2: Make a Super-Sized Rocket Stove

Converting a large metal trash can into a rocket stove is fairly straightforward. Cut a hole at the bottom of the trash can to accommodate a stovepipe made of 6” elbow piping; the stovepipe will need to be constructed as a double-walled chimney with a trim ring and an extra section of piping. The stovepipe will fit into the hole cut toward the bottom with its top trimmed below the top of the garbage can. The pipe should be secured with dowels and nuts arranged in a wagon wheel pattern to stabilize it. The pipe is then insulated with vermiculite poured between it and the sides of the trash can.

You will need to lay a grate across the top for a cooking surface. Load the bottom of the stovepipe with wood and light. Now you’re ready to boil water and cook food on a stove so efficient it requires very little wood to produce the necessary amount of heat.

3: Dispose of Human Waste

A smaller trashcan can work as a makeshift toilet. This is a simple solution in situations where human waste needs to be carried away for disposal. Line your trashcan with a double layer of garbage bags. Place a couple of 2x4s over the rim to create a seat. Waste can then be carried away and the trash bags replaced as needed.


4: Grow Food

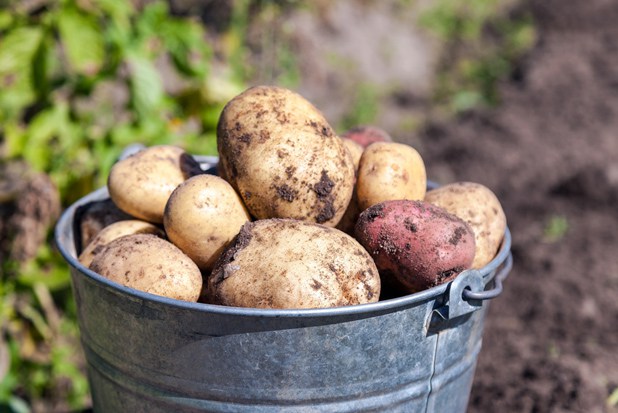
Trash cans can be great tools for growing plants. A favorite trick of home gardeners everywhere: using a trash can to grow potatoes. Potatoes require large amounts of earth heaped on top of growing plants, and a large trash can (think 20 to 32 gallons) is a great way to keep soil in place as the potato plants grow upward. Either drill holes in the bottom for drainage or just cut the entire bottom off of a plastic trash can.

Potatoes don’t have to grow in the ground. You can use an old trash can to create a potato growing container

Start the potatoes in about 10 inches of soil and add more for every 10 inches or so of growth. The best part is the trash can is easily cleaned and used for a new crop as soon as the first is harvested.

5: Shovel Snow

That small trashcan in your bathroom or office can become a snow shovel. Shoveling with a small can certainly won’t be easy on your back, but a trash can may also work to move soil and sand. Just make sure the can is sturdy enough to hold up under the weight of snow before you start using it to dig yourself out.

6: Faraday Cage

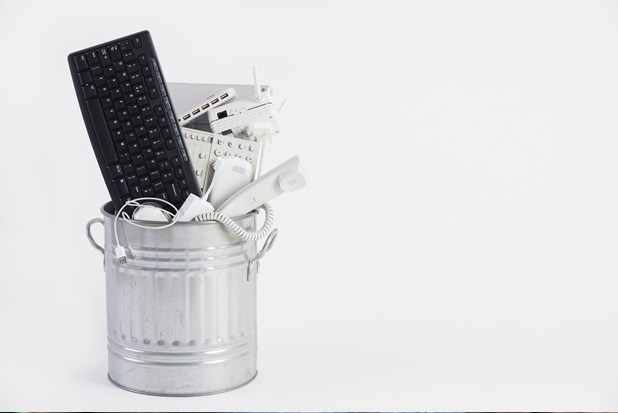
A Faraday Cage is essential for keeping your small electronics safe from an EMP (electromagnetic pulse), and you can make one using a steel trash can. Wrap each item in cloth, then wrap in three layers of foil. Place the item in a box and wrap the box in two layers of foil. Store off the ground once wrapped.

Trash cans can be used for simple Faraday cages.

Completely line your trash can with cardboard and seal with its tight-fitting lid. For this protective system to work there needs to be a clear separation between both the layers of foil and between the foil and the trash can metal. Steel trash cans are sold in a variety of sizes, so you can select the one that works best with the number of electronics you are trying to keep safe.

7: Hold Emergency Supplies

Trash cans make useful storage containers for prepping supplies. They come in a variety of sizes with all kinds of lids and handles. You can even select cans in different colors to better organize your supplies. Larger trash cans may be used to store emergency supplies for a whole family– just throw it into the bed of your truck for hauling supplies the moment you need to. Then you can repurpose the trash can for any of the above ideas.

Think Creatively, Be Prepared

A trash can is useful for much more than holding garbage – it can be an integral part of how you collect water, cook food, dispose of waste, grow food, or protect your electronics. Of course, these are just a few of the ways your common trash can fits into survival plans:

We buy a lot of things to prepare for the unexpected…or expected, that SHTF will be at our doorstep one day. For some, this is further in time, for others

A critical prep that you have to plan for including in your bug out bag is water. When I first got into prepping, I had people saying that they would carry all of the water they needed in their bug out bags. If you figure 3 gallons (1 gallon per person per day), that would simply not be wise or possible for most people for very long. Then I started seeing people say they would pack 3 liters of water. That’s better, but 3 big plastic bottles is almost 7 pounds, not to mention you must have space for them. Not the end of the world, but not insignificant either.

One of the ideas I try to promote is to watch the weight on your bug out bags and not overload them. I recommend this for a lot of really simple reasons. If your Bug Out Bag is too heavy, it will hurt eventually. It might not hurt when you first take off walking, but it will eventually. In addition to rubbing you raw and potentially causing injury, you will be more off-balance and less able to quickly move. If you can’t move out of danger quickly enough, that bug out bag could get you killed. The better idea is to pack your bug out bag in a way that is as light as possible while still maintaining the essentials you need to survive for up to 72 hours. Don’t go minimalistic for the sake of making the scales proud, but you should look carefully at the overall weight.

Water, Food and ammo, possibly a tent are all great places to shed pounds from your bug out bag and today we are focusing on water. I have personally tried a few different water filtration methods and wanted to highlight the pluses and minuses for you today on Final Prepper as I see them. Hopefully this information you will make sure the bug out bag water filtration options you choose will work well for you if you ever need to use them.

In addition to being less heavy than simply carrying your water on you at all times, these bug out bag water filtration options will give you increased range and capabilities. Instead of being limited to only the water you are able to carry, it is easy to filter an extra liter or more from sources along your route. All the while, ensuring that the water you are drinking isn’t going to make you sick.

MSR MiniWorks EX Water Filter

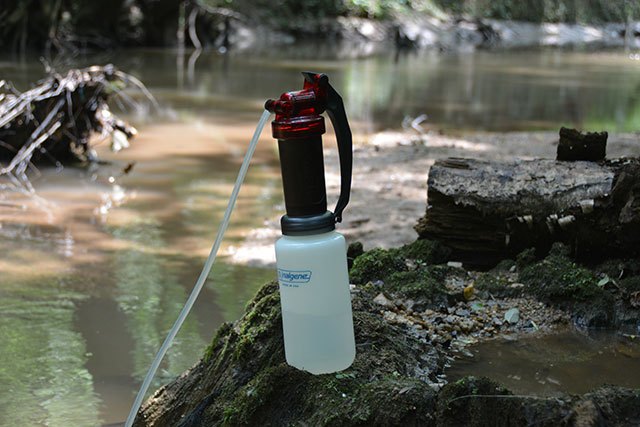
This first filter I tested is one I have owned for years and up until recently used on my backpacking trips. The MSR MiniWorks EX is a great water filter that is activated by a manual pump. You simply connect the hose, stick that into the water and screw your Nalgene bottle or dromedary bag onto the bottom of the filter and start pumping. In just a few minutes the water from your  source will be pressed through the filtration system and with a little time, you will have a full bottle of clean water to drink. Filtering a standard Nalgene bottle like below probably took 3-4 minutes.

msrminiworksfilter

The MSR MiniWorks EX was my first backpacking water filtration. We loved it when we had to depend on it in the woods.

I would take these down to the river and fill up everyone’s water bottle as well as two 48 ounce bladders we had when we stopped. The bladders were to refill bottles and went toward coffee and reconstituting our freeze-dried food.

So, good and bad about this filter. First off, I like the fact that this is pretty simple to use and you don’t have to get down into the water to collect anything. The water tastes great and the pump has stood the test of time for the most part. I did have one pump stop working on my wife when we were on a backpacking trip. Fortunately, I had two filters so we had some redundancy built-in. Pumping does take you a little while and the pump isn’t the lightest or cheapest option. Once you return from your trip you need to clean the filter element, usually with a scrubbing pad to get the gunk off of it and let everything dry completely for a few days before you put it away.

MSR MiniWorks Features

  • Ceramic/carbon Marathon™ EX element effectively removes bacteria and protozoa including giardia and cryptosporidia
  • Also removes unpleasant tastes and odors caused by organic compounds, such as iodine, chlorine and pesticides
  • Filter can be cleaned over and over for maximum field life with no tools required
  • Bottom screws onto an MSR Dromedary® Bag or Nalgene® water bottle for easy operation (both sold separately)
  • Easy dis-assembly lets you troubleshoot and maintain the MSR MiniWorks EX filter in the field

Weight: 14.6 ounces

Cost: $84 on Amazon.com

I also found this excellent review of the MSR MiniWorks EX from Black Owl Outdoors for those who like to watch videos.

Sawyer Mini

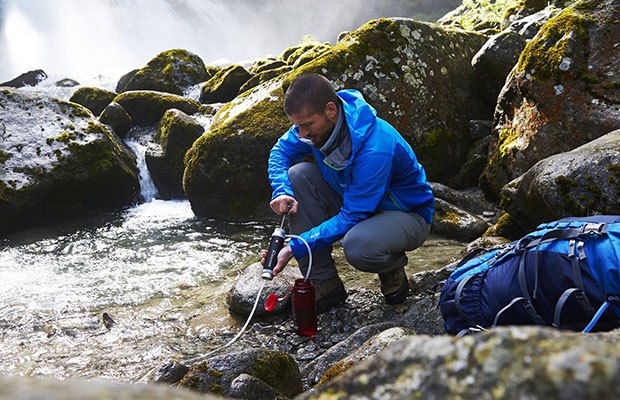
When I first tried out the Sawyer Mini I thought this was the best invention in the world at least from the standpoint of water filtration options for preppers. The filter was extremely lightweight, compact and could filter hundreds of thousands of gallons. The Sawyer Mini could be used as a straw to drink from a water bottle like the life straw or from the included squeeze bag that comes with it.

The cost, low-weight and ability to filter so much water is an incredible advantage, but using either the squeeze bag or a standard water bottle has some drawbacks in my opinion. You are still only filtering on demand unless you squeeze the water into another container and that isn’t always the most practical. One of the reasons I don’t think the LifeStraw is the best option for me in all cases.

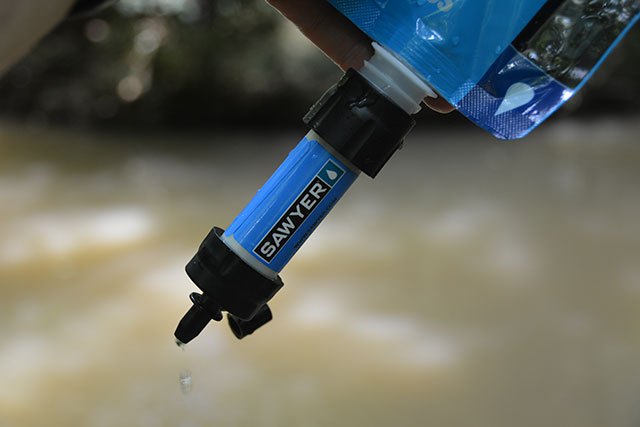
sawyerwaterfilter

You can use the included squeeze bag to collect water and the Sawyer will make it safe to drink.

Sawyer Mini Features

  • Hollow-fiber membrane offers a high flow rate; sip on the Mini like a straw and it filters the water while it’s on the way to your mouth
  • Filter will also fit the threads on the included Sawyer 16 fl. oz. reusable pouch that you can fill at a lake or stream and then use to squeeze water through the filter
  • 0.1-micron filter physically removes 99.99999% of all bacteria, such as salmonella, cholera and E.coli; removes 99.9999% of all protozoa, such as giardia and cryptosporidium
  • Filter will also fit the threads on most bottles of water that you buy at a grocery store; can also be used as an inline filter (adapters and hoses not included)

Weight: 2 ounces

Cost: $20 on Amazon.com

I also found this review for perspective from Preparedmind 101

Polar Pure – Crystal Iodine Water Treatment

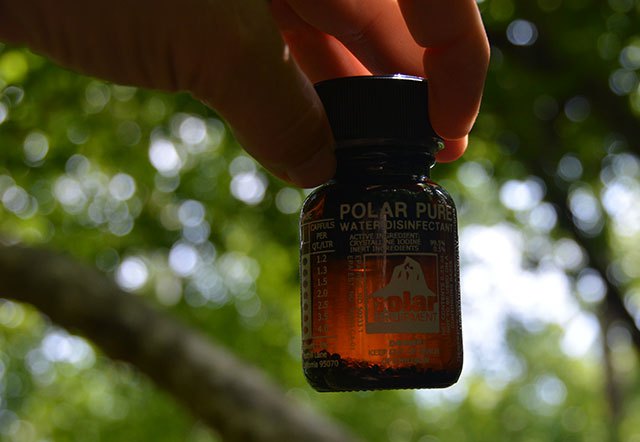
The third option I tried is Polar Pure. Polar Pure is a Crystal Iodine water treatment, not a filter. The bottle holds actual iodine crystals you might be able to see in the photo below. The process is for you to fill the bottle with water and let this sit for 1 hour. At the end of an hour you have something like concentrated iodine brine that you can use make almost any water safe to drink. There are simple to follow instructions on the bottle and even a hand-dandy gauge to tell you how many capfuls of the solution your water will need to be safe. The number depends upon the temperature of the water.

polarpure

Polar Pure uses iodine crystals to disinfect water.

You pour the recommended capfuls into your 1 liter water bottle and let it stand for 20 minutes before drinking. When you are done, just fill the bottle up with water again and it will be ready for your next treatment in another hour. This relatively small bottle will last for up to 2,000 liters of water, although I don’t know who would count them. When the iodine crystals are gone, so is your ability to use this to make your water safe.

Iodine, unlike the micron water filters above can kill viruses. Giardia, mentioned above is caught by the water filters, but if you have something like hepatitis or polio in the water, the simple filtration method above won’t work. Now, the question becomes, do you have to worry about viruses in the water you are drinking or just organisms that can make you violently ill?

The Polar Pure bottle is one that I would carry with me as an extreme back up for highly questionable water. The science is good on making your water safe. Iodine has been used for a very long time, but the bottle is glass. You could be in trouble if this is all you have and it is broken. Additionally, iodine will make your water safe, but it won’t filter it out so if you pour yourself a big cup of slightly brown pond water and treat it with iodine, it will be perfectly safe for drinking – brown pond water. Filtering your water first through a handkerchief or something like coffee filters at a minimum would be better. Some people use Polar Pure plus another filter for the ultimate in safe water.

Weight: 5 ounces

Cost: $20 on Amazon.com

For those who want to see the polar pure in action, there is a good video from Provident-Living-Today.com

Platypus 2L GravityWorks Filter

The last item I tried out for my bug out bag water filtration decision process was a relatively new purchase. I had heard about the Platypus GravityWorks Filter system from one of the readers on Final Prepper when I was initially looking at the Sawyer answer to the same functionality. The Platypus was almost half the price so I decided to give this a try because it looked like the perfect solution to me.

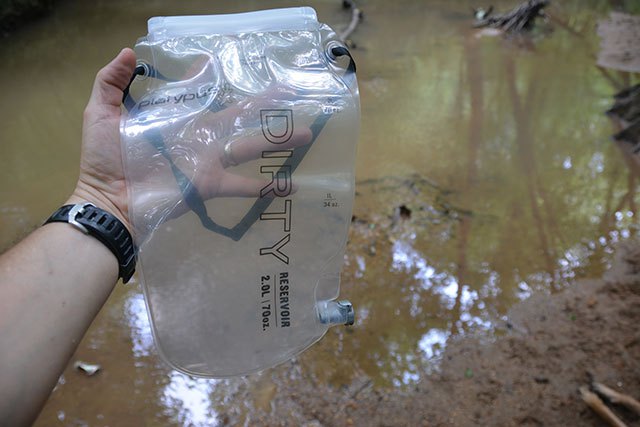
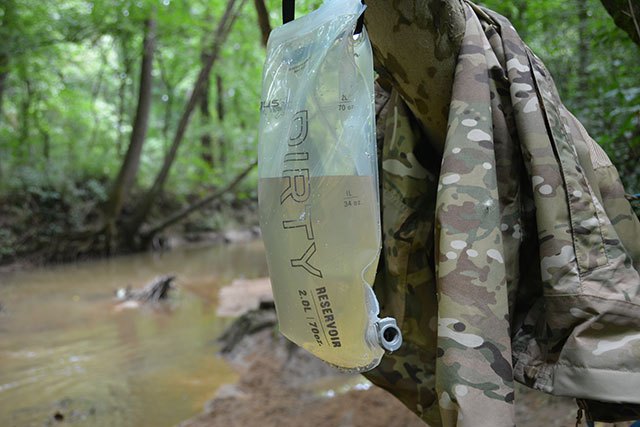
platypusdirty

Keeping the bags separated is easy with clear labels.

The Platypus 2L GravityWorks Filter is a two bag system. You have one bag for water collection and it is very simply labeled “Dirty”. Your dirty water goes in here and it has a wide opening at the top which works very similar to a zip loc bag. This wide opening allowed me to collect 2 liters of water from the creek very quickly and easily. You can see my test water isn’t a crystal clear glacier spring so the bag’s label was very appropriate.

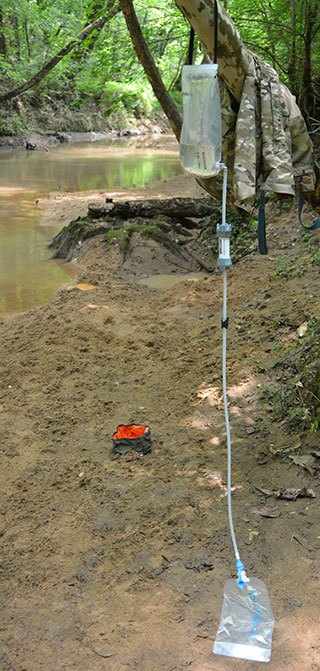
platypusbaghang

The Platypus Bag system has a simple attachment system to hang your bag of water to be treated up on a tree, bumper or anything higher than the clean bag. Gravity does all the hard work.

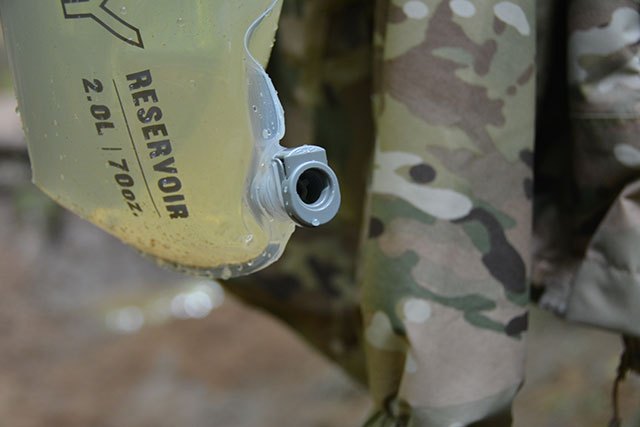
Another nice feature were the connectors. The Platypus GravityWorks has a quick connect so you can collect your dirty water and either pack it out for filtration later or carry it back to camp. The filter element snaps in and you are ready to filter.

platypusquickconnect

The Platypus filter element snaps into the reservoir quick connect and you are all set to filter water.

platypusgravityworks

This system is fast. I only filled up about 1 liter but it was filtered in less than 2 minutes.

Once the filter is snapped in, the water will flow almost immediately. The tube running from the filter has a stopper that you can use to quickly pinch off the flow while you hook up the clean bag. As long as the bag of dirty water is higher than the clean bag, the appropriately named GravityWorks filter will take care of all your heavy lifting while beautiful clean water flows into your empty bladder.

This system will hold 2 liters of water which I think gives you a lot of water for the average person. You can also just filter two liters, then collect two more liters of dirty water for later. You will be carrying four liters of water with you at all times. Two filtered and two that needs to be filtered.

Cleaning this system is as simple as lifting the clean water bag up over the dirty water bag and squeezing your clean water bag. You will see the dirty sediment flow back into the dirty bag and you know your filter is clean when that stops.

Platypus GravityWorks Filter Specs

  • Easy, Pump-free filtering
  • Fast! 1.5-liters per minute
  • Weighs as little as 7.2 oz. (203 g)
  • Ultra-Compact
  • Meets all EPA & NSF guidelines for the removal of Bacteria and Protozoa, including Giardia, Cryptosporidium, E. coli, Salmonella and Cholera

Weight: 7 ounces

Cost: $79 on Amazon.com

And I found this review from Outdoor Gear Lab that shows the larger 4 Liter system.

So What is the best bug out water filtration system?

This question isn’t something I can answer with a definitive statement that will stand for all time or in all situations, but I will share some of my thoughts. My idea of bugging out involves living possibly for some time in forested terrain. I plan to be on the move and I don’t want to slow down more than I have to for rest. Water is crucial for life so I don’t want to have to go to more trouble than is prudent to acquire it. Additionally, if I am strapping a pack on my back and walking out the door, I have to plan for being on my own so to speak for potentially much longer than 72 hours.

I have considered both caplets like the Portable Aqua Water Filter tablets and I even own some of them, but they last for a finite amount of time. The standard bottles will give you I think 25 quarts of water. With a hike for three days in the summer, enough for food and your bottle will quickly be cleaned out. It will go faster if you are sharing.

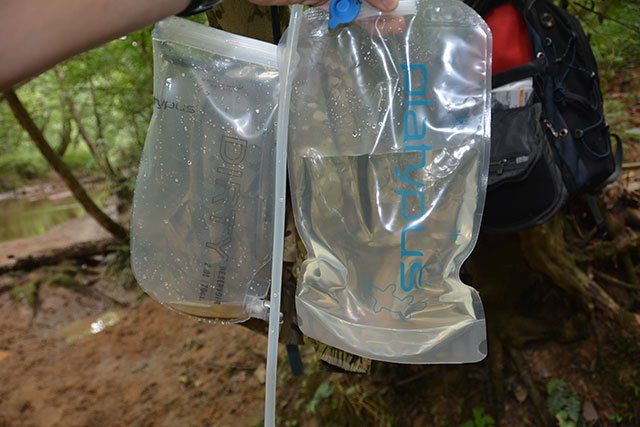
platypuswaterfiltration

I had all of this clean, fresh tasting water in a little less than two minutes.

The LifeStraw product is one I just don’t think is practical. It is a great idea, don’t get me wrong, but I for one don’t want to be forced to stick my head in a puddle just to get a drink. I want to take giant gulps of water if I am thirsty and I want to be able to take water along with me. Sure you can fill up empty bottles and drink out of them with a LifeStraw, but I think there is a better option.

The MSR Filter pump has usually been a great filter, but because it is mechanical, I have had one give me troubles. I was able to repair it eventually, but that wasn’t a good sign. I should have back-ups anyway I know, but I would rather go with a more stable platform and the MSR is heavier than all of the other options I have tested.

What about boiling water? Sure you could do that, but you have to build a fire first and then boil your water, then let it cool down. Do you want to do all of that in the heat of summer? Even in winter, that fire might be nice, but to go through all that effort for drinking water seems like a fall back plan, not the first option.

Iodine crystals like Polar Pure seem to be the best option for killing viruses, but like I said, their bottle is glass. One slip out of your hands onto a rock will end your water filtration options for that bug out trip. Even if you don’t drop it, I prefer to drink water as soon as possible and wouldn’t want to remember to keep my iodine warm for effectiveness.  I think Polar Pure makes sense as a back up, but not the sole method of water filtration in a bug out scenario. For Backpacking trips Polar pure is a great idea. If you have the time to leisurely prepare your water, I think this is a good option.

The Sawyer as it is would probably be my second choice because of the weight and size. I would have to fill a large reservoir, something like the 48 ounce Naglene Bladders and rig up some way to squeeze filter a larger amount of water into my bottles. Not the best, but it is incredibly light and could get the job done.

What about items like the SteriPEN that use UV light to make water safe to drink? What about EMP? What if it breaks? What if you run out of batteries?

I think that for me the GravityWorks system from Platypus is the easiest and fastest way to collect water that will be clean and fresh tasting. With it’s fast flow rate, I can grab a 2 liter bag of water, hook up the filter and throw them both in my bag if needed and keep on going to a safe location. This seems to offer the most capacity with the fastest filtration time and easiest system to learn and remember. I can teach my kids how to use this in about 2 minutes which is about the same amount of time it takes to produce 2 liters of clean water.

That is my take on the best bug out water filtration options. What do you use?

A critical prep that you have to plan for including in your bug out bag is water. When I first got into prepping, I had people saying that they would

In the face of disaster, preppers know we need to move quickly. We should be prepared to act in a minute’s notice when we realize our family is in jeopardy. We each have our Bug Out Bags ready to go or they should be but it is a different matter altogether if the family bug out mobile is involved. How many times have you watched a Prepper show where the family simulated loading all of their gear to escape town? Often it took them much longer than they anticipated and in at least one case, they couldn’t even take their main prep with them.

We have talked about conducting a trial load of your bug out vehicle before and that makes perfect sense, but what if you had a simple way to plan and stage your bug out vehicle equipment, food and gear that would only take you 10 to 20 minutes to load, was ready to go when you needed it and would give you just about everything you would need to live on your own for at least 30 days? What if this simple bug out vehicle load plan could get your and your family on the road faster? Do you think it would be worth it to spend a little time now as opposed to wasting life-saving hours later?

What do you need to pack if you are running away from disaster?

The idea for the bug out vehicle load plan comes from a couple of places. First, like so many of you, I have tried to figure out and plan for all my supplies if the situation dictated that I needed to throw everyone in the car and leave. I have written about my plan to shelter in place because I think everything being equal, it is much easier to weather some disasters from the comfort of your own home. However, I do realize that I don’t always get a vote. Perhaps a chemical spill 5 miles away was causing illness and evacuations. I would need to go and quickly.

I have many prepping supplies that I think are vital to living and surviving away from my home, but I don’t have them all packed and ready to go. I have some items in closets, some in sheds, some under beds, in spare closets and others strewn in numerous drawers. If I have plenty of time, I think What I have collected so far can cover a lot of bases, but in this scenario, we want to get out quickly. It could be that you want to beat the rush that could quickly cause the highways to be parking lots. It may also be that if you don’t get to safer ground, you will die.

lesak

Roof racks greatly extend your cargo carrying capacity.

The list I have put together draws a lot of inspiration from camping trips. I do still maintain that in many aspects, living off the grid is very similar to camping. Yes, there are many ‘but what about’ to that analogy, but if you have the basics to live in the woods for a week without starving, you are in pretty good shape. Will that last years? Will that keep you safe from hordes of Mongolians on horses? No, but we are working towards a goal here. Not everyone is able to have a bug out retreat.

What do you need to survive?

The consistent part of prepping is that everyone needs the same core things to survive. You need water, food, shelter and security. Technically you don’t need security if you are on an island and no creatures or humans are trying to separate you from your head, but you get the idea. In this world, you will likely need to defend yourself from others, in some situations, at some point.

71rudzc9ewl-_sl1500

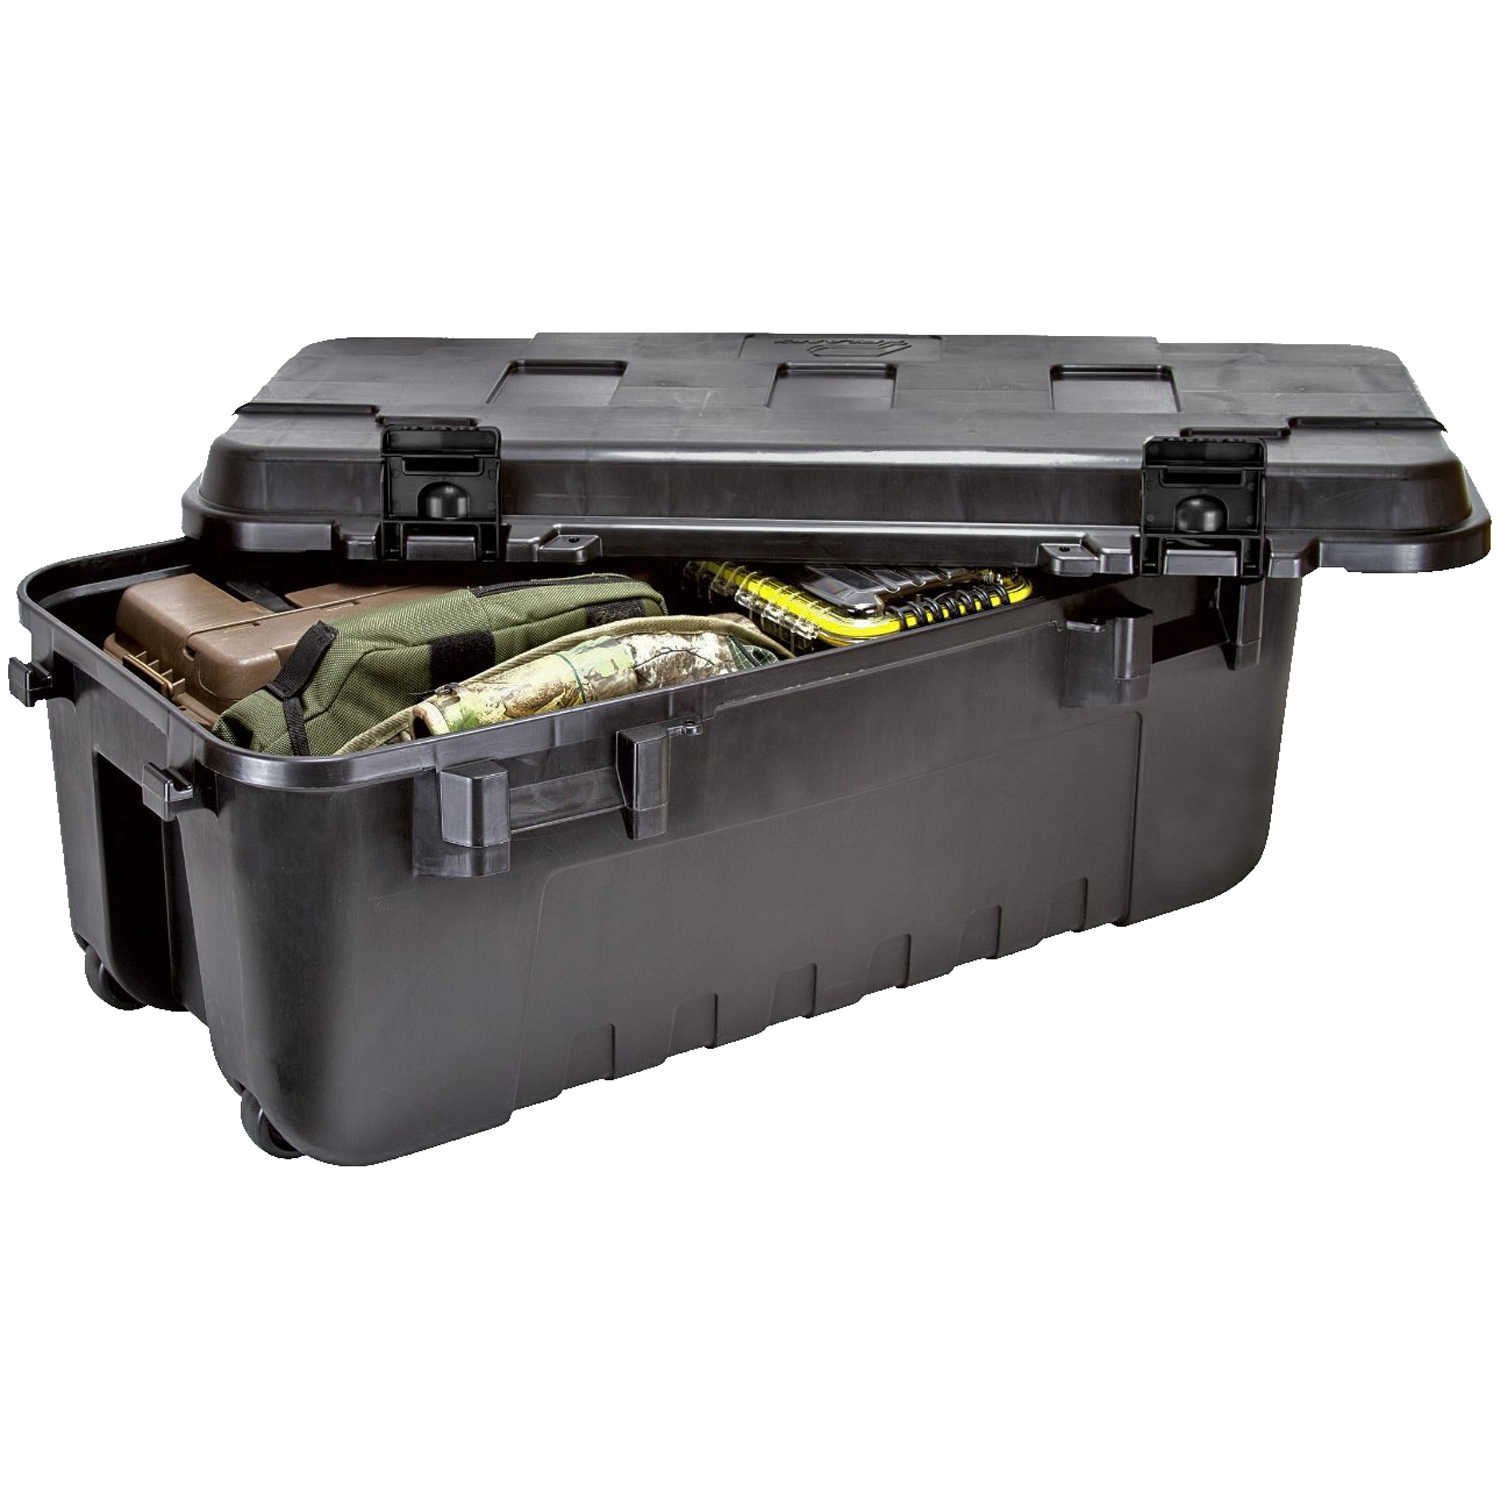
Plano 1919 Sportsman’s Trunk

So our packing list is broken down into storage cases that represent some of these crucial elements. My plan is to have weather proof cases packed with all of these supplies ready to go at all times. If I need to go, it is a pretty simple matter to load them on my vehicle, secure them and roll out of the neighborhood.

The cases I use are from Plano. They are called the Sportsman Trunk 1919. The case dimensions are 37.75″ X 18.25″ X 14″ and I have room for three of these on the top of my vehicle plus more actually. I have more room inside the vehicle too, but I will get to that later.

Case 1 – Food

I think what goes in your food case will vary greatly. What I am comfortable eating would make some of you wince with pain. You have to consider the weight, storage space and caloric benefit of what you do pack though. For example, if you fill your food case up with nothing but bags of rice and cans of beans, that will last a while, but will quickly become boring. How sad is it when nobody wants to eat your food to survive? ‘They’ll eat when they get hungry enough!’ I know, I have said that too, but we should be able to agree a little variety is better.

Hopefully, we all know that nothing refrigerated should be going in this case and I would even argue against a cooler too. You should be packing food that you can forget about and only bring out when you need to leave. Coolers are big wastes of space.

What kind of food? I have several boxes of freeze dried food from a few different vendors. With choices like chicken noodle soup, mashed potatoes, powdered milk, chocolate pudding, rice, fruit, mac & cheese, etc. there is bound to be something we can all enjoy. Plus, the freeze dried food takes up so much less space than cans.

car_expanded

There are many creative options for extending the usefulness of your vehicle to keep you comfortable away from home.

What’s in there?

  • Strawberry Fields Cream of Wheat — 64 Servings
  • Maple Grove Oatmeal — 112 Servings
  • Uncle Frank’s Italian Lasagna — 16 Servings
  • Granny’s Homestyle Potato Soup — 48 Servings
  • Traveler’s Stew — 48 Servings
  • Summer’s Best Corn Chowder — 16 Servings
  • Blue Ribbon Creamy Chicken Rice — 48 Servings
  • Liberty Bell Potato Cheddar Soup — 40 Servings
  • Traditional Fettuccine Alfredo — 40 Servings
  • Independence Hall Chicken Noodle Soup — 16 Servings
  • Cheesy Broccoli & Rice Soup — 32 Servings
  • Country Cottage Mac & Cheese — 32 Servings
  • Heartland’s Best Mashed Potatoes — 64 Servings
  • Creamy Stroganoff — 32 Servings
  • Instant White Rice — 40 Servings
  • Chocolate Pudding — 60 Servings
  • Honey Coated Banana Chips — 32 Servings
  • Orange Energy Drink Mix — 32 Servings
  • Settler’s Whey Powdered Milk — 48 Servings
  • Coffee & Filters – Plenty…

This food is stored in a cool dry place in the Plano trunk so it’s ready to go. This should last a family of 4 approximately, 30 days. There are lots of freeze dried vendors out there. I suggest you do some research and then watch for sales. You can save a lot of money sometimes and it is always cheaper to buy in bulk. Your personal case might need to be adjusted for special diets, but this is an example.

Case 2 – Shelter

This case should be pretty simple to explain. It’s just the big gear we will use to keep us out of the elements.

  • Tent – 6-man tent
  • Tent stakes
  • 3 tarps – One for our ground cover. The others can meet various other needs.
  • Coleman Lantern and spare fuel
  • Camping Axe
  • Sleeping bags/pads

Case 3 – Supplies & Extras

Cooking

Cleanup/Hygiene

Health

  • Bug Spray
  • First Aid Kit

Miscellaneous

  • Fire Bag  – Flint, tinder, wetfire, lighter
  • Toilet Paper -Probably not enough to last 4 people 30 days, but enough to get us started.

Is that it?

That is the million-dollar question isn’t it? I know that some people will have items I have missed and I can easily come up with hundreds myself, but you have to ask if those items are necessary. Can this list keep you alive? Can you store this and get it loaded quickly? I think so and in an upcoming post, I will show you how I load everything.

There are other supplies that get packed in here too like weapons, bug out bags and communication items. I also have vehicle preps and clothes so stay tuned for more.

In the face of disaster, preppers know we need to move quickly. We should be prepared to act in a minute’s notice when we realize our family is in jeopardy.

Isn’t Wikipedia amazing? I needed and intro for my soap article. And nothing is better than starting with some hard facts. Here we go.

The earliest recorded evidence of the production of soap-like materials dates back to around 2800 BC in ancient Babylon.A formula for soap consisting of water, alkali, and cassia oil was written on a Babylonian clay tablet around 2200 BC.

The Ebers papyrus (Egypt, 550 BC) indicates the ancient Egyptians bathed regularly and combined animal and vegetable oils with alkaline salts to create a soap-like substance. Egyptian documents mention a similar substance was used in the preparation of wool for weaving.

In the reign of Nabonidus (556–539 BC), a recipe for soap consisted of uhulu [ashes], cypress [oil] and sesame [seed oil].

My point is, people understood they needed something to wash away the aftermath of their daily activities, so they got very inventive. Some even scientific. At least the ones who realized there’s more to living than surviving. And inventing soap helped us not only survive and kill germs, but it also helped us thrive.

It’s easy to focus on the major needs when talking about survival. Food, water, fire and a few other things get a lot of airtime, when it comes to discussing what we need. But the reality is, there are a lot of minor things that are necessary as well. Having enough clean water to drink and food to eat won’t matter for much, if you and I end up dying of disease.

That’s why we need soap. Yes, something as simple as soap is actually important to our survival. It’s one of the biggest and best defenses we have against disease. Soap not only helps us to clean dirt and germs off of our hands, but it is a fairly good antibacterial as well.

But what do you do when there’s no soap to be found? One option is to use the root of the yucca plant.

Yucca grows throughout the Midwest and Southwest, from Texas up to Alberta, Canada, although it is found mostly in warmer climates. This amazing plant is useful for a lot of things, with the roots being edible. The root of the plant is a tuber, like a potato; with the liquid pressed out of it is also usable as soap and shampoo.

Digging Up the Yucca

DIY Wilderness Soap And Shampoo From This Plant
Figure 1 – Flowering Yucca plant


Yucca are fairly easy to dig up, as the tuber is the only real root of any size. The rest of the roots are hair size and break easily. But the tuber itself can go quite deep, especially on a large plant like the one shown above. If you’re going to dig up a yucca, I’d recommend using a smaller plant, like the one I’m digging up below.

Before going any farther, I need to mention that it is not legal to dig up yucca in all places. I was able to dig this plant up, because it was on private property and the owner wanted to get rid of it.

The plant shown in this photo was found in the wild and would have been illegal for me to harvest. So before you do this, make sure you’re doing it someplace where it is legal; unless, of course, you’re in a survival situation.

As I’m doing this for survival purposes, I decided to try digging it up with a machete, rather than a shovel, under the assumption that I might not have a full-sized shovel available to me.

I wouldn’t want to try and dig up a yucca with the small folding shovel I have in my bug out bag, because the ends of the leaves are all thorns. Digging it up with that small a shovel would probably see my hands scratched up pretty badly.

DIY Wilderness Soap And Shampoo From This Plant
Figure 2 – Digging up the Root with Machete

As you can see in the photo, I’m holding the leaves aside, while I dig with my machete. What I did was insert my arm under the leaves, and then lift it up, pushing the stiff leaves up with my arm. I was then able to turn my hand around and grasp them, getting them out of my way.

Once the leaves are out of the way, it’s a simple matter to stab the machete into the ground, all around the root. I made a circle about eight inches in diameter, which was enough. Then, grasping the plant’s stalk, near the root, I simply wiggled it back and forth, breaking the root free and was able to lift the plant out of the ground.

DIY Wilderness Soap And Shampoo From This Plant
Figure 3 – The cleaned root

The leaves of the yucca can be used for other things, like making some pretty good sandals; but for now, all we need is the root, so I cut it off at ground level, with one swipe of my machete. Once cleaned, the root looks like this.

Cutting Up the Root

DIY Wilderness Soap And Shampoo From This Plant
Figure 4 – Cutting off the husk

As you can see in the picture above, the root is covered by a thick skin or husk. We’re going to need to cut that off, much like cutting the outside off of a pineapple. It is hard, but not all that difficult to cut. In order to make it easier, I cut the root in half, allowing me to put the flat, cut end on my cutting board. The skin of the root cuts off fairly easy, if you have a good, sharp knife. I had no problem, but I’m using a very high quality knife with a really sharp edge. Notice the red around the edges of the pieces in the foreground. This all needs to be cut off, as well as the dark lines you can see in the piece I’m cutting.

DIY Wilderness Soap And Shampoo From This Plant
Figure 5 – Dicing the root

The peeled root is then sliced and diced. I did about ½” cubes. You can do smaller, but I wouldn’t recommend any larger. The ½” cubes worked well for my needs.These cubes of yucca root then need to be broken down. Even though I’m working in my kitchen at this point, I didn’t use a food processor or blender for this. We’re doing this for survival soap and I doubt that any of us keep a food processor in our bug out bags or survival kits. We need something that’s more on the order of what we’d use in such a situation.

DIY Wilderness Soap And Shampoo From This Plant
Figure 6 – Grinding the root

I used a Mexican molcajete, which is a traditional mortar and pestle. Rather than being made out of ceramic, they are usually made out of lava rock, which is very porous. Mine is made out of granite, which isn’t as porous, making it grind less, but is much easier to clean. Traditionally, the Mexicans use these for making salsa and guacamole.The root is hard enough that I found it necessary to beat it with the pestle, breaking it down, before grinding it. You want to get it as fine as you can, ending up with a fibrous mush. Actually, the finer you grind it, the more usable soap you’ll get out of it.

The molcajete isn’t the only way you can grind up the yucca root for use. The same thing can be done with the type of grinding stone that the Indians used for grinding corn. However, I don’t happen to have one of those and it would have been expensive to buy. In the wild, I would look for a flat stone I could use to grind on, with a rounded rock out of a river or stream as my pestile.

Now the Soap

DIY Wilderness Soap And Shampoo From This Plant
Figure 7 – Extracting liquid soap

With the root thoroughly ground, you’re ready to extract the soap. All that’s needed it to take the ground root in your hands and squeeze it. The liquid that comes out is usable as soap or shampoo.

If you need to really scrub something, such as a greasy pan, you can use the ground up root as soap. In this case, the fiber in the root will act as a scouring pad, helping you to clean the surface.

But you’ll need to use a fair amount of pressure with it, so as to press the soap out of the fiber as you go.

Even after we’ve gotten a lot of liquid out of the ground root, it is still useful for cleaning. We can dry the root in the sun and save it.

Then, when we need more soap, we can reconstitute it with water, which will draw more of the chemicals we need out of the ground up root, giving us more soap.

It is best, when doing this, to not have pressed out all of the liquid from the ground root, as you will get better soap from it the next time around, if there is still some liquid in it when it is dried.

Isn't Wikipedia amazing? I needed and intro for my soap article. And nothing is better than starting with some hard facts. Here we go. The earliest recorded evidence of the

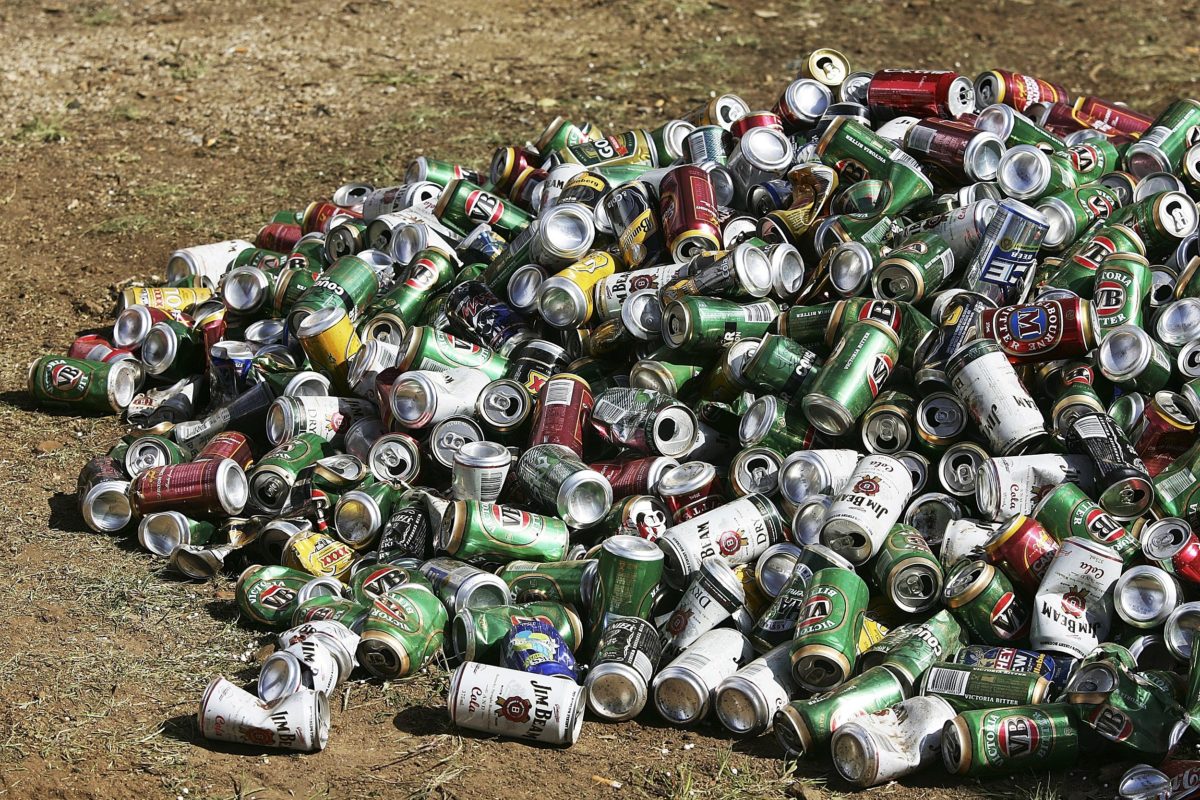
Fact: there’s no limit to what you can with a beer can. Why? Simply because it’s called a beer CAN, not a beer CAN’T. Yes, I know it’s a shitty pun, but there’s truth in what I’ve said – a metallic beer container can serve all kinds of purposes, long after the beer’s gone (sad face). Anyway, a couple of days ago, I had myself a little pow-wow with some of my buddies.

Not all preppers, but we do get along even on stuff that is not exactly related to survival. However, in talking with them, I found out that there are in fact people out there who really know how to get creative when they have to deal with what we come to an SHTF-type of situation. And because no boys’ night should be without beer, we kinda ended up talking about ale till the crack of dawn.

I’m truly sorry for not being able to share a bottle of suds with you people, but at least I can make it up to you by showing you a couple of ingenious ways to use empty beer cans in a shit hits the fan situation So, here’s my top X choices in reusing cans.

  1. Perimeter alarm

Halt! Who goes there? Maybe’s just the wind of a highwayman ready to deprive you of your valuables. Just joking. A perimeter alarm is a must-have if you’re planning on spending a night in the woods. Of course, I don’t think there are any cutthroats nearby, but there may be wild animals prowling the area.

No need to invest tons of money in one of those fancy, laser-triggered alarms when you can make one yourself using a couple of empty beer cans and some cordage. You can always replace regular cordage with dental floss if you plan on using it for other purposes.

  1. Poor man’s survival kit

If you can’t find it within you to spend a couple of bucks on a professional or military-grade survival kit, you can always make one yourself using an old beer can. Just cut a hole on the side and fill it with stuff like weatherproof matches, lighter, dental floss, shoelaces, fishing utensils or whatever.

  1. Camping Stove

As they say, survival can be a beach. If you find yourself in a tight spot with nothing to cook your dinner or warm up the inside of your tent, craft a small camping store using an empty beer can. Flatten the top, cut a hole on the side, and place a small candle on the base. Soup may take forever to cook, but at least you’ve got something to keep you warm during the night.

  1. Lantern

All out of matches? Tac light’s batteries died out on you? No problem. I got you covered. It may be possible to make a meager lantern out of an empty beer can and a small candle. Cut a hole in one side of the beer can. Fit a small candle inside. Attach a stick to the ring, fire up the candle, and, voila, you now have a small lantern. May it be a light for your in dark places, when all other lights go out (and I did not quote from The Lord of the Rings).

  1. Starting a fire

Remember that article about how to start a fire using a water bottle? Well, believe it or not, you can do the same with an empty beer can. Basically, you will need to harness the reflective power of the can’s butt in order to focus sunlight on tinder. Here’s what you will need to do. While the sun’s still high (not that kind of high), grab an empty beer can and place it on the ground. Just below its butt, place a handful of tinder. Rotate the beer can in order to focus the sun rays on the tinder.

If nothing happens after 15 or 20 minutes, it means that the can’s butt is not polished enough to reflect the sunlight. Not a problem – grab a handful of sand or rock salt and start giving that butt a good shine. Allegedly, you can also use chocolate to do the same thing, but I haven’t tested that yet. Place the can again on the ground and rotate it in order to focus the light. When you see smoke coming out, add some more tinder, and blow on it.

  1. Makeshift kettle

Cowboys went through a lot of trouble to make sure that they start each day with a hot cup of coffee. As you know, that meant carrying a heavy cast-iron pot. Well, times have changed, but our need for a hot drink remains the same. Now, if you find yourself stranded in some neck of the woods and nothing to boil water in, you can always pour water in an empty beer can and place it close to the embers. That’s also a great water purification method.

Here’s how it works. First of all, find a way to wash the beer can. Second, pour water into it and place it directly into the fire. Please bear or beer in mind that it will take a while for the water to boil, so sit tight. Once you hear bubbly sound coming from the can, use a stick or a pair of prongs to remove the can from the flame. Wait for it to cool down, pour in your canteen, and enjoy. You know what? This kind of victory calls for another beer. Cheers!

  1. Making char cloth

If you the thought of packing some char cloth has never crossed your mind, don’t worry because you can make some using an empty beer can. Get a fire running. In the meantime, fill a can with cotton, punk wood or bark. Fold both ends and toss in the fire. In a couple of minutes, the beer can will begin to disintegrate. When you see that you’re running out of a can, remove it from the fire, wait for it to cool down, retrieve the char cloth, and celebrate.

That about covers it for my list of great ways to reuse an empty beer can. Feel that something may be missing from the list? Get scribbling and let me know.

Fact: there’s no limit to what you can with a beer can. Why? Simply because it’s called a beer CAN, not a beer CAN’T.