Home2020 (Page 5)

I wanted to address a few common misconceptions that I think some people have with how they plan to address a SHTF event in their lives. There are some that are more dangerous than others granted, but all of these prepping myths give us an opportunity to dissect various topics in the prepping community to better understand the risks and rewards of various approaches. In this article, I want to discuss the myth that some preppers have that if the SHTF they are simply going to don their brand new Bug Out Bags and quietly walk into the national forest. This is the bug out to the woods strategy that I read about often in comments or on forums.

This weekend I was walking with my dog on a new trail we had discovered and as often happens, I began to look around at the trees and water sources and soak in the apparent solitude. I think about how remote we are when we get into the woods and the sounds from roads, picnic areas or nearby neighborhoods falls away and you are left with the feeling that you are in the middle of nowhere. I think about this even though I know full well that I am just a short walk back to the parking lot where myself and dozens of others have pulled in temporarily to enjoy the outdoors and a relatively undisturbed spot of nature that our tax dollars are funding.

I was walking down trails, crossing small creeks and envisioning how someone could think that if a disaster happened how they could run out here and survive for a while at least. I was even thinking this myself for a while, but the idea that many people could survive a SHTF event simply by walking into the woods and making a shelter is foolhardy. If this is your plan, you might want to consider a few things first before you leave it all behind and step into the woods for what could be the last time.

Could other people have the same idea as you?

What do you think you are running to?

As with any conversation on topics common to the prepping community, it helps to set a framework for discussion. For the purposes of this article, we will assume that you and your family must leave your home. This could be for a whole host of reasons, but we will go on the assumption that you are running from a bad situation (riots, war, plague, and zombies) and your hope is to find peace, safety and perhaps a new life hidden in the woods of a nearby forest. This could be a large national forest or simply a few thousand acres in your town that hasn’t been developed.

It sounds logical at first doesn’t it? You have the gear you need in your bug out bag, you have been camping before so living in the woods on its face doesn’t seem like a bad idea. There is no place else to go and if you simply walk into the forest, you can find a place next to a stream or a lake, set up camp and begin hunting for wild game and frying some freshly caught fish. Maybe you even have a location that you have been to before that you know is perfect and you think that you will be safe in this remote space in the woods and that somehow you will be able to avoid whatever it was you were running from.

Now, I will admit that there are people who can walk into the wild and survive, even thrive. The number of people who can do this with only what they carry on their back is a miniscule number though and the people I have witnessed (usually on TV if I’m honest) have a tremendous amount of skills, experience and luck. Is this a group you consider yourself a member of?

Most of us, even the crustiest through-hiker on the Appalachian trail needs supplies to live. Can we go out for brief times and survive? Of course, but if you plan to walk into the forest for the rest of your life with nothing more than some snares you have never used, your trusty .22 rifle , and some dehydrated food I think you need to revisit your strategy.

What are the downsides?

The downsides to this approach are numerous but I think the main two are that most of us do not live in the middle of nowhere. If a societal collapse were to happen, there would be a lot of other people with bug out bags hiking into the woods right along with you. That wild game you are depending on catching just like they do on the survival shows, won’t stand up to an onslaught of weekend warriors with their expensive sleeping pads and high powered rifles. In this scenario, it isn’t like you can walk back to Walmart and get some groceries and go back to your tent in the woods.

Where I live we have a homeless population that disappears every night. I know that in warmer months, a good number of them live in a wooded area between two interstates, but my assumption is that area isn’t the safest place in the world. These homeless people have a stable society they can walk to for shelter or a handout on most days. What if the stable society collapsed and started moving in with them? What if nobody could eat and there were no shelters to go when the temperature gets cold? Maybe you could find a reasonably remote place to stay where you wouldn’t have other people around you, but you would still find the issues of acquiring food a major obstacle.

If that isn’t enough, safety would be a huge consideration in the woods. Your tent offers zero protection from a sharp stick, much less bullets. Additionally, have you tried to live in them for weeks at a time? Even the best tents start breaking down and hand-made shelters would need to be constantly worked on to maintain their weather proofing. If you are surrounded by forest, it will be harder to see people approaching you and it would be easy for them to spy on you from a distance without being seen. If the SHTF and times are desperate, anything you have could become something that unscrupulous people want to take from you. What about if you wanted to leave camp? You couldn’t lock anything up could you so it could easily be stolen while you were away. Leave someone behind and they could be overwhelmed by larger numbers. Would you leave a woman alone in this situation?

Is there a better plan?

I have said numerous times that my first plan is to bug in at almost all costs. Does that mean I will never leave my house regardless of the reason? No, but I would have to be under extreme pressure before I would take my family into the woods. If I was making my way somewhere and only needed to stop in the woods for the night – that would be one thing. I would not plan on packing all our stuff on our backs and hiking into the forest though and expect to survive for very long.

What if you know how to forage off the land and you can eat nuts and berries? That’s great but all the other issues are still there. Other people are going to be with you in the forest, and you can’t defend a tent as well as you can your house. If you believe that your bug out plan is to hike into the National Forest that connects to your property and you haven’t considered some of these points, maybe it’s worth a second thought. I myself will know when it’s time to retreat and run away, but I will be very slow to leave my home and although I love walking, hiking and even backpacking in the woods I don’t think it is a valid plan to try and live there if the grid-goes down. Give me my home and zero electricity or water over the nakedness of the forest any day.

I wanted to address a few common misconceptions that I think some people have with how they plan to address a SHTF event in their lives. There are some that


Preparedness means different things to different people. Some may be comfortable with just an emergency kit in their cars, while others stockpile ammo, food and toilet paper in a secret underground fortified bunker. Prepping will always run the gamut.

My husband and I are somewhat new to the idea of prepping, and have taken only a few measures ourselves at this point in time. But in our many discussions, we decided we don’t just want to survive if the SHTF, we want to thrive—live well, prosper, flourish. It is our goal to position ourselves well for a good life in bad times, especially if life as we now know it in the USA comes crashing down.

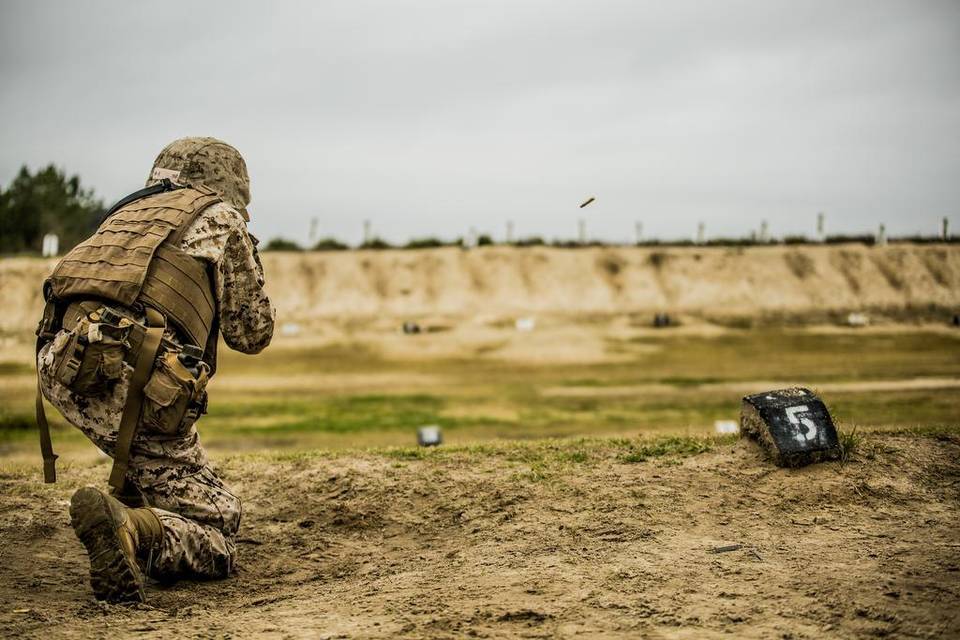
Skill building may just be the most important prep of all, but it is not something that everyone immediately considers ahead of stockpiling and other preps. Your skills go with you no matter where you are, for one thing, so you’ll have them if you need to bug out. And the better developed any particular skill is, the more it can be of service to you. A simple illustration of this is shooting a gun; target practice will help you be more accurate if you need to hunt for food or defend yourself.

But skill building is important for more than an emergent situation or immediate crisis. Knowing how to do some of the things we take for granted in this consumer-product-driven society can make daily life better in a protracted survival situation. And certainly, when you have skills, you are better able to put yourself in a position to barter for items you lack; you can trade goods and you can also trade services.

How skill building could help you if SHTF

As a natural part of my personality, I have always liked to learn to do things hands-on. But when I stop to think about it, much of what I have learned from others or taught myself has been driven by having that nagging feeling of uncertainty from time to time which all preppers are familiar with to varying degrees. The more self-sufficient we are, the better, right?

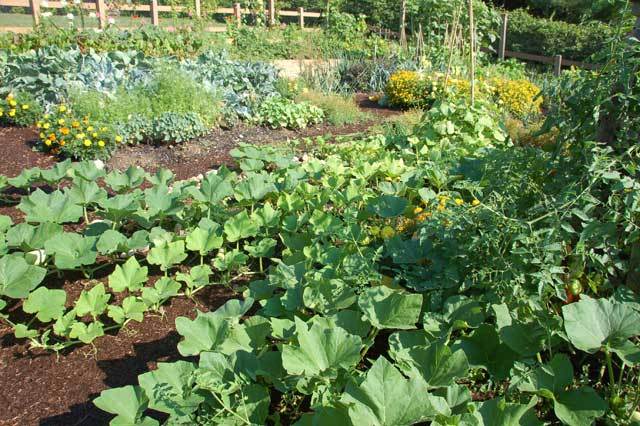
Take gardening. When we were deep in the great recession, I applied for and received a USDA grant to assist with putting up a very large high tunnel greenhouse. I didn’t know it at the time, but I was becoming a prepper. We are self-employed, and the drop in our income was significant during the recession. While we made it through mostly unscathed, at the time I was eager to get the high tunnel to be able to grow more of our own food in case things got worse. The high tunnel allows us to start plants earlier and keep them going later into the fall. In winter survival conditions, we could grow cool weather crops like carrots and salad greens in the high tunnel under floating row covers, which effectively drops the zone we are in from a Wisconsin zone 5 to more like a Georgia zone 7.

We also do traditional summer gardening outdoors, and dabble in hydroponics and straw bale gardening. All of these techniques require very different management for success, and learning them has made us more adaptable and prolific food growers.

I also have learned to keep bees, which helps the garden and gives us wonderful no-expiration barterable products: honey and beeswax. Another shelf-stable item I have learned to make that we could trade is maple syrup we make, thanks to the handful of very large old maple trees planted by my husband’s ancestors. I think the old-timers planted them for more than just shade—they were a small insurance policy against the possibility of tough times.
No easy way out

Is it work to do these things? Yes. I have a garden every year, and it is far from pristinely weeded. I don’t make maple syrup every year and there have been times I’ve been too busy to deal with honey so it sits in the frames and waits for me to process it. I’ve resigned myself to my imperfection and the fact that I can’t clone myself. But knowing I have the skills and equipment on standby is comforting in and of itself.
What do I do with all of the fruits of my labor? Sell some and preserve a lot. Thanks to the “buy local” movement, I sell a several hundred pounds of produce each year to the local grocery store and some of the small farm markets—which is very helpful since there are times everything seems like it is coming in at once! I registered as a farm as part of the grant process for the high tunnel. Since I am selling produce, I can also legitimately deduct some of my farming costs on my taxes, like seeds and seed-starting supplies (always helpful.) Will we get rich doing this? No, but we do save some money, which can be put toward other preps. I think of it this way: I am turning my tomatoes into ammo.

Preserving is kind of therapeutic for me as I imagine other sorts of stockpiling are to other people. Seeing all of the jars lined up with good things in them is satisfying and makes the labor and time spent worthwhile. Not being afraid to experiment with new techniques and recipes has expanded my knowledge, and increased the variety in my pantry. One of the essential components of thriving, in my mind, will be to have variety. It’s not only better for the body in terms of getting enough of the necessary nutrients and calories, but in a prolonged survival situation food takes on a greater psychological value in terms of boosting morale. Imagine living on spaghetti for dinner for thirty days versus having thirty days of spaghetti, beef stew, and navy bean soup. Without variety, you’re surviving but not necessarily thriving.

Speaking of variety, I have a ton of cookbooks, many of which pertain to fermenting and preserving. Although they take up a lot of space, I think they’re important to keep around, especially since our family hasn’t yet taken the step of getting a solar or wind energy system. There’s always the possibility that a smart phone might be useless for looking up ways of pressure canning everything in my freezer that is suddenly thawing due to a catastrophic grid failure. (Keeping a couple of cases of empty jars and lids on hand also takes up space, but could be very useful in such an event.)
The Art of Fermentation: An In-Depth Exploration of Essential Concepts and Processes from around the World

Items most people purchase rather than make that I have learned to produce successfully at home include sourdough bread, handmade pasta, wine and beer (including mead from our honey), wine vinegar, sauerkraut, and mustard. If you think about these products in particular, they are easy to make, and you could get by without refrigerating or canning them. Added to shelf stable items in my pantry (and what’s in the garden depending on the time of year) we will be eating like kings if things go south. Is it necessary as a part of prepping to make all of these things and keep them on hand? I don’t think so. But having some fermentation equipment available for when you need it is not a bad idea (you can ferment so many things as a preservation method) as is keeping things like yeast and flour in good supply.
Another skill I picked up over the years is knitting and crocheting. It was something I was always sort of interested in, and I finally just buckled down to learn it in my thirties. I would consider myself only an intermediate skill level, but I think if I were in a survival situation I could do things like make or repair simple garments or even make something useful in capturing food, such as a net or a rope.

One of the women in my knitting circle was a homesteader who raised meat animals for sale. As her daughter went off to college, she and her husband were short a worker for processing turkeys at Thanksgiving. I offered to help, and she let me, although I think she had her suspicions I would be grossed out. I found it to be a little rough at first, but then a natural rhythm set in and the gross factor dropped away. That experience led me to raising our own chickens, including meat birds. It was great to eat the eggs (and sell a lot of them!) and eat the meat knowing the birds were treated humanely. I now know what to do with a dead animal if we ever need to hunt for food, or if raising our own livestock becomes a necessity. Once again, skill building, even if it is not in your comfort zone, can truly benefit your quality of life in a survival situation. My garden is still benefiting from the chicken manure although we are taking a break from raising birds!

Soap-making is one of my more recent interests, which I am slowly turning into a small body-care business, with lotions and other products. This came about because I bought a beef quarter from the aforementioned farmer to fill my freezer, and the butcher asked me if I wanted the suet when I was telling him what cuts I wanted. At the time I thought I would make suet cakes for the wild birds, but little did I know how much I was going to get! I rendered it, poured it into plastic containers and froze it, and eventually decided to try my hand at soap. It is so much better than store-bought soap, I love the “kitchen chemistry” of it, and it is such fun to unmold it the next day and see how it turned out. In a survival situation, soap is one of those things that could be traded for something you don’t have, given how fast humans get to smelling bad!

Again, we are not “advanced” preppers yet, although we’ve always had some prepper tendencies. I must admit I am not super-skilled in the down and dirty survival stuff. But I have upped my game in two major areas in the last year: firearms and power tools. Those have been my husband’s domain until recently. I took a gun safety course last fall, and I learned to be more comfortable using a number of scary power tools last summer. I discovered in both cases, these potentially dangerous things are not that big of a deal as long as you pay attention and think about what you are about to do.

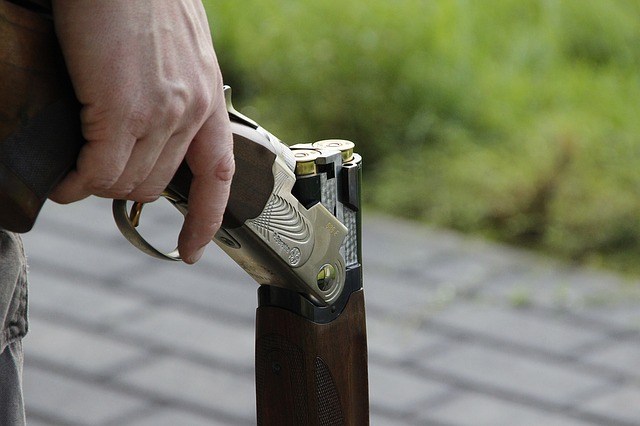
I would encourage anyone to step outside their comfort zone and at the very least get familiar with firearms. Even if you cannot envision ever using a gun to defend yourself, try to imagine that you could be in a situation someday where you have to pick a gun up and unload it just to neutralize it. Knowing how to check if a gun is loaded, empty it, and be sure it is empty is an important skill to have.

Knowing how to use common tools can make you more of an asset in an emergency or in a prolonged survival situation. If two people instead of one can operate a circular saw, for example, one can be cutting plywood while the stronger person nails the cuts up over the windows. If everyone in the group bugging out has fire-starting skills, one person can get the blaze started while the rest gather enough fuel for the night. Basically, extra working hands, not just helping hands, can make all the difference.

When you consider how this great nation was settled, both men and women had to have a number of skills to be able to build a homestead, make it through a harsh winter, or protect themselves and their property. There was more of a crossover between what was considered “men’s work” or “women’s work.” For example, in our family, my husband’s great uncle was an island lighthouse keeper in the late 19th/early 20th century, and knit all of the socks and mittens for the family.

Back in the day, people knew how to preserve more than just vegetables, and used every part of an animal from “nose to tail” because it served a purpose in daily life or for the future, not because of personal ethics, environmental purposes, et cetera. Prepping was part of life, because in the wilds of America, the S could hit the F on any given day and there would be no neighbors, and no government entity to help you out.

Those with no skills died, those with basic skills survived, and those with lots of different skills thrived. Those that thrived were able to settle the land, build wealth, and have strong, healthy heirs. Although I’m short-cutting the telling of history, our thriving forefathers and mothers passed on their legacies to subsequent generations, and thus America was built into the greatest nation on earth.

Renogy 400 Watt 12 Volt Monocrystalline Solar Starter Kit will help you thrive if the power goes out.

I hesitate to use the word “Darwinian” to describe what I am getting at, but when you think about, it is evident that smart people with well-developed skill-sets who work hard applying their skills do better in life, and in turn they tend to pass on their genetics and knowledge to the next generation. (And here is why government handouts don’t actually help people at the low-end of the economic spectrum lift themselves out of poverty; handouts do not teach them anything they can use, and therefore they don’t learn to improve their own positions and pass that on to their children. But that’s another discussion altogether.)

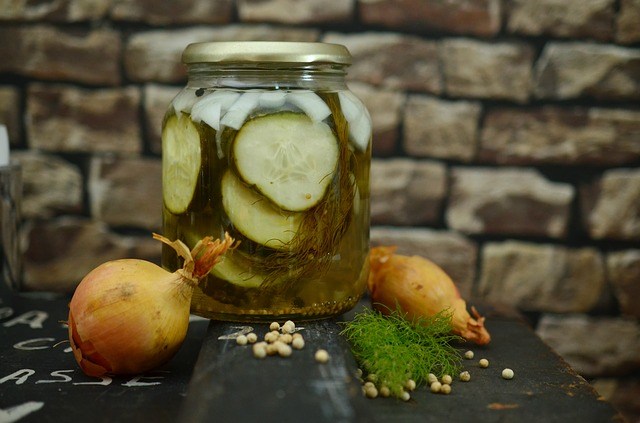
What are my next skill building preps? One will be spending more time at the firing range getting comfortable with shooting. Also, my fermentation obsession is going to expand very soon into kombucha and lacto-fermented pickles of all sorts, especially since probiotics have been found to be extremely important for a healthy gut, and may help prevent any number of diseases. Good health is important to thriving, after all!

As a fellow prepper, I encourage everyone to pick up new skills or expand upon existing ones, and break out of gender molds. If you’re a man, although it might seem like “women’s work,” you may be surprised at how rewarding it is hearing your sourdough bread’s crust “sing” when you take it from the oven, or at how much your friends appreciate getting your homemade soap (future customers when the SHTF.) If you’re a woman, and power tools frighten you, find someone willing to show you how and try a beginner’s project, like a birdhouse or a Leopold bench. Soon you’ll be amazed to find yourself with the confidence to take care of things on that “honey do list” instead of nagging the old man!

Fair warning to both sexes: you might just get hooked, and new skills could become lifelong hobbies or obsessions. Since you have the prepping gene, it’s highly likely! But if the SHTF, you can rest assured by expanding your base, you and yours will not be living in mere survival mode. You will enjoy a better quality of life and have more creature comforts than your neighbors because you can do things yourself and/or barter to meet your needs—in other words, you’ll thrive!

  Preparedness means different things to different people. Some may be comfortable with just an emergency kit in their cars, while others stockpile ammo, food and toilet paper in a secret

Even though there’s not much to it, I get more questions about how to store food than anything else. It’s something that anyone who is serious about getting food storage needs to think about because if you’re investing your time and money into food, you want to make sure you’re storing it properly!


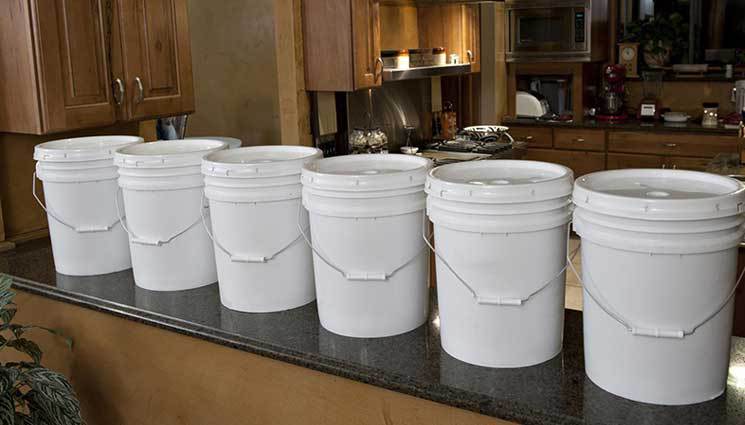
Our society seems to be so concerned about supersizing everything these days, EXCEPT for food storage. While closets have been expanded to fit every handbag in America, the pantry has been shriveling away, and in some homes, it’s practically non-existent. This is one reason, among many, that I LOVE buckets! They have come to the rescue, and have allowed people the option to supersize their food storage, while at the same time using little space.

What Can You Store in Buckets?

storing

You can store pretty much anything that is dry and sits on the shelf (except your cat, my brother tried), but look below for more ideas. Make sure to stay away from foods with high oil or sugar content; those need to be vacuum-sealed in jars.

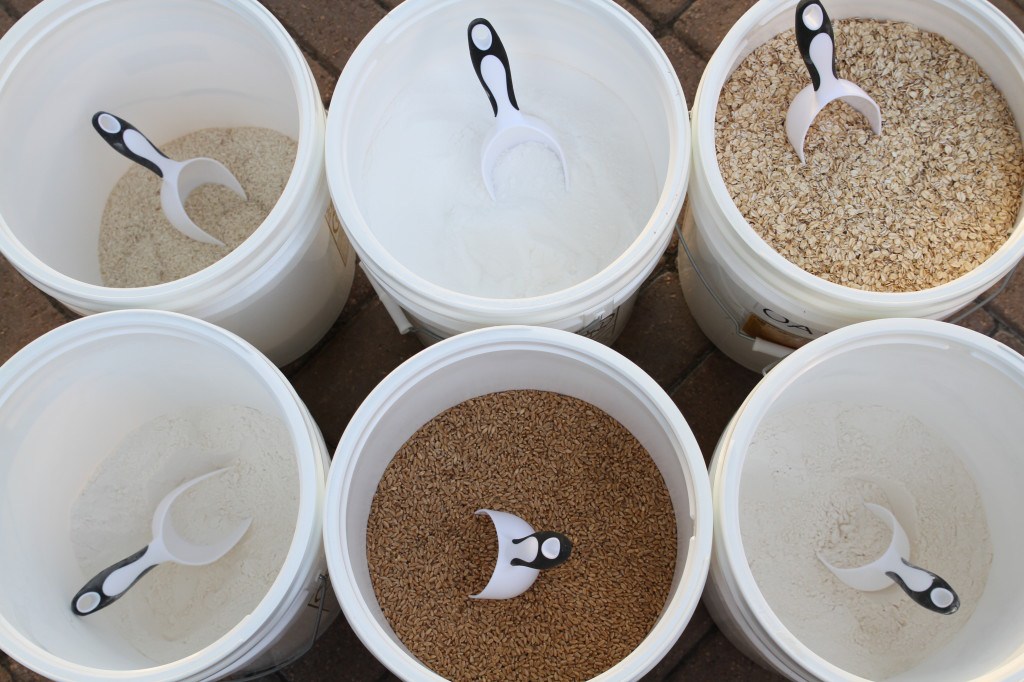
I store 5 different type foods in my buckets that you can see below (the ones with the ***). I reserve my buckets for foods I use frequently and need more of. One rule I have that helps me stay organized and rotate my food is that I store each type of food in only ONE type of container. For instance, if I decide to store my flour in buckets, I DON’T then go store it in #10 cans, flour bags, etc. By storing food in one type of container it helps keep things rotating well in my food storage system.

For food items that I use less of, I store mainly in #10 cans – like my beans, popcorn, hot chocolate, and freeze-dried foods.  But if you use a lot of those items in your home, you might want to go ahead and use buckets.

Anyways, hopefully, that made some sense, just figure out a system that works best for you!

How Much Do You Need?

Now the fun part! You get to pull out your calculator and give your brain a workout. You first need to figure out how much food you want, then you can figure out how many buckets you’ll need!

Most bulk food you find is in 25 or even sometimes 50-pound bags. So if you needed 100 lbs of oats, you would need 5 buckets & 4 (25lb) bags of oats. Here’s some of the best estimates I could find, so figure out your plan and good luck with the math!

FOOD ITEM

#10 CAN

5 GALLON BUCKET

*** Wheat
5 lbs 37 lbs – (12 buckets)
*** Oats
2.5 lbs 20 lbs – (6 buckets)
*** Rice
5.3 lbs 36 lbs – (4 buckets)
*** Sugar
5.7 lbs 35 lbs – (6 buckets)
*** Flour
4.5 lbs 33 lbs – (8 buckets)
Popcorn
5 lbs 37 lbs
Macaroni
3.1 lbs 21 lbs
Beans
5.6 lbs 35 lbs
Brown Sugar
4.5 lbs 33 lbs
Powdered Milk
3 lbs 29 lbs

Options for Storing Food in Buckets:

There are various ways you can store food into buckets, but I’ll talk briefly about the top 3 and let you choose.

1- Do Nothing

This method involves just that, you don’t do anything. You just put the food in the bucket and put the lid on (ok, maybe you do a little). If you’re rotating through your food on a regular basis (probably at least every 5 years), then you can maybe get away with doing this. You need to make sure the bucket and lid you use are sealed on properly to keep as much air, light, and bugs out. The bucket only provides one layer of protection against the elements, so it’s not the most trusted way of storing food, especially long-term.

2- Dry Ice

This way is similar to using oxygen absorbers, but instead, you are using dry ice. It’s a little cheaper and can kill off insect eggs at the same time, but it can be somewhat tricky. You want to make sure it’s done properly so you don’t have the opposite effect and leave a puddle of water at the bottom of your bucket instead. You only need about 1 ounce of dry ice per 1-gallon container, so if you’re up for some experimenting and playing with dry ice, feel free to give it a try. I just didn’t want to take a chance on all the food I had just invested in!

3- Mylar Bags w/ Oxygen Absorbers

This is the method I prefer and the one the pros use. Most companies you buy pre-packaged buckets of food do it this way. Plastic buckets alone are slightly porous and will still allow for air to transfer through them. Using Mylar bags with buckets cuts the oxygen down to almost nothing, helping to preserve your food for 25+ years.

For instructions, look below.

Storing Food in Buckets w/ Mylar Bags:

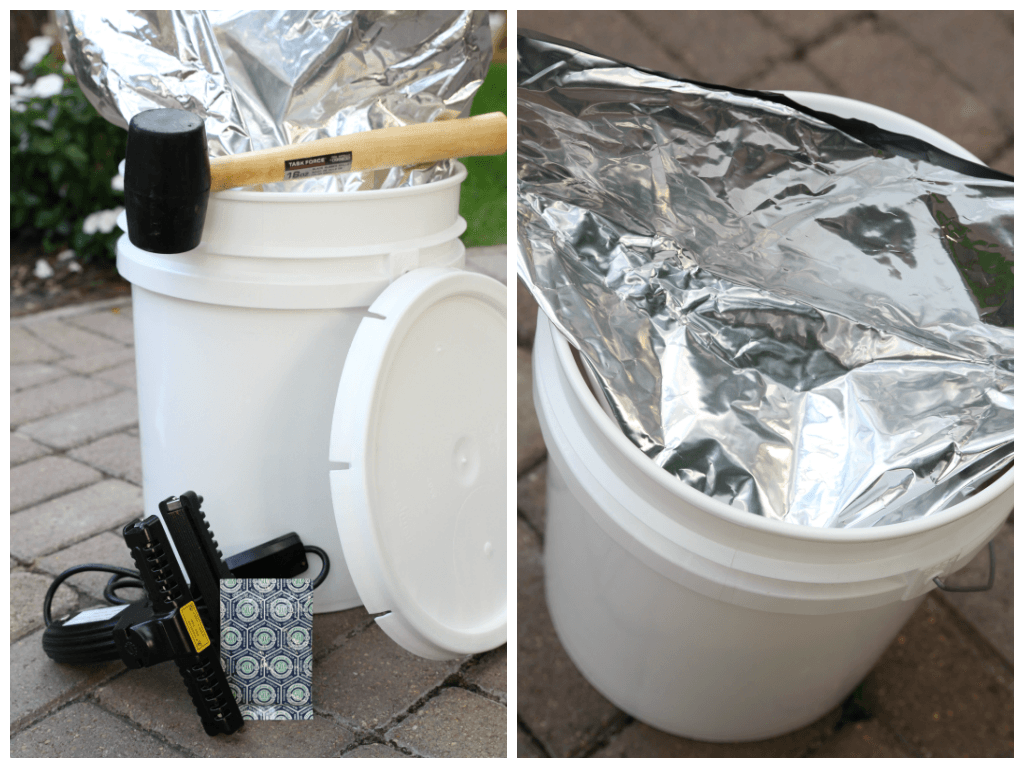
Gather your supplies. If you’re feeling extra energetic and want to hunt down leftover buckets from bakeries, restaurants, grocery stores, you can get them for FREE! I’m lazy, and I like them to all look exactly the same, so I got most my stuff from the links below and from Baytec Containers.


1- Get Your Supplies:

  • BUCKETS – You want food grade buckets.
  • MYLAR BAGS – 20″ x 30″ bag
  • OXYGEN ABSORBERS – 2000 cc for a 5-gallon bucket
  • SEALER – You can use a hand-held sealer, iron, or flat-iron.
  • GAMMA LIDS – I use these only on my 5 buckets in the pantry.
  • REGULAR LIDS – I use these lids on all my buckets, except in the pantry.
  • RUBBER MALLET – Used to beat the lid on the bucket.
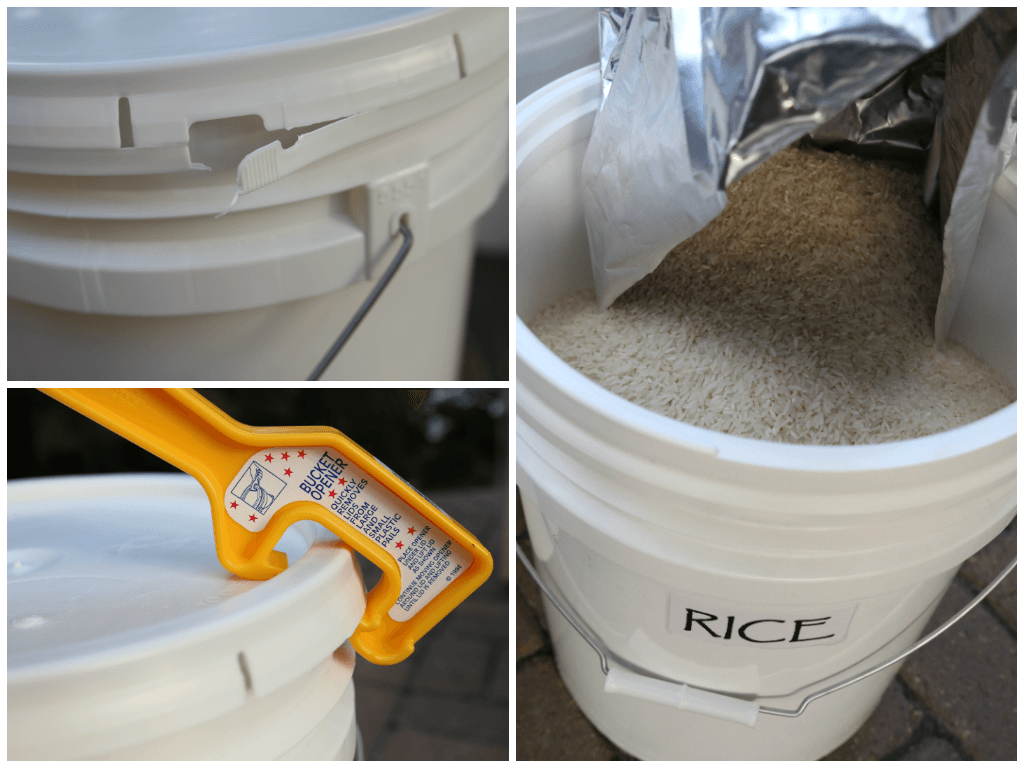
  • BUCKET OPENER – Helps take the lid off when you’re ready.
  • BULK FOOD – To fill your buckets.

 2- Put Your Mylar Bag into the Bucket:

I prefer 5-gallon buckets, but you can use smaller containers if that’s too heavy, or if you don’t need as much food. If you’re extra buff you can impress us and get 6+ gallon containers, just don’t say I didn’t warn you! They can get extremely heavy, so 5 gallon is my max.

Once you have your bucket, get a mylar bag that fits the size container you are using and put it inside. Mylar bags gives an extra layer of protection that keeps the oxygen, light, humidity, and pests out. Anytime someone tells me they had a bug infestation in their food I ask if they used a mylar bag and the answer is always NO, so don’t disregard these bad boys. These bags combined with the bucket, make it nearly impossible for critters to get in.

buckets

3- Put Food Into the Mylar Bag:

You may want a helper for this part, preferably not one dripping in ice cream ???? I’ve never had one, but I’ve dreamt about how I would boss one around, especially as I’m pouring 50 lb bags of food into mylar bags while trying not to spill it all on the floor! Maybe one day…

Anyways, fill the bag up as full as you can, just make sure to leave room so you can put the lid on!

img_2

4- Add an Oxygen Absorber:

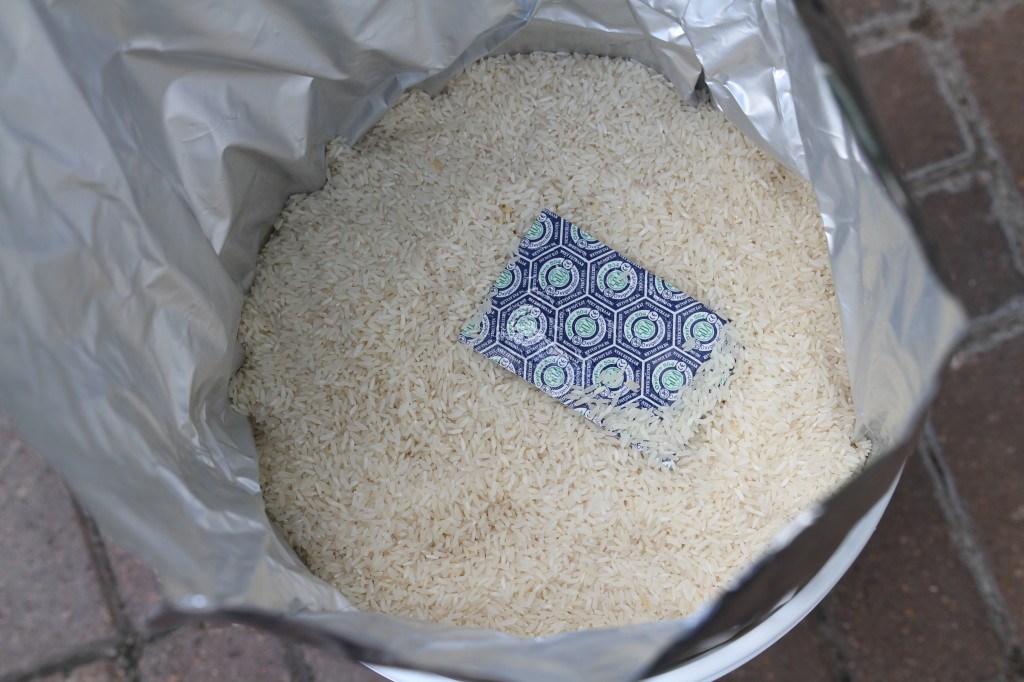
Do not add an oxygen absorber until you’re ready to seal! As soon as you open up a package of oxygen absorbers they start doing what they do best, absorbing oxygen. Make sure to have all your buckets ready to go with the mylar bags and food inside before you even think of opening the package up. As soon as they are opened, get ready to run around crazy throwing them into all your buckets. The goal is to have all your buckets sealed within about 10-20 minutes after opening the absorbers so they can have the maximum impact possible.

DO NOT USE OXYGEN ABSORBERS WITH SUGAR (unless you like eating bricks)

buckets21

*For a 5 gallon bucket use a 2000 cc oxygen absorber or you can use 5 of the 300 cc ones.

Size Container

 Oxygen Absorber Needed

Quart Jar or 32 oz container 100 cc
#10 can or 1-gallon container 300 cc
5 or 6 gallon bucket 1500cc – 2000cc

If you’re planning on using the leftover oxygen absorbers, you want to make sure you seal those back up ASAP. Often times I use the package they came in and re-seal it with my hand-held sealer, or you can repackage them in a vacuum-sealed bag, or store them in an appropriate sized canning jar with a tight-fitting lid. If possible, try to buy smaller packages of oxygen absorbers so they can be used all at once.

5- Seal the Mylar Bag

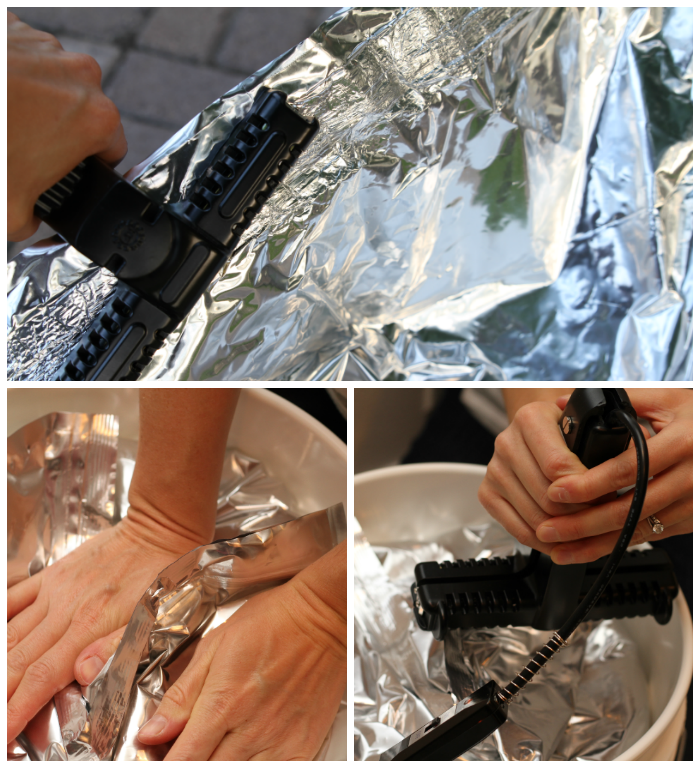
Once the bag is filled and the oxygen absorber is added, it’s time to seal the mylar bag. I went ahead and bought a hand-held sealer, which I love! Best birthday present I’ve bought myself so far.  You just go along the very top edge of the bag and melt the bag together to form an airtight seal. I leave a little opening at the end, squish as much air out as possible, and then finish sealing the corner.

img_18

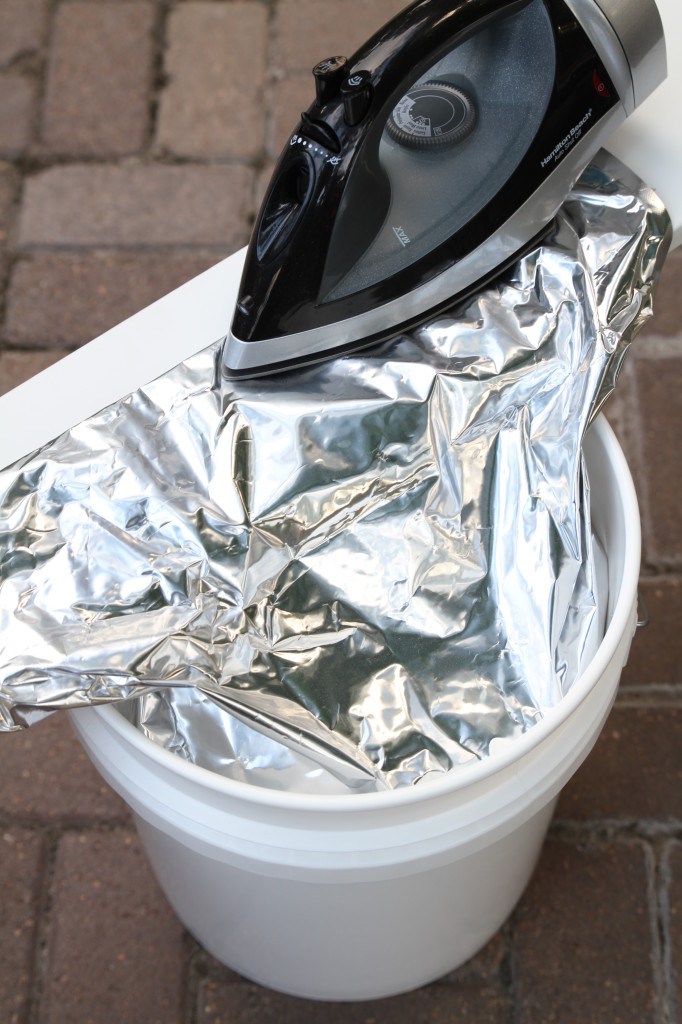
You don’t have to wait until your birthday to buy yourself a hand-held sealer – a clothes iron, or even a flat-iron you use for your hair will do the trick. Just lay a board on top of the bucket, lay the bag on top, and iron away! You might want to cut a strip of the bag off to test beforehand to get the correct temperature setting, or if your impatient like I am, just go for it.

buckets3

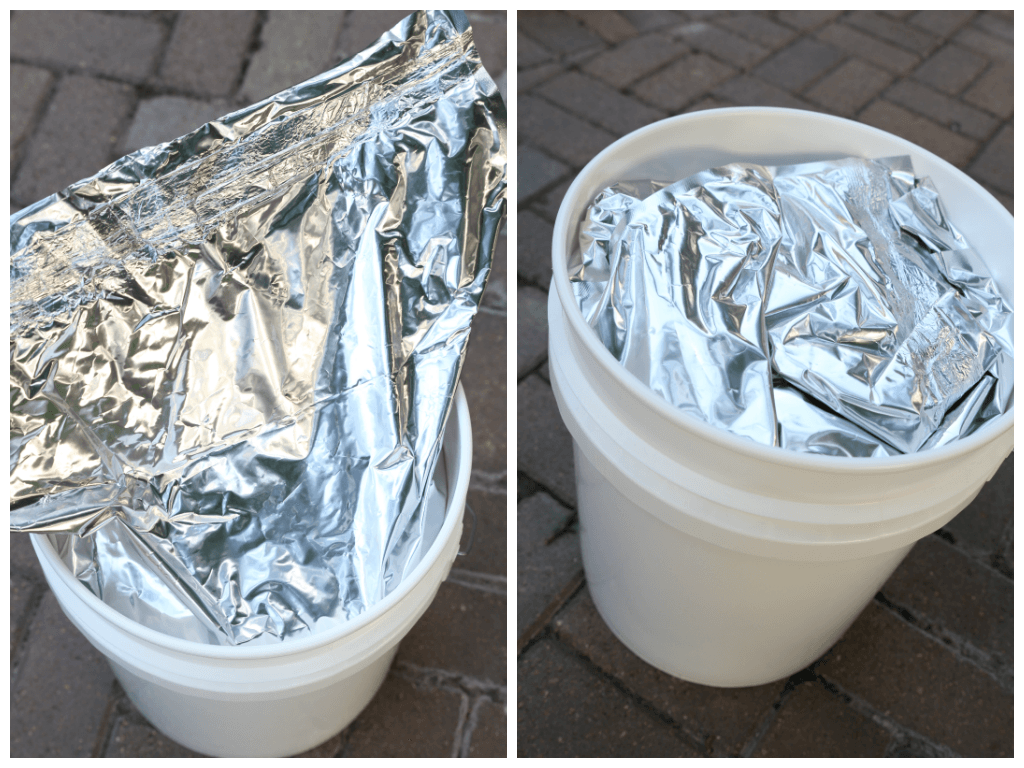
Make sure your bag is completely sealed, you don’t want any air creeping in. If the temperature is too high it will destroy the strength of the bag, but if it’s too cool the seam will pull apart fairly easy.

img_1

The bag may seem monstrous for the bucket, but that’s good.  If you seal close to the top edge of the bag (above is an awful example), you can cut right below the seal when you open it and REUSE the bag! It can be reused over and over again, all you need to replace is the oxygen absorber.

6- Beat the Lid in Place

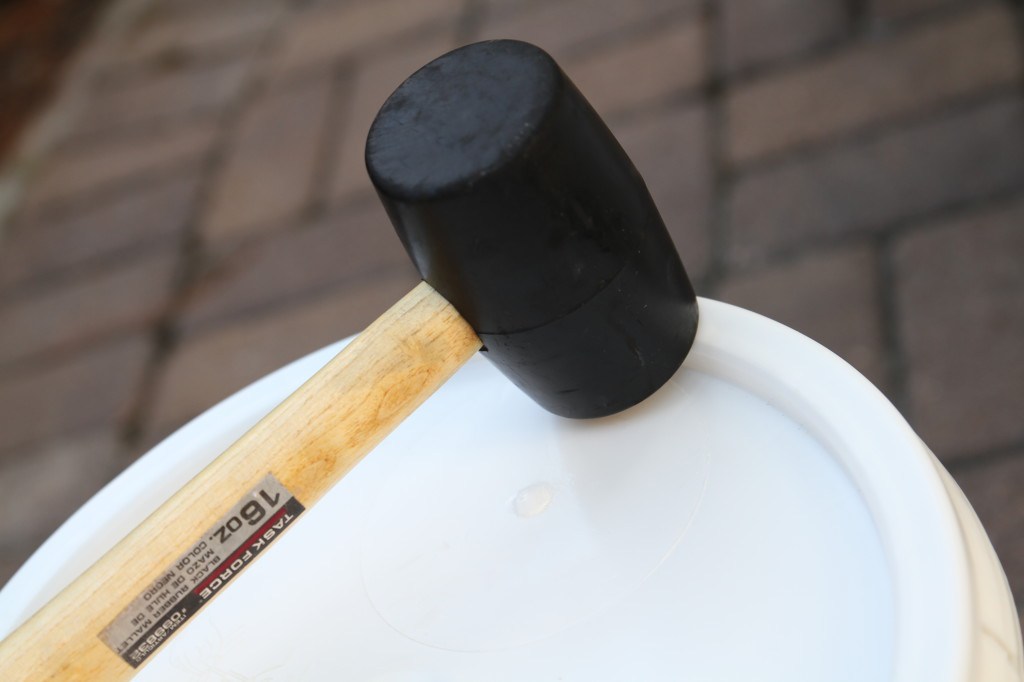
You can try to tap the lid in place, but until you lose control and start beating the crap out of it, the lid isn’t going anywhere. This is a great project to do after you’ve walked in on your boys while they’re painting themselves to look like Darth Vader and giving their room a Death Star makeover!

img_0

Gamma vs Regular Lids: Which Lid Should You Use?

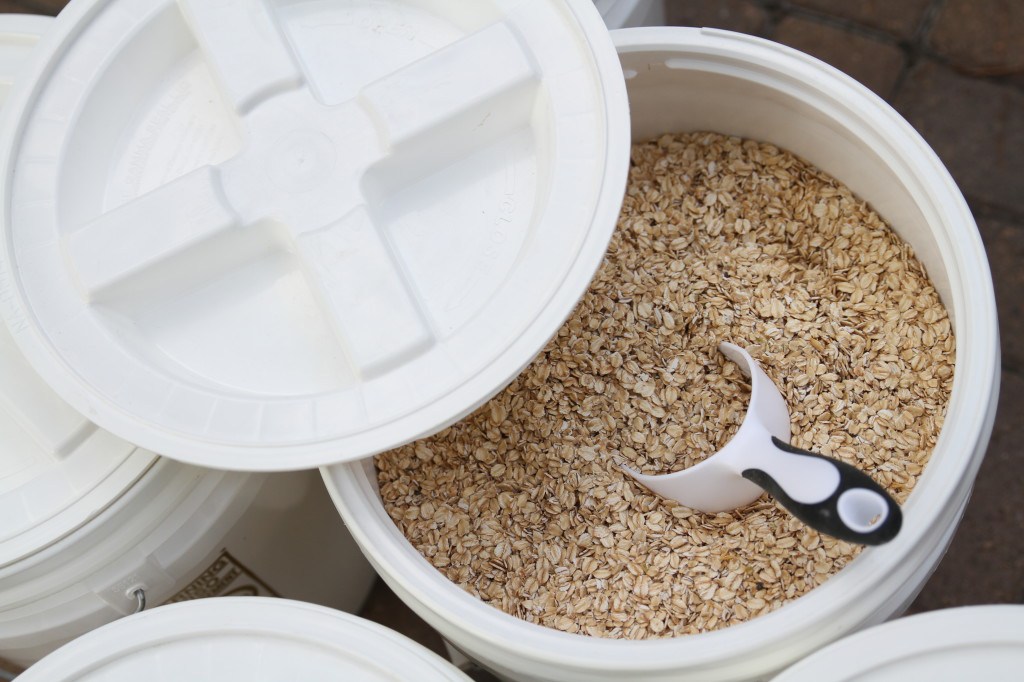
GAMMA LIDS – These twist on lids allow for easy access to the contents of your bucket which is one reason I prefer to put these on the buckets I have in my pantry. I can quickly twist the lid off to get the food out and then twist it back on. Some people put these on all their buckets, but the main issue is they are more expensive! They usually run about $4-6 more than regular lids, which can add up fast when buying 30+ buckets!

REGULAR LIDS – I prefer these for most my buckets because they are cheaper, stack easy, and create a good seal. If you are needing to get into your bucket often though, definitely go with the gamma lid if possible.

7- Label Buckets

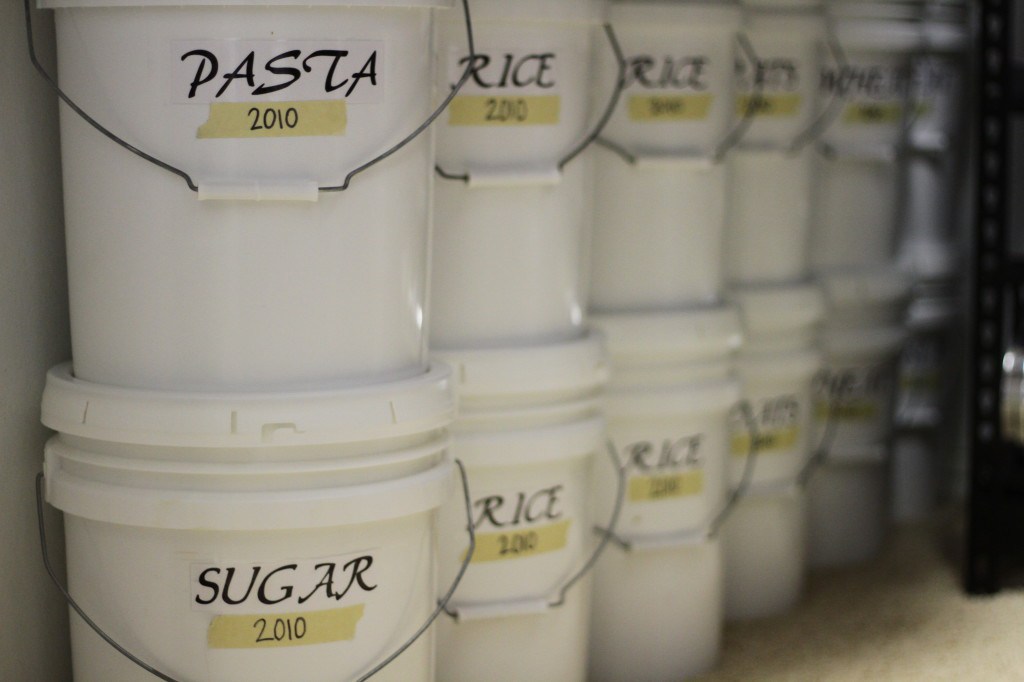
I spent 2 hours peeling labels off my sister’s buckets, because we had to refill them and they needed a new year. After that, I had a brilliant idea! Instead of always needing to put a whole new label on, why not just put the year on some easy to remove tape. Ingenious, I know!!!

Since I already did the math and figured out what I want in each of my buckets, I went ahead and printed labels with the food item for each bucket.  I don’t plan on changing the contents of the bucket so I went ahead and made sure to tape it on good! The year is changing every time it’s re-filled though, so I put the year on a separate piece of tape! Now I won’t ever be scraping tape and labels off buckets again! Maybe it doesn’t look as nice, but at least it won’t take me 2 hours to change the date!

buckets

8 – Store in a Cool/Dry/Dark Place ????

Just like everything else, you want to store your food in the coolest, driest, and darkest place you can find. This is sometimes where you have to be creative and maybe even consider storing some under the bed. When storing, you want to make sure they’re off the ground (so air can flow underneath), and I’m told you don’t want to stack them more than 3 high (they might crack). I like to be a rebel, so mine are stored right on the carpet, and I stack mine 4 high! The biggest concern is making sure they don’t topple over on anyone, especially the kiddos. So whether you decide to follow the rules, or be a rebel, just make sure to be careful!

Opening Your Buckets:

If the bucket lid is new, you’ll need to pull the plastic part off around the lid. Once that is off, use the bucket opener to pry the lid off. Remember to cut as little of the mylar bag as possible if you plan on reusing it. I then take the bag out and pour the food into the corresponding bucket in my pantry.

buckets4

Using Your Food:

I have 5 buckets in my pantry, which contain ONLY the food I’m currently using. With these buckets, instead of the regular lid, I use the twist-on lids known as Gamma Seal Lids. Mine are all boring white, but you can be fun and get different colors to help keep them organized, or to just add some excitement to your pantry.

img_1

Other Options:

Some other options with storing food is putting multiple smaller mylar bags into one bucket. I don’t necessarily promote this method, because there’s a lot of wasted space and it’s hard to rotate, but I’ve had many people mention they do it.

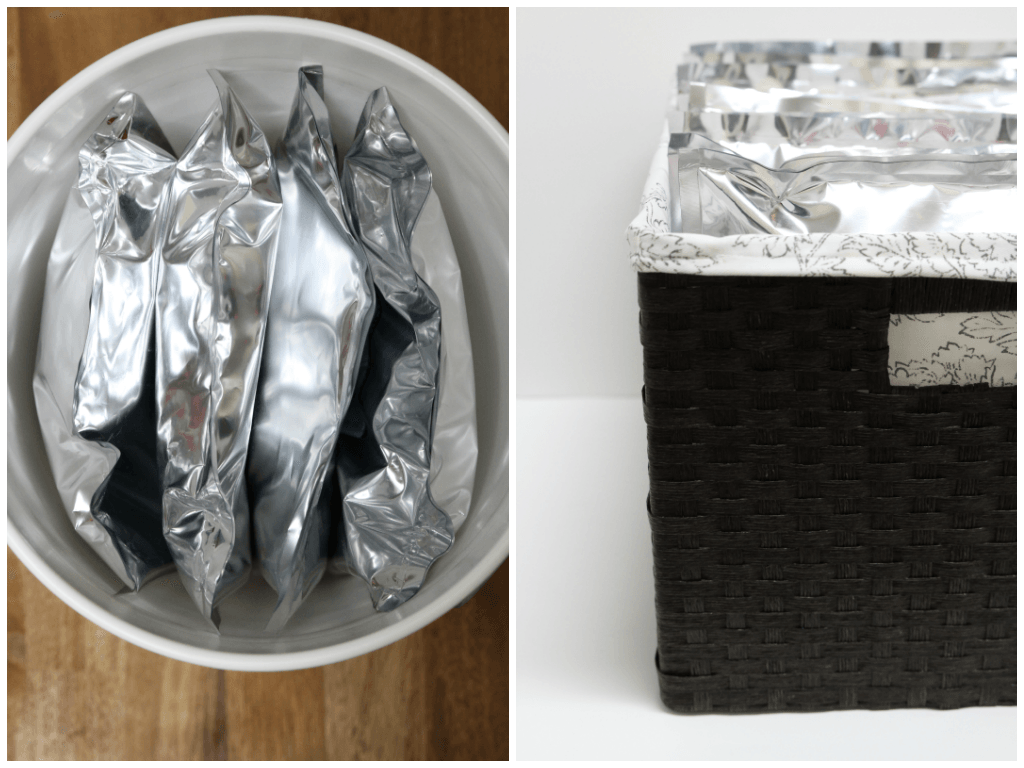
I prefer to put smaller mylar bags of food into crates or boxes that allow for more bags and are easier to rotate.  These smaller mylar bags can be purchased from places like the LDS Canneries and are a great option to use for storing smaller quantities of food like –  brown sugar, powdered sugar, spaghetti, etc.

bucket

Don’t let me squish your ideas or creativity, have fun and come up with your own ways to super-size your food storage! Just make sure you share your ideas with the rest of us!!!

Is there a method or way you like to store food long-term?

Even though there’s not much to it, I get more questions about how to store food than anything else. It’s something that anyone who is serious about getting food storage

What will go first in a SHTF scenario?

I totally agree with all of you about the importance of storing food, water, medical supplies, knives, weapons, and ammo. What I see as a discrepancy is that some are forgetting about the ‘looting masses”. The idea of “trade” or barter resembling near what everyone thinks will happen,  wont exist for a long time. The looters will not have a lack of guns, ammo, knives, or food for at least 3 to 6 months and when that runs out, they will be stealing from every store that sells guns and ammo. Granted, the food will probably run out first because they are either too lazy or they aren’t smart enough to plant gardens or can their food if they do. The ones who weren’t prepared will be looting or killing for food and water.

The Encyclopedia of Country Living, 40th Anniversary Edition: The Original Manual of Living Off the Land & Doing It Yourself

Medicine will run out after the pharmacies are looted dry. Drugs will be a hot commodity. Beer and liquor will last only as long as the looters allow. Paper money will be good for starting a fire. Rather than being in short supply, I believe that clothing will last a very long time just because the “looters” will be going from home to home and taking what they want and there are so many clothing stores. If they run out of bullets, they might try to trade for it. Silver and gold might hold some value but we have to remember that any place that sells or trades precious metals will be on their list to knock off. Wedding rings, diamonds, ear rings, gold teeth, or necklaces will be stolen from the less fortunate.

Gas will only last for a very limited time, even with the proper additives and stored properly. Diesel will last longer and there are many homes that have “fuel oil” heat that can be used in diesel vehicles. I’m not sure what the life expectancy of propane is. That will run out also.

Everything will run out eventually

Do I sound like the “grim reaper”? Sorry. Just trying to keep it real. If you’re going to prepare, Prepare for the worst and hope for the best. Preparing like you are going on a camping trip and being caught in a real major TEOTWAWKI catastrophe is going to leave you a statistic. You won’t be any better off than those who didn’t prepare. In my opinion trying to survive alone is the worst case scenario and is not an option. The “looters” won’t come around knocking at your door and asking if you can help them and they won’t be alone.

If you want my opinion, get as much ammo as possible and learn to reload. Start growing your own food, collect water from natural sources and learn skills now that can help you protect your home or bug out location. You also need to get as many like-minded people with skills to join you. The only people to consider are those that you can trust and know will have your back no matter what.

It’s always a good idea to have the 5 basic weapons. There is another posting on here for that. Having the ammo and the skills to use those firearms are just as important as having them in the first place. I would like to add 1 more, the air rifle. To be exact, you should consider an Adult Air Rifle. Don’t discount its possibilities. It can save your life in more than one way.

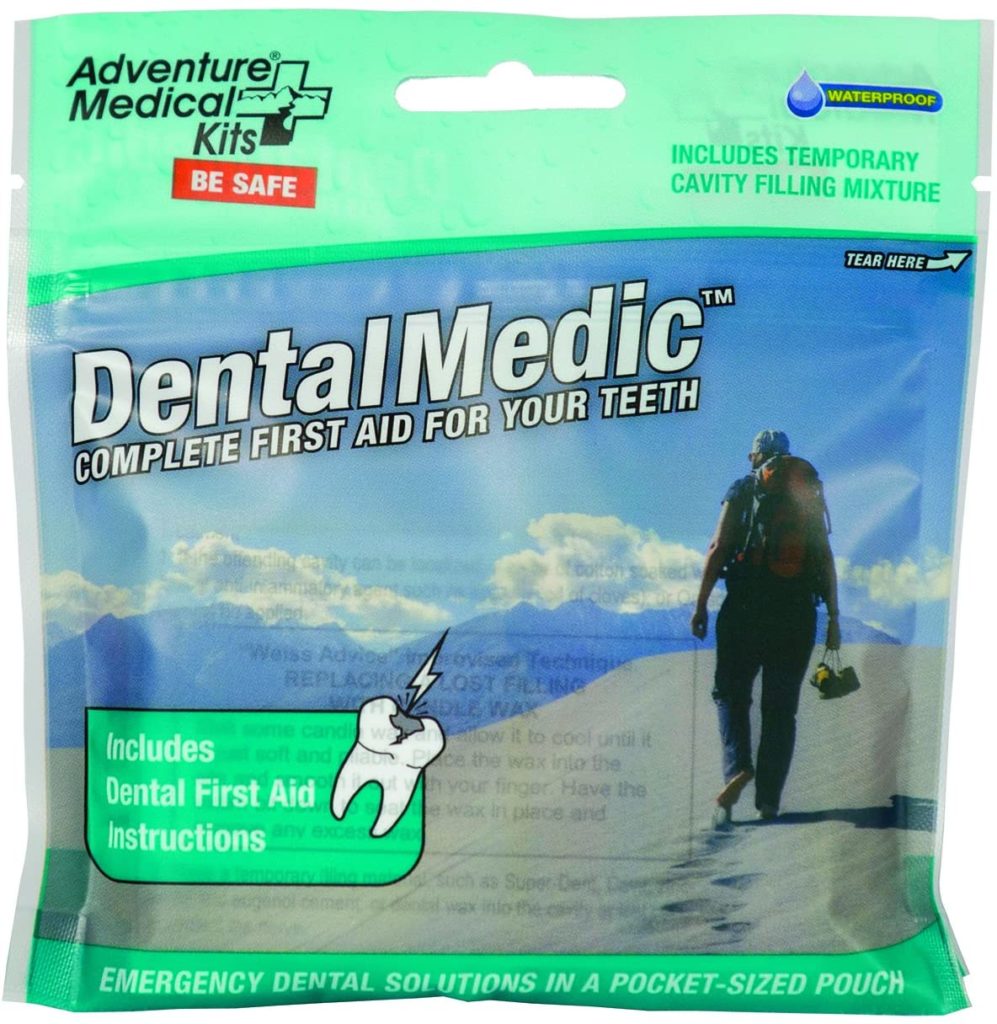
Nothing brings a person to his or her knees like a dental emergency – be it an infection, a lost filling, or fractured tooth.

Having extra seeds to plant your garden (or trade) is or can be a life saver. Buying the right seeds are just as important. Heirloom seeds are seeds that are taken from mature vegetables. They will grow the same plants and give you the same vegetables year after year. You can also use those same seeds to trade or plant new stock.

Fishing and hunting skills are necessary by someone in your group and could prove not only to save you, your family, and group, but to barter with if you have a “good day” and can’t preserve it. You don’t need expensive fishing poles and reels. You don’t need a lot of lures. You will need hooks, sinkers, and bobbers. Remember, you’re not trying to win a fishing tournament; you’re trying to supply food. Small fish taste just as good as or better than big ones. Nets, fish traps, trout lines, hand lines and a stick with a string, hook, and worm will catch you a meal.

Rain catchment barrels are a must. They can give you many gallons of water even in a small rain fall. The water still needs to be purified but a simple boil can make it ready for drinking. I would strongly suggest getting food grade barrels and converting them to your gutters. There are many YouTube videos on how to do this. Very easy and very cheap.


The final piece of equipment I would strongly recommend is an M-67 Immersion heater. They can heat your water for showers, heating food, and cleaning dishes and they are not expensive. (under $200) You will need a metal trash can (35 gallon or larger) and PLEASE, READ THE INSTRUCTIONS. It runs off of gas, diesel, kerosene, or any flammable liquid.

What will go first in a SHTF scenario? I totally agree with all of you about the importance of storing food, water, medical supplies, knives, weapons, and ammo. What I see

Disasters and emergency situations are a part of our lives. You may not plan on getting lost in the wilderness while heading out on adventure plans, but it can happen to any of us. You may lose your way or get in an accident and end up in the wilderness.

Now, it is all about how you respond to such a situation that plays a significant role in your survival. With the right skills and knowledge, your chances of surviving the emergency situation will be high. Having a positive attitude will greatly increase your chances of finding solutions to problems that can occur in a survival situation. The key is to put your knowledge to use and create your master plan for survival in the wilderness.

While it is nice to have all the tools, food and water along with you, you may lose your basic survival kit and would have to survive the emergency situation with nothing except the tools in our head. No matter how scared and alone you may feel, optimism makes a big difference and impacts your ability to handle the survival situation.

This article is about all the skills you need to learn and remember that can help save your life in any wilderness survival situation. Having a working knowledge of these skills will improve your ability to survive in the wilderness drastically. You may not have any equipment with you, but with the right knowledge of the below-mentioned skill you will still do fine.

This survival guide ensures that you are physically and mentally prepared to face any situation without any tools with you and help yourself at all times. Learning these skills can help you make it through most dangerous survival situations and bring you back home safely.

There are a number of skills but the seven survival skills mentioned below are the most basic ones that you should be mastering first because these are the skills that will help keep you safe for a longer time until you are rescued.

Making Fire

It is important to keep the wind direction and the surrounding area in mind when trying to start a fire.

The first survival skill you must know is how to make a fire. Knowing how to build a fire that burns through the night is crucial. Fire provides you heat, light and smoke keeps you warm and comforts you during the night. You can use it to cook food, purify water, as a signal for help, as a source of light, to see in the dark, make tools and also for keeping critters away. It also creates a sense of security and safety.

When traveling in the wilderness, it is always better to carry a few fire-starting tools like lighter, matches, firesteel, etc.  You could also light a fire with the help of eyeglasses, water bottles, and cell phone batteries. In case you do not have any of these available then fire by friction is the most effective technique that you can use.

There are various other methods of starting a fire with a bow drill, flint, and steel, fire plow, fire saw, hand drill, etc., depending on what resources you find around you. It is important to keep the wind direction and the surrounding area in mind when trying to start a fire. Make the fire away from hanging branches, stumps, logs, dry grass, and leaves as it could turn out to be dangerous.

Finding and Purifying Water

Finding water will be mostly dependent on the surroundings you are in.

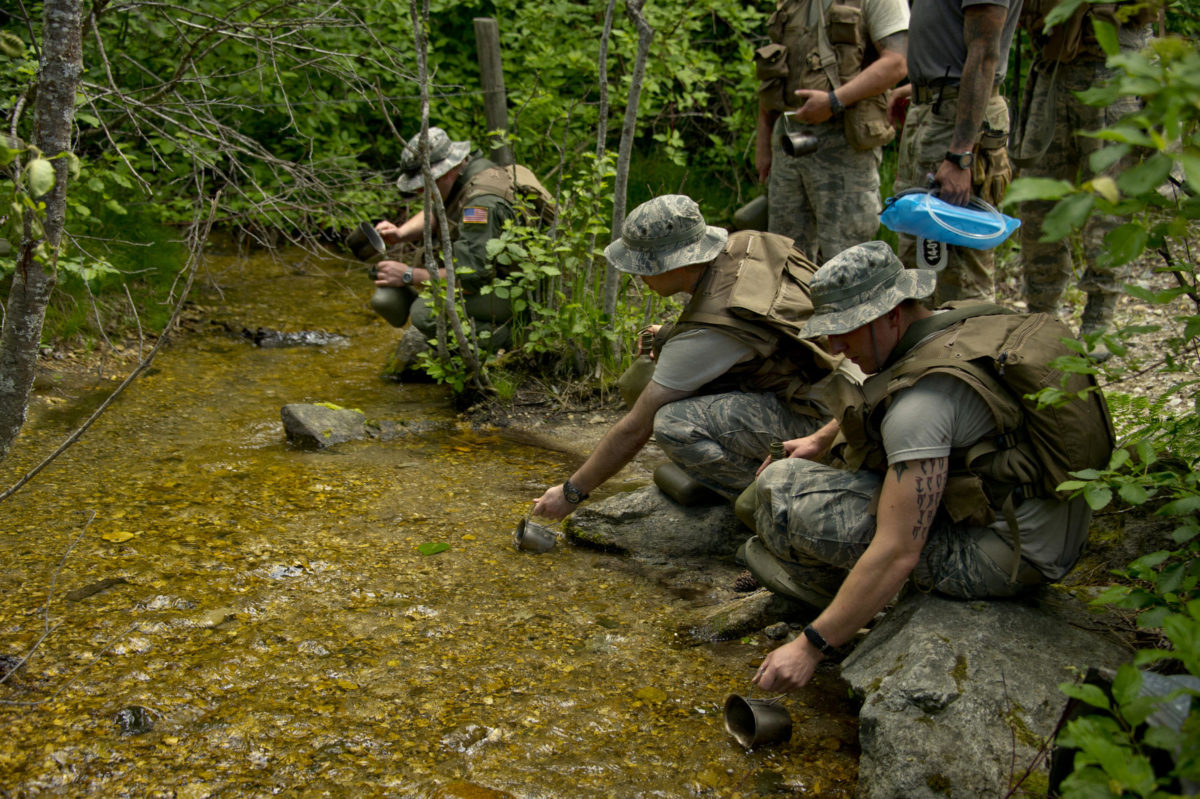
The next most important priority is water. Finding and purifying water is of primary concern in a wilderness survival situation. The best sources for drinking water in a wilderness are springs, headwater streams, and morning dew. You can find water by following the sound of a flowing river or grazing animals.

Finding water will be mostly dependent on the surroundings you are in. Large plastic bags can draw water from tree leaves; you can tap a tree to get some water. Dew on the grass is another brilliant source of water; you can collect water by running a piece of cloth through the grass. In the desert area, you can find water by digging up a dry creek bed. Stagnant water is not suitable for drinking even if you boil it.

Once you have found water, purifying it is another task. You can purify water by either boiling or filter it.

If you have a fire then boiling is the best way to purify water. Even if you don’t have a container to put water in, you can heat up some rocks, drop them into the water and let it boil for 2-3 minutes.

For filtering, allow the water to stand till the mud settles to the bottom and then you can use any cloth to strain out remaining silt.

Building Shelter

You can collect materials that could be put together as a rough shelter to help you get through until help reaches you.


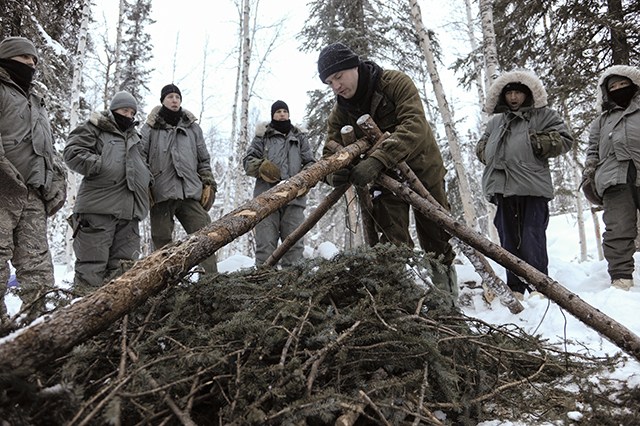
You are going to need a shelter at some point until you are rescued. You should at least carry a tarp in your kit, if not a tent. A tarp could be a lifesaver when stuffed with leaves or grass as a barrier from the wind, snow or rain. In case you lose your bag, you can build your shelter as long as you can collect materials that could be put together as a rough shelter to help you get through until help reaches you.

Being able to build a shelter is vital in a wilderness survival situation. You need to consider the location before planning to build a shelter. A good survival shelter must block all the outside elements and protect you from the ground, freezing temperatures, heat, winds that insulate cold or heat, snow, driving sleet and rains.

There are various kinds of natural shelters to consider such as caves, hollow stumps, and logs. You can also build shelters such as a debris hut, lean-to, scout pit, snow shelter, etc., The type of shelter depends on the supplies available to you. The debris hut is the most practical and easiest to construct in almost any environment.

Finding Food

If you do not have any food with you, you will have to find something to eat


Food might not top the survival essentials list, but it is equally important as you will start to lose strength if you do not eat for a long time.  It is wise to keep a small container of olive oil as it is packed with a huge amount of calories and can be used for other things as well. But if you do not have any food with you, you will have to find something to eat. Fishes, small animals, plants, and berries are some options that you can look for in the wilderness.

Most of the natural environments are filled with all these and various other foods. If you are around a lake or a river, fishing could be the best option in any survival situation. Hunting small animals with snare traps could also be considered if placed at the right spot.

Plants are another natural and best options that can satisfy your hunger during survival. But it is very important to identify any plant you plan to consume. Do not eat unless you are not sure about the plant as many plants can be poisonous. The best and readily available options are acorns from Oak tree, nut and inner bark from Pine tree, stalk, root and tuber from the Cattail of the grass.

Paracord Use and Paracord Knots

There are extensive uses of this survival tool like building shelter, making fire bow, snares, fishing lines, and stringer, securing an animal, building raft, ladder, etc.

Paracord is a very important survival tool that should always be kept handy. It is made of nylon, and it gives incredible strength and durability that can accomplish a variety of tasks. It is made in a braided form and can hold up to 550 pounds of weight. It is quick drying and resistant to rotting.

Paracord could be used in almost any wilderness survival situation. Paracord can be used intact, or the inner strands of it can also be separated and used for any work. There are extensive uses of this survival tool like building shelter, making fire bow, snares, fishing lines, and stringer, securing an animal, building raft, ladder, etc.

There are some cool Paracord projects that you can try yourself.

Paracord also has many uses in first aid and can be used as a signaling tool as well. All these abilities make paracord a powerful weapon.

Paracord Knot tying is another essential skill in survival techniques. It is a fast & easy way to make a quick safety harness. There is a kind of knot for every survival situation. There are numerous ways of tying paracord knots but taut-line hitch, figure eight knot, square knot, clove hitch and bowline are the most important and widely used paracord knots in any survival situation.

Self Defense

Self-defense is another very important skill in any wilderness survival situations. It is always recommended to carry a few tools or some weapon with you like a knife or pocket saw or any other sharp object that you can protect yourself with. If you do not have any of these, then you can probably make a weapon with the resources and materials available to you. You can find many potential weapons in the wilderness.

Self-defense weapons could be anything like a sharpened stick, branch, or a club or bow and arrow or an axe or simply a piece of rock. You can make a war club or an axe by using a sharp rock and a branch of the tree. All these could be a defensive weapon even in the most untrained hands in survival situations.

If you are at risk from any animal, do not panic or run away from it. It is better to face the animal and get away from it slowly. Throw anything that you can find at it. In case the animal attacks you, try to block its mouth with your non-dominant hand and smash its snout or directly hit it in the eye. Once the animal is temporarily disabled, run to find something that you can hide in. Arm yourself with any sharpened object that you can attack the animal with.

Learn to Communicate

Survival is your priority, but you also need to be rescued. One of the skills required in any survival situation to be rescued is to communicate. Communication is the key, and proper signaling plays an important role. Signaling is drawing attention. The rescuer must be able to recognize your signals and so you need to know effective communication skills.

Considering some wilderness places might not have cell coverage, you can use the following ways to communicate.

  • Construct unnatural objects that do not sync with the surrounding area and are easily noticeable. Use colors, materials, and shapes that can draw the rescuer’s attention.
  • A mirror can be used to reflect during the day. Aluminum foil, watches, silver parts on credit cards or anything shiny can also be used.
  • At night flares, torch and flashlights work best.
  • You can build a signal fire at a certain height in an open space and keep it ready to be lit instantly as you notice any plane or a helicopter.
  • A wave is considered as a signal to not land. Instead, form your arms in a “Y” shape indicating that you need help.
  • Wave your arms or a t-shirt attached to a branch of a tree vigorously; your movement will be noticeable.
  • Radio is surest and fastest way of communication. Learn how to operate and be familiar with the radios in your unit.
  • Whistles are another sure communicating tool that can be heard from far away. Always try to carry a whistle with you or learn how to whistle.
  • If you’re moving, it is better to leave some things behind as a signal at prominent clearings.

By maintaining a positive attitude and with the help of the above survival techniques you can not only successfully survive any wilderness situation but also you can get yourself out safely. For any situation Prepare, Adapt and overcome is the key to succeeding.

Disasters and emergency situations are a part of our lives. You may not plan on getting lost in the wilderness while heading out on adventure plans, but it can happen

The Pro’s & Con’s of Perennials

One of the benefits of going with perennials is that they’re largely a one-time investment. Some may only last a handful of years or a decade, but most will give us 20-50 years or whole lifetimes of production once they get started.

The flip side of that is that most perennials require at least a year or two to establish, many 4-10 years, and fruit/nut perennials could need 10-20 years before they start producing a reasonable yield. A lot of the fruiting perennials are one-offs per year, as well. There are some with longer harvest seasons, but it’s not like an annual garden where in some cases we have the potential to plant four different things in a space per year, and tree and shrub fruit isn’t usually like lettuces or spinach that we can repeatedly harvest from the same plant.

On the other hand, once they’re established, most perennials don’t really need us a whole lot, unlike annuals, and trees need us even less than smaller shrubs and perennial plants. Perennials can be highly multi-function, with additional roles such as nitrogen fixation that can improve soils around them, soil stabilizing roots, pollinator habitat and food sources, livestock fodder or forage in the form of green limbs and leaves or tree hay, and medicinal value. Some can be coppiced or selectively pruned to provide us with kindling, rocket stove fuel and mulching chips.

Here I’ll stay away from trees like apples and plums that are so commonly grafted and are super susceptible to diseases and pests. They tend to need us, and they tend to be pretty recognizable. Instead, we’ll look at some other options. Most of the ones I’ll recommend are largely free of pests.

I’ll come back to the ones that can be a little less obvious as food production in another article as well. Right now, here’s a look at my top five perennials preppers should consider, selected as such due to their climate versatility, ornamental aspects, health, versatility for all stages of preparedness, and highly multi-functional landscape and production roles: pea shrub, oak, willow, wild plums, and crabapples.

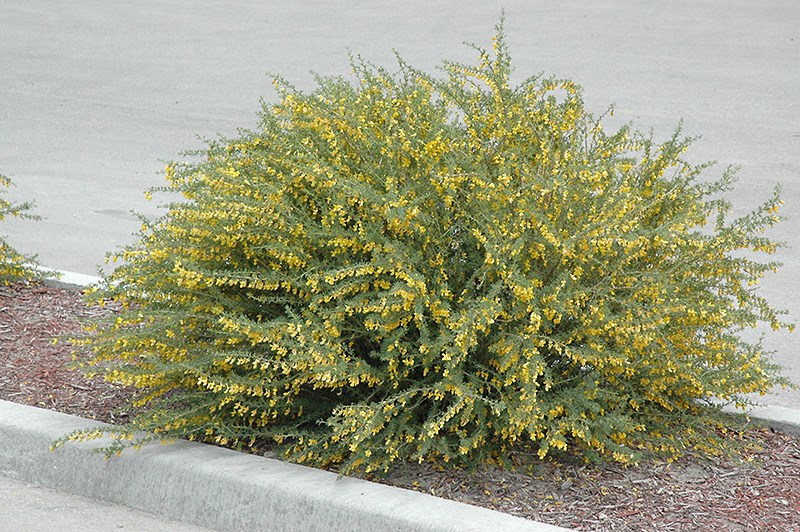
Pygmy peashrub can easily fit into even small urban and suburban gardens and homes.

Pea Shrub

Pea shrub is one of the more controversial plants that we increasingly see due to permaculture’s spreading interests.

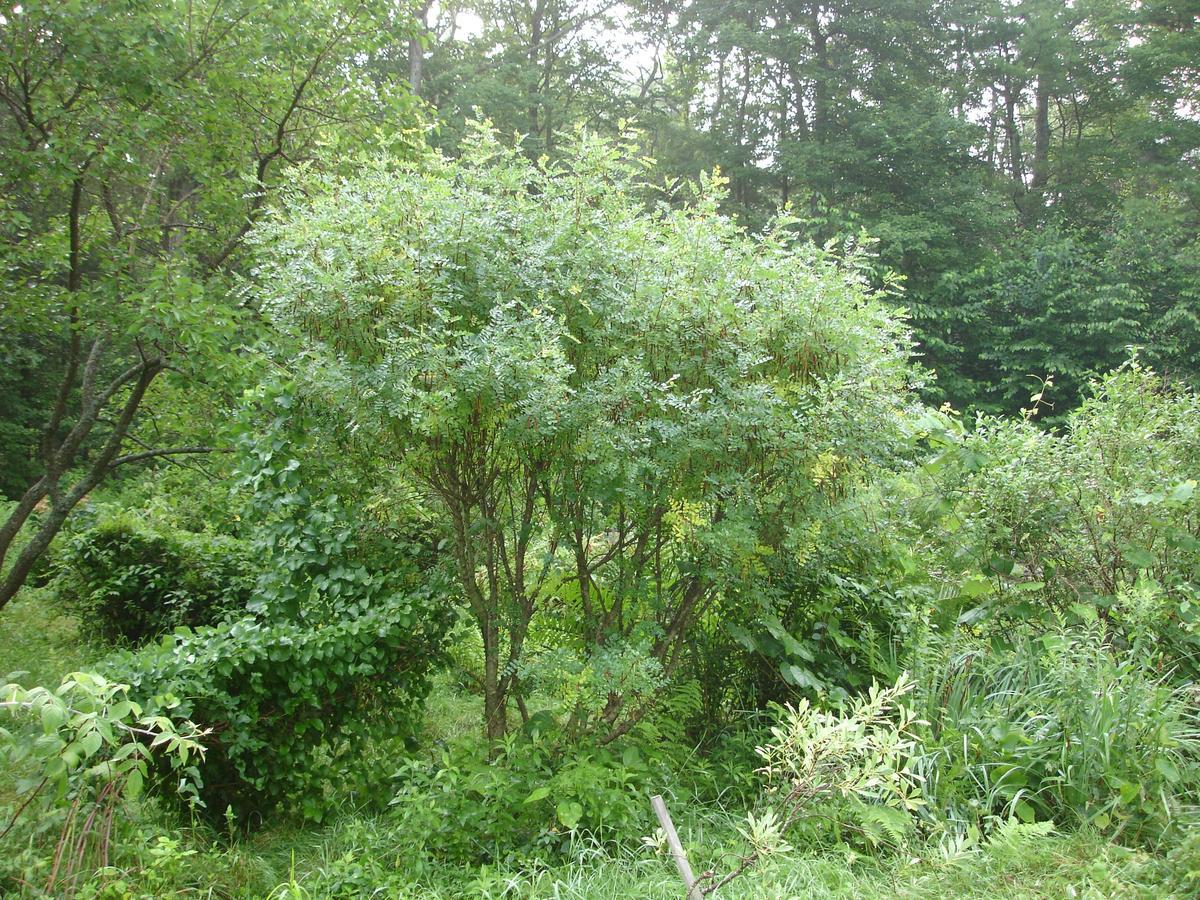
Many types of livestock can consume the leaves and pods of pea shrub, providing a fodder or forage plant that can sometimes be lacking in the cooler climates. It’s also a habitat builder for small game and small birds, and beneficial predatory insects. Because it can survive in some pretty gnarly climates and ugly soils (thin, compacted, stripped out) it’s an excellent nurse crop or soil retention and rebuilding crop for mismanaged lands, drylands, and cool or cold climates. As a nitrogen fixer, it’s ideal for production alongside trees and larger shrubs with high needs, especially those that can use the N boost later in the growing season (it takes part of the season for the legumes to start producing excess nitrogen, even the perennials).

Peashrub offers great variety in use, tolerant of manicuring to a shaped hedge or blending into a freeform native patch – both hiding food or resource production in plain sight.

It’s happier in part shade than in full sun, which makes it an excellent addition for base shrubs against a northern or eastern wall and alongside established trees.

It’s one of the few where instead of a cold-hardy ceiling, we’re bounded instead by heat. Siberian pea shrub can handle zones up to 8 if there’s water, but many varieties will only go up to 6 or 7.

Warmer areas (7-8, sometimes 6 by variety) will find less flowering with some varieties, which means fewer of the pods we can consume and feed livestock green, the tender green seeds, and the dry peas. Shaded areas can help combat this. Even at its warmer limits, it produces foliage well, with that foliage an excellent addition to our tree hays as well as nutrient-rich mulch that we can use to overwinter strawberries or cover our garden beds.

Oaks

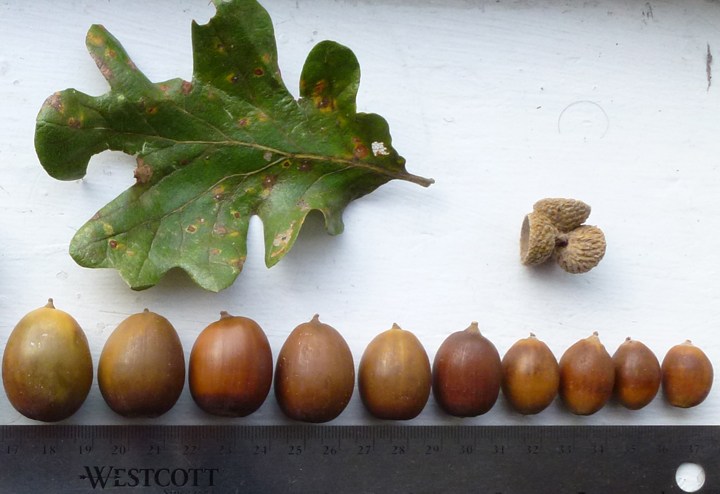
Oaks produce acorns, although there’s more to that story than some might think. Acorns come in a number of sizes and shell thicknesses, which increases and decreases their ease for human consumption or the livestock and wildlife that can make use of them. Oaks also tend to produce in cycles, although the cycles can vary widely, from those that grow and mature the nuts in a single year, to those that might take 2-3 years to drop harvests. Some have the same boom-bust cycles found in other nut and fruit trees.

There’s an oak that can be found for every zone, 3-9 at least, with most zones having multiple species native or compatible. Oaks also cover a wide, wide range of soils and precipitation. This site http://www.wildlifegroup.com/shop-for-hardwoods/ is a sale site, but I keep it handy as a reference for oak types, from their size to their zones, soil and climate needs, to production cycles.

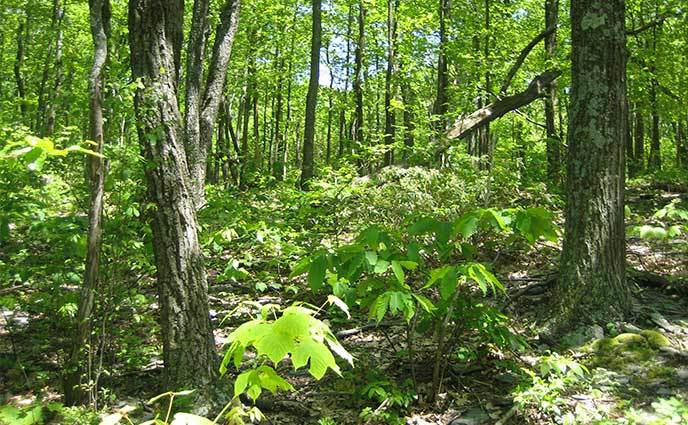
Oaks come in a huge variety, from leaf shape to acorn size and shape, to the climates and conditions they’ll thrive in and their cycles of production.

Oaks can create some challenges due to the jugalone they produce and the high-tannin highly acidic leaves they drop, as well as the dense shade they produce, but there are plenty of native fruits and nuts in oak forests, and even some domestic crops and ornamental edibles that can share space with them, from blueberries to paw-paw. We can also mow the leaf drop annually to mulch over annual gardens and berries that like acidity, or create leaf mold.

A number of yarrows, reed grasses, lilacs, wild-type buckwheats (Californian, coastal, Suzi’s red), woodland and mock strawberry, lavender, lupines, Californian coffeberry/buckthorn, verbena, sages, sorrel, bunching fescue-type grasses, and others can grow in close association with oaks. They allow us to create a naturalized setting or a very ornamental one, with food production for humans as well as medicinal and herbal plants, and pollinator and nurse plants all in the same area. With tailoring, they can create managed free-range grazing for birds raising their own nests, goats, and other species; small game or game bird habitat for increased hunting in cities, suburbs or rurals; and harvested-fodder from grains to soft legumes to fruits and foliage for livestock.

Willow

From the ability to make small-batch or large-plot propagation-rooting and garden-transplant boosting “tea” to the ones that can help with pain management, willow is a pretty well-known function, resource, and survival tree.

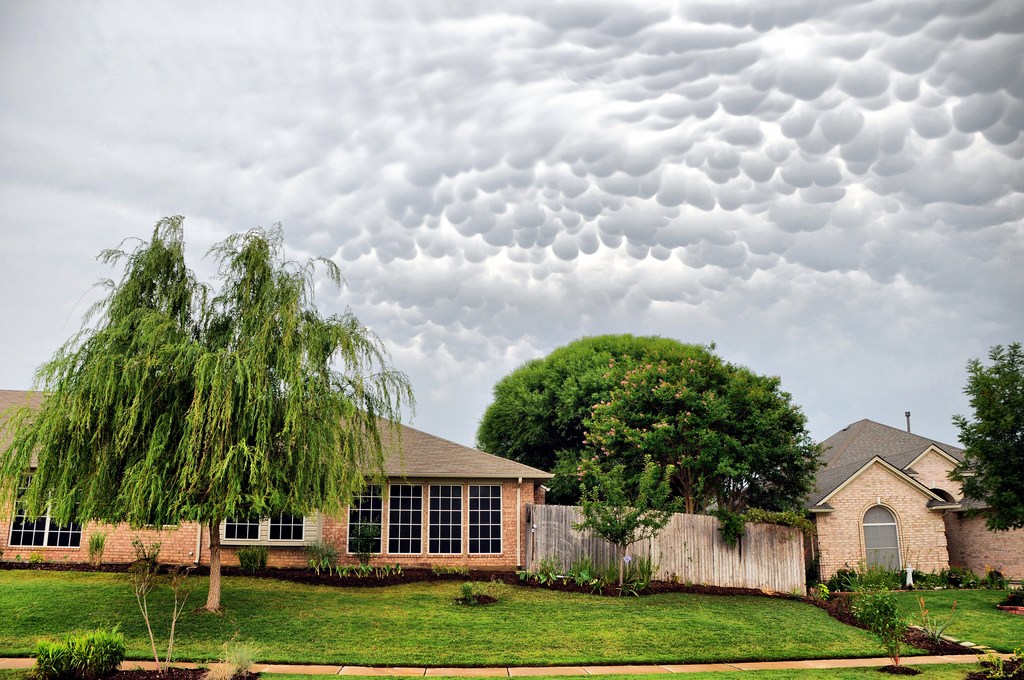
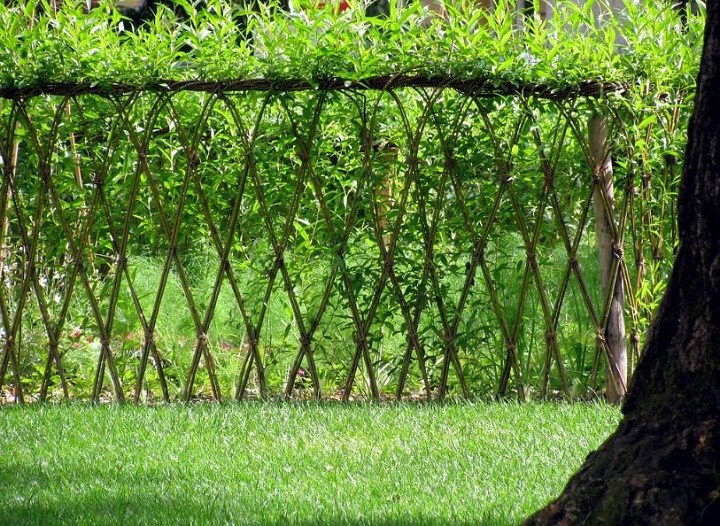
We can use its leaves as medicinal feed for most livestock, or regularly supplement with it for goats and rabbits, even chickens, and turn it into tree hay. Wands can be woven for window covers and floor mats, baskets and chair seats, and used as natural ties in some forms of construction, from plant trellises and cages to fish traps and boxes. Its rapid growth enables us to turn it into living fences and hedges with relative speed and ease. We can even use some species to help us “mop up” seasonally or annually boggy areas to allow other plants a better shot at growing.

Willow is adaptable to trimming and pruning to hedges, domes, arches, living fences, and small shrubs, increasing its versatility in small lots as well as large homesteads.

Overhanging ponds, creeks and rivers, willow creates excellent habitat for game birds as well as fish, and it can help stabilize banks. As with use in open yards, it can help create a flood and high-rain buffer, soaking up incredible amounts of moisture, especially as a coppiced hedgerow backed by larger trees. Willow’s absorption powers can also help create a buffer between waste-generating systems like livestock manure, outdoor kennels and pet wastes, overflowing septic systems, and runoff from composting toilets or outhouses, and nearby veggie patches or waterways (look up algal blooms for the impact on fishing and waterways).

Willow makes an excellent resource and function tree, creating shade and habitat, fodder, and wands for various uses.

Bees and other pollinator and predatory insect species use its pollen extensively. The catkins (flowers) provide a very early season nectar flower for pollinators when not much else has started blooming.

As with oaks, there’s a willow for nearly every climate. Some willows excel in a few key functions far more than others, so some research into variety can help us.

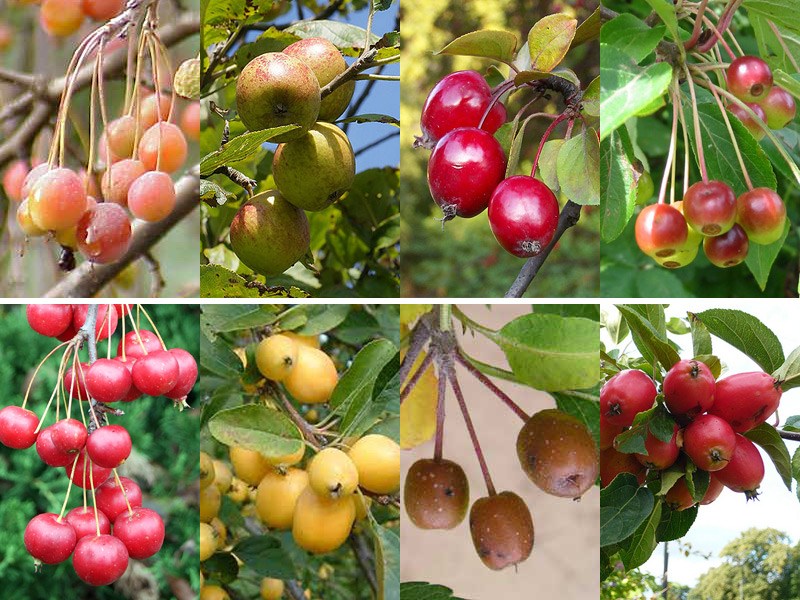
Crabapples come in a variety of sizes, flavors and textures, with varying degrees of palatability.

Wild Plum & Crabapples

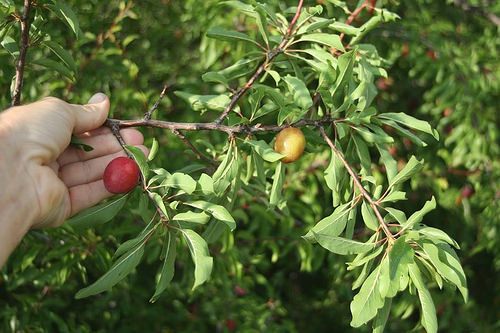
Chickasaw is by far my favorite wild plum, but it’s somewhat limited as to region. Like oaks and willows, in most of the U.S. and Canada – as well as Europe – there is a wild plum that is native to our area, or from a region that very closely mimics our conditions. Those will almost always be more successful than something we’re trying to force into our conditions.

Chickasaw plum

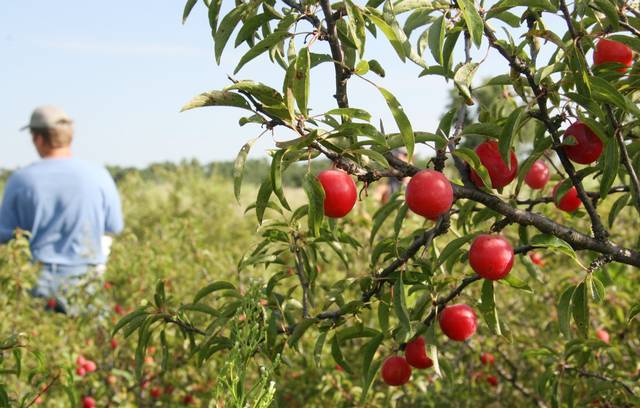
Wild sandhill plum

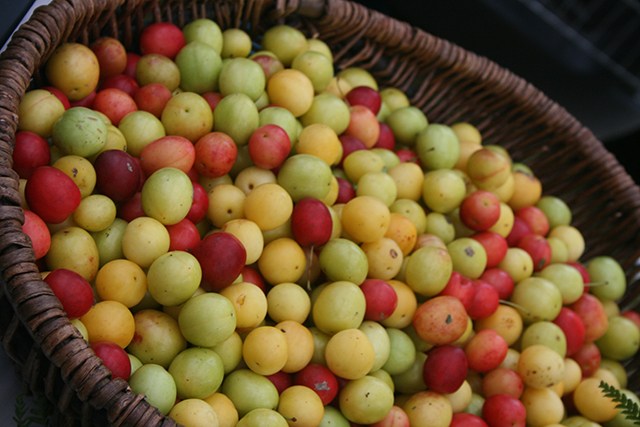
Wild plums are highly, highly variable. Not only do varieties change hugely in fruit size, texture, and flavor, those fruits can regularly change tree-to-tree, climate-to-climate, season-to-season –even within a small yard’s space, due to microclimate. Some make larger fruits that, while pretty tart, are readily consumed raw and have enough fruit around the pit to be worth it. Some produce tiny fruits. Some really have to be juiced and turned into jelly with lots of sweetness added.

Crabapples tend even further toward the “needs processing” side of the line, but sometimes a hybrid or cultivar can be found that isn’t too bad fresh or only baked, or can be aged in cool storage like a Braeburn apple or mayhop to totally sweeten the flavor and soften the texture.

Wild plums and crabapples have a number of uses even with the drawbacks.

They tend to be hardier and a little more resistant to the diseases our domestic rubus fruits face. In some cases they might act as a carrier for pest and disease, but in many cases, the wild cousins can actually help us by forming a “windbreak” of sorts, except for pests. Pests and disease carriers hit them, and the wild fruits keep the disease or insect from jumping from apple to peach to plum to roses to berry brambles.

Wild plums and crabapples tolerate heavy pruning and pleaching, providing the potential of food, fodder, and cross-pollination for domestics in any environment.

They can also regularly serve as cross-pollinating partners for domestics. Wild cousins tend to also be broken into early, mid and late seasons, but they regularly have much longer flowering seasons. As a result, if we lose an ideal partner, our wild cousins may be close enough to fill that role not just for one cultivar, but for several.

Wild plums are highly variable in fruit size and flavor, with a long flowering period that results in longer harvest periods.

The extended flowering translates into extended fruiting as well, whereas domestics tend to have a 2-4 week window for harvest, by variety. Wild plums and crabapples can be ripening for as much as a 2-3 month period. That can let us spread out the workload, help cover gaps if we missed the harvest season due to injury or a travel, and it can allow us to harvest some of the later fruits or earlier fruits, and run livestock under them for the rest.

Just like domestic apple and plum limbs can be fed in small amounts green or larger amounts when cut and dried for hay, so can wild cousins. The cousins tend to be lower, bushier and even faster-growing, which can increase the ease and amount of fodder harvests.

Some wild plums are thorny, like pea shrub can be, and the woody trunks and branches have the ability to form living fences with the bonus of harvests.

Crabapples share the hedge-tolerant and woody growth advantages. Both also create habitat for edge-dwelling wildlife like quail and rabbits, increasing hunting capabilities whether we’re using a pellet gun in the ‘burbs or a low-load saboted .30-06 on a large spread.

Mixed crabapple hedge

Perennial Foods

There can be some huge benefits to creating a food forest and forage meadow around our homes. Even if we don’t own homes or don’t own much land, we might consider picking up a hardhat and road guard vest, and putting in some perennial shrubs and trees near us, or indulging in some seed bombs (do NOT throw invasives like bishop’s weed or kudzu anywhere; in fact, stick to wild edibles that are native to your area or the habitat-building natives that increase edible wildlife).

In many cases, the plants we choose can be beautiful and provide other services like shade and pest insect reductions, while giving us a resilient, permanent backup food source should we need it. They can provide feed for livestock, or they can create habitat and food sources to increase our game populations. Whether we’re rural or renting, increasing game means increasing food sources.

Planting natives is becoming ever more popular, so they’re increasing in availability. To fill in the areas around these perennials – and any others – look to not only the native species around you, but also to some of the nostalgia fruits like gooseberry, chokecherry and garden huckleberry that fewer folks recognize these days, and natives from similar areas or foods from Africa, Asia and South America that put up with inclement climates and are equally less known such as teff, amaranth, Asian yams, and quinoa. They tend to have fewer U.S. and Canadian pests, and can help make sure we’re the ones harvesting, not passersby.

The Pro’s & Con’s of Perennials One of the benefits of going with perennials is that they’re largely a one-time investment. Some may only last a handful of years or a


Take a second and think if there is anyone you know who has loads of supplies packed in their home. Now ask yourself if that person has the knowledge and skill level to employ that equipment in critical times. What about you? Do you have the know-how when the going gets rough?

Maybe you’re just getting started with prepping and have an extremely tight budget. Your community and family are going to need capable people who can execute vital tasks when times are hard and lives are on the line. Don’t sell yourself short if your finances prevent you from acquiring massive amounts of equipment for any number of disasters. Think about the people on the other side of the coin who have lots of gear, but not lots of training on how to use it. Aristotle’s said, “The whole is greater than the sum of its parts” and pulling together as a community can pull you through any difficult circumstances.

Take a stroll through any prepper website and you’ll see that a ton emphasis is placed on gear and gadgets. I’m here to tell you that skills beat gadgets any day of the week and twice on Sundays! Knowledge weighs nothing and you always have it on you. People often try to buy their way out of a problem, but skills are built through habit and time. Today we’re going to focus on 6 basic skills that every prepper needs: Shooting, Medical, Survival, Communication, Gardening, and Leadership.

Shooting

A rifle with a sling in the hands of trained marksman can devastate and enemy force or consistently provide meat for the pot.

When things fall apart, it’s handy to know how to handle a weapon. Not just for self-defense purposes, but also for hunting. Even if you only have a .22 rifle, you can become deadly with it. Fancy scopes, match-grade barrels, suppressors and bi-pods are not required. A rifle with a sling in the hands of trained marksman can devastate and enemy force or consistently provide meat for the pot. You need to learn how to shoot – it can literally save your life!
Project Appleseed is a non-profit nationwide community of volunteers that teaches traditional rifle marksmanship that will “transform you from a person with a rifle into a principled and skilled Rifleman.” They offer inexpensive weekend shoots in nearly every state.

Medical

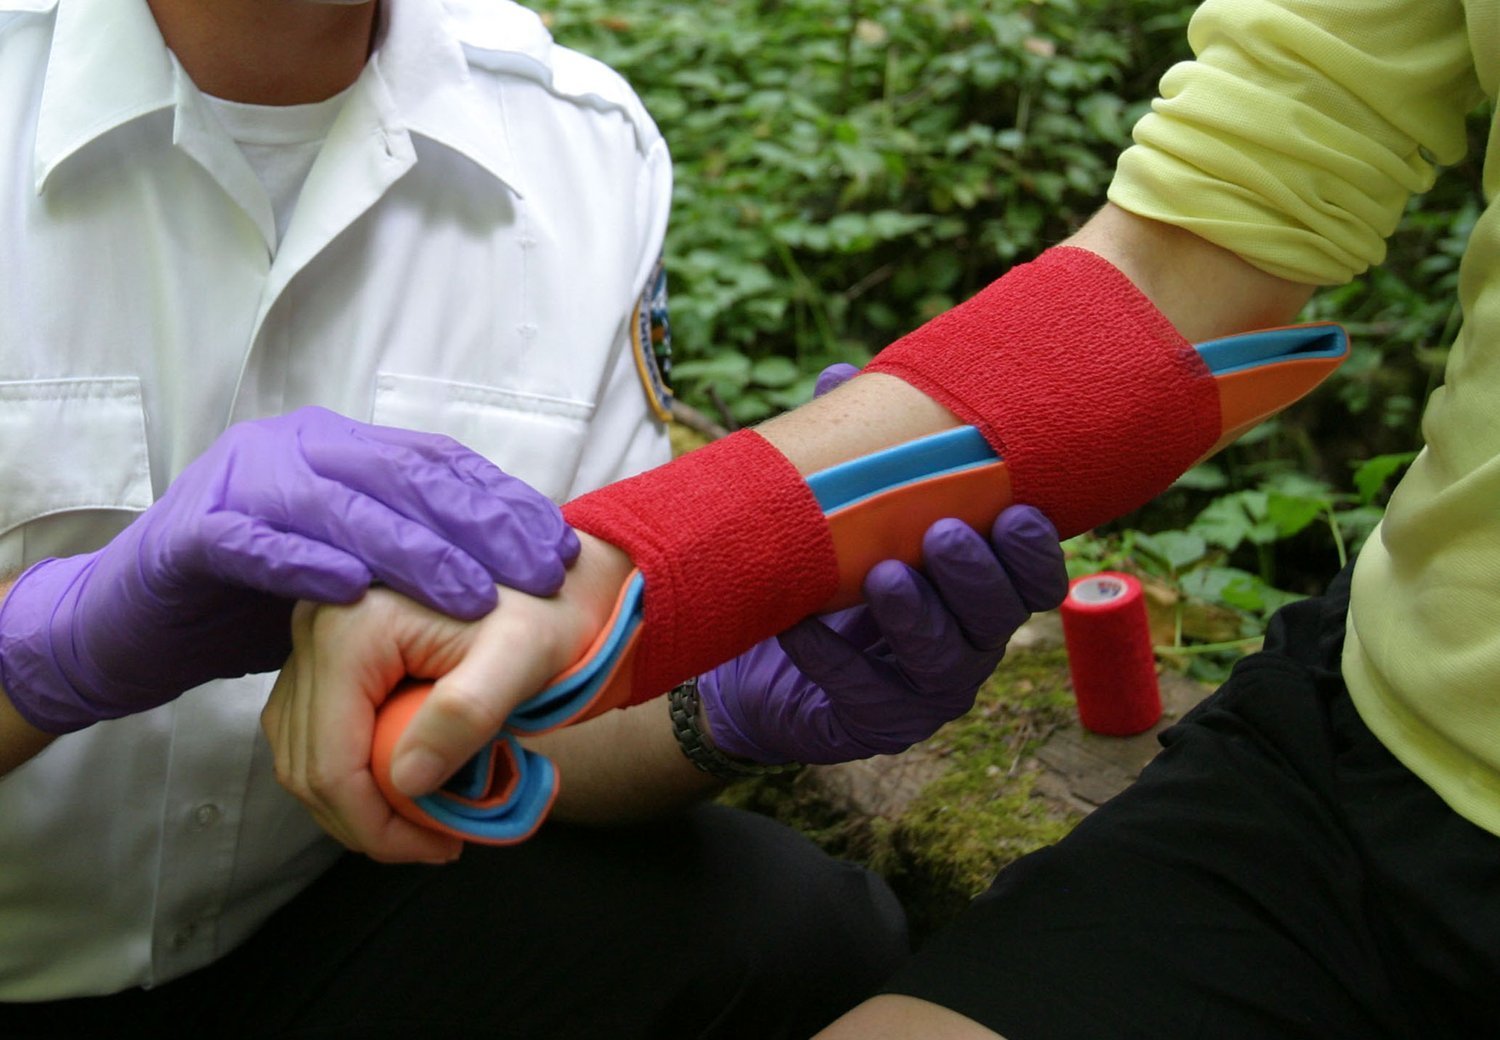
Medical emergencies don’t wait for the end of the world. They happen every day to thousands of people in your community. Trained First Responders can mean the difference between life and death. It’s likely that everyone will have to deal with some sort of medical or traumatic situation so it’s probably not a bad idea to learn how to deal with medical emergencies before they occur.

There are many counties/cities in every state that need volunteer firefighters. Since almost 80% of their calls are medical related, there are departments that will pay for your Emergency Medical Technician (EMT)- Basic Certification Course in return for your volunteer service to their department. This is an outstanding way to learn a crucial skill (for free) and get involved in your community. During my time as an EMT, I’ve seen first-hand the varied and extreme reactions of people’s response to stress while also developing the muscle memory to stay calm and provide emergency care to the sick and injured.

Survival

Whether you’re bugging out during a crisis or simply lost in the woods, survival skills are foundational to maintaining life. There are a lot of great resources on this topic that are free. Check out your local library for books or DVDs on survival. YouTube can also provide a lot of information regarding water purification, shelter building, fire-craft, signaling, navigation and snaring. There are a wide variety of techniques in the survival community so focus your search on practical skills and less on the primitive living techniques that can take years to master like fire by friction, tanning hides, flint-knapping, etc.

Communication

It’s a good idea to learn how to use radios now before you need them.For communities to effectively work together during catastrophes, they have to be able to communicate. In today’s society, we’ve become complacent with luxuries like the internet and cell phones that are highly vulnerable to failure when things go south.

In times of need, HAM radio operators stand in the gap to provide lifesaving information. This allows communities to prepare for incoming threats, make informed decisions, adjust provisions for crisis duration or work in concert with nearby communities. You can learn the basics of HAM radio with this free course.  Also, it’s less than $40 to get your license and using a simple handheld radio you can be talking to other operators in your community in no time!

Gardening/Canning

A garden is simply a prepping must-have to live off-grid.

You’ve probably heard the saying that “Growing your own food is like printing your own money” and in hard times this has never been truer. Imagine your delight eating fresh tomatoes or strawberries after two weeks of freeze-dried food. Or opening a jar of raspberry jam in the middle of winter that you canned earlier that summer. Gardening and canning are skills that can be learned with a minimum amount of startup costs. If you have no idea where to start, check out your local county extension or city. They likely offer free workshops on these subjects and some even provide supplies to take home! Don’t worry if you don’t have a lot of space. A simple window sill herb garden can teach you the learning curve that comes with gardening. The beauty of gardening is that even if crisis never comes, you’ll still enjoy the fruits of your labor. Ha…you see what I did there?!

Leadership

Working together is a key factor to surviving disasters and leadership is a fundamental role in making that happen. Your community is a lot like a tribe and it needs leaders at the local level. Good leadership comes from being informed and understanding what people need in hard times. One part of leadership is understanding what planning and execution is taking place at the city, state and national level. FEMA has tons of free online courses so you can work together and relay community challenges using the local chain of command. Here is a snapshot of some of the courses they offer:

  • Understanding the Incident Command System
  • Emergency Planning
  • Decision Making and Problem Solving
  • Planning for the Needs of Children in Disasters
  • Natural Disaster Mitigation

Check out their site to learn more:

There are also free courses on personal emergency preparedness offered by your city or county. A quick Internet search should point you in the right direction.

Sometimes the hardest part with most things in life is getting started. The good news is that you don’t need a fortune to start building your skillset. The danger here is not acting on this information; you have to apply it! Like Derek Sivers says, “If information were the answer we’d all be billionaires with perfect abs”. Now you know how to get started and move towards your goal. This can actually be a lot of fun. Invite a friend along with you and learn something new together. You might even find a new hobby!

  Take a second and think if there is anyone you know who has loads of supplies packed in their home. Now ask yourself if that person has the knowledge and

1 – VARIETY

Most people don’t have enough variety in their storage. 95% of the people I’ve worked with only stored the 4 basic items we mentioned earlier: wheat, milk, honey, and salt. Statistics show most of us won’t survive on such a diet for several reasons.

  • Many people are allergic to wheat and may not be aware of it until they are eating it meal after meal.
  • Wheat is too harsh for young children. They can tolerate it in small amounts but not as their main staple.
  • We get tired of eating the same foods over and over and many times prefer not to eat than to sample that particular food again. This is called appetite fatigue. Young children and older people are particularly susceptible to it. Store less wheat than is generally suggested and put the difference into a variety of other grains, particularly ones your family likes to eat. Also store a variety of beans. This will add variety of color, texture and flavor. Variety is the key to a successful storage program. It is essential that you store flavorings such as tomato, bouillon, cheese, and onion.


Also, include a good supply of the spices you like to cook with. These flavorings and spices allow you to do many creative things with your grains and beans. Without them you are severely limited. One of the best suggestions I can give you is buy a good food storage cookbook. Go through it and see what your family would really eat. Notice the ingredients as you do it. This will help you more than anything else to know what items to store.

2- EXTENDED STAPLES

Few people get beyond storing the four basic items, but it is extremely important that you do so. Never put all your eggs in one basket. Store dehydrated and/or freeze-dried foods as well as home canned and store bought canned goods. Make sure you add cooking oil, shortening, baking powder, soda, yeast and powdered eggs. You can’t cook even the most basic recipes without these items. Because of limited space I won’t list all the items that should be included in a well-balanced storage program. They are all included in the The New Cookin’ With Home Storage cookbook, as well as information on how much to store, and where to purchase it.

3 – VITAMINS

Vitamins are important, especially if you have children, since children do not store body reserves of nutrients as adults do. A good quality multivitamin and vitamin C are the most vital. Others may be added as your budget permits.

4 – QUICK AND EASY AND PSYCHOLOGICAL FOODS

Quick and easy foods help you through times when you are psychologically or physically unable to prepare your basic storage items. No cook foods such as freeze-dried are wonderful since they require little preparation. MRE’s (Meals Ready to Eat), such as many preparedness outlets carry, canned goods, etc. are also very good. Psychological Foods are the goodies – Jello, pudding, candy, etc. – you should add to your storage.

These may sound frivolous, but through the years I’ve talked with many people who have lived entirely on their storage for extended periods of time. Nearly all of them say these were the most helpful items in their storage to normalize their situations and make it more bearable. These are especially important if you have children.

Store a variety of beans. This will add variety of color, texture and flavor.

5 – BALANCE

Time and time again I’ve seen families buy all of their wheat, then buy all of another item, and so on. Don’t do that. It’s important to keep well-balanced as you build your storage. Buy several items, rather than a large quantity of one item. If something happens and you have to live on your present storage, you”ll fare much better having a one-month supply of a variety of items than a year’s supply of two to three items.

6 – CONTAINERS

Always store your bulk foods in food storage containers. I have seen literally tons and tons of food thrown away because they were left in sacks, where they became highly susceptible to moisture, insects and rodents. If you are using plastic buckets make sure they are lined with a food grade plastic liner available from companies that carry packaging supplies. Never use trash can liners as these are treated with pesticides. Don’t stack them too high. In an earthquake they may topple, the lids pop open, or they may crack. A better container is the #10 tin can which most preparedness companies use when they package their foods.

7 – USE YOUR STORAGE

In all the years I’ve worked with preparedness one of the biggest problems I’ve seen is people storing food and not knowing what to do with it. It’s vital that you and your family become familiar with the things you are storing. You need to know how to prepare these foods. This is not something you want to learn under stress. Your family needs to be used to eating these foods. A stressful period is not a good time to totally change your diet. Get a food storage cookbook and learn to use these foods!

It’s easy to solve these food storage problems once you know what they are. The lady I talked about at the first of the article left realizing what she had stored was a good beginning, but not enough. As she said, “It’s better to find out the mistakes I’ve made now while there’s still time to make corrections.” This makes a lot more sense.

If you’re one who needs to make some adjustments, that’s okay. Look at these suggestions and add the things you’re missing. It’s easy to take a basic storage and add the essentials to make it livable, but it needs to be done. As I did the research for my cookbook I wanted to include recipes that gave help to families no matter what they had stored. As I put the material together it was fascinating to discover what the pioneers ate is the type of things we store. But if you have stored only the 4 basics, there’s very, very little you can do with it. By adding even just a few things it greatly increases your options, and the prospect of your family surviving on it. As I studied how the pioneers lived and ate, my whole feeling for food changed. I realized our storage is what most of the world has always lived on. If it’s put together the right way we’ll be returning to good basic living with a few goodies thrown in.

1 – VARIETY Most people don’t have enough variety in their storage. 95% of the people I’ve worked with only stored the 4 basic items we mentioned earlier: wheat, milk, honey,

When we think of castles in the medieval periods particularly, we generally think of staid, damp, barren places. Within some areas, they certainly were. It was a harsh, brutish time for many. It and the times leading up to it were filled with violence – hence the need for wall-ringed castles and hillforts in the first place.

And yet in these periods when death by violence and disease was prevalent, when survival was a constant chore, we find castle gardens within the very walls that were so utilitarian. By medieval and Tudor times, portions of the castles and even villager areas were being designed for pleasure as well as productivity. While we may not have enough land or resources to truly create our own castle, we can take away a fair bit from the layout of those castles, hillforts and even some of the equally guarded and protected monasteries.

First let’s take a look at some of the general consistencies between castles and protected areas during the pre-cannon times, and then we’ll look at how the residents can impact how we arrange large, sprawling homesteads and even small areas and yards.

Castle Layouts

British Hillforts tended to be Spartan environments, but even there – and when the Spartans existed – defensive structures also included water sources and regularly livestock and at least some limited garden spaces or wild foods within the safest palisades.

In the case of castles, there was even greater gardening taking place within the tiers of earthworks and walls carved out of hillsides.

Dunlop Hillfort and village – a macro-example of defensive structures and Spartan existence.

Castles and hillforts both made use of terrain. At the time, high was good, since it afforded more outward line-of-sight and thus more time to sound alarms. Deep trenches or moats surrounded the innermost walls and upper levels. Attackers not only had to scale the lower and outlying walls, they had to get themselves and siege equipment uphill, while defenders had the benefits of gravity and elevation on their side in all phases of attack.

If they could hold a force outside even middle and lower rings and walls, the defenders could even still reap the benefits of having crops and livestock grazing the rings around the inner walls.

Bonus – Fun Fact: This is the era in which we became obsessed with lawns. Rich folks had bunches of livestock, especially sheep. Sheep grazed all around, closely cropping grass and anything else that dared grow. It resulted in tightly mown lawns. The more sheep, the more pure grass and closer shorn it was. Having nothing but foods, shrubs and trees right around the house meant you couldn’t afford sheep. That poverty-wealth dichotomy stayed embedded as specialization grew, and everybody wanted a lawn so show their worth. It has stayed so embedded that here we are, hundreds of years later, burning fuel to prove we’re rich enough for short grass and competing with neighbors to have the most perfect, even, level grass on the block.

We can apply the lesson the same way Iron-Age Europeans did. We can create alleys or rings of silvopasture to shade and feed livestock and ourselves, creating tough fixtures and alarms where we can’t see – like the age-old sheepdog and sturdy gate or ha-ha. We can arrange properties large and small so that lower pastures and fields are outlying, allowing us more time to visualize threats.

We can create some of our first-line defensive walls with things like hugelkulture beds and other raised beds, and create ditches across roadways or leave trees standing that we can use to reinforce gates. Low or mid-height and dense, thorny brambles can also form our walls or create enough depth, noise and pain that simple thugs can’t make the jumps or choose and easier target.

We can use water catchment, mandala and keyhole beds, and our buildings and vehicles to form an inner wall from which we can defend property if necessary, keeping the things and supplies we most need access to safe within the innermost ring.

And we can use the castle gardens as examples of ways we can still produce food and medicine even if we decide to retreat inside our high, inner walls and abandon the rest.

The aerial view of Pensevey ruins helps show the amount of green space inside a hillfort and its moats, with sheep still grazing one of the inner walls and farm and grazing land still laid out around the lower and outer earthworks. We don’t have to have a true castle or that much space to follow the example laid out.

Zoning

In permaculture, a concept called zoning is at the forefront of design – right up there with the ever-pressing reminders of health and productivity through diversity and edge habitat. Zoning is where we create spaces for each thing, working by patterns of traffic frequency.

The places we go most are Zone 1, and we put the most needy members of our homesteads there, the things we’ll need to visit most often. Zone 5 is the outer limit. It’s basically an area left wild, only periodically visited for at most a little foraging and hunting.

The terms and definitions may have changed, but castles made use of the same theories.

The inner set of tall, high walls would be our Zones 1-2, with 3-4 those rings of livestock and feed and large crops outside the moat. Maybe we have a true Zone 5, or maybe we designate little patches of brush, hang bug motels and bat houses, and create towers and boxes where swallows and owls will do their things – ridding us of pests as they do.


Pottager Gardens

Pottager gardens are just a different way of saying kitchen garden – or they were.

Starchy peas, turnips, potatoes, and the grains for bread were largely grown in some of the outer rings and beyond them – the equivalent of Zone 3 and 4 from our permaculture example – but most of the rest was either from the hedgerows and wild fruit areas, collected by foraging, or grown very near the kitchens where they’d be used.

Most of the British populace ate little meat and roasted foods even up into Tudor times. Instead, pottage was the daily meal – and was for a long, long period of history. It’s basically just a stew based around peas and whatever is in season. The gardens that mostly influenced the stew’s flavor picked up the same name.

Pottagers evoke certain images for designers and historians: small beds, regularly bounded by wattle (woven horizontal branches and saplings) or stone, raised as often as they were ground level.

They were usually surrounded by bent-hedge (laid hedge) living fencing, dense hedges, brush fencing that used upright posts filled with thick timber debris laid horizontally between them, rip-gut twisted-timber and -stick fences, vertical wattle, or simple vertical stick and top-rail fences, either vertical posts or arranged in a series of bottom-heavy X’s with horizontal poles laid in the cross sections.

The fencing was largely dependent on what it guarded against – poultry, dogs, rabbits, a loose horse in some areas, geese – and was made out of fast-growing “junk” brush and the leftover debris from cutting housing timbers, firewood, and clearing fields. Wattle was even used to make livestock housing in some temperate areas of Great Britain, particularly.

Medieval Style Garden

We see pottager beds inside tight castle spaces as well as out among the village cottages and even used in the wide-open outlying guard shacks.

Outside the castle walls, fencing would typically be stronger and taller to prevent entry by deer, but thick debris fencing was even used to contain or exclude pigs.

Square beds predominate, with triangular or curving beds as well, particularly in later periods. In the small square and rectangular courtyards between various walls and towers and portions of the castles and hillforts, they were efficient to work by hand without losing much space.

It’s hard for us to conceive breaking up long rows, even with our high-yielding, milder, sweeter vegetables. In fact, Europeans and early colonists with their less-efficient crops may have benefitted hugely by using them instead of the plows.

Pottagers were visited and tended much more frequently than crops that were alternated with grazing animals between the rings of the further, lower outer walls around a castle. The field crops had to deal with much less compaction as a result.

Working the smaller beds from walkways likely kept those beds in better health because no one was stepping on the soil, packing it down the way we do when we work down our rows and lines.

Every Single Inch

While there were gardens near kitchens, and while chatelaines typically also had gardens, they all also had to compete with the chapel gardens that were typically allowed and with the physic gardens maintained by the official healers.

It could get tight.

Because so many people could be expected to cram into castles and protected monasteries during attacks, carrying everything they could, to include livestock, and because the early castles and the hillforts, especially, tended to be high-traffic areas, growing space within the inner walls was at a premium – a condition many of us can relate to.

Growing food and herbs in long sweeps between sets of castle walls.

It was also vital to be able to grow some of the food inside walls in case of siege.

So they made use of roadsides not only for foragable hedgerows, but also for small trees, flowers, herbs, and annual and perennial fruits. In some cases, they even built up raised beds against the castle walls themselves.

It was also very common to have orchards in the graveyards inside one ring of a castle or another, to use arbors around gates for vining fruit, and to make use of the steep sides of the earthworks that were left with sometimes vary narrow verges.

Images: Recreation of the castle-interior kitchen gardens of Highcote

Diversity

The small spaces weren’t necessarily a bad thing. From the narrow spaces available between pathways and walls, to the kitchen, noble women’s, and monk’s gardens, the tight quarters led to increased diversity in garden strips, hedges and beds.

Historians have decided that it was actually pretty rare for herbs and high-yielding fruits and vegetables to be separated into rows. Bulk-produced foods – especially those that needed each other for pollination, kept close because gardeners realized they did better when grouped even if they didn’t understand the mechanics – might occupy whole beds, but most were rambling and intermingled where there was space for annuals.

Recreated and English-style kitchen gardens typically have fruits, vegetables, herbs and flowers intermingled, with perennial hedges, shrubs, arbors, and trees in corners an surrounding the garden space.

Beautification and “smelling” gardens around trees in graveyards and orchards increased diversity there. Even when things were only planted to take advantage of pre-leaf-out sunlight and make every use of the space, it resulted in longer periods of flowering, a heavy mixing of herbs and perennials near and with annuals, and a great many microclimates where all the plant types met each other.

Until formal gardens took over, those “margin” areas undulated and staggered in differing waves and sizes, further increasing the amount of edge.

Diversity and a mixing of microclimates creates the same relationships we see with both companion planting – where a plant attracts or repels something for another plant – and at the edges of roads, places where water meets woods or meadows, and other verges – places that we harvest the most game and the most edible weeds.

With rich, diverse webs of life taking place in the soil, nutrients are cycled effectively. Mixed plants mean roots are drawing from different levels, and pests find it harder to locate their victims.

It also creates resiliency. With so much life, if something in the soil is wiped out one way or another, it’s not that big of a deal. There’s plenty of other life available to make up for it.

Likewise, with many types of herbs and foods growing together, should one fail in one spot, another might survive. If all of a type were lost, because gardens were so diverse, there was still food production taking place – inside the inner walls, even if it was unsafe to venture out into the lower-walled sections with bulk crops and livestock.

Fences were made with what you had on hand, designed for simple function.

Castle Gardens

We can learn a lot from history, and given the defensive mindsets of preppers, we can apply some of the defensive lessons directly to even our suburban and urban homes. Really, up until the last hundred years, we still very strongly relied on defensive works designed surprisingly similar to castles – well after the widespread adoption of cannon and cartridges.

The gardens kept within the walls of palace castles and hillforts have particular application as well, both for efficiency and for remembering that even when life was short and brutish in the Iron Age an medieval eras, peons and princes still planted their castles for beauty as well as yield.

Castle defenses, medieval gardening methods, and permaculture sectors and zones are all things that can be further researched to forward the preparedness of our homesteads. Permaculture’s stacking functions can help make our spaces even more efficient.

They can also help city dwellers, looking at apartments and condos as inhabitated towers and making use of the narrow strips of greener. Japan’s container and small-bed growing has been in place since the time of the Samurai in the largest cities – about the same time we’re looking at European castles – and can make for good study as well for those in tight, tiny spaces.

For more information about some of the garden features from the Iron Age through medieval and Tudor times, check out http://www.castlesandmanorhouses.com/life_06_gardens.htm and http://www.sudeleycastle.co.uk/gardens/tudor-physic-garden/ . There are tons of images, as well as lists of foods and medicines valued by people who depended on what they pulled out of the ground.

When we think of castles in the medieval periods particularly, we generally think of staid, damp, barren places. Within some areas, they certainly were. It was a harsh, brutish time

I recall reading somewhere that we don’t actually measure life in hours, minutes, seconds or years, but rather in a coffee spoon. I have to agree with this one – if I did that right, I would say that my age would be around two cargo containers filled to the brim with coffee.

Anyway, today’s topic won’t revolve around coffee, per se, but the coffee ground. Yup that icky stuff that usually ends clogging the kitchen sink has many uses. So, without prolonging your agony too much, here are 9 ingenious ways to reuse coffee grounds.

Pots and pans detail

The only thing worse than burning your food is having to scrape that pot or pan afterward. It’s frustrating because no matter how hard you scrub, that scorch mark will still cling to your cookware. When everything else fails, use coffee grounds. Even though that stuff’s been drenched in hot water, it’s still quite abrasive – good news for you, bad news for whatever dirt’s left on the pot. I personally prefer giving the skillets a through coffee grounds scrub every now and then. That’s the reason why I keep a box of that stuff next to the kitchen sink.

Creating awesome marinades

Cooking’s great because it allows you to experiment with various ingredients combos. Take marinades, for instance. Each marinade consists of 5 basic ingredients: oil, salt, pepper, water, and spice mix. However, this doesn’t have to stop us from trying other things. Some use scented oils, veggie mix, Worcestershire sauce, Tabasco, and whatnots. I personally prefer to use coffee ground. Apart from the fact that it makes the meat literally melt in your mouth (try this the next time you’ll be cooking pulled pork) it also gives it a smoky, earth-like aroma and aftertaste. Not to mention the fact that it’s a great way to recycle coffee ground which in 99.9 percent of cases would end up in the trash.

Giving plants a run for their money

Many people have asked me what type of chemical I use around the garden. Well, I don’t use that stuff because I don’t want to end up with supermarket tomatoes. I usually make my own compost from coffee grounds, wilted veggies, and dung. Plants simply love it. Sure, you need to wear a hazard mask to walk around the compost pile, but nothing beat a tasty and nutritious veggie dinner.

No more ice-skating

If you’re having trouble figuring out a way to remove the ice from your driveway with destroying the driveway in the process, try with coffee grounds. That stuff provides great traction while melting the ice.

Getting rid of dead skin and acne

Acne’s always an issue, regardless if you’re 14 or 44. Don’t waste your money on expensive skin creams when there’s a cheaper alternative – using fresh coffee grounds. After grounds cool down, stick them inside a food processor and give them a couple of spins. Use this fine powder to scrub your face and other parts of the body.

No more ants in the pants (or food basket)

Summer’s just around the bend, and we all know what this means – quite family picnics, hiking, and drives. If you don’t want to see any ants or other pests crawling all over your food, sprinkle some coffee grounds the picnic area. They hate them. Apparently, according to researchers, caffeine, the very same substance that gives us a kick in the morning, disrupts their central nervous systems, making the critters feel mightily uncomfortable.

Getting rid of nasty fridge smells

I know that no one’s in the mood to take everything out of the fridge and scrub that thing clean at the end of the week. Obviously, if you postpone this for too long, you’re going to end with a smelly fridge. Now, if you’re not a clean freak, you may be able to get rid of fouls smells from the fridge by putting some coffee ground on a plate or small bowl. Place it inside the fridge, and that’s it. You can also use the same stuff as an air freshener. FIY, coffee grounds are very effective at removing tobacco smell from the room.

Grow your own shrooms

No, not those kinds of mushrooms, because they’re illegal. I was thinking more on the lines of champignons, the same shrooms you find in every supermarket. It’s super easy to do it. Take a plastic bucket and fill it with some earth. Add a handful of compost and mix with a trowel or hands. At your local supermarket, take a look around the gardening section for shroom seeds. They’re very cheap (around $1 per package). Empty the pack’s content in the bucket, water, and place in a dark room with a loss of moisture. I personally keep my bucket shrooms in the basement. After a couple of weeks, you’ll be able to harvest and use them for cooking your favorite meals.

Keeping mold away from your linen closet

Nothing beats opening your closet and taking a whiff of those freshly-ironed bedsheets. Well, you wouldn’t feel that way if your nose was to be assaulted by a rancid smell. That’s the trouble with keeping linen for far too long under lock and key – they tend to smell of mold. However, there’s a quick to prevent that from happening, and it doesn’t involve washing, ironing or buying pricey closet fresheners.

Fill a small satchel with coffee grounds and place it between the bedsheets. The coffee grounds will remove any mold from the closet and make your linen smell as if they were just taken out of the washing machine. You can also do the same for your wardrobe and drawers where you keep stuff like underwear and socks. These coffee ground sacks will also keep moths and other critters away from your clothes.

Well, that’s about it on how to reuse coffee grounds around the house. What’s your take on this? Hit the comments section and let me know.

Yup that icky stuff that usually ends clogging the kitchen sink has many uses.

No matter what type of SHTF you are prepping for, expect the power grid to eventually cease to function. Many preppers stockpile oil lamps, and that is a great idea, but learning how to make oil lamps yourself will allow you to put back even more off grid light sources for a fraction of the price of store bought ones.

In addition to creating DIY oil lamps now (so they are ready immediately ready for use), you can also stockpile kits so more lamps can be put together in mere moments for use during a long-term disaster.

What Kind of Containers Are Used for DIY Oil Lamps?

You can use about any glass container on hand or purchased cheaply at a local dollar store or yard sale. Typically…

  • Mason jars
  • glass food jars
  • …and wine bottles

…are used to make inexpensive oil lamps at home.

Can Kerosene Be Used in Oil Lamps?

Kerosene is often cheaper than commercially manufactured lamp oils but, lamp oil does not boast an unpleasant odor and burns far cleaner than kerosene.

Kerosene is far safer to outdoors than indoors. When using kerosene indoors, proper ventilation is essential to avoid asphyxiation and quite possibly, death. In some countries, kerosene is referred to as paraffin.

Can You Use Vegetable Oil in an Oil Lamp?

Nearly any common type of cooking oil can be used as fuel in a DIY oil lamp. Also, butter, Crisco, lard, and even ghee, due to their animal fat content, can be used.

What Oil Can You Use in an Oil Lamp?

If you do not want to use kerosene, lamp oil or olive oil, there are many other fuel options that are equally readily available and inexpensive to use:

  • Hemp Oil
  • Tallow
  • Coconut Oil
  • Nut Oils
  • Fish Oil
  • Lard
  • Vegetable Oil
  • Castor Oil
  • Seed Oils

Can Mineral Oil Be Used in Oil Lamps?

Mineral oil will ignite fairly easily, especially when blended with other types of safe burning oils.

What Can I Use for an Oil Lamp Wick?

A DIY oil lamp, just like a mass produced oil lamp or a candle, must have a wick in order to burn. The wick draws up the oil to use as fuel to make a flame. Wicks are made of fibrous material, like plant fibers, linen, and papyrus when commercially manufactured.

It is best to weight the bottom of the wick so that it does not move around in the oil. I often use a pop can tab, piece of cork, or washer to tie onto the base of the wick to help keep it weighed down and as immobile as possible.

You can also wrap craft wire around the lip of a Mason jar and then run two pieces of wire across the mouth of the jar to run the wick through to help hold it in place.

Yet another way to help hold the wick in place it to poke a hole through the lid of a Mason jar and thread the wick through it before securing the lid in place with a ring.

DIY oil lamp materials

DIY Oil Lamp Instructions

Equipment

  • Hammer

Ingredients

  • 1 Mason jar
  • 1 Mason jar lid
  • 1 Mason jar ring
  • Olive oil
  • Scissors
  • Cotton, cording, or other suggested wick material
  • Nail
  • Vice, two bricks, or two blocks of wood
  • Washer, nut, or piece of cork

Instructions

  • Put the Mason jar lid in a vise or upside down between two bricks or pieces of wood so the center area is exposed.
  • Use the hammer and nail (or a power drill and a bit if you prefer) to punch a hole in the middle of the Mason jar lid large enough for your wick to fit through.
  • Set the lid aside and remove the tools from your workspace.
  • Slide the wick through the hole so the top end is sticking out. I suggest temporarily taping the wick in place so it does not fall back inside when being placed in the DIY oil lamp or unravel while during placement.
  • Fill the glass jar with your chosen lamp oil.For the best results, fill the jar only a little more than ¾ of the way full. I recommend using olive oil.
  • Tie the washer or nut around the bottom end of the wick.
  • Gently place the lid with the wick through it into the DIY oil lamp container. Line the weighted bottom up so it is as centered as possible in the base of the Mason jar. I suggest keeping your thumb on the taped portion of the top of the wick to make sure it stays secured in place.
  • Screw the ring onto the Mason jar around the lid while holding the top of the wick firmly in place.

Notes

Allow the wick to soak up the oil for at least 15 minutes before lighting for the first time. You can use the oil lamp just as it is, or dress them up a bit with essential oils, herbs, cinnamon sticks, or pine cones and use them as attractively disguised prepper gear around the house.

I often give these inexpensive and handy oil lamps as gifts to loved ones, and to folks I am attempting to introduce to prepping.

If you want to know more about oil lamps and their safety, I’ve included this handy FAQ where I answer some common questions.

Can Oil Lamps Explode?

When using any of the natural DIY oil lamp fuel choices noted above (especially olive oil) such an incident would be highly unlikely. But, the possibility of “liquid fire” traveling along the floor, furniture, clothing, and the human body could happen if the lamp is knocked over or exposed to intense wind or blowing.

Are Oil Lamps Safe To Use Indoors?

Commercially manufactured lamp oil is designed and tested to ensure they can be safely burned indoors even without ventilation. Kerosene is not safe to burn indoors without proper ventilation.

Do Oil Lamps Give Off Carbon Monoxide?

Oil lamps can emit small amounts of carbon monoxide.

Do Any Vegetable Oils Catch Fire?

Like olive oil, vegetables oils are not really considered flammable. When used as a fuel in a DIY oil lamp, place a thick wick into the lamp so it becomes thoroughly saturated and helps to ignite the oil placed inside the lamp. Once started, vegetable oil should burn steadily for many hours.

Is Olive Oil Safer Than Kerosene in Oil Lamps?

The short answer is – yes. Oil lamps that use olive oil as a fuel will be far less likely to ignite if the flame drops down into the oil in the glass container. It would be rare to olive oil to catch on fire while being burnt as an oil lamp fuel. Kerosene will offer a brighter light, but DIY oil lamps using olive oil are generally bright enough to read by in the dark.

Olive oil will also smolder and put itself out and is largely considered a low volatility lamp oil fuel. Olive oil should not burn unless its temperature reaches a minimum of 550 degrees.

It is strongly recommended NOT to use K-1 kerosene in oil lamps and lanterns that will be used indoors because they contain impurities, including sulfur and red dye, that causes fumes that may be harmful and cause headaches.

What Is Lamp Oil Made From?

Commercially manufactured lamp oil is used as fuel in lamps, lanterns, and outdoor torches, oil lamps and lanterns. Generally, store-bought lamp oil has a petroleum base that has been professionally refined to enable it to burn in a soot free and odorless manner.

Is Olive Oil Better Than Vegetable Oil as a Lamp Fuel?

Olive oil has a lower smoke point than vegetable oil, which can be advantageous when using the DIY oil lamp indoors.

Are Baby Oil and Mineral Oil the Same?

Mineral oil is made out of paraffin oil (not paraffin like kerosene) Nunol, white mineral oil, and liquid petroleum. Mineral oil is classified as a hydrocarbon compound. The only real differences between mineral oil and baby oil are density and fragrance.

What Kind of Oil Was Used in Ancient Lamps?

Long before factories mass produced lamp oil, both beeswax and animal fat were used to fuel lamps. To a slightly lesser degree, olive oil, grapeseed oil, coconut oil, and sesame oil were also used. In the Mediterranean region, coconut oil was almost exclusively used as lamp oil.

What Is the Cleanest Burning Lamp Oil?

Olive oil seems to be the cleanest burning oil lamp fuel. For my fellow Christians, you might recall that is was olive oil Aaron used to generate light in the temple in the book of Exodus. The cleanest burning fuel is olive oil, the fuel that Aaron was directed to use for temple light in the book of Exodus.

Does Lamp Oil Go Bad?

Lamp oil, regardless of which type you choose from the suggestions given here, basically has an indefinite shelf life – as long as it is stored properly. Keep a firm fitting lid on your lamp oil or oil lamp when not in use and store it at room temperature in a dry place.

Is Coal Oil the Same As Kerosene?

Cannel coal oil is a form of petroleum that is made from a particular type of bitumen soft coal. Kerosene is refined from liquid petroleum (or crude oil) directly. In my opinion, coal oil has a far worse stench than kerosene.

What Is Florasense Lamp Oil?

Florasense lamp oil is an odorless commercially produced lamp oil that is quite popular for use both indoors and out. Florasense lamp oil is known to produce a bright glowing light when used in either manufactured oil lamps or the DIY oil lamp version you can make cheaply in large quantities.

Can You Burn Essential Oils in an Oil Lamp?

Unlike vegetable or animal fat cooking oils, essential oils are plant extracts and should only be heated to room temperature for aroma or natural medicinal purposes and not to create light or heat.

Why Does My Oil Lamp Wick Burn So Fast?

If the wick appears to be burning down too quickly, it is most likely a fuel oil issue. If the chosen oil is burning at too fast of a rate, pour it out and choose a safe indoor oil with a lower ignition temperature.

Can You Make Your Own Oil Lamp or Candle Wick?

To make a wick for your DIY oil lamp, roll up cotton fabric, newspaper, wood, twine, toilet paper, or paper towels as tightly as you can. Tie the wick together using twine or dental floss so that it does not lose its shape and density.

For best results when making your own wick, soak the material in a brine made of equal parts salt and water first and allow it to dry thoroughly. This process helps to prevent the wick from burning too quickly. Some folks use equal parts of not just water and salt, but an equal part boric acid, when making a wick stabilizer brine.

How Do You Trim an Oil Lamp Wick?

To trim a wick to fit a DIY oil lamp, cut it across the top, curving it just slightly at the ends using a pair of sharp scissors. The flame created by your DIY oil lamp should be about ½ of an inch tall to that it does not burn too quickly yet still produces a good quality light.

Do Oil Lamps Smell?

If you are experiencing a strong odor coming from your oil lamp, the flame may be either too high or too low or a poor quality lamp oil was used. If there is a lot of soot like smoke also showing, the wick may be over exposed.

Other self-sufficiency and preparedness solutions recommended for you:

The vital self-sufficiency lessons our great grand-fathers left us

Knowledge to survive any medical crisis situation

Liberal’s hidden agenda: more than just your guns

Build yourself the only unlimited water source you’ll ever need

4 Important Forgotten Skills used by our Ancestors that can help you in any crisis

Secure your privacy in just 10 simple steps

No matter what type of SHTF you are prepping for, expect the power grid to eventually cease to function. Many preppers stockpile oil lamps, and that is a great idea,


First off, properly splinting any part of the body requires careful attention to details, knowledge, and practice. We strongly recommend only qualified medical personnel perform splinting (or any advanced medical treatment for that matter). However, due to any number of unknown factors, qualified medical attention may not be available. With that disclaimer out of the way, let’s get started.

General rules regarding splinting of an injury

If you suspect a broken bone, dislocation, or sprain, the suspected area should be splinted and possibly immobilized.

Splinting is not a permanent treatment of an injury, although it does reduce the chance of further escalating the injury.

How does a Splint Work?

A splint consists of a rigid material accompanied by the use of adhesives or tying material to hold the rigid material in place. This prevents the targeted area from movement, which reduces the possibility of future injury. The rigid material should be placed from one side of the injury to the other and secured on the ends. Once secured, the entire affected area is commonly wrapped to ensure a secure hold. Be sure however to not block circulation by over-tightening the splint.

How is a Splint Made?

Splints can be quickly made from a wide variety of basic materials. Common splint materials can include: sticks/branches, layers of newspaper or cardboard, cut up pieces of a foam sleeping pad, thin strips of metal, etc. Basically, anything straight and rigid can be used as a splint.

For digits, a couple of standard Popsicle sticks, (or any similar object) wrapped with tape usually does the trick.

Splinting Fingers

Fingers and thumbs are commonly splinted body parts, as we tend to unfortunately put our hands where they don’t belong. For digits, a couple of standard Popsicle sticks, (or any similar object) wrapped with tape usually does the trick. Before splinting, carefully straighten the digit and first treat any surface wounds. If you know a digit is dislocated, it should be set back into place before being splinted. Once the digit is stabilized, cooling it with ice will help to reduce any swelling.

Select a straight, rigid, relatively flat object such as a ruler, paint mixer, layers of cardboard, sticks, etc to use as a splint.

Splinting Wrists

Wrists are incredibly complex body parts and can suffer a wide variety of injuries. Without proper medical attention, it can be difficult for the average Joe to identify the specific injury suffered and exactly how to treat it. If you or a partner suffers a wrist injury however, something still needs to be done about it until it can be properly treated.

With any wrist injury, first carefully clean any surface wounds in order to prevent infection. Select a cylindrical object roughly 3 to 4 inches long and 1 to 1 ½ inches in diameter (depending on hand size). This is placed in the hand, adding stability to comfort the victim. Select a straight, rigid, relatively flat object such as a ruler, paint mixer, layers of cardboard, sticks, etc to use as a splint.

Place the splint over top the round object so it’s touching the fingers on the inside of the hand. Carefully tape around the split and forearm. Encircle the top of the hand and splint. Depending on the injury, the thumb can be left free or splinted along with the wrist. Cool the area with ice if possible to reduce any swelling.

Splinting Arms

If the injury is a forearm, it should be splinted with a straight, rigid object, secured above and below the injury using the same process as the wrist above. If unsure of the exact location and extent of the injury, err on the side of caution and splint the entire forearm, including the wrist.

Use any piece of cloth and fold it into a triangle. Carefully bend the uninjured forearm to a 90° angle, placing the elbow snugly into the folded part of the cloth.

All other arm injuries should generally be splinted with a sling in front of the body. Use any piece of cloth and fold it into a triangle. Carefully bend the uninjured forearm to a 90° angle, placing the elbow snugly into the folded part of the cloth. Tie the sling between the shoulder and wrist. Lastly, tie another piece of cloth around the victim’s waist and sling, immobilizing the arm against the side of her/her body. In the picture to the left, we used a ½ torn up shirt we had lying around that we had previously used to make some char cloth.

Splinting Legs

Lower leg and ankle injuries should generally be immobilized together with the foot placed in a neutral (standing) position. To do this, use long, rigid objects such as branches/sticks, pieces of metal, foam from a sleeping pad, etc. These should be run along both sides of the leg between the knee and bottom of the foot. Secure the splint above and below the affected area. Take care when securing around the ankle, by wrapping underneath the foot to the side of each splint. When finished, the foot should be immobilized from the knee down. Once splinted, weight should not be put on the leg, as this can lead to further injury.

Upper leg injuries are far less common and typically cannot be treated solely in the field or at home. In order to avoid further damage, a splint should be placed on both sides of the leg between the hip and knee. Carefully secure it above and below the injury, wrapping the entire splint. Cooling the area afterward will help to reduce pain and swelling. This type of injury can be very serious, and professional medical treatment should be sought as soon as possible. Meanwhile, the individual should not put any weight on the leg, instead using crutches.

Takeaway

Once again, with any potentially serious injury, we highly recommend seeking professional treatment.

When assembling your bug out bag, or any preparedness kit for that matter, having the right tools for the job is essential. Rather than hunting down the right stick for an injury, we urge you to consider adding a SAM splint to your kit. These universal splints are inexpensive, compact, incredibly lightweight and completely mold-able to fit nearly any injury. They can be used repeatedly, offering a lifetime of various uses.


  First off, properly splinting any part of the body requires careful attention to details, knowledge, and practice. We strongly recommend only qualified medical personnel perform splinting (or any advanced medical