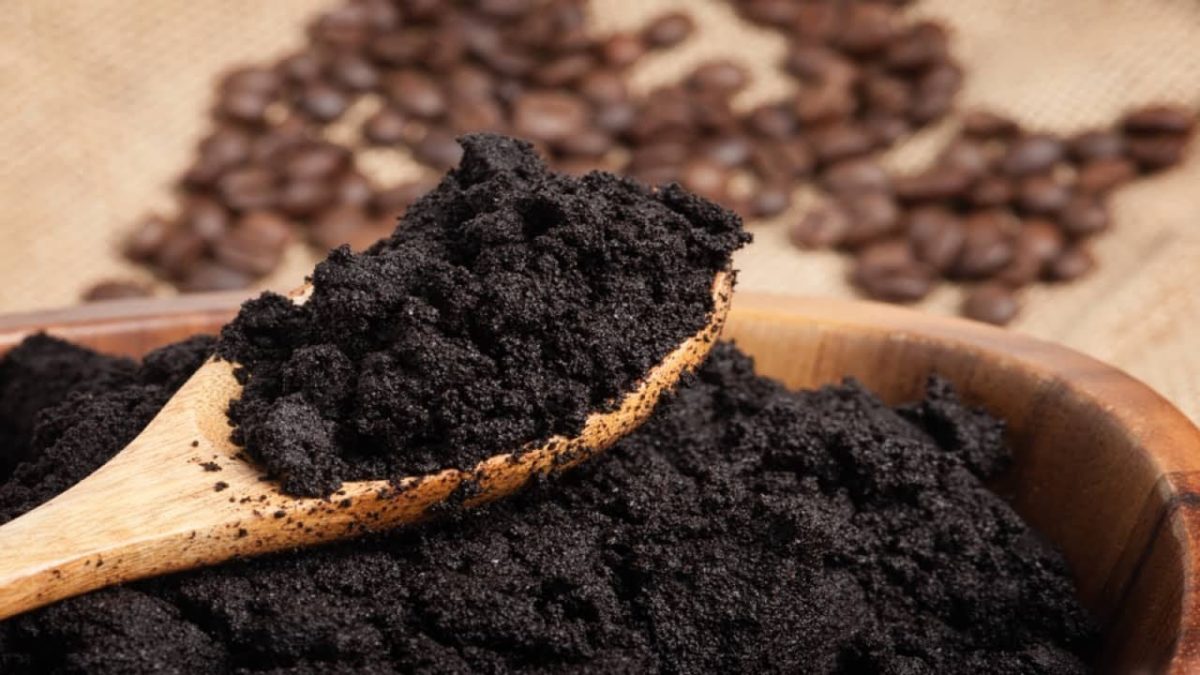
Home2020 (Page 4)

I recall reading somewhere that we don’t actually measure life in hours, minutes, seconds or years, but rather in a coffee spoon. I have to agree with this one – if I did that right, I would say that my age would be around two cargo containers filled to the brim with coffee.

Anyway, today’s topic won’t revolve around coffee, per se, but the coffee ground. Yup that icky stuff that usually ends clogging the kitchen sink has many uses. So, without prolonging your agony too much, here are 9 ingenious ways to reuse coffee grounds.

Pots and pans detail

The only thing worse than burning your food is having to scrape that pot or pan afterward. It’s frustrating because no matter how hard you scrub, that scorch mark will still cling to your cookware. When everything else fails, use coffee grounds. Even though that stuff’s been drenched in hot water, it’s still quite abrasive – good news for you, bad news for whatever dirt’s left on the pot. I personally prefer giving the skillets a through coffee grounds scrub every now and then. That’s the reason why I keep a box of that stuff next to the kitchen sink.

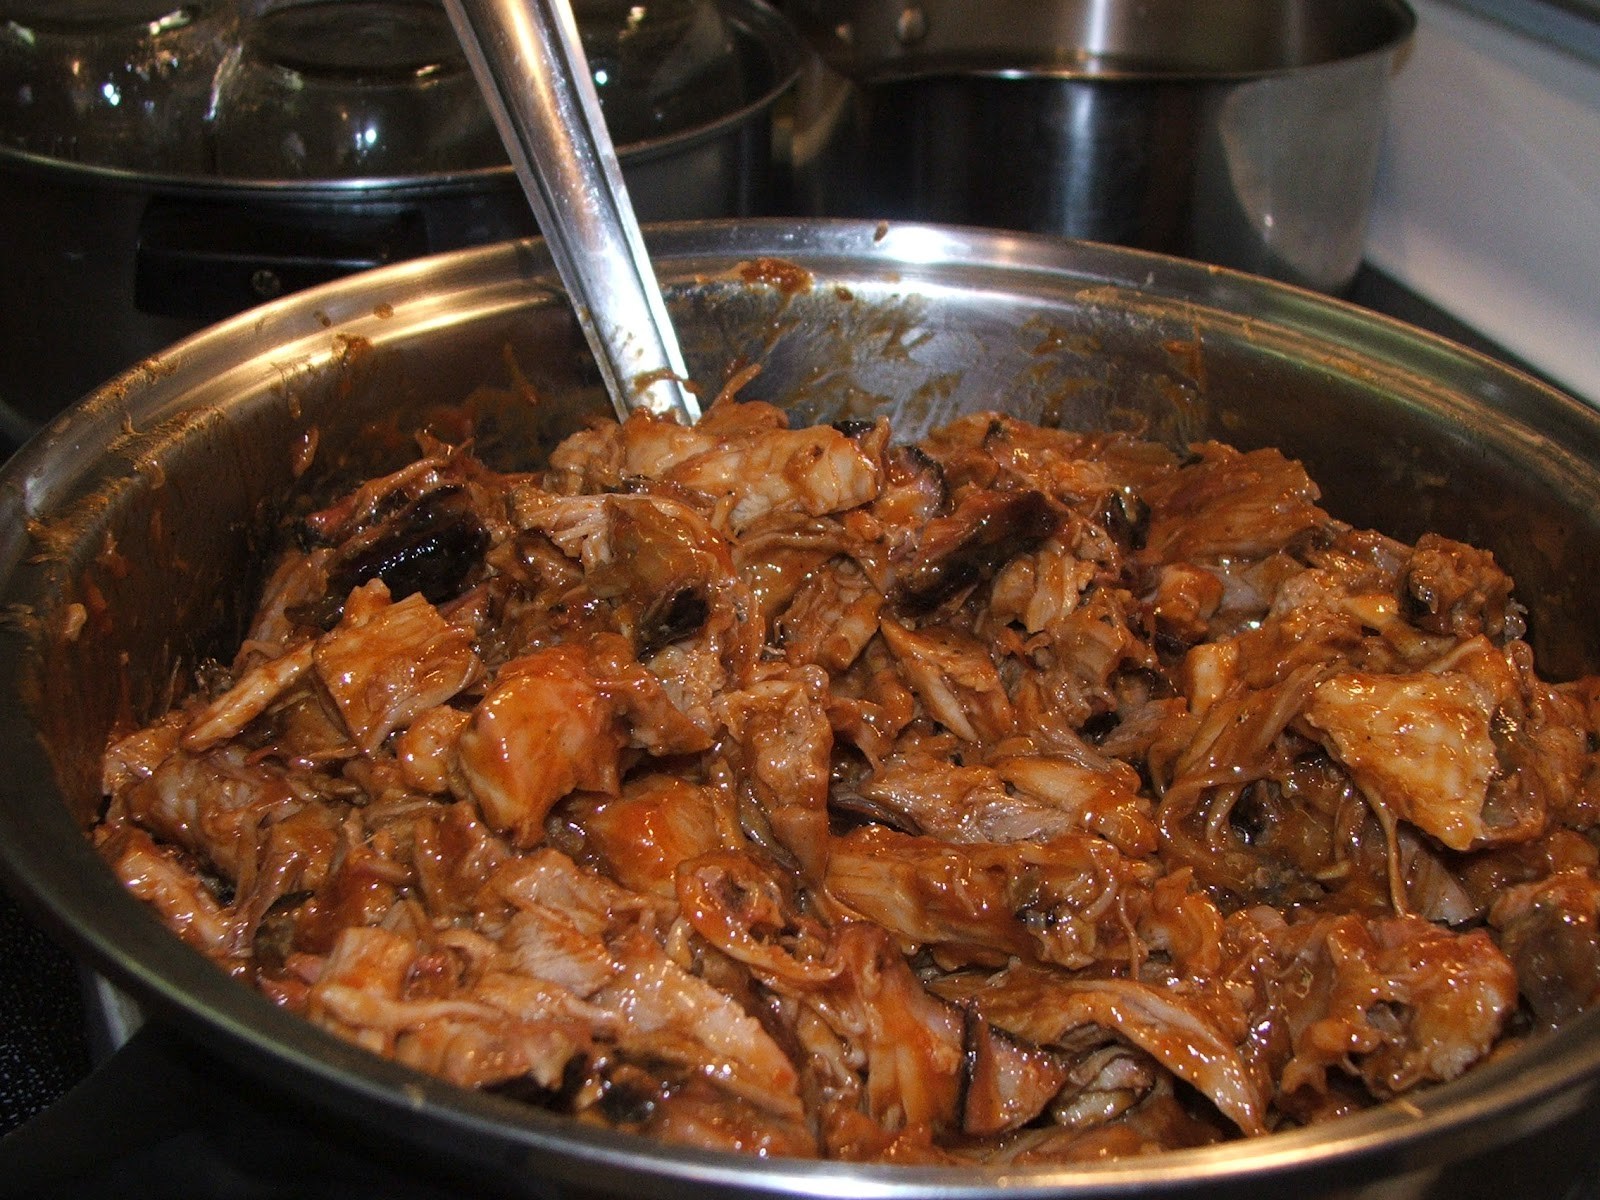
Creating awesome marinades

Cooking’s great because it allows you to experiment with various ingredients combos. Take marinades, for instance. Each marinade consists of 5 basic ingredients: oil, salt, pepper, water, and spice mix. However, this doesn’t have to stop us from trying other things. Some use scented oils, veggie mix, Worcestershire sauce, Tabasco, and whatnots. I personally prefer to use coffee ground. Apart from the fact that it makes the meat literally melt in your mouth (try this the next time you’ll be cooking pulled pork) it also gives it a smoky, earth-like aroma and aftertaste. Not to mention the fact that it’s a great way to recycle coffee ground which in 99.9 percent of cases would end up in the trash.

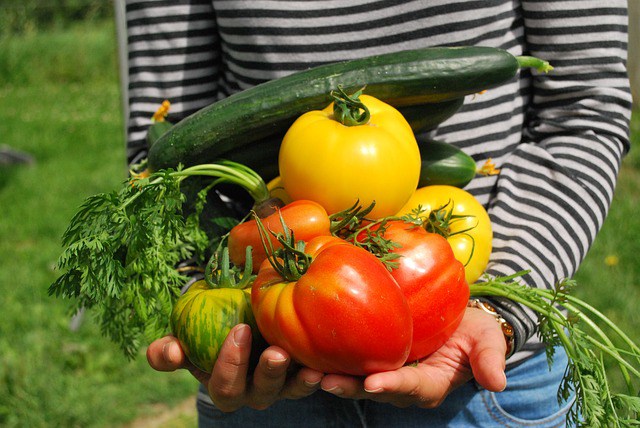
Giving plants a run for their money

Many people have asked me what type of chemical I use around the garden. Well, I don’t use that stuff because I don’t want to end up with supermarket tomatoes. I usually make my own compost from coffee grounds, wilted veggies, and dung. Plants simply love it. Sure, you need to wear a hazard mask to walk around the compost pile, but nothing beat a tasty and nutritious veggie dinner.

No more ice-skating

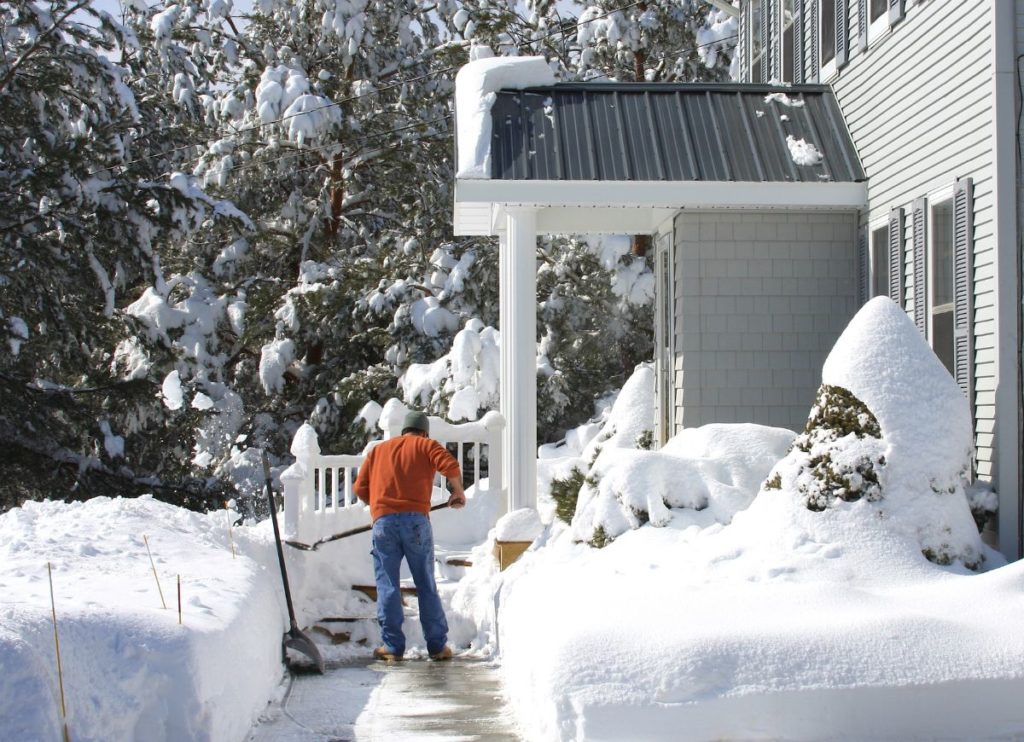
If you’re having trouble figuring out a way to remove the ice from your driveway with destroying the driveway in the process, try with coffee grounds. That stuff provides great traction while melting the ice.

Getting rid of dead skin and acne

Acne’s always an issue, regardless if you’re 14 or 44. Don’t waste your money on expensive skin creams when there’s a cheaper alternative – using fresh coffee grounds. After grounds cool down, stick them inside a food processor and give them a couple of spins. Use this fine powder to scrub your face and other parts of the body.

No more ants in the pants (or food basket)

Summer’s just around the bend, and we all know what this means – quite family picnics, hiking, and drives. If you don’t want to see any ants or other pests crawling all over your food, sprinkle some coffee grounds the picnic area. They hate them. Apparently, according to researchers, caffeine, the very same substance that gives us a kick in the morning, disrupts their central nervous systems, making the critters feel mightily uncomfortable.

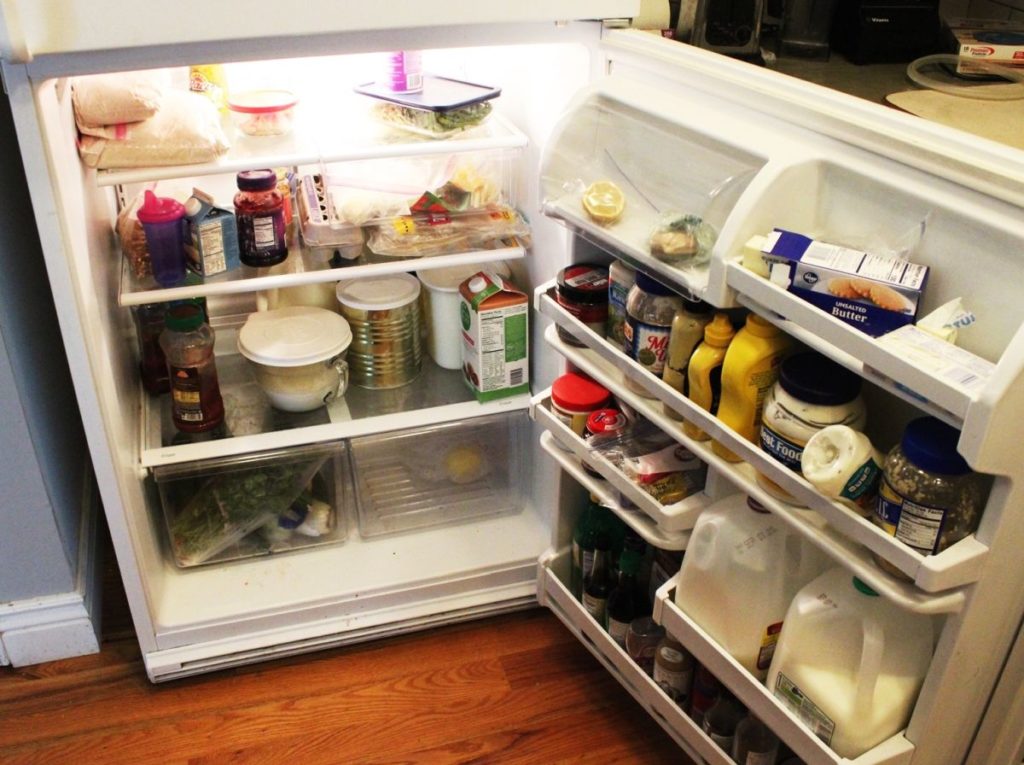
Getting rid of nasty fridge smells

I know that no one’s in the mood to take everything out of the fridge and scrub that thing clean at the end of the week. Obviously, if you postpone this for too long, you’re going to end with a smelly fridge. Now, if you’re not a clean freak, you may be able to get rid of fouls smells from the fridge by putting some coffee ground on a plate or small bowl. Place it inside the fridge, and that’s it. You can also use the same stuff as an air freshener. FIY, coffee grounds are very effective at removing tobacco smell from the room.

Grow your own shrooms

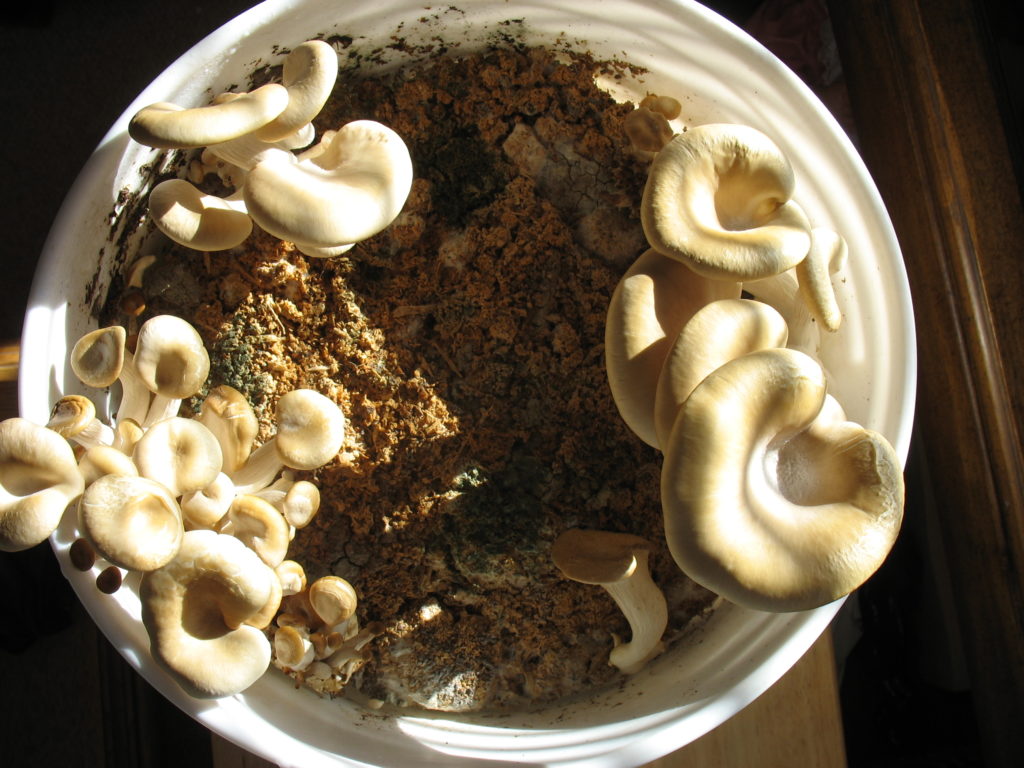
No, not those kinds of mushrooms, because they’re illegal. I was thinking more on the lines of champignons, the same shrooms you find in every supermarket. It’s super easy to do it. Take a plastic bucket and fill it with some earth. Add a handful of compost and mix with a trowel or hands. At your local supermarket, take a look around the gardening section for shroom seeds. They’re very cheap (around $1 per package). Empty the pack’s content in the bucket, water, and place in a dark room with a loss of moisture. I personally keep my bucket shrooms in the basement. After a couple of weeks, you’ll be able to harvest and use them for cooking your favorite meals.

Keeping mold away from your linen closet

Nothing beats opening your closet and taking a whiff of those freshly-ironed bedsheets. Well, you wouldn’t feel that way if your nose was to be assaulted by a rancid smell. That’s the trouble with keeping linen for far too long under lock and key – they tend to smell of mold. However, there’s a quick to prevent that from happening, and it doesn’t involve washing, ironing or buying pricey closet fresheners.

Fill a small satchel with coffee grounds and place it between the bedsheets. The coffee grounds will remove any mold from the closet and make your linen smell as if they were just taken out of the washing machine. You can also do the same for your wardrobe and drawers where you keep stuff like underwear and socks. These coffee ground sacks will also keep moths and other critters away from your clothes.

Well, that’s about it on how to reuse coffee grounds around the house. What’s your take on this? Hit the comments section and let me know.

Yup that icky stuff that usually ends clogging the kitchen sink has many uses.

No matter what type of SHTF you are prepping for, expect the power grid to eventually cease to function. Many preppers stockpile oil lamps, and that is a great idea, but learning how to make oil lamps yourself will allow you to put back even more off grid light sources for a fraction of the price of store bought ones.

In addition to creating DIY oil lamps now (so they are ready immediately ready for use), you can also stockpile kits so more lamps can be put together in mere moments for use during a long-term disaster.

What Kind of Containers Are Used for DIY Oil Lamps?

You can use about any glass container on hand or purchased cheaply at a local dollar store or yard sale. Typically…

  • Mason jars
  • glass food jars
  • …and wine bottles

…are used to make inexpensive oil lamps at home.

Can Kerosene Be Used in Oil Lamps?

Kerosene is often cheaper than commercially manufactured lamp oils but, lamp oil does not boast an unpleasant odor and burns far cleaner than kerosene.

Kerosene is far safer to outdoors than indoors. When using kerosene indoors, proper ventilation is essential to avoid asphyxiation and quite possibly, death. In some countries, kerosene is referred to as paraffin.

Can You Use Vegetable Oil in an Oil Lamp?

Nearly any common type of cooking oil can be used as fuel in a DIY oil lamp. Also, butter, Crisco, lard, and even ghee, due to their animal fat content, can be used.

What Oil Can You Use in an Oil Lamp?

If you do not want to use kerosene, lamp oil or olive oil, there are many other fuel options that are equally readily available and inexpensive to use:

  • Hemp Oil
  • Tallow
  • Coconut Oil
  • Nut Oils
  • Fish Oil
  • Lard
  • Vegetable Oil
  • Castor Oil
  • Seed Oils

Can Mineral Oil Be Used in Oil Lamps?

Mineral oil will ignite fairly easily, especially when blended with other types of safe burning oils.

What Can I Use for an Oil Lamp Wick?

A DIY oil lamp, just like a mass produced oil lamp or a candle, must have a wick in order to burn. The wick draws up the oil to use as fuel to make a flame. Wicks are made of fibrous material, like plant fibers, linen, and papyrus when commercially manufactured.

It is best to weight the bottom of the wick so that it does not move around in the oil. I often use a pop can tab, piece of cork, or washer to tie onto the base of the wick to help keep it weighed down and as immobile as possible.

You can also wrap craft wire around the lip of a Mason jar and then run two pieces of wire across the mouth of the jar to run the wick through to help hold it in place.

Yet another way to help hold the wick in place it to poke a hole through the lid of a Mason jar and thread the wick through it before securing the lid in place with a ring.

DIY oil lamp materials

DIY Oil Lamp Instructions

Equipment

  • Hammer

Ingredients

  • 1 Mason jar
  • 1 Mason jar lid
  • 1 Mason jar ring
  • Olive oil
  • Scissors
  • Cotton, cording, or other suggested wick material
  • Nail
  • Vice, two bricks, or two blocks of wood
  • Washer, nut, or piece of cork

Instructions

  • Put the Mason jar lid in a vise or upside down between two bricks or pieces of wood so the center area is exposed.
  • Use the hammer and nail (or a power drill and a bit if you prefer) to punch a hole in the middle of the Mason jar lid large enough for your wick to fit through.
  • Set the lid aside and remove the tools from your workspace.
  • Slide the wick through the hole so the top end is sticking out. I suggest temporarily taping the wick in place so it does not fall back inside when being placed in the DIY oil lamp or unravel while during placement.
  • Fill the glass jar with your chosen lamp oil.For the best results, fill the jar only a little more than ¾ of the way full. I recommend using olive oil.
  • Tie the washer or nut around the bottom end of the wick.
  • Gently place the lid with the wick through it into the DIY oil lamp container. Line the weighted bottom up so it is as centered as possible in the base of the Mason jar. I suggest keeping your thumb on the taped portion of the top of the wick to make sure it stays secured in place.
  • Screw the ring onto the Mason jar around the lid while holding the top of the wick firmly in place.

Notes

Allow the wick to soak up the oil for at least 15 minutes before lighting for the first time. You can use the oil lamp just as it is, or dress them up a bit with essential oils, herbs, cinnamon sticks, or pine cones and use them as attractively disguised prepper gear around the house.

I often give these inexpensive and handy oil lamps as gifts to loved ones, and to folks I am attempting to introduce to prepping.

If you want to know more about oil lamps and their safety, I’ve included this handy FAQ where I answer some common questions.

Can Oil Lamps Explode?

When using any of the natural DIY oil lamp fuel choices noted above (especially olive oil) such an incident would be highly unlikely. But, the possibility of “liquid fire” traveling along the floor, furniture, clothing, and the human body could happen if the lamp is knocked over or exposed to intense wind or blowing.

Are Oil Lamps Safe To Use Indoors?

Commercially manufactured lamp oil is designed and tested to ensure they can be safely burned indoors even without ventilation. Kerosene is not safe to burn indoors without proper ventilation.

Do Oil Lamps Give Off Carbon Monoxide?

Oil lamps can emit small amounts of carbon monoxide.

Do Any Vegetable Oils Catch Fire?

Like olive oil, vegetables oils are not really considered flammable. When used as a fuel in a DIY oil lamp, place a thick wick into the lamp so it becomes thoroughly saturated and helps to ignite the oil placed inside the lamp. Once started, vegetable oil should burn steadily for many hours.

Is Olive Oil Safer Than Kerosene in Oil Lamps?

The short answer is – yes. Oil lamps that use olive oil as a fuel will be far less likely to ignite if the flame drops down into the oil in the glass container. It would be rare to olive oil to catch on fire while being burnt as an oil lamp fuel. Kerosene will offer a brighter light, but DIY oil lamps using olive oil are generally bright enough to read by in the dark.

Olive oil will also smolder and put itself out and is largely considered a low volatility lamp oil fuel. Olive oil should not burn unless its temperature reaches a minimum of 550 degrees.

It is strongly recommended NOT to use K-1 kerosene in oil lamps and lanterns that will be used indoors because they contain impurities, including sulfur and red dye, that causes fumes that may be harmful and cause headaches.

What Is Lamp Oil Made From?

Commercially manufactured lamp oil is used as fuel in lamps, lanterns, and outdoor torches, oil lamps and lanterns. Generally, store-bought lamp oil has a petroleum base that has been professionally refined to enable it to burn in a soot free and odorless manner.

Is Olive Oil Better Than Vegetable Oil as a Lamp Fuel?

Olive oil has a lower smoke point than vegetable oil, which can be advantageous when using the DIY oil lamp indoors.

Are Baby Oil and Mineral Oil the Same?

Mineral oil is made out of paraffin oil (not paraffin like kerosene) Nunol, white mineral oil, and liquid petroleum. Mineral oil is classified as a hydrocarbon compound. The only real differences between mineral oil and baby oil are density and fragrance.

What Kind of Oil Was Used in Ancient Lamps?

Long before factories mass produced lamp oil, both beeswax and animal fat were used to fuel lamps. To a slightly lesser degree, olive oil, grapeseed oil, coconut oil, and sesame oil were also used. In the Mediterranean region, coconut oil was almost exclusively used as lamp oil.

What Is the Cleanest Burning Lamp Oil?

Olive oil seems to be the cleanest burning oil lamp fuel. For my fellow Christians, you might recall that is was olive oil Aaron used to generate light in the temple in the book of Exodus. The cleanest burning fuel is olive oil, the fuel that Aaron was directed to use for temple light in the book of Exodus.

Does Lamp Oil Go Bad?

Lamp oil, regardless of which type you choose from the suggestions given here, basically has an indefinite shelf life – as long as it is stored properly. Keep a firm fitting lid on your lamp oil or oil lamp when not in use and store it at room temperature in a dry place.

Is Coal Oil the Same As Kerosene?

Cannel coal oil is a form of petroleum that is made from a particular type of bitumen soft coal. Kerosene is refined from liquid petroleum (or crude oil) directly. In my opinion, coal oil has a far worse stench than kerosene.

What Is Florasense Lamp Oil?

Florasense lamp oil is an odorless commercially produced lamp oil that is quite popular for use both indoors and out. Florasense lamp oil is known to produce a bright glowing light when used in either manufactured oil lamps or the DIY oil lamp version you can make cheaply in large quantities.

Can You Burn Essential Oils in an Oil Lamp?

Unlike vegetable or animal fat cooking oils, essential oils are plant extracts and should only be heated to room temperature for aroma or natural medicinal purposes and not to create light or heat.

Why Does My Oil Lamp Wick Burn So Fast?

If the wick appears to be burning down too quickly, it is most likely a fuel oil issue. If the chosen oil is burning at too fast of a rate, pour it out and choose a safe indoor oil with a lower ignition temperature.

Can You Make Your Own Oil Lamp or Candle Wick?

To make a wick for your DIY oil lamp, roll up cotton fabric, newspaper, wood, twine, toilet paper, or paper towels as tightly as you can. Tie the wick together using twine or dental floss so that it does not lose its shape and density.

For best results when making your own wick, soak the material in a brine made of equal parts salt and water first and allow it to dry thoroughly. This process helps to prevent the wick from burning too quickly. Some folks use equal parts of not just water and salt, but an equal part boric acid, when making a wick stabilizer brine.

How Do You Trim an Oil Lamp Wick?

To trim a wick to fit a DIY oil lamp, cut it across the top, curving it just slightly at the ends using a pair of sharp scissors. The flame created by your DIY oil lamp should be about ½ of an inch tall to that it does not burn too quickly yet still produces a good quality light.

Do Oil Lamps Smell?

If you are experiencing a strong odor coming from your oil lamp, the flame may be either too high or too low or a poor quality lamp oil was used. If there is a lot of soot like smoke also showing, the wick may be over exposed.

Other self-sufficiency and preparedness solutions recommended for you:

The vital self-sufficiency lessons our great grand-fathers left us

Knowledge to survive any medical crisis situation

Liberal’s hidden agenda: more than just your guns

Build yourself the only unlimited water source you’ll ever need

4 Important Forgotten Skills used by our Ancestors that can help you in any crisis

Secure your privacy in just 10 simple steps

No matter what type of SHTF you are prepping for, expect the power grid to eventually cease to function. Many preppers stockpile oil lamps, and that is a great idea,

Say what you will about paper money, but it sure has made the process of buying things convenient. And plastic credit cards… well, perhaps they make purchasing a little TOO convenient. But what will happen when the day comes when paper money is no longer issued or backed by the government? What will happen when our credit and debit cards slide for the last time? Commerce and industry will never disappear, there will always be people buying, trading and selling. The only difference will be how they will be doing it once today’s money loses its value. So, below we’ve put together a list of 10 bartering items that will be worthy of trading for those days ahead, on the other side of that moment we call when the SHTF…

Information/knowledge

If you know how to do something and another person doesn’t, and the other person needs to know how to do that thing, then you have something of value. Some examples of knowledge that would be valuable for those days after the SHTF could be things such as an understanding of gardening and growing foods, basic medical knowledge, an understanding of herbs and medicines, skill in animal husbandry, skill in midwifery, skill in hunting, tracking or defense. Even a skill in storytelling might help you come out ahead at times. I mean, everyone wants someone fun to sit around the fire with!

So, while you’re preparing for those days ahead and storing your food and water, don’t neglect yourself or your brain. With the right decisions and knowledge what you see when you look in the mirror might be the most valuable bartering object you have!

Fabric

knit

Everyone needs fabric to keep themselves and their loved ones protected and warm and if the factories aren’t running eventually there will be a shortage. What fabrics you would want to save depends on where you live and what your lifestyle is. Lighter fabrics might be somewhat valuable in warmer climates, but in the cold and the mountains, thick wool fabric can be a literal lifesaver. Whether it’s mending a ripped coat or stitching a new pair of pants for a growing child, sometimes a thin layer of fabric is the only thing we have between us and a cold death.

Precious Metals

money

We humans have used precious metals like gold and silver for trading for tens of thousands of years. Usually precious metal is traded in coin form. Gold and silver coins are considered valuable due to their scarcity (there is not a lot of it and it’s hard to mine) and their how small and easily transportable they are.

While gold and silver coins will likely always have some degree of value you still can’t eat them or wear them, they won’t keep you warm and they won’t keep you out of the rain. Because of that gold and silver coins won’t likely have much value in the days immediately after the SHTF because people will be more worried about more immediate needs (like food and protection). But, once things start to calm down and an economy begins to reform it’s more than likely that gold and silver coins will once again claim value.

“Shoes”

work-boots

When I say “shoes” I don’t mean only shoes. What I really mean is any type of item that is both necessary and that also wears out with regular and sustained use. Shoes are simply a good example of this sort of item. This doesn’t mean I suggest you clear out the back portion of your garage and stock up on shoes the next time the shoe store has a sale. I’m simply reminding you that people aren’t going to want to have bare feet. And if you have shoes… well then…

Survival Gear

Yes, I know this is a huge category. It’s spans everything from knives to tents, from water purifiers to binoculars. But there is no denying that when things go south objects and items that help people stay alive will be in great demand and any item in great demand has trading value. With this in mind, when you upgrade to new equipment you might not want to throw out the old stuff. That old pair of binocs, while perhaps not something you’ll be using anytime soon, might be worth a week (or a month) worth of food to the right person.

Canned Food

This is an obvious one. We, humans, need food every day, but every day lots of food spoils or goes bad. Canned and bottled food is the answer to this problem. When properly stored some canned and bottled food can last for decades or more. That’s a lot of flexibility in food storage. And, if after a couple of years you’re sick of your bottled green beans then perhaps you can find someone else who’s sick of their bottled beets and boom! You’ve got a trade (and thankful taste buds).

Guns

bestgun

Another obvious one. Guns, guns and more guns. Whether it’s a .22 or a .306, a pistol or a shotgun, few things will be more valuable than guns for when the SHTF. Guns can be used to provide food for yourself and your family, they can be used to protect your loved ones and to defend your own food. Perhaps one of the most valuable thing about guns isn’t shooting them at all, but simply the knowledge that you could shoot if you needed to.

One caveat that comes with bartering guns, make sure you trust who you’re trading the gun(s) to. A gun doesn’t care who’s holding it, it’s a tool, nothing more. And a gun in the wrong hand can do immense degrees of harm to you and the ones you love. So, if you have enough guns and see a value in trading feel free to do so, but don’t hand a gun over to a man or woman who will be likely to simply turn the gun around and use it on you.

Alcohol

whiskey

Even if you don’t drink it, chances are there will be someone nearby you that does, and they might be willing to trade you quite a bit for the chance to taste a bit of alcohol again.

Plus, alcohol can be used for more than just drinking. It can be used as a cleaning liquid, as a solvent, as a fuel and even as a preservative! And as long as the bottles are kept closed alcohol will store for basically forever. If you’ve got shelves full of canned and bottled food then you might want to consider adding a bottle or two, or twenty, of alcohol to your collection. You just never know when it will come in handy, and you never know just how much someone else will be willing to trade for it.

Dried Foods

Dried foods are in the same category as canned and bottled foods. The only difference is that the fact that they are dried means they are lighter and easier to transport. Because of this, dried foods will find their greatest value in a society or world that is moving and transitory. If you live in a cabin in the woods then you might want to invest in bottled foods. If you’re living in a tent and moving around then dried foods will be your best caloric value.

Bullets

bullets

And here we are, item #1, what some might argue could, at the end of the day, be the most valuable trading item for those days on the far side of that moment where the SHTF. Bullets. Bullets? You might ask. Why would bullets be so valuable?

A handful of reasons. First, like precious metals, bullets are both difficult to manufacture and they are small and easily transported. Plus, like food or fabric, bullets have a utility value since they can be used to keep you and your loved ones alive. Like canned or bottled food, bullets have a very long “shelf life”. In addition, guns are mostly worthless without bullets so, if your neighbor is the guy with all the guns, and you are the one with all the bullets then chances are you’ll have a lot to talk about.


Many different types of bullets can also be reloaded and used multiple times as well. Due to all these elements, bullets will always have a great value in a post SHTF world.

At the end of the day, intelligence should be used while you prepare for the future and when you are preparing and prepping be sure you make the best purchases, especially with the goal of being able to barter in that strange new world.

Say what you will about paper money, but it sure has made the process of buying things convenient. And plastic credit cards… well, perhaps they make purchasing a little TOO

When most people think of long term food storage, pantries filled with canned goods is what often comes to mind. However, we have to be very careful with what we store and buy. Things are not always what they seem when it comes to food storage many products claim to be made with the famed 25 year shelf life, but start to read the label and you will find ingredients that will not last more than 2-3 years. This article will teach you what to look for.

When looking at long term food storage, you must first look at the ingredients. Can you pronounce every ingredient? Do you see words like hydrogenated, hydrolyzed, or Mono-sodium Glutamate (MSG)? These words, along with many others indicate artificial flavorings, colorings, and preservatives that can be very harmful to your body, not to mention unstable.

Read the label

If you have bought food go grab it and lets look at the label. If you see things like cake flour it only has a shelf life of 8 months to a year. Keep looking, do you see soy bean oil, canola oil, hydrogenated oils or hydrolyzed syrup? Those all have a shelf life of only a year or two, yet they are being sold as 25 year food storage! Don’t forget to also look for things like whole eggs or dairy as well. These ingredients simply can not last as long as these food storage companies claim and you need to be aware.

To be shelf stable, there also has to be the minimum of water content in the food. The FDA suggests that dehydrated food, using any form of dehydration, must have a water content less than 7%. The problem most companies find with following this mandate is simply cost. Making sure the food actually gets under 7% of water content requires extra time, effort and power, creating a path for shortcuts to be taken which most companies do.

When shortcuts are taken, added preservatives have to be used. By putting in the hydrogenated oils, food storage manufacturers can extend the shelf life of lower quality oils such as vegetable, soy, and safflower oils.  These oils have a natural shelf life of 18 months under preferable conditions. When chemicals and artificial preservatives are introduced, they can store for several years, but they have been altered to an unhealthy form to accomplish it.

When purchasing your food, make sure you do your homework and read the label. It may literally save your life.

Finding a manufacturer that believes in using natural, shelf stable ingredients means that they don’t have to use the artificial chemicals to preserve their long term food storage. The food is just as flavorful, healthy, and nutritious as when it was originally sourced. When you are looking for good ingredients, look for real food products that have been freeze dried and prepared to last. For example things like tomato or onion powder chopped or grated vegetables. Also look for whole foods like whole beans in the food, products that contain these types of ingredients will be sure to provide you the nutrition your body will need, when you need it.

Is your food protected?

Another thing to look for is packaging, this isn’t always the easiest thing to see because many products now come in the large white buckets. While the buckets look good they are not what actually is protecting the food from the elements. When you open up the bucket you will notice that the food is individually packaged in plastic or Mylar type bags. This is crucial to long term food storage because if your packaging fails your food will spoil long before its shelf date. A few things I like to look for is the quality of the bag itself. Is it flimsy and folds easily? That’s a bad sign, look for solid, quality bags at least 5.4 mm think so it will stand the test of time. I also really like the resealable option so you can one use a little at a time and still seal off your food.

The next thing to look for when it comes to packaging is how the provider is eliminating oxygen from the food. This will again provide the product a long shelf life as well as keep it fresh. If the company only provides an oxygen eliminating pack in its product, that’s really not enough to keep the food fresh. Look for a producer that fully nitrogen flushes its food to eliminate all oxygen in each bag.

Getting your food storage doesn’t have to be difficult. Don’t make the mistake of buying from the first food storage company you see and getting food that won’t be edible in an emergency.

When most people think of long term food storage, pantries filled with canned goods is what often comes to mind. However, we have to be very careful with what we

The various types of emergency foods that are available, coupled with the commercial hype surrounding them, can understandably lead the prepper to make less than optimal decisions with regard to the types and amounts of emergency foods to acquire. In this article I will briefly recap the most common types of emergency food and describe how each would fit in to a practical survival strategy.

The common types of emergency food stores include:

  • Canned Foods – Canned foods consist of fruits, vegetables and meats that have been prepared for long-term storage in jars and cans. Canned foods can be prepared at home and are available at virtually any grocery store. Depending on the type of food, they can either be ‘dry-pack canned’ or ‘wet-pack canned’. (Wet-pack canning involves immersing the food in hot water – sometimes in a pressure cooker – prior to vacuum-sealing.) Dried beans and dried white rice are the dry-pack canned foods most commonly stored by preppers and survivalists because they have an extremely long shelf life (up to 25 years!) and provide a good supply of proteins and carbohydrates.
  • mre

    MRE’s are a common choice for Emergency Food.

    Dehydrated Foods – Dehydrated foods have been processed in a food dehydrator to remove much of their moisture. This inhibits the growth of microorganisms that cause the food to spoil.

  • Freeze-dried Foods – Freeze-dried foods have been processed in a commercial freeze-drier in such a way that virtually all water has been removed (much more than is removed by a dehydrator). This process results in food that is lightweight and which has a very long shelf life.
  • Cured Meats – Cured meats have been treated with chemicals (usually nitrates) in such a way as to inhibit the growth of microbes and extend the unrefrigerated shelf life of meats.
  • Smoked Meats – Smoked meats have been exposed to the heat and smoke such that the increase in temperature dehydrates the meat (which inhibits microbial growth) while the smoke deposits an anti-microbial chemical layer over the meat.
  • Meals Ready-to-Eat – Originally developed for the military, MREs are portable, long-shelf-life food packets that contain complete meals. MREs can quickly be prepared and consumed. Often these packets include built-in food heaters and provide complete meals.

ISSUES RELATED TO NUTRITION

In general, all of the above forms of preserved foods provide good nutritional value. While the heating associated with some canning processes can degrade some water-soluble vitamins such as vitamins A, C, thiamine and riboflavin, they still serve as a good source of these and other nutrients. While nutritional value is preserved in the above types of foods, the nitrates used to cure meats have been shown to be carcinogenic in larger quantities. Salt and sugar may be added to canned foods to improve taste, which can also affect the nutrition offered by such foods (be sure to check the labels of any canned foods for references to sugar and salt!).

MREs provide good calories and some nutrition, but also contain a large quantity of sodium, which has been show to have adverse health effects when consumed excessively (MREs are designed to simply “get the soldier across the battlefield”).

SHELF LIFE OF DIFFERENT EMERGENCY FOOD TYPES

The shelf lives described here assume the foods are kept at room temperature of about 70 degrees Fahrenheit.

Canned fruits and vegetables typically have a shelf life of between 2 and 5 years. There is much anecdotal evidence of canned meats being eaten (and having good flavor and nutrition) after being stored for as long as 10 years. Some dry-canned foods such as dried beans and dried white rice can have a shelf life that exceeds 25 years.

Dehydrated fruits and vegetables typically have a shelf life of up to one year, while dehydrated meats have a shelf life of only about one month.

Freeze-dried foods have a shelf life that ranges between 5 and 25 years, depending on how well it is packaged (plastic food pouches have a shorter shelf life, while cans have a a much longer shelf life).

Smoked meats have an unrefrigerated shelf life of only a few weeks.

Cured meats have an unrefrigerated shelf life that ranges from a few weeks to as long as a year, depending on the type of meat and how it was cured.

Canned foods offer offer the most nutrition at the least cost. The other forms of food have the advantage of lighter weight and/or longer shelf life, but at significantly greater cost.

Smoked meats have an unrefrigerated shelf life of only a few weeks.

NOTE: While the storage of cured and smoked meats is of limited value in the time leading up to disaster; the ability, equipment and supplies required to smoke and cure meats will certainly be valuable skills to have in the aftermath if refrigeration systems are unavailable.

Modern MREs have a shelf life of between 3 to 4 years when stored at room temperature, however that shelf life can decrease rapidly when stored at higher temperatures (in a desert environment the shelf-life for a MRE may be as short as one month!). Also, when purchasing MREs you should be certain of their date of manufacture – otherwise you won’t get the benefit of the full shelf life.

DETERMINING YOUR OWN EMERGENCY FOOD NEEDS

A good way to begin to understand the types of emergency food supplies you will need is to consider how you will most probably be traveling during and after a major disaster. If you expect to be sheltering-in-place then the bulk of your emergency food supplies should consist of canned foods, as canned foods offer a very good shelf life and provide a lower cost per meal than other forms of emergency food. Even though canned foods are heavier than other types of emergency food, if you are sheltering-in-place then portability becomes a less important consideration than cost.

If you expect to be traveling on foot for an extended period, then the weight of your food will be a major consideration. In these circumstances you should plan on having freeze-dried food available, as freeze dried foods have an extremely long shelf life and are extremely light.

If you expect to be traveling by vehicle then weight is less of an issue and the ability to “eat while on the move” becomes important. MREs are an excellent choice for these circumstances because they can typically be unpackaged, heated and eaten without the need to interrupt travel. Also, because they utilize a chemical reaction to generate heat, the preparation of MREs does not produce smoke that might attract undesired attention.

When considering these factors you should not only be anticipating your travel needs when bugging out, but also potential future needs to travel overland for trade, barter and defense. Of course no one has a crystal ball to be able to predict these needs with certainty; however you should at least be able to develop a reasonable estimate. Additionally, you should build into your estimates the expected duration of the disaster, which should ideally be the amount of time required for you to become self-sufficient.

A quick way to estimate your emergency food needs is to answer the following questions:

  • How many people are in my group?
  • What duration disaster (in days) am I planning for or how long do I anticipate before achieving self-sufficiency?
  • If bugging out to another location, how many days of travel will be required?
  • In the aftermath of disaster, what percentage of total group members’ time will be spent on extended trips away?
  • What percentage of meals will utilize basic dry-canned foods such as beans and rice?

The answers to these questions can help you to estimate your own emergency food needs. If MREs are used exclusively for travel, for example, then the total number of MREs needed for travel is simply the product of number of group members, number of days of travel and number of meals per day. You may then increase this number so as to plan to use MREs for a percentage of post-disaster travel when concealment and speed are a top consideration.

Amounts of freeze-dried meals can be estimated as the product of average number of people traveling, the number of days of travel and the number of meals per day (while there will be some double coverage of travel by MREs and freeze-dried food, it’s never a bad idea to have some extra food on hand).

The balance between dry-packed “beans and rice” type meals and canned foods will be much more subjective, however by thinking in terms of the percentage of beans-and-rice meals vs. other meals, and of course considering the number of people you are planning to feed and the expected duration of the disaster, you will be able to identify the types and quantities of these bulk emergency foods that will meet your preparedness needs.

NOTE: Even before disaster strikes you should normally be consuming and replenishing your supply of canned disaster food so that you do not find yourself with a cupboard filled with expired canned food when disaster does strike!


The various types of emergency foods that are available, coupled with the commercial hype surrounding them, can understandably lead the prepper to make less than optimal decisions with regard to

Do you raise honey bees? If so, you should know that their usefulness extends well beyond the production of honey. In addition to pollinating your plants and ensuring a healthy ecosystem, bees also produce honeycomb.

While it may not sound fancy, honeycomb produces many pounds of beeswax which can then be used around the home. Here are some of the best ways to use beeswax on the homestead – no matter where you live.

beeswax

What is Beeswax?

Beeswax is made from the honeycomb of honeybees. Bees consume about eight times the amount of honey that will need to produce one pound of beeswax. This one pound of wax requires an impressive 150,000 flight miles! Why waste it?

When bees mix pollen oils into honeycomb, this turns the naturally white wax into a luxurious yellow or brown color. When purchased commercially, beeswax can be bought in yellow, white, or bleached shades. While yellow wax will be that which was extracted directly from the honeycomb, white and bleached beeswax have been altered.

Beeswax is a medical aid for a variety of conditions, such as lowering cholesterol and relieving pain. It can also be used to reduce swelling, treat ulcers, eliminate diarrhea, and treat hiccups. White beeswax, as well as yellow beeswax treated with alcohol, are also commonly used as stiffening agents in cooking.

Beeswax works well around the homestead because it contains a mixture of crucial elements like creotic acid, hydrocarbons, alcohol, minerals, esters, pigments, and water. These combinations give it a low melting point, making it possible to work with it without needing special equipment.

How Do I Find Beeswax for the Homestead?

Beeswax is produced by honey bees, used to create honeycomb for their hives. Each hive will contain several sheets of beeswax comb. If you raise your own bees for honey, you can easily harvest the beeswax to use around the homestead. If not, contact a local beekeeper.

Extra beeswax is usually not thrown away after the extraction process but instead melted into blocks to be used later on. It can also be purchased in bulk online or at local craft stores.

If you are harvesting beeswax from your own hives, you will want to allow gravity to remove as much honey from the wax as possible after extracting your honey. Place your wax in a five-gallon pail and top it off with water before pouring it through a colander to wash it. Then, place the washed wax in a double boiler to melt it.

You should always use a double boiler to melt beeswax and avoid melting beeswax directly on a n open flame. It’s extremely flammable, so don’t leave the room while you are working.

Afterwards, you can strain the melted wax through a few layers of cheesecloth to remove any particles. This can then be produced into a block mold to use around your homestead.

How to Use Beeswax on the Homestead

Beeswax has multiple purposes, with a delightful scent and a unique texture that makes it ideal for a variety of homestead tasks. You can use it by itself or with a combination of other ingredients to create products that have multiple uses around your home and farm.

1. Beeswax candles

It never hurts to have extra candles lying around the house for emergency situations. Plus, beeswax candles make excellent gifts! You can use rolled sheets of beeswax or beeswax tapers, or simply melt down beeswax chunks from your own hives. Add essential oils for a lovely scent.

Related Knowledge to survive any medical crisis situation

2. Sewing buttons

You can use beeswax in sewing to help make it easier to attach buttons. All you need to do is cut your thread to the length needed, then wrap the thread around a block for wax and sliding it along the wax. Push it down with your finger, and the thread will be much easier to knit.

3. Unstick a drawer or zipper

Just a little bit of beeswax can help make your drawers (or even your windows!) slide a bit easier. Just use a few drops of wax to lubricate the sashes. You can even put beeswax on the teeth of your zipper to make it easier to open.

4. Wax wooden furniture

If you have furniture or even structural elements (like ceiling beams) that you want to have a little extra shine, consider mixing equal parts of linseed oil, turpentine, and beeswax. Warm the mixture and apply with a rag.

5. Coat your cooking pans

Don’t worry about using butter or other unhealthy oils to coat your pans. Use beeswax! Just rub a small amount inside your favorite frying or sauce pan before use. Make sure the pan is slightly warm.

6. Seal envelopes

Don’t let your tongue get tired with all the mail you need to send – particularly all those cards at Christmas time! Instead, use beeswax to seal the envelope and you’ll save yourself a lot of effort.

7. Beeswax food wraps

Instead of relying on plastic, use beeswax. You can make your own reusable beeswax food wraps that are eco-friendly -and also better for your health.

8. Preserve a bronze or patina

You can also seal color and shine into copper by rubbing it with warm beeswax. Just polish off any excess with a rag.

9. Use beeswax for canning

Beeswax was used for hundreds of years to prevent jam spoilage during preservation. All you need to do is apply a coat of wax over the food between uses.

10. Clean your grill

If you like to grill – but hate the clean-up process – use beeswax. Make sure it’s warm, but then you can apply it to your grilling rack before use. It will prevent the buildup of food residue, but remember not to use beeswax while the grill is hot – it can flash up on you.

11. Loosen rusted nuts and lubricate screws

If your old screws aren’t twisting quite the way they should, you can use beeswax to smooth the drive and remove corrosion. All you need to do is rub a bit of wax over the threads to keep them lubricated.

Related Build yourself the only unlimited water source you’ll ever need

12. Clean your iron

If your iron has developed heat marks and is leaving stains on your clothes every time you use it, you might want to wipe it down with some beeswax. This should remove any residue.

13. Wax your own cheese

If you make your own cheese on the farm, regardless of whether it is from cows, sheep, or goats, you can make your own natural covers with beeswax. Allow the cheese to dry before applying hot wax. This will give it a proper seal.

14. Fix frayed rope

If you find that the rope you like to use around the homestead is beginning to unravel, you can fix it by wrapping a waxed piece of string around the tip of the rope a dozen times. Tie the loose ends and trim any excess.

15. Dye fabric

Beeswax can be used in a method of fabric dyeing known as batiking. This involves covering fabric that is not meant to be dyed with removable wax. You’ll need a bit of paraffin, too, but otherwise beeswax will do the trick for you.

16. Use beeswax on your saws

If you are preparing to use a hand saw in new wood, consider using some beeswax. If you rub the wax on the sawteeth, it will help them cut through wood more easily.

17. Condition wooden cutting boards

Before you break in your new wooden cutting board, condition it with beeswax. Combine a half-teaspoon of wax to a cup of mineral oil, and heat it up until the wax has melted. Apply it to the board using a soft cloth.

18. Make a pain-relieving salve

Beeswax has anti-inflammatory properties that make it an excellent item to reduce your aches and pains. Mix chickweed, wormwood, olive oil, and beeswax to create individual tins of pain-relieving salves.

19. Use beeswax as a fire starter

If you like to camp or simply enjoy having fires at home, use beeswax. You can brush melted beeswax into tiny squares of cardboard. Pack them with you, and they’ll help you start your next fire in a pinch.

20. Prevent rust

Apply beeswax to your favorite cast iron pans, hand tools, and shovels. This should prevent them from rusting out.

21. Polish concrete

If you have concrete surfaces, like countertops, in your home, you can use beeswax to give them a natural luster. All you need to do is rub melted beeswax on the surface, let it dry, and then wipe it away.

22. Soothe itchy skin

Did you accidentally come into contact with poison oak, poison ivy, or another itch-inducing substance? Consider using beeswax to heal the itch. You might want to mix it with some olive oil or chickweed powder to make it more effective – and easier to spread.

23. Propagate your plants

If you enjoy grafting new plants, consider using beeswax. It can easily hold two parts of plant material together, making it a natural and non-toxic solution.

24. Beeswax cosmetics

Beeswax is used in many popular toiletry and cosmetic items, including lip balm, hand and foot cream, and body butter. You may need to add ingredients like coconut oil, shea butter, or magnesium flakes, but otherwise, they’ll come together quickly and work like a charm.

25. Waterproof leather

Before you hang that saddle up, pull out the beeswax. By combining equal parts of tallow, neatsfoot oil, and beeswax, you can make a salve that can be rubbed on your saddles, gloves, or work boots.

Are There Any Drawbacks to Using Beeswax?

The short answer – not really! Because beeswax is a natural product, it is safe when used in most functions around the homestead. However, if you plan on consuming beeswax in any form, make sure you consult a medical professional first.

While it’s believed to be safe in treating most conditions, as well as when applied to the skin, it’s good to consult a doctor if you have any preexisting conditions or concerns.

Should I Use Beeswax on the Homestead?

Beeswax is a great tool to have around any home – but particularly around the homestead. If you live in a rural area or want to become more self-sufficient, beeswax is an excellent tool that has a long shelf life.

You won’t have to worry about running out any time soon! Consider using beeswax for these twenty-five most common tasks around the homestead today.


Other self-sufficiency and preparedness solutions recommended for you:

The vital self-sufficiency lessons our great grand-fathers left us

Knowledge to survive any medical crisis situation

Liberal’s hidden agenda: more than just your guns

Build yourself the only unlimited water source you’ll ever need

4 Important Forgotten Skills used by our Ancestors that can help you in any crisis

Secure your privacy in just 10 simple steps

While it may not sound fancy, honeycomb produces many pounds of beeswax which can then be used around the home. Here are some of the best ways to use beeswax

Yesterday I began a new series called, Back to Basics. People every day can simply look at events happening anywhere in the world and understand how taking some simple steps to ensure you can handle minor emergencies, isn’t crazy. Prepping to a certain level makes sense for everyone, regardless of where you live.

This series was designed to go back to the basics of prepping, obviously. Today I wanted to share tips for how to stockpile food for emergencies that anyone can use. I will focus on preppers who are just starting out, but I think some ideas in the topics below could be useful to anyone looking to ensure their family has food and does not go hungry. This article will also have dozens of links to other content on the subject for additional reading.


I believe there are 5 main components to survival that everyone needs to consider. They are simply Water, Food, Shelter, Security and Hygiene. Yesterday we talked about the need for water and how you can easily store water for emergencies that render your traditional methods of obtaining water impossible. Water is more important to life than food or at least you can live longer without food than you can water, but they are both important.

Why do you need to stockpile food for emergencies?

If you are new to prepping, you may have something that triggered your awareness of the subject. Preppers have many reasons for doing what they do and no two preppers are alike. Some are preparing for the end of the world, but most see situations in our daily lives that give a perfect reason to stock up supplies. You have only to look at the recent winter storm that affected large swaths of the Eastern Seaboard to have a perfect example of why you don’t want to be left without a means to feed your family.

emptystoreshelves

Greeks are finding food, medicine and fuel in short supply.

It seems almost cliché at this point, but invariably it always happens when a winter storm is forecast. Everyone rushes out to the store and certain food supplies are wiped out. Images of empty shelves are shown on practically every newscast and eventually prepper websites. Food shortages during simple storms are common if not expected. We don’t really even blink anymore because we are so used to this practice of waiting until the last-minute and then hitting the local grocery store on the way home from work to grab some basic necessities or comfort food.

Related – Build yourself the only unlimited water source you’ll ever need

If you can’t live for more than 3 days without going to the store, it’s time to reevaluate your family’s readiness. The statistic we hear most of the time is that the average home has only 3 days’ worth of food in it. If this is true, where would you be on day three if you had not been able to make it to the grocery store before the storm? What if instead of a snow storm, a virus outbreak had occurred and everyone was told to stay indoors to prevent infection? Each of us should have more food on hand that our families and friends will eat than is absolutely necessary to prevent surprises from leaving you hungry.

How much food do you need to store?

In the example above I used a virus outbreak as the condition that would prevent you from getting to the store. There are others though and weather could certainly be one of them. Some storms where I live have left roads impassable for upwards of a week. Could we walk to the store? Sure, but what if the stores having already been cleared of just about all of the food were closed? What if power outages prevented them from conducting any transactions? These are things you should consider.

Prepping is not something I ever consider you can accomplish. By that I mean, you are never going to be fully prepared. You may be much better prepared than some or all of the people around you, but you will never be 100% self-sufficient. Prepping should be done incrementally even if you have more money than you know what to do with because as you start to stock up food you learn lessons.

Related – The vital self-sufficiency lessons our great grand-fathers left us

A good rule of thumb for me is to start small when you are beginning to stockpile food for emergencies. You don’t need a year of freeze-dried foods to start with. Try just having a week or two of extra groceries that your family already eats. This is accomplished without any exotic storage needs usually or 5 gallon buckets of grains you have to figure out how to prepare.

Premium Fresh MREs Meal with Heaters

My wife purchases the groceries and I started out by giving her extra money to simply buy more food. I did this in the beginning because she is a much better shopper than I am and will always save more money than me. This worked great because she was easily able to fill our pantry and had plenty of meals planned to last us well over 30 days. Sure, at the end of that 30 days of food we would be getting into more exotic cans of mushrooms and soups that are better left as part of a recipe as opposed to your entire meal, but we wouldn’t starve.

What are the best types of food to stockpile?

Once we had a month worth of food and water stored up, I started looking at other options. I think each person should have a layered approach to food storage. This gives you flexibility and more importantly variety that as you go out to 6 months or 1 year or 2 will be important. My own personal goal is 2 years’ worth of food stockpiled for my family but that isn’t made up of only food from our grocery store. That can certainly be done though with a very good rotation plan.

Related – 4 Important Forgotten Skills used by our Ancestors that can help you in any crisis

Food storage should ideally cover the following:

Short Term Food Storage – The best and simplest foods are like I said above, what your family eats every day. One thing to consider is that the bulk of this food should be non-perishable in case you lose power. Canned foods are great as well as pastas, drink mixes and staples. These usually last at least a year.

Medium Term Food Storage – For the 5 – 10 year range MRE’s are a great option although they are heavier and their convenience comes at a higher price. I have several boxes of these and I like MRE’s because they are self-contained and don’t really need any water. Freeze dried camping foods like Mountain House are another great option to just add hot water to. Rice and beans make great additions to this category because you don’t really have to do anything crazy to store them as long as they are kept cool and dry.

Long Term Food Storage – When you start to look at foods that will keep for many years you get into stored grains like Hard Red Winter Wheat that you store in sealed 5 gallon buckets. Freeze dried food from any one of many suppliers out there keep for 20 years usually and are individually wrapped Mylar packets. They require water to re-hydrate but the taste can be surprisingly good. Make sure you have seasonings though….

Renewable Food Storage – This is when you have to get your inner farmer working. Renewable foods are an intensive garden, small livestock like chickens or rabbits and the occasional wild game caught either through hunting or snares. In the worst disasters, your food will run out so having a plan for that ahead of time will help you prepare.

vegetables

For a well-rounded plan, growing your own food will give you the most flexibility.

How do you plan for your food eventually running out?

I have a mix of the food storage options above. We eat on our grocery store items every day, but I also have MRE’s and a pretty large amount of freeze-dried foods stored. We also have the grains I mentioned and the all-important grain mill to grind them into flour. Several hundred pounds of rice and beans round out the equation.

Stockpiling food is only the start. We have a garden and small flock of chickens. The stored food is just to get us through the worst of the disaster. Hopefully before our food runs out whatever disaster has happened will be mitigated and life will have returned to some sense of normality. If not, we have a huge leg up that will allow us to further harvest our garden to put away food like the pioneers had to do. It is an approach that gives us some sense of security and prepares us to come out on the other side still alive.

What is your plan to stockpile food for emergencies?


On a different note, here’s some other self-sufficiency and preparedness solutions recommended for you:

The Lost Ways (The vital self-sufficiency lessons our great grand-fathers left us)
Survival MD (Knowledge to survive any medical crisis situation)
Backyard Liberty (Liberal’s hidden agenda: more than just your guns…)
Alive After the Fall (Build yourself the only unlimited water source you’ll ever need)
The Lost ways II (4 Important Forgotten Skills used by our Ancestors that can help you in any crisis)
The Patriot Privacy Kit (Secure your privacy in just 10 simple steps)

If you can’t live for more than 3 days without going to the store, it’s time to reevaluate your family’s readiness. The statistic we hear most of the time is

A generator without gas is like a rifle without ammunition. For this piece of machinery to be of any use to you outside of a very expensive and heavy paperweight, you need to have a plan for fuel storage. This is also the case if you don’t want to end up like millions of people each year who are unable to get gas after a natural emergency like Hurricane Sandy. A good fuel storage plan usually involves purchasing and properly treating a minimum amount of fuel to last you through whatever scenario you are planning for.

This might be fuel for your generators, or enough gas to get you to your bug out location. It is easier to pre-purchase fuel and store it so that in the case of an emergency, you aren’t standing in line. There are a few things to consider when you are planning to store fuel long-term that we will cover below.

What type of container should you store fuel in?

Similar to having water on hand in an emergency; having a supply of fuel in containers that protect the fuel and are easy to carry is important. Could you store gas in thousand-gallon tanks buried underground? Yes, and that is my dream scenario but for now, I and I assume most others will have to settle for something a little more cost-effective and portable. There are many different types of fuel containers but for gas, the most common style is plastic and red in color with a built-in spout of some form. Kerosene containers are blue, Diesel is Yellow and it is important to follow this handy color convention so that you don’t accidentally pour regular gas in your kerosene heater and fry your eyebrows off or worse.

Having a few containers of stored fuel could save you in an emergency.

You can get new fuel cans just about anywhere. Home Depot, WalMart, Lowes, and any hardware store will have some options for you. Most of the new models at Walmart near me are from a company called Scepter and have a new type of nozzle which is probably the result of stupid legislation that doesn’t work well at all. The nozzle requires you to press two tabs and pull them into a position for the fuel to dispense. This doesn’t work very well and the fuel doesn’t come out smoothly. I don’t think this is necessarily Scepter’s fault and they are probably only doing what is required from government regulations.

You can also pick fuel cans up at yard-sales or salvage companies. There is a salvage company down the road from me that routinely has perfectly good fuel cans for very cheap with the old gooseneck spouts. These are much superior in my opinion and if you are going to be pouring fuel out of a heavy can into a small hole I would recommend getting a good goose-neck or buying an older can. I have several of the new cans full of gas in my shed and a couple of older ones. If I need to pour anything out, I will use what is in the old-style cans first and then pour my gas from the new cans into the old cans. It is just easier for me that way.

Regardless of whether you have a new or old can, the place you store your fuel should be as airtight as possible. You don’t want fumes leaking into the area you have your fuel stored and gasoline evaporates quickly when exposed to air.

Using Fuel Additives for long-term fuel storage

Gas loses its potency over time and this also applies to Diesel and Kerosene. Diesel for example if stored at lower than 70 degrees will last about 12 months without any additives provided it is kept in a sealed container. If your temperatures are much above 70 that time slips by 50% to 6 months.

As diesel gets older, a fine sediment and gum forms in the diesel brought about by the reaction of diesel components with oxygen from the air. The fine sediment and gum will block fuel filters, leading to fuel starvation and the engine stopping. Frequent filter changes are then required to keep the engine going. The gums and sediments do not burn in the engine very well and can lead to carbon and soot deposits on injectors and other combustion surfaces.

Now, what can we do to prevent issues like this and protect our fuel because you don’t want to be trying to outrun the mutant zombie bikers from Mars and have your engine stop? Additives. There are two main additives that I have run across, STA-BIL and PRI-G. PRI has several lines of additives and the –G stands for gasoline. They also have PRI-D for diesel.  PRI additives are designed to be added to your fuel on a yearly basis to maintain the fuel in the best condition possible and they even claim that if your fuel has aged already, just adding PRI-G has proven to restore the fuel to “refinery-fresh conditions”. I would rather not test that out but PRI-G does have a decent reputation.

STA-BIL is one that I have personally used and does pretty much the same thing as PRI-G in terms of conditioning your fuel to last a lot longer in storage than it would without treatment. The instructions are simple, just dump the required amount in with your fuel and Voila! You should be able to safely store the fuel for at least a year with no adverse effects. I pour in the additive first and then the gas so that it is mixed as thoroughly as possible.

How Much and Where do I store my fuel?

Can you ever have too much fuel? I don’t know that you can in a real emergency. If you are unable to get to the gas station or there are rations at the pump you can never have too much. Would 500 gallons be enough? It really depends. If you have a minor power outage that lasts a few days, then you wouldn’t need that much gas at all. If we have the end of the world and there are no gas stations anymore, that 500 gallons is going to be a huge help, but it won’t last forever.

What I think is a good baseline takes into consideration the 80/20 rule. What is the likelihood that you will need this fuel for? For most people I think storing fuel for a bug-out vehicle or a generator is the most common scenario to plan for. For your car, I would plan on storing as much gas as you need to get you to your bugout location and add 50% to that. So, if you needed 2 tanks of gas to get you to your retreat and your tank held 20 gallons, I would store 60 gallons of treated fuel. This way if for some reason the grid goes down, the SHTF and zombies are walking all over the gas station parking lots, you should have plenty to get you there.

For a generator, I think you have to look at what you plan to run and how long you plan to run it. 15 gallons would last me about a week as long as I was using the generator for necessities only. Of course, it depends on the time of year but that is an average. Everyone should have at least one can of gas stored for emergencies but I like to store a minimum of one tank of gas for my car which is roughly 17 gallons and another 10 for the generator

Fuel should be stored in a clean, preferably cool place away from where you live. Don’t store fuel in your house if possible because that is an accident waiting to happen. If my shed blew up I would be a lot less concerned than if my house blew up.

Don’t forget to rotate

There are many common mistakes preppers make and storing fuel should be considered as well. I wouldn’t buy 50 gallons of gas, throw in some stabilizer and forget about them. Use and rotate your fuel yearly and you will be in great shape if something does require you to use your supplies. Since they blend gas differently in the Winter, I buy my fuel around January and store that for a year. Before the next January comes around I load up my gas tank in my car expending my stores and then head to the pump for a fresh batch. This way I think my fuel will be in as good a condition as possible.


On a different note, here are some other self-sufficiency and preparedness solutions recommended for you:

The Lost Ways (The vital self-sufficiency lessons our great grand-fathers left us)
Survival MD (Knowledge to survive any medical crisis situation)
Backyard Liberty (Liberal’s hidden agenda: more than just your guns…)
Alive After the Fall (Build yourself the only unlimited water source you’ll ever need)
The Lost ways II (4 Important Forgotten Skills used by our Ancestors that can help you in any crisis)
The Patriot Privacy Kit (Secure your privacy in just 10 simple steps)

Thanks for reading and if you have any thoughts, please add them in the comments below.

A generator without gas is like a rifle without ammunition. For this piece of machinery to be of any use to you outside of a very expensive and heavy paperweight,

Pressure canning is, by its nature, done by those who wish to preserve an overabundance of fresh food for consumption at a later date, and as such is an activity routinely engaged in by many preppers. Of course, there are many other reasons people do their own pressure canning: environmental (only a thin metal lid to dispose of as the jar is reusable); nutritional (you know what’s in that jar); financial (saving energy by cooking several meals at once and by having convenience foods on hand).

However, those who are preparing for the dark days ahead don’t use their pressure canning to its fullest potential. They just don’t realize how important it is going to be to have variety in the diet, especially in a world where fresh and frozen foods will be lacking. 

Most people look at pressure canning as a means of preserving garden produce and maybe some meat or a few stews here and there. And for those reasons alone a pressure canner is a worthwhile investment. But there is so much more that can be done. So let’s take it to the next level. The Ball Blue Book of Canning (hereafter the “BBB”) should be found in every prepper’s library and will provide all the guidelines for canning the basics. It should be consulted for all matters related to food preparation and processing times. This article is focused more on preserving some of the foods you really want to have on hand, those that will make meals a little more delicious and boost morale in difficult times.

Vegetables

Most of what is in the BBB regarding vegetables is pretty straightforward and beyond jazzing them up with spices or peppers, there isn’t a whole lot to discuss, with two exceptions. The first is canning shredded zucchini. Most people prefer to simply freeze their shredded zucchini to use later in zucchini breads and cupcakes (a favorite around here) and soups. But we’re preparing for when we won’t have freezers. So every year we can a few jars of shredded zucchini so that we can make our treats. The zucchini simply gets shredded in the food processor, packed in jars, and processed per the BBB.

Ball Blue Book Guide To Preserving should be found in every prepper’s library

The other exception is potatoes. Yes, potatoes are routinely canned so as to be able to make soups and mashed potatoes long after the fresh potatoes in the root cellar have run out. But in this case we’re talking about that other main food group in the American diet: the French fry. Even if the pressure canner was not used for anything else, it would be worthwhile (in this family, at least) to acquire one just to be able to have French fries when the grid goes down. These fries are so incredibly divine. Unfortunately, I can’t give you a taste. You’ll just have to trust me.

You’ll want a French fry cutter to make preparation a whole lot faster. Amazon sells them for about $15. (Use the larger blade—1/2”. The smaller blade is just too fine and the fries will kind of disintegrate. ) Buy a bag of large potatoes—not the super huge ones. The potatoes need to be scrubbed well, but as long as they are being used for fries, they don’t need to be peeled (soil can harbor the botulism spores, but deep-frying will kill the botulism, so no need to worry about peeling). Cut the potatoes into fries and follow instructions in the BBB, except instead of boiling potatoes for 10 minutes, only boil for three. Place the fries in wide mouth canning jars. Continue canning per instructions from your BBB.

When you wish to eat some fries (which will be often!), open the jar and put the fries into a strainer. Thoroughly rinse and drain to remove excess starch. Deep fry in peanut oil until they reach a golden brown.

Dry Beans

Dry beans aren’t a particularly exciting item to can, unless you get excited about saving money, time, and energy. Dry beans normally take hours to prepare for each meal. By utilizing a pressure canner, you prepare beans for several meals at once, saving money now and time down the road. So how is it done?

By utilizing a pressure canner, you prepare beans for several meals at once

Soak beans for several hours or overnight. Rinse and drain beans several times, then fill jars about halfway. This is the part that is a little tricky, and I can’t be more precise than “about halfway.” You see, the exact amount to put in the jar will vary due to several factors—the type of bean, for example black beans usually expand more than pinto beans; the age of the bean; and how dry the bean is.
After filling jars about halfway with beans, add salt (1/2 teaspoon per pint, 1 teaspoon per quart) and boiling water. Process per instructions in your BBB.

Meats

For those who haven’t ever ventured into the world of canning meats, but do have experience with canning fruits and vegetables, don’t be scared. Yes, you need to follow directions and be careful, just like for produce, but canning meats is so much faster and easier! All meats are canned exactly as outlined in the BBB; what I present here, however, are some ideas for preparing and packaging meats for other uses generally not discussed elsewhere. Having a variety of dishes in our menus will be critical to good morale in the coming crisis.

Beef

I can a good quantity of stew meat to be used as is in stews, but also to be shredded for use as taco filling, French dips, etc. Ground beef also gets browned and canned so that I can make soups and casseroles very quickly. Most people who are preppers and canners are already familiar with this. However, I know it will be very nice in the future to also be able to have a hamburger now and then. Obviously stew meat won’t work for this purpose, and neither will ground beef that hasn’t had a little extra preparation.

So this is what I do to have some hamburger patties. Form about one pound of ground beef into a log and roll it up in parchment paper that has been cut so that it is about an inch wider than the wide mouth jar being used for canning. Fold the parchment paper over the ends to help hold the hamburger log together. Put the hamburger log into the jar, making sure that you have one inch of head space. Process as per ground beef instructions in your BBB.

When you’re ready for some slider-sized burgers, run the jar under hot water for a minute or so to loosen the hamburger from the sides of the jar. Carefully slide the hamburger log out and remove the parchment paper. Slice the patties about ½” thick and fry them in a little butter or bacon grease for extra flavor. Serve with buns and all your favorite condiments.

Pork

Some pork is canned in chunks for later use in chili or to be shredded for taquito filling or super quick pulled pork sandwiches. Leftover ham from Christmas and Easter (we always get a large one for just this purpose) gets canned for adding to soups or fried rice.
I think bacon will be one of the most important morale boosters in the food department, so I can quite a bit. To can bacon strips, cut a piece of parchment paper about two inches longer than the height of a wide mouth pint jar. Lay the bacon strips (which you have cut into halves or thirds) side by side down the middle of the parchment, fold the parchment over the bacon ends, and tightly roll the bacon up as you go. You’ll need a few pieces of parchment, and you’ll want to overlap each additional parchment strip with the previous one to hold everything in place. Stop when the roll is large enough to fill the jar and place the roll in the jar. Process per BBB instructions for canning pork. When you wish to cook your bacon, you’ll need to run the jar under hot water to soften the fat and be able to remove the roll from the jar. Lightly brown the bacon and enjoy.

Can there be such a thing as too much BBQ after the grid goes down?

I also can bacon ends and pieces. These are typically sold in three-pound packages. There is usually quite a bit of fat, but there is also quite a lot of solid meat, and there are some pieces that look more like regular bacon. They all get canned separately. I use the bacon fat in some of my cooking, and the meat will become bacon bits for salads and baked potatoes. Some will say that in a TEOTWAWKI situation, bacon bits will be a bit of a ridiculous luxury. And I might have agreed a few years back, but for this one experience. A few years back we had a phenomenal crop of potatoes, and as such baked potatoes were a frequent dinner in our home. The kids were getting a little tired of them, so I decided to fry up a can of bacon bits to add to the spuds that night. I could not believe what a difference it made in the kids. They were so excited! Another lesson learned in avoiding flavor fatigue.

Chicken

This is probably what we can the most of in the meat department, mostly because I have one son who cannot have beef or pork. Home-canned chicken is perfect for making quick casseroles or adding to a summer salad for a main dish meal. And with a can of chicken on hand, it takes no time to get homemade chicken noodle soup ready when someone comes down with a cold.

Chicken bones. No, this isn’t being recommended as food for people, but chicken bones can be pressure canned (using directions for canning chicken meat) for feeding cats. Because the bones are hollow, after being pressure canned they can be easily mashed with a fork and fed to cats. Unfortunately, the chicken bones are too high in protein to be fed to dogs. (Too much protein can cause kidney damage in dogs.)

Convenience foods

Pressure canning is mostly about preserving the harvest, but it’s also just as much about making life easier. It’s what people have been doing for decades when purchasing processed foods at the grocery store. However, as more of us realize what kind of garbage is being added to commercially produced convenience foods, we’re opting to do more of our own. While we all enjoy freshly prepared meals, sometimes that just isn’t an option—the chief cook is sick, there’s been an emergency, or labors that day were needed elsewhere.

Keeping a ready supply of stew, chili, soup, and spaghetti sauce on hand for just such situations is a great way to reduce stress and be prepared at the same time.

Having some home canned convenience foods can really save the day. Keeping a ready supply of stew, chili, soup, and spaghetti sauce on hand for just such situations is a great way to reduce stress and be prepared at the same time. Because every family will have their own favorite recipes, I’m not providing any here. Most any recipe can be adapted for canning; one just needs to always remember to process for the time stated for the ingredient that needs the most time and highest pressure.

Traditional favorites for convenience foods to can at home are stews, soups and chili. Bear in mind, however, that some items just don’t do as well in a pressure canner at home. I’m not sure what the difference is between commercial canning and home canning, but unlike their commercially canned counterparts, noodles and rice just seem to go to mush when canned at home. So in this house we always add those ingredients just before mealtime.

With dark days ahead, and days that could quite conceivably turn into years, why not invest in a pressure canner and start preserving your own (at significantly greater savings over purchasing commercial products)? With more and more food being sourced from who knows where and with increasing reports of unsavory individuals employed at food processing plants, why not take control for more of our own food needs? A pressure canner is going to cost $100-$300. But the peace of mind that comes from preparing your own food? Priceless.

Pressure canning is, by its nature, done by those who wish to preserve an overabundance of fresh food for consumption at a later date, and as such is an activity

As the proud owner of two small cats, I can admit that sometimes I just can’t keep up with their potty habits. Sometimes they’re worse than kids; spreading those silica pebbles all over the bathroom or bringing them to bed when it’s nap time. Anyway, in buying so many sacks of cat litter, a thought occurred to me – what if I can use this stuff for other purposes than, well, kitty litter?

Of course, this sort of thing called for some extra time spent online searching for non-cat uses of kitty litter. Well, after a very though peer review (cats were pleased with the results of my searches), I pieced together this small list of ways to repurpose kitty litter.

Yes, I know that most of you have heard that cat litter can be used to defog car windows or to gain extra traction during the winter, but there are other ways to use this stuff.

Now, without further ado, here are some ingenious ways to use kitty potty pebbles during an SHTF situation.

  1. Dump some of that stuff in a portable emergency potty

Since kitty litter is made to draw out moisture, it makes for an excellent smell and liquid buster for your portable toilet. The idea of having to go number two in a bucket or whatever may be unnerving, but you won’t have much choice during an emergency.

Want to hear one more reason why you should add kitty litter to your portable toilet? Because you won’t have the time or disposition to empty it after each use. So, do yourself a favor and put some of this stuff inside your mobile potty before nature takes its course.

  1. Making your driveway slip-free

You know how people end up in the ER when the frost sets in? Slipping on the driveways after getting out of the car. You can either use regular rock salt to deal with the ice, but that stuff eats through concrete like acid, or you can opt for an environmental- and driveway-friendly solution which is kitty litter.

Sure, it won’t do much about the ice, but at least you’ll have enough traction to stay upright until you get inside the house. You should also sprinkle some kitty litter under your doormat – yup, that thing can also become very slippery during the winter.

  1. Putting the kibosh on them moles

Prepper loves veggies, mole loves veggies, but prepper does not like a mole – that’s how it is; a true Shakespearian forbidden love affair which ends in the above-mentioned person finding all kinds of non-soil-friendly ways to get rid of the blind Romeo.


Anyway, if you don’t want to end up poisoning the ground, sprinkle a little bit of cat litter around your plants. For some reason, moles abhor cat litter and will stay away from your garden. From where I stand, it’s a win-win situation: no one gets hurt, the soil remains healthy, and plants will grow unhindered.

  1. Nips grease fires in the bud

Whether you’re cooking outside or inside, grease fires are a very real and very scary possibility. Even worse is that you can’t do shit with water. Now, if you forget to check your fire extinguisher, leave it where it is. Grab a handful of kitty litter and toss it over the fire.

Since the silica pebbles are designed to draw out moisture from, well, anything, they’ll blanch that grease spot faster than you can say “preparedness.”  You should also consider keeping a small bag of kitty litter in your BBQ’s firebox if you’re planning on cooking grease-laden foods.

  1. No more rancid smells around the house

Kitty litter is great at reducing foul smells around the house. If there’s a stink in the fridge, put some of this stuff on a small plate and place it inside the fridge.

Now, if the kitty litter doesn’t help with the bad smell, try this trick – in a small bowl, combine one tablespoon of diatomaceous earth, one tablespoon of fine rock salt, and one tablespoon of baking soda. You can also add a splash of apple cider vinegar if you like. Stick the bowl in the fridge, and I guarantee you that by morning, the inside will smell as if the fridge just came out the production line.

  1. No more rodents lurking around your food pantry

Before I got around to redoing the pantry where I keep my emergency food and water stockpile, rats and mice were a big issue. Sometimes I had to throw entire packs of trail mix or whatever because they were literally covered in rat bites and feces. Plugging every hole that you can find is indeed a good fix, but a costly one.

After doing a little bit of research, I’ve discovered that moles aren’t the only pests that detest the sight and smell of cat litter. Apparently, even rats and mice flee in terror at the sight of these pebbles (probably because they know that a cat may be hanging around).

Anyway, doesn’t matter if you own a cat or not, should you find yourself up to the neck in rodents, scatter some kitty litter around the area where you saw bites or feces. They won’t trouble you any longer after this.

  1. Plant care

Since I’ve always like fooling around the garden, knowing how much moisture plants need was kind of an issue for me. There was this one time I ended drowning my wife’s cabbage patch because I used the power hose to water them. If you’re just like me when it comes to gardening, you can use kitty litter to balance the water levels.

Since this stuff absorbs extra moisture, you need not worry about giving too much water to plant – it will draw out the exact amount it needs. The rest will be absorbed by the kitty litter (would be best to use silica pebbles, because they have a higher absorption rate).

That’s it for my 7 funky and fun ways to use kitty litter in an SHTF situation. What are your thoughts? Hit the comment section and let me know.

As the proud owner of two small cats, I can admit that sometimes I just can’t keep up with their potty habits. Sometimes they’re worse than kids; spreading those silica

When you start to consider prepping, one of the first things you need to start prepping for is food. Simply put, food is one essential you need to live and your family must have a supply of food on hand regardless what the day or your situation is. Because of our just in time supply chain model, most grocery stores do not have more than 3 days’ worth of food stocked. In any type of emergency or disaster situation, the store shelves are cleaned quickly. You do not want to be one of those people who realize you have nothing in the house for dinner and a major snow storm, hurricane or  other event is imminent. You will go to the grocery store and find bare shelves like they did during hurricane Sandy. This happens in every instance where people could face the possibility of going hungry. The stores are cleaned out and the larger your city, the quicker the shelves are bare.

Not only will there be no food on the shelves, but the shelves could stay that way for a long time. What if the roads are impassable? What if there is some supply disruption. You could be out of food for a long time and this should never happen. You eat every day and so does everyone else. Running out of food should not be an option for your family at least for a reasonable amount of time.

FEMA recommends 3 days’ worth of food and water to last most common emergencies and I would say 30 days is a better goal to shoot for. If you have a month of food stored in your house you can worry about other things like getting back to your family if you are away from home or not going out in the first place to fight the lines of panicked people who waited until the last-minute.

Storing food can be complicated and costly but it is possible to start with a very simple list of items that you can purchase from your local grocery store or big-box chain like Wal-Mart, Costco or Sam’s Club. I have compiled a simple list of common foods that you can go get today that will allow you to feed a family of 4 for 30 days. If you have more or less people or giants in your family tree then you would need to adjust accordingly.

Basic FoodsEmpty-Shelves

I shop at Costco or Sam’s, but you can get all of these at your friendly neighborhood grocery store. You may have to adjust the quantities. I like Costco and Sam’s because I can buy larger containers and have to worry about fewer items, but you can also use Amazon.com. At a store, you can also throw these into your cart and nobody is going to look at you like you are a deviant. If anyone does ask you what you are doing, just tell them you are having a big Chicken Stew or some other neighborhood type of event.

  • Rice – First off, buy a 50lb. bag of rice. These contain 504 servings and I don’t know too many people who won’t eat rice. It is simple to cook and stores for years if you keep it cool and dry. This bag at Sam’s costs about $19 now.
  • Beans – Next buy a bag of dry beans. This will check off the Beans part of your Beans, Bullets and Band-Aids list. A good size bag is about $5 and makes 126 servings. Buy two if you think your family would like them.
  • Canned meat – Cans are great for fruits and vegetables and anyone can find something they will eat. For canned meat, I recommend tuna or chicken because it tastes a heck of a lot better than Spam and you can easily mix that into your rice. For the meat you will need approximately 35 cans. Each can has about 3 servings and this will be the most costly, but they last over a year usually and your family probably eats chicken or tuna on a semi-regular basis anyway so restocking this should be simple.
  • Canned Vegetables – you will need about 40 cans of vegetables and again this can be whatever your family will eat. Expect to pay around a dollar each so $40 for veggies to last your family a month.
  • Canned Fruit – again, simple fruits that your family will eat. These can even be fruit cocktail if that is the safest thing. At Costco they have the #10 cans of fruit like pears or apple slices and each of these has 25 servings. 5 of these will cost about $25 and give your family their daily dose of fruit.
  • Oatmeal – Good old-fashioned oatmeal is simple to cook and store. A normal container has 30 servings each so purchase about 4 of these and your family won’t starve for breakfast. At $2 each that is about $8 for breakfast for a month for a family of four. Could you exchange Pop-tarts? Maybe, but I find oatmeal more filling and less likely to be snacked on.
  • Honey– Honey is a miracle food really as it will never go bad if you keep it dry and cool. Honey will last you forever and Sam’s has large containers that hold 108 servings. You can use this in place of sugar to satisfy the sweet tooth. Honey even has medicinal properties and you can use this to add some flavor to your oatmeal for breakfast.
  • Salt – Same as honey, salt will never go bad if you keep it dry and helps the flavor of anything. You can buy a big box of salt for around $1 and that will last your whole family a month easily.
  • Vitamins – I recommend getting some good multivitamins to augment your nutrition in the case of a disaster or emergency. Granted, rice and beans aren’t the best and you won’t be getting as many nutrients from canned fruit and vegetables so the vitamins help to fill in the gaps and keep you healthy. One big bottle costs about $8. You will need to get a kids version too if you have children small enough that they can’t or won’t swallow a big multivitamin.

All of the list above will feed the average family of 4 for right at 30 days and makes a great start to your food preparations. The meat was the most expensive part but the bill comes to around $500 give or take but this will vary by where you live. Should you stop there? No, but this is just a good starting point and you should expand from here. I would keep all of these items in your pantry along with your regular groceries and rotate these to keep the contents fresh.

What Next?

Once you have 30 days of groceries in your pantry I would recommend looking into storing larger quantities in Mylar bags or purchasing freeze-dried foods and bulk grains to augment your supplies. You would also need to plan for basic necessities like hygiene (hello toilet paper!) and different food items.

What else should you have? I would recommend several large candles (very cheap at WalMart) or a propane powered lantern, matches or lighters, batteries for flashlights a good first aid kit, radio and plenty of water. You should also add bullion cubes and spices in to make the meals more palatable. Is this going to be as good as some toaster strudel or 3-egg omelets from your chickens in the morning? No, but this list above will keep your family alive.

Water is another post, but for a month you will need 120 gallons at a minimum. Storing this isn’t as easy as groceries but there are lots of options.

This should get you started on your food preps and you can build on from here. Let me know if you have other ideas I missed.


Other Self-sufficiency and Preparedness solutions recommended for you:

The Lost Ways (The vital self-sufficiency lessons our great grand-fathers left us)

Survival MD (Knowledge to survive any medical crisis situation)

Backyard Liberty (Liberal’s hidden agenda: more than just your guns…)

Alive After the Fall (Build yourself the only unlimited water source you’ll ever need)

The Lost ways II (4 Important Forgotten Skills used by our Ancestors that can help you in any crisis)

The Patriot Privacy Kit (Secure your privacy in just 10 simple steps)

When you start to consider prepping, one of the first things you need to start prepping for is food. Simply put, food is one essential you need to live and

Where would we be today without mouthwash? Probably brushing our teeth several times per day in order to get rid of all those food pieces. Wouldn’t call it a marvel a technology, but mouthwash does have its uses and, some of them, go way beyond oral hygiene.

And because I was thinking the other day about reasons to stockpile even more mouthwash than usual, I ended up burning the midnight oil to see what that stuff’s good for apart from, well, using it to wash your mouth. Of course, I won’t bother you with tall tales about guys using mouthwash and mumbo-jumbo to summon otherworldly beings, but I did discover some very interesting facts about this stuff.

Did you know that there was a time when FDA was seriously considering blackballing mouthwash on account of a freak study that linked this substance to oral cancer? Of course, it was later proven that the study was a bogus and that the only severe reaction mouthwash can cause is the so-called black tongue – basically, the tongue grows tired of shedding dead skin cells which end up sitting there, is not pretty.

The black color is the result of a chemical reaction between an oxidizer commonly found in mouthwash and the dead skin cells. No reason for alarm, as it is not life-threating (just use a brush with soft bristles to scrape your tongue or chew some gum).

Anyway, back to the topic du jour – mouthwash in survival. As many common household items, mouthwash can also be used during an SHTF situation. Here are my choices in alternative uses of mouthwash.

Antiseptic

Let’s start by stating the obvious – since mouthwash was designed to kill bacteria responsible for tooth decay and bad breath, it’s safe to assume that it has strong antibacterial properties. If you don’t have anything else on hand, you can always pour a bit of mouthwash on small scrapes and nicks. Word of caution though – this stuff’s going to sting like hell.

Have you ever tried to disinfect a minor wound with medicinal alcohol? It stings even worse than that. Don’t forget to wash with clean water and flush the area with a saline solution – mouthwash contains other substances that really don’t belong inside the wound.

Get this book now and learn such facts as: The Antioxidant 550 times stronger than vitamin E and 6,000 x More Powerful Than vitamin C. Get your copy here.

Washy-washy the toothbrush

As I’ve said countless of times, oral hygiene’s very important, no matter how shitty the situation is. If you ever find yourself stranded in the field, it may be possible to sterilize your toothbrush with a little bit of mouthwash. In fact, it’s quite advisable to do so before putting that thing in your mouth, especially if you’ve been on the road all day.

If you want to make sure that toothbrush’s germ-free, I would advise soaking it in mouthwash – grab a zip-lock bag or small airtight container, put the toothbrush inside, pour a little mouthwash, seal, and stir.

No more stinky feet

Yeah, I know that this not qualify as an SHTF situation, but try sleeping in a closed tent after a day of walking, hiking, running or whatever. In case you don’t have any soap nearby, just drizzle some mouthwash on those mutton chops, rinse with water, and dry yourself with a towel. Yes, you’ll have less mouthwash, but at least you’ll get a good night’s sleep.

Itchiness and Accidental Poisoning

There’s nothing more thrilling than the feeling of tiptoeing through poison ivy or nettles. Don’t fret, don’t whine, and, most importantly, stop scratching. Put a bit of mouthwash on the sting, and you’ll be up on your feet in no time. Just be sure you use an alcohol-based solution – the other kind won’t be of any use to you in this situation.

Ensuring that your cooking stuff is germ-free

One thing hikers and backpackers fail to observe are keeping their food utensils clean. Yes, I know no one will be in the mood for washing plates and cutlery after a hearty meal, but this would mean extending an invitation to all kind of nasty germs.

Now, if you don’t have anything on hand to sterilize your plates, and that includes clean water, you can always use a bit of mouthwash. Shake the bottle for some foam – it will be easier to remove grease and anything sticking to the plate.

Makes body stink go away

Because no good deed should go unpunished, the result of pushing your body beyond its limits is a nasty smell. From where I stand, there are two options – either you wait until you find a source of water to take a bath or do something before the smell curls your toes.

If you have nothing else in your B.O.B, use a tiny amount of mouthwash to wash those stinky body parts. Works great for the armpits, chest, and legs, but I wouldn’t try it elsewhere.

No hand sanitizer? Not a problem.

Hygiene’s important but it becomes vital in a shit hits the fan situation. Apart from the fact that most of the environments you’ll be traversing are riddled with all manner of germs that would like nothing more than to take a bit out of you, your hands will be in permanent contact with icky stuff. I don’t know if your B.O.B contains soap or not, but it should at least have a small bottle of hand sanitizer.

In the event you run out of the stuff, use some mouthwash to sterilize your hands. Might not be as powerful as a regular hand sanitizer, but at least your hands are clean enough to handle food or tend a wound. I don’t judge.

And so, we come to the end of yet another entertaining piece of how everyday items can save our lives in a potentially life-threatening situation. Mouthwash is indeed a good thing to have around the home, regardless if you’re a hygiene freak or not. Just to be safe, you should throw in a couple of small mouthwash bottles in your B.O.B. Missed anything? Drop a line or two in the comment section and let me know.


Other self-sufficiency and preparedness solutions recommended for you:

The Lost Ways (The vital self-sufficiency lessons our great grand-fathers left us)

Survival MD (Knowledge to survive any medical crisis situation)

Backyard Liberty (Liberal’s hidden agenda: more than just your guns…)

Alive After the Fall (Build yourself the only unlimited water source you’ll ever need)

The Lost ways II (4 Important Forgotten Skills used by our Ancestors that can help you in any crisis)

The Patriot Privacy Kit (Secure your privacy in just 10 simple steps)

Where would we be today without mouthwash? Probably brushing our teeth several times per day in order to get rid of all those food pieces. Wouldn’t call it a marvel