Home2020 (Page 11)

As a child I grew up in a house named The Orchard and although the land had long since been sold off several large apple trees remained which gave us a reasonable harvest each year. I have fond memories of the delicious fruit pies and crumbles my mother used to prepare. Growing fruit is one of the most efficient forms of gardening – once the trees are established you can expect an abundant supply for decades with only a little pruning and mulching to keep them happy.

Without doubt, the cheapest way to start a mini-orchard is to buy bare-rooted plants: those sold without a pot and delivered while the weather is still cold and the plants are dormant. As well as saving money, you will often find a much wider selection of varieties and sizes available as bare-rooted trees. Many wonderful types of apples, pears, plums etc can be grown by the home gardener that are never available in supermarkets and the trees can be trained to fit the area you have.

However, bare-rooted trees need to be planted correctly and given careful treatment during the first year in order to establish healthy root systems and give a reliable harvest…

apple-harvest[1]

Timing

The biggest stresses on a new fruit tree are usually below ground. Getting sufficient water and nutrients in the first few months after planting is essential and that’s why the timing is crucial. The number one priority is helping your new tree establish a healthy root system. The best time to plant bare-rooted trees is towards the end of winter or the first half of spring – once the ground is no longer frozen so it can be easily dug but before new growth starts.

It’s usually worth consulting a tree nursery that know your area and can advise on the window of time when they lift the young plants and deliver them and when conditions are right for your area. In the mild maritime climate where I live, trees can be planted from November onwards and this gives them a few extra weeks for the roots to establish but in harsher areas you’ll want to wait until spring. You will need to plant them quickly once they arrive – usually within a couple of days, though it’s possible to pack the roots with moist earth to extend this period if conditions outside aren’t favourable.

If you miss the ideal window of time for your area but still want to plant this year, it’s worth paying more for container-grown plants. These will already have roots that have grown into the soil around them and as long as you don’t disturb these too much when planting, they’ll be ready to draw up moisture and nutrients during warmer weather.victoria-plum[1]

Location, Location, Location

Fruit trees don’t like to be moved so it is important to get the location right first time. Things to consider are:

  • Sun or Partial Shade: Nearly all fruit trees require plenty of sun but by carefully scouring catalogues you’ll find there are some less well-know varieties that are tolerant of partial shade. Don’t just consider the ground – it’s the leaves that need sun and this often opens up possibilities for otherwise unproductive areas.
  • Soil: Most will want free-draining soil, enriched with compost. Avoid areas that regularly flood or higher ground that dries out quickly.
  • Wind and Snow: Be aware of the direction of prevailing wind and any large buildings nearby. A wall or fence may create a sheltered environment perfect for heat-loving fruits, or it could funnel icy winds during winter. Roofs can dump a ton of snow on an unsuspecting tree below, snapping its branches. Observe your garden closely to choose the best spot.
  • Other Plants: Trees are remarkably good at drawing up nutrients and water from the surrounding area. Unless you’re using raised beds, remember that a nearby fruit tree or bush may compete with your other plants.

Planting Tips

Many good fruit-tree suppliers will sell reasonably priced kits that include a stake, tie, mulch mat etc and I think it’s a false economy to skip these items.

Follow these simple steps to give your tree the best start:planting-fruit-tree[1]

  1. Dig a hole about a spade’s depth and around 3ft (1m) wide. Although it’s natural to dig a round hole, a square one is better as it encourages the roots to push out into the surrounding ground. Keep the soil you have removed in a wheelbarrow or on a large plastic sheet.
  2. Add a few inches of good garden compost and work it into the base of the hole using a garden fork. Mixing is important so that the tree’s roots don’t meet a sudden boundary between compost and regular soil. Also, mix some compost into the soil you removed.
  3. Look for the slightly darker ‘watermark’ on the tree’s trunk that indicates where the soil level was when it was first grown. Place the bare-rooted tree in the centre of the hole and a cane across the hole so you can check that this line is level with the soil around your hole as trees shouldn’t be planted deeper or shallower than they were first grown. If necessary, add or remove soil to achieve this. Most fruit trees will be grafted onto a rootstock and the join should always be above ground.
  4. Remove the tree and put in a thick wooden stake a couple of inches from the centre of the hole and on the side where the prevailing wind comes from. Hammer this firmly into the ground using a mallet.
  5. Place the tree back in the hole, position it so the trunk is close to the stake and start to shovel the soil-and-compost mixture back around the roots. Gently firm this in with your boots, being careful not to damage the roots. When it’s half full, pull the tree up an inch and then let it drop again as this helps the soil to fill in around the roots.
  6. Once all the soil has been added and firmed, use the supplied strap to fix the tree to the stake, leaving enough room for the tree trunk to grow but not so much that it wobbles about. Also add a protective tube around the trunk if animals are a problem. At this stage I also sprinkle a little seaweed meal fertilizer around and cover it with a bio-degradable hemp mat to suppress weeds.
  7. Water the soil well to stop the roots drying out and to further settle the soil around them.

The First Year for Fruit Trees

fruit-tree-planted[1]Fruit trees always seem to be such strong, healthy plants that we forget how vulnerable they are when first planted. Yet during the first year, the tree can easily die from not getting enough water or nutrients. Until the root system is at least as large as the tree it supports, it is particularly vulnerable to environmental stress.

During the first year or two, keep the tree well watered, especially during dry weather. A good soaking once or twice a week is much better than surface watering daily, though during very hot weather it can be worth doing both. It’s also vital to keep the area around the tree completely free of weeds and grass as they will compete with the young tree, which is why mulch mats are very effective.

Finally, don’t forget to remove all blossom from the tree in the first year. Although it’s tempting to let some fruit develop, doing so will again place more stress on the tree as it establishes and forgoing the first year’s fruit will result in a much healthier tree and better harvest in years to come.

Source: Growveg.com

The cheapest way to start a mini-orchard is to buy bare-rooted plants: those sold without a pot and delivered while the weather is still cold and the plants are dormant.

If the world goes to hell in a hand basket you may wish at some point that you had hidden supplies or items that you don’t want found. What if there are confiscations of gold like there were back in 30’s when President Roosevelt signed Executive Order 6102? What if you have a simple home robbery? What if you are forced to evacuate without enough time or the ability to take all of your valuables with you? What if there is a relatively normal “Natural Disaster” that blows your house away with all of your stuff?

These are all compelling reasons to plan for and create your own Survival Cache. A survival Cache (pronounced like Cash) is just a fancy sounding word for a hiding spot. Preppers for years have been devising new ways to bury items that they may need. Actually, burying treasure isn’t a new concept by any stretch of the imagination. People used to bury prized items all of the time. We didn’t even keep money in the bank until relatively recently and by that I mean history of the world relatively. If you take precautions, storing a cache or even multiple caches could give you supplies you need (like Hunger Games) or keep valuables safe from those who would try to take them.

The-Importance-of-Urban-Survival-Caches[1]

Plastic buckets like this hold a lot of supplies.

What should you put in your survival cache

This is the million dollar question isn’t it? Everyone will have their own ideas and needs and you don’t have to keep everything in one single cache. Actually, I would recommend you don’t if you have a lot of items. Burying items in a cache is useful in the scenarios I mentioned above, but they can also be used to store supplies along your route if you have a long distance to drive. Let’s say you are living in the suburbs and your plan was to Bug Out if anything serious started happening, but your retreat location was 400 miles away. You could bury fuel and additional food in a cache half-way to your destination. This would give you the ability to refuel your Bug Out Vehicle along the way. That is a great plan if you have a long distance to travel and for some reason, the gas stations are no longer operating. As long as you have properly stored your fuel for the long term, it could mean the difference between driving to your retreat and walking.

That makes sense for caches stored along a route, but what about something close. I know some preppers who are going to be storing gold and silver in buried caches. Others are going to bury firearms, first-aid supplies, maybe a change of clothes, first-aid kits and some food. This type of well-rounded cache would seem to make great sense if you are bugging out or have some fear that the items you store would be confiscated as in the case of firearms or precious metals.

The contents of your own survival cache should be designed to address the need of why you are hiding the cache in the first place. If you are looking for a resupply type of option, then fuel, ammunition and food might make the most sense. If you are simply trying to hide valuables, maybe you don’t worry about food at all. Design the cache to give you what you think you will need the most if you have to go and reclaim it.

How to protect the items in your survival cache

The topic of how to actually build a survival cache will be covered in another article. If you are looking for construction details, there are tons of YouTube videos out there. Regardless of the construction methods of your cache, you will want to ensure that whatever you store in the cache is safe and in the same condition as when you left it.

burial-tube[1]

A well stocked cache can give you vital supplies to survive.

The items you store in the cache and your cache location are going to dictate a lot of what you need to consider for protection. Are these items that will rust like weapons or ammo? Do you live in a humid climate or plan to bury your cache underground? Virtually any place you can store a survival cache is going to be prone to the elements unless you seal it in concrete and that kind of defeats the purpose of hiding it in the first place.

Water damage is I think the primary concern for anyone who is storing a cache. There are tons of “waterproof” caches you can build or even purchase but water has a tricky way of finding any crack if given enough time. Ideally you want to hide your cache in a location that is not going to be exposed to an excessive amount of water and ensure the contents inside are adequately protected and that your survival cache container has as water tight a seal as possible.

All of the items in your cache should be stored in plastic. Smaller items can be stored in ziploc bags and I would actually recommend at least two ziploc bags at a minimum. The freezer Ziploc bags are a heavier plastic and as long as abrasion isn’t an issue, which it shouldn’t, these will keep the water out nicely. I have also heard of people who go the next step and shrink-wrap items on top of the plastic. I might do this with a firearm for extra protection.

For firearms specifically, I have heard of people burying disassembled rifles coated in axle grease and packing a cleaning kit. I don’t know if you have to do all of that, but an excessive amount of lubricant would be very wise. For a pistol I would completely coat the weapon in your lubricant of choice, place the gun in a bag. Place that bag into another Ziploc bag and that should cover you unless you have a very leaky cache container. Into the container I would add several bags of desiccant. I would say the same for ammunition and any spare metal parts I have. There are waterproof bags available online with much denser plastic, but in most normal circumstances, I think two heavy-duty freezer quality Ziploc’s should be up to the challenge.

Quick and easy food grade items like MRE’s or canned food aren’t going to last as long as a hunk of metal, so you can’t really stick these in a tube and forget about them for 50 years. However, they should be protected in the same way, minus the gun oil of course. MRE’s already come in sealed bags, but I would still throw them in another water proof bag if possible. Clothes can be shoved into a water proof bag and as long as you don’t have your cache buried under the sea everything should stay nice and dry.

Where to hide your survival cache

So you have your survival cache of items and a container – now all you need is a place to hide it. The good news is that you literally have millions of options. The bad news is you have millions of options. Most cache’s are buried and this is because of the old adage. Out of sight, out of mind. If people don’t see your valuables they aren’t likely to find them. Of course you can hide valuables in your house as long as you choose a safe place but a survival cache usually has a different utility and needs to be handled in a more secure and hidden manner.

So, assuming you want to bury your cache, you need to try and find a location that has the following criteria:

  1. You will always have access to it. – Locations in cities are tough but not impossible. I would be very hesitant to hide a cache in an abandoned building. Fire or demolition could take your cache away and leave you with nothing but a sad look on your face. If you have to store this in a building try to ensure that you check on it often so you can move it if you notice it has been tampered with or if the status of the building is changing. For instance, if the building is for sale. Some people have suggested national parks as a good place to store a cache and that may work for a lot of people. They aren’t very likely to put a shopping mall or a highway through a national park.
  2. The landscape is not going to change significantly – This one requires some research depending on where your cache location is. If the cache is buried in your back yard, you have a lot less to worry about. If you have decided on a private piece of land, you might want to check to see that no zoning notices have been registered and before that you obtain permission. Like the example above, you don’t want to desperately need your cache only to find out they put a super Wal-Mart up last summer. Or, the land could be in a forest that is logged for trees. Good luck finding your cache if that happens unless you have a very significant landmark.
  3. Not in an area prone to flooding – I wouldn’t bury a survival cache in a river bank or actually too close to a river or major creek for this reason. Even if you have sealed your cache so that it is completely waterproof, there are chances your survival gear could be washed away forever. You don’t want to run to the location to grab your cache when it is a matter of life and death only to find that it is gone, probably due to that once in a century flood last year. Or maybe it isn’t gone, but its under 20 feet of water and now you have no way of getting to it since the local dive shop has burned down.

How to keep people from finding your cache

This is when it might get tricky. First you have to make sure nobody knows about your cache, then that nobody sees where you bury it and finally that nobody stumbles upon it accidentally. To keep the last thing from happening you should ensure that it is buried very well. Depending on the shape of your cache, I might dig a vertical hole instead of horizontally. To prevent people from finding it with metal detectors, you should dig your cache down very deep so that the top is 4 feet underground. You can then fill in a foot of dirt and bury an old piece of metal that you find at a junkyard. Add another 2 feet into the hole and add another piece of metal. The chances of anyone from that crazy TV show coming across your personal treasure should be remote, but this might through a random person with a metal detector off the trail. Additionally you can move large rocks over the cache location and this should prevent anyone with a detector as well.

Two is one and one is none is the old adage so I would consider having two caches you can get too if necessary. Worst case scenario, someone finds one but the chances of them finding both are next to impossible. I would make sure the distance between the two caches is significant though as in miles.

Take extra precaution when you are burying your cache. The last thing you need is for a curious person to see you walking into the woods with a big box and a shovel. If possible, you may do this at night or at a time when nobody is around in more urban settings. Depending on the location, you may draw less attention in broad daylight as opposed to night. I have often thought of going into my own yard with the headlamp on at 3 in the morning, but the chance of neighbors seeing me is still too great. I can always plant a new bush for my wife and the neighbors don’t notice me taking a little longer on the hole.

How to find your survival cache

Now that you have your survival cache buried, how will you make sure you can get back to it when you need to? In a perfect world you would know precisely where you dug your cache, but if you are hiding this along your route in unfamiliar territory, finding your way back might be more difficult. This is even more true if you are under duress.

For locations nearby, your memory and some landmarks may be sufficient. Make sure you have at least three points of reference. If you have buried your cache in the woods, I would try to locate them near a major rock on a hill off a trail. This way, you can find the trail or barring that, the hill and finally the rock. What about GPS? That works great until the grid goes down, but you can also incorporate Geocaching into your cache plans. This can give you a great way to get out of the house with your kids, learn how to read a map and check on the cache.

Maps are more foolproof if you know how to read one and have been very precise with your bearings. I would additionally take photos of the area in all seasons if possible. Also, this is not something you should set up and forget about for years. Make a point to check on your cache fairly often. You don’t necessarily have to dig it up, but you can put eyes on the location to make sure it hasn’t been disturbed.

I would dig your cache up every 5 years though to check on the contents. If this is simply a gun and ammo and you are certain it hasn’t been affected by water this might not be necessary. For clothes, food and spare boots I would check them for rot and fit and replace the food. 5 years is a long time.

Hopefully this gives you some ideas for hiding your own survival cache. I’d love to hear your comments below on your experiences with survival caches.

If the world goes to hell in a hand basket you may wish at some point that you had hidden supplies or items that you don’t want found. What if

Many people are scared that all of their efforts towards prepping would be futile if TEOTWAWKI never actually comes. The problem with this parochial view is that they never take into account the high possibilities of disasters such as floods, snowstorms or even power-grid failures. The other thing holding them back is the “Is this worth the cash?” argument they have with themselves.

Preppers actually learn to save money and prevent spending on things unnecessarily. We buy prepping supplies that are often used to sustain our life while it can still be kept long-term. Preppers also cultivate survival skills such as gardening and home repair which can save them a pretty penny in the long-run. Since increasing your survival odds is highly correlated to the amount of survival knowledge you have, most preppers will definitely invest their time in learning new skills.


There are many disasters happening and most of us are not aware of it. Hence, these are 8 reasons why prepping is good for you.

Reason #1: Cash conservation

The skills that you acquire – preferably practical skills to survive will help you to save the money needed to call that repairman to your house. Planting a garden is an excellent way to prep and it is extremely cost-effective. Instead of buying commercial food or constantly eating out, learn how to cook your favorite meal and plant your favorite fruits, you will not regret it!

Do you remember that Greece had to undergo a collapse in their economy which caused many lives to be at stake where those people who could not accept it commit suicide? There were many stakeholders pointing fingers to each other but the debt crisis was actually due to flawed accounting practices and not being transparent enough.

In my opinion, having a job which is more within your control such as being self-employed or starting a blog is one of the best defenses for an economic downturn. You can even start thinking of how used items can be made into something beneficial that we need to survive. Furthermore, you can start prepping with basically no cost at all by learning the skills needed and getting free gear from survival blog giveaways. The art of preparedness is basically how to live by yourself without depending on external sources such as lending money which is the main cause of bankruptcy.

Reason #2: Security better than insurance

When a SHTF situation occurs, your life would be threatened and most people will suffer the consequences of not sufficiently preparing. The suicide rate would spike even when an economic collapse happens where people who are indebted kill themselves just to get out of the loop of debt they got themselves into.

In preparedness, we never support the idea of lending money and we would fully advocate low-cost prepping. Keep a journal with you regarding the best prep skills, fix that leaking roof in your house and stop spending money unnecessarily! Feeling safe and peaceful would be much more frequent when you are much more prepared.

Even recently, retrenchment is rampant in our current economy where most people lost their active source of income. Preparing for a SHTF situation by having a side income, running your own business, stocking up on food and water or even having a surplus of cash would definitely help you to get back on your feet. Is this not better than conventional insurance? What if a snowstorm hit your place? Will your insurance be able to take the pain or would being prepared more likely to mitigate the amount of pain and loss?

Reason #3: Cultivation of critical thinking

When you are preparing for a crisis, you have to pan out what items you should bring and what are the steps you should do for survival. With the constant thought of how to prepare in your mind, you will naturally put in unremitting effort to cultivate the skills needed. What do I need to do to find a safe shelter? How can I ensure that my family would be able to survive at least for a week without external aid? All of these questions are at the very core of the preparedness journey. To increase your survival rate, you have no choice but to cultivate critical thinking, practice it in everyday life and survive!

Since we do not know how a TEOTWAWKI situation will look like, we have to be well-rounded and prepare for the worst to come. But of course, it is wiser to get ready for a more frequent disaster that may occur in your area. Use your intelligence to solve the problem.

Reason #4: Keeping your body healthy

The first rule of thumb to preparedness is keeping your body healthy so that you can think on your feet when a life threatening situation happen. This all involves knowing what food to eat and how much of it you can consume.


Basically, there are situations where we are met with water shortage. Storing water is very essential and learning how to purify water is a must. Keeping a body healthy means, you have to know what is the amount of water and food your body needs.

Learning the art of bush craft or how to scout will also be beneficial to your physical health while increasing your chance of survival. The very essence of preparedness is to have great physical capabilities. Can you walk for a few days non-stop in search for safety? If the answer is no, time to get on that treadmill.

Reason #5: Acceptance of the current condition

Knowing that an economic downturn and political tensions are inevitable, ultimately preppers do not complain but we do what we can now. The prepper community always keep their heads up for the recent news and practice practical skills that can help them survive.  If you are reading this post now, most likely you are one of the few people preparing rather than complaining. Preparing for the worst is something much better than complaining about it when the SHTF.

It would be great for you to bond with family and friends. Since you do not complain and you are capable of giving aid to your friends when a disaster strikes, they will trust you more. Since trust is a difficult thing to build and turning people off with your complaint is bad, it would be wise that you start prepping now.
By having enough supplies in your house and knowledge in your mental storehouse, you would have peace of mind appreciating every moment when no problems occur. Even if things do happen, you would accept it totally and put your supplies into good use.

Reason #6: Consistent supply of alternative energy

Preppers will also prep for power grid failures which will potentially happen in a TEOTWAWKI situation such as an EMP strike. Do you know how to make a cost-effective electric generator? How about getting that windmill to generate electricity? All these ideas are great to provide a constant supply of electricity which will potentially help you to save costs in the long-run.

The knowledge on how to get an alternative energy source in the most efficient way possible would definitely be great. Besides saving on certain amount of cash, you get the energy to keep yourself and your family comfortable when a power outage occurs.

Reason #7: Keep yourself safe

In preparedness, you have to learn how to shoot a gun and how to conceal it. There might be times when your life is at the line with robbers or terrorists threatening your very existence.

What happens when your car breaks down in a deserted highway with a winter storm? You would have prayed that you placed your EDC (Every Day Carry pack) or even a bug out bag in the trunk. Having some extra blankets and food to keep you warm would be great.

How about when your house catches fire? Where have you kept the important documents? This would be the time where you wished you packed your bug out bag with the important documents. When your life is at stake, you would not have time to think twice of what documents to keep. All you can do now is to prepare for the most frequent crisis and keep your faith that nothing bad would happen to a good person.

Reason #8: Save people around you (especially your loved one)

The practice of food storage can actually save you and your family’s life because food shortages can potentially happen. Do not always assume that you can purchase food in the local grocery shop, there might come a time even when an earthquake or flood happens where you will be thankful you had that supply of food.

Moreover, medicine would be scarce when the SHTF. When distribution channels are disturbed by a natural disaster for that matter, your local pharmacy or doctor may have their supplies wiped out. Hence, it is imperative that we keep a First Aid Kit and have the knowledge to use it. Who knows? You may come across a wound and get hurt when disaster strike, and knowing how to tend to your wound would be a matter of life and death!

Conclusion

I would like to congratulate you for reading this post! Most people would not even take the first step in gathering information regarding preparedness thinking that it is a waste of time. With this 8 reasons, I urge you to start preparing now because it would definitely be beneficial! What other benefits do you have in mind? Please share in the comment box below.


Other self-sufficiency and preparedness solutions recommended for you:

The vital self-sufficiency lessons our great grand-fathers left us

Knowledge to survive any medical crisis situation

Liberal’s hidden agenda: more than just your guns

Build yourself the only unlimited water source you’ll ever need

4 Important Forgotten Skills used by our Ancestors that can help you in any crisis

Secure your privacy in just 10 simple steps

Many people are scared that all of their efforts towards prepping would be futile if TEOTWAWKI never actually comes. The problem with this parochial view is that they never take

As you consider the following and plan your food storage, bear in mind that your survival in any scenario will have a great deal to do with the decisions you make now about your food. Good food—and a good variety of that food—boosts morale tremendously in difficult situations. Less palatable food causes stress and much worse. Whether you and your family survive and thrive in the coming difficulties will ultimately depend on acknowledging the essential role of a healthy, varied diet and planning for it. This article will give you some real food storage ideas to use for your family.

There is a lot of advice out there to store food for uncertain times, but how much? How much food to store depends on how long the difficult times last, and only you can decide how long you want to prepare for. First off, consider your situation. How many people are you responsible for? What are their ages? When you are calculating how much food to store, everything is calculated based on an adult and teen males consuming 2500 calories per day. Pregnant and nursing women get the same number of calories. Teen girls and other women are allocated ¾ of this amount. Children under 12 years count as ½.

Consider your food storage needs

Decide what event(s) you are prepping for. Is it a civil war, world war, EMP, financial collapse, personal financial misfortune, pandemic, etc., or maybe all of the above? There is no shortage of people telling you what exactly is going to happen when. So far, they haven’t been right, but someday somebody will be. Collapse of some sort is in our future; history says so. If I’m prepping for a pandemic, I’m going to want a fair number of heat and eat or freeze-dried meals for when people are too sick to prepare food. With a financial collapse, I’ll supposedly have the time to prepare normal meals at home. With an EMP, I better be able to make meals without electricity.

Consider what you want to eat. Do you really want to live on MREs, canned soups, freeze-dried meals, and the like, all of which are really high in sodium and artificial preservatives? Is that how you normally eat, or will suddenly changing to such a diet be a shock to your body? Do you want to just buy a package deal—and trust that someone else knows what and how much you want to eat? If so, pay attention to the number of calories per day. Some of those packages contain as little as 1200 calories per day. Who is going to be happy with that? TEOTWAWKI is not the time to lose that extra weight. Mental stress alone will contribute to weight loss. In addition, are you planning on doing much more physical labor when TEOTWAWKI hits? (You should be.) How happy are those doing the heavy labor going to be on 2,000 or even 2,500 calories per day? Hint: They won’t be happy. You need to plan on double the number of calories for those doing heavy physical labor.

Defining your food storage budget

Decide what your budget is. Most people can probably manage to buy a few weeks’ worth of freeze-dried meals or MREs, but if you’re prepping for the long-term and/or for a family, and your funds are limited, you are going to have to be more careful. The biggest bang for your buck is going to come from long-term storage foods such as grains and legumes.

What new skills you are willing to learn? Are you willing to learn to bake? Are you willing to learn to bake bread—without an automatic bread machine? Are you willing to grind your own grains? Are you willing to learn to garden? What about learning to can fruits, vegetables, and/or meats? Raise livestock? It doesn’t have to be cows and pigs—chickens and rabbits are much more manageable for beginners. The answers to all of these questions should govern the decisions about what you store. If you are not willing to learn to bake bread, storing a whole lot of wheat may not make much sense. You can store white flour instead—its shelf life is much shorter and it is far less nutritious, but it will keep you alive. Pick one new skill to learn each month. The most important one is probably learning to make bread, followed by gardening.

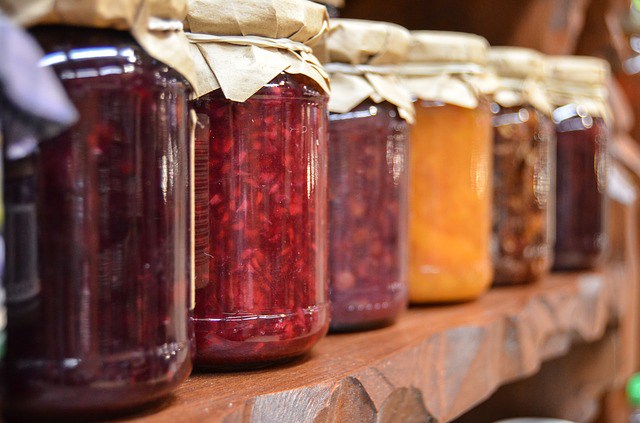
jam-428094_640

The first items to store should be a three-month supply of foods you normally eat. Whatever it is that causes us to eat our stored food is going to be a stressful time. The last thing your digestive system needs when it is already stressed is more stress from eating unfamiliar foods. Children and the elderly are much more vulnerable in this situation and you don’t want to increase their stress (and yours!) by forcing a radical new diet on them.

So come up with your list of foods you already enjoy preparing at home and you are already accustomed to eating, preferably foods that require no refrigeration. You should really have a three-month supply of these foods. Make up a menu for one week, list every item you need for each meal, and buy thirteen of each item to have a three-month supply.

What are some real food storage ideas you can use?

Once you have done this (because how many of us really think the chaos will be over in three months and life will immediately return to normal?), consider adding longer-term storage foods. For each adult male per month, store the following:

  • Grains: 33 lbs per month. If you are grinding your own grains for bread, store 20 lbs hard white wheat (white wheat is generally preferred for its lighter, sweeter taste, and is also easier on the digestive system), 5 lbs white flour, 2 lbs rice, 3 lbs pasta, 2 lbs oatmeal, 1 lb popcorn.
  • Dry beans: 5 lbs per month. Pinto beans, white beans, black beans, legumes, lentils. Beans are among the most sensitive of long-term storage foods and must be stored in a cool, dry place. Otherwise, they will become tough and require much longer cooking times to soften.
  • Sugars: 5 lbs per month. This is only for baking and cooking meals, no desserts. It is about 3 tablespoons per day. It does not include amounts needed for canning, making jam or syrup. White sugar and honey store indefinitely. They don’t even need to be kept particularly cool, though they should be kept in a dark place if possible. You can also store brown sugar, molasses, corn syrup, pancake syrups, jams, and jellies. Often I hear people say they don’t need that much sugar. And it is true that we should all probably eat less sugar. However, bear in mind that sugar has become an important ingredient in many of our comfort foods. In addition, if you choose to store less sugar, you need to increase the amounts of other items you store to compensate for the calories.
  • Salt: ¾ lb per month. You need both plain and iodized. Most people in my food storage classes thought far less salt would be enough because they would never go through that much salt in one month. And that is true for most of us who still buy most of our food at the store. But when you are making everything from scratch, especially bread and beans, you use a lot more salt. Children need iodine for proper brain development. The rest of us need iodine for continued brain function. We generally get adequate iodine in our diets. However, when many of the commercially prepared and vitamin and mineral-fortified foods that we depend upon are no longer available, we will need to ensure we have sufficient iodine in our diets. For those who are planning to make their own bread (and we should all be planning to do that—bread is the staff of life), it bears mentioning that iodine actually retards the fermentation of yeast and thus hinders the rising of bread dough. So you really want about half of your salt to be plain and half of it to be iodized.
  • Oils: 28 oz of oil per month really is the minimum. Not only is oil an essential ingredient in many recipes, but it can also render normally unpalatable foods rather tasty. Store a variety of oils—olive oil and peanut oil for frying and baking, coconut oil for some frying but more for a long-term storage butter substitute. Avoid vegetable oil (it’s all soy, and almost all soy is GMO). Some food storage experts place peanut butter in the oil category due to its calorie content, but really, do you want to use peanut butter in your baking and frying recipes? Not generally. Peanut butter is indeed high in calories and high in protein and as such makes an excellent addition to the pantry. It just shouldn’t be classed with the other oils. Call it comfort food and store a goodly amount of it, at least 1 lb per person per month. Store all oils in a cool, dry place. And for longest-term storage, store all oils in glass—they will last much longer than in plastic.
  • Dry milk: Store 1.75 lbs of dry milk per month. This amount includes not one drop for drinking—this is only for baking and cooking. If you want to be able to drink some milk, you will need to store more. If you want to improve the flavor of your powdered milk, stir in 1 teaspoon of sugar and ½ teaspoon of vanilla extract per quart of milk. And of course, make sure your milk is well-chilled. Dry milk is the most sensitive of all long-term storage foods. It must be kept dark—light will degrade the vitamins and cause deterioration in flavor. It must be kept cool, and of course, it must be dry.

Once you have stored the basics, start adding in other items.

  • Baking essentials–baking soda, baking powder, yeast, powdered eggs, cocoa.
  • Canned items—fruits, vegetables, and meats.
  • Spices—pepper, cinnamon, chili powder, cumin, mustard, ginger, herbs (oregano, basil, thyme, sage).
  • Condiments—Ketchup, mustard, relish, soy sauce, salsa.
  • Comfort foods—chocolate chips, candy, gum, Jell-O gelatin, and pudding mixes.

As you build your food storage, you also need to be learning to use it so that you will be accustomed to eating these foods—and enjoying them. It takes practice to learn how to make good bread. And your body needs time to get used to eating whole grains. Make the switch from white flour to 100% wheat in your diet, and you might find yourself with a serious case of the trots.

While doing all of the above, consider your garden. Spring is just around the corner and the time has never been better for learning how to grown your own. Fresh salad greens, home-grown tomatoes, carrots, potatoes, and who can’t grow zucchini and green beans? Eating from your garden will add variety to your diet while making your long-term storage go a whole lot further.

Storing food for future uncertainties isn’t exciting. Nobody gets worked up over a bucket of beans or a bag of wheat. And that is probably because the vast majority of preppers and those reading this site have never been without food and have never seen starvation. I know I haven’t. But I am a student of history. Bad things happen when people don’t have any food, when they don’t have enough food, and when they don’t have nutritious food. Don’t let bad things happen to your family. Be proactive. Store a wide variety of long-term storage foods and learn to use and like them now. Recognize that your future and that of your family depends greatly upon the decisions you make now about your food. Start today.

As you consider the following and plan your food storage, bear in mind that your survival in any scenario will have a great deal to do with the decisions you

Water is life. As a prepper, as an outdoors person, and even as a human, this fact has been drilled into our heads over and over. It’s a cornerstone of the “Rule of Threes.” Three days without water and the human body starts to suffer the consequences. Water has a big place in our preparations, and it rightly should.

Water is important not only for drinking, but for cooking, for washing, and especially for hygiene. (And harvesting rainwater is a great way to have it be readily available!) My beautiful wife loves to go camping and has lived out of a backpack for weeks at a time, but the elimination of bodily wastes in the woods is not a favorite activity for her. Or for anybody, I think!

One of the most cost-effective ways to store larger amounts of water is in food-grade barrels. The barrels are strong, compact, and are relatively inexpensive. Aside from their weight when full, the other drawback to storing water in barrels is the inconvenience of getting the water back out of them.

But what if there was a way to use your emergency water storage barrels to run your household in a nearly normal fashion during a grid down event?

Would it make you happy to use your indoor plumbing as usual, without going outdoors to some out-of-the-way spot to defecate or urinate? What if you could do dishes in the sink, almost like normal? Get a glass of drinking water from the kitchen tap? I have developed a system for my home that allows me to do just that.

My inspiration for this emergency water storage system came from a power outage, timed coincidentally with a day when the entirety of my in-laws had descended upon our home. A squirrel had met its end at an electrical substation, causing power outages in the local village, extending into the rural area where we live. Although I owned a small generator at the time, it was nowhere near large enough to run the well pump.

I had water stored in several 55-gallon barrels, and initially thought I had finally found a chance to prove my foresighted genius for my wife and her family. I took a 5-gallon camping water jug (you know, the kind with the spigot?) down to my water barrels, anticipating finally having a payoff for my hard work in preparation for a day like this. I assembled the plastic water hand pump (purchased in 1998 for Y2K), and that’s when my troubles began.

The pump had threads that were different than the threads on my barrel. It wouldn’t screw in, and thus, I had to hold the pump in one hand and pump with the other, while my third handheld the jug to….uh oh: I needed more hands! After I recruited my brother-in-law to hold the jug, I found out the suction hose on the pump was also missing a part, too. The hand pump was out of order. Shaker siphon? Dang. I last saw that on my camping trip a few months ago. In the end, I used a new-in-box drill pump and a battery operated drill. It was an OK ending to the water problem, but not ideal.

What finally evolved from that occurrence and some experimentation is an emergency water storage system that I am pretty happy with. In fact, one problem may be that it is too convenient, not discouraging water use.

emergency water storage

The system is simple and – aside from the battery and pump – inexpensive.

Currently, my indoor emergency water storage consists of two 55 gallon barrels. I have a small 3 gallon per minute RV water pump attached to a couple of valved pickup tubes, and leading to a spigot that I installed in the water line coming into the house from the well pump. The RV water pump is powered by a small 35AH gel cell connected to a float charger, so the battery is always topped off. It can also be recharged by the 50W solar panel and small charge controller I already have.

In the photo, you will notice that there are two spigots, with a valve between them. This was so I could completely isolate the well and pressure tank from the house plumbing: If the foot valve on the well pump went out, and I tried to pump water into the house plumbing, water from my barrels would be pumped back down my well. That’s no good! The valve, hose, and fitting between the pickup tubes in the photo is the inlet where I fill the barrels.

emergency water storage

The clear hose (far right) connected to the upper spigot. Note the isolation valve between the two spigots.

Hooking up the water tanks to the spigot is a snap. I have placed valves in line to allow me to draw from one or the other, or both barrels. With a flick of a switch, the pump is activated. Since it is an RV pump, it has its own pressure sensor, which activates the pump when a faucet is opened. When someone flushes the toilet, the pump kicks on and refills the toilet tank. When someone opens the kitchen tap to wash hands, prepare food, or get a drink, the pump kicks on and delivers the water.

This system also routes the water through our whole-house water filter. also At 3 gallons per minute, it is very nearly the same as having our normal well pump working. The flow is noticeably less, but not by a huge amount. Just for fun, I took a shower with the backup system, and it was very acceptable. My water heater does not use electrical power to heat water, so it was even a hot shower! See what I mean about the system being too convenient? It does not really encourage water conservation.

emergency water storage

The simple PVC pickup tubes. The transparent tube in the center is for filling the barrels.

During one of the “Grid Down Weekend” exercises that our family performs, with no attempt at water conservation, we easily went through more than 60 gallons of water per day. We have a larger, 220V generator now, able to run the well pump. During the Grid Down Weekend, I ran the generator for about two hours a day. We let the refrigerator and freezer run, charged batteries, and ran the well pump for laundry, took showers and refilled the water storage barrels. This actually worked pretty well, letting us use water as “normal” without running the generator. If we were unable to run the generator for some reason, we would definitely want to implement methods to reduce the water usage.

emergency water storage

This 50-watt panel recharges the battery in just a few hours

Materials and cost breakdown for my project:

RV pump: eBay, used, $40 shipped
Clear food-safe tubing: 6 feet @ $1.50/foot
Garden hose “repair end,” female: $3.50
Misc. 1/2″ PVC fittings, valves, tubing: $15
Hose Clamps, stainless steel:  3 @ $1.24/piece
Battery: Used, free. New they are about $55
Float Charger: $20, Amazon
Wire, terminals, switch, etc.: $10

The drawbacks to this emergency water storage system are fairly minimal. As I pointed out, you have to keep an eye on your water use. You also have to make sure that your hose ends are kept clean. You have to make sure your stored water is clean. You may find yourself “stealing” that battery for other needs. Other than those limitations, I think it’s a great system that makes living without grid power a bit easier.

Oh, I did finally get the hand pump repaired and figured out. You know, just in case.


Other self-sufficiency and preparedness solutions recommended for you:

The vital self-sufficiency lessons our great grand-fathers left us

Knowledge to survive any medical crisis situation

Liberal’s hidden agenda: more than just your guns

Build yourself the only unlimited water source you’ll ever need

4 Important Forgotten Skills used by our Ancestors that can help you in any crisis

Secure your privacy in just 10 simple steps

Water is life. As a prepper, as an outdoors person, and even as a human, this fact has been drilled into our heads over and over. It’s a cornerstone of

In a disaster our first instinct is to move as quickly as possible to safety or to the closest approximation we have to our ideal of safe. For me, if anything happens my goal is to get back to my home as quickly as possible. I have supplies at home specifically designed to help me and my family handle the aftermath of almost any emergency and logically this is our first/main rally point in any crisis. No matter where I am if something happens I will be working immediately to make it back to reunite with the rest of my family. My get home plan is my first priority if I am away unless there is something that prevents me from reaching home. This is less of an issue if I am with my family and we are together, but I like most of you spend a good part of my day away from home.

We like to speak of the ideal of heavily stocked survival retreats located on hundreds of acres of land in the boonies only accessible via a dirt road and after crossing several water hazards. That is the ideal maybe, but almost none of us, when you start looking at the numbers live anything near that type of lifestyle. Are there people who live in remote areas? Of course, but for most of us, our survival retreat is our home in the suburbs or semi-rural areas still easily accessible by plenty of roads with a Walmart within a short drive. Even more live in the cities where our neighbors are practically on top of us. Most of us who call ourselves preppers do not live year round at a retreat taking care of livestock, building barns and furniture from trees we felled and wood shaped with hand tools. Most of us work a job for someone else in an area that is anything but remote and that is almost always away from home. I personally want the retreat, but unless my life changes drastically that isn’t going to happen anytime soon. For me right now, I am where I am so I plan to make the best of it. If something happens I will be heading to my home.

There are multiple strategies for travel needed with the unexpected emergency but the variables start adding up when you consider all the permutations of what the emergency could be and where you are at the time. Today I want to talk about how you can begin to prepare for a situation where you are at work and your goal is to get back home to your family, your supplies and your castle. In a lot of cases you have to plan for situations that are out of the norm. The first plan of course would be to simply hop in our cars and drive home, but what if the roads were blocked? What if you couldn’t even reach your car? You should make a plan now for getting back home in alternate ways and plan for travel that isn’t ideal.

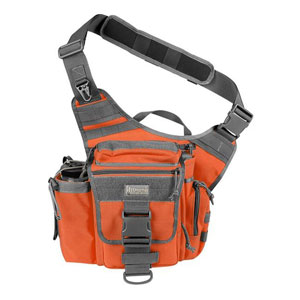
My Get Home Bag of choice right now.

How will you get home?

Before we can really start discussing how to get home, you have to take into consideration how far away home is. For the purposes of this article, I will use the example of a typical work day. For most of us that means we leave home in the morning, go to work and return home the same day. I have written articles on getting home from much further distances, but for this article we’ll assume you aren’t on the other end of the country, you are at your regular day job.

One of the first things I recommend thinking about is a Get Home Bag for anyone who works more than a few miles from home. I personally use the Maxpedition Jumbo Versipack right now pictured on the right. A get home bag has been called by a lot of other names, but it is simply a bag with basic supplies that you might need in order to walk back to your home. This is not the same as a bug out bag, but the concepts are related. All of these bags are simply containers for some essentials you might need in an emergency situation. My Get Home Bag is stored in the trunk of my car and has very basic items because on an average day I am not more than 15 miles away from home. I have spare water, some food in the form of a Mainstay bar, work gloves, lighter, paracord, ammo, multi-tool, headlamp and dust mask along with some blood stopper bandages. Could I pack more in there? Of course but I try to lean toward the minimal side on these bags and focus more on what I really could need versus what would be nice to have. For example, I don’t have a compass because I know my town and where my home is. I don’t have hand sanitizer because that is the last thing I am going to worry about. I don’t have a radio because I should be home in a few hours tops but I do have a ham radio in my car that is mobile. Your get home bag should have what you would expect to need on your trek home.

But what if my car is blocked or I can’t get to my car? What if the parking deck that my car sits in all day is shaken to the ground by an earthquake or an explosion? That is when the absolutely prepared person would grab their back up bag from their desk. I don’t have a bag in my desk and really I don’t live far enough from work that I don’t think I could make it back even without a bag. Couldn’t I leave my Get Home Bag in my desk at work and eliminate that problem? Sure but what if my office is closed or blown up or for some other reason I can’t get back to my desk? For me, the trunk of my car is the safest bet that will be with more more often than my desk drawer and if that doesn’t work out I will adapt. One thing you don’t want to have to adapt to are the elements though. I carry rain gear on days when there is a chance of rain even if I don’t plan on going outside. Cold weather is the same thing. Its easy to leave home and think that you will just be in the car, but what if you are forced to walk? Dress for the weather outside, not the weather inside.

Another aspect of making it back home is to have footwear up to the challenge. I have written before about how so many people wear flip-flops everywhere they go now and I shudder to think about what it would be like in a real disaster to have virtually no protection on my feet. As well as my Get Home Bag I have a pair of sturdy work boots in my car. I never wear flip-flops but if for some bizarre reason I have a John McClain moment and am caught with my shoes off I will have a backup.

Carry your Every Day Carry – EDC

Another aspect of my preps is my EDC or Every Day Carry items that I have on my person at all times when I am away from home. For me, my EDC consists of a concealed handgun, handkerchief, multi-tool, flashlight, knife and water. My water bottle is in my backpack with my computer, but I always have that with me. These items augment what I have in my Get Home Bag and I try to religiously make sure they are on me. If I am walking out the door to work I have an almost perfect track record of taking all of my EDC gear, but it is the odd times where my outfit choices are different when this falls down. Going to the pool for example, I have been known to change things up due to necessity and some of my gear stays in the car as opposed to poolside.

With my EDC gear it is always in my pockets or my bag, but how many of you have gone to the bathroom without your cell phone? How many have run down to the corner store without your car keys? What if something prevented you from getting back to your desk or work location and the only way you had to get into your car was several floors up, or under rubble? I try to take my keys and cell phone with me anytime I leave my desk so that I will have this option if needed.

Plan more than one route back home

Where I live, there isn’t a tremendous amount of traffic so I routinely take the same route to and from work. This is the quickest way for me to travel, but in an emergency, roads could be blocked and impassable. If needed, I can take alternate roads, but in some cases that might make my trip longer by taking me further away from home to route back to a good road. Alternately you could cut through the woods or neighborhoods but this isn’t always faster. In some situations, it might be a bad idea to cut through someone’s yard and you could find yourself in an altercation you didn’t need to get in. What if your travel takes you through a rough part of town? You would necessarily want to avoid those areas at this time so that you don’t become the victim of a predator. It helps to know the area you live in well enough and in some cases to perform what I call Neighborhood Recon to scope out alternate routes and identify obstacles ahead of time. Could you make it through the swamp that is in the woods? Maybe, but would you want to?

Have a communication plan with your family

In a disaster, cellular communications might be down and who has land lines anymore? You used to find a phone booth on every corner but now they are nonexistent where I live. My communication plan is really meant to address a lack of communication I can foresee in a disaster. My family knows what my plans are and that is to come home. I might be delayed but I will stick to the plan. In the event that some crisis hits and my family is not in immediate danger from staying put at our home, they are supposed to wait for me to arrive. Depending on the crisis this could be several hours to a day, possibly overnight. Does your family know what your plans are? More importantly, do they know what to do if you never show up?

What are your plans for making it back home in an emergency if your trusty vehicle isn’t available?

In a disaster our first instinct is to move as quickly as possible to safety or to the closest approximation we have to our ideal of safe. For me, if

Emergencies can take place in a moment’s notice — at home, work or in public places — and knowing what to do next can very well safeguard you from injury or even death. There’s no point in waiting until an actual emergency happens. With that in mind, here are a few ways you can be prepared for whatever comes your way with these emergency survival tips.

Prepare for the Worst

If you live in California, you know the state has been expecting a massive earthquake for several years now. And if you live someplace where snow days are the norm, it’s important to be prepared for toughing it out if you find yourself snowed in for several days. Whatever situation comes your way, it’s important to be mentally and physically prepared for the possible events that can occur. Do your research on what can go wrong and you’ll be better prepared for anything that comes your way.

Pack a Generous ‘Bug-Out’ Bag

This may be the most crucial component of preparing for a disaster. Emergency preparedness bags, or “bug-out” bags, contain a number of items to sustain and protect you for long periods of time when you’ll likely have no other available resources. Some potential items include flashlights, a first-aid kit, water and food, emergency contact information, clean clothes, and an emergency fund. Plan accordingly for any situation and pack all necessary items ahead of time, while regularly updating your bag so any perishable items stay fresh.

training-828764_640

You can be prepared in every aspect, but if your health is poor, it’ll make every other task more difficult than it has to be

Optimize Your Physical Fitness

In order to successfully evade danger in an emergency, it’s important to be in the best physical condition possible. You can be prepared in every aspect, but if your health is poor, it’ll make every other task more difficult than it has to be. If you haven’t already done so, begin an exercise regimen that will build your muscles and endurance. Try going on long hikes and lifting weights to build muscle mass. In addition, eat healthy meals to keep your body in tip-top condition.

Develop Safe Driving Skills

In the case of a disaster, it’s not unlikely you’ll have to relocate to a safer location. Wherever that is, it’s important to drive safely to your destination in the midst of chaos. Begin refining your defensive, offensive and evasive driving skills by refreshing your knowledge on the rules of the road.

Plan for Recreation, Comfort Foods

It’s likely you’ll end up with a lot of “downtime” during a crisis. You may be stuck at one location for long periods, so it’s important not to let panic get the best of you. One way to avoid succumbing to fear or just a bad attitude is to prepare recreational activities and comfort foods. Pack a deck of cards or your favorite board games in your emergency preparedness bag. Include your child’s favorite toys, as well as some snacks your family enjoys. These items will become a source of comfort in an emergency situation.

joining-a-survival-group-007

Form a survival group as soon as possible to gain advantages with numbers of like-minded people

Prep as a Community

One important aspect of prepping is to become a part of a community that shares your preparedness. This way, in a crisis, you can all support and help one another to survive. Having a community with the same mindset will make you stronger in adversity. If no one around you shares your gusto for prepping, talk to your family and close friends about the importance of being prepared for a disaster or emergency crisis. Upon finalizing your plan, share your preparation tips and tricks, as well as some resources and knowledge with one another.

Emergencies can take place in a moment’s notice — at home, work or in public places — and knowing what to do next can very well safeguard you from injury

Food is one of the crucial items for your bug out bag and INCH bags. It seems as if you typically find the same recommendations on every website. You want different options! You should know the difference between a bug out bag and an INCH bag.

An INCH bag stands for I’m never coming home. Essentially, it is a larger survival kit with all of the necessary items you will need to survive the SHTF scenario. The plan is for this plan to sustain you indefinitely or until you can reach a safety point, such as a predetermined location.

On the flip side, a bug out bag (BOB) holds three days of rescue items. They are ideal for civil unrest, hurricanes, fires, snowstorms, and other disasters. You do plan to return home when the coast is clear.

There are hundreds of choices when it comes to what types of food you can put in your bags. There are a few things you want to consider when making your choices.

  • Calorie Ratio to Weight of Item: That can of soup might sound like a good idea, but it weighs a lot. You want food that has a small weight with higher calorie. You want as many calories per ounce as possible.
  • Macronutrients: You want more fats and proteins than carbohydrates. However, don’t forget the carbs because they do give you bursts of energy that you need for your journey ahead. Fats and proteins fill you up faster and add more calories.
  • Shelf Life: Yes, a fresh apple would take amazing, but you can’t store them in your bag waiting for an SHTF You need food that lasts for a long time. It is important that you keep a list of expiration dates, so you know when to rotate the items.
  • Preparation: The food items you select shouldn’t be hard to prepare. It is nice to have some comfort foods, but the food you select should be easily prepared. All you might have access to is a campfire or no form of cooking at all!

The List

  1. Raisins and Peanuts: If you’ve spent any time hiking, you know that raisins and peanuts are a standard food item. They are rich in calories and require no preparation efforts. You can pick the kind that has chocolate peanuts – everyone loves chocolate! However, it can melt if you are in the heat. It is best if you get individually locked bags rather than those huge bags. One cup of peanuts and raisins equals close to 700 calories.
  2. Freeze Dried Meals: Many preppers like to keep freeze dried meals in their bags. They will fill you up quickly. All you have to do is pour some hot water into the bags. Then, you seal up the bags for the recommended time. Some meals are enough for more than one person.
  3. Peanut Butter: A tablespoon of peanut butter can have up to 190 calories. That is a lot! Instead of lugging around a jar of peanut butter, look for individually peanut butter packets or cups.
  4. Dried Fruit: There are so many choices for dried fruit, from apricots to apples. They are full of sugar, so it can help to give you a boost of energy when you’re feeling low. Your local store should have a great selection. Pineapples, bananas, mango, and berries won’t weigh too much in your bag.
  5. Protein Bars: When you are walking for a long time, you need energy and protein to keep going. Protein bars are a favorite among hikers. You can eat them on the go. Most of them are pretty delicious. The only downside to protein bars is that they can get messy, especially if they contain chocolate. You can fit a few protein bars into your bar, taking up very little space.
  6. Beef Jerky: Jerky is another food item that doesn’t take up too much space or weight of your bag. You can munch on jerky as you are walking. Beef jerky is sold in dozens of flavors and packaging. It is a great source of protein. However, beef jerky also has a higher level of sodium, which could cause dehydration if you eat too much. Make sure that you limit yourself.
  7. Emergency Meal Bars: These bars are similar to MREs and protein bars, rolled into one. Emergency meal bars can have 2,500 calories in one bar! The flavor isn’t always amazing, but your goal is survival. Taste isn’t most important. They store easily in bags and make a good choice for an INCH bag to save space.
  8. Granola Mixes and Bars: Stores have whole sections devoted to granola bars and mixes. You can find bags with different things in the granola, a great choice for breakfasts and snacks. Granola bars are great food ideas for on the go. Even kids love granola bars! They store easily and come in multiple, delicious flavors. Some have nuts, oats, chocolate or raisins!
  9. Tuna and Salmon Pouches: You want different sources of protein for your bags. Cans of tuna are out of the question; they tend to weigh your bag down. The stores sell pouches of tuna and salmon, not mixed. They are great eaten cold or warmed up. You can put some tuna on a cracker for a snack. The pouches of tuna and salmon are relatively inexpensive, costing around one dollar each. They also come flavored, such as BBQ and lemon pepper.
  10. Dried Soup, Chicken and Beef Bouillon: If you want to make soup on the go, you need some bouillon cubes. They can easily be stored in envelopes and paper bags. All you have to do is add hot water. Just like MREs, you can find packets of dried soup that just requires hot water to reconstitute.
  11. Instant Oatmeal: If you have a tin cup to heat water, you can make yourself instant oatmeal. Instant oatmeal contains mostly carbs, but it is a great kick start to your day. There are multiple flavors available, taking up very little space in your bags. I would suggest keeping them in a plastic, zippered bag. Instant oatmeal pouches are easily torn.
  12. Meal Replacement or Protein Powders: Protein powder tends to be disgusting, but it is a source of protein and nutrients for you. All you have to do is add the powder to water. Add scoops to a plastic baggie and store them in your bag. You can also keep electrolyte powders in your bag that you just add right to the BOB bag. They will keep you hydrated.
  13. Instant Noodles: Who doesn’t like Ramen noodles? Instant noodles are super lightweight, but they make a great meal. Instant noodle packets are high in carbohydrates. The flavor packet has salt. Eating actual meals can feel comforting after a long journey or a hard day.
  14. Sardine Tins: There is some weight to sardine tins, but the tins themselves are quite small. There is a lot of protein, calories, and fats in these little cans. The weight might be worth it if you want an extra source of nutrients.
  15. Salami or Pepperoni: The idea of pulling out a log of pepperoni or salami might seem comical. However, you can find bags of sliced pepperoni. It does contain more salt than other meats, but you want some variety in your BOB and INCH bags.
  16. Tortillas: Bread is too bulky to take with you, so tortillas are a better choice. Tortillas contain plenty of carbohydrates, and you can use them with other food. It is a great addition to tuna or salmon to complete your meal.
  17. Ready to Eat Rice Pouches: Rice pouches are great for quick dinners now, and they are a great addition to your BOB for a real meal. Remember, these pouches have a lot of sodium and carbs. You shouldn’t pick rice pouches for an every meal type of item. However, you can add them with your tuna pouch to make a complete
  18. Instant Mashed Potatoes: When you want to have some comfort food, mashed potatoes fit that bill. Since you can’t bring along potatoes and create homemade potatoes on the trail, it has to be instant mashed potatoes. All you need is hot water. Add some instant mashed potatoes with a can of shredded chicken for a delicious dinner.
  19. Spam Pouches: Here is another idea for a source of protein, even if it is slightly strange. You have to enjoy the taste of Spam to want to include it in your BOB or INCH bag. Spam pouches can be heated in a cup of hot water.
  20. Dehydrated Hummus: Hummus is a favorite treat for many people. It is usually kept refrigerated, so most people don’t think about it as an option for a BOB. You can find packs of dehydrated hummus that requires you to add water.
  21. Crackers: Many of the items on the list are better with crackers. Yes, they are a bit bulky, so you have to consider what type you are bringing and the amount. Crackers make life better! They give you a better way to eat your dehydrated hummus and peanut butter pouches.
  22. Bags of Beans: Pinto beans are a favorite among preppers. They do take the effort to prepare, so that should be a factor. You need a pot that you can put over a fire. A bag of beans will need to cook for at least an hour in water over a fire. However, there is plenty of protein in a single bag of beans.
  23. Cereal and Breakfast Bars: If you need a boost of energy, cereal and breakfast bars are great choices. They typically contain oats and some fruit. They can give a bit of flavor and excitement to your pack!
  24. Sunflower Seeds: When you are on your journey, you want a lightweight and delicious snack that contains healthy fats. Sunflower seeds are a comfort food that can soothe stress and satisfy your hunger until you find somewhere you can set up camp to cook. Other seeds to consider are chia and flax seeds, which are lightweight and contain extra oil.
  25. Dehydrated Vegetables: Did you know that you can dehydrate your vegetables at home? All you need is a dehydrator, Mylar bags, and oxygen packets. Dehydrated veggies are easy to reconstitute with water and make great additions to dinners and lunches.
  26. Chocolate: There isn’t much protein in chocolate, but it contains sugar which gives you a burst of energy. The energy wears off quickly, but it will satisfy your cravings. It is a welcome relief after just eating canned and prepackaged food for multiple days. If you don’t want just to take plain chocolate, Tootsie Rolls are a great choice. Tootsie Rolls are great for hot summer months. Believe it or not, World War II soldiers carried them to eat. You want to make sure that you grab the long ones to conserve space!
  1. Nuts: I mentioned peanuts and raisins, but there are other nuts you can try. Pistachio, almonds, and cashews are almost the top choices. You do have to be careful and look at the sodium content. Salted nuts do help to replace the salt lost because of extra sweating, but it can make you more thirsty. Too much sodium leads to dehydration.
  2. Cereal: Chances are you won’t have access to fresh milk while on the go. Dried cereal still adds carbs to your diet and gives a feeling of comfort. If you have kids along on the journey, Cheerios are a beloved cereal.
  3. Honey Straws: Honey is a delicious, unique source of sugar and energy. You need the energy to survive an SHTF Honey straws or hard sugar candies can give you that little burst that you need.
  4. Coffee Singles: Even if you are on the go, you still want to have some caffeine and coffee on the go. You can purchase instant coffee and Coffee Mate To Go for flavoring and sweetness. Make sure that you have a cup with you that lets you heat your coffee over the fire or however you want to cook your coffee!
  5. Pop Tarts: I know you are thinking that those aren’t healthy at all. You would be right. Pop Tarts are mostly artificial sugar. However, they give you some energy and carbs if you need a pick me up. Plus, kids are pretty quick to eat them.
  6. Peanut Butter Crackers: I mentioned peanut butter and crackers separately, but you can purchase these together to save space. Premade peanut butter cracker sandwiches are found in the store and are relatively cheap.

There are so many choices for foods you can include in your bug out bag and INCH bags. You don’t want to pick all of these items. Find the ones that you think makes the most sense and you find the most enjoyable. Remember, a BOB is enough food to last you 72 hours. Most experts recommend a week or two of food for an INCH bag. After that, you should have supplies to start gathering your food by hunting and fishing.


Other self-sufficiency and preparedness solutions recommended for you:

The Lost Ways (The vital self-sufficiency lessons our great grand-fathers left us)

Survival MD (Knowledge to survive any medical crisis situation)

Backyard Liberty (Liberal’s hidden agenda: more than just your guns…)

Alive After the Fall (Build yourself the only unlimited water source you’ll ever need)

The Lost ways II (4 Important Forgotten Skills used by our Ancestors that can help you in any crisis)

The Patriot Privacy Kit (Secure your privacy in just 10 simple steps)

Food is one of the crucial items for your bug out bag and INCH bags. It seems as if you typically find the same recommendations on every website. You want

Your list of home remedies is about to get even more interesting and spicier. Although these natural herbs are have been used hundreds of years, doctors and scientists are now recommending them to be used for healing purposes. These natural medical resources can be easily substituted as traditional methods of medication. The plants have capabilities to heal and reduce cholesterol, high blood pressure and arthritis pain to name a few. Some of the best healing herbs even have the ability to treat cancer cells and also help alcoholics to curb their drinking habit.

The natural medical resources or herbs and other natural remedies are as effective as traditional treatments. In some cases, they are even more effective without any side effects. Here are some of the best medical resources that you can get from nature. These super-healers can be added into your natural medicine or herbal products cabinet along with your favorite recipes. Fitting a few of them in your daily routine can be beneficial for the body.

Turmeric

Turmeric is a rhizomatous herbaceous perennial plant of the ginger family, Zingiberaceae. It is native to southern Asia

Turmeric contains anti-oxidant, anti-inflammatory and anti-cancerous properties. Whoever thought an ingredient used for taste in curry can help to relieve pain? This spice which is popular for its use in curry contains curcumin that helps to treat arthritis. Curcumin is a powerful anti-inflammatory and an important element that works just like Cox-2 inhibitors drugs to reduce the Cox-2 enzyme which results in the swelling of arthritis.

The herb is known for doing wonders. Another reason why turmeric is popular because it reduces precancerous lesions when taken with quercetin which is found in apples, onions, and cabbage. Turmeric also helps to clear plaques in the brain that are an important characteristic of the disease.

Cinnamon

A recent study on type 2 diabetics showed that taking cinnamon extract every day reduces the blood sugar level in the body by 10%. It reduces risks related to heart and slash cholesterol by about 13%.

1 g capsules of cinnamon extract every day help to tame blood sugar while 1 to 6 g capsules reduce cholesterol. However, a large amount of actual spice is not good for health. Thus, it’s better to stick to water-soluble extract.

Rosemary

Heterocyclic amines or HCAs are some vital carcinogens that are present in several types of cancers. These amines are created after grilling, frying and broiling meat at high temperatures. Rosemary extract which is a common powder mixed in beef after cooking reduces HCA levels in the body.

Rosemary extract also prevents carcinogens from binding with DNA and stops them from entering the body. It is the first step of the formation of tumor and rosemary extracts helps to prevent cancer at an initial stage. Thus, taking rosemary extract will kill carcinogens before they turn into a tumor. This research has been only carried out on animals but the extract has a tendency to prevent cancer.

In order to reduce HCAs in the body, make sure that you add rosemary extract in any spice mix. It will also enhance the taste, making the dish stronger in flavors. You can mix the herb with oregano, parsley, thyme and onions for a perfect mix.

Ginger

Ginger can protect your stomach from various sources including motion sickness, pregnancy, and chemotherapy. This is an old home remedy that we often hear from our mothers and grandmothers. They are right because it really works!

Ginger is a powerful antioxidant that blocks the effects of serotonin in the body. It is a chemical that the stomach and body produce when you feel nausea by stopping the production of free radicals which is also another cause of an upset stomach.

Garlic


High consumption of garlic have cured colorectal and ovarian cancers. People have also experienced a reduction in the number and size of precancerous growths. The benefits of garlic are not only limited to lowering risks of cancer, but it also decreases high blood pressure. There are about 70 active phytochemicals in garlic including allicin that deceases blood pressure by 30 points.

Garlic in your diet slows down the arterial blockages and prevent strokes. Fresh and crushed garlic offers the best cancer-fighting and cardiovascular benefits. However, one should have at least five crushed garlic cloves to enjoy maximum benefits.

Holy Basil

Several animal studies back holy basil, a special variety of the plant you use in your pesto sauce, Holy basil is effective in reducing stress by increasing the noradrenaline and adrenaline along with decreasing serotonin in the body. The herb is also popular to relieve headaches and indigestion. Tea leaves of the holy basil is a great natural resource which is more effective than traditional methods of relieving pain.

Aloe Vera

Aloe Vera was used in traditional medicine for treating skin disease, constipation, infections, worm infestation and colic. In Chinese medicine, it is popular for treating various fungal diseases. In today’s modern times, the herb is used in various cosmetics to make skin softer.

Surprisingly, Aloe Vera consists of more than 78 active components. Studies have shown that the herb also contains antiviral, anti-inflammatory and anti-fungal properties. It builds up the immune system and does not cause any allergic reaction.

FeverFew

FeverFew is a natural herb that has been used over centuries to ease headaches, toothaches, stomach-ache, infertility, menstruation problems and labor during childbirth. The healing effect comes from a biochemical present in the herb known as parthenolides. It fights against the widening of blood vessels during migraines. The herb also prevents blood clots, dizziness, relieve allergies and reduces arthritis pain.

St. John’s Wort

St. Johns Wort herbs are not used to treat the physical symptoms but also used for relieving anxiety and mild to moderate depression. The best thing about it is it works effectively as any other drug without any side-effects.

Saw Palmetto

Saw palmetto is used as a supplement consumed by men to treat prostate cancer. It also contributes to several health issues related to men such as hair loss, libido and enlarged prostate. Other than that, it is said to promote relaxation, treat respiratory conditions and boost immune function.


The natural medical resources or herbs and other natural remedies are as effective as traditional treatments. In some cases, they are even more effective without any side effects. Here are

Increasingly, people are looking for ways to have more control over the source of their food. They are also looking for ways to make their food supply more sustainable. The answer, for many, is found in aquaponics, a fairly new method of gardening that is quickly becoming popular. Aquaponics gives people a sustainable way to grow their own food at home, regardless of what the soil in their yard may be like.

“Aquaponics is an environmentally friendly route to growing food right at home, in schools, or pretty much anywhere,” explains Sylvia Bernstein, president of The Aquaponic Source, and author of the book “Aquaponics Gardening: A Step-By-Step Guide to Raising Vegetables and Fish Together” (New Society Publishers, October 2011). “Based on the idea of raising fish to create your own plant fertilizer, it creates a natural food source that can’t be beaten.”

Aquaponics is easy enough for anyone to get involved. Here are some tips for starting an aquaponics garden of your own:

  • Get Educated. Find a trusted source of information, like Bernstein’s book or corresponding online course, to make sure your experience is successful, the first time.
  • Get the right fish. Although you can use a wide variety of fish, you want to stick to freshwater varieties. Determine whether you want to raise the fish for the fun of it or whether you plan to eat them. If you want to include eating the fish in your plans, you may want to opt for raising tilapia. They are the most commonly used fish for aquaponics, they are easy to grow, reproduce readily in captivity, and most people like the way they taste.
  • Pick your plants. When choosing the plants to include, opt for ones that are not acid-loving varieties. Be sure to plant them with their ultimate growth size in mind, so they can each get the sunlight they need.
  • Establish the microbes. Every successful aquaponics system must have a good beneficial bacteria source. This is an essential step that must not be overlooked, or the fish and plants will not be able to live.
  • Add the worms. After a couple of months of having the system up and running, you should add some red worms in order to help break down the fish waste that will be used for fertilizing the plants.
  • Consider other elements. There are other things that need to be considered, including the temperature of the water, which will depend on the type of fish you are raising. Lighting is also important when it comes to growing your plants, although it is not needed for your fish. You will also want to take the size of your tank into consideration, as that will determine just how much you can comfortably grow.
  • Get expert help. When you have questions about getting started, or about maintaining an aquaponic garden, be sure to speak with an expert. The information will be invaluable, helping to ensure that everything is set up correctly and that each garden is successful.

“We love to help people get their system set up,” added Bernstein. “Knowing that someone is getting started on this route to sustainable gardening is a step in the right direction for them, as well as for the planet.”

In addition to Bernstein’s book, she is the owner of The Aquaponic Source center, located in Longmont, Colo., 15 minutes NE of Boulder. The center focuses on all things Aquaponics and features a retail store, education center, and research and development lab. They offer free tours every Saturday at 1:00 and on-site classes, which teach people how to be successful with aquaponics. The retail store sells all of the necessary supplies, including aquaponics systems and aquaponics plumbing.

Increasingly, people are looking for ways to have more control over the source of their food. They are also looking for ways to make their food supply more sustainable. The

‘When the SHTF I am bugging out man’! ‘If the SHTF you will be glad you have one of these’. ‘You won’t be able to do that if the SHTF’. ‘When the SHTF you better be prepared’! If you have been anywhere near prepping, survival, self-sufficiency or emergency preparedness content, movies, TV shows, books or blogs, you have heard someone say a sentence that went roughly like one of those above.

Do you know what everyone means by SHTF?

Just in case there are some of you out there who do not know what this handy little acronym stands for, it is S**t Hits The Fan. When the SHTF basically all hell breaks loose. The exact meaning of SHTF varies by person and sometimes SHTF is used interchangeably with TEOTWAWKI. As in ‘If there is an EMP device exploded over the US it would be TEOTWAWKI’. TEOTWAWKI is another acronym for The End of The World As We Know It which is also used to describe a million different things to different people. One thing we do know though is that when it comes to SHTF or TEOTWAWKI they both mean that bad things happen and most likely our lives will be changed dramatically in some way for some period of time.

I think one of the aspects of prepping has to be with an eye toward a SHTF type of event. We prepare for minor inconveniences like being stranded on the side of the road, or living without power for a couple of days, but with relatively simple steps these two examples are by themselves minor in the grand scheme of things. If you have prepared, there is really nothing to worry about if the power is out. Will you have to adjust and make do? Probably but if you have prepared for a power outage the adjustment could be very minor. Would you be inconvenienced? Most likely, but you will survive.

Most preppers I have talked to are at some point along an arc of preparedness. (I am copyrighting that phrase right now) One end of the arc is no preparedness at all. The other end of the arc is our individual version of being totally prepared or at least extremely prepared. I say extremely prepared because like I have written before; I don’t believe you can ever finish prepping. There should be a point when you are pretty darn set though when you compare yourself to the rest of the world.

The prepared end of the arc is our supplies, skills and gear for really bad things. This is the SHTF that people are preparing for and it is this concept that many are striving for all along. To be actually prepared as well as possible to handle or maybe more accurately, live through a SHTF event. Our preps would ideally help make that possible. The prepared end of the arc deals with Long-term and abundant food storage, plentiful and renewable sources of water, shelter from the elements while at home or in a bug out scenario and survival firearms for each member of your group. Personally, I don’t want to ever need to use my supplies on the ‘Prepared’ end of the Arc but they are there if the time comes.

What does SHTF look like?

And so we get to the big question that I have heard asked a million times. Well, not a million but a lot and that is ‘How will I know when the SHTF’? How will I know when it’s time to bug out and move our family out of harm’s way? How will I know when I need to hunker down, board up the windows and keep watch overnight? The reason so many people want to know this is that they don’t want to be caught unaware. You don’t want to be the last person trying to get out of your town before the roads are too clogged with traffic, or the one who shows up at the grocery store after they have taken everything except the mops back in housewares. Anyone who is prepping for SHTF is doing so because we want to avoid it as much as possible so knowing how to identify the actual moment that the S**T Hits the Fan is pretty important.

The problem is that unless we are talking about huge, cataclysmic national events, defining the moment that it happens is too late is difficult across the scale of everyone in the country. If a huge terrorist attack happens in Los Angeles California but nowhere else, would you as someone living in Las Vegas do anything besides watch the news? If a nuclear bomb went off in New York, would you as someone living in Tennessee go anywhere? I think the answer to almost any situation where we are asking if the SHTF moment has arrived is unfortunately, ‘It depends’.

What does this event mean to me?

There is a famous Supreme Court case, Jacobellis V. Ohio in which the subject was a movie that had been deemed obscene. The movie theater owner who showed the movie had been convicted and his case made it to the Supreme Court where Justice Potter Stewart, in his concurrence with the other judges ruling for overthrowing the case, said with respect to hard core pornography, “I know it when I see it”. There are other details which you can read here, but the point I am trying to make is that there is no universal SHTF moment or series of actions. You can’t point to a terrorist attack and say that for everyone it is a SHTF moment. Now, it most certainly will be for people involved in the event and surrounding areas of course but it may not impact you at all. If it does however, you will most likely know it when you see it.

Well, thanks that wasn’t helpful at all! Maybe you were hoping I would give you a checklist of items to look for to determine when the S had actually HTF? OK, I can do that but each of these would be examples that have to be taken in context. All of that would also need to be considered with your own personal situation. Some items to look for:

  • Loss of Electricity on a regional scale for more than one week
  • Media blackout
  • Martial law declared
  • Door to door gun confiscations – yes they have happened before.
  • Stock Market takes a dive of 10% and they halt trading the next day.
  • Bank holidays are declared and you are not allowed to remove money from your bank. If you are you are limited to a small amount.
  • Attack on US soil – This would be most likely blamed on terrorists of one shape or another
  • Virus outbreak rates that continue to go higher and occurrences start to increase in your city.
  • EMP device that causes massive power outages (multi-state)
  • Nuclear reactor meltdown
  • Natural disasters that impact you locally (fires, tsunami, hurricane, flood, etc.)

These are all examples that in the right context could be signs that we are in a SHTF moment. On the other hand, some of these could be single events that for a large part do not impact you or your family. I have said before that everything depends on the disaster and if something like this is happening to you, in your town things may be totally different from others across the country not affected. Naturally a stock market collapse or EMP doesn’t fall into that category but regional issues would. I always advocate watching the news media – not to hear about the latest starlet who is acting trashy but to get a feel for what is going on in the world. Maintain an active awareness of the news and be prepared to act fast if you get wind of events that you are considering as being a real SHTF event for you.

Will there be a national SHTF event? Who knows? It could be that we have minor SHTF events that happen to us and that doesn’t make them any less real or dire. You could have your own personal TEOTWAWKI moment that doesn’t impact anyone else and you will still need to react.

I believe we have an intuition but we have to tune ourselves to hear it. I think one aspect of that intuition is what prompted me to begin prepping and I believe that for many others out there you have that same feeling. That small voice telling you to prepare; that gut instinct that something is rotten in the state of Denmark. When it comes to your town, I think you will know it when you see it if you are prepared to look for it. Don’t expect the news, FEMA, your governor or me or any so-called expert in the world to tell you when it’s time to go. You will be able to make that decision for yourself.

‘When the SHTF I am bugging out man’! ‘If the SHTF you will be glad you have one of these’. ‘You won’t be able to do that if the SHTF’.

When SHTF, or if life just throws you a curve-ball and you find yourself in a survival situation without being prepared, one of the first things on your survival to-do list is to find water.

Once you’ve found a water source, though, there are two important factors to consider. First, is it clean/drinkable/safe/purified? And second, how are you going to be able to store it or take it with you?

A few ways to purify your water include boiling, water purification tablets, using a commercial water filter, mixing small amounts of bleach into your water, or crafting a DIY filter out of soil and sand. But once you have clean water, how can you store it for later use or carry it with you?

Unless you’re planning to sit back and wait for rescue, you’ll probably need to leave the source of your water (especially if you’re being chased by zombies). Even if you plan to stick close to your water source, you may not want to drink all of your purified water at once, and it can make life much easier if you have containers in which to store your clean water.

Fortunately, nature has given us lots of provisions when it comes to the things we need, including water containers. It definitely helps to have a good survival knife on hand to make some of these containers, but where there’s a will, there’s a way!

3 DIY Natural Water Containers:

Wood

To create a container out of wood, you’ll need to:

    1. Locate a dry log or thick branch. To ensure that it’s large enough to build a container, look for (or cut) a log that is about two feet long. If you can split it in half, even better–a flat surface makes things easier. Hardwoods are better for making water containers simply because they are better at holding liquid without it seeping through the wood. Also, avoid rotten or cracking wood.
    2. Once you’ve located your wood, you’ll need to build a fire until you have red hot coals. If you were able to split your log in half, lay it on its side with the freshly split side facing up, and place a few coals on the flat surface. If you couldn’t split it, place a few coals on the flattest possible surface. Use a piece of straw or reed to blow air onto the coals. This not only makes them burn into the wood faster but also helps you shape the container by blowing the coals in the direction you want them to burn.
    3. Once the coals cool off, remove them and scrape out the charred wood with your survival knife or a piece of sharp rock.
    4. Place another red-hot coal into the depression and repeat the previous steps.
    5. Once you’ve created a large enough cavity, use a rounded rock to sand down the container and remove any remaining charcoal.
    6. Having a visual reference always helps, so here’s a video walking you through the process:

Birch bark

One of the best materials for creating containers is birch bark because it is quite pliable, especially when heated. To begin, you’ll need to:

  1. Find a birch tree (preferably one that has fallen but is still in good condition).
  2. Use a hammer and chisel, a survival knife, or a sharp rock to cut into the tree and peel off the bark. A rectangular piece of bark will work well to create a container.
  3. Once you have the bark in hand, heat it up a bit until it’s very flexible. – This next part gets a little tricky to explain, but stick with me (or just skip to the video below).
  4. Imagine you’re a child in elementary school (it’ll help) and your teacher hands you a rectangular piece of paper. You need to turn it into a triangle-ish shape. We’ll call the shorter top and bottom edges “A” and the longer right and left edges “B.” So, to change the rectangle into a triangle (ish), you take an “A” edge and fold it to meet a “B” edge and make a crease. This is practically the whole first fold of your birch container, except that you won’t crease all the way down. The distance from where the “A” and “B” edges are pressed together and the crease kind of creates a third edge to a triangle. That distance gives you the depth of your container. Stop creasing when the “third edge” of your “triangle” gets to whatever depth you want for your container.
  5. Crease that “third edge” of your mini “triangle” and fold the triangle it towards the “A” edge (the shorter edge) of your original rectangle.
  6. If you were able to grasp that great verbal description, give yourself a well-deserved pat on the back and repeat that step with the rest of the corners of the birch bark making sure that the folds overlap at least a little bit. This will create a box or bowl (depending on the depth and creases). You can hold the overlapping folded edges by creating a really rough clothespin out of a partially split branch.

If that was way too many words without any pictures, there’s a great walk-through in the video below showing exactly how to make these folds and create your birch bark container.

Bamboo

With bamboo, you can create either a bowl or a cup. Bamboo stalks have sealed joints, so when cutting a piece of bamboo stalk, simply make sure that one end of it includes a sealed joint. An extra bonus of bamboo is that it also contains water inside its hollow stems.

Animal Parts

The skin, bladder, and intestines of animals can also be used as water containers. (This is a survival situation, so no time to get queasy here).

  1. To make a water bottle from the stomach of a large animal, make sure to thoroughly clean it with water. If you have considerable time, you can boil some water, take it off the heat, and place the stomach in it for 2 hours. Continue to repeat this process until you see the water remaining clear even after soaking the stomach.
  2. Then, turn the stomach inside out and scrape off the lining carefully using the back of your knife so you won’t puncture it. Do this while the stomach is still in the warm water to make it easier.
  3. Once you’re done, boil another batch of water, take it off the heat, and soak the stomach for half an hour. Then, tie off the bottom end while the top end is left open. You can fasten it closed with some cordage to keep the water from spilling out.

Other Containers

There are also some ready-made containers that you can use to store water such as coconut shells, hollowed out acorns, seashells, and even turtle shells (after being thoroughly boiled of course) if you happen to stumble on any. For coconut shells, make sure to scrape out all the fruit inside and sand down the wood to smooth the bowl’s surface.

Naturally, in an ideal situation, you would have a water container with you. It makes life much easier, but should you be unfortunate enough to find yourself without one, one or a few of these DIY containers should do the trick.


Here’s some other self-sufficiency and preparedness solutions recommended for you:

The Lost Ways (The vital self-sufficiency lessons our great grand-fathers left us)

Survival MD (Knowledge to survive any medical crisis situation)

Backyard Liberty (Liberal’s hidden agenda: more than just your guns…)

Alive After the Fall (Build yourself the only unlimited water source you’ll ever need)

The Lost ways II (4 Important Forgotten Skills used by our Ancestors that can help you in any crisis)

The Patriot Privacy Kit (Secure your privacy in just 10 simple steps)

When SHTF, or if life just throws you a curve-ball and you find yourself in a survival situation without being prepared, one of the first things on your survival to-do