Home2019 (Page 6)

Could the year you were born have any bearing on your chances of surviving doomsday? Are there any advantages for one generation over another when it comes to living through some apocalyptic event? Do these labels (Baby Boomer, Generation X, Millennial), that somehow became affixed to relatively random ranges of time, hold some clue as to whether or not you and a bunch of your high school buddies could make it through a zombie apocalypse or invasion of mutant bikers from mars?

Related The vital self-sufficiency lessons our great grand-fathers left us

I was thinking about this topic from the singular perspective of my sometimes least favorite generation the other day: Millennials. Sometimes they are called Generation Y, but no matter what they are called in the media, their collective praises are sung at such high levels, in every facet of our society of how important this latest generation is to our country, planet and probably the entire universe as well.

The Millennial generation has received so much attention over the years that at times it nauseates me. If you didn’t know better you would swear anyone who wasn’t a millennial was both stupid and had purposely made a mess out of everything from the paper clip industry to education to race relations and the planet. Thank God we finally had Millennials to save us from ourselves.

No, I am not a millennial.

But this has been going on for a relatively long time of several years and there wasn’t some new event that prompted me to think about them although it could have derived from some conversation in the office I work during the day. The company I work for (yes I have a real job too) has a vested interest in making Millennials happy so I am forever hearing what the Millennials like and don’t like.

What motivates millennials and what inspires them, what they prefer in a job and their thoughts on giving back to the community to the point where I simply don’t care what happens to these people to a great extent anymore. After a little too much of this I started to think of a way to excoriate them.

Related Knowledge to survive any medical crisis situation

Instead of just looking at this one generation though, I thought it might make sense to step back and look at the three largest or most influential generations we have going right now, Baby Boomers, Generation X and Millennials and see which of them would have the best chances of surviving doomsday. So, mustering all of the highly anecdotal evidence I can; here is what I believe the results would look like if we faced a TEOTWAWKI disaster. For the record, this is not a scientific article, just in case that wasn’t clear.

You don’t get to be in your 60s usually without learning a lot of life’s lessons; some of them the hard way.

Baby Boomer Prepper odds of survival

Born between the years 1946 and 1964 – currently aged 51 to 69

Baby boomers have a lot of things going for them. Generally speaking they no longer have children at home to worry about or if they do, most of them are pretty self-sufficient in the respect that they can fend for themselves if need be and they are so inclined. Baby boomers are looking forward to retirement even if the economy has put their plans on hold for a little while. Houses are largely if not completely paid off for a lot of boomers and some have more than one property.

Most of the big purchases we make in life are already acquired by the time you reach this age so Baby Boomers have a little more disposable income. They also have the benefit of being old enough to remember a good bit of life without the modern conveniences we have today. Even if their parents, “the Greatest Generation” pampered them to the point of enabling societal changes we might not agree with, by and large they have benefited from a good degree of hard work. I think this along with the historical long-view of a well-lived life gives boomers an advantage. They have seen what works and what doesn’t and for those who are awake to the goings on of the society around them, prepping makes sense. You don’t get to be in your 60s usually without learning a lot of life’s lessons; some of them the hard way.

Related The Antioxidant 550 times stronger than vitamin E  and 6,000 x More Powerful Than vitamin C

However, age does have its drawbacks. While Baby boomers might be able to afford more time spent training or learning new skills, or making larger purchases of prepping supplies, they also have more health issues associated with age. One study called Baby Boomers, the Sickest Generation with higher rates of Obesity, High Cholesterol, Diabetes and Hypertension. In addition to requiring more medication, parts start failing you the older you get. Some of the most common surgeries for Baby boomers are Knee Replacements, Angioplasty, and Hip replacement. Not good news for a group of people who may be forced to walk long distances in a bug out scenario.

Generation X should not suffer from as many of the health issues of their Baby Boomer parents, but aren’t as spry as they once were either.

Generation X Preppers

Born between the years 1964 and 1980 – currently aged 35 to 51

Generation X is the forgotten generation. I say that because I am one of them and with all the attention focused on Baby Boomers retiring and the needs of the Millennials my generation has been rendered largely irrelevant it seems in the eyes of just about everyone. Pew research calls us America’s neglected middle child and that is what it feels like sometimes. However, this really isn’t an issue that keeps me up at night because I, like a lot of my fellow Gen X’ers are too busy at this stage of our life to care. Generation X is the typical quasi middle-aged group and we have our own set of strengths and weaknesses. Finally done with the more self-absorbed time of their lives, people in this generation are focused on protecting their families, growing their wealth if that is possible and are generally more aware of the world around them.

Related Liberal’s hidden agenda: more than just your guns

For Generation X preppers, we tend to be well along into careers with a somewhat stable life. Instead of partying every night, we are most likely at home watching TV. We have made it through the “wild times” of our younger days and have gained a little perspective and hopefully wisdom. Generation X may have children still living at home, but depending on where they fall on the scale, their ages might be all over the map. Prepping for family members is more of a focus for this generation. Most Gen X’ers do not have a remote property or enough disposable income to go hog-wild into prepping.

Generation X is coming into a more stable time of their lives financially if they have been lucky to weather the economic storms from the last 6 years and stocking up, while it isn’t easy may be more possible than someone still struggling through college or raising babies. Generation X people should not suffer from as many of the health issues of their Baby Boomer parents, but aren’t as spry as they once were either. Eyesight starts to go during this age and you learn you can’t eat what you used to be able to and quickly lose weight.

What will the highly functioning Millennial do in a world without Google to search for the answers to their questions?

The Millennial Prepper’s chances of surviving TEOTWAWKI

Born between the years 1980 and 2000 – currently aged 15 to 35

The Millennial generation is characterized by traits that our society views now as highly desirable. Often described as a product of the electronic age they have grown up in, Millennials are multi-taskers, connected via the internet to all their friends, all the time and are tech-savvy. Probably because they have been plugged into some device since they were born. With a world that has electricity, internet and no major problems, these skills seem to be great resume enhancements.

Millennials shouldn’t have any health issues at this point in their lives that couldn’t be cured by getting outside every once in a while, but their reliance on technology could be a huge factor if that is taken away suddenly. What will the highly functioning Millennial do in a world without Google to search for the answers to their questions? What will the young, technologically savvy person do if GPS doesn’t work or the car won’t start? Could this dependence on technology be a hindrance to their survival? Could the same children that were raised on a lifestyle of “Everybody wins” sports teams with helicopter parents who always took care of their every need pull themselves up and do what is necessary to survive or would they sit back and cry “unfair” at any slight that doesn’t go their way?

Just the Facts  Please

I know that the descriptions above are highly stereotypical and are even more they are very subjective. Every single person doesn’t fit into the broad categories above and I know for a fact that your chances of survival come down primarily to what you have inside yourself more so than what a lot of marketing guru’s say about you or your peers.

Knowing that each and every person is unique, I tried to find a better data point that would help me determine which Generation would have the best chances of surviving doomsday. The only objective data I could pull was from the actual viewers of the Prepper Journal so I measured the demographic information through analytics for the last two years. The results were a little surprising to me.

For the last two years May 13 to May 15 (over 6.2 million views)

  • 27% of the total Views were from people aged 55-older (Boomers)
  • 40.95% of the total Views were from people aged 35 – 54 (Generation X)
  • 31.1 % of the total Views were from people aged 18 -34 (Millennials)

So what does this tell me? I had expected that the overwhelming majority of our page views would be from people roughly my age and older but the demographics were very similar across the generations. I had expected the self-absorbed Me Me Me generation, of which 2 of my children belong, would be absent from any site that dealt with concepts like this. I thought that people their age would not care or even think about survival and by extension, their absence would be some verification that they don’t take issues like prepping for disasters seriously. I was wrong.

Related Diagnose and treat any medical problems you are going to encounter

I have said before that you can’t be too old to prep and I do believe that virtually anyone can take steps to give themselves a better chance, no matter what the disaster turns out to be in your life. If I can measure anything from the data above, it is that people from all the generations are curious about learning the subject of  prepping. Logic would say that everyone is trying to be more prepared and that every generation more or less is equipping themselves with knowledge. Their readership of sites like this one and tons of others suggests they already have the will to survive.

I guess I need to also say that you can never be too young to prep either. I shouldn’t write off a generation of people, largely based on what marketing or the experts tell me. From the youngest grade-school age child to the most senior among us, there are people from all walks of life interested in prepping and that gives me great hope for our future.

Perhaps if something happens we will stop referring to different ages by labels and share a trait more powerful than marketing demographics. Maybe we will all be able to survive as one generation.

Other self-sufficiency and preparedness solutions recommended for you:

Healthy Soil + Healthy Plants = Healthy You

The vital self-sufficiency lessons our great grand-fathers left us

Knowledge to survive any medical crisis situation

Liberal’s hidden agenda: more than just your guns

Build yourself the only unlimited water source you’ll ever need

4 Important Forgotten Skills used by our Ancestors that can help you in any crisis

Secure your privacy in just 10 simple steps

But this has been going on for a relatively long time of several years and there wasn’t some new event that prompted me to think about them although it could

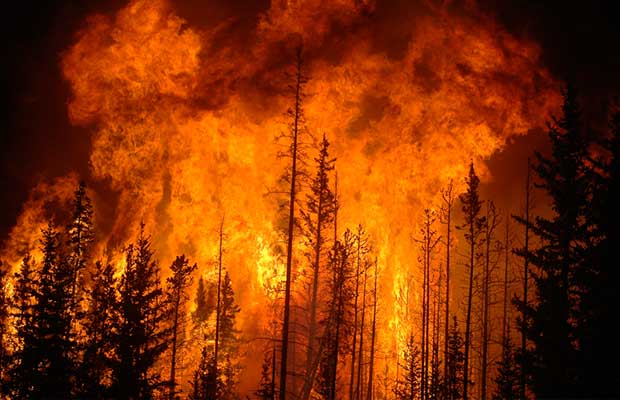
Fire safety is something I think everyone should be practicing now when times are normal and you’re not in a survival situation, so that you can prevent or minimize the danger of a fire. In a survival situation, the danger of a fire starting and the damage it can cause are magnified. The reason for this is that people who do not normally use candles, their fireplace or other alternate heat sources, use a skill set they have minimal experience with. Depending on the situation you may or may not have electricity and if you are connected to city sewer and water, there is a very good chance you will not have running water.

Here is some information to help you develop a fire safety plan now as well as some things to keep in mind should you find yourself in a survival situation.

Have a Plan

Ideally every room should have two exits, a door and at least one window. In multiple story homes have a plan to safely get to the ground. Make sure everyone knows to check the door for heat with the back of their hand and to not open it if it is hot.

School age children have to do fire drills often multiple times a year at school. Doing them in the home is a great idea as well. Explain the primary exit and the backup ones. Make sure they understand how to unlock the window and get it open as well as getting the screens out of the way.

Have a designated meeting place that is near the home; a neighbor, mailbox, anywhere that is a safe distance from the fire. Make sure everyone knows where it is.

Sound the Alarm

The code might be different where you live, but in Minnesota it is code to have a smoke detector in every bedroom. If this isn’t code where you live, it is a good idea.

Here is a report that says that ”Only 58% of kids even woke up to the sound of a fire alarm.“. There are fire alarms that record your voice. This is a great idea, as you can say the child’s name and remind them of what they are to do.

It is a good practice to test the alarms every month and to replace the batteries every six months. You can use the old batteries for other non-life saving things, like the remote. Daylight savings is a great time to replace the batteries. There are some smoke detectors that come with carbon monoxide detectors built in, you should have at least one of these in my opinion.

Fire Extinguishers

Fire Extinguisher : 101 is a site that explains all things fire extinguishers, including types of fire extinguishers, how to use them and care and maintenance of them. I personally have one in each bedroom, one in the kitchen and one in the basement near the furnace, washer and dryer and one in each car.

Fire extinguishers are not meant for fighting a fully engulfed fire. They are a great tool for fighting small fires, shortly after they have started.

Here is a video to give you some idea of how fast a fire can spread.

Here is a video that covers the important information about fire extinguishers.

Important Documents

Be they family photos, wills, insurance papers or anything else of importance, it is a very good idea to have these kept in a fire resistant, waterproof container. Another good idea is to have a record of all serial numbers, model numbers and other pertinent information. You can write down the important information for your valuables. I also recommend taking pictures of your valuables. You can store them on a flash drive that you use solely for important information. It should be kept in the fire resistant waterproof container.

Post Smelly Fan Blades (aka. “after it hits the fan”)

In a survival situation, the danger of a non-controlled fire is much higher. The reason for this is that often the electricity will be out and there will be no heat or light. This means that people will use alternative heat and light sources that they might not use often, such as candles, outdoor fires etc. The other reason the danger is higher is that if there is no electricity, there is no water pressure to help fight the fire.

In a short term situation, just practicing extra vigilance should be all that is needed. Make sure that if there are candles going, they are being used in a room that you are in and are not left unattended.

It’s official. This is now the prepper’s “go to book” saving them time and money on costly doctor visits. Details HERE

For an outdoor fire, keep burning restrictions in mind; if it’s too dry and windy, it might be best not to burn. If there are no restrictions and the weather is permitting, having an extinguisher nearby is a good idea. If you have a well or the water is running, a close by hose might be a good idea as well. Remember, as Smokey the Bear says “If it’s too hot to touch, it’s too hot to leave”.

If the situation is long term and there is no power, prudence might dictate that the scope of the vigilance be increased. Work with your community to limit burning to a few community areas or have a fire watch posted that can alert the entire community if smoke is seen.

At the Minnesota Renaissance Festival, fire “destroyed six and severely damaged about 25 booths on the grounds” I bring this up because there are no fire hydrants on the festival grounds and if there is no electricity, this means the pumps are not pushing water to the fire hydrants nearby your home, so they are useless. In the article, it says that at one time there were twelve fire trucks being used to put the fire out. If it has hit the fan, the best your neighborhood might be able to do is get a bucket brigade going and that’s only helpful if you live near a body of water or have a large amount of water available such as a swimming pool or multiple rain barrels.

As in everything we prepare for, in a long term situation, it might be wise to do what you can to mitigate the danger beforehand. I read a fictional story once, the name of which escapes me. In the book, the characters knew they were at high risk for a fire. They took some pretty drastic measures to save their homes. They cut down any trees within 50 or so yards, dug up grass near the homes which left the earth exposed. I don’t think that I thought much about it at the time, but if there was imminent threat of a fire, who knows what might sound like a good idea.

The following is an Article by Chris Ray. Too good and useful not to share it here.


Other self-sufficiency and preparedness solutions recommended for you:

Healthy Soil + Healthy Plants = Healthy You

The vital self-sufficiency lessons our great grand-fathers left us

Knowledge to survive any medical crisis situation

Liberal’s hidden agenda: more than just your guns

Build yourself the only unlimited water source you’ll ever need

4 Important Forgotten Skills used by our Ancestors that can help you in any crisis

Secure your privacy in just 10 simple steps

Fire safety is something I think everyone should be practicing now when times are normal and you’re not in a survival situation, so that you can prevent or minimize the

For a long time, preppers have been accused of being little more the paranoid hoarders. However, a lot of evolution has occurred in the field of disaster preparedness. Rather than blind action and backpacks full of gear, we have a hierarchy of the most important things to have on hand in a disaster.

When it comes to prepper storage, we are going to look at three items that are going to make a world of difference for you and your family in tough times.

Long Term Food Storage

Forget about the golden rule in a serious disaster. You see, the gold makes the rules only when there are resources to buy with that gold. Because of our just in time delivery systems our cities and towns are going to run out of food and supplies in a hurry.

We have seen the shelves go bare after small hurricanes and snowstorms. Imagine if trucking and shipping stop and all those resources are gone.

Better than having gold is having food. You see, everyone is going to want food, they are going to need food. Most people have no idea how you are going to get food after a disaster.

If you are going to store food you should know what a years’ worth of food, per person, looks like. To keep it simple you are going to need about 2 million calories per person. Really it should be a little more but from there you can work your way back.

When you talk about 3 months or 6 months of long term food storage you should only be working with shelf stable foods. The best practice is to buy these items in bulk and then bucket them up with oxygen absorbers in mylar bags inside of 5 gallon buckets.

There are few sighs of relief equivalent to putting up food for hard times. Its just one of those things that feels good deep down inside.

Heirloom Seeds

Depending solely on a garden is a huge mistake. If you think you are going to grow all the food your fmaily needs, you are mistaken. In fact, if it were that easy, you’d be doing it already.

Growing food is hard but I think you should invest considerable time and effort into it. It should be a massive supplement to your food storage diet. This will increase the vital nutrients in your diet and will put you in a position to add variety, as well.

Along with stockpiling long term food storage you should also have some version of a survival seed bank. These can be bought in sealed cans and stored in your fridge. They will keep for a very long time.

Don’t get crazy and buy a bunch of varieties of plants. Instead, focus on the seeds that produce the most food per plant. This is key if you are short on growing space. Think of things like

  • Tomatoes
  • Peppers
  • Cucumbers
  • Squash
  • Zucchini
  • Herbs
  • Greens
  • Green Beans

These plants all produce ad nauseum and that is exactly what you want out of a survival garden. You want too much produce. The extra goes into cans to be called on in the winter.

Emergency Water Plan

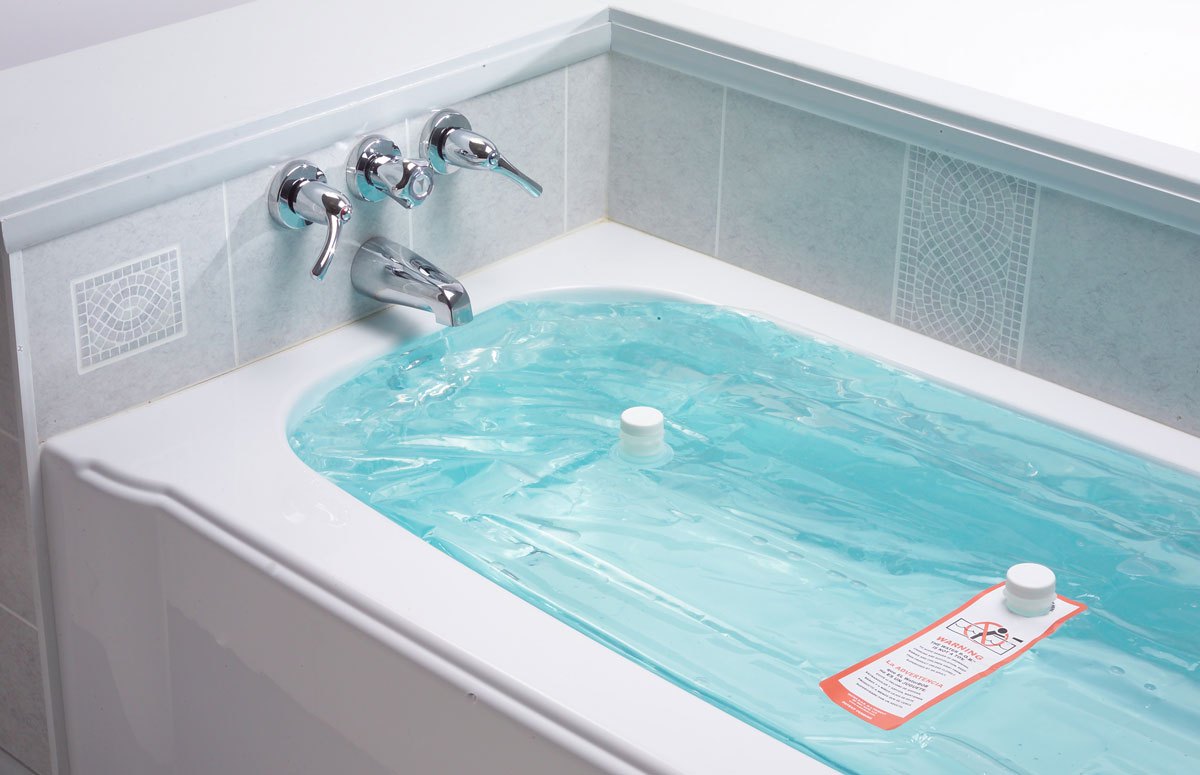
Another important prepper storage consideration is water. Water is a little different than food and seeds. You see, water is part of a larger emergency water plan. This plan has a number of components.

Because we only have three days without water before we die, you want as many ways of getting water as you can muster. We are going to look at all those ways on a high level so you can understand how sourcing, catching and sanitizing water are all just as effective as storage.

STORING WATER

The first step that most people make when considering emergency water is to store bottles or jugs in their home. This is a good method, to a point. Storing water take tremendous space and it also is very heavy when you get to a sizeable amount.

Water storage should certainly be a part of your plan but not the whole plan.

CATCHING WATER

One of the most effective means of storing water is to do so in 55 gallons, or larger, rain barrels. These barrels hold a tremendous amount of water and that makes a huge difference. With just 4 of these barrels you can carry 220 gallons of water!

This type of catchment is great because it just happens, you don’t need to do anything but maintain the barrels

FILTERING WATER

Have a method, or two, to filter water is also important. Sometimes water quality can be questionable, and filter can help you out with that.

SANITIZING WATER

Non scented bleach, aqua tabs, tincture of iodine are all options for sanitizing water and making it safe to drink. After filtering you could also boil that water and it will be safe, as well. However, quick methods like these tabs are also very effective.

SOURCING WATER

The planet is 75% water. There is a water source near you. You should get to know that source now and make plans to tap it in times of disaster.

Easy and Effective Storage

Now that you have an idea of what you should be storing, you might be wondering, where do I put it all? Well, that is where we move to the topic of a root cellars.

Expanding the home or over cluttering it is not a great option. What good are preps if you cannot get to them quickly? Besides, its good to spread your preps around. Having food and supplies in more than one location can make a huge difference if things get bad.

If you are looking for a quick primer on building your own root cellar The Easy Cellar by Tom Griffith can help you get started.

Ideally you can use this eBook to build a custom root cellar that will allow you to store your water, food storage, seeds and even extend the shelf life of produce! When we talk about prepper storage a root cellar is key. In fact, all aspects of storage are vital to having success.

Having the right resources to call on in times of disaster is not only prudent but it is becoming very popular. The writing is on the wall and people are taking notice.

With some basic materials and good plans, you can create your own easy root cellar and create your own prepper storage.

Other self-sufficiency and preparedness solutions recommended for you:

The vital self-sufficiency lessons our great grand-fathers left us

Knowledge to survive any medical crisis situation

Liberal’s hidden agenda: more than just your guns

Build yourself the only unlimited water source you’ll ever need

4 Important Forgotten Skills used by our Ancestors that can help you in any crisis

Secure your privacy in just 10 simple steps

We are going to look at three items that are going to make a world of difference for you and your family in tough times.

A Medical Chest: Is it important?

OF COURSE.

Whether your bugging out with a group or bugging out alone it is extremely important to have someone with some degree of medical knowledge and/or skill. If you’re bugging out with a group and you’ve got a plan in place, but no designated “medic”, you have a problem. If you’re bugging out alone and you don’t have any basic medical knowledge, again, you have a problem.

It’s easy enough to say “I never get sick” or “Ill tough it out” when it comes to an illness or injury in everyday life, but if you’re bugging out, everyday living will cease to exist. Whether you’re hunkering down in a bunker or climbing up foothills or mountains, sh*t is bound to happen. Maybe someone in your family brought in a simple cold. It doesn’t take long for that simple cold to turn into a sinus infection, which once your immune system is beat down enough, can turn into pneumonia. Consider you’re climbing in the foothills or hunkering down in a forest and you drink some bad water…maybe your Lifestraw has already filtered its limits, or maybe your water wasn’t heated for long enough. Bacteria can take hold of your body’s systems within days, sometimes hours, and cause unfortunate and inconvenient effects such as vomiting, diarrhea, dehydration and eventually, death. You get my point.

So what can you do to prevent this? Well, stay healthy, take your vitamins, and boil your water. Stating the obvious, right? Prevention is great, but like I said, and I’ll say it again, sh*t happens. A contingency plan for those SHTF moments is the key to efficiency and more importantly, survival. You can create a top-notch medical kit addition to any bugout bag or kit easily and cheaply. All it takes is basic medical knowledge and a small pack to potentially save you, your family or your friends in a SHTF situation.

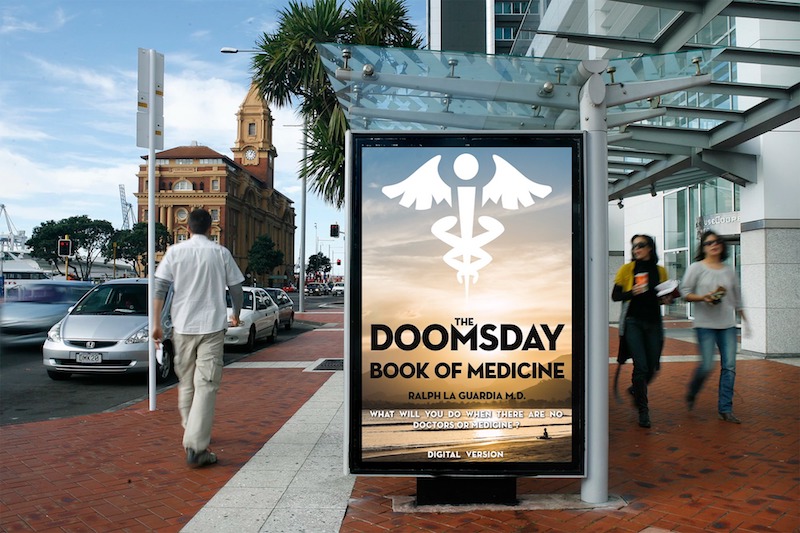
The Doomsday Book Of Medicine: A Guide for When Help is Not on the Way

I wish that there was a six star option

“I’m a dentist, and I have just enough medical knowledge to be dangerous. This marvellous book has so far exceeded my expectations that I am amazed that so much useful knowledge can be packed into one book! Hats off to Dr. La Guardia! The information in this book can be used immediately to improve your health, and expand your treatment options in many areas even if there is never a crisis event for you and your loved ones. The panorama of medical, herbal, and traditional treatments in one easy reference makes this one a MUST HAVE! for everyone interested in healthy options and preppers/survivalists in particular. Cannot recommend it more highly. If you can only buy one medical reference book, this is IT!

 
Absolutely THE BEST prepper medicine book!”
DR. DALE W HUDSON

The Basics of a Medical Chest:

Ibuprofen: So Underrated. It’ll help with mild pain, but more importantly, it can help take down and break a fever. How fun is it trying to function at your day job with a fever that turns into a massive headache that turns into hot flashes and cold sweats? Now imagine dealing with that while you’re lumbering through the wilderness. Not fun.

Pepto Bismol: Once again, underrated. Not only will this reduce your burning desire to throw up those repulsive MRES, but it has the potential to get diarrhea under control. Having to stop every 5 minutes to see a bush about a horse? Inconvenient AND unpleasant.

Benadryl: Works for both people and dogs, making it a vital part of my personal bag. Hiking through the woods and your dog steps on or eats a wasp? I know I don’t want to carry my almost 50 pound dog for very long, how about you? 1 MG per pound of body-weight will take care of that problem. It can also be used to ease a dog’s anxiety, just lower the dose a bit. If you’re traveling or hunkering down with someone who has an allergy whether it be to a food or animal, a quick response with a dose of Benadryl can make a bigger difference then you would expect. I carry a bottle of Benadryl and a tube of Benadryl Cream for topical use.

Medi-Lyte: Uncommon, but not unimportant. I used to work in the oil fields during the big boom, and this was something I always kept stocked for my guys. It is used to replace electrolytes from excessive loss of liquids. I’m talking sweat, vomit, whatever. You can purchase 500 tablets on Amazon for twenty bucks. 100% WORTH IT. Oh, and try two tabs for a hangover, it’ll do wonders ????

Hydrocortisone Cream: Once again, suitable for both you and your dog. Hiking out in the woods comes with a price. While an occasional bug bite is not something that will really bother you, being covered in them probably will. The same goes for your dog. Mosquito bites, tick bites, flea bites, poison ivy, weird rashes; it covers it all. Literally.

Triple Antibiotic: This one is basically the jack of all trades. Use it on burns, cuts, scrapes, and anything else you’re worried about getting infected. I would suggest only using it the first 1-2 days after the injury is sustained. After scabs are formed it won’t do much and there is no point in wasting precious supplies.

Everyday Allergy Meds: Sudafed, Zyrtec, Claritin, because there is nothing worse than trying to walk long distance or climb bluffs or mountains with a runny nose.

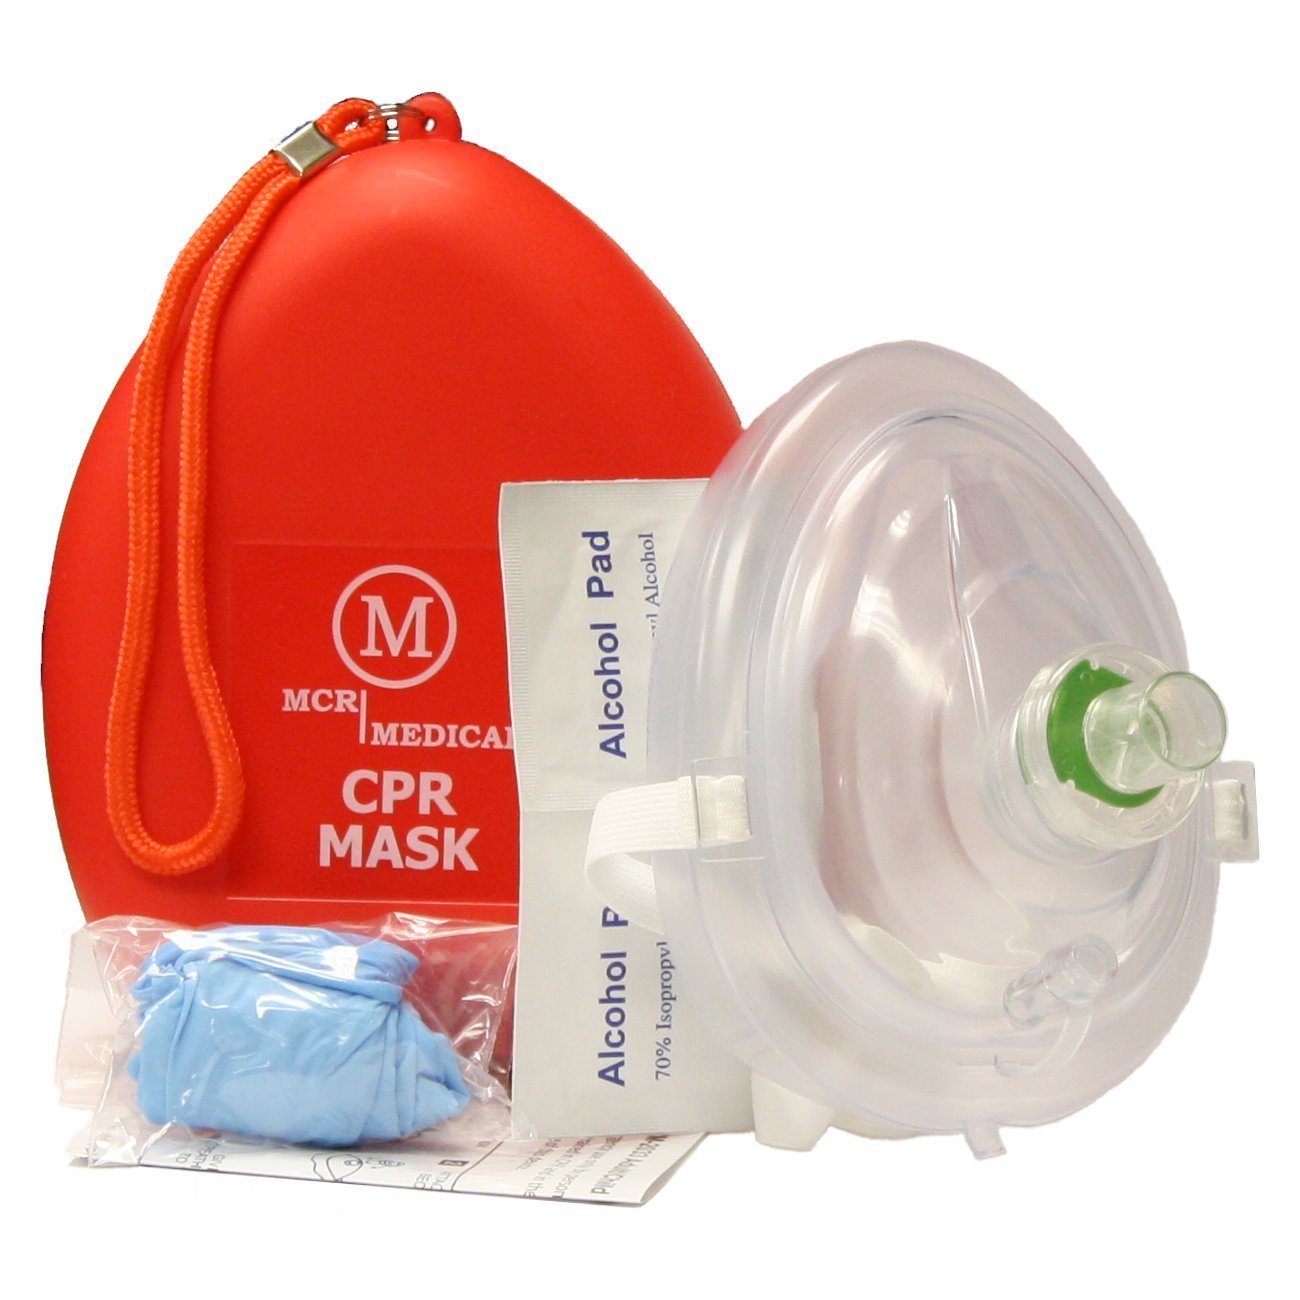
CPR Rescue Mask, Adult/Child Pocket Resuscitator

CPR Mask and Sterile or Nitrile Gloves: I don’t care how well you know someone; do you really want to take a bath in their bodily fluids? I didn’t think so. Carry a CPR mask with you in your medic bag and remember the basics from CPR Class, compressions and breaths, 30:2. Compressions should be done by finding the middle spot between the nipples and pumping your overlapped hands down onto their body. They won’t tell you in your average CPR class, but I will; you will hear ribs cracking, if they survive they will be in pain from it, and it is not easy on the body to lean over and perform compressions on someone. You will be sore. Saving someone’s life though- 100% worth it. If you haven’t taken a basic CPR class yet, don’t be a dummy. It’s 50$ on average and takes only a few hours of your time.

Hot Hands: There is nothing worse than being sweaty, cold, and out in the wilderness. Once you’re cold it is very hard to get warm, but a hot hands pad can make the world of difference. Toss one onto the top of your head and cover it up with a hat. My dad has told me since I was little; heat rises. Keep your head warm and your body will be warm.

Various sized Band-Aids, bandages, ace wraps and anti-bacterial wipes: Obvious, but easily overlooked. I was on a mountain climbing trip in Montana this fall, and I got stuck coming down at night. Not smart, and not fun. I tripped on a tiny rock and my ankle bent and twisted. The next morning I had a 7 mile hike to a primitive forest service cabin across two mountain ranges and I could barely walk without my ankle giving in. An ace wrap and some duct tape made the world of difference.

The Not-So-Basics:

I don’t expect you guys to have giant stockpiles of these things lying around, but I can guarantee you if you dig through your cabinets and junk drawers you’re bound to find one or two of these things lying around. Please also remember I am not a doctor, and I’m not god, so take everything I say with a grain of salt. Having these things does not guarantee a life saved.

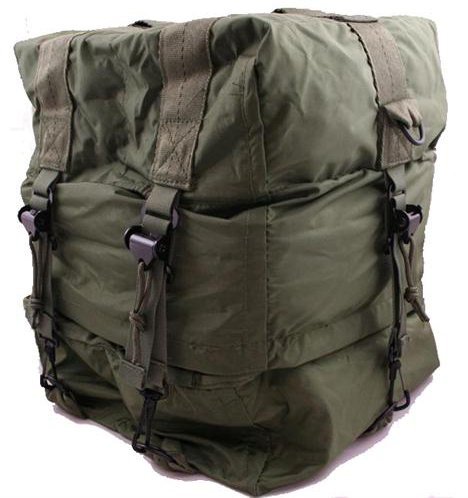
Elite First Aid Fully Stocked GI Issue Medic Kit Bag, Large

Epi-Pens: Unfortunately, these have gotten harder to come by recently, on account of obnoxiously high prices, but if you or your family member has an allergy that requires you to carry one of these, don’t leave it behind when you bug out. Not only could it save your life for what it was intended, but it could save someone in your groups life should they encounter an unexpected allergy source.

Muscle Relaxers: If you’ve done any hiking, walking or running long distances you know how exhausting it can be on your body. Imagine doing it for days at a time while trying to find the perfect camp location. These come in handy to both relax your body and your mind, making it much easier to carry on hiking or even sleep. Personally I can take one of these and continue on with my day, but I’ve heard stories of people taking them and falling asleep within the hour, so remember that everyone responds differently.

Antibiotics: I know I can’t be the only one that’s been prescribed antibiotics and not taken all of them. Do you have a stockpile of half taken antibiotics? In everyday life it’s not a good idea to take half of a dose and leave the rest behind, as it puts you at risk for antibiotic resistance, but if you’re in the wilderness or an emergency situation and you need antibiotics, I think you can afford to take that risk. The same goes for your basic antifungals.

Higher Dose Pain Relievers: If you have left over pain killers from a surgery or injury, pack them up and take them along. I will let you imagine all the possible injuries that may require their use.

Israeli Pressure Bandages: These bandages have been carried by the Israeli Army for ages for a good reason. They compress, clot, and cover a wound. The instructions are on the packaging, and they are fairly simple, lightweight, and about 10$ a piece on Amazon. Worth it.

Suture Kits: Also available on Amazon, although they are usually labeled “for veterinary use only.” They will work in time of need. It’s basically a needle and thread. Buy a few and practice stitching up an orange, or if you’re looking for a little more “real world” (and gross) experience, a pigs foot. It’s pretty much what you see on TV. Unless you went to medical school, you will not be an expert, but if it’s absolutely and undeniably necessary, you’re better than nothing.

I have all of these things in my bugout bag, and it only takes up a very small portion of it. Scrounge up what you can from what you already have, and buy the rest when it’s convenient or on sale to keep costs low. If you’re low on space, take the pills out of the bottles and package them in plastic instead, but remember that the bottles can have other uses in your bag.

I have no doubts that with even 1/2 of these items in your bag you will be better off than your average prepper. Never underestimate the power of basic medical knowledge and preparation. Good luck out there!


Other self-sufficiency and preparedness solutions recommended for you:

The Lost Ways (The vital self-sufficiency lessons our great grand-fathers left us)

Survival MD (Knowledge to survive any medical crisis situation)

Backyard Liberty (Liberal’s hidden agenda: more than just your guns…)

Alive After the Fall (Build yourself the only unlimited water source you’ll ever need)

The Lost ways II (4 Important Forgotten Skills used by our Ancestors that can help you in any crisis)

The Patriot Privacy Kit (Secure your privacy in just 10 simple steps)

A Medical Chest: Is it important? OF COURSE. Whether your bugging out with a group or bugging out alone it is extremely important to have someone with some degree of medical knowledge

One item that can take up a lot of space and potentially the most weight in your bug out bag is a tent. That is unless of course you are spending a lot of money to get an ultra-light tent that folds up into the size of an Altoids tin and expands to sleep 20 people comfortably. Actually, when my family and I went camping in the great outdoors a while back, I had two tents in my pack because my children were too young at the time to handle the extra weight. Each tent was a two man tent and weighed 5.11 pounds. We did not spring for the more expensive tents for a couple of reasons. First, because we didn’t know how the kids would enjoy camping and didn’t want to make that investment if it wasn’t going to pan out. Second, I didn’t want to spend the money.

You don’t have to wait for a crisis to use this book. Use it in your everyday lives to treat any medical problems that might occur. Details and how to get it here.

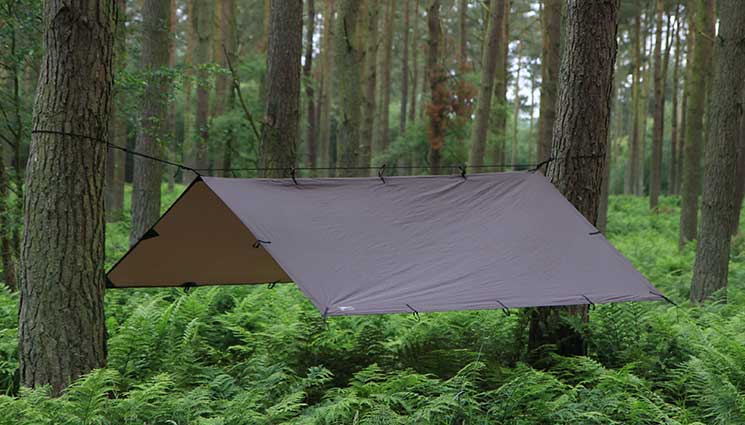
Now, you might be saying to yourself 11 pounds isn’t that much weight. Well, I beg to differ. It is a lot of weight and space when you consider that I could have carried a tarp system which weighs less than one pound. If I had 8 less pounds in my pack that would have made a huge difference in weight, but the sheer volume those tents occupied meant that I had to offload some of the food on my wife.

Tarps are a great idea if you are looking to shed pounds from your bug out bag and they give you most of the protection from the elements of a tent. True, they don’t enclose you completely, but they can keep the rain off just as well and the size and weight savings is nothing to sneeze at. The guys at ITS Tactical have a set of videos that show a tarp rigging system that will allow you to add this gear to your pack, save weight and eventually set up time. One great thing about this system is that breaking camp is a cinch.

There are a lot of varieties of camping tents out there and some are of course more expensive than others, but you will appreciate the time and weight savings.


Other self-sufficiency and preparedness solutions recommended for you:

The Lost Ways (The vital self-sufficiency lessons our great grand-fathers left us)

Survival MD (Knowledge to survive any medical crisis situation)

Backyard Liberty (Liberal’s hidden agenda: more than just your guns…)

Alive After the Fall (Build yourself the only unlimited water source you’ll ever need)

The Lost ways II (4 Important Forgotten Skills used by our Ancestors that can help you in any crisis)

The Patriot Privacy Kit (Secure your privacy in just 10 simple steps)

There are a lot of varieties of camping tents out there and some are of course more expensive than others, but you will appreciate the time and weight savings.

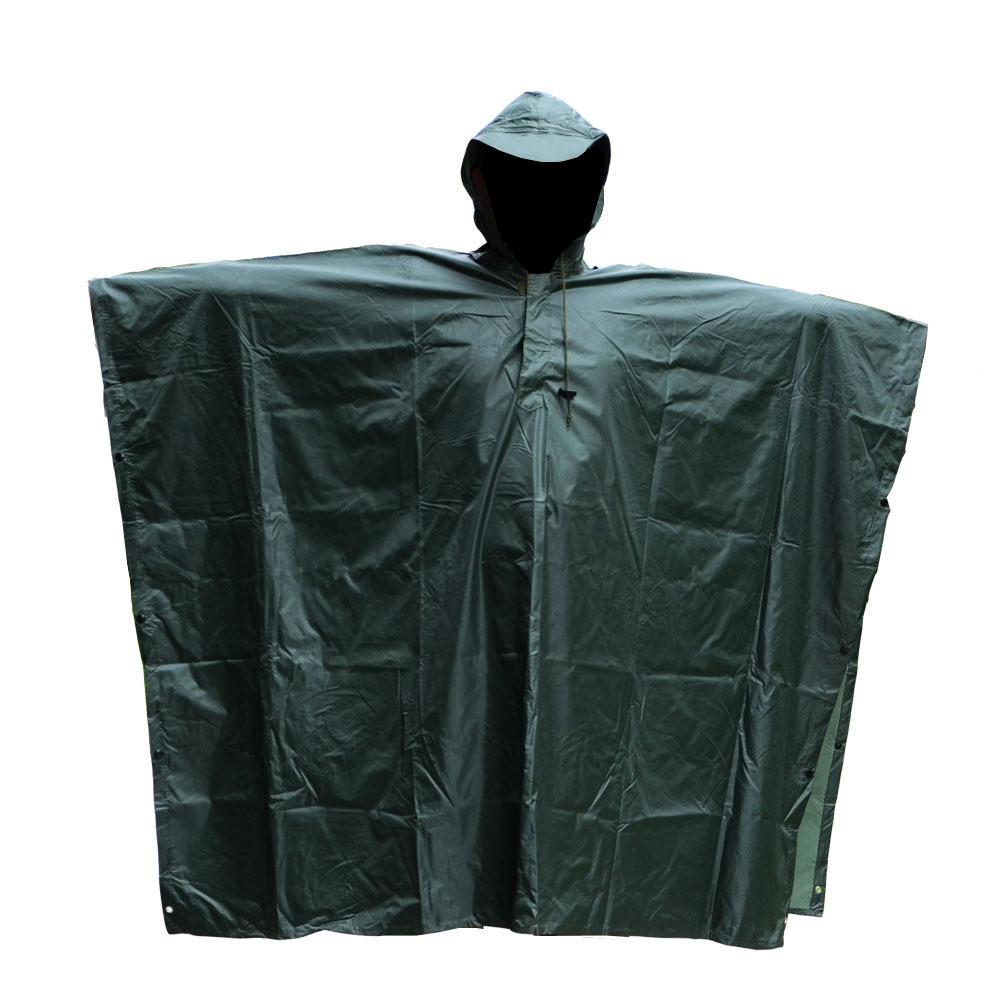
I can’t even begin to describe the way I feel about ponchos – yes, those things you carry around in your B.O.B like all the time without actually having a chance to use it. I know that my “opening” statement could’ve come out sounding a bit off, but it’s the truth. One the one hand, they’re very useful for a lot of stuff besides rain.

However, I am sometimes annoyed by the fact that a good poncho is heavy as shit and that you never get around to use it. This is the very reason why I’ve made the journey to the all-knowing, and all-seeing Oracle called the Internet, in hopes of finding other uses for that over-sized raincoat.

Have to admit that I was a little bit surprised by the fact that most people who wrote about ponchos tend to emphasize the non-rain-use part, which I think it’s great. Anyway, because most of you are probably thinking about the same thing right now, here are X ingenious ways to use a poncho during an SHTF situation. Enjoy!

  1. Water collector

When SHTF, water becomes top priority (remember, remember, the rules of threes). Obtaining it might be a bit problematic, but don’t lose hope. While scouting for a water source, lay your poncho in a clearing. You may want to check the weather beforehand to see if there are any chances of rain. If you have Mom Nature on your side, that poncho of yours will soon become a veritable water tower.

  1. Taking shelter

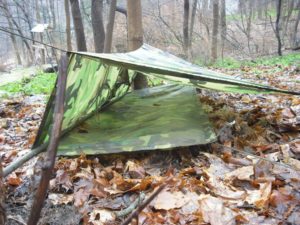
Besides food and water, you will also need to find shelter. The simplest way to take cover from the elements is to take out your poncho and to turn it into a makeshift tent – just stick a long pole under the hood and get yourself some sack time. You’re going to need it.

  1. Crafting a mattress

Nothing’s worse than having to sleep on the bare ground. Sure, it’s no delight waiting for the Sandman to come when you’re lying on a thin sheet with rocks prodding you in the back, but it doesn’t have to be that way. You can make your own mattress by stuffing your heavy poncho with leaves, grass, fresh moss or pine needles. Snap it shut, place in on the ground, and sleep like a boss.

  1. Creating a hammock

Since we’re still talking about sleeping, nothing beats the comfort of a hammock. Ever! Well, a hammock’s kind of heavy to carry around, not to mention the fact that it’s a nightmare to make that thing fit inside a backpack. If you’re looking to relax after a long day of hiking, take out your heavy poncho, and use whatever cordage you have on hand to tie it between two trees.

  1. Shower curtain

Even a seasoned survivalist needs a good shower every now and then. Well, the idea of getting naked even there’s no around for miles can be a bit unnerving, but you can wish that anxiety away by making a shower curtain from your heavy rain poncho. Hang from the nearest tree, get inside, scrub until you drop, and come out a new man or woman.

  1. No more dripping

As a person who spent most of the summer looking for holes in the roof, I can wholeheartedly say that my heavy poncho spared me a lot of trouble. Sure, the roof still needed patching, but at least I managed to get myself a breather by plugging some of the larger holes with the poncho. Looks like a nasty piece of work, but who’s complaining?

  1. Red Riding Hood Cosplay

Yes, I know it sounds kinky, but I was, more or less, referring to how you can use your poncho as a basket. There are a lot of goodies lying around the forest and simply not enough hands to collect all of them. So, get into your apple-picking gear and enjoy your foraging.

  1. Controlling hemorrhages

Although it’s not advisable to use a tourniquet to control the bleeding, sometimes it may be the only way to prevent a person from going into hypovolemic shock (that’s what happens when someone loses more than 20 percent of his blood supply).

If you don’t have anything on had to use as a tourniquet, cut a long strip of poncho material, apply it above the wound, and start twisting with a stick.

  1. Carrying sick or injured party members

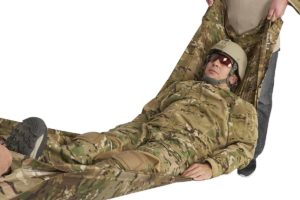
If someone from your hiking groups becomes injured or experiencing life-threatening symptoms, use the heavy poncho as a stretcher to carry him down to base. Don’t forget to get in touch with the local emergency serves and to stay on the line until the operator says that you can hang up.

  1. Protection against toxic fumes

If you’re about to cross an area which is filled with toxic fumes (a thing that happens very often during a wildfire), get the heavy poncho out of your bug out bag, put it on, cover your face and nose, and pull strings to keep it shut.

  1. Improv pillow

Being lost in the wild without any hopes of seeing your loved ones doesn’t mean that should give up the comfort of your home. What most non-preppers don’t realize is that we really don’t drink our own piss or eat half-digested berries from bear’s dung in order to survive. Nope, we use our noggins to increase our comfort and increase our chances of getting out alive.

You already know how to fashion yourself a mattress using a heavy one. If you also remembered to pack a light rain poncho, then you have everything you need to create a bedroom fit for a king.

Go around the woods and scavenge soft stuff like pine needles, leaves, moss, grass, soft earth. Put everything inside you light poncho, pull on the strings, put on the mattress and sleep as if you have not a care in the world.

Hope you enjoyed my article on ways to repurpose a poncho. Any thoughts? Hit the comment section and let me know.


Other self-sufficiency and preparedness solutions recommended for you:

The Lost Ways (The vital self-sufficiency lessons our great grand-fathers left us)

Survival MD (Knowledge to survive any medical crisis situation)

Backyard Liberty (Liberal’s hidden agenda: more than just your guns…)

Alive After the Fall (Build yourself the only unlimited water source you’ll ever need)

The Lost ways II (4 Important Forgotten Skills used by our Ancestors that can help you in any crisis)

The Patriot Privacy Kit (Secure your privacy in just 10 simple steps)

I can’t even begin to describe the way I feel about ponchos – yes, those things you carry around in your B.O.B like all the time without actually having a

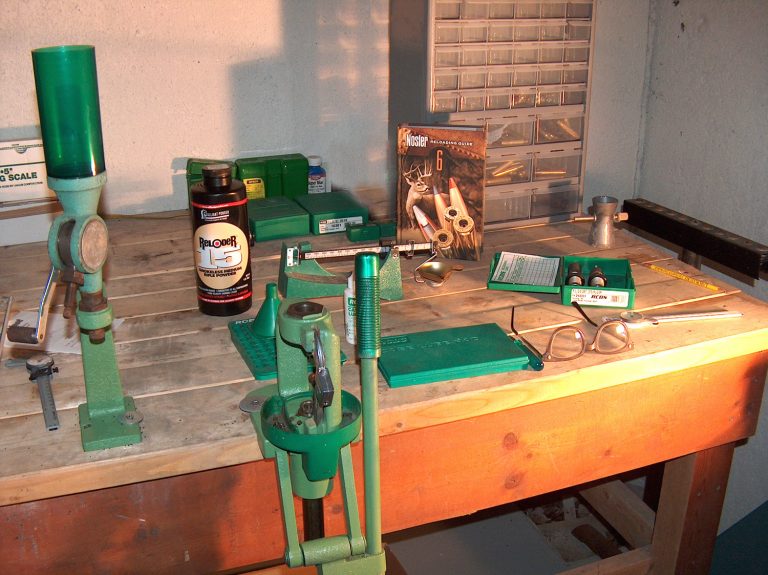
With the interest in the preparedness lifestyle growing at an explosive rate, one important skill is often brushed aside: reloading ammunition. Often, persons embarking on their own personal prepping journey will procrastinate on learning to reload their own ammunition. The reasons to put off learning to reload are understandable. Often, many people would rather just buy more firearms and more ammunition than put the time and money into learning reloading. People usually are put off by the expense of reloading equipment, feel that they do not have the time to learn reloading, or they do not have a person available to teach them.

Learning about all the reloading equipment and techniques can seem daunting at first but the skill is worth the effort. The initial investment in equipment and supplies for reloading can cost as little as about $300 or as much as one is willing to spend. However, there are many benefits to making the investment.

  • First, a person can save a lot of money reloading, quickly recouping the startup costs.
  • Second, by reloading ammunition a person can get much improved accuracy over using only factory ammunition.
  • Third, for many rifle and pistol calibers a hand-loader will have many more choices available than solely relying on factory offerings, the combinations of components are near infinite.
  • Fourth, reloading will allow a person to have ample supply of hard to find ammunition for a favorite pet caliber, unusual and rare cartridge, or old hunting rifle.
  • Finally, when the next ammo shortage happens the reloader will be able to maintain his / her stockpile.

As can be seen, there are many good reasons for preppers to take up reloading and each one will be looked in more detail.

Obtaining greater accuracy is another good reason to learn reloading. Many people who start reloading just to save money quickly discover this benefit. The quest for peak accuracy is what gets many people really fired up about reloading. Once a person experiences how easy it is to increase accuracy for a given load, they are well on the way to a life time of reloading.

Firearms are expensive. Many times, people have been very disappointed with a new firearms shot groups, assuming there is a problem with the expensive new weapon. After hand-loading some ammunition, they have discovered there is nothing wrong with the weapon and that factory available ammunition is causing this sub-par performance.

For example: this is very typical for 45 Colt revolvers.

Historically, there has been some variation in bore diameters of production revolvers in this caliber. For safety reasons, the major ammunition manufacturers will produce loaded ammo with bullets in the smallest produced bore diameter. In some guns, these too small bullets will not engage the rifling’s and just rattle down the barrel, flying erratically out the muzzle. Accuracy is unbelievably poor when this happens.

An easy fix for a reloader is to determine the bore diameter and reload using bullets of the appropriate diameter. This method has been proven to turn poorly grouping guns into tack drivers.

Sometimes, the problem with a firearms accuracy is not in the gun but in the ammunition. Loading one’s own ammunition can help correct that.

Without a doubt, one of the most popular reasons that persons learn to reload ammunition is to save money. Ammunition is expensive and it is not getting any cheaper! However, anywhere from 65% to 80% of the cost of ammunition is in the cartridge case. Therefore, a person should always pick up their spent cartridge cases. That reusable brass case ties up a bunch of money, too much money to just leave laying on the ground like garbage.

For example: if a box of rifle ammunition cost around $20 then about $15 of that is likely tied up in just the cartridge cases. No one would walk by $15 laying on the ground and not pick it up but people will leave perfectly good cartridge cases laying all over the range. A person could reload that box of ammo for $5 or less. That savings adds up fast and recoups the initial investment in equipment.

The amount of money saved can be used to buy more ammo, more guns, optics, range time, training, prepping supplies, and on and on. If shooting those big safari rifles is appealing, the savings to the reloader are truly amazing.

Some big game rifles cost the shooter anywhere from $5 to over $25 every time the trigger is pulled. This cost can prevent any frequent or meaningful target practice, often even impairing properly sighting in the weapon or zeroing a scope. Reloading can make shooting these big guns affordable and fun.

As mentioned earlier, cost savings is a major motivator for reloaders. As a person living the preparedness lifestyle, allocating money and resources properly to maintain a regular life while preparing for the worst events is an ongoing process.

  • Reloading is a good way to help preppers cut cost and spare resources.
  • Reloading greatly improves consistency and uniformity in the loaded cartridges.

Hand-loading can definitely help with increasing accuracy over the modest distances of handgun ranges but the most dramatic improvements can be gained over the longer ranges usually shot with rifles. Some factory ammunition is very good. However, hand-loads will give the best and most accurate results over factory loaded ammunition. Much of the accuracy potential in a batch of hand-loads comes from consistency gained through precise attention to detail. With factory ammunition, there can easily be a 5% to 10% variation in muzzle velocity from shot to shot. A careful hand-loader can greatly reduce that variation in muzzle velocity, which will give a more consistent point of impact.

Reloaders can also adjust the overall length of the loaded cartridge by adjusting bullet seating depth to better match the specific weapon they are using. This will improve accuracy by reducing bullet jump (distance a bullet travels before engaging the rifling) and more closely aligning the bullet center with the bore axis when the rifling is engaged, resulting in a better spin and truer flight.

A careful reloader can more precisely align the bullet into the case, keeping the center of the bullet more closely on the axis of the weapon’s bore. The reloader is in control of every variable of the cartridge. The case lengths can be trimmed to exact specifications. Case mouths and crimping can be uniformed. Any possible variable can be minimized or eliminated to produce the most consistent ammunition, which all leads to better shot groups. Competitive shooters have long known that hand-loading is the way to get out the most accuracy from their weapons.

If a person is not shooting one of the more popular calibers, they may be disappointed with choices in factory available ammunition. Some of the lesser known, newly introduced, or very old calibers will not have enough choices of bullet styles and weights available in factory production ammunition. Some very capable cartridges are no longer offered in newly manufactured ammunition.

A reloader will still have the ability to produce ammunition for these discontinued calibers. Dies and cartridge cases can still be purchased for calibers that have been discontinued long ago. Handloading or reloading ammunition is a way to get around these limitations.

The combinations of components are limitless. Bullet weights and shapes can be chosen specifically for maximum efficiency for any given purpose. Different bullet tip shapes, ogives, and base configurations can be chosen to fit a rifle or load for greater accuracy, consistency, or function.

A person can load expanding bullets into cartridges for old surplus rifles that are generally only available in full metal jacket configuration, turning that old surplus rifle into a viable hunting weapon. Different propellants will burn with different rates and characteristics. This will affect muzzle velocity, consistency, and accuracy.

With so many possible combinations of bullets, propellants, primers, and cases, a person can tailor a specific load for any purpose. If the goal is to get maximum efficiency, maximum utility, maximum accuracy, or effectiveness over a wide range of shooting distances, reloaders can tailor ammunition to any purpose. The sky’s the limit on possible loadings.

One very important thing to anyone living the preparedness lifestyle is securing and maintaining an ammunition supply.

In recent years in the United States, we have experienced several ammunition shortages of varying degrees and durations. Everyone knows that is not a question of whether or not there will be another ammunition supply interruption but when the next big one is coming.

The author remembers a time when he would give no consideration to leaving the house with a firearm without any ammo thinking “I’ll just pick up some on the way to the shooting range.” It is getting better but not quite back to those days yet.

Certainly, anyone reading this article has not so distant memories of going to wally-world and seeing the ammo shelves empty. During the last ammo shortage, reloading components were still available for a time after all the ammo was off the shelves, allowing reloaders to stock up on components before the supply temporarily dried up.

Reloading components are easy to stock up on.

For example: at the time of writing this article Unique and Power Pistol powders were about $20 a pound. A person could load up around 1,150 rounds of 9mm ammo with one pound of these powders! Store a few pounds of powder and a person is set up to last through the ammo drought.

Another way for a reloader to cut cost and extend his or her ammo supply is to cast lead bullets. After the initial cost of equipment, money saved by casting bullets will quickly recover the startup costs. Additionally, lead could be gathered from alternative sources instead of buying it. This will allow the resourceful prepper to make lead bullets at no cost.

With some components in storage, the resourceful prepper can spend a little time in the evening reloading and replenishing his or her ammo supply when everyone else is scrounging for ammo or getting gouged by online price hikes.

So, it’s easy to see how reloading is another valuable tool in well-rounded preppers kit. Many people tend to feel rushed and overwhelmed when coming into the preparedness lifestyle. Along with marksmanship, martial arts, archery, fishing, hunting, farming, canning, tanning, mechanics, carpentry, communications, first aid, sewing, sanitation, and land navigation (just to get started) reloading seems like a ton to learn. However, persons reading this already have a great asset: motivation.

Everyone is different and learns differently. For some people, it will be very difficult to pick up a reloading manual and start off reloading without any issues. For most people, the easiest and fastest way to learn is to have a someone actually show them step by step how to do it. Unfortunately, unless someone already knows a friend or family member who reloads it can be difficult to connect with someone willing to teach. No one wants to deal with that grumpy old condescending jerk at the local gun shop or put up with the know it all attitude from gun show arm chair rangers.

This is why I’ve taken it upon myself to bring reloading to the preparedness community. I had no one to help me when I was learning reloading. It was frustrating. There is a whole new crowd of people who are either first time gun owners or have a general interest in firearms but feel isolated because they don’t have good resource people in their social circle. Often these persons are turned off to guns or discouraged because someone at a gun shop or gun show discouraged them or talked to them like they were stupid.

If a person is willing and motivated to learn, there is a wealth of resources available.


Other self-sufficiency and preparedness solutions recommended for you:

The Lost Ways (The vital self-sufficiency lessons our great grand-fathers left us)

Survival MD (Knowledge to survive any medical crisis situation)

Backyard Liberty (Liberal’s hidden agenda: more than just your guns…)

Alive After the Fall (Build yourself the only unlimited water source you’ll ever need)

The Lost ways II (4 Important Forgotten Skills used by our Ancestors that can help you in any crisis)

The Patriot Privacy Kit (Secure your privacy in just 10 simple steps)

With the interest in the preparedness lifestyle growing at an explosive rate, one important skill is often brushed aside: reloading ammunition. Often, persons embarking on their own personal prepping journey

When it comes to prepping, there is a lot of talk about what material needs we should have on hand. A bug-out bag, freeze-dried food, water, transportation, first-aid kit, weapons for protection and a place to bug-out to. The idea is to have the basic needs of food, water and shelter readily available. The problem is; when the SHTF not everyone gets to just go merrily about their way, to easily head out and get gone. In fact, it is quite likely that many of us will sustain significant injuries that need to be tended to. Whether it is ourselves, our loved ones, or the friends who will be with us, we will need to know how to take care of each others injuries and illnesses.

It’s official. This is now the prepper’s “go to book” saving them time and money on costly doctor visits. Details and how to get your copy here.

I am an Emergency Medicine Physician Assistant with more than 20 years of Emergency Room experience, the majority of it in Level I Trauma centers (where the most severe cases…crashes, gunshots, severe work injuries, falls from heights, etc. go). Prior to becoming a PA, I was an EMT. I have a great deal of experience dealing with trauma victims and worked in an ER where we saw multiple gunshots daily. I have lectured at several colleges in the Chicago area as well as being responsible for teaching EMT, Physician Assistant, Medical and Podiatry students. I have also been an instructor for the American Red Cross teaching First Aid, CPR and Advanced Cardiac Life Support (ACLS) classes.

There is a lot of information out there about what makes up a good medical kit for your bug-out bag. Everything you need can be either assembled by you or purchased as anyone of a variety of pre-stocked kits. While the kit you have with you when you bug out is obviously important, it is also completely useless if you have not taken the time to learn how to use it. The truth is you can stop most bleeding with direct pressure. Sometimes you need a torn shirt, some duct tape and a pair of trauma scissors. You don’t have to be MacGyver to do it. You do need proper training.

Pamela Rauseo, 37, performs CPR on her nephew, 5-month-old Sebastian de la Cruz, after pulling her SUV to the side of the road. The baby was rushed to Jackson Memorial Hospital, where he is reportedly doing OK.

That said; EVERYONE who expects to deal with the aftermath of when the SHTF needs to know basic CPR and at least basic Trauma First Aid. That means taking classes and practicing what you learn. I can tell you stories about people attempting to administer first aid who had no training, but I won’t. Suffice it to say the outcomes were less than desirable.

The Doomsday Book Of Medicine – What To Do When There’s No Doctor Or Medicine Around

Let’s think about some injuries you can expect in the woods, hiking or running to find cover. Or for that matter, just being in a place where help is not going to come anytime soon. Falls are very common and can result in anything from a scrape to sprains to more serious injuries like fractures and head injuries. So ask yourself; do I really know how to treat a sprain? What about a fracture? Do I know how to stop bleeding and properly clean a wound? Have I ever done those things? Would I be able to actually do the job the right way should I need to? What if it was something life threatening? Could I save a person’s life?

If the answer to any of the above is NO, then you can have all the gear in the world at the ready, but YOU are not ready to bug-out!

I’m going to give an example of injury event that can be a tragedy if you are not properly trained to treat it. Remember, this is about knowing: both what TO do and what NOT TO do.

You and your companion are moving quickly through a heavily wooded area and your companion falls. When you reach them, you see a branch has impaled their arm. They are essentially stuck to a tree because of a branch sticking all the way through their arm. Your companion is in shock and not even aware of the extent of the injury. They are confused. There is blood coming from their arm and also from a gash on the right side of their head which is bleeding profusely. You think you see bone exposed through the head laceration and it seems that one of their legs has something wrong. Closer examination shows you that the ankle is sitting at a strange angle. What do you do now?

If you are like most people, you freak out, try to compose yourself so you don’t freak out your companion, get really pale and nearly pass out and then reach for your cellphone to call 911. Oops, no connectivity, so no help coming. So what now? The first aid kit! You have a first aid kit with a manual in it to walk you through caring for these injuries. You dig out the kit, open and it and check the book only to find it’s great for small cuts and bruises and simple things, but it has nothing remotely close to what you’re dealing with now.

Suddenly, you realize that maybe it wasn’t such a good idea to cancel that first aid class you had signed up for but decided you were too busy/tired to take. Besides, someone else will know what to do or I’ll call 911 anyway, I’ll never need to use it.

WOW! Talk about contrary to prepper philosophy. Or is it? It would seem that Emergency Medical preparedness training is a no-brainer, but in reality, most prepper sites and stores that cater to preppers are focused on the medical equipment you need rather than the training required to use it.

So anyway, I can’t teach you the how to do it in this article. I can give you a good idea of what good, accurate care and treatment of this fall will require. And yes, you can look all these things up on the internet. However, unless you learn from a real, live person who can guide you and correct mistakes you will surely make as you learn, you are never going to be able to really address the problems this very real scenario depicts.

STOP, LOOK, and LISTEN.

The very first thing required in any trauma/accident situation is an evaluation of the site of the accident. Stop, take a breath and look at where you are about to go. Is it a safe place to enter? In the urban world this is akin to a Paramedic called to the scene of a gunshot victim. In that situation, the Paramedic cannot help the victim until the Police have arrived and determined that the Paramedic is safe from the danger of being shot herself when she goes to help. At that point the scene is declared “safe” and the Paramedics can get to work.

In the wilderness or woods, the dangers are different but still just as potentially deadly. Is the ground stable? Are there dangerous branches or rocks that could fall onto you as you make your way to your companion? Will you slip and fall as well if you attempt to help? Do you need to take time to tie off before going to the person? What about wildlife? Are you in danger of animal or insect attack when you go to help? Can you find a way to make the scene safe?

Only after you treat the area as if it were a busy street corner will you be safe. You have to STOP, LOOK, and LISTEN.

Once the scene is determined safe, or made safe the next thing is to get to the injured person and take stock of the situation by doing an initial survey of them. This is done by looking and speaking to them without touching them. Encouragement to stay still is recommended at this point. Usually saying “Hold on, try not to move, I’ll be right there,” is a good start.

Look carefully at the person and where they are lying. Do you see any blood? Where is it coming from? What about limb deformities? If so, which ones. Are there any objects that will cause difficulty in treating the injuries? Can they be cleared or do you need to find a way to work around them.

Now it’s time to your ABCDE’s: Airway/Head and Neck, Breathing, Circulation, Disability/Deformity, and Exposure assessment.

Airway: If the person is conscious and talking, then they have a clear airway, but they might have a neck injury which will require stabilization. In the case of any significant fall, or one with an accompanying head injury, be sure that the cervical (neck) spine is stabilized. If the person is unconscious or can’t talk, be sure that the airway is clear of obstruction before going further. Gently lowering the jaw while holding the forehead steady will allow you to see if anything is causing an obstruction. Look for broken teeth, blood, dirt or some foreign body causing an obstruction. Remove any obstruction you can see. Do not blindly probe their mouth. You could push an unseen object backward and cause an obstruction where none had previously existed.

Breathing: Is the person breathing on their own? If they can talk, they are breathing. Is there any reason to suspect a possible lung injury? Do they have any evidence of a chest injury that could have broken a rib? A broken rib can puncture a lung and lead to air in the chest collapsing the lung on that side. You can check this several ways. One is to watch the rise and fall of the chest and see if both sides rise equally. Another is to put your ear on one side of the chest, then the other and listen for breath sounds to be equal on both sides. If you notice that the trachea, the tube that runs down the middle of your neck, is pushed to one side; that is a clear sign of a lung injury. The best case scenario is that you have a stethoscope in your kit that will allow you to hear the actual breath sounds easily. If there is a lung injury, this is a true emergency and will need to be treated quickly, but that is a procedure that requires specialized training.

Circulation: Check for obvious bleeding, but also in the case of extremity injury, is there good blood flow to the far portions of the extremity? Is the color of distal (far) limb pink or pale/bluish? Is it warm to the touch or cool/cold? Pink and warm = good. Anything else indicates blocked blood flow which may be due to arterial injury or compression. Arterial injury needs repair soon. Compression can often be correct by adjusting the limb to an appropriate angle.

Disability/Deformity: Is neurologic function intact or are they confused, unable to answer questions or showing other signs of significant head injury? Are there limb deformities, obvious chest or facial depressions indicating broken bones? Depending on what you find, a variety of things may be needed from re-evaluation of the airway, to splinting or bandaging.

Exposure: How long has it been since the injury took place? Are they becoming chilled or hypothermic? Cold =shock. Putting a warm cover over an injured party ASAP is essential even in hot weather.

The important thing to do now is stay calm and determine what needs to be treated first. If there is copious bleeding indicating probable arterial involvement (this can also be characterized by blood that sprays with each pump of the heart) apply direct pressure and if necessary a tourniquet that can be tightened and released easily. If there is no major bleeding issue, then recheck the airway and breathing. If there is chest deformity and/or other evidence of a collapsed lung, that is the next thing to deal with unless there is now evidence of airway obstruction or the person is not breathing on their own. The former requires clearing the airway, the latter requires rescue breathing. The collapsed lung requires specialized training you can’t get from the internet or a book. Any other injuries can wait. Remember; the brain starts to die after 3 minutes without oxygen. Airway is first unless bleeding is so profuse that not stopping it would mean there would not be enough blood to circulate oxygen.

Back to our fall victim; we have bleeding, limb deformity, confusion and a fall. The fall means we have to have high suspicion of a neck injury and the confusion could be shock or it could indicate a more serious injury such as concussion or a brain bleed. We also have a penetrating injury which may have been an insult to a major artery. This person is seriously injured and qualifies as a trauma patient. Ideally, we would get this person stabilized and out of there ASAP, but that is not an option. Instead, we have to stabilize and create a sheltered space as close to where we area as possible so we can begin to treat the various injuries.

Assuming there are no immediate life threats (Excessive bleeding or collapsed lung/blocked airway) we begin by stabilizing the neck. A towel, shirt or thick cloth of some kind can be rolled and taped carefully in place to accomplish this. Next stabilize and splint any limb deformities so that we can move the victim with the least amount of discomfort to them. Continue to talk to them to assess their mental status. At this point, things get tricky…

People’s first instinct when presented with something sticking out of or through a body part is to remove it. STOP! Don’t do it! Not only is it exactly the wrong thing to do, it could quite possibly be the thing that kills the person. I know it is scary looking and seems like the danger comes from it being stuck in the person, but at this point the person is alive and has survived impalement. Leaving the object embedded is not dangerous at this point; it is actually the safest thing to do. As long as the object is left in place, it is acting to tamponade (stop) the bleeding. That is, it is putting pressure on any lacerated vessels and preventing any major bleeding. Yes there will be some oozing around the injury site, but it will be minimal as compared to what happens should the object be removed. NEVER REMOVE AN IMPALED OR IMBEDDED OBJECT FROM A PUNCTURE WOUND unless you have been trained to handle this procedure. This is another procedure that requires specialized training courses.

But what about infection, you ask? Yes, infection risk is high, but it is not a life threatening problem at this time. A neck injury or brain injury will need prior attention as will the bleeding from the head wound. Antibiotics are something you can give, but not at this time because the victim has a decreased mental status and it is not clear if they can swallow a pill without causing an airway obstruction or aspirating it into a lung.

For the time being, the safest and most efficacious thing to do is to cut both ends of the branch so that your companion can be maneuvered to the sheltered spot. Start with the end of the branch still attached to the tree and try to keep the arm as immobile as you can while doing so to minimize pain. You can then trim the protruding opposite side.

Don’t cut the ends short. Leave enough to be able to grasp both ends firmly to assist removal when it is time. Use your gauze or Ace wrap to secure the branch so that it moves as little as possible during transport to avoid causing undo pain.

Continue to monitor the ABC’s and mental status and address what need to be done ASAP. Once you have done as much as you can, find a way to get this person out of there and to an emergency care center as quickly as possible otherwise, they will likely not survive for very long.

This all started out as a fall but resulted in multiple injuries placing your companion in danger of dying. With the proper training, you could swing the odds much more in favor of a good outcome. So before you buy that cool medical kit, or put one together on your own, get out there and get trained. If you know someone who has been trained and can teach you the emergency survival techniques you’ll need, ask them to teach you. Meanwhile there are a multitude of courses in first aid, tactical lifesaving, wilderness emergency medicine, survival medicine and CPR. Don’t forget to look into classes that teach herbal remedies. Know what plants can ease pain or prevent infection, they may be the only medications you’ll have available.

So go out and get prepared. Learn.


Other self-sufficiency and preparedness solutions recommended for you:

The Lost Ways (The vital self-sufficiency lessons our great grand-fathers left us)

Survival MD (Knowledge to survive any medical crisis situation)

Backyard Liberty (Liberal’s hidden agenda: more than just your guns…)

Alive After the Fall (Build yourself the only unlimited water source you’ll ever need)

The Lost ways II (4 Important Forgotten Skills used by our Ancestors that can help you in any crisis)

The Patriot Privacy Kit (Secure your privacy in just 10 simple steps)

When it comes to prepping, there is a lot of talk about what material needs we should have on hand. A bug-out bag, freeze-dried food, water, transportation, first-aid kit, weapons

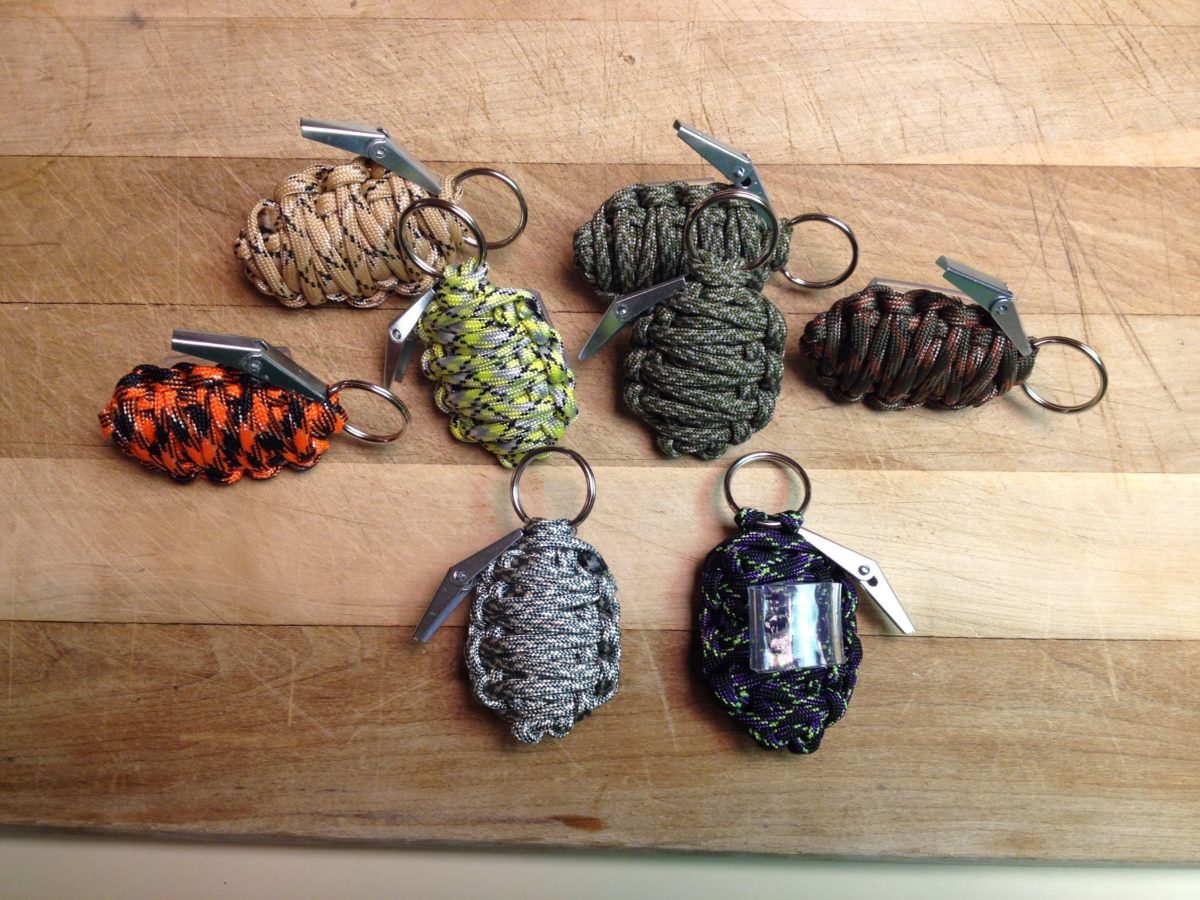
You can wipe that smile off your face because I ain’t going to teach you how to make a real grenade. Apart from the fact that they’re illegal, which means that I will be up to my eyeballs in SWAT the minute I hit the “publish” button, it’s not the topic of today’s article. Remember that scene from Rambo, when John unscrewed the cap of his knife to take out a piece of cloths? Well, that’s exactly what a paracord grenade is – a very small container that comes will all the items you will need to get out of shit hits the fan situation.

So, why is called a paracord grenade if it doesn’t explode? Well, maybe because it’s shaped like a grenade and because having one tied to your belt makes you a bad MF.

Anywho, in my opinion, every prepper should have at least one of these neat accessories. Yes, I am well aware of the fact that your bug out bag has everything you will never need, but you never know what could happen – maybe you’ll lose it, forget to take it or perhaps you may be compelled to abandon it in order to run faster. So, without further ado, here’s how to make your first paracord grenade.

Materials required

For this project, you will need the following items:

  • Survival items of choice. I packed an emergency blanket, a signal mirror, a magnesium rod, two pieces of paper, a small pencil, six Band-Aids, some fishing line, and a small fishing hook.
  • 550 paracords. For this project, I used black and red 550 paracords.
  • Rubber bands.
  • Scissors
  • Paracord fid (they look like regular knitting needles, but they’re used for paracords).
  • Mini carabiner.
  • Aluminum foil.

All done gathering your supplies? Good! Here’s how to make your paracord grenade.

Step-by-step paracord grenade

Step 1. Place some aluminum foil on your work table. Use a knife or a pair of scissors to cut the excess foil.

Step 2. Place your survival items in the center of the tin foil.

Step 3. Fold edges as to create a grenade-shaped package.

Step 4. Tie the black and red paracords to the small carabiner. To ensure that both paracords will be wrapped tightly around the package, use a Larks Head Knot for both of them. If you don’t know how to make this type of knot, check out the video below.

Step 5. Place the carabiner on top of your package. Right now, the red paracord should go on the left of your package, while the black one should run along the right edge of your package.

Step 6. Secure paracords to package by applying two rubber bands right below the mini carabiner.

Step 7. Tie the red and black paracords ends at the bottom of your package. For this, you will need to use a square knot. If you don’t have any clue on how to do that, check out the video below.

Step 8. It’s now time to make the first knot. Now, take the paracord piece on the left side and make an S shape right below the package.

Step 9. Grab the end of the left paracord and get it through the loop that’s on the left side.

Step 10. Now pull until there’s no more slack. Leave the loop on your right side for the time being.

Step 11. To close the loop on your left side, you will need to grab and pull the upper part of the loop that on your right side.

Step 12. Now you can pull the upper part of your right loop to close the left one.

Step 13. To cover the rest of the package’s surface with black paracord, make several Solomon knots. If you don’t know how to do them, watch the video below.

Step 14. Once the entire surface is covered, start the second pass using your red paracord. Follow the steps above to add another layer of paracord. When you’re done, use a square knot to secure the red paracord to the mini carabiner.

Step 15. Attach the paracord grenade to your belt or bug out bag, and you’re done.

Additional considerations on the paracord grenade

Keep in mind that the paracord grenade can be used only once – just like a regular grenade. If you run into trouble, undo the knots, take out the items inside, and save the paracords for later use. I wouldn’t recommend attempting to make a paracord grenade in the field because it’s a time-consuming process.

Now, if the above-mentioned steps seem too difficult, you can use one type of paracord instead of two. The process is the same: start with a square knot at the base of the mini carabiner, Solomon knots all around, and finish up with another square one.

As far as the contents of the paracord grenade are concerned, you’re free to add or remove items. When I first did this project, I used the same items as John Rambo. One thing I forgot to add was a firestarter. Of course, the magnesium rod is important, but you can also try to add things like a bit of char cloth wrapped around in plastic or even a wad of steel wool. Think of it this way: the paracord grenade mirrors the prepper’s personality. Your bug out bag contains all items needed in the field, but this small container should pack only those items you can do without.

Another thing to keep in mind is to add some sort of protection for sharp or pointy items. For instance, if you want to pack a pocket knife or fishing hooks, wrap them in some tissue paper or cloth before putting them inside the package. If you want to weatherproof your package, place your items inside some plastic wrap first before packing them in aluminum foil. You may also want to add some dental floss in case the paracord is too big.

That’s basically it on how to create a paracord grenade. What’s your take on my little DIY? Hit the comments section and let me know.

You can wipe that smile off your face because I ain’t going to teach you how to make a real grenade. Apart from the fact that they’re illegal, which means

Grow more food next year with these 5 fall gardening tips, yes please. These tips apply if you are doing raised garden beds, container gardening, regular in the ground gardening, or any type of growing your own food, aka, universal no matter where or how you’re growing.

Learn how to analyze this year’s garden for better and improved crops and harvest next year. You ready?

This book teaches you everything from the soil up. Details HERE.

This is an unusual year in that we have not had our first killing frost yet, so we’re still bringing in some things where normally the harvest would be completely done, but for the majority of the garden we are in definite fall mode, moving into winter.

What is a killing frost?

A killing frost is when you get a really good, deep frost that kills off all of your warm weather plants. I mean, everything is obliterated by this frost, so all of your summer squash, tomatoes and such.

***Note with tomatoes: If you are planning on canning your tomatoes, and you know a killing frost is coming, you need to harvest those tomatoes before they go through a killing frost. If tomatoes are left on the vine and they are killed, it lowers their acidity level to that of unsafe for canning.

Prior to the killing frost, we’re still bringing in tomatoes from the greenhouse, and we still have a few straggler zucchinis coming on in. We’re waiting for that first killing frost before harvesting our grapes and Brussel sprouts, because that brings out the best flavor in both of these crops.

Prepare your garden for winter

1.  Fall Garden clean up and winter soil amendments

One of the first things we do when it comes to our fall garden prep is to make sure that we do a really good cleanup.

  • Get rid of the old stuff that’s dying out and isn’t going to be producing anymore.  You don’t want to leave any diseased plants behind over winter to further infect your soil, or to breed disease.
  • Do soil amending after you’ve cleaned up and where you don’t have any winter crops going in.

2.  Make notes of your harvest

Take notes if you need to increase, decrease, stay the same.  This is where I look at the crops that we’ve grown based upon what we’re eating now, because with over 19 plus years of growing my own garden for our family, it has definitely changed over time.

We use a lot more of some things now than we ever did before, and vice versa. It’s always important for us to look at what we’re doing and using now, and then plan out next year’s garden and crops based on that.

For example, I didn’t used to use as much green bell pepper in my cooking, but lately, I’ve been just tossing them into some of our soups and stews, and we really like the flavor. I need to increase our bell pepper plants. We did not have enough this year for me to preserve very many.  The plants that I did have produced quite prolifically, I just needed more volume.

On the flip side, I planted quite a few jalapenos. I use jalapenos sometimes when I make enchiladas, and when making home-canned salsa.  My husband loves hot and spicy, so he will do candied jalapenos, but he’s the only one that eats those.  We didn’t use near the amount of jalapenos, so I over planted.

I can decrease my jalapeno crops and increase the bell peppers, I’m making note of that for next year.

LOOK AT WHAT YOU PLANTED, HOW MUCH THOSE PLANTS PRODUCED, AND THEN DECIDE WHAT, IF ANY, CHANGES YOU NEED TO MAKE FOR NEXT YEAR.  DO I NEED TO INCREASE, DECREASE, OR KEEP IT THE SAME?

When it comes to seed starting time, and planting the garden, I use those notes and then base calculations off of that.  My goal is to not just have fresh eating, but to take that produce and preserve it to last us the entire year, until the next growing season.

Now is a really good time of year when you’re coming fresh off the harvest and it’s all right there in your mind, make these notes, and then use them when it comes closer to seed starting, and further in the year. Having these notes handy now expedites the process faster for you moving forward.

3.  Notes on how the harvest went down

Make any notes on if any plants did not do good, or you had specific pests, or diseases, in order to get those researched and fixed for next year if possible.

If you had any crops that were suffering from disease, if you had a lot of blossom-end rot, fungal disease, or blight, then you’re going to want to look at amending your soil and seeing what it could be deficient in. Make notes of certain crops right now, because like I said, it’s fresh.

If you had crops that really didn’t produce how you wanted to, or disease or pests wiped them out, make some notes. Quick notes on what happened, and then you have at least a few months this time of year to work on that.  Do more research and see what you need to do and when in order to fix those problems.

Look back on the harvest and determine if maybe you could have done some more succession planting, or if you should have. What do I mean by that?

With our extended growing season, which I said is a little bit unusual for us to be this far into the year without that killing frost, if I had planted some additional zucchini and cucumber plants about two to three weeks after the first plants that I put in, then I would still be having a lot larger harvest on those second planting plants, because our growing season was extended.

If you find that you planted all of your plants at one time, and that they were spent before the growing season was over, you might want to look and see if maybe you should have planned a little bit more succession planting so that you had smaller harvests at one time, but longer into the year. This can be beneficial so that you don’t have this huge glut of everything all at once, and then you can take your time preserving, and harvesting it, longer and in smaller amounts.

4.  Evaluate the climate and growing season

Take notes on your climate.  If there’s been any extension or patterns over a long period of time, that may adjust your planting schedule. It may be you get to plant earlier, which means a longer growing season. Hallelujah, but it could be the opposite.

It may mean you need to plan on not putting in your garden quite so early because you keep getting wiped out with cold weather, or it struggles because it’s not quite warm enough.

Sometimes you can just have an off year. For example, this year as I’ve said, we are having an extremely long growing season which is not normal. This is the first year that we’ve had this, but if over the next three or four years our first frost is pushed back into October, and we don’t get it in September, then with that being repetitive, it starts to feel like it’s kind of the new norm.

I would not make changes based off a weather pattern for just one year. I’m talking multiple, multiple, multiple years in a row, but if it looks like it has changed and it’s going to stick around, then I would evaluate.

We’re going with our fifth really dry summer, and it’s pretty much a holding pattern now.  So knowing that, I am not keeping peppers, and my heat loving things like basil, in the greenhouse anymore, with the exception of my tomatoes to avoid blight.

I do still look at the weather, and I’m cautious with putting out my stuff too early, but that’s been the pattern five years in a row.  I still keep an eye on the forecasts. On what is predicted and go by that each year. But you may notice a change in your area and should adjust your planting accordingly.

5. Take note where everything was planted this year

Then lastly, take note of where everything was in order to practice crop rotation for next year’s planting.  If it’s still visible, take a picture with your phone. You’ve got it on there, so then when you go to plant this coming spring, you know where you need to practice your crop rotation. If you already did it in the springtime, then you don’t need to worry about it now, but for those of you who forgot, or you just didn’t know, now is a good time to do that if you didn’t do it earlier.


Other self-sufficiency and preparedness solutions recommended for you:

The Lost Ways (The vital self-sufficiency lessons our great grand-fathers left us)

Survival MD (Knowledge to survive any medical crisis situation)

Backyard Liberty (Liberal’s hidden agenda: more than just your guns…)

Alive After the Fall (Build yourself the only unlimited water source you’ll ever need)

The Lost ways II (4 Important Forgotten Skills used by our Ancestors that can help you in any crisis)

The Patriot Privacy Kit (Secure your privacy in just 10 simple steps)

Grow more food next year with these 5 fall gardening tips, yes please. These tips apply if you are doing raised garden beds, container gardening, regular in the ground gardening,

For some minutes after this fancy possessed me, I remained without motion. And why? I could not summon the courage to move. I dared not make the effort which was to satisfy me of my fate — and yet there was something at my heart which whispered me it was sure. Despair — such as no other species of wretchedness ever calls into being — despair alone urged me, after long irresolution, to uplift the heavy lids of my eyes. I uplifted them. It was dark — all dark. I knew that the fit was over. I knew that the crisis of my disorder had long passed. I knew that I had now fully recovered the use of my visual faculties — and yet it was dark — all dark — the intense and utter raylessness of the Night that endureth for evermore.    The Premature Burial, Edgar Allan Poe

Welcome, weary traveler! The journey’s been a long one and you rest. Sleep! Sleep! And awaken to find yourself trapped in a pine box. Deep silence apart from the thumping sound made by your heart – like a Mad Hatter racing past everyone to get front-row tickets to see the Rapture. Charming perspective, isn’t it?

Well, for us, it’s just a tall tale, a decrepit fable meant only to scare children or to make chicks jump into your arms when campfire ghost stories become too ghosty. However, for people living in the Victorian Age, it was a very distinct and frightening glimpse into the afterlife. Rumors of medical conditions that so perfectly mimicked the symptoms of death fueled the common folk’s fear, leading to all kinds of peculiar funeral practices.

Have you seen the Autopsy of Jane Doe? Great horror movie, by the way. You should definitely watch it if you like old-school horror flicks with lots of jumpscares. Anyway, there was this scene in the movie where a mortician explains to his apprentice the significance of attaching a small bell to the cadaver’s toe.

Won’t spoil the movie for you by quoting the doc, but I’m going to say this – that’s a very old and very common 19th-century medical practice to ensure that the deceased wasn’t interred while being alive. As I’ve mentioned, some conditions such as catalepsy mimic the symptoms of death.

With Medicine lacking the needs to detect faint life signs, some patients were declared dead even though they were very much alive. The bell attached to the toe was to make everyone aware that the soon-to-be-buried person still had life in him.  Historical records that toe bell was not the only peculiarity when it came to the mortal dread of being buried alive.

Affluent families commissioned intricate coffin which featured let’s say, emergency release switches. These levers or buttons were installed inside the coffin, probably in proximity to the deceased’s limbs.

As death spares neither the rich nor the poor, even the working class sought to outfit their loved ones’ final resting places with similar signaling devices. The most common was the bell mounted on the tombstone, which could be triggered by the deceased via a thin metal wire running through the ground.

Anyway, welcome again to the first part of my extreme survival series; a project which I have postponed for far too long. As you’ve probably guessed by now, the first article will be about how to escape being buried alive.

I know that with nowadays medical gadgets it’s next to impossible to second-guess the symptomatology associated with death, but it can happen (check out the story about the Spanish man who woke up during the autopsy). Now, without further ado, here’s what needs to be done in order to escape a coffin if you’ve been buried by mistake (or intentionally!).

Step 1. Assess the situation

Fear is only natural and waking up in utter darkness, surrounded by four wooden boards can make even a man with nerve made of steel to go nuts. Don’t do that! I know it’s hard to think about anything else in those moments, but screaming, kicking, crying, and obsessively scratching the inside of the lid will only force your lungs to consume more oxygen, not to mention the fact that you will more than likely end up hurting yourself.

Take a minute or two to compose yourself and assess the situation. Knock on the lid and listen – if you hear a hollow sound, it means that the coffin has yet to be placed underground; in which case, all you’ll need to do would be to kick open the lid. Doesn’t matter if haven’t had the chance of break open a door – with that much adrenaline coursing through your veins, you can probably kill a bull.

Now, in the event that you don’t hear a hollow sound, you should assume that the casket has been buried. There’s no reason to panic. Calmly, reach into your pockets and try to figure out what you have in them. I know that this sounds really sad, but people nowadays tend to bury their loved ones with some of their possessions – this could mean, well, anything: a small switchblade, a lighter, a smartphone, a tablet, heck, even a laptop.

Don’t even bother trying to call someone if you find a phone in your pockets – the signal won’t get through that far underground. However, you can use flash to check out the inside of the casket. Don’t forget about your breathing – even if all the odds are against you, panicking will only make you act irrationally.

Most caskets are made from flimsy materials, meaning that breaking open the lid would not be much of an issue. It’s the earth on top that must concern you at this point.

Step 2. Provide some sort of head protection

It’s obvious that you won’t have access to the tools you keep inside your B.O.B, but that doesn’t mean you can’t improvise. Bear in mind that breaking the coffin’s lid is the easy part. Having to deal with the earth will be quite challenging, but not impossible.

To spare yourself a chocking death once the earth starts pouring into the coffin, pull your T-shirt, shirt or park over your head (hands should not be in the sleeves). After doing that, use the sleeves to make a knot just above the head. Yes, I know it sounds awful and rather ineffective, but this simple trick will protect your head while preventing you from chugging dirt.

Step 3. Look for weak spots in the coffin.

If the unfortunate event happened very quickly and away from your family, you’re very likely to have been buried in a rectangular box. Those require little force to break since the lid’s held in place by a couple of nails. Still, if some funeral arrangements were observed, you could end up in one of those double-doored caskets. It doesn’t really matter, because all of them have weak spots – in the latter case it’s the gap where the two doors meet. That’s where you will need to strike.

However, before making any attempts, take a few moments to compose yourself; you’re alive, you’re still breathing, and you will get out of this no matter what. Free your mind of any menacing thoughts and focus only on the task at hand.

Step 4. Break the lid and start shovelling

When you’re ready, ensure that the shirt’s sleeves are secured, and, using all the force you can muster, kick the coffin’s lid. Hit it until earth begins to fall inside the coffin. Don’t panic when that happens. Push the falling earth on the sides.

Always keep your head and torso above the earth. Keep pushing and piling the dirt to the sides. You can guess how far you will need to pile by using your nose – if the air’s still stale and, well, earthy; it means you’ve still got a few feet to go. Again, keep breathing at a steady pace and don’t attempt to remove the ‘bag’ over your head no matter how uncomfortable you feel. As the earth piles inside the coffin, you’ll notice or rather feel less of the stuff falling on you.

Step 5. Get up on your feet, soldier!

Once the inside of the coffin starts feeling up, arch one of your feet, and plant the foot firmly on the coffin’s bottom. You’re nearly out! One more push and you’re free! Using that foot as support, muster all the strength you have left and stand up.

You’re one step away from freedom. It may be very hard at first, but once you’ve managed to raise your head and torso above lid level, standing up will be very easy. At this point, all you’ll need to do would be to push away the remaining earth and to crawl out of your grave. Congratulations! You’ve just survived one of the worst fates anyone can imagine.

Final Thoughts

I should emphasize the fact that even with our astounding progress in life signs detection, errors can sometimes occur. Nobody’s to blame for this. It’s just the fact that your body has decided to slow all body functions to the point where detection becomes impossible. Still, one cannot ignore the fact that someone could have done that to you on purpose. Yes, I know that it’s a rather disconcerting thought, but, then again, the world is a crazy place.

Once you’ve got out of the grave, head immediately to the nearest hospital for a full checkup. You should also find a way to notify the authorities. The chances of you being the target of an assault may be slim, but at this point anything is possible. One more thing before I go – emotional support. This kind of things stirs some serious shit inside your noggins.

Don’t even dare to assume that it’s over. Ever heard about PTSD? Yes, that awful conditions which afflict so many battle-hardened soldiers. Post-traumatic stress disorder doesn’t occur solely during an intense battle. Nope! According to the docs, you have more chances of experiencing PTSD-like symptoms after a car accident or going through a breakup, than on the battlefield.

So, after the good doc gives you a clean bill of health, do yourself a favor and go talk to the therapist about this experience.

What are your thoughts of being buried alive? Hit the comments section and let me know.


Other self-sufficiency and preparedness solutions recommended for you:

The Lost Ways (The vital self-sufficiency lessons our great grand-fathers left us)

Survival MD (Knowledge to survive any medical crisis situation)

Backyard Liberty (Liberal’s hidden agenda: more than just your guns…)

Alive After the Fall (Build yourself the only unlimited water source you’ll ever need)

The Lost ways II (4 Important Forgotten Skills used by our Ancestors that can help you in any crisis)

The Patriot Privacy Kit (Secure your privacy in just 10 simple steps)

For some minutes after this fancy possessed me, I remained without motion. And why? I could not summon the courage to move. I dared not make the effort which was

In a SHTF situation where you can’t stay in your own home, and moving in with a friend or relative is not an option, what will you do? If bugging out to the wilderness suddenly becomes your only option, will you survive? Probably not for very long, if you believe the experts. Nevertheless, if your survival plan doesn’t include a bug out to the forest option, it should, but coming up with a good plan might be more difficult that you think.

For starters, do you have a reliable bug out vehicle? If your bug out plan has you escaping the city or suburbs in a modern vehicle, you may be in for an unpleasant surprise. Most modern vehicles won’t survive a strong EMP event. You may find yourself traveling on foot, away from a major metropolitan area, in search of food and water. But at least you won’t be alone. When food and water run out, millions of others will be traveling, mostly on foot, away from large centers of population. Even if you have a working vehicle, it may be useless, due to the gridlock created by people and disabled vehicles, all on the same escape routes. You may avoid some of that if you get away quickly, but will you? How much time will pass before you’re packed, and ready to go? Will the roads already be jammed by the time you depart? As time passes, the situation will get worse. Can you imagine what starving, desperate, people are capable of doing? I’m thinking “zombie apocalypse”.

My Bug-out Plan

Understanding the predicament, I don’t have to look any farther than my garage for a solution. My bug out plan doesn’t depend on a full-size vehicle, but I won’t be bugging out on foot either. I suspect that I wouldn’t last very long, with just the items I can carry on my back. Instead, I’ve decided to use my garden tractor (riding lawn mower), pulling a small trailer. Don’t laugh, it’s more practical than it may seem.

  • It would probably survive an EMP event.
  • It can travel off-road, avoiding traffic jams and bypassing bottlenecks.
  • It can pull a small trailer, loaded with essential supplies.
  • I can avoid people who may want to harm me, or take what I have.
  • I’ll have a 360 degree view, helpful for situational awareness, and if I have to use a firearm.
  • I’ll be able to travel to places inaccessible by car, which in theory will make me more secure.
  • My getaway will be at a whopping 6 miles per hour, maximum, but it beats walking.

There are drawbacks, of course. I’ll have no shelter from the elements, as I would in a car or truck. My traveling companion will have to ride in the trailer, or walk along side. Perhaps the biggest drawback is that I won’t be able to outrun anyone. For that reason, it’s important to pack and leave quickly, before things get out of hand.

The bug out location I’ve selected is far from the densely populated area where I now live, and is an area that provides opportunities for hunting, fishing, growing crops, and is near a fresh water source. I know what some of you are thinking… A city boy, living in the wilderness, wouldn’t last long. You might be right, but what choice do I have? Since I don’t own a wilderness cabin, or even a camper, how can I best prepare for a situation that forces me to abandon my home? For starters, I’ve compiled a virtual library of information that will be helpful in such a situation. I’ve also purchased some basic survival equipment and supplies. I practice the skills I’ve learned, and I’m a pretty good gardener.

While living in the wild will be a challenge, I first have to arrive there safely. Traveling with a fully loaded trailer screams “Hey look at me! I have food, water, and survival gear!” How do I get to my destination without being robbed or killed? I see two main problems:

  1. Starving, thirsty, desperate people won’t hesitate to attack me and take what I have.
  2. Those already settled in, near my bug out location, won’t appreciate the competition for limited resources.

To make matters worse, the noise of the tractor will announce my presence. In either case, one bullet could ruin my day.

Bugging out is risky, but I’m thinking of a scenario where I have no choice. I’ll improve my odds somewhat by getting away quickly, before anarchy is commonplace. To do that, all of my things need to be organized, and ready to toss into the trailer. This includes items that are protected from EMP’s. The list that I’ve already prepared helps to make sure that I don’t forget anything.

As I travel, I expect to cross paths with others who are also bugging out. The majority of the people I encounter will be just like me, trying to survive. Many of them will be traveling on-foot, with very limited supplies. My survival odds will improve if I join a like-minded group of travelers, or convince others to travel with me. I’ll bring extra food to share. Travelling with a well-fed and motivated group should help to keep the criminal element away. I’m not trying to be a group leader, or a macho tough-guy, but just one of the many people fleeing an area that has become unsafe. Being armed, and avoiding likely trouble spots, will also help.

With luck, I’ll make it to my bug out spot, probably with a number of other people who’ll soon become my neighbors. As I settle in, I’ll begin to implement a plan that might be described as “Living in the Wilderness, but Not Wilderness Living”. After food and water, my top priority will be the construction of a substantial shelter. As Pat Henry put it “your tent offers zero protection from a sharp stick, much less bullets.” I’ll use modern tools and technology to deal with challenges that come with living in the wild. I’ll have lights when and where I need them, and I’ll use sensors to alert me to intruders, and garden pests. Some of the pests that would otherwise be a threat to my garden, will become food, if I can kill or capture them. My garden tractor-trailer combination will continue to be an asset, as long as gasoline is available. I’ll be able to haul whatever useful items I can find, including building materials, firewood, and water. It’s likely that some of my traveling companions will become the nucleus of a survival group, and the benefits of belonging to a group are many. One could be hunting or fishing, while another guards the supplies and equipment. One could be on the lookout for intruders, while another prepares food, or tends to a garden. One could sleep, while another stands guard. Portable two-way radio equipment, as well as low-tech devices, such as whistles, may be used to alert group members to emerging threats.

My trailer is approximately 48” by 30”. If stacked 30” high, I’ll have about 25 square feet of cargo space. My supplies will be covered with a tarp, protected from rain and wind.

I’m using 3 plastic containers. One is for food, another for shelter, and the third for cooking, cleaning, hygiene, health, and miscellaneous supplies. Those containers account for about 15 square feet, and mine will be similar, leaving me with at least 10 additional square feet. Because I’m thinking long-term survival, I’ll pack clothes and bedding for all weather conditions. I’ll use the additional space for items that will help me survive in the long-run. Included will be the components of a small solar electric system that can be easily reassembled at my destination. I’ll have lights, and a variety of electrical devices that can be powered by the solar electric system. Sensitive electrical items are pre-packed, wrapped in aluminum foil and insulated from each other, which is the equivalent of a Faraday Cage. The ability to use power tools will make construction of a shelter much easier.

Because of the trailer’s small size, I look for ways to conserve precious space. I won’t bring bulky items, like table lamps. Instead, I’ve assembled small and simple light fixtures. I won’t bring a pedestal fan, or even a tabletop fan. Instead, I’ll use small muffin fans, similar to those you find in computers. I’ll mount them on frames, made from pvc tubing, that can be disassembled, saving space when packing. I’ll make good use of paracord, rope, and plastic sheeting. I need not carry books, and volumes of survival literature, because all of those things have been scanned, and stored on a KindleFire. Likewise, carrying a large quantity of water is not practical. I don’t have space for large containers. Instead, I’ll pack several collapsible water containers. I won’t bring a propane stove, or even a charcoal grill, but I will bring a grill top. I’ll assemble a fire pit with stones that I’ll find at my bug out location, and finish it off with the grill top. I’ll pack my cast iron Dutch oven, overlooking my concern for weight, just this one time. Once settled in, my tractor-trailer’s ability to haul things contributes to my bartering opportunities.

The bug out location I’ve selected will be a 7 to 8 hour trip by garden tractor. I have to make sure I have enough gasoline, but my preliminary estimates indicate that I can make it with just the capacity of a full tank, and a full 2 ½ gallon container. I’ll also carry a tube for siphoning, in the event I’ll need to do that. I’ll be carrying a shovel and an axe, helpful if I get stuck or need to clear a path, and very useful when I’ve settled in at my bug out location.

I’ll have the ability to collect and store rainwater. I’ll be prepared to filter water, and boil it, making it safe for drinking. My bug out supplies will include heirloom and hybrid seeds for food crops. Traveling light is an important consideration, and for that reason I’ve created a separate list of items to acquire, once I’m settled in at my bug out location. For the most part, those additional items will make life more comfortable, but are not essential for survival.

Once I’ve settled in at my bug out destination, my first priority will be a sustainable source of food. I’ll start a garden of course, but I’ll need to have other food while I’m waiting for my crops to mature. My bug out supplies include a live trap for small animals, but it is safe to assume that others will quickly decimate local population of rabbits, squirrels, and other edible creatures. My bug out location is near a large lake, and I suspect that I’ll be able to catch fish.

In an effort to avoid bland meals, I’ll pack items such as olive oil, spices, sauces, flour, and corn meal. My list for shelter is similar to Pat’s, but I’ve added an air mattress for additional comfort. I’ll have construction tools, and plan to make tent-living a very temporary arrangement. My list for cooking, cleaning, and hygiene is different from Pat’s list, because I put more emphasis on long-term survival. While I will pack items such as soap and dish detergent, I’ll place a high priority on reusable items, such as wash cloths and towels. Instead of a propane stove, I’ll pack a rocket-stove, and reusable cooking supplies. I’ll have a solar-heated camp shower, wash basins, and collapsible containers for water. I’ll have a good first-aid kit, a variety of medicine, alcohol, bug spray, toilet paper, and other items for health and hygiene. One container, perhaps a backpack, will be for items that need to be easily and quickly accessible. Items in this container will include a flashlight, weapons, maps, a compass, binoculars, cash, a lighter, a KindleFire, snacks, a pocket knife, basic tools, and a rain parka.

My “electronics” box will include all of the components for a small solar electric system, except the solar panels and batteries. It will include test equipment, extension cords, power strips, lights and light fixtures, fans, portable alarms, an AM/FM radio, and a GPS device.

Items that will be packed separately include tools, solar panels (mounted on a hinged aluminum framework), batteries (for the solar electric system), weapons and ammo, live trap, gasoline container, tackle box with fishing supplies, shovel, ax, rake, grill top, and a jump starter (includes tire pump and light). I’ll have the tools and supplies needed to make repairs to the tractor and trailer tires.

After I’ve set up camp I’ll be on the lookout for anything that might be useful, such as a propane stove with a full propane tank, table and chairs, buckets, tools, food and water. If I can find them, I’ll increase my stockpile of disposable items, such as paper towels, zip-lock bags, trash bags, aluminum foil, toilet paper, soap, dish detergent, laundry detergent, insect repellent, toothpaste, shaving cream, alcohol, and other items for health and hygiene. I’ll also stock up on firewood and tinder.

Perhaps the most important item I hope to acquire after I’ve settled in, is an energy-efficient chest freezer. In the event that I have success hunting, fishing, trapping, or growing crops, the freezer will provide an easy way to preserve food. Not needing to find and process food everyday will give me opportunities to rest, and attend to other aspects of survival. The smallest of the chest freezers on the market today are very energy-efficient, meaning that they can be powered by a small off-grid solar electric system. According to the energy-guide tag, 600 watt-hours per day is required for a 5 cubic foot chest freezer. I can get that much power with just 2- 100 watt solar panels, and 2 – 100ah batteries. My system will be a little larger than that, to accommodate the other things needing power, and for extended periods of cloud cover.

Cold Weather Considerations:

Where I live, the months of December through February can include some very cold and nasty weather. Extreme weather may force me to deal with the danger, and postpone bugging out. I may instead choose to make my home as secure as possible, and prepare to defend it. Those traveling through my neighborhood would also be susceptible to extreme weather, perhaps giving me a bit of an advantage. If I’ve already bugged out, and set up camp in advance of cold weather, preparing to survive cold conditions will be a high priority. This includes the construction of a substantial shelter, and a way to provide heat.

The Long Run:

In the event that federal and state government no longer exist, law and order will be maintained at a local level, by an assembly of the people of that area. A protective force can be created, and guard duties shared. Efficiency can be realized in areas such as food production and cooking. Those with special skills will be highly revered, and will serve the entire community. Bartering will be commonplace.

I don’t expect my wilderness life to last more than a couple of years. In a serious SHTF situation, many people will die off from lack of food, or simply from the inability to survive without the conveniences we take for granted today. If that happens, there will be plenty of empty homes to move into. I would choose one with a fenced back yard, to help protect my food source. Most of my food will come from my garden, and perhaps some fish, chicken and rabbit.

Summary:

If I can’t safely stay in my own home, which is at the edge of a big city, or move in with someone else, far from a densely populated area, moving to the forest may be my only option. I need to be ready to bug out quickly and travel safely. I’ll need to bring the appropriate equipment and supplies. And finally, I need to be able to survive wilderness living. I’ll have to depend upon my hunting, trapping, fishing, and gardening skills. My prepping includes the equipment and knowledge to do those things. I don’t expect it to be easy. The competition for limited resources will be fierce, and not everyone will be honest and ethical. Still, I plan for a comfort level far exceeding that of tent camping. I applaud those who can live in the forest with only a knife and the clothes on their back, but I can’t do that.

Perhaps the best things I have are a list, and a plan. I don’t depend upon a modern vehicle, since impassable roads, or an EMP event, could stop me dead in my tracks. My pack-out list helps to ensure that I’ll bring the essentials, while not being overloaded with items I can do without. My extensive database of information will be useful in the event of a medical emergency, or other unexpected circumstances. Moving quickly, with a destination in mind, might prevent me from becoming a victim of the lawlessness that would likely follow a SHTF situation. Getting to my destination quickly means that I’ll also be able to “scavenge” more quickly than some, and acquire useful stuff before it’s all gone. Banding together with trust-worthy, like-minded others may offer the best odds for survival.

We thank John D for his contribution.


Other self-sufficiency and preparedness solutions recommended for you:

The Lost Ways (The vital self-sufficiency lessons our great grand-fathers left us)

Survival MD (Knowledge to survive any medical crisis situation)

Backyard Liberty (Liberal’s hidden agenda: more than just your guns…)

Alive After the Fall (Build yourself the only unlimited water source you’ll ever need)

The Lost ways II (4 Important Forgotten Skills used by our Ancestors that can help you in any crisis)

The Patriot Privacy Kit (Secure your privacy in just 10 simple steps)

For starters, do you have a reliable bug out vehicle? If your bug out plan has you escaping the city or suburbs in a modern vehicle, you may be