How to Make a Horseshoe Backpack
If I could, I would write an ode to the bug out bag.
A couple of days ago, I was wondering what the H would I do if that B.O.B would go missing or worse, gets damaged beyond repair? Well, in the world of prepping, a broken backpack means nothing as long as you have a couple of materials at the ready.
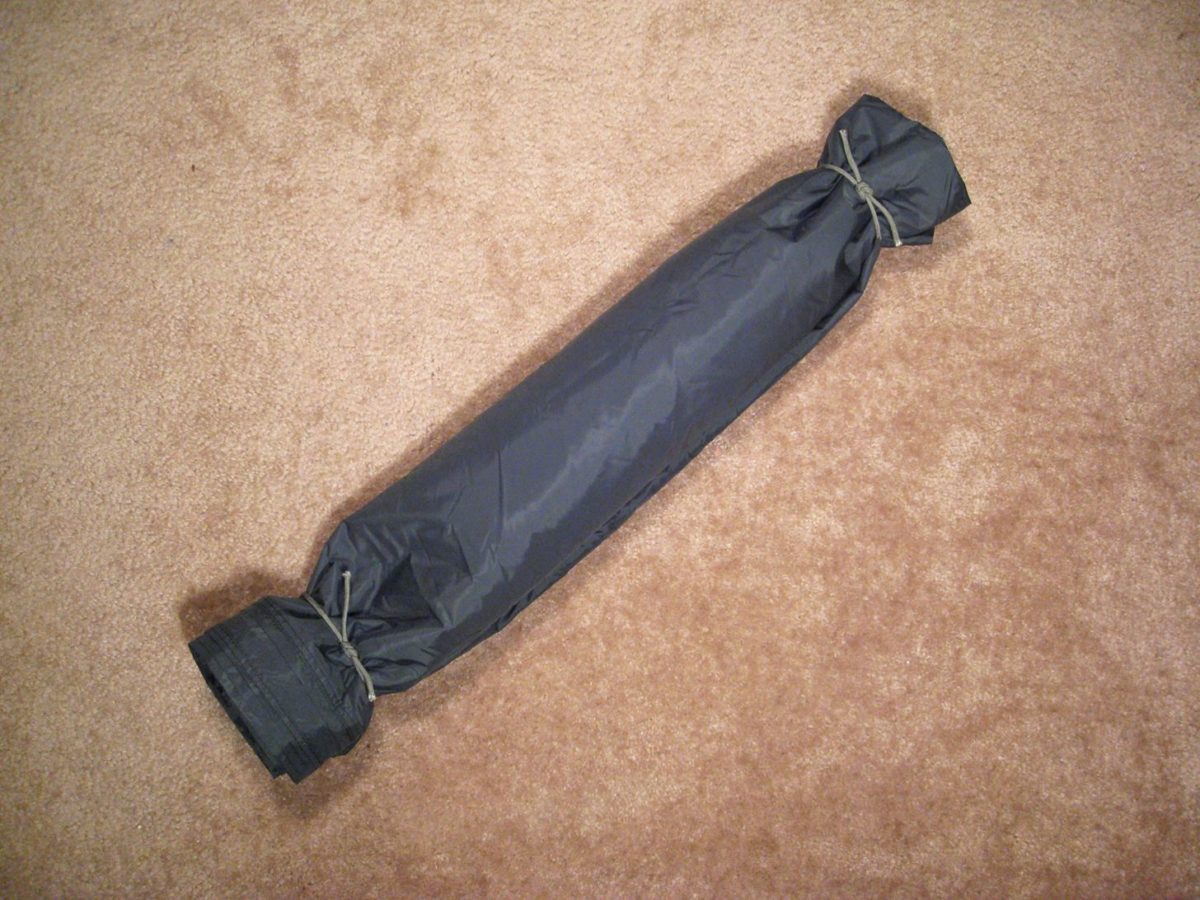
In today’s article, I’m going to show you a quick easy way to craft your own backpack. Apparently, this type of carrier is called a horseshoe rucksack although I cannot see any resemblance between this thing and the metal hoop that goes around the horse’s hoof.
Anyway, from a historical perspective, the horseshoe backpack was, let’s say, invented around the time of Napoleon’s military campaigns. This kind of rucksack was used by foot soldiers to carry stuff like toiletries, spare ammo, paintings or valuables.
Well, I have to admit that given its aspect, the horseshoe rucksack goes above and beyond the call of duty – it’s incredibly light, can be used to store any number of objects and, most importantly, it’s incredibly resilient.
So, without further ado, here’s how you can craft your own horseshoe rucksack.
Materials required
For this project you will need the following items:
- Cordage (works with anything from 550 paracords to string and dental floss).
- Heavy poncho (you can replace with light rain poncho or a rectangular piece of the tarp).
- Everything that goes inside your B.O.B or scavenged items.
Yup, it’s that simple. Soldiers didn’t like this type of rucksack for nothing. Imagine having to spend hours crafting an intricate backpack knowing that the sarge could give the “move out” order at any moment. All done gathering all the necessary gear? Great! Find yourself a quiet spot to piece together your horseshoe backpack and get to work.
How to assemble a horseshoe backpack
Step 1. Take out your heavy rain poncho\light rain poncho\tarp and set it on the ground.
Step 2. Fold it in the middle two times. You should end up with a rectangular piece. Don’t forget to tuck away the hood.
Step 3. Place your items on one side of the backpack. Arrange them in a straight line. If you have sharp or objects with jagged edges, wrap them in pieces of cloth to protect your tarp or poncho. Keep in mind that you’ll still need to use that for other purposes like water collection or shelter-crafting.
Step 4. When you’re done arranging the objects on the tarp\poncho, grab one side and start rolling it. Remember when you were little, and your mother asked you to roll the carpet? It’s the same thing. Be careful not to let any of the objects slip.
Step 5. After rolling the tarp\poncho, take some cordage, cut a small piece, and tie one of the ends. Don’t forget to make a tight knot. You wouldn’t want to lose the stuff inside the rucksack.
Step 6. Tie the other end of the poncho\tarp roll using a small piece of cordage.
Step 7. Cut two more pieces of string and make knots along the length. Now it’s time for the strap.
Step 8. Measure a piece of string and cut it with your survival knife or sharp rock. Take one end and tie it to the string attached to the upper part of your rucksack. Finally, tie the other end to the lower part, and you’re done. It’s adventure time!
Additional considerations on the horseshoe rucksack
Technically speaking, you can craft one of these backpacks from, well, anything you have on hand – a T-Shirt, a long piece of sterile gauze, a bedsheet or whatever. However, there is a good reason behind the use of a heavy rain poncho.
First of all, by default, ponchos are waterproof or, at least, it should be if it doesn’t have any holes in it. Second, ponchos, especially army-grade ones are resistant to tearing, breaking, and warping. So, you can be sure that everything inside will be dry and very well protected.
The old horseshoe backpack has only a single caveat: it’s not suitable for carrying heavier items. If you bug out back contains stuff like AM\FM radio, personal emergency buoy, extra smartphones or whatever, you will need to find other ways to carry them with you – I would recommend a pouch made from a piece of cordage and a piece of cloth.
There’s a big difference between hiking with a regular backpack and using the horseshoe – in the first case, the overall design distributes weight equally. The same thing cannot be said about our horseshoe backpack. I should also mention the fact that hiking with that thing on for more than four hours is totally unadvisable.
If the lack of weight balance is not a major turnoff, then the strap tearing into your shoulder is. Still, I wouldn’t consider this a caveat since you can easily fix it by adding some kind of padding to the string segment resting on your shoulder. If you still have your old backpack, use your knife to cut a piece of strap. Aim for the one with extra padding. Place it over your shoulder, and that’s it!
When tying the horseshoe rucksack, I would advise you to be extra careful around the dangling end. For extra safety, tie another piece of cordage around it.
Other Options?
In case you have to hike for a longer amount of time, the horseshoe backpack’s not exactly the best option.
For this, I would recommend building a so-called cage backpack. Instead of using your heavy poncho, construct a cage-like frame by stacking small pieces of wood. Secure them using your cordage of choice. Mount two string straps and that’s it. In addition, this type of backpack is quite useful, especially if you’re forced to hunt – you can’t really fit the game, no matter how small, inside the horseshow.
Congrats! You now know how to make a simple backpack. What’s your take on this? Hit the comments section and let me know.
Other Self-sufficiency and Preparedness solutions recommended for you:
The Lost Ways (The vital self-sufficiency lessons our great grand-fathers left us)
Survival MD (Knowledge to survive any medical crisis situation)
Backyard Liberty (Liberal’s hidden agenda: more than just your guns…)
Alive After the Fall (Build yourself the only unlimited water source you’ll ever need)
The Lost ways II (4 Important Forgotten Skills used by our Ancestors that can help you in any crisis)
The Patriot Privacy Kit (Secure your privacy in just 10 simple steps)
Well, in the world of prepping, a broken backpack means nothing as long as you have a couple of materials at the ready.

