Over the years I’ve heard many people describe how they would prep if they won the Lottery.

The Big Survival Truck is usually the first thing mentioned, and it’s almost always a 4-wheel drive multi-ton with brawny winches fore and aft and full stealth capability. Then there’s the all-encompassing armory of truly first-class (and extremely expensive) firearms. Plus tons of ammunition, and a Band-Aid. And a 30,000-acre BOL in Montana with a 17-bedroom underground nuke-proof house and an Olympic-size Jacuzzi—all solar-powered, of course.

Unfortunately, most of those people don’t do very much prepping while they’re waiting for their winning numbers to pop up. They just don’t have the money.

In today’s troubled economy, money goes fast, but it doesn’t go far. The average person doesn’t have enough money in the bank to carry them (and their family) through one month of lost income, much less a full-scale disaster. A person should always try to have some kind of emergency reserve. Not having emergency funds doesn’t leave much room for prepping.

So what can a poor penny-pinched Prepper possibly do?

Simple: Get four envelopes and label them Water, Food, Clothing, and Gear. Determine to use the contents of each only for its designated purpose. Then follow these three easy steps to fill them up with money:

Sell

Take a good look at everything you own. Then sell everything you don’t actually need and/or use except items of genuine sentimental value. Everybody needs two 9/16″ wrenches. But if you have three, you should sell one. Even if you can only get $0.50 for it. It may seem like a small thing—too little to be worth bothering with—but the average adult has about $2,500.00 worth of possessions they neither use nor need. Those are the things that should fund your first preps.

Sell everything that you don’t need or want to make money which could be used to purchase prepping supplies or simply build a nest-egg for harder times.

Auction the good stuff on the Internet, have a few yard sales, rent a stall at a flea market, advertise in the free Classifieds, and tell all your friends. Be persistent. Eventually, you’ll sell it all. Trust me on this: Somewhere, somebody desperately wants that three-headed elephant statue that someone must have given you because you’d never buy anything like that, especially if it cost money and you weren’t drunk. However much money this step makes, divide it equally into your four envelopes. (Water, Food, Clothing, and Gear)

Buy

Think outside the box and purchase wisely. Water, of course, should be your first concern. It’s far more critical than food. A person can last a month without eating, but after three days without water they’ve stopped lasting and started dying. The minimum water allowance should be 1 gallon per day, per person. Set 5 gallons per person as your first water goal, and pursue it with the cost of the container in mind. You can buy 3 gallons of “spring water” from the Wally Store for $5.78—but you shouldn’t.

Instead, collect freshly emptied 2-liter soda bottles, rinse them out, and fill them with food-grade water right out of the tap—at the rate of about $1.50 per 1,000 gallons. Price: $0.01, rounded up. Also collect every screw-top beer can you can get your hands on. Wash and rinse them thoroughly and then you can use them for storing water and many other needful things. Free cardboard boxes can be collected from supermarkets to store your water bottles neatly and to shift them fast if you ever have to bug out.

Don’t worry about purifying tap water that goes into clean containers. The chlorine that’s already in it will do that job for you automatically. Gradually work your way up to storing 30 gallons per family member, if you can. When you reach your water storage goal, empty the Water envelope into Buy/Sell.

Water should be the very first item you stock up on.

Food should be your next concern because in an emergency the supermarkets will be picked clean within hours. Do all your panic-buying long before it’s time to panic—then you’ll never have to. Again, shop wisely: Don’t automatically shop at the most expensive supermarkets. Go to the cheaper ones, and also check out any Bent & Dent Stores in your area. Many times the canned goods there aren’t dented: They just came out of torn cartons. Clip coupons and look for sales. Be sure to check out any local auction houses. Some have monthly food auctions where you can get almost anything except fresh meat at amazingly low prices—as low as 10% of retail for some things.

Buy long term storage foods only, plus whatever you find that you would normally buy in your ordinary shopping. After each auction, figure out how much you saved on the regular shopping items and add that much as cash to your Food envelope. What you save on regular items at the auction is the time and gas you would have expended in ordinary shopping. The cash saved can go to your preps without impacting your standard of living.

The first rule is “Store what you eat and eat what you store.” If you hate green olives, don’t buy a gallon just because they happened to be cheap at the moment. You should stock only foods that you are accustomed to and like. ALL your foods should be comfort foods. Emergencies are stressful enough. There’s no need to add diet discomfort to the situation. Store the kinds of food you are eating, eat the food you have stored before its expiration date, and replace it as you do.

Buy rice and beans because they are cheap and provide complete amino acids when eaten together—but be sure to acquire the recipes that make them into superb meals. Buy canned beef, pork, and chicken, plus soups and vegetables. Buy white pasta because it keeps longest. (Spaghetti packs very compactly.) Ramen noodles are cheap, but go rancid in about two years. Buy extra virgin olive oil and canned lard. Both have their different uses.

The Prepper’s Water Survival Guide: Harvest, Treat, and Store Your Most Vital Resource

The second rule is to buy in small containers. Refrigeration may not be available, so don’t buy canned vegetables by the gallon—unless your family is large enough to eat a gallon in one day.

The third rule is to buy variety: Don’t buy 100 lbs. of rice and 100 lbs. of beans and 10 lbs of “everything else”. Buy some of every kind of food you like, plus enough spices to put some serious zing into your cooking. When the flat-screen TV is dead, meals may become the high moments of the day.

Your first food goal should be three days (nine meals) for each person in your family. Do some careful calorie counting, and plan for three 1500-calorie meals a day. That’s more than the total 1500 calories a day many people recommend, but emergency situations are stressful, and usually require a lot of manual labor (such as walking instead of riding). The idea is to maintain your optimum body weight, not to drop to your minimum.

Gradually work up to a thirty-day food supply, and eventually try for ninety. When you’re good for food, retire the Food envelope and roll any leftover money into Buy/Sell. Then turn your attention to Clothing.

Start with durable but comfortable foot gear. Buy good new work boots, or military surplus combat boots. Buy several pairs of thick wool socks. Break the boots in, and wear them at least a few hours a week to keep them supple. Buy a surplus military poncho w/ liner. That’s good gear, and you definitely don’t want anything orange or yellow at any price. You may eventually need to be very inconspicuous.

Assemble one complete set of clothes for winter and one for summer. Include a camo hat with a brim and a black knitted watch cap, work gloves, knee pads, two bandannas, and sunglasses. Don’t be too proud to shop the thrift stores for used clothing. Incredible buys can be found there. Plus, in a disaster situation you don’t want to be seen in anything that says “Rich Person/May Have Food”.

When you’re good for clothing, empty the Clothing envelope into the Buy/Sell envelope. Then turn your attention to Gear.

Gear is an endless exercise in optimization. Start small. Buy the cheap stuff first. Haunt the thrift stores, dollar stores, yard sales, and flea markets. Roughly in order of importance: a good folding knife and a good sheath knife for each person. Also two Bic lighters, a Stainless Steel water bottle, personal cooking kit, pocket chainsaw, 30’ of 550 paracord, a tarp, a groundcloth, and a good wool blanket. A buck saw and a ¾-axe for the group, plus a four liter pot with bail & lid. Matches in a waterproof pill bottle for everyone, plus a small first aid kit.

Store your gear in a large gym bag—and with it your three day supply of food and three gallons of water. Two bags is okay, if there isn’t room in one.

All of that will be far too heavy to carry on your back, which is why you needn’t put it in a backpack. Instead of a $100+ backpack, buy an old golf dolly from a thrift store for $3.00 or so. You can tie the bags on and roll your gear instead of having to carry it. You’ll be amazed at how well that works.

The last part of Gear that bears discussion is personal defense. It’s a sad fact that in a serious emergency or disaster scenario the only animal you’ll find that will be both vicious and eager to attack you will be another person. Every person should carry a razor-sharp machete to chop brush with. Machetes do not run out of ammunition. Mace can also be a good friend in bad times. The best brand is Bear Spray.

Depending on the circumstances and the personal choice of conscience, a firearm may be desirable. The debate over which is best is endless, but having both a pistol and a long gun offers the best of both worlds. Being seen with a long gun can be disadvantageous—it can draw the attention of law enforcement (if there is any law left) and it can draw the first bullet from an unseen sniper on the trail.

For that reason, I recommend the only long gun I know of that can easily be hidden in a Bug out bag, gym bag, or book bag.

That’s a 12-ga slamfire shotgun made according to the instructions in the Kindle eBook The 15-Minute Shotgun. It breaks down into two pieces, the longest being 18-1/2”, reassembles instantly without tools, and can be used for both personal defense and subsistence hunting.

And, to the delight of the average Penny-Pinched Prepper, it only costs $10.00 to make.

When you’re reasonably well geared up, the Gear envelope can also go away, and you’ll be down to one envelope: Buy/Sell. And that brings you to Step 3:

Buy/Sell

Prepping is an ongoing process. It requires a small but continuing subsidy. Use your Buy/Sell money at auctions to buy things you can immediately sell for a profit on Craigslist. By that I mean a good washer-dryer set bought for $50.00 and sold for $200.00 the same week. Or an ugly flatbed trailer bought for $65.00, spray painted generic black, and re-sold for $250.00. Or an immaculate recliner bought for $5.00 and sold for $75.00. I have done all of those things at auctions and many more. I have funded my preps for years with an occasional Buy/Sell and made a little money on the side, too.

Spend your Buy/Sell money however you wish. By the time you’re reasonably well geared up you’ll probably know exactly what you next prepping goals should be. Whatever they are, they’ll probably be as uniquely individual as you are.

In my case, I’m saving up for that solar-powered Jacuzzi.

  Over the years I’ve heard many people describe how they would prep if they won the Lottery. The Big Survival Truck is usually the first thing mentioned, and it’s almost always

Numerous factors must be just right in order for concealed carry to work well, and concealment can change daily depending on our clothes and activities. Gun size, on-body carry position, holster angle, and ride height are all things to consider, and just one problematic factor can be frustrating enough to discourage us from carrying. Since our bodies and gun preferences are all different, the CC method that works best for one person may not work for another; therefore, the more perspectives we can get from individuals similar to ourselves, the better.

As a petite 5-foot-4-inch female of 118 lbs who carries a gun everywhere she goes, I’ll be the first to admit that concealed carry can still be a headache on certain days, resulting in a pile of clothes, guns, and holsters. In addition, a lazy week and a change in eating habits can (and will) make my pants fit a bit more snugly than usual. What woman really wants to squeeze a gun anywhere inside her pants when they are feeling tight already?

Women’s clothes are often fitted to accentuate our curvy figures, and our miniscule pockets are only capable of holding dainty things. Most of us just want to wear what we want to wear, without making getting dressed another chore to add to the daily list. Thankfully, there are many holster options available today, even for petite women, because I sure wouldn’t carry a gun on my body daily if it were not both comfortable and concealable.

ankle holster

Women definitely have an advantage with ankle holsters since they are very easy to access when wearing long skirts and dresses. One with both a calf strap and soft inner padding, such as this Galco Ankle Lite, provides both comfort and stability.

Along with the high number of holster options available for us to choose from, there are also a lot of places to position them around our bodies. INside-the-waistband (IWB), OUTside-the-waistband (OWB), shoulder, ankle, bra, pocket, thigh, appendix, and purse carry are the main CC methods that come to mind. Once you figure out where you can actually conceal on your body, then there are more choices to pick from. Leather, Kydex, hybrid leather/Kydex, and fabric holsters all vary in terms of comfort and retention. Numerous holster choices may be overwhelming, but there is no doubt in my mind that something will work for every licensed woman who wishes to conceal carry, if she is willing to spend some time going through her options and is truly determined to carry her gun on-body.

First things first, I recommend you decide which gun you most want to carry with you on a regular basis, and then try to make concealment work on your body with that gun. If you are unable to find a method of concealment (holster and body position) that works for that particular gun, then switching to a smaller gun can definitely help. A tiny .380 might conceal the best for all of us, but perhaps you’d actually prefer a slightly bigger (but still small) gun like a 9mm Glock 26 or a Ruger LC9. Gun selection is truly a matter of individual preference, and although very small guns conceal the best on my petite frame, other guns can conceal well too, depending on the season.

In the summer, I can only really conceal a .380 or a NAA mini .22 revolver on my body. In the winter, however, any gun can be concealed underneath heavy clothing. I’d prefer to carry my double-stack S&W M&P compact 9mm year-round, but with my small body size, I just can’t conceal it well enough with normal summer outfits. I’m not going to stop wearing shorts and tank tops in 90 degree weather in order to conceal my biggest gun, so I simply downsize to the smaller Ruger LCP or Kel-Tec P-3AT during those months.

Thigh holster

Thigh holsters, like one from Clament Custom Leather, can work well for smaller women with lightweight guns, when worn under loose, knee-length skirts and dresses. When angled out the backside of the leg, they are less likely to rub when walking.

Once the weather starts cooling off, cover garments become much easier to incorporate back into daily wear, and it becomes a pleasure to carry the M&P again. Sweatshirts, jackets, vests, and sweaters are all excellent concealed carry helpers for those times of year when the temperature drops a bit. Even lightweight, sleeveless vests can be very helpful for concealment during the summer, although I’ve found darker colors to always conceal better than lighter ones.

I didn’t want to drastically alter my wardrobe to start carrying a gun, but being a new CC licensee was a great excuse to peruse eBay, thrift shops, and the mall, since I didn’t own many sleeveless vests or cover garments at the time. I wasn’t going to buy anything that I wouldn’t normally wear, so shopping for CC clothing was my own form of research. I asked myself, “What types of cover pieces could you add to your closet that you would still wear, even if you weren’t carrying a gun?”

Although I didn’t set out to change my clothing style, I will admit that finding a few select pieces sure did help with my concealment efforts. Having a few sleeveless vests in your wardrobe can make a huge difference, and shopping for new cover garments can be a true highlight of concealed carry. If you start out struggling with the concealment of your firearm, I highly recommend doing some shopping research of your own and not giving up until you find a few cover-ups that you’d be excited to wear any day of the week.

OWB holster

A long cover-garment is essential for OWB concealment, since you must cover both the gun and the holster. Concealing a mid-sized gun like this compact S&W M&P in an OWB holster can be hard for a petite woman, so switching to an IWB holster and/or a smaller gun can help.

Also, if you are like me and normally wear tighter pants that don’t allow for much wiggle room, definitely consider buying a few pairs that are one size up from what you normally wear, so that you can better experiment with IWB carry. I didn’t give into that for the longest time, but I’m so glad that I finally have because IWB holsters have become much more comfortable for me.

If you are going to spend the money on a concealed carry handgun, definitely consider CC clothing to be an investment to the cause—you may no longer have to leave your gun at home! You may even come to find that when you’re out shopping in the future, garments that are beneficial for concealed carry really jump out at you. Don’t forget that the ability to wear unique, feminine cover garments is one fun luxury of being a woman.

For my very first concealed carry gun, I chose a simple, lightweight revolver: the Ruger LCR. I experimented with all different types of holsters for that one gun, and of course I kept hitting walls. Some of my pants lacked belt loops, which ruled out all belt holsters. Others were very tight at the ankles, which ruled out any ankle carry. All dresses and most skirts did not work with a belt holster, and all of my pants pockets were too small for any gun. If you really want to carry your gun, however, persistence pays off. I have learned that on my body, with the types of fitted clothing I usually wear, different outfits work better with different types of holsters.

My wide-leg pants or long, floor-length skirts and dresses always favor an ankle holster, especially when they don’t have belt loops or the fit is too snug to accommodate a gun in the waistband. Knee-length skirts and dresses often work well with a thigh holster, as long as the gun being carried is small and lightweight. I have found, however, that skirts made of stiff, heavy fabrics can make drawing from the thigh holster more difficult, and skirts worn above the knee are often too short for a thigh holster to conceal adequately.

IWB holster

Jean skirts often have belt loops, which means ‘belted IWB holsters’ can still be worn in the summer. For a woman who carries a small 380, an adjustable IWB holster, like this Crossbreed Minituck, may conceal very well underneath a loose tank top or T-shirts.

Instead of thigh carry for those skirts, an IWB holster can work much better. Depending on whether or not the skirt has belt loops, I use either a Crossbreed MiniTuck or a clip-less Remora holster, positioned low in the waistband for best concealment. Not only is an IWB holster my CC method of choice with shorter skirts, but it is also my main choice for shorts, pants or jeans, paired with a regular T-shirt, hooded sweatshirt, vest, or cover garment.

A gun can also be concealed outside the waistband if you are wearing a longer, heavier sweater or jacket, although OWB holsters are bulkier in general, making them harder to conceal. Very specific cover pieces, like a roomy winter coat or a dark colored vest, can work especially well for most CC methods, including OWB, shoulder, and pocket. However, since concealable clothing options for smaller women can be limited with both shoulder and pocket holsters, I still carry either IWB or OWB in the winter.

Sometimes a woman, petite or not, has no other option but to carry her gun in a purse or bag. For those occasions, it is beneficial to have a dedicated gun purse, with a separate compartment for your gun. As a fail-safe option for when I’m either running out the door or heading on a more adventurous trek, I conveniently holster my gun inside a Gun Tote’n Mamas shoulder pouch or a Disse Gear concealed carry bag. I’ve also recently discovered a unique, new bra-style holster called the “Flashbang” which is made for various small guns. It may work well with most female clothing, aside from dresses and sports bras, although I still have yet to try it.

OWB holsters

A straight drop (neutral cant), as shown with this Crossbreed SnapSlide OWB, is meant to be worn directly on your side in the 3:00 or 9:00 position. This angle is great for the range, although it doesn’t conceal well on a petite woman. (bottom) A slight forward rake, or even a more “extreme” forward rake, as seen on this Lobo Gun Leather OWB, can conceal very well for a petite woman in the 4:00 position. This angle helps keep the grip of the gun from poking through a cover garment.

Most of the time, I truly prefer IWB carry, and the sweet spot on my small frame is always the 4 o’clock position, directly behind my strong-side (right) hip. If I so much as even think about small of the back or appendix carry with my slim build, however, lo and behold, quite the bulge appears! For some women, those positions might work, so don’t rule them out until you try them yourself. They just don’t conceal well with my particular physique.

I like to wear shorter tops and cover garments too, so the main highlight for me with an IWB holster is that you only have to conceal the gun and holster above your pant line, since most of the gun and holster is already concealed within your pants. With an OWB holster, however, you have to wear a longer shirt or cover-up, since you must cover not only the entire gun, but the entire holster as well.

With any IWB holster, both the ride height (depth of the holster and gun in your pants) and cant (degree angle or “rake” your gun is tilted at) will make or break your IWB concealment attempts. The Crossbreed SuperTuck was my first IWB holster, and I’m so glad it was because that specific holster is adjustable for both ride height and cant. An adjustable holster is beneficial, especially for those starting out, so you can figure out exactly how you need to position a holster on your own body for it to conceal.

For me, a lower ride height conceals best, since I often wear fitted tops. Also, a more extreme forward cant works the best for me, since that angle is least likely to allow the butt of a gun to stick out the back of my shirt.

clipless IWB holster

Many skirts lack the belt loops needed for waistband holsters, while others are too short for thigh holsters. A “clip-less” IWB holster with a tacky exterior surface, like this Remora No-Clip IWB, is a good option for a skirt that fits snug.

The versatility that different holster options provide is terrific and no single holster will work for all applications. With that being said, I’ve also come to believe that it is worth making small compromises in our wardrobe in order to carry a gun in the same position on most days. Since it is not a good idea to frequently switch your on-body carry location from day to day, picking a main style of clothing and preferred carry method is beneficial. If you wear a lot of long skirts, an ankle holster might be perfect for most days. If you prefer a lot of baggy hooded sweatshirts and T-shirts, an IWB holster might be the main way to go.

The problem is, if you constantly switch where you wear your holster, it may not be where you attempt to retrieve it from should you ever have to use it. It would be detrimental to forget where you are wearing your holster on the day that you need your gun, and you surely don’t ever want to fumble with getting it out. If you pick one or two carry methods for wearing your gun most of the time, then it will be easier to fit in plenty of crucial drawing and shooting practice at the range.

I am so grateful for the right to carry a concealed firearm for protection, and as CC permit holders, we should all respect the responsibility that entails. No matter which carry methods you choose, it is most important to be comfortable with your firearm and know how to handle it safely.


Numerous factors must be just right in order for concealed carry to work well, and concealment can change daily depending on our clothes and activities. Gun size, on-body carry position,


We know in a grid down situation that medical supplies will become a thing of the past. I worked as a delivery driver for two different major companies supplying hospitals and clinics with their supplies in Northern California. I can tell you for certain that there are no reserve medications in most hospital storerooms. Most hospitals operate on a just in time delivery system. They order it one day and get it in the next day. They may keep a small one day supply of some things on hand that they can use up that day and replace the next day. But they keep nothing on hand. To drive home the point: If most medical centers need a 9 volt battery to run a machine they order one 9 volt battery which is placed into a 55 gallon plastic bag, which is placed into a plastic tote which includes a packing slip with a bar code on it, and a bar code on the outside of the tote. When the hospital receives it they check the tote and pull the battery and send it directly to the machine that needs the new 9 volt battery.

Antibiotics

You can do some things now and some things later. I would advise that you get a supply of a general antibiotic such as Amoxicillin on hand now. You don’t need your doctor’s prescription to do it. Fish Amoxicillin comes from the same place as the stuff they give to humans. You can order on-line. Since most of the time I’ve been given Amoxicillin it’s a 500 MG dosage 3 times a day for 10 days. That means you need 30 pills. I have ordered on-line and purchased 100 pills for about 30 dollars. That would give me enough for 3 separate treatments and still have 10 pills left over for trade. In a true SHTF situation each tablet will be worth more than gold. I recommend you keep your bottle in the refrigerator. Keeping antibiotics cool helps extend their potency.

Food grade hydrogen peroxide

Food Grade Hydrogen Peroxide. This stuff is dirt cheap. You need the Food Grade which is a 35 percent solution and no additives or stabilizers in it which can hurt you. Food Grade is a 35 percent solution and is used in the agriculture industry to clean eggs among other things. I strongly recommend you obtain and read a book by Madison Cavanaugh called “The One Minute Cure.” It provides a lot of history for it and some ideas for its uses. Like anything else in life you must take some precautions in using it. First, at 35 percent it is considered to join the Hazmat family of flammables. 90 percent Hydrogen Peroxide is called rocket fuel. So don’t use it near open flames and remember it must be diluted a lot before you use it with the body. If you happen to spill some on your skin you need to immediately wash it off. Prolonged exposure can cause permanent nerve damage. There are several books on how to use it. Please get one and understand it fully and how to safely use and store it.

I was introduced to Food Grade Hydrogen Peroxide when joking with another truck driver who was performing a pre-trip inspection on his truck. I got so excited about what I heard I ordered a gallon of the stuff and had it at home waiting for me to try. Actually I quickly discovered that when I read the book, which I received at the same time I got my Hydrogen Peroxide, I had purchased enough for a lifetime, or two. There are numerous ways that Hydrogen Peroxide is useful. I’m going to include a way to use it that I’ve not seen anywhere in print. In several books I have seen mention that it was used to fight the Pandemic of 1918. But no one said how.

I have had severe Asthma for as long as I can remember and I’ve been on one or more asthma drugs 24/7 since I was age 3 just to breath. I wondered how to I could safely get some diluted Food Grade Hydrogen Peroxide into my lungs and see if it would help control my asthma.
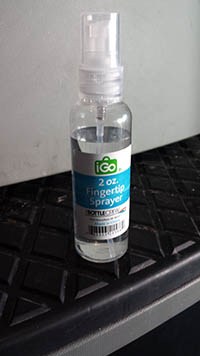
A bottle like this makes a good delivery mechanism for the Hydrogen Peroxide.

I purchased a 2 ounce empty spray bottle in the travel section at Walmart for 99 cents. All of my readings told me I needed to dilute it down to something near a 3 percent solution. I’m an over-the-road truck driver and figured I needed a way to measure. Doing the improvised method, I took my thumb and held it against the bottom of the 2 ounce spray bottle and then kept applying it going up the side of the bottle. I estimated that my thumb represented about 1/11 of the bottle. I figured that was close enough. I held my thumb against the bottom of the bottle and filled the bottle up to the line of the top of my thumb. Then I filled the remainder of the bottle with purified water (I used reverse osmosis—most books recommend you use distilled.) I then took the spray bottle and squirted the watery mist into my mouth a couple of times while I inhaled through my mouth like you do with asthma inhalers.

Read More: Medicine to stock up on for when there is no doctor

I was currently using Symbicort and Ventolin. Both of these drugs, like all Asthma drugs have side effects including raising your blood pressure. My next challenge was to guess how much I would need to try to make a difference and get me off my prescription medications. I decided to start with three inhalations three times a day. I did that for a day and then I stopped taking my Symbicort. Ventolin is used for emergency breathing situations only. I had been using my Ventolin three to four times a week.

I was fine for the rest of the day without needing any Ventolin. For the next week I kept taking my hydrogen peroxide spray. I had no Asthma problems. I did not need my Ventolin once! I could actually feel my lungs changing. Up until now I have always had congestion, felt moisture, on the insides of my lungs. That all went away within a week. I had no wheezing or other noise coming from my lungs. I have since dropped the dosage to one to two puffs once a day when I remember. Yes, I can sometimes go a day or two now without any. If I’m near my trigger situations such as severe cold or smoke then I take more.

The Survival Medicine is an excellent resource every prepper should have in their library. When you can’t seek professional medical attention you will be on your own.

Since March 9th, 2012 I have only used Ventolin twice. Once when I had been near forest fires where I had been breathing the smoke for days. I finally started clogging up and needed a burst of Ventolin to give some relief. The other was in Idaho last summer when I took some time off and went camping with friends. We were near a lot of forest fires and again I used a puff of Ventolin. I needed the extra clearance with all of the physical activity I was doing at the time and wanting to keep up with friends.

I have a cousin with COPD from smoking for years. She was on Ventolin and her doctor was experimenting with other inhalers to improve the oxygen level in her blood. I told her about this and sent her one I had set up for myself to help get her started. I saw her a couple months later and she was extremely happy. The oxygen in her blood has gone up a full point since she has started using it and she has stopped all the other inhalers. Her doctor is happy with her lung capacity now.

There is another way you can use the stuff and that is by adding it to your drinking water. Think a drop to a few drops to a bottle of purified water. If it starts tasting like bleach, dilute it immediately.

I mention this because most end of the world as we know it books all believe that at some point we will also get some kind of respiratory pandemic. I believe that this stuff can help the body greatly strengthen the immune system. Most of the bacteria that makes us sick does not do well in a highly oxygenated body.

It’s also a way to increase the levels of oxygen in your body without spending a fortune. I would keep some on hand with a few spray bottles just in case. Please keep it in a low temperature stable environment. Like most other things heat breaks it down. Again, you may be able to find some in places that sell stuff for agriculture. But right now you can get it on-line pretty cheap.

Charcoal

Most of us are familiar with alternative treatments for a wound such as honey or tree sap and using super glue to help close a wound. I’ve not read anything in any of the prepping books about plain old charcoal.

It’s an old camping trick. I’ve had buddies who have been out on long hikes in the mountains and made the mistake of eating something that probably just went bad. They end up sicker than a dog. They collected the charcoal from their fire, crushed it down as much as they could and dumped it into a glass of water and drank as much as they could. Charcoal is an amazing substance. It will absorb a lot of bad things in the stomach. It’s not a cure-all, or a stomach pump. But most people who overdose and get taken to a hospital to get their stomach pumped are then often given some solution with charcoal either pumped into their stomach if they are unconscious or given to drink if they are awake (I was told this by a friend who worked in an ER in Silicon Valley many years ago). If you ever eat something and things start going south get as much charcoal into you as you can (and of course if medical treatment is available get to the ER as well).

I personally keep a bottle of charcoal capsules in my bug out bag and several other places. It’s cheap, light, and easy to carry.

  We know in a grid down situation that medical supplies will become a thing of the past. I worked as a delivery driver for two different major companies supplying hospitals

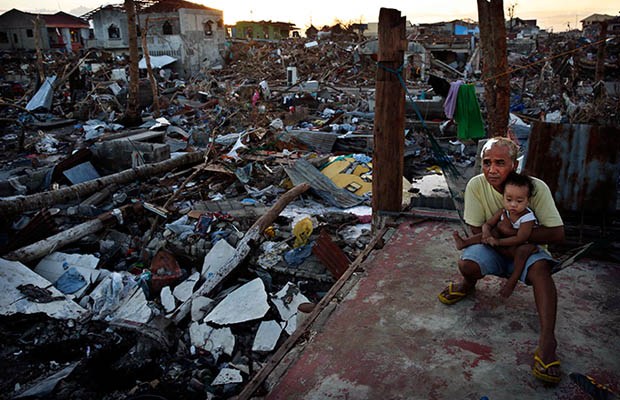
Some of us have the ultimate goal of self-reliance. Maybe it’s just “increased” self-reliance, or maybe we’d like to be almost totally self-reliant. A big part of self-reliance is the ability to produce our own food, whether we’re working with planters in a window to avoid the common recalls or plotting out our 30K square foot pantry garden. Regardless of scale, maximizing our production is something we all strive for. There are some terms and sowing concepts we may see but not really understand that relate to sowing seeds, especially, that can help us maximize our yields.

Some of those concepts include underplanting, underseeding, sub-sowing or under-sowing, succession and staggered planting, and congestion planting or fill beds. A lot of the ways we can maximize production from our space overlap and interact, which means the terms get used together or in place of each other. That can lead to some confusion on what each really is. I’ll largely use small-bed examples to try to clarify the concepts, but they can be expanded to larger plots

Congestion Planting

Congestion planting has two main facets. In some cases, congestion planting refers to the use of a bed instead of separated single rows, even in bare-earth, tilled-ground plots. In other cases, it refers to absolutely packing something into a space – a “fill” or “blanket” sowing style.

The latter can be visualized as blanketing marigolds around tomatoes and cabbages instead of having one marigold to one crop plant, with bare earth around them. It can also be seen in spread seeding – sprinkling or machine throwing something like lettuces or a game plot mix over a surface. When we talk about congestion planting a companion like sweet alyssum or a cover like buckwheat, this is what we mean – dense blankets. It’s done to maximize benefits from a companion, create a zero-bare-earth or total-canopy systems, and to choke out weeds.

In other cases, congestion planting is used to maximize harvest.

Creating a diagonal grid or staggered line instead of a straight line or a square grid lets us put more plants into the same area. “Gaia’s Garden” by Toby Hemenway has a good example of the “row” version of this, which can be applied to annuals as well as perennials. Congestion planting a grid of plants in a workable bed instead of separating rows of crops lets us get more yield out of the same space, too. For example, take a 12-foot by 6-foot garden area. In this case, it’s for spreads of about a foot – because there are an awful lot of plants that fit that space, beans to pak choi, fingerling potatoes to corn, candle peppers to rattail radish – but it works for 15-24” plants as well.

Instead of getting 36 as in a single-row row-cropping example, we’re able to get 42 primary plants into the same area with a diagonal grid (AKA: staggered grid, offset grid). That is a ratio that scales up.

Read More: Conventional Guides to Crop Rotation

A “straight” or “square” grid (squash the row cropping lines together) would have netted 48 primary plants, while the diagonal grid allows for an additional 12 companions or smaller crop plants with the main crop, for a total of 54 yielding plants in a 4’x12’ space. Both exceed the yield from single-row sowing.

*Individual interests, planting style, and needs, as well as choosing a 3’ instead of a 4’ bed, will determine if a diagonal or square grid is more efficient.

In addition to the increased total yield from congestion planting, there are other benefits to congestion planting in beds – raised or in-ground.

Eliminating the walkways between each row means there is less compaction, which makes for better root and soil health through better water movement and increased aeration. The shade created by the mature main crops will help keep soil cooler and moister than open rows with bare earth between plants. It will also allow for cooler-season annuals like radish, spinach and lettuce later in the season than they would normally be palatable. Once established, the canopies also help reduce weed growth, whereas the space between rows allows for sunlight to penetrate to the soil line, making weeds more of a factor.

Eliminating the walkways between each row means there is less compaction

Succession Planting & Staggered Planting

Mini Farming: Self-Sufficiency on 1/4 Acre

Succession planting isn’t an overly new concept, and it’s probably one of the most-heard terms. In succession planting, the goal is to not have dormant space and open earth in production spaces. Crop cycles are timed so that we maximize our space and growing season, avoiding lost time and wasted area. We have our tomato and pepper transplants ready and staged so that as lettuce and cabbage comes out, we plug in the next start immediately. Heading toward autumn, we start additional cabbages and sometimes greens so we can stick them in sweet corn plots immediately.

“Succession planting” is also sometimes used instead of “staggered” planting and harvest – staggering sowing dates this time instead of designing a staggered row.

With staggered planting, we start our seeds at weekly or two-week or even monthly intervals. We may do only a few plants at a time, we may do a couple of square feet at a time, or we may do a few rows or a partial plot at a time. For things like radishes, we may put in 12-18 every two or three days for a while, skip a week, and do a few more sets.

Staggering our planting allows us to harvest reasonable amounts. We can start some early and late for fresh eating, and plot out periods when we expect to have the bulk of determinate tomatoes coming in, spreading out the canning workload around our tree crops and other annuals, vacations, and our busiest parts of the seasons.

It also allows us to hedge our bets. We can start the first 2-5 tomatoes, then another set, and hold off on the main body of our for-canning tomatoes until we’re certain weather will hold for them. Then we take a break, and either root some of the suckers we pinch or start a few more seeds, and plant additional tomatoes that will still be in full production later in the season, or that can be grown in containers or in a protected area, extending our tomato harvest into cooler weather. We could easily divide our tomato season into thirds or quarters instead, starting seeds for each segment so that they’re yielding excesses for canning, but so that a late drought, low-calcium problem, or early cold, wet weather doesn’t affect our total harvest as much.

Read More: Understanding Seed Types and their Importance

Succession and staggered planting aren’t exactly the same, although the terms are sometimes used interchangeably. Staggered planting is more a factor to take into account with succession planting. Succession planting is similar to “zero bare earth” or “full canopy” planting in that there is always something active in the garden during growing season. It can be used with tilled-earth methods as well as the mulch-bed systems, and with transplants or the concept of underseeding and underplanting.

Underplanting & Underseeding

Underplanting is an umbrella concept that includes underseeding (AKA: sub-seeding, sub-sowing, under-sowing).

Underseeding is when we drop seed while another plant is still actively growing. It’s a little different than the staggered seeding that produces best results in a Three Sisters mound. In underseeding, we wait for our Three Sisters mound to start crinkling from frosts or reaching its maturity, and we plant something like beets, radishes or greens underneath the corn, beans and squash.

The timing is important. We want to be cutting down our hungry, mature plants about the same time the seed is germinating below them, so the cool season plants don’t face as much competition. We can do it in the mounds mentioned, or we can do it along the sides of rows and within beds as well. It’s limited to non-tractor farming unless mature plants are low enough and well-spaced enough for single- or multi-row equipment to get through. The tight spaces make it something much more common for a backyard kitchen garden or containers than large-scale field crops like wheat and beets.

Underplanting has applications both for perennials and for annuals.

Deciduous trees take some time to leaf out in spring. By building up a no-till bed around their bases, even dense canopies can have some early garden space eked out for radishes, beets, turnips, greens, and some others. Cut-and-come-again crops like spinach and lettuces will benefit from an extended season in a lot of climates due to the cooling shade and reduced evaporation. Depending on orientation and climate, things like onions and some herbs may be fine all season under an apple tree, and in some cases, a summer cover crop such as crowder peas or buckwheat may be possible. Edible ornamentals like hostas and wild food such as upland cress or mock strawberry are additional options for the bases of trees.

The benefits to underplanting trees and shrubs extend beyond the additional and early harvest. The trees themselves benefit from less mowing compaction, increased biomass, and pollinators that camp out due to constant pollen and nectar access. In some cases, the crops and herbs we choose to grow may actually repel some tree pests and disrupt some diseases or their vectors.

In the case of annuals, underplanting acts more like the Three Sisters example.

For example, consider a plot where lettuces are interspersed with a line of beets of turnips or radishes, and maybe some small head cabbage (with bunches of marigolds if inclined). When the root veggies are pulled and it’s warm enough for tomatoes, those starts go out, with the lettuces and cabbages still thriving. Some of the lettuces are pulled instead of cut, opening up a little space around the new tomato.

With an egg and a handful of compost, tomato starts are plenty big enough and aggressive enough – especially since they have deeper root systems than most cutting lettuces – to grow without problems. Cabbages are timed to be cut and have the roots severed as the tomato grows to 18-24” tall and they start encroaching on each other. By the time the tomato is starting to rob from and shade out lettuces, the lettuces are bolting or going bitter anyway, and can be cut a final time. If they’re already bitter, they lay right on the ground, providing some additional shade and mulch for soil, which retains more moisture. That’s about the same time the tomato needs every bit of nutrients and less competition for flowers and fruit set, and – especially in raised beds and containers in dry and hot climates – enormous amounts of water.

The system works in reverse again as the season ebbs and tomatoes start to dry off. We underseed spinach and chard, prune our tomato aggressively so it concentrates on maturing its fruit about the same time our baby plants start popping up, and by the time the spinach and chard are starting to struggle from the competition, our tomato should be done for the season. A serrated blade or pruning shears gets used to sever the roots and cut the stalk, and our bed stays in constant production.

Both underplanting and underseeding are intended to make sure that not only is garden space actively doing something, but that there is no exposed earth. They limit the total amount of space we need to produce significant yields, and they reduce the amount of time we wait in between harvests.

Seeding schemes

Congestion planting, succession planting, staggering seed sowing, and underseeding or underplanting are just a few ways we can maximize our yield within a given amount of space. There are labor and water-saving benefits to some of them, but the primary goal is to make the most of our cultivated land. Using our space to maximum efficiently may allow us to grow additional crops, or we may find room for rabbits, water catchment systems, composting, chickens, an outdoor seating area, or shrubs and trees that will further increase our yields or act as passive solar heating and cooling devices.

Even more than when we select what types of seeds and the specific crops we want to grow, deciding upon a planting or sowing style can hugely impact our gardens and crop spaces. Someone who wants to use a tractor for all phases of growing and maintenance may not find as much use for most of the discussed styles, but for others, an efficiency planting style might be worth some consideration.

Some of us have the ultimate goal of self-reliance. Maybe it’s just “increased” self-reliance, or maybe we’d like to be almost totally self-reliant. A big part of self-reliance is the

Have you ever needed to strap something down and went to look for a length of rope or bungee cord? When I do this it is usually to tie down something on the roof of my car and rope seems to be the best option in most cases, but in order to get a really perfect length of rope you need to cut your rope. This isn’t always what I have to do but if I needed to secure a tarp for example at various points over my vehicle I could end up needing 8 small pieces of rope. Assuming I tie knots that hold tight and are easy to remove I have 8 small pieces of rope that aren’t good for much else.

I could go with bungee cords too but if the distance between the tie down grommet or item and what I am securing the item to isn’t far enough I have to rig the bungee in a way that it takes up less space. Sometimes this works and others it doesn’t. Another option is a big zip tie and these work great in a lot of places but they are single use. Once you use a zip tie and you need to remove it, its life is over and we toss it into the trash. It is one of the small things in life that I find more frustrating than they need to be.

Well, you are getting worked up over nothing you say. You would be right. I could keep a wider assortment of ropes, bungees and zip ties with me in each vehicle to deal with any situation I run into, or I could work harder at my knot tying skills but I know there has to be an easier or smarter way to do stuff like this. I am not a trucker , don’t work in construction or haul things often, so my practice at tying things down is usually reserved for helping people move, big trips back from the hardware store or packing for an extremely long trip where the baggage weighs more than the people in the vehicle. When I run into a case where I am temporarily foiled by something as simple as a tarp it gets on my nerves.

TitanStraps work for strapping down small items to your Bike or 4-Wheeler

Enter TitanStraps. TitanStraps are one of those inventions that make you say, “Why didn’t I think of that”? I think the best description I have heard of it is that TitanStraps are like a re-usable zip tie and they work perfectly for so many times that you need a simple strap that is easy to tighten and best of all, remove. The TitanStrap has so many uses that it is limited only by your imagination.

TitanStraps are made from a stretchy, high performance polymer. Rather than being hard plastic, the TitanStrap is very supple and its been injected with a 10-year UV additive for extra longevity. The buckle is made from heat-treated aircraft aluminum and fits securely into the holes in the strap. Each TitanStrap is 25” long and can even be daisy chained together to secure larger items. It’s like a belt in that you can wrap it around the item you are securing, slide the other end through and stick the buckle through the holes in the strap.

I think a challenge may be thinking of a place they don’t work but this primarily comes down to size because the TitanStraps are beefy. As soon as I had these in my hands I started envisioning how they could be used to tie down equipment to my roof in a bug out scenario. I thought of how I could use these on my deer stand to quickly strap up items I had pulled up there with me that I didn’t want occupying the seat but I didn’t want to drop them either. Usually I would just snap a carabiner over the side rail, but this could make noise. Plus, the orange TitanStraps are already colored for safety. My wife would be pleased.

No more little pieces of rope.

I put a couple of these in my vehicles and some in my get home bag but I probably need at least 4 per vehicle to go along with the rope I have. I know they won’t work in every single instance that I need to tie something down but they are great anywhere a strap will work. If I needed to secure a canoe for example to the front of the car I would need a much longer rope than the titan straps but for many uses, these are perfect. Bungee cords are great in some places too, but you don’t have to worry about a TitanStrap slipping off and that big metal hook taking out an eye. The straps easily unbuckle (just like a belt) and there is no high tension to sling items back at your hands or head.

Titan Straps come in at least three colors (Orange, Blue and Grey). They did have a black option and they have a working load limit of 206lbs. As an added bonus they are made in the USA. You can find them at hardware stores like Home Depot or you can order them from Amazon or on the TitanStraps website. If you are looking for a great tie down strap option, you might want to give the TitanStrap a try. I am sure you will be happy with your choice.

Have you ever needed to strap something down and went to look for a length of rope or bungee cord? When I do this it is usually to tie down

Stacking functions is a quick term for the concept of planning things (elements) and areas (space) to perform the most services for us with the least input. It’s reusing things as many times as possible to get the most out of our time and energy, and letting the spaces themselves do some of the work for us. Elements used in stacking ideally perform multiple services and functions to not only further increase the efficiency of a space, but also add to our resiliency by creating redundancies in our systems. Analyzing homestead elements for multi-functionality and redundancy were covered in the first article. This time we’ll look at combining them into multi-function spaces.

Companion Planting & Guilds

An example of a multi-function space use is companion planting. Companion planting is basically co-locating plants so that one or all partners provide something the others need. A guild is taking that to another level to create a long-sustainable system with few or no outside resources needed for its continued health.

For example, we can put chives and daylily around the base of our trees to prevent weed growth and limit our work or need for mulching that particular area, and they’ll soldier through the dense shade seasons. Around the verges of fruit, nut and resource trees we’d put shade-tolerant and part-sun or full-sun berries, depending on sunlight, or we might have berries and-or vines on the fence beside the trees.

We might include wallflower, lavender, rosemary, and lupine around some of the trees and berries to provide health and pest benefits for those plants, and plug-in some radishes and nasturtium to act as pest traps and food sources. We’d include something that produces nitrogen if we were going with a hazelnut shrub or pear instead of a locust. We might build up rings of soil to plant sweet potatoes or yams to spread and choke out weeds, and use the biomass for livestock feed, mulch or compost. We could use weeds like henbit, plantain, wood sorrel, and dandelion for their varied human or livestock feed purposes as well as the health benefits to soil like N-fixation and nutrient mining, and their early and late pollinator feed potentials. We can fill space between the guild and other areas with somewhat decorative grass grains or high-biomass sun-loving crops like buckwheat or native oats, collecting the seed or letting it be a forage area while producing biomass we’ll use for livestock bedding or mulching.

Things like shrubs and brambles can provide shelter for small livestock that’s grazing, like rabbits, ducks and quail, should predators show up. Leaving runways of stubble and standing grasses will increase those hiding areas, either protecting our livestock or increasing our hunting territory (if neither applies, cut stubble shorter to decrease the number of critters that can hide).

All of the plants we include in the guild have at least one or two primary purposes. Most are edible or herbs, most have parts that feed livestock or worm/BSF farms, most provide something else for the system like a groundcover, nutrients, or mulching. Something like brambles might be used to deter some pests or predators, while other plants might discourage cats or ants.

We’ve jam-packed a particular area with a ton of services, yields and functions by selecting things that work well together, provide services beyond their primary role, and that fit our space and wants. By doing so, the guild doesn’t need us as often, and we can harvest a lot from a relatively small space compared to having just a couple of trees, a bramble or fence on a vine, and then mulch, monoculture pasture, or yard grass below them.

*If a companion planting list suggests chives for anything but trees and shrubs, take everything they say with a big grain of salt.

Three Sisters

One of the most well-known companion guilds is the Corn-Beans-Squash combo. Corn goes in, peas or beans follow and use the corn to climb, giving the corn extra support against wind and replacing some or all of the nitrogen the corn will use over the season. Squash follows, and is trailed around the verges to act as a shading ground-cover, decreasing evaporation and weed competition.

There are some other benefits from the system, though:

  • Increased blooming season, especially depending on type of bean and squash (good for pollinators)
  • Bug-rich hunting grounds for chicks with high-protein needs (no semi-mature chickens or geese)
  • Squash seeds for next year’s garden, eating, or livestock feed
  • Corn cobs for firestarters
  • Corn stalks to chip for bedding or mulch
  • Pea stalks for bedding or mulch (chip for bedding)
  • Squash biomass for compost
  • Dense space for ducks & guineas to hide from hawks & eagles
  • Dense, potentially long season space for beneficial insect lifecycles

Savvy birds will use elements we provide – like a hawk teepee, Three Sisters mound, or dense brush – to hide from predators while free-ranging.

Hoops & Coops – Vertical stacking

Shelters for small livestock have the potential to cram an enormous number of functions in to a stacked vertical space, just like silvopasture and aquaponics.

There’s the ability – as discussed in other articles – to stack coops or hutches over either compost or worm bins or a BSF farm (or all three). That increases the efficiency by directly feeding the bins with animal wastes, and not hauling litter and bedding more than a few feet. Another example would be storing straw or mulch under those coops, and having a bin between them. With a coop for a few chickens right beside a tier of hutches over a worm bin, we can provide young birds or layers with a handful of wigglers right there while we’re dealing with egg collection and watering and feeding.

Roofs offer two opportunities.

First, a green roof of herbs, grasses, and weeds for livestock, or human foods. Rabbit manure is “cool” and could easily be spread carefully enough to make even lettuces safe (I still wouldn’t do raw manure and root veggies, personally, but that’s me). Especially in small, compact spaces, using roofs can increase the amount of sunny area somebody has, allowing them to use the rest of the yard for larger crops. We can collect fresh feeds and let our hares and chooks clean up out out-cycling plants for us by reaching up with pruners and then taking a step to the side.

The roof can also be set up for water catchment. If it’s water that’s already filtered through shallow growing pans, it might not be great for the rabbits or chickens, but there’s no reason not to use it for the growing trays during dry periods, to keep compost and worm bins moist, or to water something like a strawberry or herb tower or some other vertical growing system that’s beside the livestock.

We can use catchment from any sized roof to create ephemeral pools, edible rain gardens, or fill catchment buckets and barrels.

We could also channel our roof runoff into a pond, and use edible lilies or cattails or damp-loving shrubs to filter and clean that water, or just make an edible rain garden.

Stacked hutches can be positioned to create shade for another set of vertical towers or planters, increasing the palatability of greens and lettuces later in the season and keeping more feed going for livestock.

Throw in a tree with human or livestock fruit, nuts, or seeds beside and across from the coops and hutches, and we’re increasing the yields of food (or feed), increasing shelter from wind and rain, providing shade (which keeps Mr. Bunny at peak performance later into the summer and earlier in the fall), creating some wind blocks and potentially terrestrial insulation for critters in winter (less heating/bedding needed), and if we arrange our buckets correctly or reuse a kiddie pool, increasing our water catchment for that area, decreasing the amount of fresh water we have to use for watering plants or animals.

Coops, Hutches & Greenhouses

Another way to stack functions in a space is something permies will love: increased integration via a combination coop-greenhouse. We’re basically going to take some of what we talked about in the efficiency article and expand it a little further.

The bare design is pretty darn good as it is: The plants benefit from the body heat and-or “deep bedding” heating method from the fowl, the insulated glass increases sun warming, and soil and water act as a heat sink in winter. Critters can clean up some of the greenhouse wastes and help reduce pests. Add in deciduous trees or vines to provide passive cooling (shade) during summer, but allow light to penetrate and warm during winter.

Some of the same thermal-mass and passive heating can be derived by siting a greenhouse and cold frames near our own homes.

Some take the combo-coop concept even further with the addition of planning trees and shrubs and annual crops nearest the greenhouse-coop to be fodder and bedding or just supplements, and all of them benefit by making it faster and easier to toss plant thinnings, prunings, and scraps to birds, and to care for both plants and animals at once.

Others stack functions by arranging chickens or geese as pest- and weed-control patrols in areas that already need to be protected, and allowing them to mow and leave manure behind for perennials to use.

The functions stacked within the building itself can be increased further as well, by increasing the diversity within the space and the use of space.

If there’s only a few animals in the types of coops and hutches shown in the first hutch examples, we can still increase the number of functions that space performs for us. We can erect a hoop house or build panels from soda bottles to arrange against and over/around the existing stacks, increasing the animals’ shelter and insulation, and using the dual body-heat and solar-heat yields to create a warmer space for starting seeds or keep “weeds” growing to feed to our livestock.

All aspects are rolling in together to create a guild of plants and animals as well as the abiotic factors like sun, wind and rain and our manmade structures, regardless of the scale.

Analyzing Elements to Stack a Space

Chickens and geese are both grazers, but ducks and guineas can be encouraged to only nibble the tenderest of shoots along with their bugs and seeds. That means ducks and guineas can be incorporated into more systems with fewer worries and less fencing. On the other hand, they require more non-vegetative feeds, they won’t till or mow for us, and they won’t cycle as much of our garden and food wastes as chooks will.

The amount of space we have, the other livestock we’re running, our feed resiliency in the form of BSF and worm farms or fish, and our own preferences lead us to deciding whether we want the increased functions and redundancy of one type of fowl over the others.

In the first stacking function article, we mostly focused on listing the services various elements can provide. When we start stacking functions within a space, especially in permaculture, we want to do basically a SWOT analysis for each element we want to include, with the element’s needs falling under its weaknesses and opportunities.

We would also list the time we need to devote on a daily, weekly, monthly and seasonal basis, and be aware of the tools we’ll be using – now and as we become older or injured – so that we can plan for proper access to each element in our system and the system’s basic infrastructure.

Then we compare it, seeking relationships where a byproduct or primary function of one serves the needs of others. We also look for similarities in needs and functions to increase efficiency.

Each kind of livestock we have or want should be taken into account as we analyze spaces for stacking functions, with structures, plants and other livestock all affecting each other in a system.

For example, if I’m choosing to have ducks or guineas and rabbits in a combined ecosystem, and I know rabbits can’t have too much fresh apple leaves and ducks don’t eat a whole lot of vegetation, I might not plant my crabapples, plums, and apples too close to them. I might instead use elms or maples – things that drop seeds my poultry will eat, but that I can also collect for hay or bedding for my livestock and to feed my worm bins. I might also use more tender forages or create a pond or ephemeral creek system for duckweed and make the guilds nearest the coop-hoop house water-based edibles.

I can use the same riparian-type edibles to create buffers and feed zones that protect waterways from livestock runoff and chilling winds.

Or I might have boggy or seasonally soaked spots and choose to create a guild or system of guilds based around willows that will help dry up those spots. The willow’s functions have increased from just shade, fodder, medicine, and possibly baskets/lashing resource limbs to also include wind break, soil stabilization or tailoring, habitat creation (fish-roots and overhanging limbs), and water purification.

It’s only by analyzing which elements we want and how each element interacts with all the others that we can best create the guilds and spaces that contain the most functions, and contain them most efficiently.

Stacking Functions – Diversity & Resiliency

Any time we can get a space to perform more services for us, it tends to increase the diversity of that space. Diversity leads to greater health. Diversity and stacked-function areas with multiple elements increase our production per square foot. Stacking also increases our efficiency by decreasing travel time (and repeated steps back and forth). The condensed, efficient use of space allows us to do even more on our property, from a rental with a balcony and some windows to a 500-acre dream ranch.

Stacking functions is worth more research. It’s another area of permaculture and functional landscape design with whole articles devoted to just one example or type, and is the subject of books and multiple chapters. Small space gardening can be another field to look into for inspiration even on large properties.

Other areas that may interest homesteaders and folks interested in doing a lot in small spaces are permaculture zone and sector analysis, redundancy in food webs and permaculture, diversity’s effects on soil, and fodder/forage trees, especially the legume family trees and shrubs that also fix nitrogen.

Stacking functions is a quick term for the concept of planning things (elements) and areas (space) to perform the most services for us with the least input. It’s reusing things


Once you have a firearm you need to consider what it is going to take to feed your weapon. You can think of it in the way of just getting enough ammo for a particular hunt or recreation, but I suggest you take a good hard look at stockpiling ammo for the just in case scenario. There are some good guidelines and tips on stockpiling ammo that will simplify this process for you and make it easier than it sounds on some forums you may have come across.

Stockpiling Ammunition: Amounts and Types

First we will go over the best amounts and types of ammunition to stockpile. This could be specific to the caliber and gauge of the firearms you so they may be somewhat generalized. The first type is the ultra popular 22LR. It is common and popular for good reason because it is light, effective, and generally cost efficient. The fact that you can generally get larger lots of this ammo for a fraction of the cost makes it an absolute staple in any ammo stockpile. Chances are you already own a 22LR and if you are new to firearms they are great way to get into shooting because of the lack of harsh noise and absence of recoil making it easy to get your fundamentals down. If you are able to master your shooting fundamentals with a gun that uses cheap ammunition you will be way ahead rather than trying to buy a gun to make you better. 22LR is now becoming a little easier to get a hold of in the 500 round lots again so it is a good time to go out and grab some. My recommendation for the amount to keep on hand is 2,000 rounds that you actually keep stockpiled away from your normal shooting stash. In the event you need to hunt for food this gives you a lot of opportunities with minimal space to store it and weight of the cache. This is only 4 cases of the 500 round “bricks” you typically see people buying.

For semiautomatic weapons such as your AR-15 and AR-10 platforms, as well as semiautomatic pistols it is a good idea to keep around 2,000 rounds as well because these types of rifles can really chew through your ammunition stock if you do a lot of shooting. It’s pretty much nothing to go out and shoot 100 rounds in an afternoon and that is just a little over 3 standard 30 round magazines. If you can keep stock of more than this it is even better but aiming for 2,000 rounds in reserve plus whatever amount you deem for practice shooting is a great goal to shoot for. It is the easiest and most affordable to buy FMJ (full metal jacket) ammunition because it is the most available and in the largest lots if you want to get bulk pack. A good goal is to have around 200 rounds of the more specialty type ammunition such as ballistic tip, hollow point, and match ammo because they are great for what they are designed for but are often over double the price of the conventional FMJ type ammunition.

For your bigger bolt guns and magnum rifles try to keep around 250 rounds in your reserve stash. The reason for this being a lower number is factored by two main reasons: cost and amount typically used. If you own a 300 win mag you know how expensive it is to shoot and the fact you don’t typically go out and try to shoot 100 rounds in a day unless your shoulder is made out of granite. However if you do a lot of long-range shooting you may go through more of this ammo so keep in mind the 250 rounds is just the amount of ammo you are saving for an emergency not included in your normal shooting ammo. For shotguns aim for about 500 rounds because regardless of gauge this is a lot of firepower. It might be a good idea to get a variety of loads besides just basic #7 bird-shot. 00 buckshot is great because of its effectiveness at self-protection and slugs for hunting.

Storage Solutions for your stockpiled ammo

MTM 50 Caliber Ammo Storage Can – $10

Now that you have a better idea of how much ammunition to keep on hand I’ll go over the best ways to store it for long-term storage. First you will need some good containers such as plastic or metal ammo cans. These come with a gasket in the lid to make a strong seal when snapped shut making moisture and humidity difficult to permeate. I recommend leaving the ammunition in the boxes it comes in just for organizational sake to keep a bunch of loose rounds from rolling around. If you buy larger lots they sometimes come in an ammo can already so that will save you a step looking for a container. You can buy replacement gaskets so if a gasket ever starts to fall apart or dry up you can simply throw in a new gasket to keep the integrity of the ammo can. The best thing to do is keep desiccant packages inside the ammo can to absorb any moisture that would be inside the can keeping the rounds dry.  These are cheap and you can usually find them in things you already purchased in the packaging. Make sure to mark each box with what is inside either with some tape to write on or stencils so it is easy for you to identify if in a hurry.

Cost effective way to start stockpiling ammo

If you do not have the money to drop $350+ on a big lot of ammo you can simply go for a small box of ammo every week or couple of weeks. Just as an example say you will get a box of 20 rounds of .223/5.56 every week at around $9 a box for basic FMJ will add up to only $36 dollars a month and give you 1,200 rounds year. So basically you can incrementally add to your ammo stockpile instead of have to buy in bulk. It does offer some cost savings to purchase larger lots but may be a little easier to budget for a smaller weekly expense. As long as you take some simple steps to budget and prepare for it you will be able to begin getting a good cache built up.

  Once you have a firearm you need to consider what it is going to take to feed your weapon. You can think of it in the way of just getting


When you’re out hiking or camping, you can never be sure of what awaits. A simple unpredictable weather event or losing track of where you are on that hike into the wilderness, can ruin everything including your clothing and food. For some reason, you might be forced to stay in the jungle longer than you had planned. But regardless of what happens, the last thing you want to be is starving. The great news is, you can never starve in a jungle – if you are motivated, but it is always up to you differentiate between what is safe for eating and what is not.

As a regular camper, I would suggest that you turn to insects. Reason being, they are rich in nutrients including proteins, fiber as well as fats you will need to survive in the jungle. Another great piece of news is that it is unlikely that they will make you sick. But just like any other food, there are those insects that are safe for eating as well as those that are not.

This post has compiled a list of five edible insects that might save you from starving when you are stuck in the jungle. They are easy to access, could allow you to survive in the jungle, and the best part is they don’t require a long procedure to prepare.

Locusts

One insect you can never miss while you are out in the jungle is a locust. Locusts are always everywhere and most importantly, nutritious. Up to 50 percent of locust’s dry weight contains protein which is quite high than what you will find in cows. Other valuable nutrients include fats, carbohydrates and more.

You can catch more locust during the day because that is the time they are most active. All you need is some net. But make sure you release them in some bucket immediately, you’ve caught enough to prevent them from eating your net. You can then prepare some locust meal, by dry roasting them, adding some salts and serving.

Crickets

Crickets serve as an excellent source of food in many parts of the world. They are also among the most nutritious insects you can easily catch in the jungle. For example, 100 g of crickets has up to 121 calories, 5.5 grams of fat, 12.9 g of protein.

The insect also packs many nutrients including calcium, phosphorous and much more. To catch some crickets, place some sugar into a deep bowl or a jar. Find their location and sink the jar into the ground. Leave it there overnight and expect a large meal of crickets very early in the morning. You can also store them for some time by adding a breathable material on top of the jar. You can then dry roast them, add some salt and eat them.

Ants

Ants are always everywhere and the best part, easy to catch. They are packed with proteins providing your body with the amino acids. They are also rich in copper, phosphorous and many other nutrients. Ants are easy to catch because they always match in one line. Just look around to see if you can find one or locate an ant hill.

If you’ve found an ant hill, place some stick through the opening. The ants will start climbing on it trying to bite it. When this happens, take the stick out and dunk the ants on the stick into a container filled with water. Once you have gathered enough, you can boil them for approximately, five minutes to neutralize the acid in them and then eat.

Termites

If you want something tasty, then you will love having some termites for lunch or dinner. Apart from being among the most nutritious insects in the jungle; they also offer a variety of health benefits. For example, they have been used for medicinal purposes, particularly in the rural areas of the world. Studies have also shown that they have some antiviral properties that make them effective in treating a variety of complications including asthma, bronchitis, sore throat, whooping-cough and more.

To catch some termites, break and open a log and then shake them out. If it is raining, you can place some light into a bucket. They will gather around the light. You can then collect as many as you want. Prepare them, by roasting them in a dry pan on a campfire.

Stinkbugs

You might despise their name, but stinkbugs are great when prepared well. They are also among the best delicacies in Mexico. Apart from being nutritious, they offer a variety of health benefits just like termites. Stinkbugs are easy to access and catch during winter. You can find them hiding or taking shelter under logs or rocks, and sometimes you will see them on the open ground.

Stink bugs unlike many insects in this list can be eaten raw, but it is always advisable that you soak them in some warm water for approximately, 10 minutes then roast them in a dry pan. You don’t have to eat them immediately. After being boiled, stinkbugs can last a week without going bad.

Additional Tip

Even though most insects are nutritious and safe to eat, it is advisable that you be a little bit cautious when choosing your food. For example, experts advise that you avoid brightly-colored insects and those with strong smell because they can be toxic.

Also, remember; some of the edible insects mentioned here such as ants and the rest produce some toxic chemicals when offended. So, make sure you’ve prepared them well. Also, make sure that your cooking water is safe. No matter where you are planning to get your water, make sure it is boiled properly before use. If your only source is spring, I would suggest that you consider spring water testing.

Final words

If there is one thing I’ve learned about camping is survival. One fact is, a jungle has everything you need to survive, but it is up to you to figure that out. These five insects will without a doubt serve you well, but that never implies that they will be available at the location you will choose to set your tent or at the time you need them most. Using the methods mentioned above, make sure you’ve collected enough when you get the chance, prepare and store safely to use later.

  When you’re out hiking or camping, you can never be sure of what awaits. A simple unpredictable weather event or losing track of where you are on that hike into

Introduction

If you happen to have worked on a military base in the past, I’m sure you’ve encountered guards standing at the guardhouse routinely waving traffic through the gate – maybe stopping the occasional vehicle to ask a question or two before waving them through. Such a relaxed approach may be adequate during peacetime, however post-disaster these procedures will be wholly inadequate. This article will describe how small communities can establish and manage effective post-disaster roadblocks.

With the recent unrest in Ferguson, MO we’ve actually had a rather ugly preview of coming attractions regarding the need to control and monitor the movement of people. The image of a large gang of criminals, intent on looting, migrating to a neighboring community and shooting their way into a locked store, is an image that should be forever branded into the consciousness of every prepper. This is precisely the reason that the movement of people will need to be controlled, and it’s going to require more than a smiling face and a wave of the hand.

In the wake of a major disaster, those living in small to mid-sized communities will be faced with the challenge of quickly reorganizing to cope with new and immediate concerns. One critical need will be to “control the perimeter”, which will involve establishing security checkpoints to control and monitor comings and goings. Without such controls the risk of disease and lawlessness could threaten the community’s very existence.

While, at first blush, it may seem trivial to set up a roadblock (“Hey, you two guys go down the road and check anybody passing through town!”), during times of disaster an effective roadblock requires more serious consideration.

Selecting Locations for Roadblocks

As with many aspects of life, when establishing a roadblock “location is everything”, and factors that should help to identify the best location for a roadblock include distance from population centers, availability of sufficient space to meet the roadblock’s missions, ability to be defended and potential for line-of-sight communications.

Ideally a roadblock should be a minimum of 0.75 miles (1.2 kilometers) from any dense population centers. This distance corresponds roughly to the range of a high-powered rifle. In other words, a defensive perimeter is much less useful to a community if an adversary can effectively shoot at members of the community from outside the defended perimeter (a roadblock should, if possible, be that distance from any location where a member of the community lives or works).

Military snipers have been known to, on rare occasions, hit targets at distances approaching 1.5 miles. Obviously a bit larger safe zone should be considered if one anticipates adversaries having military sniper training.

Roadblocks are staffed by people, and in the long term people require supporting infrastructure. Such infrastructure potentially includes provisions for the sanitary elimination of human waste, protection from the weather, storage of supplies and space to be used to detain travelers without blocking traffic. Any location considered for a permanent or long-term roadblock should address these real-world needs.

The security of those staffing a roadblock should be a primary concern when selecting its location. It is inevitable that there will eventually be security incidents at any roadblock, and the personnel there should be able to ward off any anticipated attack until reinforcements can arrive. The availability of hard and soft cover should be considered, as well as local geography (with regard to both offense and defense). In some situations it may be important to have a concealed shooting position located nearby to provide supporting fire in the event of the most serious situations.

Yet another important factor to consider when selecting the location of a roadblock is the availability of line-of-sight communication to the community. This can be important in case other more conventional means of communication become unavailable. For example, flags might be flown to request reinforcements or to visually indicate other abnormal situations. In some cases it may be necessary for a central headquarters within the community to have a line-of-sight to the roadblock, while in other cases it may be sufficient for the roadblock to be within sight of any population center (from which communication might be relayed to the central headquarters).

In addition to the factors already mentioned, a roadblock should be established at a location that is a natural traffic bottleneck. Otherwise it is possible that intruders could simply bypass the roadblock.

Sandbags are an often over-looked prepper supply that can make very effective cover for fighting positions. Just add hard work.

Facility and Equipment

Without certain basic features necessary to meet the needs of those who will be staffing it, the ability of a permanent or long-term roadblock to accomplish its mission will be significantly degraded. The roadblock station should feature:

  • A latrine or other means of eliminating human waste in a sanitary fashion
  • A source of clean water
  • A structure that provides protection from the weather
  • A flagpole (and various colored flags) for backup visual communication
  • A siren or other device for producing a loud and distinctive audible alert
  • A lockable storage bin that is protected from the weather
  • Sandbags or some other form of hard cover
  • Nearby access to places of concealment
  • A movable barrier to control the flow of traffic
  • A radio or other device for security-related communications
  • Chairs
  • A temporary parking area where one or more vehicles may be detained without blocking other traffic
  • Signs posted at appropriate locations to provide instructions and cautions to approaching travelers

Flags of various colors should be available to, at a minimum, signify abnormal security conditions (perhaps yellow and red), requests for unscheduled personnel rotation and requests for medical assistance.

In addition to the equipment listed above, those who staff the roadblock (and anyone providing them covering fire) should carry weapons that are appropriate to their role. Holstered handguns, along with spare magazines and a good supply of ammunition, are probably a best fit for those staffing the roadblock; with a rifle close at hand in the guard shack. The advantage of holstered handguns is that they leave hands free for signaling and conducting searches.

Communications

Good communications, both among the personnel staffing a roadblock and between the roadblock and other security personnel within the community, is vitally important. Efficient non-verbal communications between the personnel staffing the roadblock can be quite useful. For example, hand signals might be used to guide traffic or to quickly and silently communicate ‘caution’ or ‘danger’ to other personnel staffing the roadblock. They might also be useful in communicating with any concealed locations that are tasked with providing covering fire during times of heightened security.

Radio or other forms of electronic communication between the roadblock, a central headquarters and/or other roadblocks or other security personnel can obviously also fill a vital role. If non-secure radio communications are utilized then standard code words (similar to the ’10 codes’ used today by law enforcement personnel) should be employed to augment communications security (‘COMSEC’).

TA-312 field phones can still be purchased in surplus stores.

An alternative to radio communications is the use of military grade ‘field telephones’. Such phones provide the advantage of increased COMSEC. Military-model phones worth consideration are the TA-1, the EE-8 and the TA-312 field telephones, which have been used by the US military throughout the twentieth century. The TA-1 offers a range of up to four miles and requires no power source (it is voice-powered). The EE-8 offers a range of up to 17 miles, but requires batteries. The TA-312 has a range of up to twenty-two miles under dry conditions, and features a built-in hand generator so that batteries are not necessary for operation.

Small military switchboard devices can be installed at the central headquarters to enable point-to-point telephone communications between multiple locations. There would also be a need to obtain sufficient lengths of telephone wire to interconnect the desired stations.

As has already been mentioned, flags and sirens can fill an important role by providing a means of communicating certainly critical conditions to the entire community.

Staffing

It is typical to have a roadblock staffed by a minimum of three individuals; two members of the team typically process foot traffic and vehicles through the roadblock in accordance with standing orders, while the third oversees the operation from the guard shack and is ready to react appropriately if an incident develops. Occasionally the duties associated with manning the roadblock can be physically demanding (for example, if the station comes under attack), so it is important that all team members be physically fit.

Under normal circumstances teams should work in shifts and rotate on and off the roadblock in accordance with a pre-established schedule. As already suggested, in times of heightened alert it may also be prudent to employ a concealed sniper to provide support on an as-needed basis.

Using Roadblocks to Gather Intelligence

Roadblocks can be excellent (and cost-effective) sources of critical intelligence information about potential future security threats to the community. Question and answer sessions conducted with passers-by can provide a wealth of information which can often be corroborated by multiple independent observers. When collecting information from travelers about potential adversaries they may have observed, the following ‘SALUTE’ questions should be remembered:

  • S)ize of potential adversaries
  • A)ctivity a potential adversary was observed being engaged in
  • L)ocation of potantial adversaries
  • U)nit Types Capabilities of potential adversaries
  • T)ime the potential adversary was observed
  • E)quipment possessed by a potential adversary

Policies and Procedures Governing Roadblocks

The individuals manning a community roadblock should be governed by policies and procedures in addition to and standing orders. Policies governing a roadblock should include:

  • If possible the personnel staffing the roadblock should wear common uniforms or otherwise present themselves to travelers as members of a disciplined and professional unit.
  • To the greatest extent possible, roadblock personnel should maintain detailed notes of all incoming and outgoing traffic, including answers to the ‘SALUTE’ questions described above as appropriate.
  • The maximum number of consecutive hours that individuals should attend a roadblock without being relieved.
  • Identification of different classes of travelers (e.g. community members, vs. known locals vs. unknown personnel)
  • Standard operating procedures for handling each class of traveler.
  • Policies regarding personnel taking necessary breaks during their work shift.
  • Regularly-scheduled check-ins with the central headquarters.
  • The use of special signs or signals for identification purposes.
  • The procedure for evacuating the roadblock in the event that it is overrun (including the destruction of sensitive materials and equipment)
  • Criteria for pursuing vehicles that attempt to flee the roadblock

Conclusion

The use of roadblocks to control and monitor the flow of inbound and outbound traffic (foot traffic and otherwise) is important to the community from many perspectives. In addition to strengthening the defense of the community, it can be a valuable source of strategic intelligence. The presence of roadblocks also increases the community’s sense of security and well-being, which can itself translate into increased productivity and economic activity.

To paraphrase the great poet Robert Frost who once proclaimed that “Good Fences Make Good Neighbors” it can be said that “Good Roadblocks Make For Secure Survival Communities”.

Somehow my version just doesn’t seem as poetic!

Introduction If you happen to have worked on a military base in the past, I’m sure you’ve encountered guards standing at the guardhouse routinely waving traffic through the gate – maybe


I love the internet and social media. It lets me be exposed to a slew of information and knowledge that I would have otherwise never been able to view. In just a couple of clicks I can watch how to build a primitive spear thrower,  or purify dirty water into something ….less dirty. After enough clicks, however, I inevitably stumble upon something displaying the need for a horribly impractical “prepper tool” that I just must have. Holding this awesome, life-saving, badass and totally affordable (insert sarcasm) thing is some ex-military looking, bearded fitness model that TOTALLY MIGHT HAVE BEEN SF, Or an overly sexualized woman with chiseled abs.

Now hear me.

I don’t think there is anything wrong with looking like a Viking with an AR or a jacked and tan super woman–in fact, that’s actually super impressive. But is it indicative of someone living the prepper lifestyle?

Pros of Tacticool

Let’s not underestimate the power of looking like a tactical boss, because there are some practical advantages to be found.

1) Predators naturally seek soft targets– It’s primal, like natural selection. Whether the predator is a lion or street thug, the predatory instinct is driven to achieve its goal via the easiest, most non-confrontational path available. When looking to rob a house, break into a car, or mug an innocent bystander, the criminal has a vast amount of potential options and they will inherently choose the path of least resistance. This is one obvious advantage to looking like a former linebacker with Don’t Tread on Me tattooed across your throat.

2) You might feel more confident– Hormones are a hell-of-a drug. Seriously. And your mindset and mentality play a role in how your body produces and expresses levels of certain hormones. Confident people have higher levels of testosterone than their more sheepish counter parts. They also have lower levels of cortisol. Here is a quick talk on body language hormones, it’s worth the watch. What will that do for you?! How about greater muscle mass, clearer skin, stronger bones, lower stress levels, and decreased levels of anxiety. So if a Mo-hawk and 80-piece pocket tool are what you need to feel awesome, then I would say, go for it.

3) It’s just fun– Unless you’re too uptight to enjoy the simple pleasure of holding blacked-out combat katana or you wouldn’t enjoy setting up plans with your buddies on how you would take back and survive a potential “Outbreak” like scenario.  But for most of us, this serves as a temporary form of escapism. We take it seriously, but definitely enjoy the process along the way.

Cons of Tacticool

How could looking awesome be a bad thing?

1) The issue with abs– On average men are 18-24% and women are 25-31% body fat. This is relatively natural. For men, they typically start to show visible abdominal muscles around 10% body fat, but will have more defined musculature closer to 6%. Women tend to fluctuate around these numbers because they naturally store fat in locations other than their midsection (where the sexy abs are). So what happens to these fitness icons if there is an actual SHTF scenario and food acquisition has becomes a real problem. At 6% body fat your body is already running low on fat, which is actually very important for cellular function. Now your body is forced to burn your lean tissue and muscle for calories. This is not an excuse to be un-athletic or out-of-shape. But if you do truly identify yourself with the prepper lifestyle, then how prepared your body is must be a primary goal. You should absolutely be strong and physically capable. I believe you should consider pursuing a body that thrives in every situation and scenario, rather than one that simply looks good on Instagram.

At 6% body fat your body is already running low on fat, which is actually very important for cellular function.

2) The lines between tactical and tacticool become blurred– The more time you spend in and around any group or community the more that community becomes your status quo. I am sure you have experienced this in your life countless times. Everyone at your work drinks beers on Wednesday nights at a bar close to your office. Now you also drink booze on Wednesdays. Your significant other watches a specific TV show, now so do you, etc. If you spend enough time pouring yourself into the cool, but unrealistic, prepper activities and products then eventually you will lose sight of what makes sense and perhaps lose sight of what’s out there just to make someone else money. This is a trap that most of us have fallen prey to at some point. If this is you, then don’t be too hard on yourself. You are in great company. But take note of the things and time you have invested in, that offer little to no return on actual preparedness.

3) Cool is not going to help, when all hell breaks loose– This seems like the most obvious and important reason why we shouldn’t be pursuing phony replacements for the real thing, but it needs to be said. The reason we prep is because we have this thing in the back of our minds telling us, “event X could happen”. Whatever your X is, you’re probably right to pursue it. But somewhere along the way we tend to get caught up in gadgets and thing-a-ma-bobs that offer little to no value in prepping for our X. Do not get caught in this trap. If you wake up one morning and event X is taking place all the money and time you spent on superfluous things and skills will leave a tangible bitterness your mouth.

Pros of Tactical – You are the real deal


1) You’re an actual hard target – There is a difference between looking the part and being the part. If you are stuck in the “cool mindset” currently then this will be hard for you to distinguish. But if you ever have the opportunity to spend time with someone who is actually prepared for event X then you will quickly realize they have no flashy bumper stickers, no unnecessary tools and they do not feel the need to show anyone how prepped they are.

2) You ARE more confident – There is something to be said about the benefits of the “fake it till you make it” mindset and the power of feeling confident. But nothing will substitute the confidence that comes from being tried, tested and proven worthy. This type of mental shift permeates every fiber of your being and you see the world differently. When you understand what you’re capable of and know the limits of your training, you can take that with you wherever you go.

3) It’s deeply satisfying – Don’t get me wrong, it also fun. But there is a certain sense of satisfaction you get with a job well done. There is a specific feeling of accomplishment and deep well-being that acts like a filter through which you see the world, knowing that you are ready. Ready for whatever life throws at you, ready for the good, the bad and the many potential X events that exist.

Cons of Tactical (kind of)

1) Work, work, work, work…work – This type of lifestyle and level of preparedness takes work and a lot of it. You cannot purchase it. You cannot watch a few YouTube videos and consider yourself amongst the elite. You must be diligent, consistent and continually striving to master yourself and your situation. This is something that few people are willing to do, because work is hard and uncomfortable. But that’s why few people are really prepared for the hardships of life. But you are going to win in this is game, while others are satisfied with following the status quo of mediocrity.

2) It takes humility – Humility is something that we are culturally void of and so, being humble is typically counter intuitive for most. But if you are over-confident or the least bit arrogant then you will have a false assessment of your abilities and mistake your level of preparedness for something it isn’t. Being tactical requires self-reflection and an accurate assessment of who you are and what you’re capable of. This will typically be accompanied by a degree of emotional or mental strain as your reality will not match up with your ideal. Being a great Prepper takes the ability to assess your situation and degree of readiness with accuracy.

3) It takes patience – Like humility, patience is another very important skill that one must cultivate if they are going to be prepped for life’s contingencies. It would be great if in an afternoon or weekend we could take a class, get a certification and be off-the-grid ready. But this type of work takes time. The more time you spend in this world the more you will come to realize that you have additional skills to master and continual knowledge to obtain. So, enjoy the journey and take pride in every step along the way. Patience is not only a virtue, it’s one of your closest allies.

As you can see, the above “Cons” are not negatives, they are just challenging. As you continue down the tactical road of physical and mental preparedness, remember that the journey is meant to be enjoyed. Don’t get sidetracked or fooled by anything that claims to be the end-all of products. Put in the time and work, seek to better yourself and know that the best investment you can make in your preparations for the future will always involve personal growth and investing in yourself.


  I love the internet and social media. It lets me be exposed to a slew of information and knowledge that I would have otherwise never been able to view. In

Hiding in plain sight is a term everyone has heard at one point or another. What does it mean from a prepper’s perspective? How much can you really carry around while still looking like the average Joe/Johanna? In this article I list some of the most unusual ways that some basic survival gear, weapons, and defensive tools can be disguised in items you already wear every day.

This is not about concealing knives and firearms. It is a collection of ways hide small survival items hidden in plain sight. You will even be guided through how to create one of the most useful resources that most people never think to include in their gear!

Here are just some of the items that can easily be concealed or disguised:

Razor Blades:

Secret Compartment Money Belt

  • a simple sheath and these are easily stored in a wallet
  • Can be inserted into a slit in a leather belt
  • Under the insoles of your shoe
  • Sheathed and taped to the inside of a steel toe boot (helps with metal detectors and xray)
  • In a hollowed out sole or heel of a shoe
  • Encased in a faux gold plaque that are common for necklaces as engraved name plates
  • Behind a fancy belt buckle
  • Underside of a watch face
  • Part of a brooch or inside your name-tag


Razor Wire:

  • long “noodle beads” can be used to protect ones skin and turn this into a necklace
  • Hollowed out heel
  • Inside a hollow purse strap
  • In a special groove inside a man’s ring
  • In a belt
  • Fishing Hook
  • encased in tear drop earnings
  • In/Behind pennants
  • Backside of belt buckles
  • Made into a Broach
  • Embedded in the brim of a hat
  • Inside a hair scrunchy (caution, best if used loosely over a rubber band bun)
  • Hollowed out shoe heel

Small items like razor, wire or even maps can be hidden in special watches.

Fishing Line, Rope, Paracord:

  • Simply sew into various items of clothing as a contrast stitch.
  • Embroidery
  • Necklace
  • Bracelet
  • inside hollow watches
  • Woven into a beanie
  • Braided into a belt

Survival Hiking Boot Laces – Wilderness Survival Emergency Fire Starter – 550 Paracord Laces with Ferro Rod Tips and Serrated Steel Striker Tools – Black or Brown

Fire Starter Rods:

  • Hollow tips of shoelaces
  • Dangle earnings
  • Pendant
  • Bracelets
  • Inside a Hollowed belt
  • Belt buckle
  • Inside wallet
  • Hollowed out heels
  • Replacing sections of underwire in a bra.
  • Fastened to a barrette

Black Powder vials:

  • Worn as pendants
  • Inserted into hollow chap stick or lipstick tubes.
  • Inside the heel of a shoe
  • Attached to your key-chain
  • Inside empty travel sized hand lotion bottles
  • Inside empty travel sized toothpaste tubes
  • taped to the backside of a large belt buckle
  • Simply slipped into a pocket/purse
  • Disguised as ornaments on the outside of a purse

100 Deadly Skills: The SEAL Operative’s Guide to Eluding Pursuers, Evading Capture, and Surviving Any Dangerous Situation

Blow Gun Darts:

  • Attached to barrettes and bobby pins
  • Dangle earrings
  • Pendants
  • Broaches
  • Inside belt-loops
  • Part of the belt buckle
  • Inside a hollow belt
  • Inside the straps of a purse
  • Replacing part of the underwire of a bra
  • In your wallet
  • On a key-chain
  • Under the insoles of your shoes
  • In a hollow shoe heel
  • Decorations on a purse

TIHK Handcuff Key

Handcuff Keys:

  • inside a slit on the back of your belt
  • On a Key-chain
  • Inside a hollow watch face
  • Inside a pendant
  • In a hollow belt buckle
  • Inside the hollow heel of your shoe

This list could go on and on. As you can see there are a variety of things that can have various survival uses that can be incorporated into items that you wear every day. By creating these clothing items now and stocking your supplies, you can guarantee that if SHTF you are wearing your basic supplies. If you cannot get to your Bug Out Bag and your EDC has been compromised in some way, you want to be sure you always have something, literally, On you.

So, where do you start?

Start with the items you wear the most. For most people this is their shoes. This is also the option that can possibly be the most difficult to alter, yet carry the most supplies. This is why I have chosen to help you through this process today.

Different style shoes have different alteration options and limitations. If you primarily wear tennis shoes with thin soles, you may want to start with replacing the shoelaces with paracord and fire starter laces. Depending on how thin the soles are, you may be able to still store some supplies in the sole (such as a razor blade) or under the insole, inside the tongue, and even secured to the inside.

If you wear boots with some heels, chances are these heels are already partially hollow. You can buy boots that already have this secret compartment, or you can take on the challenge of creating it yourself. If you are creating the hollow yourself, you will need to secure the opening of the compartment so it isn’t easily damaged, removed, or otherwise tampered with. Detach the insole of the shoe near the heel to carve it out yourself. You may want to find a solid container that can provide the heel some of the support that may be lost in the hollowing process. If you want easier access to your compartment you can leave the insole dislodged. If you are hiding items you intend to keep more secure, you will want to glue down your insole. take heed to also secure or resew the insoles before gluing so that it can stand up to more scrutinizing inspection. Depending on the width of the heel, and the quality and composition of your insole, you may need to find a thin but sturdy material, or extra rubber so that it doesn’t dip down later. We do, after all, want these shoes to remain comfortable.

The other option is to put the opening of the compartment on the bottom of the shoe for easier access. This can be accomplished by carving out a perfect circle or square and preserving it, then hollowing the sole enough to fit in the supplies you desire to hide, or the container to fit them. These must fit very snugly and be lightweight enough as to not put pressure on the plug. Take the preserved piece of sole and attach it to something a little larger than it is if you need to make it more like a cork. Simply plug the hole. If it needs help staying put, and you don’t care about how it looks you can use glue or staples. Of course if you are quite handy and looking for an even more accessible and sturdy option… You can cut the end of the sole clean off, replace the inside with a box with a circle opening, and fasten threads to the removed heel and screw it back on. This would work best on heels that were already hollowed, made of wood, or women’s high heels.

Final Tip: Pack the heel in a manner that is least likely to damage the supplies and add padding as needed so they don’t make strange noises while you walk.

Disclaimer:

Some of the items in the list could possibly be illegal to conceal in the manners suggested in your locality. Please use discretion when choosing the items to include in your EDC wear.

Hiding in plain sight is a term everyone has heard at one point or another. What does it mean from a prepper’s perspective? How much can you really carry around


Even if you only have a basic knowledge of prepping, you will be familiar with the idea of necessities. Food, water and shelter, as well as weapons, are the cornerstones of discussion pages and articles about beginning your preparations. Although those provisions are definitely necessary to keep you alive, there is one aspect of prepping that is often overlooked and it can hurt even the most knowledgeable and well equipped survivalist.

Sanitation: otherwise known as the horribly unsexy, anti-adventure aspect to survival that hardly gets discussed. Without proper sanitation, a person who has food, water and a secure shelter can still perish.

There are a number of aspects for proper sanitation that any prepper needs to consider. The simplest items for something like a Bug Out Bag can include hand sanitizing liquid, bleach wipes, water purification pills and an instant use purifier like a LifeStraw.

Benzalconium wipes that aren’t expired are guaranteed to kill many severe viruses that average household disinfectants can’t touch, so having a supply of those for cuts is going to give you an edge that alcohol swabs can’t provide. A roll of toilet paper is also a must and for ladies, a supply of feminine hygiene products, in case that time coincides with the end times.

Sanitation on the Go

An outdoor latrine already built and ready to use is ideal, but not a common site in most backyards.

The next level of sanitation preparedness involves supplies as well as preparation. If you are out in the wild that would include finding a spot at least 25 yards away from camp and 50 yards away from your water supply to do your business. That spot should include a way to wash your hands before returning to camp, so having a bar of soap is a good plan to reduce your dependence on hand sanitizer and keep your camp clean.

If you are sheltering in place your toilet is most likely not going to work, unless you are dealing with a situation where water service hasn’t been disrupted. That is fairly unlikely, so having supplies and a plan for them could make the difference in getting sick or staying healthy and ready to survive.

A simple bucket can become your best friend in a survival scenario. Using a toilet without being able to flush can lead to serious health concerns, especially if multiple people are using it. As it fills, the amount of germs becoming airborne increases. This is not safe at all. Having a plan can change that.

Luggable Loo Portable 5 Gallon Toilet = Cheap and easy Grid down solution to bathroom issues.

Using a bucket gives you the opportunity to throw your waste in an area outside of your shelter. Rather than using the bucket itself, it is far better to keep a box of garbage bags available to line the bucket. It will make disposal easier and prevent accidental spills. A bucket filled with garbage bags, soap and toilet paper rolls is easy to tuck away in a closet and it will make a drastic difference in your ability to maintain sanitary conditions.

There is always the option of buying a specialty bucket lid that is designed as a toilet seat to increase comfort, but it isn’t necessary. It’s a personal preference to include one in your supplies. Other ways to increase the safe handling of waste would be to include disposable gloves and bleach in your bucket to eliminate skin contact while moving or disinfecting with a bleach/water solution.

The most ardent prepper who has their eye on a homestead situation can take this planning even further. If you are intent on staying at your camp for an extended period of time, one of the best things you can have is a container of quick lime powder, which can be poured over your waste to help it break down faster. The same is true for packaged enzymes that are used to break down waste in septic tanks. It’s a good habit to get into, especially if you plan to build a permanent out house.

Simple plans for sanitation can go a long way in keeping your food and water, your camp or shelter and all those depending on you clean and healthy. It will help control the spread of diseases like cholera or diphtheria when medicine and doctors are hard to locate and general experience with those illnesses is lacking.

It has been said that an ounce of prevention is worth a pound of cure. With these tips and a bit of extra planning any prepper can ensure they are practicing good sanitation. Just because the SHTF, it doesn’t mean you have to get messy or sick.

  Even if you only have a basic knowledge of prepping, you will be familiar with the idea of necessities. Food, water and shelter, as well as weapons, are the cornerstones