Home2017January (Page 2)

Part II: Modes of Carry

Yesterday we talked about holster selection based on need, intended environment and material. Today we’ll talk about the different methods of OWB (Outside the Waistband) and IWB (Inside the Waistband) carry.

Hip carry

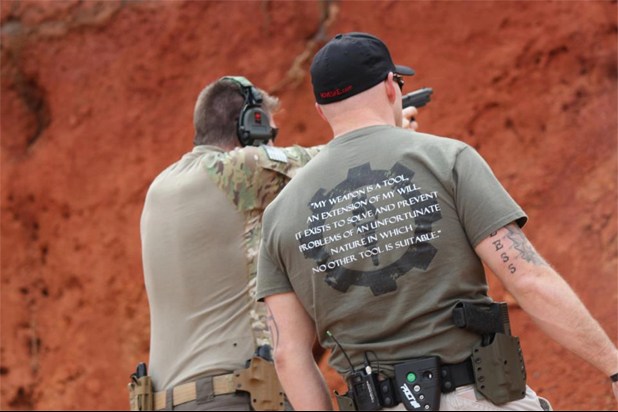
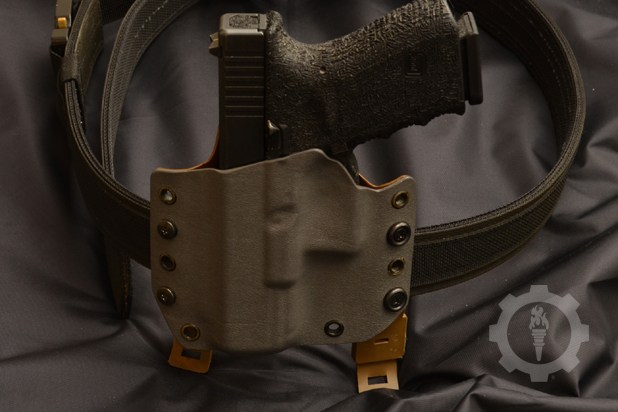
Hip carry is the traditional method of carry for a handgun, the most common and strictly speaking from a biomechanical standpoint, the most efficient (i.e. the distance of travel for the draw to the point of fire with the fewest steps necessary).  A handgun at the hip provides a stable platform allowing for ease of access and a strong position for retention due to its location near the center of balance.  The most common holster positions are straight cant (muzzle directly down) and a 15/20 degree cant (also known as FBI cant).  FBI cant is helpful in making a hip carried weapon more concealable, but it will slow muzzle to target on the draw, and by its position forces the wrist into an extreme bend in order to draw the weapon.  The necessary articulation in order to draw the weapon can be reduced depending on the location of the weapon (pushing towards the front or back of the belt) but it still will present an issue for certain shooters.  If your body type is one that requires as much concealment help as you can get, a canted holster may be a good choice, just realize that a zero cant holster will be more efficient.

When concealed, either under a T-shirt or cover garment, hip carry does have a higher chance of printing against the clothing but access to the weapon can be made quickly.  To avoid printing, clothing can be bought in a larger size, or the weapon can be positioned higher on the belt (a High Ride model holster) to push it into the natural curve of the body above the hips.  Weapon size, carrying a compact or sub-compact as opposed to a full size handgun will also help with concealment.

Leg rig

Thigh carry, leg rig, drop-leg, whatever you want to call it, is a good idea in a small (very small) set of circumstances.  In every other situation it’s a bad idea.  I hate to be blunt, but it’s true.  The leg rig has been around (in its present form) for a little more than 30 years, introduced first (arguably) by Safariland at the request of Special Operations Forces who wished to have an alternate carry method for their secondary weapon when wearing scuba gear, a parachute harness or rappelling harness.  The leg rig was also useful in allowing the draw to clear the body armor of the time.  Obviously the first issue with a leg rig is that it is attached to a part of the body that by nature is designed to move.  This tends to bang the weapon around, knock it into the environment and allow it to get hung up on anything that wants to reach out and grab it.  Leg rigs also create an almost never ending need for adjustment.  Empirically speaking, the leg rig has been shown to have a much slower (as much as half a second) draw than hip carry.  Of course I have seen users adjust their leg rig to a position where it is comfortable and carries close to the body with quick access…they did this by drawing it nearly to the belt line, which is where a hip holster could be worn in the first place (including with a 1” drop attachment now available for many styles).

With the advent of thinner body armor and the evolution of load carrying equipment in general, the majority of plate carriers no longer present an issue for a hip worn weapon. This makes the use of a leg rig a moot point.  The leg rig is a status symbol for some, or a just because decision for others.  My advice – don’t use it unless you genuinely need it.  If the leg rig is a mission for job requirement, by all means go forth and be uncomfortable.  Avoid leg rigs made of fabric (read: cheap leg rigs) and go for a sturdy Kydex such as a Safariland.  Because the holster is going to take more abuse than a hip carried holster, the stronger the holster the better.  I once saw a gentleman pressed by exigent events run three blocks. Sadly, his sidearm only ran two.  Caveat Emptor.

Shoulder carry

The shoulder holster has been around for almost (or as) long as the hip holster.  Generally it’s a harness system worn over the shoulders that supports the handgun under the support hand shoulder in either a vertical or horizontal position.  These holsters usually begin at level I retention up to level III and require the user to reach across their body to draw the weapon with their primary hand and that’s where the problem begins.  We do not want to point our weapon at anything we do not intend to shoot., yet when the handgun is drawn from the shoulder holster, the user will muzzle a wide area in the arc of the draw before the weapon is brought to target.  The issue there is explicit.  Now, the shoulder holster does conceal the weapon better than some other holster types, but it is a safety issue by design and in no way faster than a hip carry draw because of the distance the muzzle must travel before coming to the target.  A straight line beats an arc all day long.

I do not recommend a shoulder holster, as the only real advantage I can see is that if concealability.  One might point to the fact that the weapon is easier to access in a seated position than other holster types and this is true. However, this a small advantage for a under very limited conditions and may not be worth the ND (negligent discharge) risk you will have with this type of holster.  Comfort and concealability should not replace safety.

Chest carry

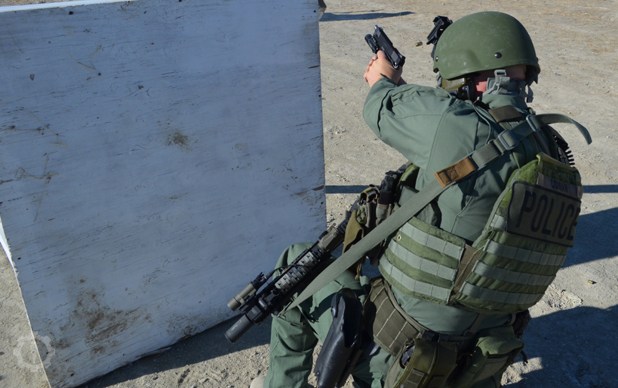
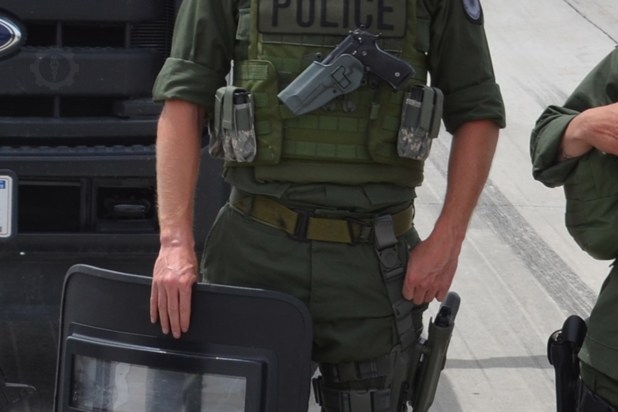
Chest carry implies exactly what it sounds like; the weapon is carried on the chest, usually in a tactical role, with the muzzle of the weapon towards the deck or at a cant for ease of draw.  This method of carry is popular and almost exclusive to the military/security contractor world as it is most common on plate carriers worn in both professions.  Like shoulder holsters, chest carry presents the same safety issues, though unlike shoulder carry, the time to target is near (sometimes faster) than that of hip carry due to the fact that the weapon is carried high on the chest in the handgun workspace and only has to make a 90 degree turn and be punched out to be put into service.

Chest carry has problems of its own in addition to those it shares with shoulder carry.  The main problem in my mind is that if a long gun is carried (which is likely) the sling of that weapon is going to have a nasty habit of hanging up on the chest mounted pistol.  This is tantamount to short sheeting your rifle.  When you need it, the handgun is going to take away just enough sling to force you to untangle it before you can use it.  The second issue with chest carry lies in shooting positions such as prone.  It is hard to lay prone on a chest mounted pistol, especially if the holster is bulky Kydex (this creates obvious problems if you are on the embarrassing end of a two-way range and you’re trying to make yourself small). Lastly, if the holster is similar in design to a Serpa, debris from lying prone stands a good chance of jamming the release mechanism for the handgun.   If your occupation requires extensive use of a vehicle in a high risk environment, a chest rig provides quick access to the weapon, more so than even a shoulder holster would.  My advice is to use a holster such as a Safariland with a MLS/QLS system that can be mounted on the chest when needed, then moved to a hip (or even thigh if that’s your bag) mount when on foot.
Ankle carry

I mention ankle carry almost as an afterthought, though it is still a very popular method of carry, usually for backup weapons.  In this situation, a good holster is one that will protect as much as the weapon as possible and will be very moisture resistant.  A hybrid design such as a leather/Kydex or a nylon/leather may be best.  When purchasing, find a model that provides the most amount of hook/loop real estate as possible both vertically and horizontally so that retention of the weapon and the holster will be high.  I would recommend ankle for a backup weapon, but not your primary.  Any weapon that is going to conceal well on the ankle is probably not going to hold enough ammunition for any sort of sustained fight if that’s what you find yourself in.  Since none of us have a crystal ball, ill use an old adage; bring enough gun.

Editor’s Note—it can also be problematic if you wind up on your back in a fight and cannot get to your ankle to draw, as I discovered once to my chagrin.  DR

Inside the Waistband (IWB) holsters

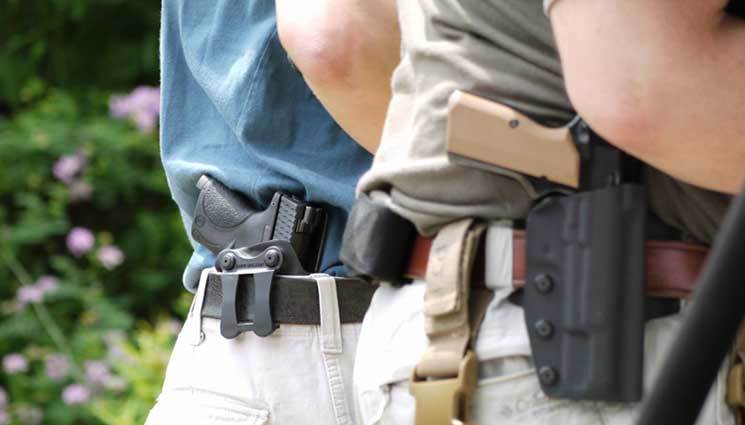
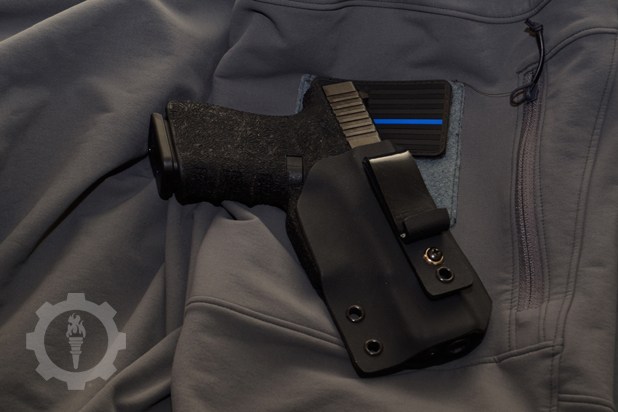
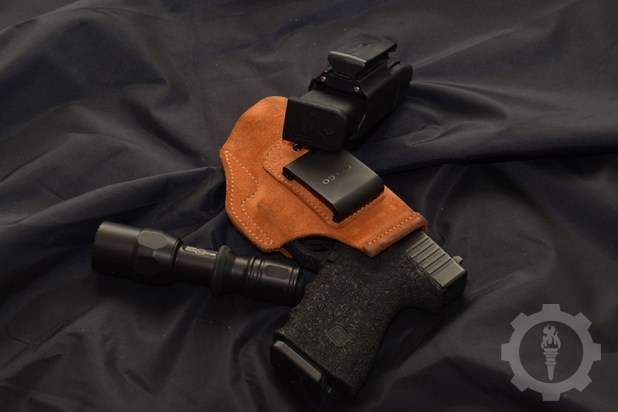
For Inside the Waistband (IWB) holsters, there are three general types; Straight pull, canted and appendix carry.  IWB holsters can be found in all three common holster materials and come in near countless configurations to aid in concealment.  The most common level of retention is friction lock, though level I and II are not unheard of.

The most important aspect of an IWB holster (besides safety and quality) is going to be comfort.  Because the holster will be worn against the body, the material should be reasonably flexible, durable and sweat resistant.  My personal preference when carrying IWB is a leather holster due to its flexibility and long term comfort.  My experience with Kydex IWBs has been poor, as most models I have tried have a tendency to “taco” (the Kydex is so thin that when the weapon is drawn, the tension of the belt bends the holster in on itself, making re-holster difficult).  Kydex is also likely to be more uncomfortable against the skin.  As for nylon/fabric holsters, the quality is going to vary greatly as the market is flooded with dozens of cheap fabric holsters that are little more than sewn pockets that offer no retention at all.  It’s also important to note that I have yet to see a fabric IWB holster that does not “taco” when the weapon is drawn.

Avoid fabric holsters.

The next general consideration is the attachment method.  Popular options for IWB include; belt loops, J-hooks and simple clips.  The belt clip is the weakest option of the three and most likely to fail, they also have a tendency to have a weak purchase on your belt line and come out with the gun upon draw.  The J-hook allows the holster to be concealed deeper into the belt line, which makes them a good choice for concealment.  J-hooks are found on Kydex and hybrid holsters.  Finally, belt loops are just as reliable as J-hooks, though will by design carry the holster higher in the belt line.  Now, the chosen attachment method can also influence positioning of the weapon on the body.  A belt loop style can, depending on body type, be worn as far forward or rear as you like, whereas a J-hook style may limit positioning as it sits deeper in the waistline.

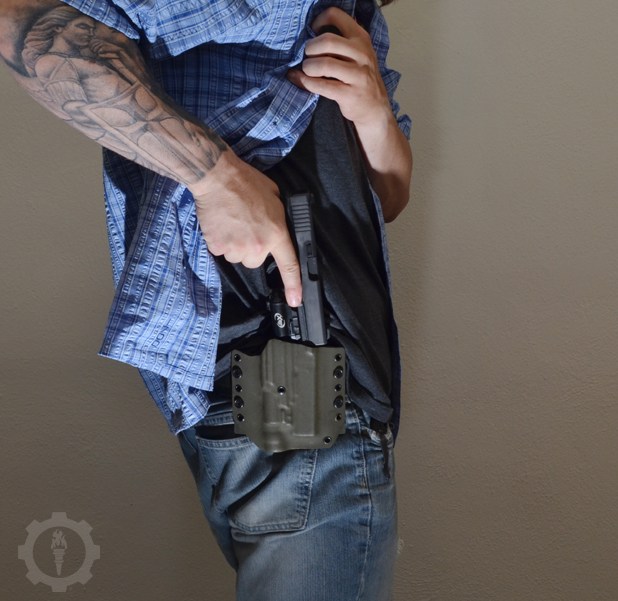
Positioning of the IWB is the final consideration.  If you carry IWB occasionally but normally prefer OWB, its best to carry inside the waistband in the same general location where your OWB holster would sit.  This reinforces repetitious memory and maintains as much continuity with practices skills as possible.  If this isn’t possible, or if IWB will be your main carry method, holster positioning should be chosen based on efficiency.   The same bio-mechanical efficiency that applies to the shoulder holster also applies to IWB.  If you carry at the small of the back (SOB) for example, your draw will require a sweeping arc and rotation of the wrist.  A draw from this location will also include incidental muzzling of unintended targets, though not nearly as grievous as a shoulder holster.  SOB carry has a printing concern that is likely to be exaggerated in light clothing and any bending forward at the waist.  Carry on the hip, or just rear of the hip instead will allow for greater efficiency and concealment in appropriate clothing.  Having discussed the general carry considerations, we can look at our three popular IWB holster types.
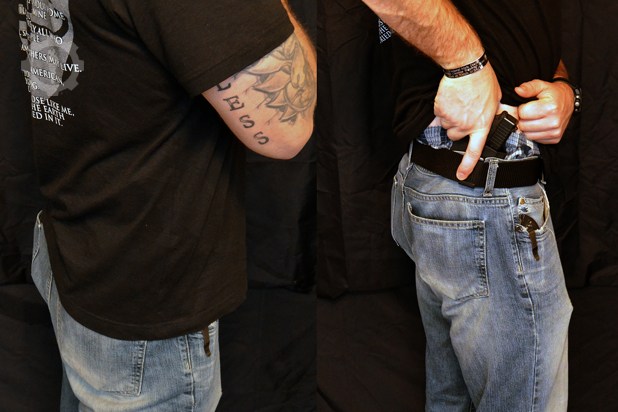
Straight cant

Just like its OWB cousin, the straight cant holster points the muzzle of the weapon directly towards the deck.  This style is designed to be worn more or less in the same location as a hip holster, though it can be moved forward or rear of the hip.  Doing so may complicate the draw, slightly forcing a bend at the waist.  The straight cant style does present some concealment issues if worn at the hip as it places the grip of the weapon more-or-less on the same plane as the belt line and this allows he cover clothing to bunch above the weapon and fall between the grip and the body.  This can be corrected by adjusting the holster off the hip where the clothing is usually looser and not as likely to cling to the body.  This solution isn’t a blanket fix but may work depending on your body type.  The advantages to straight cant carry at the hip is in the draw.  A draw from concealment is going to be slower than from unconcealed.  Likewise, a draw from an IWB holster has a good chance of being slower than OWB because the weapon is held closer to the body and the primary hand must first wedge between weapon and body before the draw.  Because hip carry is more biomechanically efficient than other methods, it provides a faster draw potential.

Canted

The canted style of IWB holster offers more placement options in the beltline, and some with better concealment.  By angling the weapon, the grip does not sit parallel to the beltline and will not have as high of a tendency to print on slimmer body types.  These holsters are common in 5 to 20 degree cants and are usually canted based on where the holster is recommended for carry.  A SOB holster will have a more aggressive cant than one intended for rear-of-hip-carry.  When it comes to choosing a canted holster, its best to get an idea of where the weapon will be carried and how likely that location is to interact with the world around you.  A SOB holster, for example, will make your choice in seating a bit tricky.  There is nothing like the bruise on the back from wearing an SOB holster and then sitting in a hard backed chair for a few hours.

For canted (and IWB in general, of course) low quality holsters should be avoided altogether.  With shoddy design and materials, some holsters will have a tendency to let the gun sit too low in the beltline and the rear sights can hook on the pants or belt, making an immediate draw a problem.  Canted fabric may also drag against the front sight on the draw, or be so pliable that it grabs the front sight upon draw and causes a tug o’ war in your pants.  No bueno.

The final popular IWB method is appendix carry.  Essentially this is where the weapon is carried in the natural pocket of the body between the thigh and the groin with the muzzle generally pointed towards the deck, however I have seen appendix carry holsters with a 5-15 degree cant or more.

Now, take a deep breath if this is your chosen method of carry.

Appendix carry is unsafe and stupid; it is literally a bad idea wrapped around a gun.  Let me qualify that statement.  With appendix carry, the weapon is muzzling your femoral artery and you genitals.  Where a gunshot wound to the latter may be life (and sex) changing, a gunshot wound to the former has a high probability of killing you dead.  For those with little or no knowledge of anatomy, the appendix carry are of the body houses the lateral pelvis, hips, genitals, bladder, lower intestines, colon, and the aorta (which branches into the left/right femoral) as well as some other things that don’t react well to gunfire.  All things considered, I don’t want to be shot in any of them, especially with my own weapon.

Regardless of the holster type or design, the weapon is carried in an area of the body where ANY sitting or bending at the waist is going to muzzle the body as the legs bend up towards the torso to sit, or the torso down to bend over.  Before I go any further, you may believe that you are safe enough with appendix carry and it’s just fine for you.  Sorry, no.  Safety should never be violated for the sake of better concealment or comfort, nor should it be ignored simply because someone believes they are proficient enough to avoid a negligent discharge.  Appendix carry is the only method of carry that intentionally and knowingly muzzles the body and you should not like that. Ever.

As to the efficiency of appendix carry, there is no advantage save better concealment.  A draw from the hip is demonstrably faster.  In appendix, the weapon is drawn from near center line of the body and must be pushed either away (towards the target) or brought past the primary hand hip (to the side) before the weapon can be fired in close contact.  If the weapon is fired from centerline immediately upon clearing the holster, the slide will impact the body and runs a high risk of malfunction.  Add to that, the weapon essentially clears the holster sideways and must be rotated before the sights can be used, which delays the first aimed round.  The lag between appendix carry and hip carry is minimal, literally fractions of a second, though we must obviously keep in mind that we carry a handgun for self-defense from an unexpected attack.  Those fractions of a second may be the difference between winning a gunfight and losing your life.

The final issue with appendix is drawing from less-than-ideal or austere shooting positions.  Drawing from the fetal or prone or for shooters with more girth, seated or even supine can be highly difficult.  Under stress these complications have a real chance of causing a negligent discharge.

A word on exposed “open” carry

Many states allow the exposed carry of a weapon either in conjunction with or in lieu of a concealed carry permit for the non LEO citizen.  Often when I see someone carrying exposed, they are doing so in a holster that offers zero retention (Fobus holsters come to mind) or are carrying in such a way as to display the weapon needlessly.  I applaud the responsible carry of a weapon by any citizen.  The key word there is responsible.  Look, just because you can do something doesn’t mean you should.  One only has to look at the FBI’s Law Enforcement Officers Killed and Assaulted annual report to see how many LEOs lose their lives every year after being shot with their own weapon.  Why do I mention that?  Because most LEOS open carry, often in a level II or higher holster.  They receive hours of weapon retention training in the academy and hundreds of more hours throughout their career.  They are taught how to stand to keep the weapon out of reach, how to recognize target glances towards their weapon, and how to prevent their weapon from being taken from them…and officers are still killed with their sidearms.  A LEO of course goes places and interacts with people the average citizen doesn’t so their risk for having their weapon used against them is higher, though the comparison is apt nonetheless.

Any confrontation, argument, disagreement or chance encounter you have in the public has at least one weapon present, and if it is exposed, all parties involved know it is there.  If you choose to open carry in a friction retention or even a level I holster, you are significantly increasing your chances of being killed with your own gun.  Certainly it is your right.  So if you are going to exercise it, carry in a level II or higher and seek professional training in weapon retention.  If you aren’t willing to do this, please cover it up (legally, or course).  Personally and professionally, I would rather not see someone open carry simply because they can; it’s foolish and the sort of machismo posturing the pro-gun community does not need.  Thousands of people conceal carry every day without a single issue. If you have the option, you should too.

In the end when it comes time to choose your first holster or your next holster or just to rethink your current holster, choose your holster based on its safety, usefulness and comfort.  Choose based on your occupation or common carry preferences and always, always train with the holster you carry.  Leg rigs are Gucci, chest carry is Gucci, but it does you little benefit to train with either if the only time you carry that way is on the range.

We don’t go to the range to learn how to go to the range.  We go to train for real life.

This has been a semi-comprehensive look at holster types and methods of carry, but by no means is it exhaustive.  Of any carry method or material, a great deal can (and has) been written.  I am only one professional voice in a field of my peers, so I encourage you to do more research.  Should you disagree with anything written here or want more advice on a specific topic, feel free to email me and we’ll discuss.


Part II: Modes of Carry Yesterday we talked about holster selection based on need, intended environment and material. Today we’ll talk about the different methods of OWB (Outside the Waistband) and

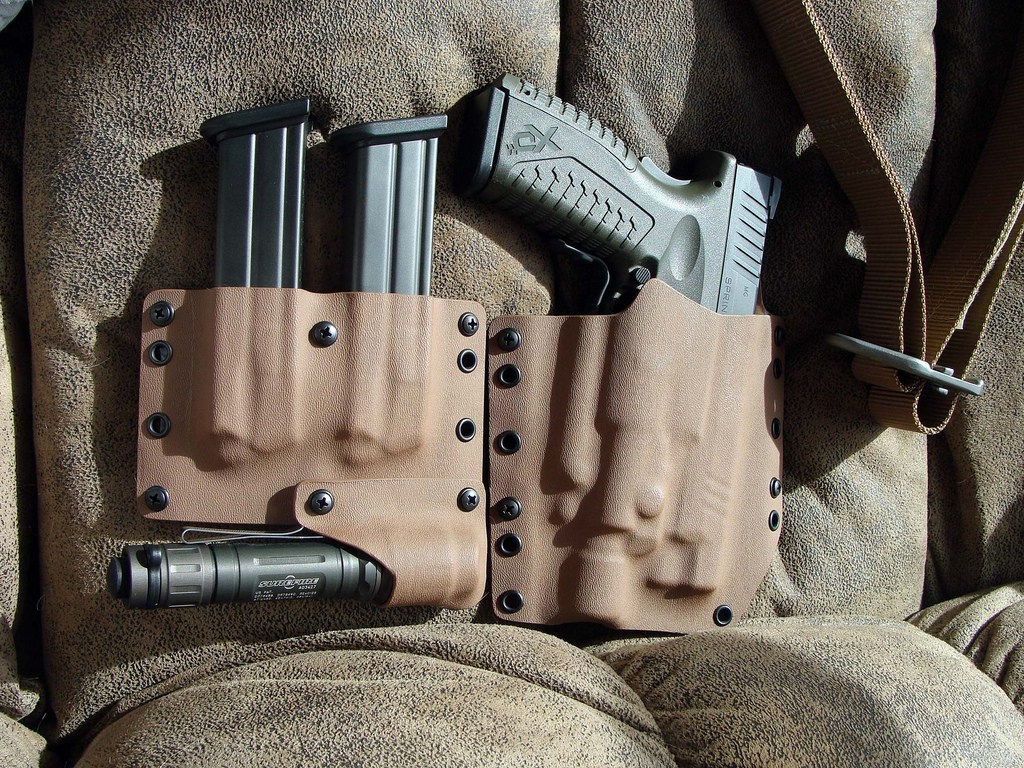
There are hundreds of holster options available.  Inside the waistband, outside the waistband, shoulder, ankle, thigh, level I, II, III retention, leather, kydex, canted, straight pull…the options are many and quite frankly make my head hurt, just as the many different opinions on what is the best method of carry and which holster you should use to do so.  What I intend to do here is address first the holster and then the method of carry. A word of caution: Anyone who has read my writing or taken a course with me knows that I’m not one to avoid Sacred Cows, nor do I like to give credence to the perception a piece a gear may have over the reality of its usefulness.  That said, while it’s not my intention to hurt anyone’s feelings, I may wind up doing so. Thus I’d ask you to keep an open mind about facts versus opinions and at least consider my arguments as you make your decision on what to carry. At the end of the day, it will still come down to informed personal preference.

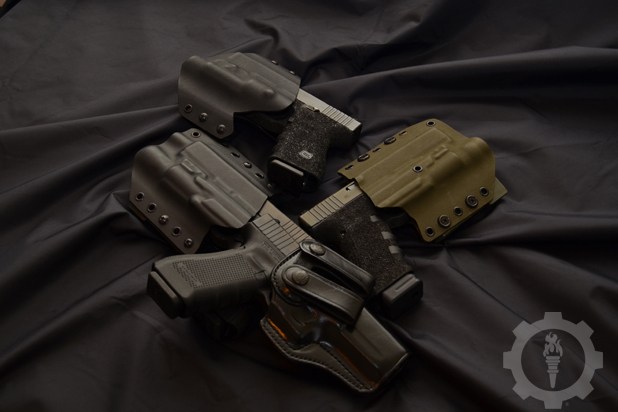
For all intents and purposes, holsters come in three general materials: leather, Kydex, and nylon (or similar fabric).  There are hybrid holsters comprised of two or more of these materials, but these three are the building blocks from which all holsters spring.  Some materials lend themselves better to specific carry methods than others, just as some materials will offer better concealment than others.  Those of us who have been carrying a handgun for a few years or more all have “that box” tucked away somewhere, the box full of the next best holster that, in all actuality, really wasn’t.

I am guiltier than some; I try every new “advancement” in holster technology that comes along so I can be knowledgeable about it when I teach. That doesn’t mean I like it.  Often the improvements are just refinements. Some refinements just reflect the implementation of higher quality of materials or a different production process.  Every now and then someone comes along with a revolution in technology, but this isn’t always necessarily a good thing.

The most important consideration when it comes to material is its durability and the environment in which the holster is intended be used.  For example, a leather holster is not likely to hold up to harsh environmental conditions as well as one constructed of Kydex because no matter its quality, it’s still made of an organic material, like nylon (a polyamide). Organic materials decay faster when compared to Kydex (or comparable injection molded plastic). Leather and nylon are also prone to collecting moisture, which will cause them to swell and shrink depending on environmental conditions.  Leather and nylon holsters can perform well in harsh conditions depending on construction, but for almost all purposes Kydex would be the better choice.  This, when considered along with the retention limitations of a strictly leather or nylon holster should dissuade anyone from using leather or nylon for any extended period in austere environments.

For Kydex/polymer plastic holsters, the case for their resistance to the elements is a strong one.  A polymer holster, by virtue of its material offers greater rigidity and general protection than a leather/fabric design; however this advantage usually comes at the expense of concealability and in some cases comfort.  An inside the waistband holster made of Kydex offers little in the way of ‘give’ that a similar leather or nylon IWB provides.  The rigid nature of Kydex prevents it from conforming to the body and because of this, may prove uncomfortable to wear. This will obviously be affected by the location of carry and the quality of design.  Kydex rigs can offer a great number of active and passive retention options not offered by leather or nylon holsters, because of their rigid nature and the ability to build them with  reinforced retention devices.

Fabric holsters are available in just about as many configurations as those of leather or Kydex, and some of them are almost decent.  Fabric is a preferred material for “one size fits all” flea market holsters you can find in the deep South, deep East LA, gun shows around the free world around, and virtually any gunshop in between.  These are the bread and butter of certain Third World sewing machines and have been hocked by pikers since the dawn of the modern age.  These holsters offer no rigid weapon support, and many lack even a way to keep them in your pants or on your belt. Of course I have seen a few fabric holsters that were well made, but they still have Kydex or leather cousins that would be a better purchase.  A fabric holster is arguably a reasonable choice for strictly range and sporting purposes, but for concealed carry I would strongly advise against it.

The next consideration we have is the choice of retention level.  There are generally two types of retention; a method to secure the weapon in the holster for carry and a method to secure the weapon in the holster to prevent it from being taken away in a struggle.  The second category obviously provides for the first, whereas the first may not cover the second.  The requirement for greater retention, versus that of simply holding the weapon in place is an issue of need and prudence. For those carrying a weapon exposed, a higher degree of active retention is desirable.  For those carrying concealed, a lower level of retention may be adequate based on the reason for carrying (duty versus personal protection).

So what are the levels of retention?

No retention:  A friction lock holster, common and popular with Kydex holsters.  The handgun is retained by the pressure of the holster on the weapon with the assistance of gravity.  Not recommended for exposed carry.  Hold on, let me say that again; not recommended for exposed carry.

Level I:  Level I retention is often considered a single active security device such as a thumb break or internal lock which requires one step (such as unsnapping the thumb break) to draw the weapon.  Other than the friction of the holster on the weapon, there are no other retention features present.

Level II:  Level II combines level I features with one additional active retention system such as a tension point or internal lock requiring an additional step to clear (such as pushing down on the weapon before drawing or an index finger release button).  Level II is the lowest level for exposed street carry I would recommend.  Because level II introduces an additional active safety measure that must be cleared in order to draw the weapon, it requires more repetitious training, which becomes a safety issue.  I mention safety at this point because one of the most prevalent level II holsters on the market is the Blackhawk Serpa.

The Serpa has an index (trigger) finger activated button on the outside of the holster, pressed inward by the trigger finger in order to disengage the weapon lock and allow the draw.  The issue with this design is that the location of the button places the trigger finger over the trigger guard of the weapon as the weapon is drawn.  Under stress, the finger may depress the button and may remain hooked, with constant pressure against the body of the holster as the weapon is drawn.  With sufficient pressure, the finger may slip into the trigger guard as the weapon clears the holster, creating an opportunity for a negligent discharge.  As one of the four cardinal firearms safety rules directs us to place our finger straight and off the trigger (I teach on the frame of the weapon) until you are ready to fire, this holster breeds potentially bad habits as it positions the finger where it shouldn’t be.  Now, this may be an issue of training (or semantics) that could be explained away if we did not have evidence of more than a few negligent discharges (some of which are floating famously around the Internet video world).

This design flaw became such a large issue that many instructors, agencies, and departments banned the Serpa from use.  I do not recommend the Serpa for this reason alone.  For a level II control device, I prefer a hood and bale system or an internal thumb drive/button as both let the thumb do the work and don’t stack fine motor skill requests in the index finger to confuse under stress.

Level III:  Almost exclusively duty holsters, level III combines three active security systems/devices into the holster that must be cleared in order to draw the weapon.   A popular combination is a bale/thumb release and shroud or a thumb break/thumb drive and directional cant.  If you are going to work in close proximity to others in potentially hostile situations, the level III is an excellent choice.  Despite the added level of security, it has been shown that with proper training, the draw from a level III can be just as fast as a level II ( see the Force Science Institute study).

Level IV:  Level IV bears mentioning just because there are still departments and units out there requiring its use.  A level IV is one more step, though as you can probably see, the training curve would get steeper, and it does.  I don’t support the idea of a level IV holster unless that fourth security device is an optional step that can be engaged for hazardous travel (rappelling, SCUBA, etc.) where weapon loss is an issue.  I am of the opinion that the level IV is a solution in search of a problem and only looks reasonable when you are a nervous salad eater and the closest you come to the field is reading about it from a desk.  We already have a level IV; it’s called weapon retention training.

Finally, we get to the method of carry.  There is Outside the Waistband (OWB) and Inside the Waistband (IWB) with numerous variations thereof.  If the choice is up to you, consider your needs first (such as weapon size and your size) and then consider how much of your wardrobe you are willing to adjust for concealment.  If the holster is for duty carry, concealment may not be an issue for you.  As with anything, you are going to get what you pay for.  Holster quality and service life are almost always linked to price.  If you can buy it new with a $20 bill and get change back, chances are it’s not a good holster.

OWB holsters include the traditional hip carry, thigh/leg rig, shoulder carry, and chest mounted.  While there may be other methods of OWB carry, these are the four most common OWB methods we will discuss tomorrow in Part II. We’ll also discuss IWB methods, including appendix carry. I hope you’ll rejoin me then, and remember: real training begins when your comfort zone ends.

There are hundreds of holster options available.  Inside the waistband, outside the waistband, shoulder, ankle, thigh, level I, II, III retention, leather, kydex, canted, straight pull…the options are many and


A Colorful History

There is no excuse for starving, especially in Florida. We have citrus of all kinds (orange, tangerine, grapefruit, lemon, lime, cumquat, and loquat), mango, grape, guava, bamboo, banana, plantain, sugarcane, avocado, acorn, dandelion, purslane, podocarpus, papaya, lychee, lemon grass, garlic grass, hickory, chestnut, coconut, cattail, coontie, cactus, cassava, Jimaca, and cabbage palm. They are all edible, all delicious, and each can be found growing throughout much of the Sunshine State, if you just know where to look. Nope, there’s no excuse for starving in Florida.

I grew up in South West Florida, just below Tampa Bay, and all my life I’ve loved studying the rich history of our Sunshine State. Florida has been home to many colorful characters throughout its history, from the pre-Columbian Chatot, Timucua, Tocobaga, Tequesta, Ocali, Apalachee, Asi-Jeaga, and fierce Calusa tribes to formidable Spanish Conquistadores like Hernando de Soto and Ponce de León to blood thirsty pirates like Jose Gaspar and Caesaro Negro to the wily Seminole and Miccosukee warriors like Osceola and Holatta Micco to Confederate blockade runners like Captain Archibald McNeill.

For me, the most interesting aspect of Florida’s history has always been the Seminole Indian Wars, partly because the Seminole and Miccosukee tribes are the only Native American tribes to never lay down their arms in abject surrender to over whelming Federal forces. Even the indomitable Comanche and Apache ultimately surrendered, but not so the Florida tribes who melted into the Everglades where Federal troops dare not follow. These two tribes were part of the Civilized Nations; they wore spun calico shirts, smoked clay pipes and were fond of their smooth bore muskets. They survived forty years of warfare (1817-1819, 1835-1842, 1855-1858)1 against a modern and well equipped army, not because of any technological superiority—although the Seminole and Miccosukee were excellent marksmen with bow and musket—but because they were adaptable and were able to live off the land in the wilds of Florida’s untamed swamps, wetlands, mangroves, and hammocks. As it was for the Seminole and Miccosukee, living off-grid in a SHTF scenario means having to live off the land.

Long-Term Scenario

We all pray that SHTF events never happens in our lifetime, but we prepare for them anyway. The Seminole and Miccosukee survived their own SHTF; will we survive ours? Our SHTF, when it comes, may come upon us slowly or suddenly. Regardless of the cause, we owe it to our children to survive, so we pray for the best and prepare for the worst.
I don’t have a cabin in the mountains. I don’t own a cattle ranch. I don’t have a fortified bunker with motion sensors and early warning systems. I am forbidden by our home owners association from installing claymores in my yard. Heck, I don’t even own any night vision optics. I just a private citizen who wants to see his family to survive. Faced with a SHTF event, I know that the acquisition of security, shelter, food, and water will be imperative to ensuring my family’s survival.

Most coastal Floridians have already faced SHTF scenarios—we call them hurricanes, and we take our hurricane preparedness seriously. Since Hurricane Andrew destroyed the southern tip of Florida in 1992, many households have maintained a family sized “hurricane box” containing enough gear and supplies for the home team to survive for at least a few of days. That may not seem like a lot by Prepper standards, but the hurricane box is not part of our Prepper provisions. It’s just a seasonal precaution. We stock the hurricane box in spring, watch the Weather Channel from May (Caribbean hurricane season) through October (Atlantic hurricane season), consume our hurricane supplies through winter, and restock the following spring. This rotation keeps stock fresh and it beats having to run to Publix for a last-minute can of green beans so my wife can whip up one of her tasty casseroles.
Preparing for the future requires forethought; the more you accomplish before an emergency event, the less you’ll need to accomplish during or after one. Stockpiling alone, however, can only carry you so far. You must be able to find renewable food sources. Once the SHTF, it will be too late to harvest Ramen at Walmart. Even if you could get your hands on that last brick of tasty noodles, fighting a gang of thugs for looting privileges is not sound tactical advice. If the gangs control your local Walmart, what then? Wouldn’t you rather be able to safely feed you’re your family from home than having to wander the means streets of some post-apocalyptic city scavenging for a nice clean dumpster? So, let’s assume you’ve already taken care of your short-term physical needs. You’ve got plenty of Evian and MRE’s on hand, your storm shutters are up, and everyone on your team who’s tall enough to ride the bog rollercoaster is strapped. No gun fight at the OK Walmart for you, but what about long-term survival? What about replenishable provisions? Have you considered that once your MRE’s run out, you will need to restock your larder with what you can hunt, fish, or grow?

Florida waters are teeming with fish, crabs, shrimp, crawdads, and turtles, not to mention the abundant squirrels, and various fowl that populate our area—with the notable exceptions of birds of prey and carrion eaters, pretty much most fowl are edible. For deer and hogs, we would need to go further afield. Barring a catastrophic decimation of wildlife, protein will most likely not be a problem for Floridians, especially for those of us living along the Coast. Carbs, however, will be much harder to come by.

The average healthy adult requires approximately 200-300 grams of carbohydrates daily.1 My favorite carb is rice, but what we’ve stored won’t last forever. We could try growing our own, but growing rice is a complete mystery involving paddies and some kind of water buffalo. We could try going native by harvesting acorns—a good source of carbs: 1 oz dried acorn (2-3 acorns) contains 14.6 gr. of carbs2—but the acorns in South Florida tend to be rather small, and harvesting them is labor intensive, requiring patience and lots of water for blanching out the tannic acid. Acorns are a great supplement—my wife makes a mean acorn-raisin cookie—but they are not a staple food.

The Lowly Sweet Potato

The sweet potato is not a magical cure-all food, but it does have many dietary and strategic qualities that American Preppers may find advantageous.

To resolve to the how-to-get-enough-carbs-so-I-don’t-starve dilemma, I would recommend the same carbohydrate-rich staple that was grown by the Seminole and Miccosukee and helped them survive as a people while they waged a forty-year long guerilla war. This same tuber was consumed by escaped slaves who filtered down from plantations in

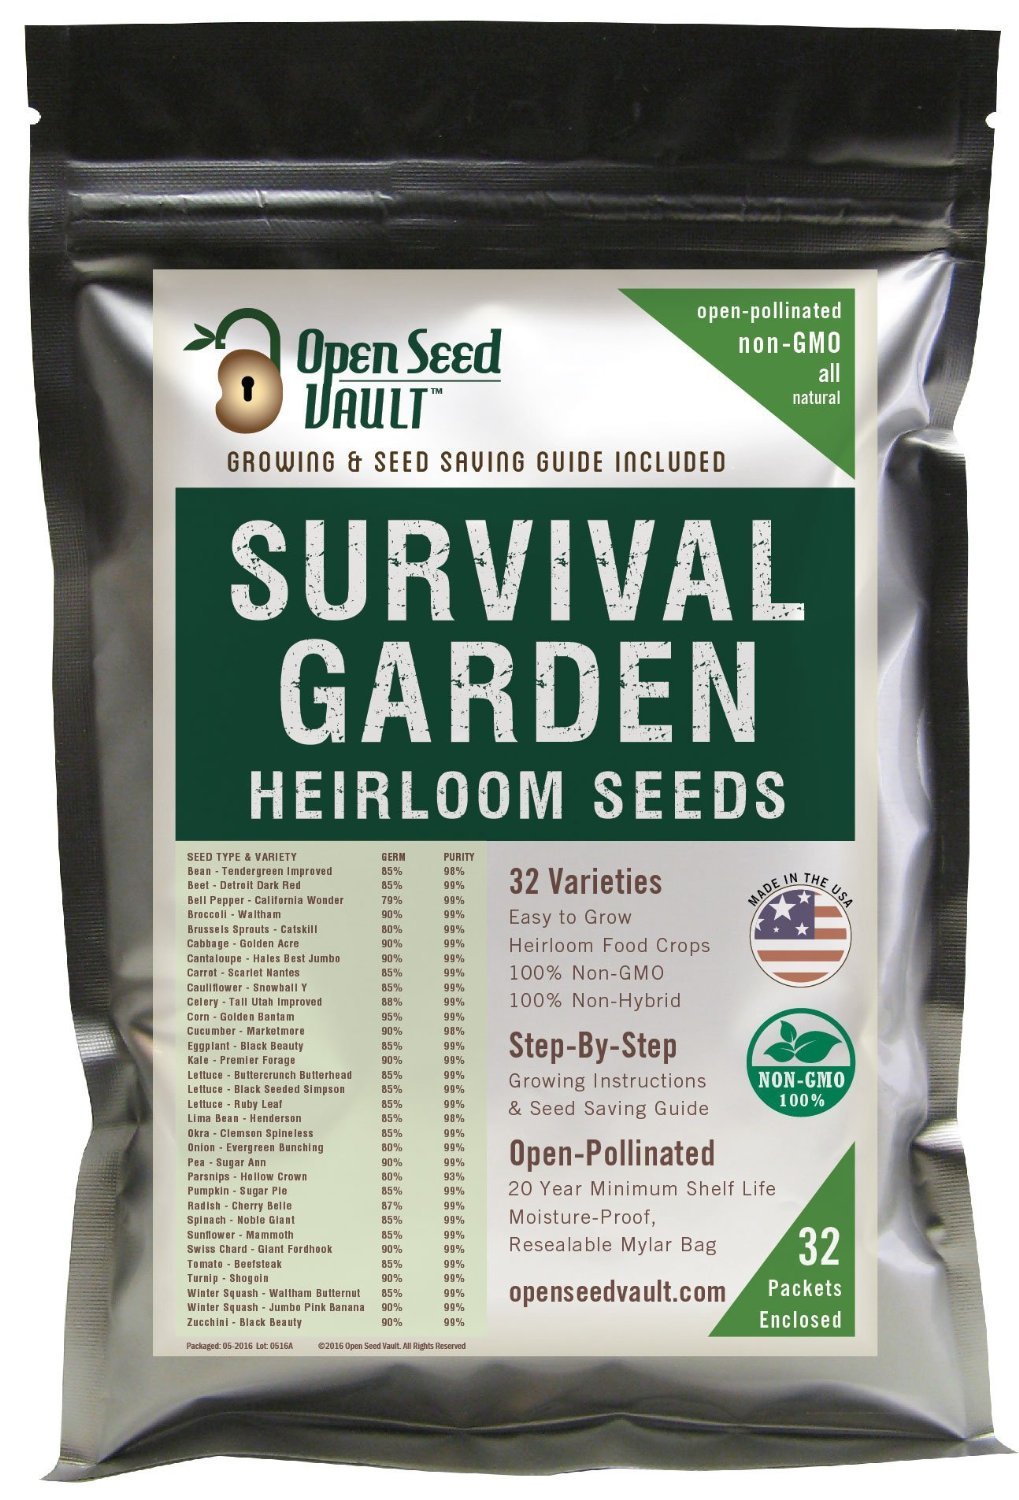
15,000 Non GMO Heirloom Vegetable Seeds Survival Garden 32 Variety Pack

Georgia and Alabama to hide in the trackless Florida wilderness, and it was eaten by early white fishermen, farmers, and ranchers who settled Florida; the sweet potato (Boniato Rojo). The sweet potato has been a staple in Central America since about 8,000 B.C.2

It grows wild (and I do mean wild) in many parts of the South, not just in Florida. The sweet potato is not a magical cure-all food, but it does have many dietary and strategic qualities that American Preppers may find advantageous. A store-bought sweet potato weighing approximately 7 oz. contains about 3 gr. of carbs while the same amount of rice has almost three times as many carbs (11 gr.), rice is labor intensive. Have you ever tried hitching a water buffalo to a rice plow? Though it lacks the carbs of rice, an average-sized sweet potato does possess many other essential nutrients including: potassium (48 gr), Vitamin A (2,026 IU), and Beta-carotene (1,215 mcg).3


Even if you’re able to fight off the first wave of spam-starved zombies, a single-family dwelling can suffer an extensive amount of damage from a break-in, let alone a firefight. During a SHTF event, we must be able to survive off-grid inconspicuously. This means living under-the-radar. It’s your choice; you can hang a “Welcome” sign over your green house door, or you can hide your food source in plain sight. Because they are so well camouflaged, the only true enemies of these delicious uber tubers are mice, floods, and weed whackers (just ask my wife).

The Growing Process

Sweet potato vines can cover ground almost as quickly as kudzu and drop roots at the nodes their entire length.

When germinating sweet potatoes, I employ the “science project” method. It is the skin that produces the buds or “eyes” that become roots, so all you will need is the outer portion of the potato. Slice out one-inch wide slips of skin from the potato. Make them about as half as thick as a pencil (1/8 inch) to lend support to the skin. Suspend—do not submerge—the inch-wide slips of skin in cool tap water by using string to form a “hammock” or tooth picks spears to hold the slips at water level, skin side down. Each slip should have its own container; too many slips in a confined space can cause the delicate sprouting roots to tangle. Direct sunlight can quickly bake young sprouts, so store them in indirect sunlight.

In about two weeks, you should see several healthy root tendrils sprouting downward from the slips into the water. When the tendrils grow to about six inches in length, it’s time for planting. Gently remove the sprouted slips from their containers and plant them about 4-6 inches deep and about 12 inches apart.4 Much of the soil in South Florida tends to be sandy and poor, so you may need to prep your soil before planting. My property is sandy and wonderful for growing sandspurs—they are the reason Floridians don’t walk around bare-footed. I do not prepare my soil before planting sweet potatoes. The whole point of the exercise is to establish a renewable food source that will grow well without any help from me. After about three to four months—depending on the variety of sweet potato, rainfall, soil, soil prep, pests, etc.—the crop will be ready to harvest. You’ll know it’s time to harvest when the leaves turn yellow on the vine, and the growing tubers cause the ground to bulge as though there were moles tunneling beneath the soil. I live in Hardiness Zone 10 (South Florida); your results will definitely vary.

Suspend—do not submerge—the inch-wide slips of skin in cool tap water by using string to form a “hammock” or tooth picks spears to hold the slips at water level, skin side down.

Sweet potato vines can cover ground almost as quickly as kudzu and drop roots at the nodes their entire length. The potatoes grow close to the surface and can be harvested easily with bare hands. I don’t use my bare hands because Florida is home to the dreaded Brazilian Fire Ant, six different venomous serpents, and an ever-growing population of pythons. This is a genuine concern when weeding or harvesting because sweet potatoes attract rodents which in turn attract snakes, and the ground cover from the leaves can be so dense that you would never notice a coiled pygmy rattler until too late. All the prepping in the world won’t save you from a coral snake bite either—they are part of cobra family—with no way to refrigerate rare anti-venom serum during a SHTF scenario. “Don’t stick your hand in there!” is a good rule to live by in Florida, so use a little common sense and employ a small cultivator rake carefully to avoid damaging your crop.

For my first attempt at sweet potato gardening, I cut eight slips, but two failed to germinate. I planted the remaining six slips in a three-foot by five-foot patch of well-drained sandy soil. My little garden yielded 14 medium-to-large sweet taters. These were germinated from one store-bought potato. Not too bad for a first attempt considering the small size of the plot and the fact that I did not water at all. The Florida August monsoons did the watering for me. The rains come so regularly in late summer, between 3:00PM and 5:00PM, that you can practically set your watch by them. That particular crop of even survived a record-breaking three-day freeze just prior to harvest. A three-day freeze might not impress most Northerners, but it is big news in South Florida.

After my first crop, I let the vines continue to grow on their own, hoping for a second picking from the same planting. Unfortunately, the potatoes did not survive my wife’s attempt to clean up the back yard with the weed whacker. The best sweet potatoes are the large ones near the original slip planting. The further away from the original plant that the nodes take root and become potatoes, the smaller the tuber will be. The stunted golf ball-sized sweet potatoes, though still technically edible, are rough and not very tasty. These became seed crop for the next planting.

Another nice thing about the sweet potato is that it can be grown almost anywhere: apartment window boxes, small backyard gardens, empty lots downtown, power line easements, around the edges of county parks, or the woods behind your house. With their dramatic purple blossoms, the attractive broad-leafed vines are used as an ornamental plant. They make such great ground cover that they are regularly incorporated into landscaping around buildings, mailboxes, lakes, canals, trees, and other shrubbery.

There is a storm canal easement behind our property. Like Johnny Apple Seed, I’ve started planting germinated slips on this property. Several plantings have taken root and are growing well. When the summer rains begin, they should really take off. The early success of this off-property experiment has encouraged me to try other locations. I’ve germinated and planted sweet potatoes at my mom’s house, my brother’s house, and at a friend’s house. They’re going to enjoy the attractive ground cover around their shrubs, and I will enjoy helping them establish a prolific and renewable emergency food source.

I’ve started scouting other areas as well for strategic planting locations that will be self-sustaining. Anticipating future fuel shortages, I’ve kept my scouting to within bicycling distance from my property. There is a long tract of scrub woods along the river near our home which will make a good planting zone as the average non-agricultural zombie wouldn’t know the difference between potato vines and kudzu. My plan is to hide a strategic and productive potato pantry in plain sight. Nope, there’s no excuse for starving in Florida.

Resources

1. http://www.semtribe.com/
2. http://www.carb-counter.net/nuts-seeds/1027
3. https://en.wikipedia.org/wiki/Sweet_potato
4. http://www.organicgardeninfo.com/growing-sweet-potatoes.html

  A Colorful History There is no excuse for starving, especially in Florida. We have citrus of all kinds (orange, tangerine, grapefruit, lemon, lime, cumquat, and loquat), mango, grape, guava, bamboo, banana,

It’s not easy raising children, even on a good day. Readers who already have, or who are currently raising families know this very well. It’s a huge responsibility being entrusted with life, and the initial core values that children develop must come from their parents because frankly, who else can they trust? Subjects like religion and politics must be taught initially by parents, who are not operating with any hidden agenda. Of course it’s much, much harder when you’re a single parent, because in order to make a living, you must rely on others (possibly strangers) more, and as a very protective father, I found that hard to do as did my wife. Therefore my wife was a full-time homemaker; a position which I believe is just as valid as the CEO spot in any company!

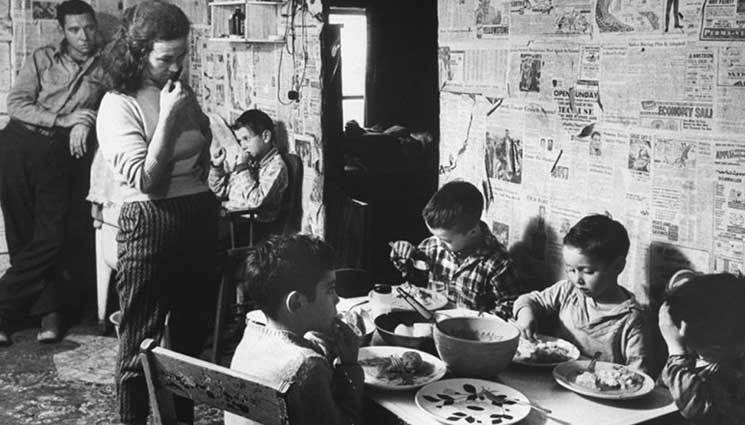
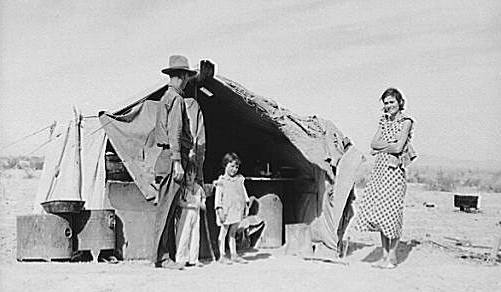
My father grew-up in Chicago during the Great Depression in a family of 11 children and the stories he told me about that still resonate in my mind. My wife and I decided that two children would be ideal and we were blessed with a son, and then a daughter, both of whom are now adults with their own families. So I can only speak from the perspective and experience of being a father, and now a grandfather, when it comes to raising kids and teaching them the values and skills that they will need in life, and with regard to disaster preparedness. I am now fortunate to be able to see my children pass-down their life’s lessons and experience to their children; my grandchildren.

Capt. Bill’s son William III; A third generation survivalist/prepper

I believe there are many very important values and lessons that come from a solid foundation and belief in God; honesty, respect, gratitude, generosity, self-worth, forgiveness, sacrifice, perseverance, justice and integrity. There are certainly more that could be on this list, and it’s a parent’s sacred-job to be the initial conduit to these teachings, but that is not the focus of this article; it’s about disaster preparedness, or ‘prepping’ as it is called in some circles.

Basic training for children is essential!

All children are by nature curious, and this curiosity is the path towards knowledge and must be carefully nurtured and leveraged to teach them the skills that may save their lives, and the lives of people around them. I think some people tend to underestimate just how much information a 4-year old can absorb! Children look to us (parents) for all things, including knowledge and I believe that it’s never too soon to start teaching kids some initial bush-craft skills. For instance; you take a simple game of hide and seek and make it into an important learning game. If the game is conducted outdoors, you can ‘find’ the child a couple times, and then show them how to make it harder for you to find them by teaching how to use things in their environment as camouflage (branches w/leaves, grasses, etc.).

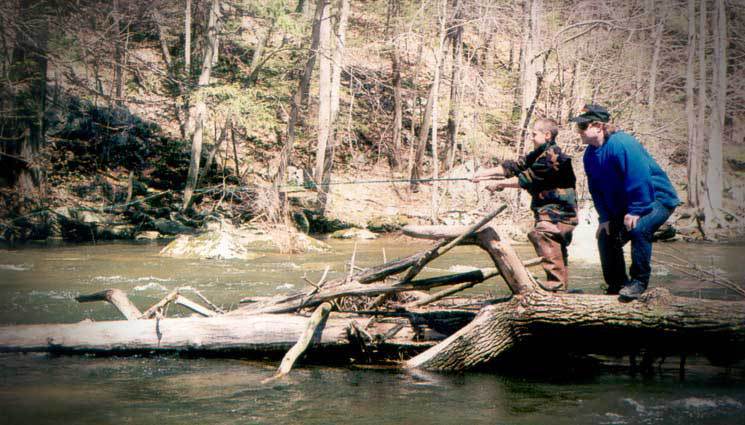
I started teaching my son the art of fishing from the time he could walk; I helped him reel-in his first marlin (40 lb. fish) when he was three years old (got the picture!) and now he’s the master fisherman and I am the pupil.
Since we did have guns in our home, we introduced the children to them as soon as they could walk in a manner that was both responsible and educational. We would take my son (and daughter) to the shooting range so they could ‘see’ and hear first-hand the loud noise and the recoil that was made when a gun was fired. Initially, this was more than enough to garner their respect for guns and so they would never touch them. Later, when they reached the ages of about 6 years old, we would talk with them about how dangerous guns are, and how they should never be touched without an adult present. These discussions were well received because earlier-on, they had seen and heard the results of the discharge from a firearm, so it made sense, even in the mind of a child. Finally, when they reached an age where they could safely effectively handle a weapon, we taught them how to shoot. In the case of my son, he was about 8 years old when I started him out with a .22 caliber revolver and rifle. Now, he’s one of the top competitive long-range rifle marksmen in the Pacific Northwest and a master hunter and woodsman.

All children should be taught to swim as soon as possible! In Hawaii, children are taught as infants to outstanding effect! My wife started teaching our son to swim when he was 10 months old, and he was swimming laps in the pool at 3 yrs old to the amazement of poolside spectators. Our daughter was born in Hawaii, so my wife used the Hawaiian method, putting her in the pool at a week old and getting her comfortable with putting her face in the water. She was snorkeling around the reef when she was 4 years old. My son (William) became such a good swimmer by the time he was 8 years old, I took it upon myself to teach him SCUBA, and he made his first open water dive in Hawaii when he was 8 years old!.

Self-defense and martial arts classes are also good because, if taught by the right instructor, children also learn discipline, respect, confidence and perseverance. Find a school with ‘traditional’ martial arts values, where the focus is on developing the student, and not the revenue model of the school, and where the instructors stress that ‘fighting is the absolute last resort’. We started our son in his martial arts training when he was 5 years old in Hawaii and he had earned his first of two black belts by the time he was 9 years old.

Bill&Laura2

Captain Bill and Laura

Many adults overlook training children in CPR and first aid, and this is a big mistake. Most children, by the time they are 6 to 8 years old, are fully capable of grasping the concepts behind CPR and basic first aid and can render effective help. Therefore they should be allowed to be trained by competent instructors, even though there is a minimum age required for ‘certification‘. We had both our children trained at these early ages (8-9 years old), and they have had subsequent updated training as well. This allows a child to help another child on the playground, in the woods or in an actual disaster in the event an adult is not nearby, and may make the difference between life and death. Of course it’s more difficult for a child to breathe for an adult victim due to lung capacity differences, but something is better than nothing… the same goes for chest compressions. A good instructor however will teach a child about these things too.

Children can start learning their bush-crafts at very early ages. There are many things that children 4-6 years old can learn; knots, weaving, making fire, filtering water and much more! Here is an excellent training guide for training children that can also be used by Prepper Parents.

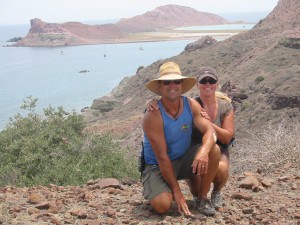
All of the initial skills we taught our children came into play during our first sailing expedition into the Sea of Cortez in 1991.  As just one example: My son was very effective in collecting all forms of seafood in support of our food needs. This family expedition was both a bonding and learning experience for everyone, and I would advise all families to engage in such adventures together. Camping is also one the best family activities that builds experience and bonds families together.

Giving your children a solid start with their basic preparedness training will allow them to grow from there, and that’s just too important to overlook. By doing this, you will be providing your children with an advantage in life, and your children will have the confidence that will allow them to get the most out of other learning opportunities, such as the scouting programs, which I feel are an outstanding extension of home-training for children.

When I look at my son and daughter today, I am in awe; they have surpassed their old dad and teacher in so many ways, I cannot help feeling proud.

It’s not easy raising children, even on a good day. Readers who already have, or who are currently raising families know this very well. It’s a huge responsibility being entrusted

Many people I have talked to over the years have expressed curiosity about how to create a first aid kit that contains natural remedies that actually work. Above all, a first aid kit needs to help you prepared for unexpected circumstances while still addressing some of your most common household health needs.

Herbs and medicinal plants from all over the world can be used in simple, natural remedies to treat a variety of common ailments. Herbs and herbal remedies can retain their medicinal potency for many months, even years, if stored correctly. The preparedness of your family’s own first aid kit can be greatly enhanced with the addition of a few traditional Chinese herbs. Here are seven traditional herbal remedies you can try for yourself.

Giant hyssop

This pungent herb is pressed into pill form for easy storage and administration. Giant hyssop is one of the most commonly used stomach remedies in all of Chinese herbal medicine. It is used to combat diarrhea, vomiting, and abdominal pain. Some people have used giant hyssop pills to treat headaches and heat stroke. To use, simply take the number of pills recommended by the manufacturer; the number you take can depend on body size and weight.

White flower oil and red flower oil

White flower oil and red flower oil are two prized herbal combinations that can be used to sooth a range of mild aches and pains. White flower balm contains wintergreen, eucalyptus, menthol, peppermint, camphor, and lavender. It has a soothing smell that is believed to relieve headache pain. Simply apply a few drops to the temples and massage into the skin. Sinus headaches can be relieved by applying a single drop under the nose or by inhaling the scent of the oil in the bottle.

Red flower oil contains menthol and camphor oils combined in a neutral carrier oil. These ingredients are used to sooth the pain of arthritis, sore muscles, and seasonal aches and pains. It can be rubbed directly into the area of the body affected using a piece of gauze.

Jujube seeds

The jujube fruit is a much-loved part of traditional Chinese cuisine and it has historically been valued as a source of medicine, too. Both the fruit and seeds have medicinal properties; they can be purchased at any store selling traditional Chinese herbal remedies. Jujube seeds make a great addition to your first aid kit because they can be used to treat insomnia and sleeplessness. Preparing the remedy from dried seeds requires a source of heat and a method of grinding the seeds to a fine powder but you can find the prepared remedy for sale easily.

Loquat syrup

Loquat syrup or loquat ointment is a thick preparation used to sooth sore throats. It contains many beneficial ingredients such as apricot seed extract, loquat leaf, licorice root, and white olives. Because loquat syrup traditionally includes honey it might not be suitable for people with diabetes or other sugar sensitivities.

Loquat syrup can be used to treat sore throats resulting from coughs, colds, and bronchitis. Though this remedy is generally regarded as being safe for children to take, always refer to the manufacturer’s recommendation for dosing guidelines.

Ching Wan Hung

This naturally red ointment is used to treat burns, rashes, dermatitis, bed sores, and irritation caused by poison ivy and poison oak. The distinctive color comes from the red foliage found of some of the ingredients; the ointment can potentially stain clothing so it is a good idea to keep the treated site covered with gauze. Gauze will also help keep the area clean and protected. Dressings should be changed daily or more often if necessary.

Ching wan hung has been used to treat:

  • First degree burns
  • Second degree burns
  • Third degree burns
  • Burns with blistering
  • Electrical burns
  • Burns caused by hot liquid
  • Sun burns.

It contains myrrh, lobelia, frankincense, dong quai (angelica), quince fruit, beeswax, sesame oil, and other healing ingredients.

 Yunnan Baiyao

Sometimes called Yunnan paiyao, this powdered combination of herbs goes to work instantly to stop bleeding and promote healing. While the exact make-up of Yunnan baiyao is guarded by the various companies that manufacture it, it is known to include both Rhizoma dioscoreae (Chinese yam) and Panax notoginseng (ginseng).

To use Yunnan baiyao on a cut or scratch simply sprinkle some of the powder on the injured area, add a bit of water, and rub the paste into the injury. You can also combine the powder with a bit of alcohol to treat bruises.

Sources:

Make Your Own TCM First Aid Kit

Chinese Herbs for Your First Aid Kit


Many people I have talked to over the years have expressed curiosity about how to create a first aid kit that contains natural remedies that actually work. Above all, a

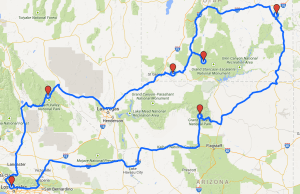
Selecting good routes is extremely important part of your security planning especially in hostile areas or in times of civil unrest. In theory the best routes should allow the vehicles to travel at the maximum legal speed limit with as little congestion and as few stops as possible but in reality this can be a difficult thing to achieve.

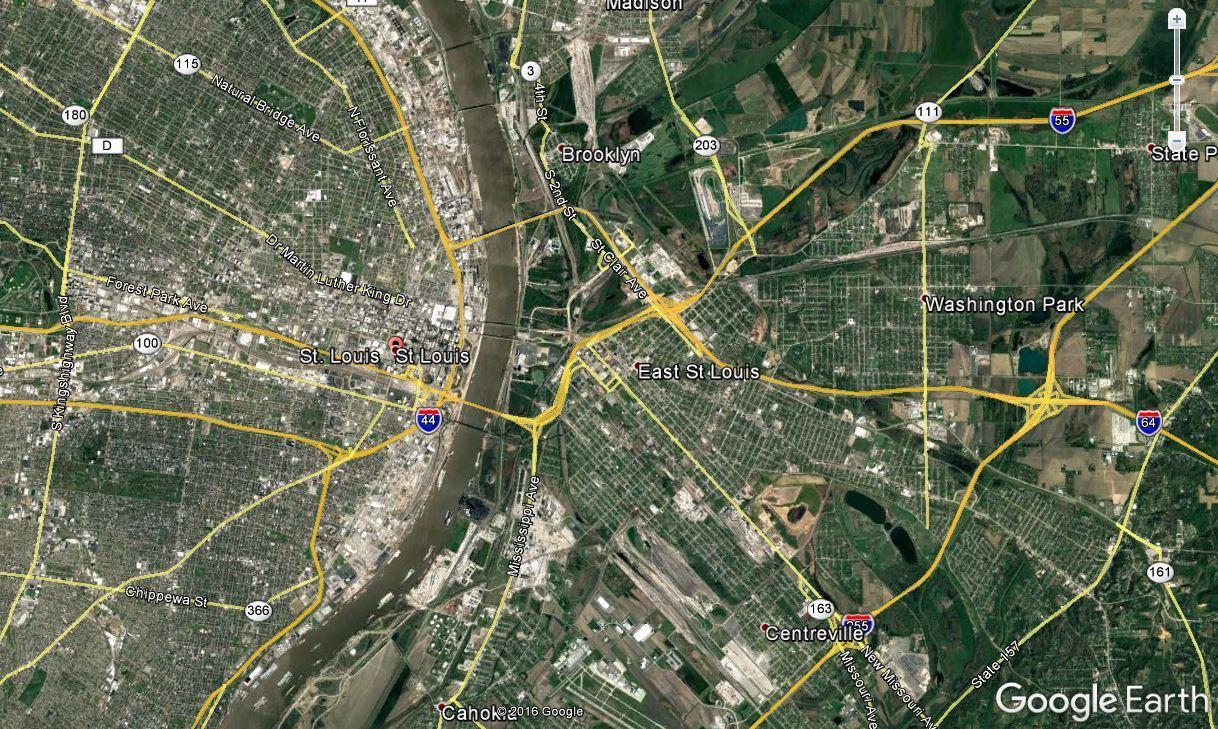
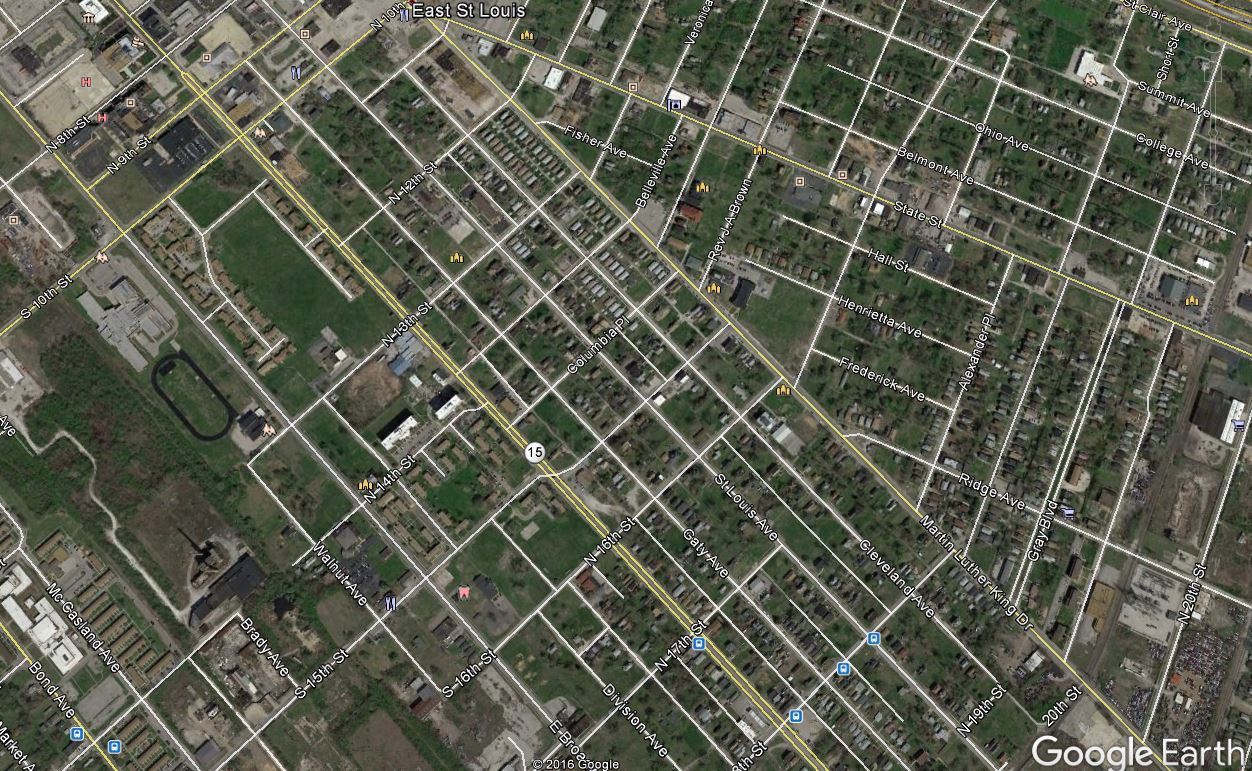
Firstly, you will need to select the routes available on a map and also use programs like Google Earth to view photos of the intended route. In the perfect circumstances the routes selected would need to be driven at the time of day you’d be using them so vehicle and pedestrian traffic flow could be assessed and also at a quiet time so a detailed survey of facilities and danger points can be compiled. You will need to plan several routes to and from each location and these will need to be varied as much as possible. In a high risk environment if you use the same route time and time again you will be asking for trouble.

The route selection needs to be broken down into simple stages and the time it takes to complete each of these stages recorded. This is because if there is a loss of communication with your vehicle at a certain time, then your location can be estimated by those your checking in with and will help people to know if your vehicle is overdue and might be in need of assistance.

You need to know the location of all the facilities along the routes such as the locations of hospitals, bathrooms, police stations, garages, hotels and so forth. Communications will need to be checked and all communication dead spots noted. The locations and payment methods (whether coins or cards) of all pay phones along the routes need to be noted. Emergency rendezvous points (RVs) will need to be allocated at positions along the routes in case of emergencies or separations, everyone using the routes will need to know the RV points.

Firstly, you will need to select the routes available on a map and also use programs like Google Earth to view photos of the intended route.

Things that could considered as danger points on your routes would be anything that could slow you down or could conceal an ambush.  These could include bridges, roundabouts, woodland, junctions, tunnels, culverts, narrow roads, one-way streets, areas of busy pedestrian or vehicle traffic, known criminal areas etc. Things to be especially suspicious of would include road works, lone-parked cars, pan-handlers, diversions and temporary stop signs. Now in reality if you live in a busy urban area I expect you will have to drive past the majority of the things listed to avoid on your daily journeys. In such environments you need to vary your routes as much as possible and take regular counter surveillance procedures. Also remember, if I know how someone has been trained I can usually predetermine the routes they will select, if I can do this so can the criminals.

You need to know the location of all the facilities along the routes such as the locations of hospitals, bathrooms, police stations, garages, hotels and so forth.

Most conventionally trained security drivers are taught to take the most direct and fastest routes between locations, which are generally easy to determine. If I was a criminal targeting them I would just wait at a stop light along their route for them to show up. I am personally all in favor of using quite indirect routes which make it easy to identify if you’re being followed and makes it a lot easier to change routes fluidly and unpredictably if required; this not the case on a motorway with limited exits and heavy traffic.

I am also not a big fan of GPS and I find it astonishing the number of people who blindly follow GPS directions right or wrong. GPS are an aid to navigation not a means of navigation. I have had many people go through my course who have gotten lost by relying in GPS; they were taken to the wrong locations or the locations I gave them were not in the GPS etc. You need to be able to use a map and compass and plan your routes properly, this might take you 5 minutes, which in today’s world is a long time but better 5 minutes planning than a couple of hours driving around lost.  Another take on GPS is that if I am a criminal who is watching you and see you’re using a certain type of GPS, all I need to do is buy the same model and it will tell me the routes you’re using between different locations, again no need for me to put you under surveillance.

Basic considerations for selecting routes are you must avoid routines, especially in daily journeys, keep your travel details secret, issue only rough timings in advance, use the most secure routes not the shortest, have a detailed reconnaissance done of the routes to be used, know what you’re going to do in the case of a break down or a security issue and know where there are hospitals and other facilities on the route.

Reaction to Ambushes

The ambush tactic, in one form or another, has been used by hunters, criminals and military units for thousands of years. They are commonly used tactic in kidnappings, assassinations and they can involve anywhere from 2 to 200 personnel. Ambushes can occur on busy city streets or on remote country roads.  When traveling in a vehicle, your best defense is speed. A trained ambusher will look for natural obstacles on a route which will force a vehicle to slow down.

In high risks areas you need to take into consideration what you are going to do if ambushed, your reaction will depend on the country you’re in, the manpower and equipment you have available. A large percentage of attacks occur when targets are traveling in, approaching, or leaving their vehicles. Attacks can range from explosives being attached to a vehicle at traffic lights to full-scale military ambushes using assault rifles and light anti-tank weapons.

 Your best defense against these attacks is your personal procedures of selecting safe routes and not using the same routes all the time and keeping details of your movements secret. If an ambush is properly planned, placed and the attackers know how to use their weapons there is a very good chance they will be successful and you will take casualties to say the least.

The attackers have the element of surprise on their side and the whole attack could last less than five seconds; to survive, your reaction must be simple, aggressive and fast. Your main objective will be to get out of the attackers killing zone as quickly as possible. You must always be aware that the initial attack might have just been a diversion to direct you into the main ambush or that the attackers might have deployed cut off teams to take you out, if you escaped the killing zone.

If ambushed speed is your best defense, remember, fast moving targets are harder to shoot that slow moving or stationary targets. To avoid ambushes, use fast roads and try to avoid places where you are forced to drive slowly, this is difficult in busy urban areas. If you are ambushed with small arms, drive through it as fast as you can. If you are traveling in a convoy, it may be possible for the chase car to attack the ambush or if there is a lone shooter, run them over. What you do will depend on your manpower and firepower. If the road is blocked to the front of you by a large obstacle or vehicle and you have a clear road behind you reverse out, use simple driving techniques; don’t use complicated techniques that you have seen in the movies.

If you are blocked to the front and rear, say in traffic or immobilized and taking fire, you will need to evacuate on foot. When you evacuate on foot stay low, bound from cover to cover and run as quickly as possible. Be aware that obvious escape routes might be booby-trapped and make maximum use of smoke or CS gas grenades to cover your escape.

Unarmed Reaction to Ambush

Here the guidelines for an unarmed contact drill that can be used if you encounter a manned road block and are in an area where you cannot carry weapons.

A consideration on weapons: In some hostile environments, criminals and terrorists put up roadblocks that can contain anywhere from 5 to 200 criminals or guerillas carrying automatic weapons. Think about it, you may have a couple of 9mm pistols in your vehicle but 5 guys with AK-47’s can put out 150 rounds, which will go through un-armored cars in just a few seconds. Additionally, in some places, if you are a foreigner and you are caught with a pistol by criminals or terrorists, you could be mistaken for being a spy and executed on the spot.  If you are going to carry a pistol, it’s best to go with a type not issued to law enforcement and military personnel; a Nickel plated .38 revolver says your careful where as a Glock can say your police!

This drill was worked out for a client who lived on a very volatile Caribbean island. Firearms were available but if they were found by local police at a routine road block they could lead to the client being arrested or getting severe beating. The client’s main threat was from driving into illegal roadblocks at night. This is a simplified version of what I worked out for him.

  • The client fitted high power spotlights to his vehicle. If he drove into a roadblock at night, he would hit the spotlights for a few seconds and temporally blind and surprise the criminals.
  • At the same time, he would reverse away from the roadblock. The client always traveled with another person at night whose job it was to drop smoke dischargers on the road to cover them as they reversed away.
  • Whenever possible and safe to do so, the client would turn the vehicle around get out of the area as quickly as possible. If chased by criminals, the client’s car was modified, so all the rear lights could be extinguished and he could drive with only the front parking lights on. In the vehicle, there was a high-powered hand held spotlight, which the passenger was to shine into the face of the driver of the chasing car, to blind them and hopefully cause them to crash.

This drill is simple but it still took a fair bit of organizing and practice to get right. You need to work out what threats that you’re most likely to encounter, then plan your reaction and then practice it.

Selecting good routes is extremely important part of your security planning especially in hostile areas or in times of civil unrest. In theory the best routes should allow the vehicles

For many preppers, a firearm is a must-have item for dealing with the aftermath of a potential SHTF or grid-down event. Firearms in the hands of properly trained individuals can prevent as well as cause death, so their use and acquisition isn’t something to be taken lightly. We routinely talk about firearms under the security category when I am mentioning the 4 things you should focus on when you are prepping, but simply having a weapon isn’t the end. You can check the box on having a firearm in your SHTF arsenal, but to be better prepared, you should look at what else needs to be planned for with that firearm to ensure that tool doesn’t become an expensive paperweight shortly after you need it.

Don’t get me wrong; just the fact that you have a firearm and a box of ammo is an advantage should you be called on to protect or defend your life, but history has shown us in order to be more fully prepared, there are other considerations that you need to account for and these topics are what I wanted to bring up today on Final Prepper. What are all of the other things you need to consider for your safety and protection that you may need to maintain that firearm and conversely your ability to protect yourself if the grid goes down?

Why do you need weapons if the grid goes down?

Before we get into the SHTF weapons checklist, I wanted to briefly paint a picture for you. Some disaster has happened and society is in chaos. Let’s take the example of an economic collapse which as I discussed the other day is a real and tangible threat our country faces. When millions (more) are out of work, services are cut and there are shortages on food, gasoline, power and protective services of police, people will get angry. Once they are angry, people will get desperate and once people get desperate, you better watch out.

A firearm is only a tool, but it is a tool designed to inflict mortal damage on your opponent. In the case of a desperate individual breaking into your home, would you rather have a firearm or harsh language? For me personally, I want firearms to be a tool my family has at our disposal in a case just like this. Above all things, I hope I never am forced to use a firearm in defense of my life or the lives of anyone in my care, but the pragmatist in me doesn’t believe for a second that people are always good deep down. I know people can be evil and act in ways that are dangerous. To believe anything else is foolish I believe so I prepare for evil and dangerous people while hoping I will never see that.

What are the best weapons for SHTF?

So if you are still hanging with me by now and don’t already have a firearm, you might be asking what are the best weapons to have on you in a STFT scenario. This question can be answered many different ways and I have actually written on this subject before. If I am looking holistically at an array of weapons you need for many different STHF scenarios, I would make similar recommendations as in our Top 5 Firearms You Need To Get Your Hands On Now, but this is an ideal scenario, not just what is necessary.

I have also recommended a shotgun as the best weapon for home defense under the assumption that if you only had time/money to purchase one weapon, what would that be. For a SHTF scenario, I think I have changed my mind somewhat on the best single weapon to a pistol. I read a post from FerFal who has his own blog. Ferfal lived through the Argentinian economic crisis and he makes a compelling case for the pistol as the best weapon for SHTF and I tend to agree with him. The main reason is that a pistol over any rifle or shotgun is highly concealable. Even if there is an economic collapse, life won’t immediately turn into Mad Max so as FerFal rightly proposes, you will still have to function in society for some time before you can whip out your camo outfit and go running down the streets geared up for battle.

The right pistol can be used for home defense easily and as I mentioned above, you can take it outside with you concealed so you can also have protection away from your home. I do still think that ideally you would have more weapon options, but a pistol would seem to be a priority for living in the immediate aftermath of any SHTF fallout.

What else do you need for SHTF?

OK, so for the rest of this article we are going to assume you have procured a SHTF weapon of some form, likely a pistol but what else would you need? A firearm is just a tool like I said and that tool needs several things to function ideally in bad situations for a long time. When we are talking about SHTF, you aren’t getting much worse than that and we will also assume a trip to Walmart or your local Sporting Goods store is out of the question.

Do you have supplies to keep your firearms clean after SHTF?

Ammo – Any weapon you have is going to need ammo and many people have asked me how much ammo do you need. Each person has to answer this question for themselves. I know some preppers who will say you can never have too much ammo. These people plan to not only never worry about running out, but logically state that ammo will be more valuable than precious metals after a collapse. Selco, who runs SHTFSchool.com and who lived through the Bosnian War where his city was under siege for years wrote that he personally gave all his gold for ammunition. Now, he says he keeps 2000 rounds per weapon. Your mileage may vary but consider how much ammo you need if you can never go to the store again. How much do you think you would need for one week? For one month? For one year? Purchase Hollow-points for damage and ball for practice.

Cleaning supplies – Sometimes we overlook how many weapon cleaning supplies you might need. Imagine the worst scenario. Do you have enough cleaning supplies for your weapons to last? Do you have a portable weapon cleaning kit? Do you have all of the right brushes for your various bore sizes? Do you have spare oil and cleaning solvent?

Magazines – Most new pistols will come with one or two magazines, but what if you lose one? What if during the chaos of a firefight, home invasion or attempted car-jacking you have to change magazines and in the panic, leave one on the ground that you aren’t able to find? Do you have spares to replace what could be lost? What about your AR-15? Do you have enough magazines for a load out and spares to replace those if you have to ditch your gear for some reason?

Holsters – This is one thing I think most people overlook and that is a good holster for your pistol. Sticking this down your pants isn’t the ideal way to carry concealed so a good holster is really important to have if you plan on carrying that firearm around with you. I would opt for a good concealed holster first and then get your go to war holster if you need one after that. Most people will only ever need a good concealable holster.

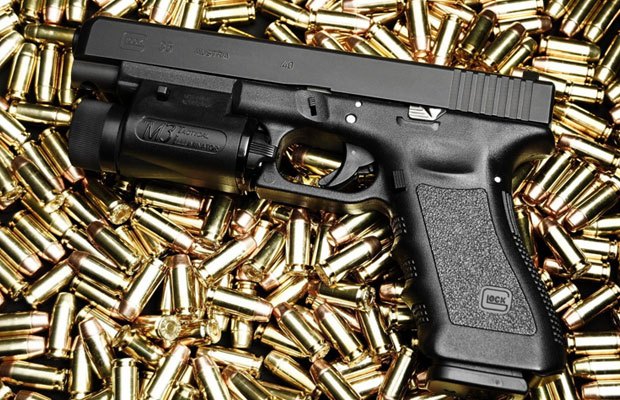
Spare parts – Things break all the time and you won’t be able to log on to Amazon.com to get 2-day free shipping in order to be resupplied after SHTF. You can now purchase spare parts for your weapons online easily so it may make sense to have spare parts on common items that may need replacing(if any) on your model of firearm . One of the reasons I like sticking to one weapons platform is that parts are interchangeable in many cases. I am partial to Glock so some of my magazines, all component parts and some barrels are interchangeable with different Glock weapons I own.

Training – Training is crucial because even if you have the best firearm in the world, pallets of ammunition and enough spare parts to last a lifetime, you still need to know how to use that weapon. Training at a minimum should enable you to safely use the weapon to hit what you are aiming at. You should be comfortable reloading ammunition, changing magazines, clearing jams or malfunctions and taking the weapon apart and putting it back together for cleanings. There are all forms of advanced tactical training courses out there too, but know the basics first.

I think that if you have a plan to keep a firearm for self-defense and you foresee a situation where you could be putting this weapon to use in a bad scenario, you should consider the checklist above. Do you have these bases covered? Did I miss anything?

For many preppers, a firearm is a must-have item for dealing with the aftermath of a potential SHTF or grid-down event. Firearms in the hands of properly trained individuals can

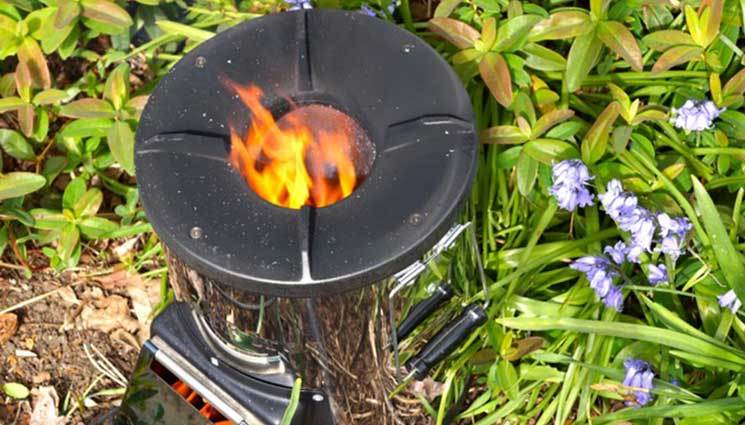
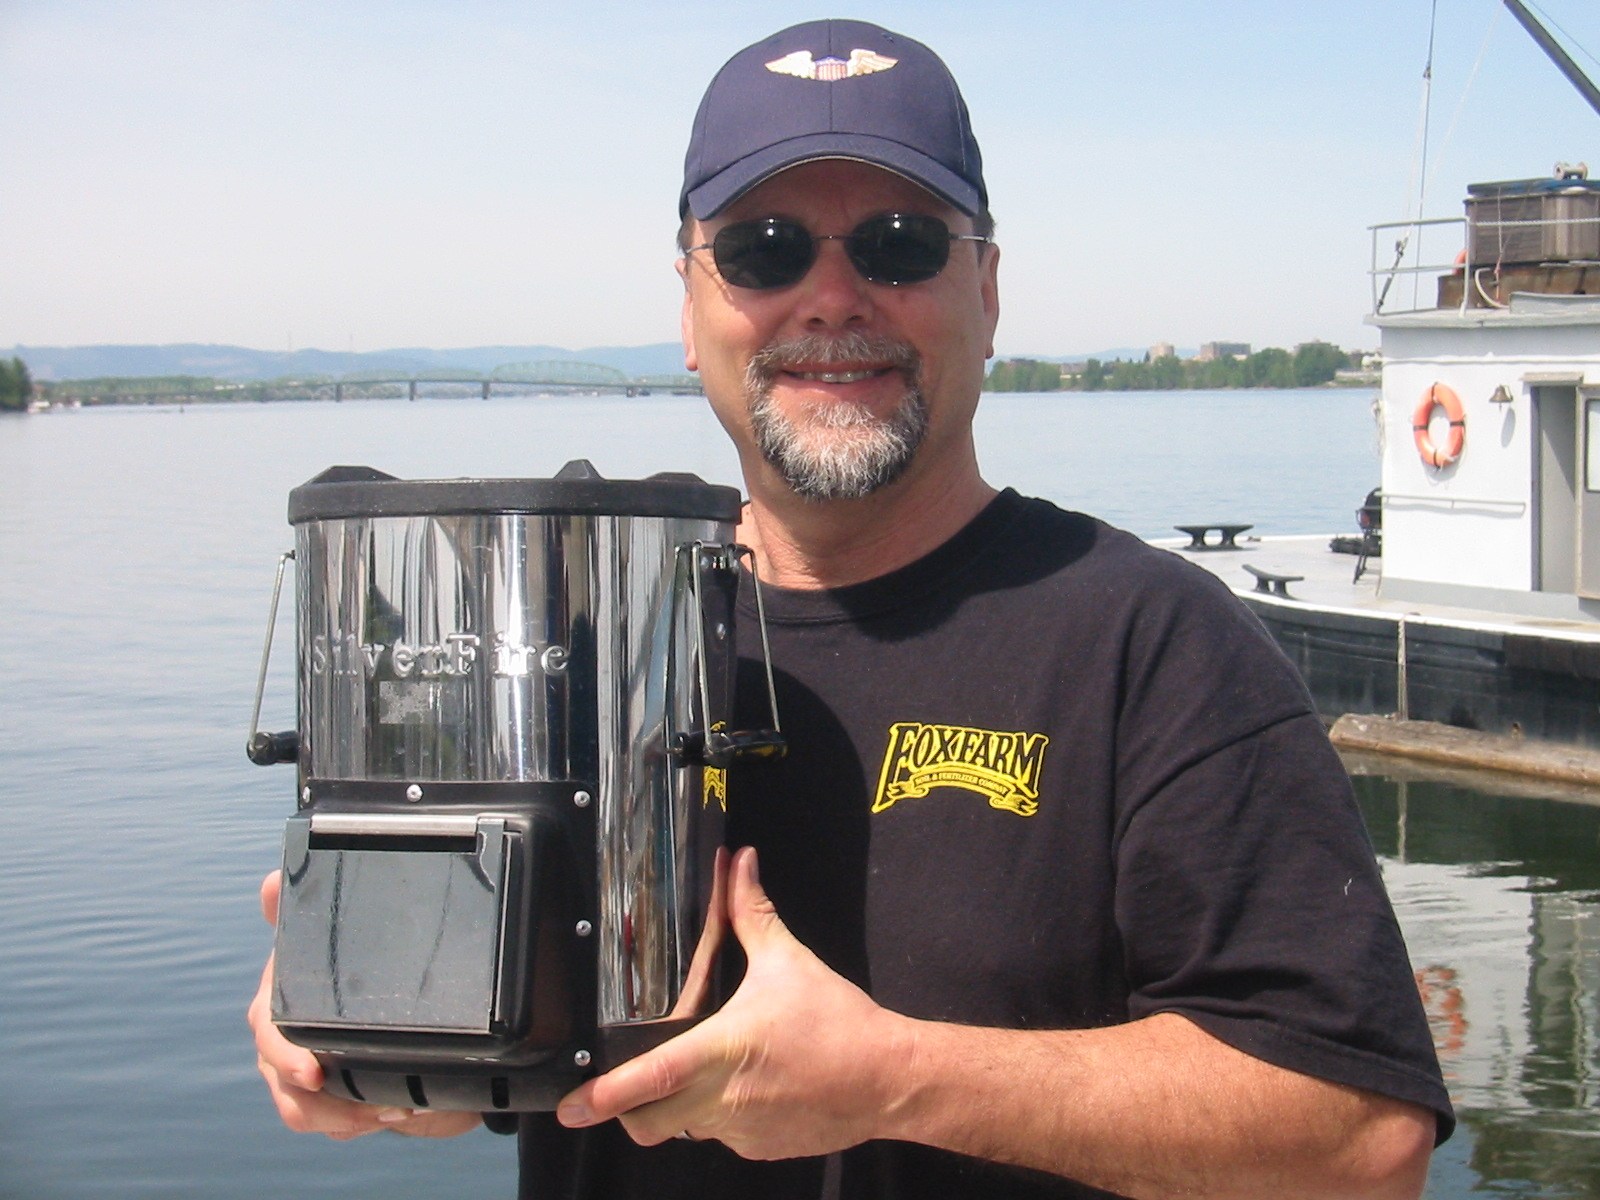
 There are hosts of camp stoves in the marketplace today, as I learned when I started to doing my research. Many use liquid or compressed gas fuels, which have the benefit of accurate metering of fuel, and as a result, the heat output of the stove. But they also have the disadvantage of the cost and inconvenience with regard to obtaining fuel, plus the added danger that some of these highly explosive fuels present.

Back in the day, being poorly funded, we either improvised a lot of our camping equipment, or we learned to do without. We may have accidentally been building and using some of the earliest versions of today’s rocket stoves, which were little more than modified Maxwell House coffee cans.

Of course like many outdoors men and women, if we were at our hunting camp and intended to stay for a week or more, we would bring-in a small home-made (welded) steel stove (which was very heavy).  If we were hiking or on horses, then that stove stayed home, and we would have to improvise and build something on-site using rocks, trying to incorporate some form of reflector for added warmth.
Coming into camp after hiking for 10 miles with your rifle, sometimes in the cold and rain, we would always be looking-forward to huddling around the warmth of the camp stove or make-shift fire pit and warming-up with some hot coffee and chow. So as we see, a good stove optimally provides some warmth and also cooks your food and heats water for coffee.

When I started my review of the ‘Survivor’ model of SilverFire’s rocket-stove, the first thing that struck me was that it was not all that heavy! Considering how well the stove is built, coupled with the fact that the stove has some form of heat-sink encased between the outer stainless steel housing and the inner liner, it’s amazing that the stove weighs-in at mere 12.5 pounds.

The encased heat-sink is important because it stores and then slowly radiates the heat collected from the fire inside in a measured manner. I also maintains and modulates the thermal updraft inside the stove’s chimney, keeping the fire inside going without the need to have it ‘blazing‘. I also noticed that the stove continued to radiate heat for a considerable period of time even after we allowed the fire to go out.

Since the SilverFire ‘Survivor’ is designed as a bio-mass stove, it will readily burn twigs or ground scrub (flammable organic biomass), making sourcing fuel an easy task in most environments. Even in post disaster areas, there is always an abundance of wood scraps and splinters strewn about, that would provide ideal fuel for this stove in most post-disaster scenarios, where a stove like this would be a real blessing.

We have been shelling walnuts as of late, and walnut shells make good fuel for small fires. Since I had a convenient pile of walnut shells, I decided to give the stove a try with the walnut shells.

I have friends that have used them in their pellet stoves will great success, And by using the walnut shells, you have complete utilization of the harvested nuts. An added benefit is that the charcoal from burned walnut shells can be used medicinally, and if properly processed and packaged in a housing, it can also be used as a charcoal filter for water, but I digress a bit.

The SilverFire ‘Survivor’ is very well made and that’s a fact; it’s solid and sturdy! It will easily endure being packed along a trail in a backpack or on a mule if you’re packing heavy.

The access door on the side of the stove made lighting the stove very easy. We used a small bed of shredded paper fire-starter (dipped with candle wax) and placed a handful of walnut shells on top of that. It lit right-off and once the fire was burning, we simply closed the access door. There is a small vent integrated into the door assembly that allows metered air-flow into the stove.

Because we were using Walnut shells, we could continue to feed the fire by lifting our pot off the top of the stove and then using a large metal spoon to periodically pour-in some added shells from the top. You can also add any bio-mass fuel in this manner (from the top), or alternatively, you can feed the fire from the access door as needed.

We decided to boil a pot of water and time that process. We added about 2 quarts of water to a stainless-steel (copper bottom) pot and waited. The water in the pot reached 212 degrees in approximately 19 minutes, which seemed a reasonable time since we weren’t running a blaze, but instead, a controlled fire.

All things considered, for the price point of about $120.00, the SilverFire ‘Survivor’ is a great compact survival or disaster stove and considering its quality, should last a lifetime!

 There are hosts of camp stoves in the marketplace today, as I learned when I started to doing my research. Many use liquid or compressed gas fuels, which have the

This is the fifth and final article in a five part series on Neighborhood defense and security in a grid down scenario. In the first article, Neighborhood Watch on Steroids I listed some possible reasons and different types of threats you could see that would compel you along with your willing neighbors to take steps to prepare to defend your neighborhood. In the second article we started looking at beginning to think about your neighborhood from a tactical perspective and how you can take advantages that you already possess to give you as the defenders of your home turf advantages over anyone trying to get in. Next I discussed gathering intelligence and thinking about how you would respond to threats you may see walking or driving down the streets towards your neighborhood followed up with ideas on how to increase your odds of survival when it comes to defending your neighborhood.

In this post I want to go into what I think are some logical weapons and supply considerations that would give you an upper hand if you were faced with a situation where you were trying to defend your neighborhood. Just like all the previous posts in this series the assumption is that there has been a national disaster that has rendered our nation in a crisis where there is no local rule of law.

Before I dive in though I want to clarify what these posts were meant to be as I have had some great questions and dialog on the previous posts. These articles are simply thoughts and suggestions from one man regarding a hypothetical event in our country that virtually no one has ever lived through.  These are my ideas based upon reflections I have had when I considered potential realities for our country with our current society. That doesn’t mean they will ever come to pass. It also doesn’t mean that what works for one person will work for everyone. I try to give ideas and my reasoning behind those ideas. If none of that works for you, no big deal. The key is to start thinking about how you would solve this problem yourself with your resources and limitations that will most likely be different than mine. I believe the simple act of thinking about a scenario like this could give you an advantage if you ever find yourself in a situation where you were faced with the prospect of defending your home or neighborhood from people in a Without Rule of Law scenario.

If you don’t believe that would ever happen, this series probably doesn’t do anything for you. There are many of our readers; actually a strong majority that do believe that some event could cause a situation just like this. In a recent unscientific poll I conducted as part of a giveaway, the number one response to the question “What is the SHTF Event you are prepping for?” was Economic Collapse. Do you foresee or are you concerned with a possible Economic Collapse in our future? Maybe you don’t but you can see the value in preparing just in case. Could an economic collapse cause widespread chaos and looting? Could an Economic collapse cause people in your town to start acting without regard for laws since there would be no law enforcement anymore? I think it is possible with the right circumstances and that was the motivation behind this series.

What do you need? – The People Problem

Get to know your neighbors now before any crisis.

One of our readers pointed out that to defend a neighborhood you would need people and lots of them. I agree that the more people you have the more able you will be to defend your neighborhood. I also agree that the more people you have the more resources you will be able to pool, but there are a couple of questions. How do you get these people in the first place and how do you convince them that it is in their best interests to chip-in so to speak to help protect the neighborhood? Do you run around now like Chicken Little talking about the impending doom and risk alienating everyone?

This is a tricky issue because I don’t believe that too many people can convince their neighbors that because of (insert your favorite grid-down threat here) we need to band together now to plan and prepare to defend your neighborhood. Now I know that some of you have survival groups already and some even have retreats and plans to bug out to the woods when the SHTF. You train together every weekend and work on getting your cabin ready with supplies, skills training and weapons practice. You are the exception.

I believe the overwhelming majority of people who call themselves preppers keep to their selves. You might have a buddy or two, but no retreat and no constitution governing how your survival group will function once the grid goes down. Even if you did, these aren’t your neighbors. I know there are exceptions, but I would bet money that most preppers are on their own to a large extent. Now add the rest of the world in there who isn’t prepping at all and you have a ton of people who will not be actively ready for anything like this. They don’t see a threat and don’t care even if they do. You won’t convince them now without jeopardizing your own security. So what can you do?

Hurry up and wait

Wait. Yes, I think in this instance you would need to wait until something happens that is real unfortunately. It would need to be something that started affecting people before they would understand and believe anything you said. I believe that if we had a crisis like I described above, you would have many more people who only then would see the rationale behind your words. Does that mean you live like a hermit until something bad does actually happen? No. It certainly doesn’t mean you should not try to help and encourage others to prepare for disasters if the opportunity arises. I think what is useful is getting to know your neighbors but focus on knowing them not converting them to preppers and drawing up a neighborhood defense plan. Get to know them as people now before anything bad happens. You want to have relationships with people first before you find yourself needing to place your trust in them if the SHTF. It may turn out that in the course of getting to know your neighbors you find out they have similar thoughts and concerns as you. This is useful information but remember to think about OPSEC when sharing your thoughts and preps. A little discretion now could save you later. If you find after a lot of time that you really do have a shared values, thoughts, preps then that person might be a great choice to form some sort of survival group with. I just wouldn’t lead with the neighborhood defense plan or offer up how the sky is falling.

While you are waiting for a reason to rally your forces, should you sit idly by not doing anything? No, I think each individual can continue to make preparations for disasters like this so that you are prepared in the eventuality that something does happen. Most items on my list below have other uses so it isn’t like you are only buying supplies for the grid going down and you may find yourself able to help a neighbor through some issue while the grid is still up and peachy.

Supply Ideas

Weapons and Ammo – Within reason. I think there are several weapon options that make sense for general home defense, hunting and even grid-down disasters. In my post on the Top 5 Firearms you need to get your hands on now I explain what they are and give my reasons for each. I don’t think you need an arsenal but the assortment I mention in that article should do just about anything you need. Now, if it comes to neighborhood defense there are some options better than others in my opinion. For starters, a battle rifle like an AR15 or and AK-47 would be my first choice primarily for range and effectiveness. Just about any good hunting rifle could pull double duty as a sharpshooter weapon by someone in an over watch role provided they were a good shot. You probably do not want to rely on pistols or shotguns as their range is more limited. They are better than nothing though. A .22 rifle while I know can kill people would not be my first choice for a defensive weapon. I know others will disagree with me.

Make sure you have more than a box of ammo for each too. I have my personal minimum ammo counts listed as well as an ammo inventory spreadsheet. Do you need 50 guns? No, but there is nothing wrong with that if you have all the other bases covered first.

Radio Communications – Radios are a great equalizer. You can relatively cheaply provide communication options to your entire group just by purchasing some good radios.


Food
– What is food doing on the supply list? You want to make sure you have enough to feed everyone in your home at least so that you aren’t forced from the safety of your neighborhood to find more. By having food supplies you are eliminating one reason people will be wandering around if we do have an economic collapse.

Binoculars – Get a decent pair of binoculars to see what is going on or coming your way. If we never have a crisis you can watch birds or do like I do and watch my neighbors doing foolish things with fire in his yard. Better than TV.

Trip flares – Its probably more accurate to call this intrusion detection. The two options I came across are non pyrotechnic so there is no flare really. The first alerts you by breaking a light stick. Great for areas where you have a good bit of visibility and the glowing chemlight will alert you. These can be seen for a pretty good distance in darkness. The other option uses a CO2 cartridge to create a noise that will alert you too. Don’t buy anything like this until you are squared away on Food, Water, Shelter and Security

Chain Saws – Chainsaws sure make the work of cutting down those trees much easier and you never know when you will need one. If you live in ‘the city’ a chainsaw might not get much use. Our yard has trees in it, but we aren’t cutting them down so I don’t have a need for a chainsaw in my day to day life. This is another nice to have for me I think but extremely valuable if the grid goes down. You don’t want to rely on an electric chainsaw if there is no power.

Shovels – As well as a good selection of regular hand tools will come in handy. Shovels will be useful for digging in the garden, digging your defensive positions and digging your sanitation trenches to keep waste from making everyone sick.

Work Gloves/Heavy duty boots – I have talked to other readers before about this subject and even wrote an article on making sure you have the right footwear for the occasion. If the grid goes down, you do not want to be running around in flip flops ladies. A sturdy pair of boots will be what is needed when you have to survive and staying pretty isn’t the most important part of the day. Men too should have a good pair of boots, some good work pants like Carhartt and sturdy gloves. The same goes for cold weather gear and rain gear. Those flimsy raincoats they sell now (yes I have one too) won’t keep you dry in a real rain for long.

Sandbags – Sandbags are relatively cheap. You can buy sandbags in bulk for .36 cents each and they have a ton of uses. This is on my list to buy once I have a few more of the essentials out of the way and I plan to put them in the shed until they are needed. Sandbags can be used to secure your home from water if it is flooding and they can be used to stop rounds from penetrating your location.

Power – You will need a source of power to recharge those radios you purchased as well as all sorts of other things. You can purchase smaller solar chargers from a lot of places or work your way up to a 4 panel system. Gas will run out eventually and you probably don’t want the noise of a generator running if you are trying to keep your neighborhood safe in the first place.

Concertina/barbed wire – Concertina is also called razor wire and you need specialized gloves to work with this but if you are willing to do that, it offers a great deterrent. Traditional barbed wire is much easier to use and it won’t slice you open but still can be used as a means of keeping people out or tripping them up. You can always use it as fence too…

Night Vision – Probably the single most important thing you can buy and one that almost nobody has. I don’t have any night vision but I recognize their extreme utility. When it comes to force multipliers, there aren’t too many higher on the list than being able to see your enemy in pitch black darkness, but they aren’t practical for everyday use in any capacity. These are designed for only one reason and they are very pricy. This will be one of my last purchases unless I win the lottery but if money was no object I would have a pair or two. You can offset the cost by only purchasing a weapon scope with Night Vision, but then you can only use it if your weapon is up.

Hopefully this series was helpful and if nothing else gave you something to think about. I hope I was able to give out some ideas about how you could start thinking about neighborhood defense. Above all, I hope that none of us has to ever worry about it in our future.

This is the fifth and final article in a five part series on Neighborhood defense and security in a grid down scenario. In the first article, Neighborhood Watch on Steroids

Editors Note: I don’t know what the future holds, but history has a funny way of repeating itself. I would be lying if I said that I have an optimistic outlook for our near term future. For a myriad of reasons, myself and others like me are preparing for a time when the stupid antics of a messed up 20 year old starlet at an award show aren’t worthy of news attention, because the world will really have more important things to worry about. My fear is going through something worse than our grandparents did in the great depression. What I am concerned about are things like my family’s safety, how I will feed them and take care of them. I wonder about what their lives will be like and if we will live to see them grow old. These are normal things for a parent, but we can easily forget just how difficult life can be and how it can catch up to us when we aren’t looking.

I came across this story below. It is mostly photos with a few poignant memories taken from people who actually lived through the depression and had some of the difficulties in life that I fear. I wanted to share this with you because I want to make sure I remember that it can all come crashing down so easily and not to take the time and our lives for granted. This is also a chance to reflect on generosity and how you may be faced with the same opportunity the people in this story had of giving some measure of comfort to a person who didn’t have anything else.

By Errol Lincoln Uys: excerpted from Riding the Rails: Teenagers on the Move During the Great Depression

“When Did You Boys Last Eat?”

In October 1929, Oklahoman Edgar Bledsoe believed a newsboy’s cry of “Stock Market Collapse” referred to a disaster at an Ardmore cattle auction barn. By 1932, Bledsoe had been riding the rails for two years picking cotton and doing menial work that rarely provided a living for the 18-year-old and two cousins. That summer the trio rode a freight to Comanche, Oklahoma heading back to his cousins’ home on a drilled-out oil field. They had to walk the last 13 miles through the woods.

“We ran across a log cabin deep in the blackjack oaks. It had a well in the backyard with a rope and a pulley. A man who must have been close to ninety years came out of the cabin. We asked if we could have a bucket of water,” Bledsoe recalled.
“‘When did you boys last eat?’ the man asked.
“When we told him, he told his wife to bring us food.
“She set out a gallon crock that was half full of milk, a pone of cornbread and a bucket of sorghum molasses. The milk was beginning to turn sour — ‘blinky’ we called it — and the molasses was full of tiny ants. We were hungry beyond being picky and we lit on the food. I still remember we couldn’t fault the old lady’s cornbread.”

At the height of the Great Depression, a quarter of a million teenagers joined the ranks of the army of migratory idle roaming across America riding freight trains or hitchhiking. — In 1933, when the economy hit rock bottom, about 9,000 banks failed, $2.5 billion in deposits was lost, unemployment soared to nearly 13 million or about one in four of the labor force. Not since the civil war had the American nation stared so deeply into the abyss.

Great Depression: White migrant mother with Children. Weslaco Texas. Photo by Russell Lee. Courtesy Library of Congress, Prints & Photographs Division, FSA-OWI Collection LC-USF34- 032086-D

Great Depression: At Holtville, California, family awaiting forced return to Oklahoma.

Eighteen year-old mother from Oklahoma, now a California migrant. Photo by Dorothea Lange, Courtesy Library of Congress, Prints & Photographs Division, FSA-OWI Collection LC-USF34- 016269-C

Some youths ran from home believing they were burdens on their families; some fled, broken by the shame of unemployment and poverty; others left eager for what seemed to be a great adventure. Romantic ideas of life on the road vanished when a young hobo felt the first pangs of hunger.

The majority of homeowners and shopkeepers were sympathetic toward the hard luck kids. Sixty years later, the simplest acts of kindness were remembered by those who’d been half-starved and utterly dejected when they knocked at a stranger’s door. Other kids, too, recalled seeing their mothers and father help hobos who came to ask for food. It was a lesson in giving that was never forgotten.

“Put Your Pride in Your Pocket.”

The roving horde was constantly hungry living for days on stale buns and bread or “toppings” and frequently going without food at all. Recalled Clifford St. Martin, who was on the bum from 1931 to 1938: “When I woke in the morning I worried about something to eat. After breakfast I worried about where to go. In the afternoon, I’d more worry about getting food. When it started to get dark, it was time to worry about a place to sleep.”

On Peter Pultorak’s second day on the road in 1931, he met an old tramp and asked him how to get by without money. “Put your pride in your pocket, your hat in your hand and tell them like it is,” his mentor advised. The lesson served Pultorak well riding the rails for the next eight years from his Detroit home to the blueberry harvests in northern Michigan.

Great Depression: Young boy waiting to see if he can get a place to sleep for the night. City mission, Dubuque, Iowa. Photo by John Vachon Courtesy Library of Congress, Prints & Photographs Division, FSA-OWI Collection LC-USF34- 060566-D

Great Depression: Children waiting in line for soup given out each night by the city mission, a community chest- financed organization. Dubuque, Iowa. Photo by John Vachon. Courtesy Library of Congress, Prints & Photographs Division, FSA-OWI Collection LC-USF34- 060600-D Great Depression: Daughter of white migrants repairing shoes with cotton thread. Sebastian, Texas. Photo by Russell Lee. Courtesy Library of Congress, Prints & Photographs Division, FSA-OWI Collection LC-USF34- 032323-D

Great Depression: Boy, fourteen, in eighth grade. Now unable to attend because of insufficient food and clothing. Subsisted two days on frozen tomatoes from field nearby. Father said

Dirty and hungry and far from family and friends, numerous acts of kindness buoyed the young migrants. William Aldridge retained a lifelong memory of a pretty girl who opened her door to him. “I asked for a glass of water which she brought me,” Aldridge recalls simply. In southern California as he walked beside the tracks, a brakeman tossed Aldridge a quarter. “Go get yourself a meal, kid,’ the man said.

“The Buzz Saw of Life”

Paul Booker was 16 when he decided to go on the road in June 1931. He hitchhiked and rode freight trains from Bedford, Indiana south to Texas and Arizona and then back north to Seattle. Riding from San Francisco to Seattle at night, he fell between two box cars when the train lurched. Only because they were moving slowly could he grab a steel bar and pull himself back up. In Texas, he was shot at by railroad bull Texas Slim as he fled the Longview yards; in the northern states, vigilantes threatened to shoot him if he tried to climb off a train.

Great Depression: Boy hopping fright train, Dubuque, Iowa. Photo by John Vachon. Courtesy Library of Congress, Prints & Photographs Division, FSA-OWI Collection LC-USF33- 001772-M5

Great Depression:

“I thought I was tough but changed my mind finding myself suddenly thrust into the buzz saw of life,” said Booker. “I arrived in Milwaukee weak from hunger, my lips in scabs from sunburn and thirst. My only goal was to get home as soon as possible.” A fast mail train was getting ready to pull out of Milwaukee’s Union Station. It carried no passengers except one: Booker grabbed the back of the engine and climbed onto the water tank. In a short time, he was in Chicago.
“An angel in the form of an 80-year-old woman touched my hand in downtown Chicago. She asked if I needed help. When I told her my story she pressed a dollar bill in my hand. ‘God bless you, son,’ she said.

“Good Place for A Handout”

The young hobos never forgot those who reached out to them in their time of need. For their benefactors, too, the ragged bands who knocked at their doors were remembered, especially by the boys and girls of the house. Many were deeply touched by seeing their parents’ compassion toward total strangers.

In the 1930s, Albert Tackis’s family lived in the small West Virginia town of Colliers, where their house backed onto the Burgettstown Grade. Two-engined freight trains stopped at a water tank behind the house before starting the 30-mile haul to Burgettstown. In summer, Albert would see 60 or 70 hobos climb off the cars to stretch their legs, every train delivering as many as eight hobos who came to the Tackis home to ask for food.
“We were five people in our family: mother, father, grandpap, my sister and me. Grandpap grew all our fruit and vegetables in his garden. In season, mother canned vegetables and made jellies. Every week, she baked 21 loaves of bread.

“When grandpap saw the hobos coming to our house, he alerted mother who would start making egg sandwiches and packing bags with carrots, tomatoes, apples and peaches. Grandpap always had something for the hobos to do. There would be wood to chop, cans to pick bugs and insects in his garden, buckets to fetch water from a spring. The hobos worked for about 20 minutes and then hopped back on the train with a good meal in hand.”

At Cottonwood, Idaho, William Loft — a local dentist’s son — would watch the freight trains pull in with tired hobos riding on the top “sitting with their heads slumped down and looking more like sacks of grain.” One day William saw one of the men put a mark on their fence. He ran out and asked why he did this. The hobo explained: “Son, when you’re starving and on your last legs, this means there’s a hot meal and friendly people you can trust.”

The mark on the Loft’s fence was one of many signs hobos traditionally used to alert each other to houses where they could get a handout, what approach might work best, and what houses were best avoided.

Hobo Signs from Riding the Rails: Teenagers on the Move Duirng the Great Depression by Errol Lincoln Uys

“In the Jungle”

The one place where the young hobo was assured a welcome was the “jungle,” as the hobo camps were called. These were generally not far from the tracks, some nothing more than a clearing for a camp fire, some well-established sites overseen by old jungle buzzards who set up home there.

Between stops at transient camps, Gene Wadsworth dropped into hobo jungles. He found permanent denizens of the camps living in shacks made of flattened tin cans, boards, railroad ties, anything that could be scavenged to build a shelter.

When a freight train rolled by and hobos started arriving, the old buzzard would issue instructions: “Hey, you, Whitey, go up to the meat market and ask for scraps.” — “Red, you go get carrots.” — “You, skinny, go find spuds.”

“I’ve seen stuff go into a stew pot that I wouldn’t feed to a hog,” recalled Wadsworth. “We’d take a tin can and the old ‘bo would fill it. If he liked your looks, he’d dip down deeper for meat and vegetables; others got mostly soup.”

Great Depression: Man in hobo jungle killing turtle to make soup, Minneapolis, Minnesota. Photo by John Vachon. Courtesy Library of Congress, Prints & Photographs Division, FSA-OWI Collection LC-USF33- 001521-M3

Fredrick Watson knew the Pocatello, Idaho jungle from a different perspective. His father worked in the Union Pacific yards at Pocatello. Watson recalled that the jungle was on the west side of town near the Portneuf River.

“There was always a population of 100 to 150 people, including entire families with kids. They weren’t bums but good citizens who were flat out of work and trying to get by.”

Watson and his young friends would go to the jungle and eat lunch or dinner with the hobos. “We would take our share, mostly coffee that we purloined from our homes. Mom and Dad probably knew about it but didn’t say anything.”

Ann Walko was deeply moved by her mother’s compassion for the downtrodden who came to their home at Wall, Pennsylvania where freight trains were broken up and re-routed.

“One day a man came to our door asking for food. Mother invited him in but he stood in silence for a moment.

“‘I have a family with me,’ he said.

“Mother said she would feed them too. He brought his wife and three children. They still refused to come inside so mother spread two rugs on the ground for them. They ate her home-made bread and baked beans and couldn’t thank us enough. In a way what a beautiful time it was.”

Great Depression: Oklahoma farm family on highway between Blythe and Indio. Forced by the drought of 1936 to abandon their farm, they set out with their children to drive to California. Picking cotton in Arizona for a day or two at a time gave them enough for food and gas to continue. On this day, they were within a day's travel of their destination, Bakersfield, California. Their car had broken down en route and was abandoned. Photo by Dorothea Lange. Courtesy Library of Congress, Prints & Photographs Division, FSA-OWI Collection LC-USF34- 009680-C

©2009 Errol Lincoln Uys

excerpted from: Riding the Rails: Teenagers on the Move During the Great Depression

Great Depression era photographs: Part of Farm Security Administration – Office of War Information Photograph Collection/ Courtesy of Library of Congress Prints & Photographs Division Washington, DC 20540. See individual image credits.

Editors Note: I don’t know what the future holds, but history has a funny way of repeating itself. I would be lying if I said that I have an optimistic

The central tenet of prepper websites is the unflinching belief that you need to be prepared for unexpected events. That statement on its face seems to be able to stand on its own, without receiving too much argument from anyone. Really who would say that it is ever better to be unprepared for disasters or catastrophic events? Common sense backs us believers up so the “be prepared” part of prepping is easy to digest and safe for almost everyone to get on board with. It is when we start discussing the “what” you should “be prepared” for that causes the splits, arguments and name calling. The physical act of being prepared no longer makes sense to certain people if the “what” is not something they either believe would ever happen  or care about personally. As long as you are prepping for something they can see happening, or view as rational you aren’t crazy, but as soon as you mention something they find odd or out on the fringe, you have lost them and they get to discount everything you say from there on out.

At least that is what I have been able to observe over the years I have been prepping and if I am being honest, somewhere in the back of my mind I do this too, but on a much different level. There are some prepper motivations that I think are highly unlikely myself and when I hear people prepping for these events, I usually cock my head a little sideways and look at them with that patronizing smile on my face that I have been on the receiving end of as well. If you tell me you are prepping for an alien invasion then I might look at you slightly differently.

On the other hand, there is a broader universe of events I do consider valid or at least more possible than I did when I started prepping. I might draw the line at some of the outer ranges of unlikely events, but I think that most of the reasons people give for prepping aren’t that insane to me anymore. Events that to your average soccer mom might seem like sheer lunacy; I like to think I can look at with a more open mind and see the possibilities from the perspective of the prepper who believes these events could happen. Maybe it is because I blog about prepping topics almost daily that I can appreciate the viewpoints of my audience a little more than the average non prepper person, but I like to think that it isn’t simply that I am trying to be more inclusive for the sake of readership; it’s just that I believe that I don’t know everything and I certainly don’t have all the answers. Who am I to say anyone is crazy?

Will the real Survival Experts please stand up
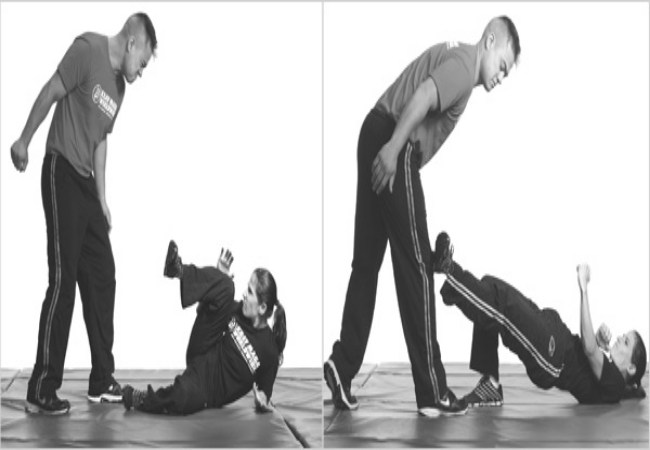
All of the arguing around the best way to go about prepping invariably begins because one or more people believe that someone doesn’t know what they are talking about. I guess another way of putting it is that some people think they know more or possess more qualifications than the person that holds the beliefs they disagree with. This is most evidenced in 3 main prepping areas. Firearms, Government abuse and the Economic woes.

There have been countless articles written about firearms from the perspective of the hobbyist, hunter, soldier, law enforcement, instructor, target shooter and yes, the prepper. I have written a few pieces myself on various subjects like the best gun for home defense and the top 5 firearms you need to get your hands on now. Both of these articles have spawned a great discussion on the advantages and disadvantages of each in numerous scenarios. Additionally, they have both been linked from other websites and re-posted on other blogs and forums. Most of the time, the comments are great, but it never fails that there are at least a few people when it comes to articles like this who say words to the effect that “sounds like it was written by an internet expert”.

Before I go on I should say that I do not consider myself an expert on anything and I am pretty sure I have not positioned myself as an expert at anything I have written or commented on. I do have experience and military training, but I don’t believe I puff out my chest about any of my credentials and try to go out of my way in saying what my experience is on any given subject in advance.

That being said, I wonder what qualifications the people who make comments like this have. Surely, to denigrate someone’s opinion from the safety of a forum post or comment field must mean that your knowledge or skills are vastly superior and that may very well be the case but does it matter? It caused me to wonder two things though. First, who are the survival experts we should be listening to? Who would be qualified to tell anyone the best firearms to have in all circumstances if the grid went down? Would someone who was a police officer be an expert? Would someone who has been on a Reality TV show and can eat bugs be an expert? Surely, anyone who has written a book would be qualified, right? Any soldier who has been overseas in conflict would be an expert, without question, correct? I know there are people who have been around guns a lot more than I have. There are people who can break down an AK47 and put it back together blindfolded, hanging upside down in a sewer after not eating for 7 days. I know a guy who has run a survival blog for years so everything he says must be absolutely correct, right? Those people are the real experts, aren’t they?

I think on most prepper topics it comes down to what you are talking about , how many opinions people have on the subject at hand and whether or not they agree or disagree with what you are saying. Some topics are virtually never controversial on the other hand. Take canning for instance. Canning is pretty simple and there are a few things you have to know and do, but the overall process is the same for the same vegetables generally speaking. If someone is going to argue with what you are saying about how you can, they will usually point to some factoid about how the process will or won’t work. Using a different example of the fear of impending Government tyranny let’s say, we are talking about hypothetical scenarios almost 100% of the time. In many cases, these are events that have not happened, but many can see the writing on the wall based upon current events and historical precedent. What can or will happen is anyone’s guess and our best guess is what each of us brings to the table based upon our experiences and information at the present time. You have guesses from writers, bloggers and people everywhere in the comments of various forums. You will have people who steadfastly disagree with what you are saying for a whole host of reasons. At this point you become the idiot because they don’t believe what you do. You are officially an internet expert.

Who is qualified to give prepping advice?

Don’t get me wrong, I think the survival gurus have some very specialized skills that we can all learn from , but those are usually from the perspective of getting stranded or lost in the wilderness. That is probably one of the most avoidable fates I can think of with a little planning and on some level, their type of survival is not what we are talking about when we are discussing the subject of prepping.

I think the best resources to go to for the broader subject of prepping present a wide spectrum of thought and information about a variety of topics that we can logically envision needing to know about when times get tough. This is rarely to mandate one and only one way to do anything, but provide a lot of different information so that you can choose what works for you. When it comes to any warnings, a good source of information will explain situations they see happening and usually offer up some rationale for why they believe the way they do. Does this mean that everything they say is 100% accurate? We will never know unless the event they were talking about comes to pass. It doesn’t mean that what they say is wrong simply because I or anyone else disagrees with it either. It doesn’t mean it won’t happen if it hasn’t yet or “Experts say it is highly unlikely”, thank you very much Doomsday Preppers. The real experts, not the internet kind have been wrong before.

In lieu of someone who has physically been through every single imaginable event known to the prepping universe and can speak to every conceivable situation on gear and recommendations, someone like Selco who survived through the Balkan war comes to mind. He has a one year in hell course that describes what he lived through and if you want to point to someone who could come close to being called an expert (in SHTF living in the Balkans during that conflict) my vote would be for him. For the rest of us internet experts who have never come close to anything like that, we are all giving our best guesses based upon our training and experiences and common sense. You know what? We won’t all be wrong either.

There is no college degree for Prepping. Prepping isn’t something you can apprentice in and after many years work your way up to your Master Prepper license that can sit framed on your living room wall. There really is no right way or wrong way to prep and nobody knows what the future holds. Most of the people who call themselves preppers are trying to prepare for a single something but what they do and how they prepare might be different than what you do if the disaster is different. If they live in a country that doesn’t allow guns, they might view how you prep as abnormal when you talk about stocking up on ammo. If you live in the country and are prepping to survive a tornado, what you do will be different than a city dweller preparing for riots. Everything depends on the disaster. Prepping by its very nature gets you prepared for a myriad of events you may not have ever dreamed of. It is the diversity of preparedness that will strengthen your family’s ability to weather unexpected events safely with as little disruption as possible. There is no way to reasonably cover every conceivable natural or man-made event that could happen to you, but regardless of what happens, if you have the basics of survival, your family will be so much better off. Who cares if aliens never land as long as you have supplies and a plan to survive when the next hurricane comes ashore? It doesn’t matter what actually lands that poses a threat, as long as you are prepared.

What should you focus on?

I think the best advice I as a non-expert can give you is to focus on what isn’t arguable. Focus on what your family as human beings need to live and that is water, food, shelter and security. If you have that taken care of, the event that causes you to rely on those preps is secondary. I do have a lot of people who will back me up on this one though. The survival and gun forum experts might have something to say, but we will leave that for my next post on firearms.

Thank you for reading; I’ll try my best never to steer you wrong.

The central tenet of prepper websites is the unflinching belief that you need to be prepared for unexpected events. That statement on its face seems to be able to stand

Self-defense is your right and it will be beneficial in a SHTF scenario, if you know how to tackle the consequences on your own with a sharp presence of mind instead of relying on others. This will give you confidence and will raise your morale and will make you independent.

Why is self defense important?

Just because some idiots out there think that they are stronger than the rest and to fulfill their illusion, they try to mess with others in the form of fighting. Or some of them are under the influence of serious drugs, due to which they are helpless to perform acts on which they have no control.

Regardless the excuses, the thing which does matter is that there are some ways you need to learn to defend yourself from any kind of attack done by these goons.

What will I get out of it?

The first thing you will achieve would be “A single piece of your body”. You love yourself right? And you also love your body and at any cost you would not like to get it dismantled.  So when the attackers attack they are never concerned about your body parts. Their focus revolves around either snatching something from you or beating you up to satisfy themselves.

For many, fighting fills some mental void which they can’t get from doing any other activity. This has been proven by the studies done by the experts and people who act in these ways has been awarded by the term of “Psycho”. You can’t change their mentality but you can protect yourself by learning some tactics of self-defense.

With enough practice, you will be able to achieve a high level of confidence and if this kind of situation comes up again then without any support you would be able to handle yourself.

What are the significant components of self-defense moves?

The attack on knee-caps:

For any form of a building, the base is an essential part which stabilizes the complete structure. So whenever you find yourself in a situation where the potential of getting attacked is high, the first thing you need to do is stay calm and try to have a verbal communication with the opponent.

The reason behind communication is to understand why the opponent is willing to attack you. If the reason is just a small amount of cash then it is better to give away cash to avoid conflict. This would not be the expensive trade to perform.

But, if the opponent doesn’t want to engage you with communication then apply the second strategy which involves making firm eye contact with him/her. This will send a strong signal to them that you also have the potential to fight. This will either break them and compel them to run from the situation or will offend them to attack and when they will approach to attack you then right away with your right leg attack on their knee-cap.

This attack done by you will make them helpless and will consume more time for them to get back stable again. In this duration of time either run away from them or if the surroundings have limited access to run then get the help of someone either by shouting loud or by using your mobile phone.

(Note: A forceful attack on their knee will provide you the time frame around 5 to 10 mins)

The attack on Groin:

Most attackers are male and they love to show their irrelevant impact on others by performing meaningless acts. Behind every strong power, there is a small amount of weakness which makes them helpless.

So if you have been attacked and you can see there is no place to run, then try to be aggressive because if the opponent is pretending to be strong, then by seeing your aggressive behavior he will run instead.

On the other hand, if they start smiling at this behavior of yours then you should stop doing it immediately because they are the real fighters and could prove harmful for you. You do not need to become tense as what you can do is put your both hand on their shoulders and within a matter of seconds lift your right knee up and bang into their groin.

The groin is the most sensitive part of the male body by attacking that it would be almost next to impossible for him to get up for at least 15 to 20 mins. From this, you can see how advantageous this defensive move is?

Hang on there is one more tip on your way. If you think the above-mentioned method is too hard for you to perform then what you can do is with your right hand grab their groin or either pull it hard or twist it like twisting a rope. This will definitely make him harmless and he will be grounded in an instant.

(Note: Just for the quick response, if you have a licensed pistol then you can always carry them for self-defense in a concealed carry handbags for better protection from such irrelevant acts).

The attack on Ribs/Solar Plexus:

The moment some stranger attacks on you can bring feelings of frustration and helplessness if you are not familiar with the concepts of self-defense. Relying on others has never been a healthy option at any cost. It is always better to protect yourself by developing our fighting skills.

So if you find yourself surrounded by a goon then the best way to avoid conflict is to run away from the situation. And by any means, if you are not able to do so then forcefully attack their ribs or solar plexus. This will break their force and will allow you 20 mins minimum of time to run away from the situation.

Attacking the ribs is the most favorable technique which has been used by many in terms to carry the fight for a long time period.  What else you can do is attack the softest tissue of their body which is under their nose. This will make them unconscious and a hefty amount of time you will carry to get some help.

Some others tips you can protect yourself in a healthy way:

Conclusion:

It is always better to learn or develop some fighting skills in order to protect yourself and to build some confidence in you. This will help you to live proudly and you would be able to tackle any kind of situation mentally or physically with an ease.

Self-defense is your right and it will be beneficial in a SHTF scenario, if you know how to tackle the consequences on your own with a sharp presence of mind